warning lights VAUXHALL VIVARO 2014.5 Owner's Manual
[x] Cancel search | Manufacturer: VAUXHALL, Model Year: 2014.5, Model line: VIVARO, Model: VAUXHALL VIVARO 2014.5Pages: 189, PDF Size: 4.16 MB
Page 13 of 189

In brief11
1Side air vents ...................... 106
2 Ashtray .................................. 76
Cupholder ............................ 65
3 Light switch .......................... 91
Rear fog light ......................... 93
Front fog lights .....................93
Exit lighting ............................ 96
Turn and lane-change
signals ................................... 93
Sidelights .............................. 91
Headlight flash, low beam
and high beam ......................92
4 Instruments .......................... 76
5 Horn ...................................... 72
Driver airbag ......................... 53
6 Windscreen wiper,
windscreen washer system ..72
Rear window wiper, rear
window washer system ........73
Trip computer ....................... 887Card reader for electronic
key system ............................ 21
8 Steering column controls ......72
9 Centre air vents ................... 106
10 Power outlet .......................... 75
Cigarette lighter ..................... 75
Coin tray, USB slot ................ 64
11 Driver Information Centre ...... 86
Trip computer ....................... 88
12 Storage tray ......................... 64
13 Front passenger airbag .........53
14 Glovebox .............................. 64
15 Idle speed control ...............112
16 Heated exterior mirrors .........36
Heated rear window ..............38
17 Power outlet .......................... 75
Cigarette lighter ..................... 75
18 Climate control system .......... 97
Electronic climate control
system ................................... 9919 Ashtray .................................. 76
Cupholder ............................ 65
20 Central locking system ..........23
21 Hazard warning flashers .......93
22 Gear lever, Manual
transmission ........................ 116
23 Eco button for fuel
economy mode ...................108
24 Power button for electronic
key system .......................... 110
25 Stop-start system ................113
26 Cruise control and speed
limiter ................................. 120
27 Ignition switch with
steering wheel lock .............109
28 Steering wheel adjustment ...71
29 Remote control on
steering wheel ......................71
Cruise control .....................120
30 Storage compartment ...........64
31 Bonnet release lever ...........132
32 Fuse box ............................. 145
Page 14 of 189
12In brief
33Ultrasonic parking assist ....124
Electronic Stability
Program ............................. 119
Traction Control system ......118
Headlight range
adjustment ........................... 92
Instrument panel
illumination control ................94
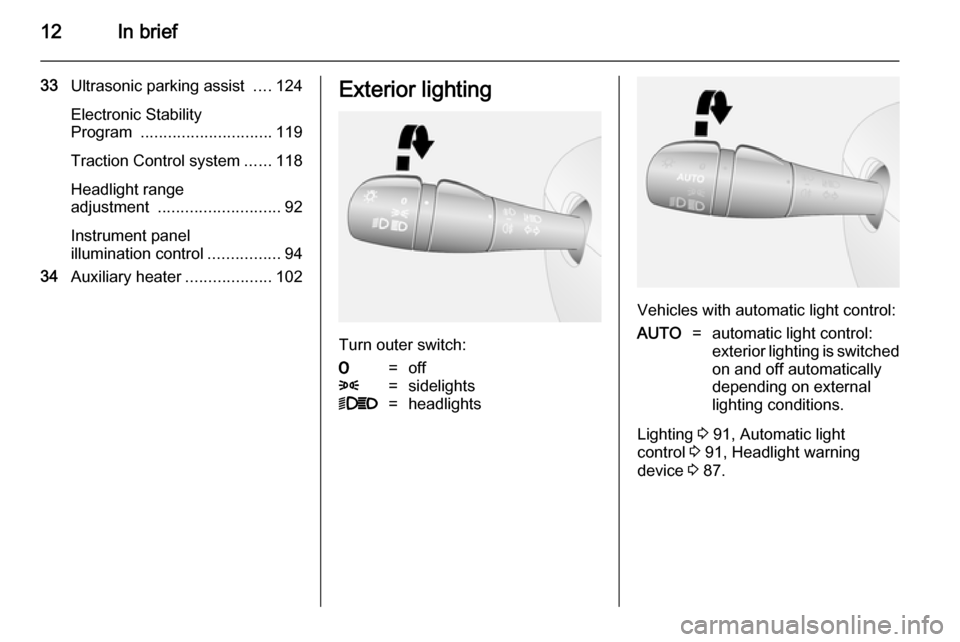
34 Auxiliary heater ...................102Exterior lighting
Turn outer switch:
7=off8=sidelights9P=headlights
Vehicles with automatic light control:
AUTO=automatic light control:
exterior lighting is switched
on and off automatically
depending on external
lighting conditions.
Lighting 3 91, Automatic light
control 3 91, Headlight warning
device 3 87.
Page 31 of 189
Keys, doors and windows29DoorsSliding door
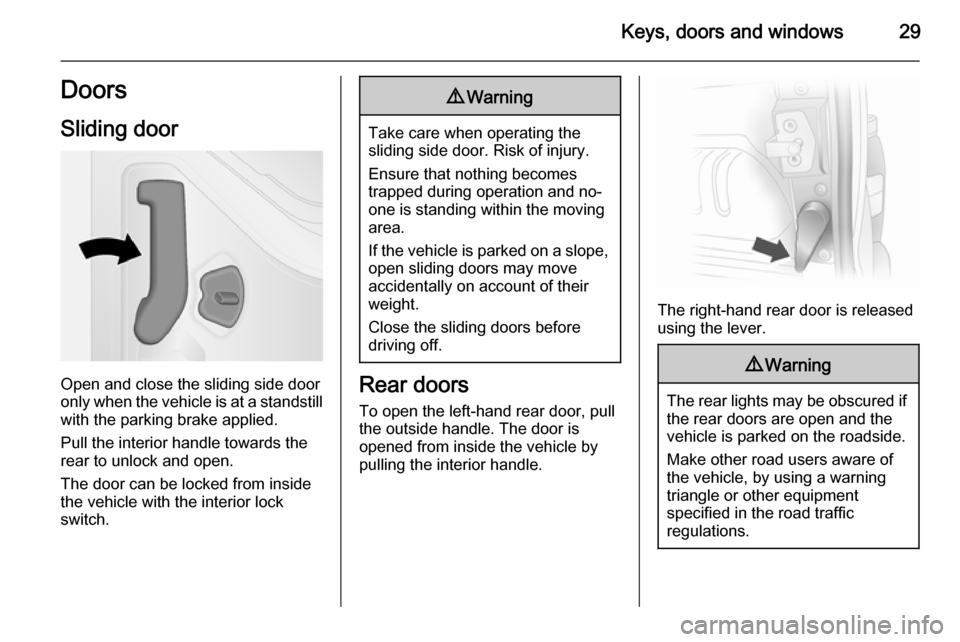
Open and close the sliding side door
only when the vehicle is at a standstill with the parking brake applied.
Pull the interior handle towards the
rear to unlock and open.
The door can be locked from inside
the vehicle with the interior lock
switch.
9 Warning
Take care when operating the
sliding side door. Risk of injury.
Ensure that nothing becomes
trapped during operation and no-
one is standing within the moving
area.
If the vehicle is parked on a slope,
open sliding doors may move
accidentally on account of their
weight.
Close the sliding doors before
driving off.
Rear doors
To open the left-hand rear door, pull
the outside handle. The door is
opened from inside the vehicle by
pulling the interior handle.
The right-hand rear door is released
using the lever.
9 Warning
The rear lights may be obscured if
the rear doors are open and the
vehicle is parked on the roadside.
Make other road users aware of the vehicle, by using a warning
triangle or other equipment
specified in the road traffic
regulations.
Page 33 of 189
Keys, doors and windows31
Notice
In very cold climates, the opening
assistance provided by the tailgate
hydraulic struts may be reduced.
Central locking system 3 23.
Closing
Close tailgate using the interior strap. Ensure tailgate is fully closed.
Central locking system 3 23.
General hints for operating
tailgate9 Danger
Do not drive with the tailgate open
or ajar, e.g. when transporting
bulky objects, since toxic exhaust
gases, which can not be seen or
smelled, could enter the vehicle.
This can cause unconsciousness
and even death.
Caution
Ensure there is adequate
clearance both above (at least
2.15 m) and behind when opening tailgate.
Vehicle security
Anti-theft locking system9 Warning
Do not use the system if there are
people in the vehicle! The doorscannot be unlocked from the
inside.
The system deadlocks all doors and
the load compartment.
All doors and the load compartment
must be closed or the system cannot
be activated.
Notice
The anti-theft locking system cannot be activated when the hazard
warning lights or sidelights are
switched on.
Activation and deactivation are not possible with the central locking
switch.
Central locking system 3 23.
Page 35 of 189
Keys, doors and windows33
Central locking system 3 23.
Electronic key system 3 21.
Anti-theft alarm system
The anti-theft alarm system is
operated in conjunction with the
central locking system 3 23.
It monitors: ■ Doors, tailgate, bonnet
■ Passenger compartment
■ Load compartment
■ Vehicle inclination, e.g. if it is raised
■ Ignition
■ Interruption of alarm siren power supply
Activation All doors and the bonnet must be
closed.
Hazard warning lights flash to confirm activation. If the hazard warning lights
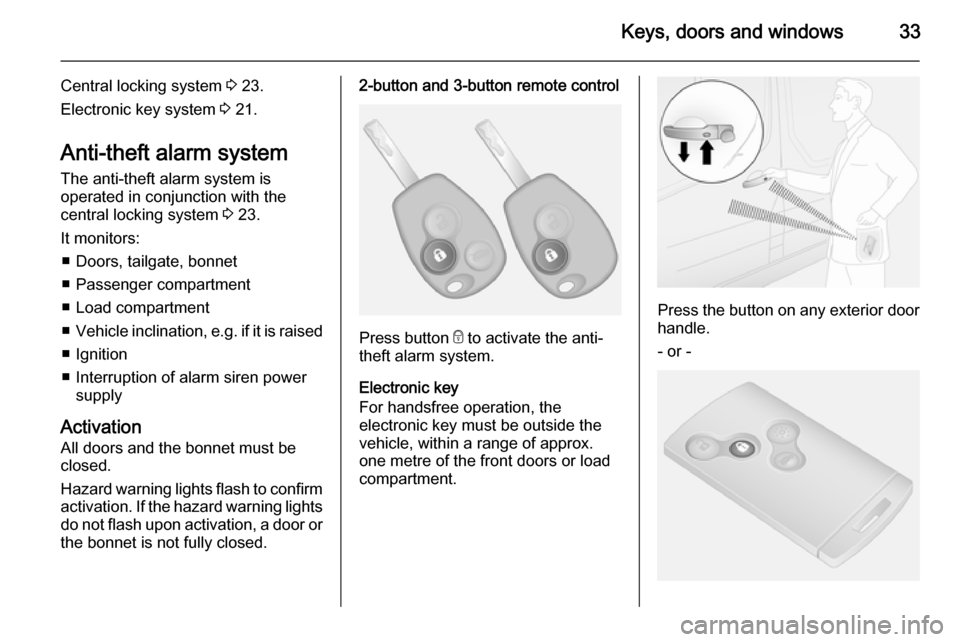
do not flash upon activation, a door or the bonnet is not fully closed.2-button and 3-button remote control
Press button e to activate the anti-
theft alarm system.
Electronic key
For handsfree operation, the
electronic key must be outside the
vehicle, within a range of approx.
one metre of the front doors or load
compartment.
Press the button on any exterior door
handle.
- or -
Page 36 of 189

34Keys, doors and windows
Press electronic key button e to
activate the anti-theft alarm system.
Electronic key system 3 21.
Deactivation
Unlocking the vehicle (with button c
or the button on any exterior door handle) or switching on the ignition
deactivates the anti-theft alarm
system. Hazard warning lights flash to confirm deactivation.
The system is not deactivated when
unlocking the driver's door with the
key or with the central locking switch
in the passenger compartment.
Notice
If the alarm has been triggered,
unlocking the vehicle with the key
will not stop the alarm siren. To stop the siren, switch on the ignition. The
hazard warning lights will not flash
upon deactivation if the alarm has
been triggered.Activation without monitoring of
passenger compartment
Disable monitoring of the passenger
compartment, e.g. when animals are
being left in the vehicle, or if the
auxiliary heater has been set for a
timed or remote controlled start
3 102.
Press and hold button e on the
remote control or electronic key; an
audible signal will sound as
confirmation.
The status will remain until the doors
are unlocked.
AlarmWhen triggered, the alarm sounds via
a separate battery-backed power
sounder, and the hazard warning
lights flash simultaneously. The
number and duration of alarm signals are stipulated by legislation.
If the vehicle battery is disconnected
or its power supply is interrupted, the
alarm siren will be triggered. First
deactivate the anti-theft alarm system
if the vehicle battery must be
disconnected.To silence the alarm siren (if
triggered) and therefore deactivate
the anti-theft alarm system, reconnect vehicle battery and unlock the vehicle
or switch on the ignition.
Immobiliser
The immobiliser is part of the ignition
switch and checks whether the
vehicle is allowed to be started with
the key being used.
The immobiliser is activated
automatically after the key has been removed from the ignition switch and
also if the key is left in the ignition
switch when the engine is turned off.
If the engine cannot be started, switch off the ignition and remove key, wait
approx. 2 seconds and then repeat
the start attempt. If start attempt is
unsuccessful, attempt to start the
engine using the spare key and seek
the assistance of a workshop.
Page 73 of 189
Instruments and controls71Instruments and
controlsControls ....................................... 71
Warning lights, gauges and indi‐ cators ........................................... 76
Information displays .....................86
Vehicle messages ........................ 87
Trip computer ............................... 88
Tachograph .................................. 90Controls
Steering wheel adjustment
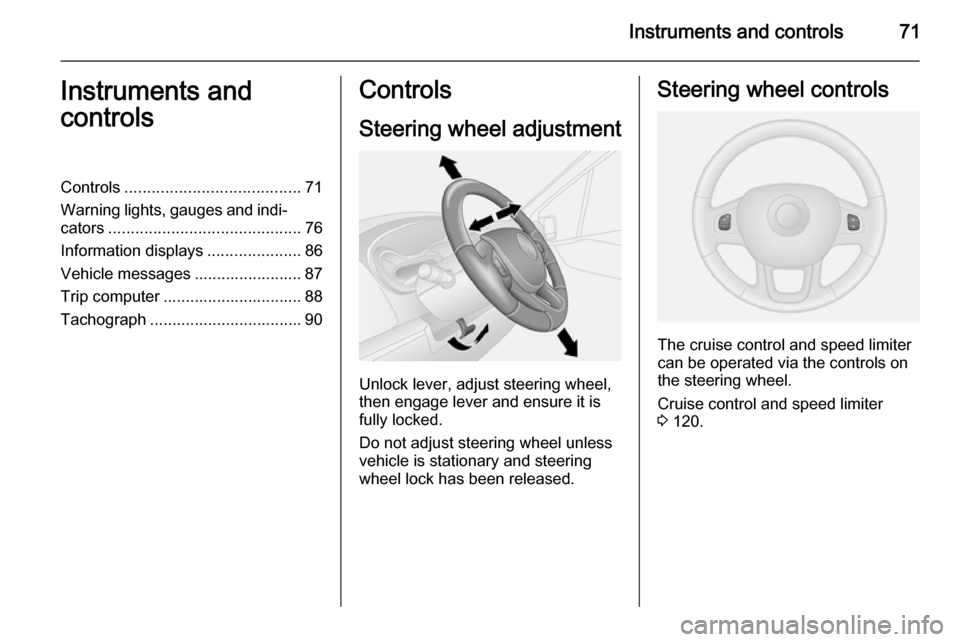
Unlock lever, adjust steering wheel,
then engage lever and ensure it is fully locked.
Do not adjust steering wheel unless
vehicle is stationary and steering
wheel lock has been released.
Steering wheel controls
The cruise control and speed limiter
can be operated via the controls on
the steering wheel.
Cruise control and speed limiter
3 120.
Page 78 of 189

76Instruments and controls
The cigarette lighter is located on the
instrument panel.
Press in cigarette lighter. It switches
off automatically once the element is
glowing. Pull out lighter.
AshtraysCaution
To be used only for ash and not forcombustible rubbish.
Portable ashtray
Ashtray container for mobile use in
the vehicle. To use, open cover.
Ashtrays can be placed in the
cupholders at both ends of the
instrument panel, centrally in the
lower instrument panel and in the rear
seat area.
Cupholders 3 65.Warning lights, gauges
and indicators
Speedometer
Indicates vehicle speed.
Maximum speed may be restricted by
a speed regulator. As a visible
indication of this, a warning label is
located on the instrument panel.
A warning buzzer will sound for
10 seconds every 40 seconds if the vehicle briefly exceeds the set limit.
Page 87 of 189

Instruments and controls859Warning
When the engine is off,
considerably more force is needed
to brake and steer.
Do not remove key until vehicle is stationary, otherwise the steeringwheel lock could engage
unexpectedly.
Check oil level before seeking
assistance of a workshop 3 133.
Fuel economy mode
ECO illuminates green when ECO
mode is engaged to reduce fuel
consumption.
ECO mode, driving economically
3 108.
Low fuel Y illuminates yellow.
Illuminates when level in fuel tank is
too low; refuel immediately 3 127.
Catalytic converter 3 115.
Bleeding the diesel fuel system
3 138.
Autostop
D illuminates when engine is in an
Autostop.
Stop-start system 3 113.
Exterior light 9 illuminates green.
Illuminated when the headlights are on.
8 illuminates green.
Illuminated when the sidelights are
on.
Lighting 3 91.
High beam P illuminates blue.
Illuminated when high beam is on and
during headlight flash 3 92.
Fog light
> illuminates green.Illuminated when the front fog lights
are on 3 93.
Rear fog light
r illuminates green.
Illuminated when the rear fog light is
on 3 93.
Cruise control
m , U illuminates green or yellow.
m illuminates green when a certain
speed is stored.
U illuminates green when the system
is on.
Speed limiter U illuminates yellow.
U illuminates yellow when the
system is on.
Cruise control and speed limiter
3 120.
Door open
U illuminates red.
Page 95 of 189

Lighting93Hazard warning flashers
Operated with the ¨ button.
In the event of hard braking, the
hazard warning flashers may turn on
automatically. Switch off by pressing
the ¨ button.
Turn and lane-change
signalslever up=right turn signallever down=left turn signal
When the steering wheel is turned
back, the lever automatically returns
to its original position and the turn
signal is deactivated. This will not
happen when making a minor
steering manoeuvre such as lane
changing.
For three flashes, e.g. when changing
lanes, move lever part way to first
stop and then release.
If the lever is moved past the first stop, the turn signal is switched on
constantly. Switch the turn signal off
manually by moving the lever to its
original position.
Front fog lights
Turn inner switch to position >.
Front fog lights will only operate when
the ignition and headlights are
switched on.
Rear fog lights Turn inner switch to position r.