winter tyres VAUXHALL VIVARO 2014.5 Owner's Manual
[x] Cancel search | Manufacturer: VAUXHALL, Model Year: 2014.5, Model line: VIVARO, Model: VAUXHALL VIVARO 2014.5Pages: 189, PDF Size: 4.16 MB
Page 151 of 189

Vehicle care149Wheels and tyresTyre condition, wheel condition
Drive over edges slowly and at right
angles if possible. Driving over sharp
edges can cause tyre and wheel
damage. Do not trap tyres on the kerb
when parking.
Regularly check the wheels for
damage. Seek the assistance of a
workshop in the event of damage or
unusual wear.
Tyres Factory-fitted tyres are matched tothe chassis and offer optimum driving comfort and safety.
Winter tyres Winter tyres improve driving safety at
temperatures below 7 °C and should
therefore be fitted on all wheels.In accordance with country-specific
regulations, a notice indicating the
maximum permissible speed for the
tyres must be affixed within the
driver's field of vision.
Tyre designationsE.g. 195/65 R 16 C 88 Q195=Tyre width, mm65=Cross-section ratio (tyre
height to tyre width), %R=Belt type: RadialRF=Type: RunFlat16=Wheel diameter, inchesC=Cargo or commercial use88=Load index e.g. 88 is
equivalent to 567 kgQ=Speed code letter
Speed code letter:
Q=up to 100 mphS=up to 112 mphT=up to 118 mphH=up to 130 mphV=up to 150 mphW=up to 168 mphTyre pressure
Check the pressure of cold tyres at least every 14 days and before any
long journey. Do not forget the spare
wheel. This also applies to vehicles
with tyre pressure monitoring system.
Tyre pressures 3 178. Always inflate
tyres to the pressures shown on the
label on the driver's door frame.
The tyre pressure data refers to cold
tyres. It applies to summer and winter tyres.
Always inflate the spare tyre to the
pressure specified for full load.
Page 154 of 189

152Vehicle care
Relearn function
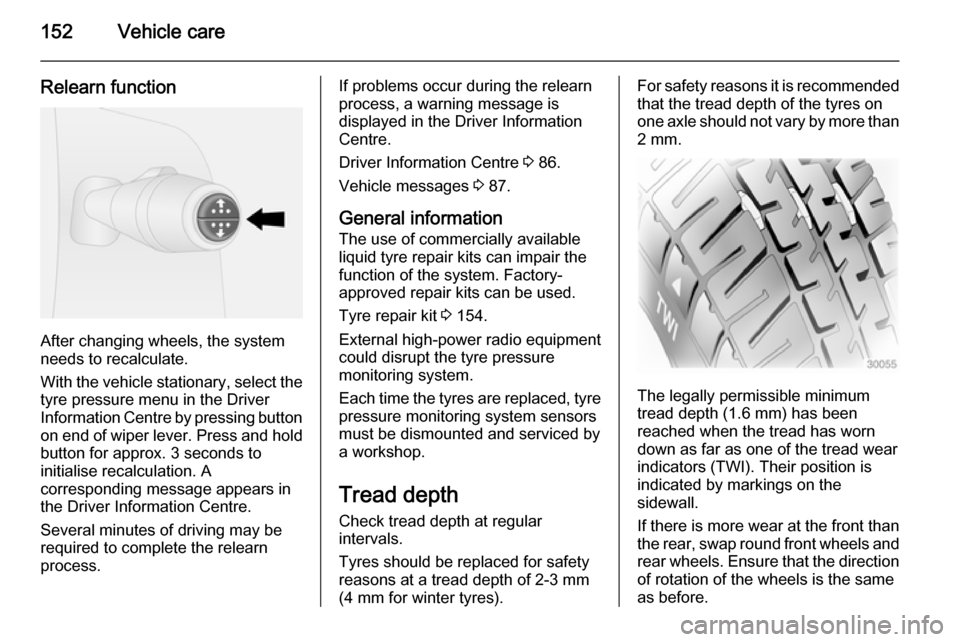
After changing wheels, the system
needs to recalculate.
With the vehicle stationary, select the tyre pressure menu in the Driver
Information Centre by pressing button
on end of wiper lever. Press and hold button for approx. 3 seconds to
initialise recalculation. A
corresponding message appears in
the Driver Information Centre.
Several minutes of driving may be
required to complete the relearn
process.
If problems occur during the relearn
process, a warning message is
displayed in the Driver Information
Centre.
Driver Information Centre 3 86.
Vehicle messages 3 87.
General information The use of commercially available
liquid tyre repair kits can impair the
function of the system. Factory-
approved repair kits can be used.
Tyre repair kit 3 154.
External high-power radio equipment
could disrupt the tyre pressure
monitoring system.
Each time the tyres are replaced, tyre
pressure monitoring system sensors
must be dismounted and serviced by a workshop.
Tread depth
Check tread depth at regular
intervals.
Tyres should be replaced for safety
reasons at a tread depth of 2-3 mm
(4 mm for winter tyres).For safety reasons it is recommended
that the tread depth of the tyres on
one axle should not vary by more than
2 mm.
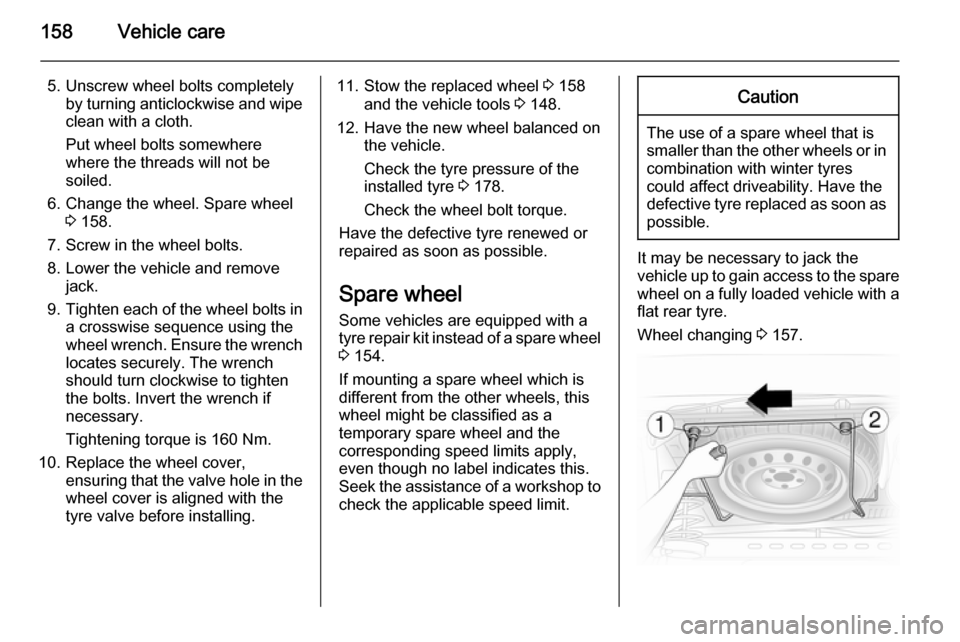
The legally permissible minimum
tread depth (1.6 mm) has been
reached when the tread has worn
down as far as one of the tread wear
indicators (TWI). Their position is
indicated by markings on the
sidewall.
If there is more wear at the front than
the rear, swap round front wheels and
rear wheels. Ensure that the direction
of rotation of the wheels is the same
as before.
Page 160 of 189

158Vehicle care
5. Unscrew wheel bolts completelyby turning anticlockwise and wipe
clean with a cloth.
Put wheel bolts somewhere
where the threads will not be
soiled.
6. Change the wheel. Spare wheel 3 158.
7. Screw in the wheel bolts.
8. Lower the vehicle and remove jack.
9. Tighten each of the wheel bolts in
a crosswise sequence using the
wheel wrench. Ensure the wrench
locates securely. The wrench
should turn clockwise to tighten
the bolts. Invert the wrench if
necessary.
Tightening torque is 160 Nm.
10. Replace the wheel cover, ensuring that the valve hole in thewheel cover is aligned with the
tyre valve before installing.11. Stow the replaced wheel 3 158
and the vehicle tools 3 148.
12. Have the new wheel balanced on the vehicle.
Check the tyre pressure of the
installed tyre 3 178.
Check the wheel bolt torque.
Have the defective tyre renewed or
repaired as soon as possible.
Spare wheel
Some vehicles are equipped with a tyre repair kit instead of a spare wheel 3 154.
If mounting a spare wheel which is
different from the other wheels, this
wheel might be classified as a
temporary spare wheel and the
corresponding speed limits apply,
even though no label indicates this.
Seek the assistance of a workshop to
check the applicable speed limit.Caution
The use of a spare wheel that is smaller than the other wheels or in combination with winter tyres
could affect driveability. Have the defective tyre replaced as soon as
possible.
It may be necessary to jack the
vehicle up to gain access to the spare
wheel on a fully loaded vehicle with a
flat rear tyre.
Wheel changing 3 157.
Page 161 of 189

Vehicle care159
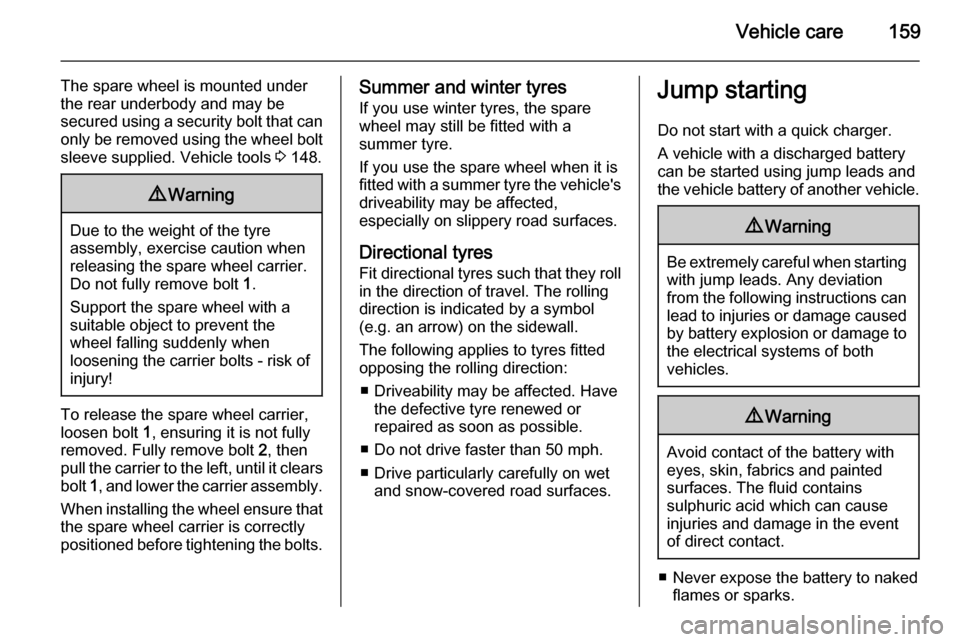
The spare wheel is mounted under
the rear underbody and may be
secured using a security bolt that can
only be removed using the wheel bolt sleeve supplied. Vehicle tools 3 148.9 Warning
Due to the weight of the tyre
assembly, exercise caution when
releasing the spare wheel carrier.
Do not fully remove bolt 1.
Support the spare wheel with a
suitable object to prevent the
wheel falling suddenly when
loosening the carrier bolts - risk of injury!
To release the spare wheel carrier,loosen bolt 1, ensuring it is not fully
removed. Fully remove bolt 2, then
pull the carrier to the left, until it clears bolt 1, and lower the carrier assembly.
When installing the wheel ensure that
the spare wheel carrier is correctly
positioned before tightening the bolts.
Summer and winter tyres
If you use winter tyres, the spare
wheel may still be fitted with a
summer tyre.
If you use the spare wheel when it is
fitted with a summer tyre the vehicle's driveability may be affected,
especially on slippery road surfaces.
Directional tyres
Fit directional tyres such that they roll in the direction of travel. The rolling
direction is indicated by a symbol
(e.g. an arrow) on the sidewall.
The following applies to tyres fitted
opposing the rolling direction:
■ Driveability may be affected. Have the defective tyre renewed or
repaired as soon as possible.
■ Do not drive faster than 50 mph.
■ Drive particularly carefully on wet and snow-covered road surfaces.Jump starting
Do not start with a quick charger.
A vehicle with a discharged battery
can be started using jump leads and
the vehicle battery of another vehicle.9 Warning
Be extremely careful when starting
with jump leads. Any deviation
from the following instructions can
lead to injuries or damage caused
by battery explosion or damage to the electrical systems of both
vehicles.
9 Warning
Avoid contact of the battery with
eyes, skin, fabrics and painted
surfaces. The fluid contains
sulphuric acid which can cause
injuries and damage in the event
of direct contact.
■ Never expose the battery to naked flames or sparks.
Page 188 of 189

186
Trailer stability assist .................130
Trailer towing ............................. 129
Transmission ............................... 16
Tread depth ............................... 152
Trip computer .............................. 88
Trip odometer .............................. 77
Turn and lane-change signals .....93
Turn signal ................................... 81
Tyre chains ................................ 153
Tyre changing ............................. 157
Tyre designations ......................149
Tyre pressure ............................ 149
Tyre pressure monitoring system ............................... 84, 150
Tyre pressures ........................... 178
Tyre repair kit ............................. 154
Tyres .......................................... 149
Tyres and wheel size, changing. 153
U Ultrasonic parking assist............. 124
Underseat storage .......................65
Upholstery .................................. 164
Upshift .......................................... 83
Using this manual ..........................3
V Vehicle battery ........................... 137
Vehicle checks............................ 132
Vehicle data ................................ 171Vehicle data recording and
privacy ..................................... 179
Vehicle dimensions .................... 174
Vehicle Identification Number ....168
Vehicle jack ................................ 148
Vehicle messages .......................87
Vehicle security ............................ 31
Vehicle shutdown ......................112
Vehicle specific data ......................3
Vehicle storage ........................... 131
Vehicle tools ............................... 148
Vehicle unlocking ........................... 6
Vehicle weight ........................... 173
Ventilation ..................................... 97
W
Warning chimes ........................... 87
Warning lights ............................... 76
Warning messages .......................87
Warning triangle .......................... 68
Washer and wiper systems .........14
Washer fluid ............................... 136
Washing the vehicle ...................162
Welcome lighting .......................... 95
Wheel changing .........................157
Wheel cover hook .......................148
Wheel covers ............................. 153
Wheels and tyres .......................149
Wheel wrench ............................. 148
Windows ....................................... 37Windscreen................................... 37
Windscreen wiper/washer ...........72
Winter tyres ............................... 149
Wiper blade replacement ..........139