lock VAUXHALL VIVARO 2015.5 Owner's Guide
[x] Cancel search | Manufacturer: VAUXHALL, Model Year: 2015.5, Model line: VIVARO, Model: VAUXHALL VIVARO 2015.5Pages: 203, PDF Size: 4.54 MB
Page 36 of 203
34Keys, doors and windows
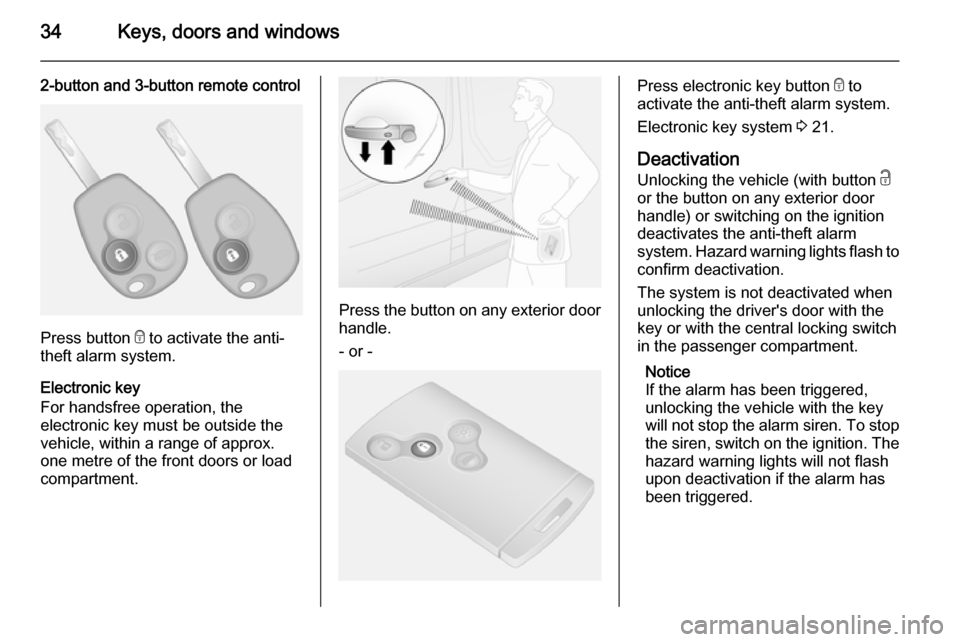
2-button and 3-button remote control
Press button e to activate the anti-
theft alarm system.
Electronic key
For handsfree operation, the
electronic key must be outside the
vehicle, within a range of approx.
one metre of the front doors or load
compartment.
Press the button on any exterior door
handle.
- or -
Press electronic key button e to
activate the anti-theft alarm system.
Electronic key system 3 21.
Deactivation
Unlocking the vehicle (with button c
or the button on any exterior door
handle) or switching on the ignition
deactivates the anti-theft alarm
system. Hazard warning lights flash to
confirm deactivation.
The system is not deactivated when
unlocking the driver's door with the
key or with the central locking switch in the passenger compartment.
Notice
If the alarm has been triggered,
unlocking the vehicle with the key
will not stop the alarm siren. To stop the siren, switch on the ignition. The
hazard warning lights will not flash
upon deactivation if the alarm has
been triggered.
Page 37 of 203

Keys, doors and windows35
Activation without monitoring of
passenger compartment
Disable monitoring of the passenger
compartment, e.g. when animals are
being left in the vehicle, or if the
auxiliary heater has been set for a
timed or remote controlled start
3 104.
Press and hold button e on the
remote control or electronic key; an
audible signal will sound as
confirmation.
The status will remain until the doors
are unlocked.
AlarmWhen triggered, the alarm sounds via
a separate battery-backed power
sounder, and the hazard warning
lights flash simultaneously. The
number and duration of alarm signals are stipulated by legislation.
If the vehicle battery is disconnected
or its power supply is interrupted, the
alarm siren will be triggered. First
deactivate the anti-theft alarm system
if the vehicle battery must be
disconnected.To silence the alarm siren (if
triggered) and therefore deactivate
the anti-theft alarm system, reconnect vehicle battery and unlock the vehicle
or switch on the ignition.
Immobiliser
The immobiliser is part of the ignition
switch and checks whether the
vehicle is allowed to be started with
the key being used.
The immobiliser is activated
automatically after the key has been
removed from the ignition switch and
also if the key is left in the ignition
switch when the engine is turned off.
If the engine cannot be started, switch off the ignition and remove key, wait
approx. 2 seconds and then repeat
the start attempt. If start attempt is
unsuccessful, attempt to start the
engine using the spare key and seek
the assistance of a workshop.Notice
The immobiliser does not lock the doors. You should always lock the
vehicle after leaving it and switch on the anti-theft alarm system 3 23,
3 33.
Page 39 of 203
Keys, doors and windows37
Depending on version, exterior
mirrors can be automatically folded to the parking position upon locking the
vehicle. For further information, refer
to the Infotainment system manual.
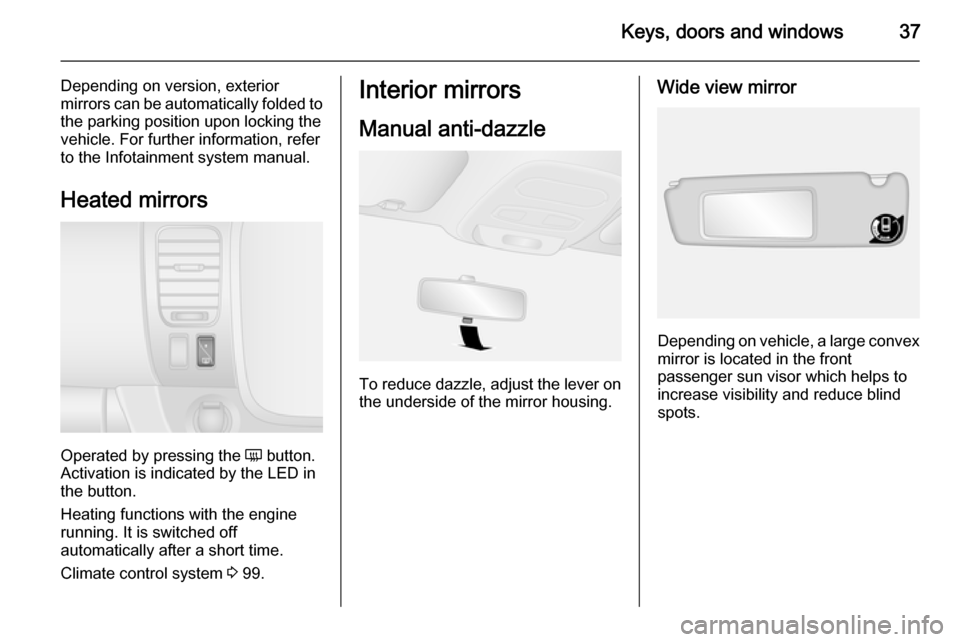
Heated mirrors
Operated by pressing the Ü button.
Activation is indicated by the LED in
the button.
Heating functions with the engine
running. It is switched off
automatically after a short time.
Climate control system 3 99.
Interior mirrors
Manual anti-dazzle
To reduce dazzle, adjust the lever on the underside of the mirror housing.
Wide view mirror
Depending on vehicle, a large convexmirror is located in the front
passenger sun visor which helps to
increase visibility and reduce blind
spots.
Page 41 of 203

Keys, doors and windows39
Operate the switch for the respective
window by pushing to open or pulling to close.
For incremental operation: Push or
pull switch briefly.
For automatic opening or closing:
Push or pull switch for longer.
Window moves up or down
automatically with safety function
enabled. To stop movement, operate
the switch once more in the same
direction.
In the event of closing difficulties due to frost or the like, operate the switch
several times to close the window in
stages.
Safety function
If the window glass encounters
resistance during automatic closing, it is immediately stopped and opened
again.
Overload If the windows are repeatedly
operated within short intervals, the
window operation is disabled for
some time.
Rear windows
Sliding side windowsTo open or close, raise the handle
and slide window.
Sun blind
Depending on vehicle, a sunblind is
integrated into the window cover.
To close, pull handle downwards and engage the locks at the bottom.
To open, disengage the locks by
pulling sunblind towards you slightly
and guide it upwards.
Page 48 of 203
46Seats, restraints
When folding or removing the rear
seat, ensure the armrests are folded
away in their most upright position.
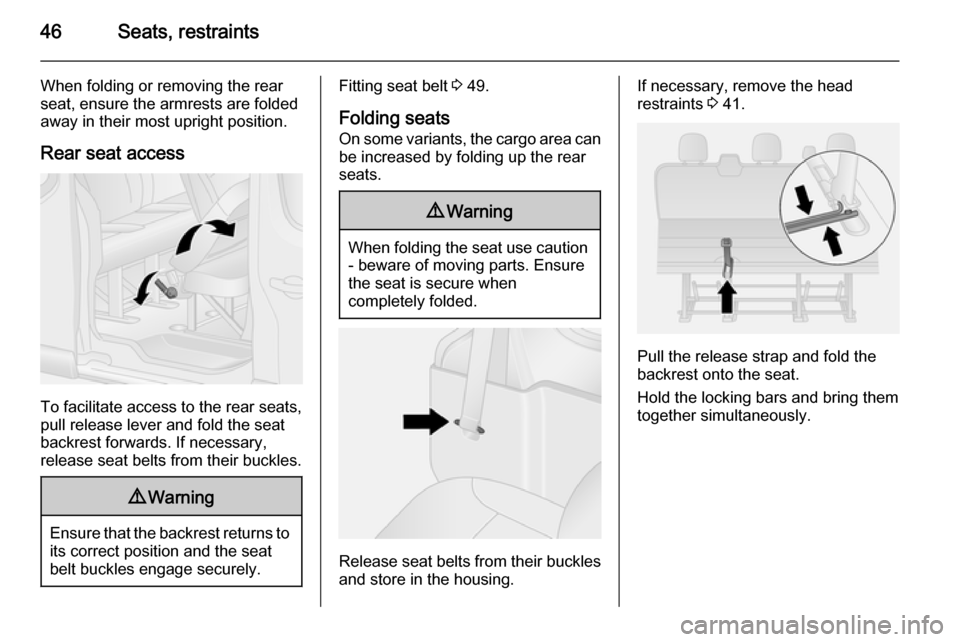
Rear seat access
To facilitate access to the rear seats,
pull release lever and fold the seat backrest forwards. If necessary,
release seat belts from their buckles.
9 Warning
Ensure that the backrest returns to
its correct position and the seat
belt buckles engage securely.
Fitting seat belt 3 49.
Folding seats
On some variants, the cargo area can
be increased by folding up the rear
seats.9 Warning
When folding the seat use caution
- beware of moving parts. Ensure
the seat is secure when
completely folded.
Release seat belts from their buckles and store in the housing.
If necessary, remove the head
restraints 3 41.
Pull the release strap and fold the
backrest onto the seat.
Hold the locking bars and bring them
together simultaneously.
Page 49 of 203

Seats, restraints47
Lift and fold the seat assembly
forwards until it engages in the folded
forward position.
Lock the seat into position by pushing the rear support legs and ensure they
are engaged.
Caution
For safety reasons, do not place
loads on the folded rear seats.
When returning the seat assembly to its original position, pull locking bars,
carefully lower seat assembly and
ensure the rear support legs are
correctly located and latched. Raise
the backrest, and if necessary,
replace the head restraints.
Removable rear seats On some variants, the cargo area can
be increased by removing the rear
seats.
Release the seats by pressing down
and sliding forward the locking
catches located on the left and right-
hand seat mountings.
Raise the locking catches, then move the seat unit towards the rear to
release from the rear floor anchor
points.
Raise the seat unit, then move it
towards the rear again to release from
the front floor anchor points. The seat unit can then be lifted out.
The seats must be removed through
the sliding door only.
Page 50 of 203
48Seats, restraints9Warning
Removable seats are heavy! Do
not attempt to remove without
assistance.
When installing the seats, ensure that the seats are properly located
on the anchor points and that the
locking catches are fully engaged.
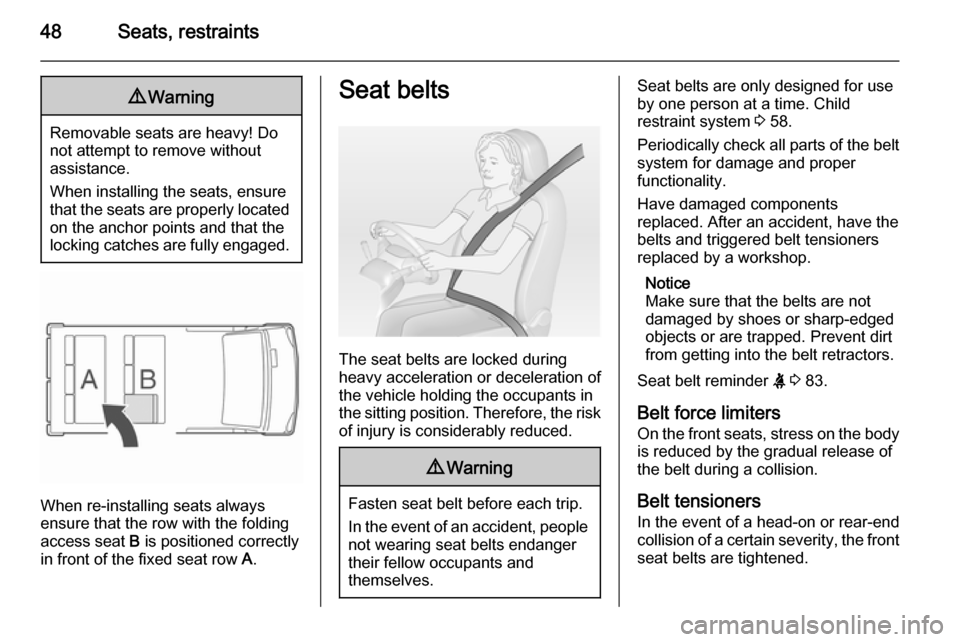
When re-installing seats always
ensure that the row with the folding access seat B is positioned correctly
in front of the fixed seat row A.
Seat belts
The seat belts are locked during
heavy acceleration or deceleration of
the vehicle holding the occupants in
the sitting position. Therefore, the risk of injury is considerably reduced.
9 Warning
Fasten seat belt before each trip.
In the event of an accident, people
not wearing seat belts endanger their fellow occupants and
themselves.
Seat belts are only designed for use
by one person at a time. Child
restraint system 3 58.
Periodically check all parts of the belt system for damage and proper
functionality.
Have damaged components
replaced. After an accident, have the
belts and triggered belt tensioners
replaced by a workshop.
Notice
Make sure that the belts are not
damaged by shoes or sharp-edged
objects or are trapped. Prevent dirt
from getting into the belt retractors.
Seat belt reminder X 3 83.
Belt force limiters On the front seats, stress on the body
is reduced by the gradual release of
the belt during a collision.
Belt tensioners In the event of a head-on or rear-endcollision of a certain severity, the front
seat belts are tightened.
Page 67 of 203
Storage65StorageStorage compartments................65
Load compartment .......................68
Roof rack system .........................71
Loading information .....................71Storage compartments9Warning
Do not store heavy or sharp
objects in the storage
compartments. Otherwise vehicle
occupants could be injured by
objects being thrown around in the
event of hard braking, a sudden
change in direction or an accident.
Instrument panel storage
Storage compartments, pockets and
trays are located in the instrument
panel.
A coin holder, a phone holder, and a
tablet holder may be located on the
instrument panel.
The tray located on top of the
instrument panel has a lid.
Glovebox
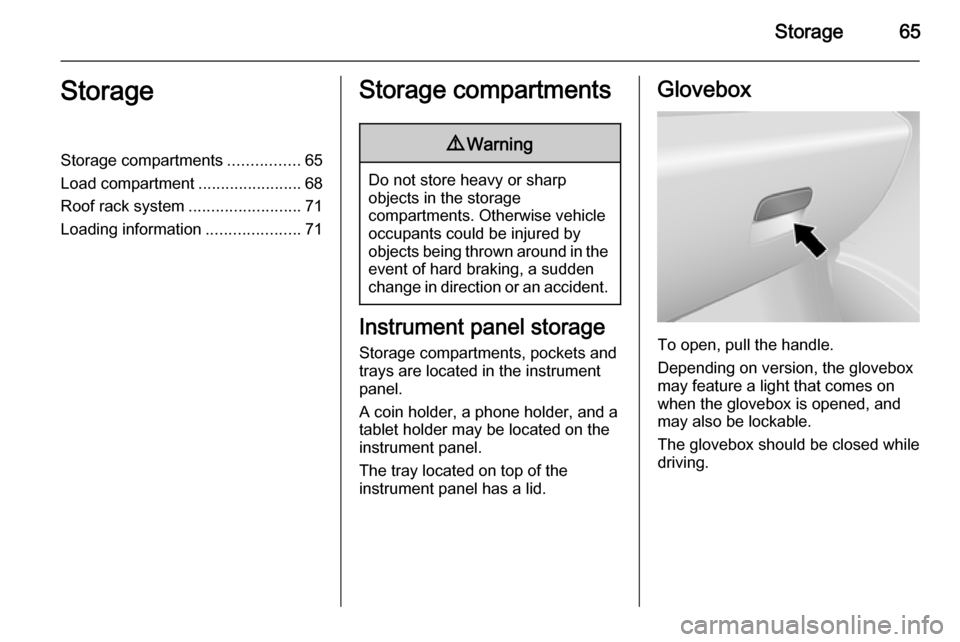
To open, pull the handle.
Depending on version, the glovebox
may feature a light that comes on
when the glovebox is opened, and
may also be lockable.
The glovebox should be closed while
driving.
Page 68 of 203
66StorageCupholders
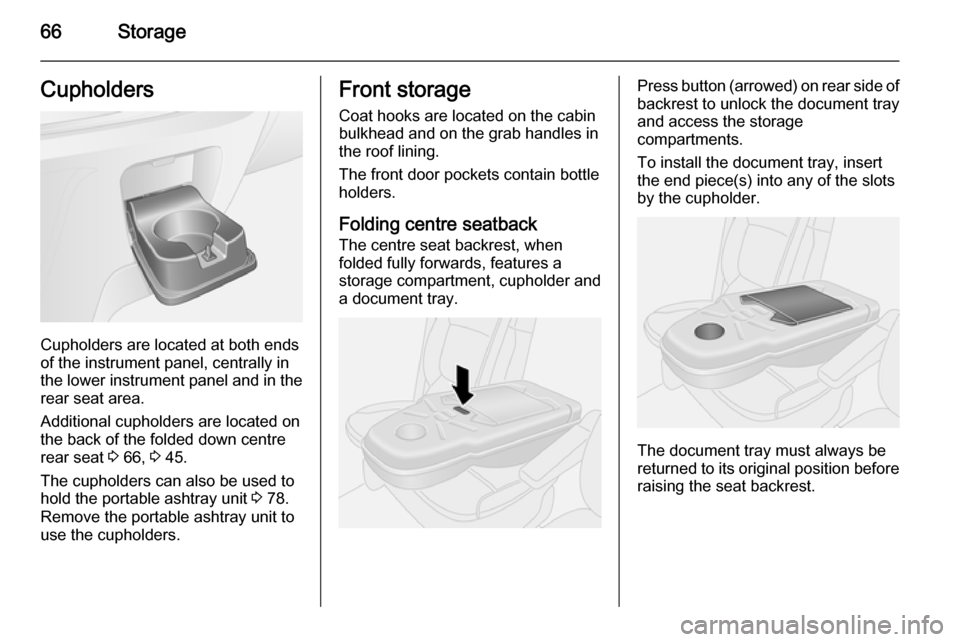
Cupholders are located at both ends
of the instrument panel, centrally in the lower instrument panel and in the
rear seat area.
Additional cupholders are located on
the back of the folded down centre
rear seat 3 66, 3 45.
The cupholders can also be used to hold the portable ashtray unit 3 78.
Remove the portable ashtray unit to
use the cupholders.
Front storage
Coat hooks are located on the cabin
bulkhead and on the grab handles in
the roof lining.
The front door pockets contain bottle
holders.
Folding centre seatback The centre seat backrest, when
folded fully forwards, features a
storage compartment, cupholder and
a document tray.Press button (arrowed) on rear side of
backrest to unlock the document tray
and access the storage
compartments.
To install the document tray, insert
the end piece(s) into any of the slots
by the cupholder.
The document tray must always be
returned to its original position before
raising the seat backrest.
Page 75 of 203
Instruments and controls73Instruments and
controlsControls ....................................... 73
Warning lights, gauges and indi‐ cators ........................................... 78
Information displays .....................88
Vehicle messages ........................ 89
Trip computer ............................... 90
Tachograph .................................. 92Controls
Steering wheel adjustment
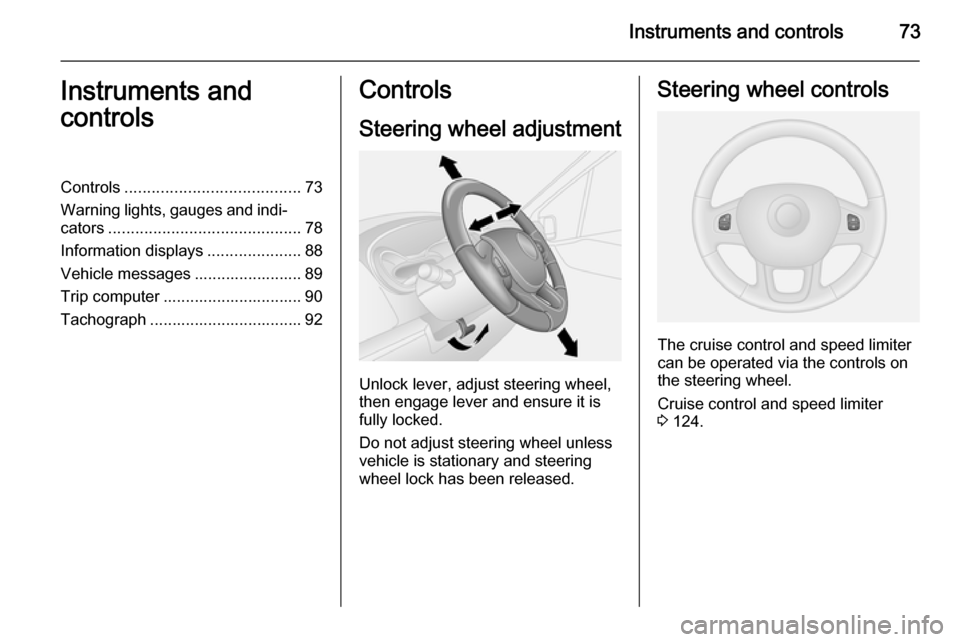
Unlock lever, adjust steering wheel,
then engage lever and ensure it is fully locked.
Do not adjust steering wheel unless
vehicle is stationary and steering
wheel lock has been released.
Steering wheel controls
The cruise control and speed limiter
can be operated via the controls on
the steering wheel.
Cruise control and speed limiter
3 124.