bonnet VAUXHALL VIVARO 2015.5 Owner's Manual
[x] Cancel search | Manufacturer: VAUXHALL, Model Year: 2015.5, Model line: VIVARO, Model: VAUXHALL VIVARO 2015.5Pages: 203, PDF Size: 4.54 MB
Page 13 of 203

In brief11
1Side air vents ...................... 108
2 Ashtray .................................. 78
Cupholder ............................ 66
3 Light switch .......................... 93
Rear fog light ......................... 96
Front fog lights .....................96
Exit lighting ............................ 98
Turn and lane-change
signals ................................... 95
Sidelights .............................. 93
Headlight flash, low beam
and high beam ......................94
4 Instruments .......................... 78
5 Horn ...................................... 74
Driver airbag ......................... 55
6 Windscreen wiper,
windscreen washer system ..74
Rear window wiper, rear
window washer system ........75
Trip computer ....................... 907Card reader for electronic
key system ............................ 21
8 Steering column controls ......74
9 Centre air vents ................... 108
10 Power outlet .......................... 77
Cigarette lighter ..................... 77
Coin tray, USB slot ................ 65
11 Driver Information Centre ...... 88
Trip computer ....................... 90
12 Front passenger airbag .........55
13 Glovebox .............................. 65
14 Heated exterior mirrors .........37
Heated rear window ..............40
Idle speed control ...............114
15 Power outlet .......................... 77
Cigarette lighter ..................... 77
16 Climate control system .......... 99
Electronic climate control
system ................................. 101
17 Ashtray .................................. 78
Cupholder ............................ 6618Hazard warning flashers .......95
Central locking system ..........23
19 Power button for electronic
key system .......................... 112
20 Eco button for fuel
economy mode ...................110
21 Stop-start system ................115
Cruise control and speed
limiter ................................. 124
22 Remote control on
steering wheel ......................73
Cruise control .....................124
23 Ignition switch with
steering wheel lock .............112
24 Steering wheel adjustment ...73
25 Bonnet release lever ...........138
26 Fuse box ............................. 152
27 Ultrasonic parking assist ....128
Electronic Stability
Program ............................. 123
Traction Control system ......122
Headlight range
adjustment ........................... 94
Page 35 of 203

Keys, doors and windows33
Deactivation
Unlock the doors by pressing button
c on the remote control or by turning
the manual key in driver's door lock
towards front of vehicle.
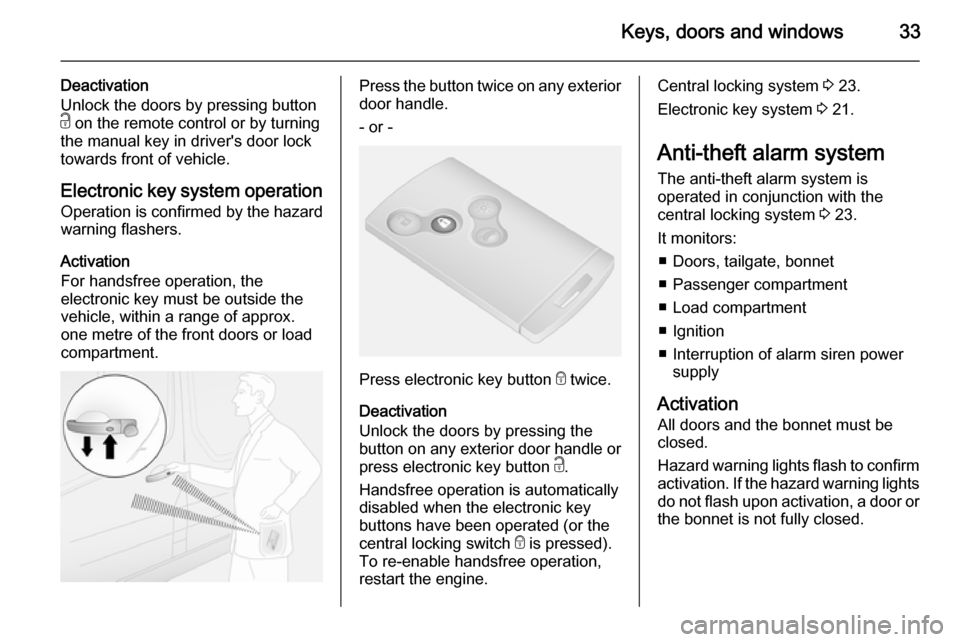
Electronic key system operation
Operation is confirmed by the hazard warning flashers.
Activation
For handsfree operation, the
electronic key must be outside the
vehicle, within a range of approx.
one metre of the front doors or load
compartment.Press the button twice on any exterior
door handle.
- or -
Press electronic key button e twice.
Deactivation
Unlock the doors by pressing the
button on any exterior door handle or
press electronic key button c.
Handsfree operation is automatically
disabled when the electronic key
buttons have been operated (or the
central locking switch e is pressed).
To re-enable handsfree operation,
restart the engine.
Central locking system 3 23.
Electronic key system 3 21.
Anti-theft alarm system
The anti-theft alarm system is
operated in conjunction with the
central locking system 3 23.
It monitors: ■ Doors, tailgate, bonnet
■ Passenger compartment
■ Load compartment
■ Ignition
■ Interruption of alarm siren power supply
Activation
All doors and the bonnet must be
closed.
Hazard warning lights flash to confirm activation. If the hazard warning lights do not flash upon activation, a door or
the bonnet is not fully closed.
Page 91 of 203

Instruments and controls89Vehicle messages
Messages are displayed in the Driver
Information Centre and may be
accompanied by illumination of
control indicator F or C in the
instrument cluster.
Information messages Information messages regarding,
e.g. engine starting conditions, stop-
start system, parking brake
application, central locking, steering
wheel lock etc. provide the current
status of certain vehicle functions and
instructions for use.
Fault messages Fault messages regarding, e.g. fuel
filter, airbags, exhaust emissions etc.
are displayed together with control
indicator F. Drive with caution and
seek the assistance of a workshop as
soon as possible.
To remove fault messages from the
display, press button on end of wiper
lever. After a few seconds the
message may disappearautomatically and F remains
illuminated. The fault will then be
stored in the on board system.
Warning messagesWarning messages regarding, e.g.
engine, battery or brake system
failure, are displayed together with
control indicator C and may be
accompanied by a warning chime.
Stop engine immediately and seek
the assistance of a workshop.
Fuel economy messages
Fuel economy messages provide tips to improve fuel efficiency. Journeys
can be saved in the system memory,
enabling you to compare
performances.
Refer to Infotainment system manual
for further information.
Fuel economy rating 3 90.
Warning chimes
A corresponding message may also
appear in the Driver Information
Centre when a warning chime is
sounded.When starting the engine or
whilst driving: ■ If seat belt is not fastened 3 48.
■ During operation of the turn and lane-change signals 3 95.
■ During illumination of certain control indicators.
■ If the parking assist detects an object 3 128.
■ If the vehicle speed briefly exceeds
a set limit 3 124, 3 128.
■ If a door or the bonnet is not properly closed when vehicle
exceeds a certain speed.
■ If there is a fault in the brake system
3 85.
■ If the vehicle battery is not charging
3 84.
■ If engine lubrication is interrupted 3 86.
■ If the electronic key is outside of the
detection range.
Electronic key system 3 21, Power
button 3 112.
Page 96 of 203

94Lighting
Daytime running lights 3 95.
High beam
To switch from low to high beam,
push lever.
To switch back to low beam, push
lever again or pull.
Headlight flash
To activate the headlight flash, pull
lever.
Headlight range
adjustment
Manual headlight range
adjustment
Adapt headlight range to the vehicle
load to prevent dazzling of oncoming
traffic.
Turn thumb wheel ? to required
position:
0=No load4=Loaded up to permissible
maximum weightHeadlights when driving
abroad
The asymmetrical headlight beam
extends visibility at the edge of the
road at the passenger side.
However, when driving in countries
where traffic drives on the opposite
side of the road, adjust the headlights to prevent dazzling of oncoming
traffic.
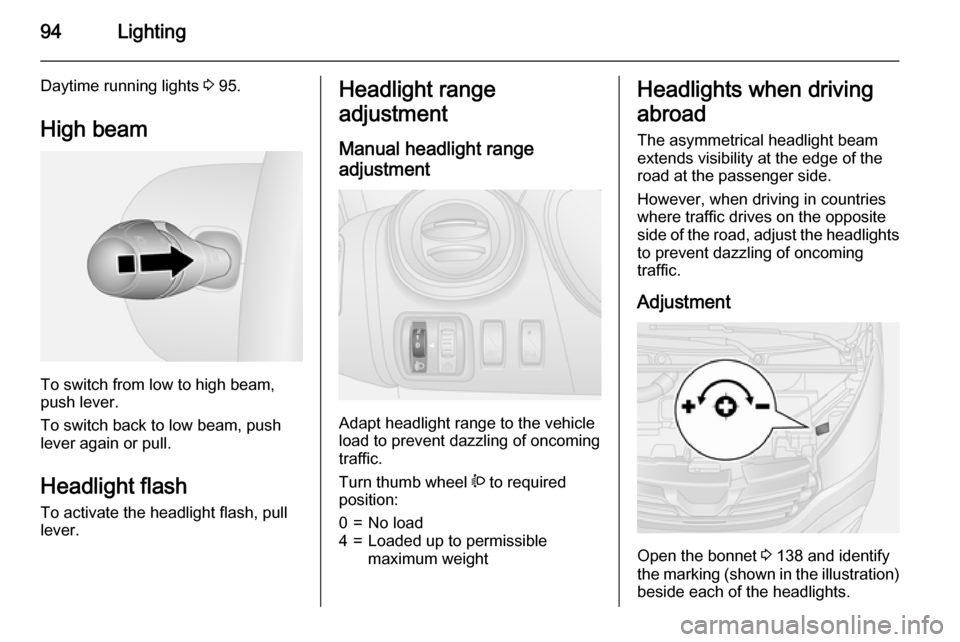
Adjustment
Open the bonnet 3 138 and identify
the marking (shown in the illustration)
beside each of the headlights.
Page 118 of 203

116Driving and operating
Deactivation
Deactivate the stop-start system
manually by pressing the Î button.
LED in the button illuminates to
indicate deactivation and a
corresponding message appears in
the Driver Information Centre 3 88.
If deactivated manually, it is possible to reactivate the stop-start system by
pressing the Î button again.
Vehicle messages 3 89.
Autostop
If the vehicle is at a low speed or at a standstill, activate an Autostop as
follows:
■ Depress the clutch pedal.
■ Move the selector lever to neutral.
■ Release the clutch pedal.
The engine will be switched off while
the ignition stays on.
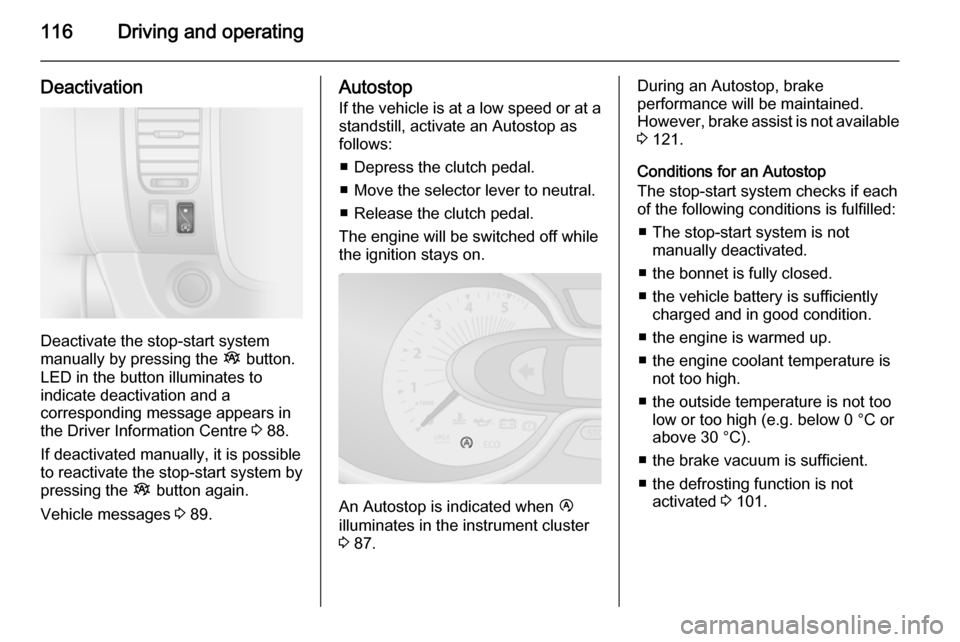
An Autostop is indicated when Ï
illuminates in the instrument cluster
3 87.
During an Autostop, brake
performance will be maintained.
However, brake assist is not available
3 121.
Conditions for an Autostop
The stop-start system checks if each
of the following conditions is fulfilled:
■ The stop-start system is not manually deactivated.
■ the bonnet is fully closed.
■ the vehicle battery is sufficiently charged and in good condition.
■ the engine is warmed up.
■ the engine coolant temperature is not too high.
■ the outside temperature is not too low or too high (e.g. below 0 °C orabove 30 °C).
■ the brake vacuum is sufficient. ■ the defrosting function is not activated 3 101.
Page 119 of 203

Driving and operating117
■ the self-cleaning function of thediesel particle filter is not active
3 118.
■ the vehicle has moved since the last Autostop.
Otherwise an Autostop will be
inhibited.
Restart of the engine by the
driver
Depress the clutch pedal to restart the
engine.
Control indicator Ï 3 87 extinguishes
in the instrument cluster when the
engine is restarted.
Restart of the engine by the
stop-start system
The selector lever must be in neutral to enable an automatic restart.
If one of the following conditions
occurs during an Autostop, the
engine will be restarted automatically
by the stop-start system:
■ The stop-start system is manually deactivated.
■ the bonnet is opened.■ the vehicle battery is discharged.
■ the engine temperature is too low.
■ the brake vacuum is not sufficient.
■ the vehicle starts to move.
■ the defrosting function is activated 3 101.
If an electrical accessory, e.g. a
portable CD player, is connected to
the power outlet, a brief power drop during engine restart may be
noticeable.
Fault If a fault occurs in the stop-start
system, the LED in button Î
illuminates, and a corresponding
message appears in the Driver
Information Centre 3 88. Seek the
assistance of a workshop.
Vehicle messages 3 89.
Warning chimes 3 89.Parking9 Warning
■ Do not park the vehicle on an
easily ignitable surface. The
high temperature of the exhaust system could ignite the surface.
■ Always apply parking brake without pressing release button.Apply as firmly as possible on a
downhill slope or uphill slope.
Depress foot brake at the same
time to reduce operating force.
■ Switch off the engine.
■ If the vehicle is on a level surface or uphill slope, engage
first gear. On an uphill slope,
turn the front wheels away from the kerb.
If the vehicle is on a downhill
slope, engage reverse gear.
Turn the front wheels towards
the kerb.
Lock the vehicle 3 23 and activate the
anti-theft locking system 3 32 and
anti-theft alarm system 3 33.
Page 139 of 203

Vehicle care137
■ Open the bonnet, close all doorsand lock the vehicle.
■ Disconnect the clamp from the negative terminal of the vehicle
battery. Beware that all systems are
not functional, e.g. anti-theft alarm
system.
Putting back into operation
When the vehicle is to be put back into
operation:
■ Connect the clamp to the negative terminal of the vehicle battery.
Activate the electronics of the
power windows.
■ Check tyre pressure.
■ Fill up the washer fluid reservoir.
■ Check the engine oil level.
■ Check the coolant level.
■ Fit the number plate, if necessary.End-of-life vehicle
recovery
Information on end-of-life vehicle
recovery centres and the recycling of
end-of-life vehicles is available on our website. Only entrust this work to an
authorised recycling centre.Vehicle checks
Performing work9 Warning
Only perform engine compartment
checks when the ignition is off.
The cooling fan may start
operating even if the ignition is off.
9 Danger
The ignition system generates
extremely high voltages. Do not
touch.
The caps for topping up the engine oil, the coolant, the washer fluid and the
oil dipstick handle are yellow for ease
of identification.
Page 140 of 203

138Vehicle careBonnetOpening
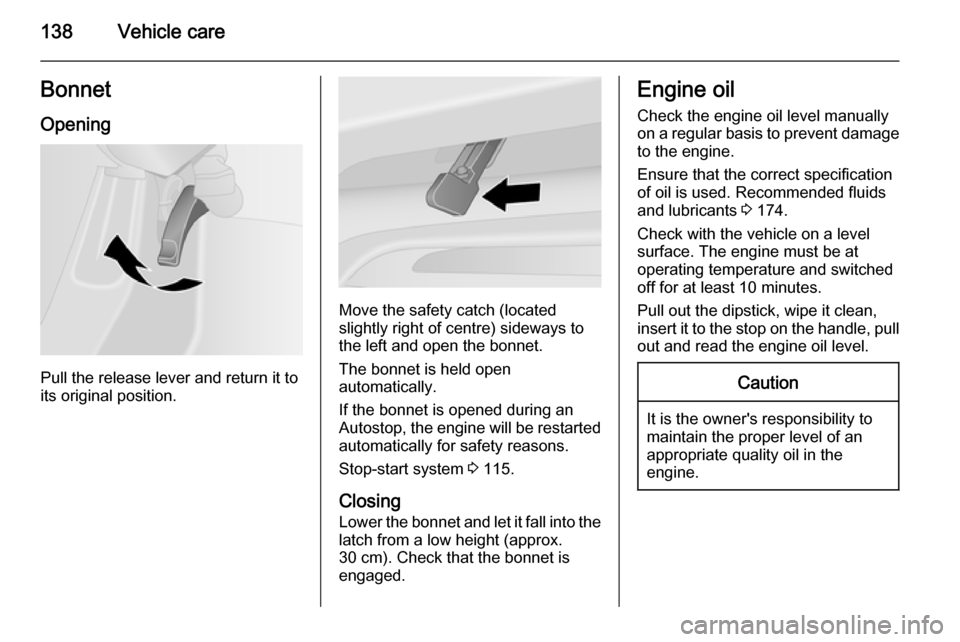
Pull the release lever and return it to
its original position.
Move the safety catch (located
slightly right of centre) sideways to
the left and open the bonnet.
The bonnet is held open
automatically.
If the bonnet is opened during an
Autostop, the engine will be restarted automatically for safety reasons.
Stop-start system 3 115.
Closing Lower the bonnet and let it fall into the
latch from a low height (approx.
30 cm). Check that the bonnet is
engaged.
Engine oil
Check the engine oil level manually
on a regular basis to prevent damage
to the engine.
Ensure that the correct specification
of oil is used. Recommended fluids
and lubricants 3 174.
Check with the vehicle on a level
surface. The engine must be at
operating temperature and switched
off for at least 10 minutes.
Pull out the dipstick, wipe it clean,
insert it to the stop on the handle, pull
out and read the engine oil level.Caution
It is the owner's responsibility to
maintain the proper level of an
appropriate quality oil in the
engine.
Page 172 of 203

170Vehicle careAppearance care
Exterior care Locks
The locks are lubricated at the factory using a high quality lock cylinder
grease. Use de-icing agent only when absolutely necessary, as this has adegreasing effect and impairs lockfunction. After using de-icing agent,
have the locks regreased by a
workshop.
Washing
The paintwork of your vehicle is
exposed to environmental influences. Wash and wax your vehicle regularly.
When using automatic vehicle
washes, select a programme that
includes waxing. Restrictions for
filmed or matt painted body parts or decor tapes, see "Polishing and
waxing".Bird droppings, dead insects, resin,
pollen and the like should be cleaned
off immediately, as they contain
aggressive constituents which can cause paint damage.
If using a vehicle wash, comply with
the vehicle wash manufacturer's instructions. The windscreen wipersand rear window wiper must be
switched off. Remove antenna and
external accessories such as roof
racks etc.
If you wash your vehicle by hand,
make sure that the insides of the
wheel housings are also thoroughly
rinsed out.
Clean edges and folds on opened
doors and the bonnet as well as the
areas they cover.Caution
Always use a cleaning agent with
a pH value of 4 to 9.
Do not use cleaning agents on hot surfaces.
Have the door hinges of all doors
greased by a workshop.
Do not clean the engine compartment with a steam-jet or high-pressure jet
cleaner.
Thoroughly rinse and leather-off the vehicle. Rinse leather frequently. Use
separate leathers for painted and
glass surfaces: remnants of wax on
the windows will impair vision.
Exterior lights
Headlight and other light covers are
made of plastic. Do not use any
abrasive or caustic agents, do not use an ice scraper, and do not clean them
dry.
Polishing and waxing Wax the vehicle regularly (at the
latest when water no longer beads).
Otherwise, the paintwork will dry out.
Polishing is necessary only if the paint
has become dull or if solid deposits
have become attached to it.
Paintwork polish with silicone forms a
protective film, making waxing
unnecessary.
Page 196 of 203

194IndexAAccessories and vehicle modifications .......................... 136
Adaptive forward lighting .............95
Adjustable air vents ...................108
AGM (Absorptive Glass Mat) battery ..................................... 142
Airbag and belt tensioners ...........83
Airbag deactivation ................56, 83
Airbag label................................... 51
Airbag system .............................. 51
Air conditioning regular operation ................................ 109
Air conditioning system .............. 100
Air intake .................................... 109
Air recirculation ...................100, 168
Air vents...................................... 108
Alert .............................................. 89
Antifreeze ................................... 140
Antilock brake system ................ 120
Antilock brake system (ABS) .......85
Anti-theft alarm system ................33
Anti-theft bolts............................. 164
Anti-theft locking system .............. 32
Anti-theft security lock ..................23
Appearance care ........................170
Armrest ........................................ 45
Ashtrays ....................................... 78
Automatic anti-dazzle ..................38Automatic fuel cut-off ..................115
Automatic light control .................93
Automatic locking ........................28
Autostop ............................... 87, 114
Auxiliary heater ........................... 104
B Battery ........................................ 142
Battery, jump starting.................. 167
Belts.............................................. 48
Bench seat.................................... 67
Bonnet ....................................... 138
Bottle holders................................ 66
Brake and clutch fluid .................174
Brake assist ............................... 121
Brake fluid .................................. 142 Brakes ............................... 120, 142
Brake system ............................... 85
Breakdown.................................. 168
Bulb replacement ....................... 145
C Capacities .................................. 189
Car Pass ...................................... 19
Catalytic converter .....................118
Central locking system ................23
Centre high-mounted brake light 148
Changing tyre and wheel size ...160
Charging system .......................... 84
Child locks ................................... 28