height VAUXHALL VIVARO 2015.5 Owner's Manual
[x] Cancel search | Manufacturer: VAUXHALL, Model Year: 2015.5, Model line: VIVARO, Model: VAUXHALL VIVARO 2015.5Pages: 203, PDF Size: 4.54 MB
Page 9 of 203
In brief7Seat adjustmentSeat positioning
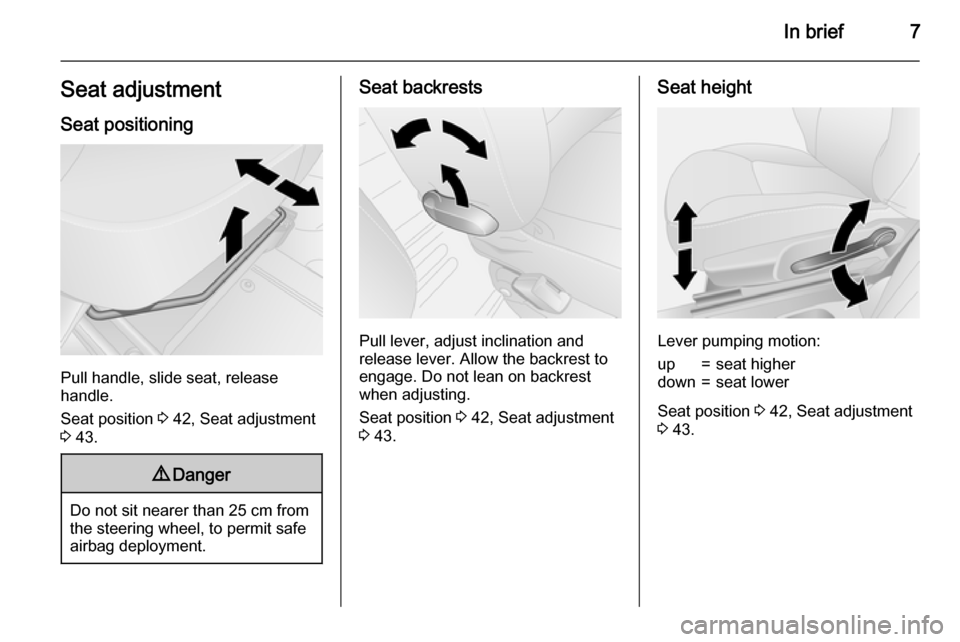
Pull handle, slide seat, release
handle.
Seat position 3 42, Seat adjustment
3 43.
9 Danger
Do not sit nearer than 25 cm from
the steering wheel, to permit safe
airbag deployment.
Seat backrests
Pull lever, adjust inclination and
release lever. Allow the backrest to
engage. Do not lean on backrest
when adjusting.
Seat position 3 42, Seat adjustment
3 43.
Seat height
Lever pumping motion:
up=seat higherdown=seat lower
Seat position 3 42, Seat adjustment
3 43.
Page 10 of 203
8In briefHead restraint adjustment
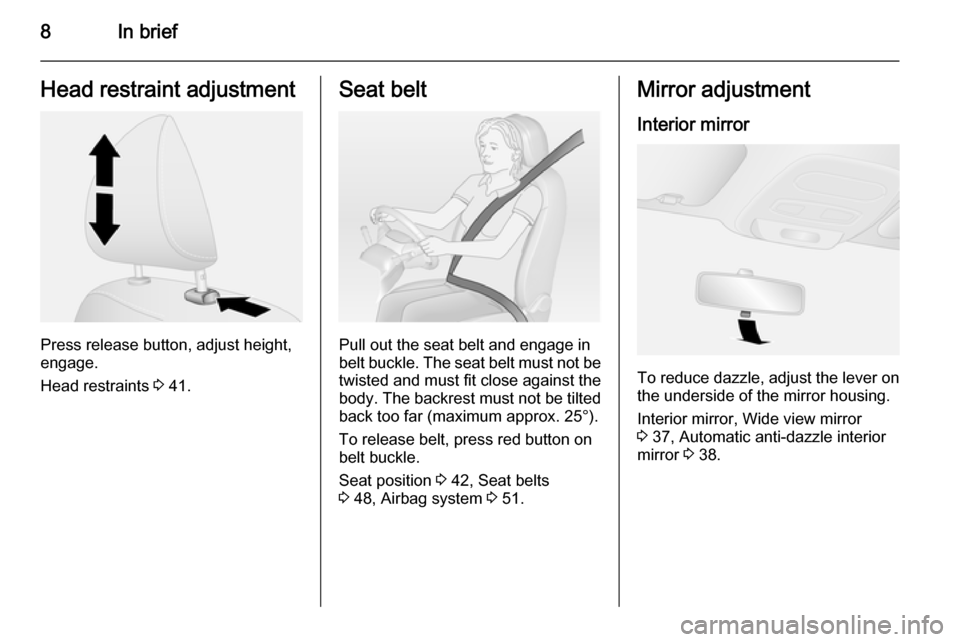
Press release button, adjust height,
engage.
Head restraints 3 41.
Seat belt
Pull out the seat belt and engage in
belt buckle. The seat belt must not be twisted and must fit close against the
body. The backrest must not be tilted
back too far (maximum approx. 25°).
To release belt, press red button on
belt buckle.
Seat position 3 42, Seat belts
3 48, Airbag system 3 51.
Mirror adjustment
Interior mirror
To reduce dazzle, adjust the lever onthe underside of the mirror housing.
Interior mirror, Wide view mirror
3 37, Automatic anti-dazzle interior
mirror 3 38.
Page 43 of 203
Seats, restraints41Seats, restraintsHead restraints............................ 41
Front seats ................................... 42
Rear seats ................................... 45
Seat belts ..................................... 48
Airbag system .............................. 51
Child restraints ............................. 58Head restraints
Position9 Warning
Only drive with the head restraint
set to the proper position.
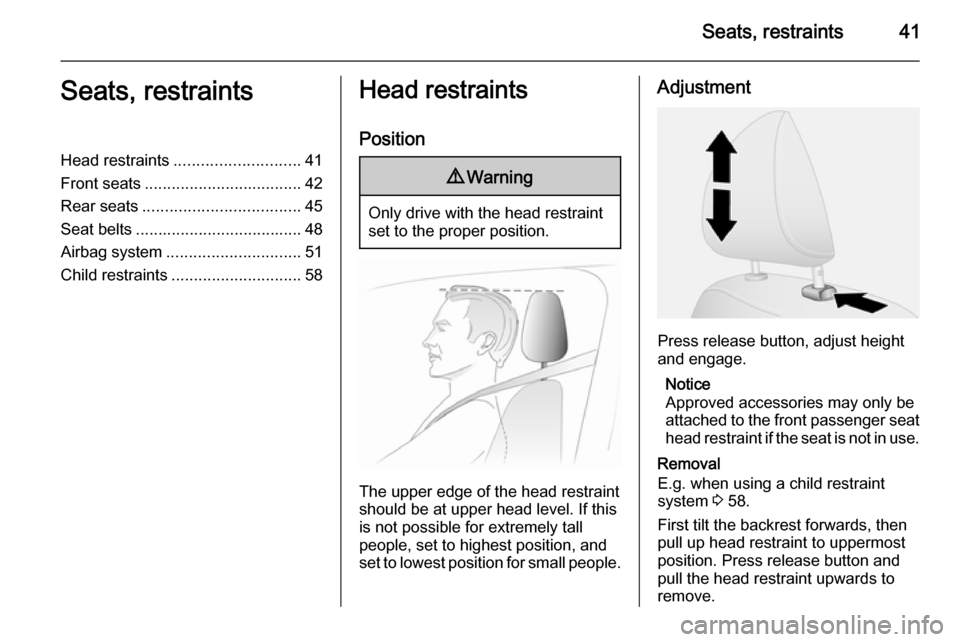
The upper edge of the head restraint
should be at upper head level. If this
is not possible for extremely tall
people, set to highest position, and
set to lowest position for small people.
Adjustment
Press release button, adjust height
and engage.
Notice
Approved accessories may only be
attached to the front passenger seat head restraint if the seat is not in use.
Removal
E.g. when using a child restraint
system 3 58.
First tilt the backrest forwards, then
pull up head restraint to uppermost
position. Press release button and
pull the head restraint upwards to
remove.
Page 44 of 203

42Seats, restraints
Stow head restraints securely in load
compartment. Do not drive with head
restraints removed if the seat is
occupied.Front seats
Seat position9 Warning
Only drive with the seat correctly
adjusted.
■ Sit with buttocks as far back against
the backrest as possible. Adjust the distance between the seat and the
pedals so that legs are slightly
angled when pressing the pedals.
Slide the front passenger seat as
far back as possible.
■ Sit with shoulders as far back against the backrest as possible.
Set the backrest rake so that it is possible to reach the steering
wheel with arms slightly bent.
Maintain contact between
shoulders and the backrest when
turning the steering wheel. Do not
angle the backrest too far back. We recommend a maximum rake of
approx. 25°.
■ Adjust the steering wheel 3 73.
■ Set seat height high enough to have a clear field of vision on allsides and of all display instruments.
There should be at least one hand
of clearance between head and the
roof frame. Thighs should rest
lightly on the seat without pressing
into it.
■ Adjust the head restraint 3 41.
■ Adjust the height of the seat belt 3 49.
■ Adjust the lumbar support so that it
supports the natural shape of the
spine 3 43.
Page 46 of 203
44Seats, restraints
Seat height
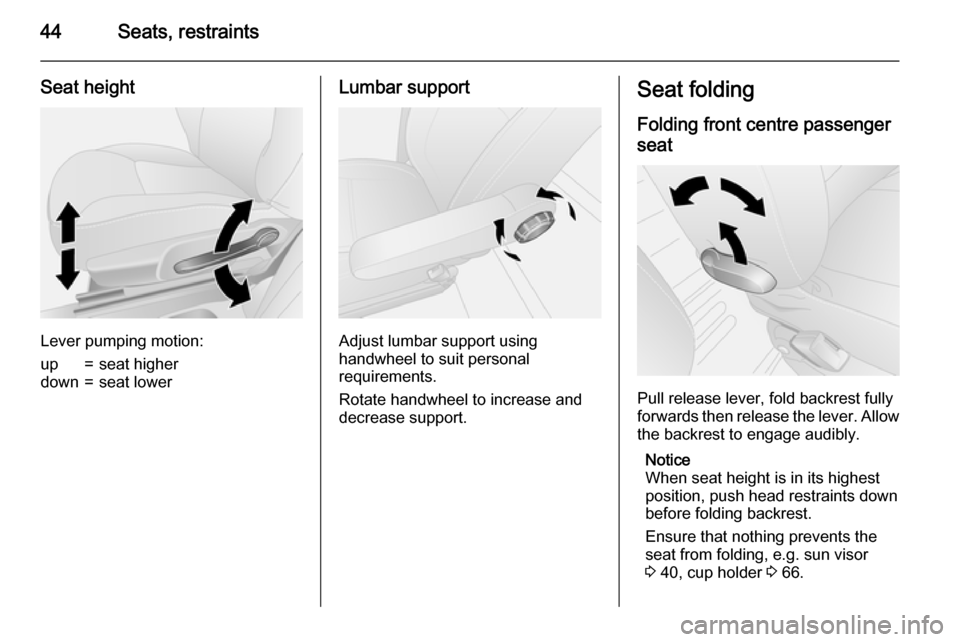
Lever pumping motion:
up=seat higherdown=seat lowerLumbar support
Adjust lumbar support using
handwheel to suit personal
requirements.
Rotate handwheel to increase and
decrease support.
Seat folding
Folding front centre passenger
seat
Pull release lever, fold backrest fully
forwards then release the lever. Allow the backrest to engage audibly.
Notice
When seat height is in its highest
position, push head restraints down
before folding backrest.
Ensure that nothing prevents the
seat from folding, e.g. sun visor
3 40, cup holder 3 66.
Page 52 of 203
50Seats, restraints
Height adjustment
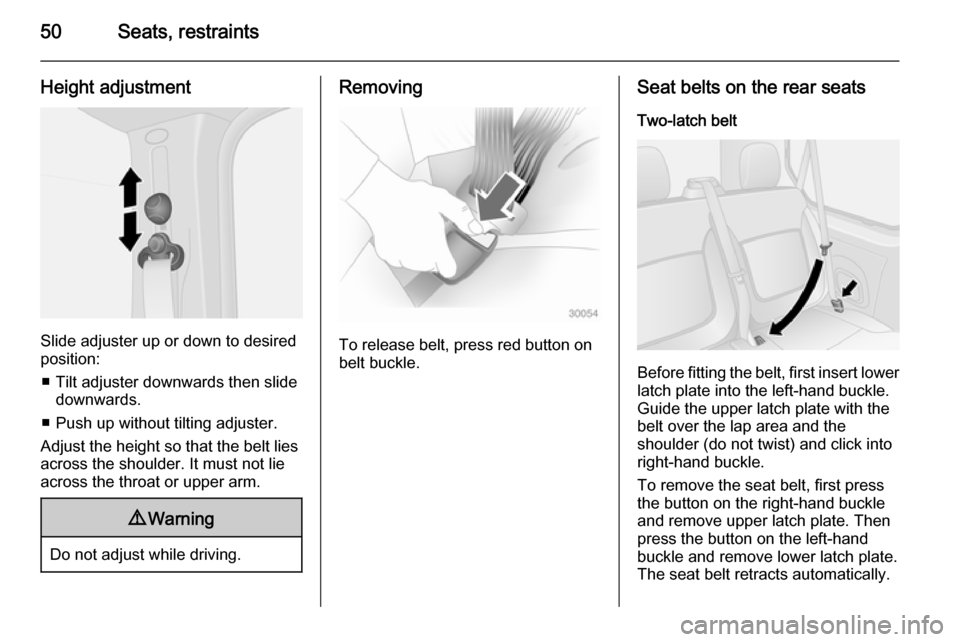
Slide adjuster up or down to desired
position:
■ Tilt adjuster downwards then slide downwards.
■ Push up without tilting adjuster.
Adjust the height so that the belt lies across the shoulder. It must not lie
across the throat or upper arm.
9 Warning
Do not adjust while driving.
Removing
To release belt, press red button on
belt buckle.
Seat belts on the rear seats
Two-latch belt
Before fitting the belt, first insert lower latch plate into the left-hand buckle.
Guide the upper latch plate with the
belt over the lap area and the
shoulder (do not twist) and click into
right-hand buckle.
To remove the seat belt, first press
the button on the right-hand buckle
and remove upper latch plate. Then
press the button on the left-hand
buckle and remove lower latch plate.
The seat belt retracts automatically.
Page 61 of 203

Seats, restraints59Child restraint installation locationsPermissible options for fitting a child restraint system
Front seats - Van
Weight and age class
Single front passenger seat 1Double front passenger seat
activated airbag
deactivated
or without airbag
activated airbag
deactivated
or without airbagcentreouterGroup 0: up to 10 kg
or approx. 10 months
Group 0+: up to 13 kg
or approx. 2 years
XUXXU
Group I: 9 to 18 kg
or approx. 8 months to 4 yearsXUXXUGroup II: 15 to 25 kg
or approx. 3 to 7 years
Group III: 22 to 36 kg
or approx. 6 to 12 years
XUXXU
1=Forward-facing child restraints: Remove head restraint 3 41 . Slide seat as far back as possible. Set seat height to highest
position. Maximum backrest rake is 25°. Seat adjustment 3 43.
Page 62 of 203

60Seats, restraints
Front seats - Combi, Bus, Double cab
Weight and age class
Single front passenger seat1Double front passenger seat
activated airbag
deactivated
or without airbag
activated airbag
deactivated
or without airbagcentreouterGroup 0: up to 10 kg
or approx. 10 months
Group 0+: up to 13 kg
or approx. 2 years
XUXXU
Group I: 9 to 18 kg
or approx. 8 months to 4 yearsXU 2XXU 2Group II: 15 to 25 kg
or approx. 3 to 7 years
Group III: 22 to 36 kg
or approx. 6 to 12 years
XXXXX
1=If adjustable, slide seat as far back as possible and set seat height to highest position. Maximum backrest rake is 25°.
Seat adjustment 3 43.2=Rear-facing child restraints only for this weight and age class.
Page 140 of 203
138Vehicle careBonnetOpening
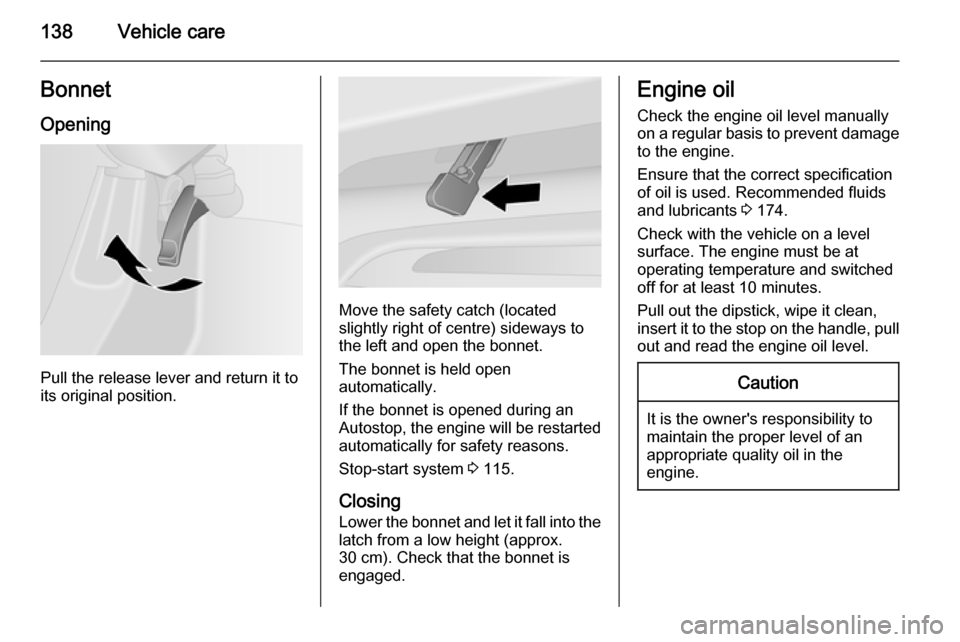
Pull the release lever and return it to
its original position.
Move the safety catch (located
slightly right of centre) sideways to
the left and open the bonnet.
The bonnet is held open
automatically.
If the bonnet is opened during an
Autostop, the engine will be restarted automatically for safety reasons.
Stop-start system 3 115.
Closing Lower the bonnet and let it fall into the
latch from a low height (approx.
30 cm). Check that the bonnet is
engaged.
Engine oil
Check the engine oil level manually
on a regular basis to prevent damage
to the engine.
Ensure that the correct specification
of oil is used. Recommended fluids
and lubricants 3 174.
Check with the vehicle on a level
surface. The engine must be at
operating temperature and switched
off for at least 10 minutes.
Pull out the dipstick, wipe it clean,
insert it to the stop on the handle, pull
out and read the engine oil level.Caution
It is the owner's responsibility to
maintain the proper level of an
appropriate quality oil in the
engine.
Page 158 of 203

156Vehicle careWheels and tyres
Tyre condition, wheel condition
Drive over edges slowly and at right
angles if possible. Driving over sharp
edges can cause tyre and wheel
damage. Do not trap tyres on the kerb when parking.
Regularly check the wheels for
damage. Seek the assistance of a
workshop in the event of damage or
unusual wear.
We recommend not swapping the
front wheels with the rear wheels and vice versa, as this can affect vehicle
stability. Always use less worn tyres on the rear axle.
Tyres Factory-fitted tyres are matched to
the chassis and offer optimum driving
comfort and safety.Winter tyres
Winter tyres improve driving safety attemperatures below 7 °C and should
therefore be fitted on all wheels.
In accordance with country-specific
regulations, a notice indicating the
maximum permissible speed for the
tyres must be affixed within the
driver's field of vision.
Tyre designations
E.g. 195/65 R 16 C 88 Q195=Tyre width, mm65=Cross-section ratio (tyre height
to tyre width), %R=Belt type: RadialRF=Type: RunFlat16=Wheel diameter, inchesC=Cargo or commercial use88=Load index e.g. 88 is
equivalent to 567 kgQ=Speed code letter
Speed code letter:
Q=up to 100 mphS=up to 112 mphT=up to 118 mphH=up to 130 mphV=up to 150 mphW=up to 168 mph
Directional tyres
Fit directional tyres such that they rollin the direction of travel. The rolling
direction is indicated by a symbol
(e.g. an arrow) on the sidewall.
Tyre pressure
Check the pressure of cold tyres at
least every 14 days and before any
long journey. Do not forget the spare
wheel. This also applies to vehicles
with tyre pressure monitoring system.