wheel VAUXHALL VIVARO 2017.5 Owner's Guide
[x] Cancel search | Manufacturer: VAUXHALL, Model Year: 2017.5, Model line: VIVARO, Model: VAUXHALL VIVARO 2017.5Pages: 231, PDF Size: 5.52 MB
Page 150 of 231
148Driving and operatingEnhanced Traction function
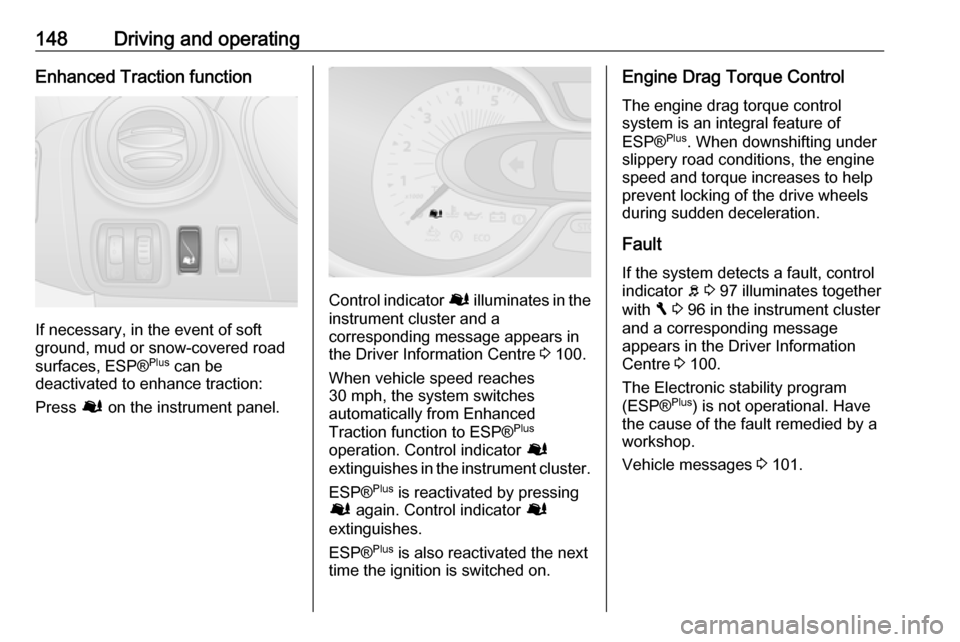
If necessary, in the event of soft
ground, mud or snow-covered road
surfaces, ESP® Plus
can be
deactivated to enhance traction:
Press Ø on the instrument panel.
Control indicator Ø illuminates in the
instrument cluster and a
corresponding message appears in
the Driver Information Centre 3 100.
When vehicle speed reaches
30 mph, the system switches
automatically from Enhanced
Traction function to ESP® Plus
operation. Control indicator Ø
extinguishes in the instrument cluster.
ESP® Plus
is reactivated by pressing
Ø again. Control indicator Ø
extinguishes.
ESP® Plus
is also reactivated the next
time the ignition is switched on.
Engine Drag Torque Control
The engine drag torque control
system is an integral feature of
ESP® Plus
. When downshifting under
slippery road conditions, the engine speed and torque increases to help
prevent locking of the drive wheels
during sudden deceleration.
Fault
If the system detects a fault, control indicator b 3 97 illuminates together
with F 3 96 in the instrument cluster
and a corresponding message
appears in the Driver Information
Centre 3 100.
The Electronic stability program
(ESP® Plus
) is not operational. Have
the cause of the fault remedied by a
workshop.
Vehicle messages 3 101.
Page 157 of 231
Driving and operating155The area displayed by the camera is
limited. The distance of the image that
appears on the display differs from
the actual distance.
Notice
To achieve the optimum visibility, the
rear view camera must not be
obscured by dirt, snow or ice.
Activation
Interior mirror display screen
Rear view camera display is
automatically activated when reverse
gear is engaged. An audible signal
confirms activation.
Infotainment system display screen
In vehicles with Navigation system,
the rear view camera display may be
shown on the Infotainment system
display screen (depending on
version).
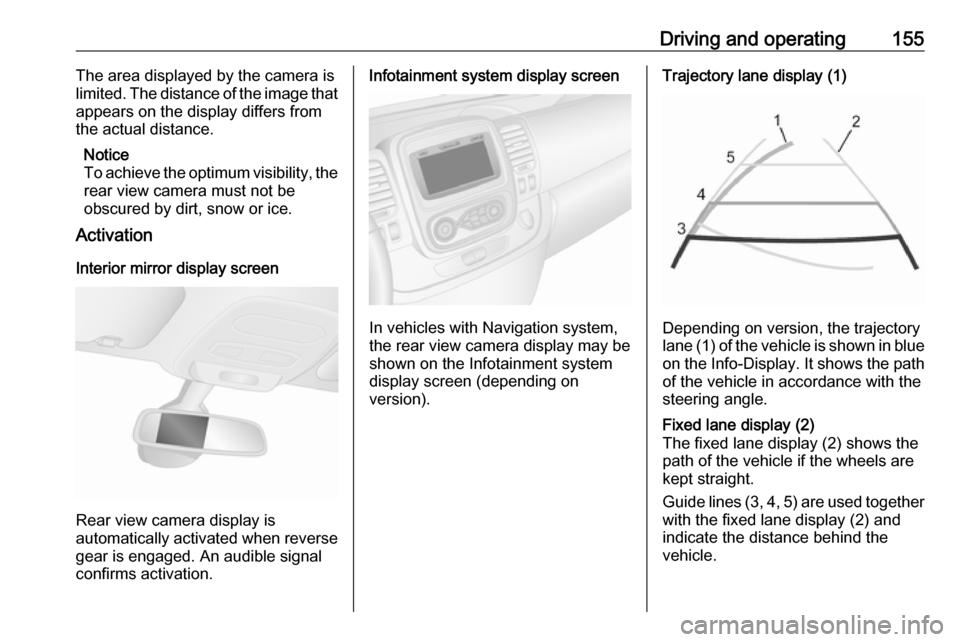
Trajectory lane display (1)
Depending on version, the trajectory
lane (1) of the vehicle is shown in blue
on the Info-Display. It shows the path of the vehicle in accordance with the
steering angle.
Fixed lane display (2)
The fixed lane display (2) shows the
path of the vehicle if the wheels are
kept straight.
Guide lines (3, 4, 5) are used together
with the fixed lane display (2) and
indicate the distance behind the
vehicle.
Page 162 of 231

160Driving and operatingIn the case of trailer loads of
1200 kg or more, the vertical coupling load should not be less than 50 kg.
Rear axle load When the trailer is coupled and the
towing vehicle fully loaded (including all occupants), the permissible rear
axle load (see identification plate or
vehicle documents) must not be
exceeded.
Trailer stability assist
If the system detects snaking
movements, engine power is reduced
and the vehicle/trailer combination is selectively braked until the snaking
ceases. While the system is working, keep steering wheel as still as
possible.
Trailer stability assist (TSA) is a
function of the Electronic Stability
Program (ESP® Plus
) 3 147.
Page 163 of 231

Vehicle care161Vehicle careGeneral Information...................162
Accessories and vehicle modifications .......................... 162
Vehicle storage ........................162
End-of-life vehicle recovery .....163
Vehicle checks ........................... 163
Performing work ......................163
Bonnet ..................................... 163
Engine oil ................................. 164
Engine air filter ........................ 165
Engine coolant ......................... 166
Power steering fluid .................166
Washer fluid ............................ 167
Brakes ..................................... 167
Brake fluid ............................... 167
Vehicle battery ......................... 168
Diesel fuel filter ........................170
Diesel fuel system bleeding .....170
Wiper blade replacement ........171
Bulb replacement .......................172
Headlights ............................... 172
Fog lights ................................. 172
Front turn signal lights .............173
Tail lights ................................. 173
Side turn signal lights ..............174Centre high-mounted brake
light ......................................... 174
Reversing light ......................... 175
Number plate light ...................176
Fog tail light ............................. 176
Interior lights ............................ 177
Instrument panel illumination ...177
Electrical system ........................178
Fuses ....................................... 178
Instrument panel fuse box .......179
Vehicle tools .............................. 182
Tools ........................................ 182
Wheels and tyres .......................183
Tyres ....................................... 183
Winter tyres ............................. 183
Tyre designations ....................183
Tyre pressure .......................... 183
Tyre pressure monitoring system .................................... 185
Tread depth ............................. 187
Changing tyre and wheel size . 187
Wheel covers ........................... 187
Tyre chains .............................. 188
Tyre repair kit .......................... 188
Wheel changing .......................191
Spare wheel ............................ 192
Jump starting ............................. 194Towing....................................... 195
Towing the vehicle ...................195
Towing another vehicle ...........196
Appearance care .......................197
Exterior care ............................ 197
Interior care ............................. 199
Page 168 of 231
166Vehicle careEngine coolantThe coolant provides freeze
protection down to approx. -28 °C.Caution
Only use approved antifreeze.
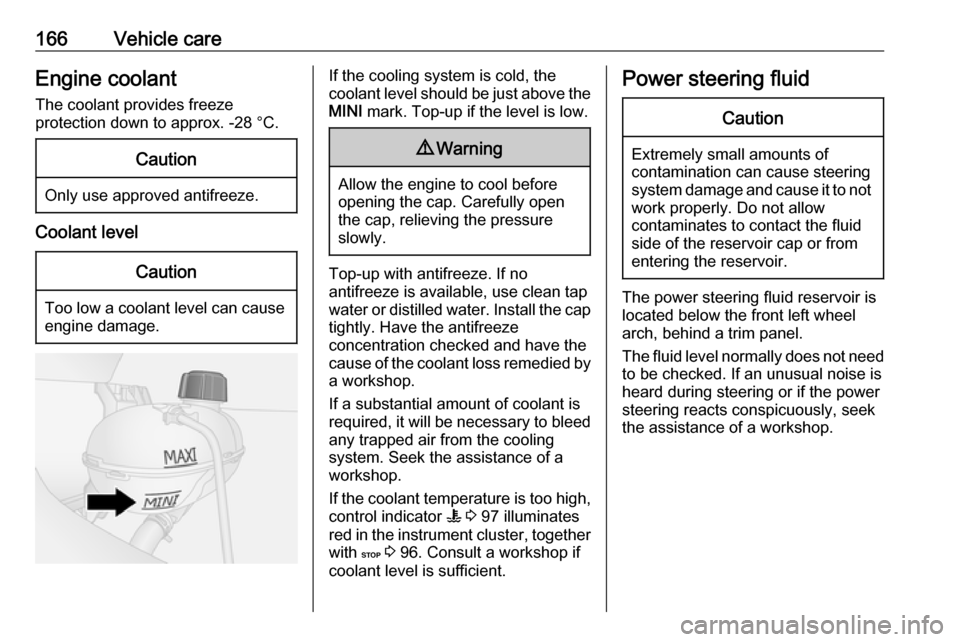
Coolant level
Caution
Too low a coolant level can cause engine damage.
If the cooling system is cold, the
coolant level should be just above the
MINI mark. Top-up if the level is low.9Warning
Allow the engine to cool before
opening the cap. Carefully open
the cap, relieving the pressure
slowly.
Top-up with antifreeze. If no
antifreeze is available, use clean tap
water or distilled water. Install the cap
tightly. Have the antifreeze
concentration checked and have the
cause of the coolant loss remedied by a workshop.
If a substantial amount of coolant is
required, it will be necessary to bleed
any trapped air from the cooling
system. Seek the assistance of a
workshop.
If the coolant temperature is too high, control indicator W 3 97 illuminates
red in the instrument cluster, together
with C 3 96. Consult a workshop if
coolant level is sufficient.
Power steering fluidCaution
Extremely small amounts of
contamination can cause steering
system damage and cause it to not work properly. Do not allow
contaminates to contact the fluid
side of the reservoir cap or from
entering the reservoir.
The power steering fluid reservoir is located below the front left wheel
arch, behind a trim panel.
The fluid level normally does not need
to be checked. If an unusual noise is
heard during steering or if the power
steering reacts conspicuously, seek
the assistance of a workshop.
Page 184 of 231

182Vehicle careNo.Circuit40Rear power outlet41Starting / Body control module42Heated seats43Tachograph44Windscreen wiper45Heating / Air conditioning
After having changed defective fuses,
replace the trim panel.
Vehicle tools
Tools
The jack, wheel wrench, wheel bolt
sleeve, torx key, adapters, wheel
cover hook, towing eye are contained
in a unit, stowed under the driver's
seat.
Slide seat forwards and fold the
backrest forwards 3 46 to access the
tool box. The tool box may be secured
in position with a wing nut. Rotate
wing nut anticlockwise to release.
Wheel changing 3 191, Spare wheel
3 192.
Vehicles with tyre repair kit: The
wheel cover hook and torx key are
stored within the tyre repair kit case,
stowed under the driver's seat.
Tyre repair kit 3 188.
Page 185 of 231

Vehicle care183Wheels and tyres
Tyre condition, wheel condition
Drive over edges slowly and at right
angles if possible. Driving over sharp
edges can cause tyre and wheel
damage. Do not trap tyres on the kerb when parking.
Regularly check the wheels for
damage. Seek the assistance of a
workshop in the event of damage or
unusual wear.
We recommend not swapping the
front wheels with the rear wheels and vice versa, as this can affect vehicle
stability. Always use less worn tyres
on the rear axle.
Tyres Factory-fitted tyres are matched to
the chassis and offer optimum driving comfort and safety.Winter tyres
Winter tyres improve driving safety at temperatures below 7 °C and should
therefore be fitted on all wheels.
In accordance with country-specific
regulations, a notice indicating the
maximum permissible speed for the
tyres must be affixed within the
driver's field of vision.
Tyre designations E.g. 195/65 R 16 C 88 Q195:Tyre width, mm65:Cross-section ratio (tyre height
to tyre width), %R:Belt type: RadialRF:Type: RunFlat16:Wheel diameter, inchesC:Cargo or commercial use88:Load index e.g. 88 is
equivalent to 567 kgQ:Speed code letter
Speed code letter:
Q:up to 100 mphS:up to 112 mphT:up to 118 mphH:up to 130 mphV:up to 150 mphW:up to 168 mph
Choose a tyre appropriate for the
maximum speed of your vehicle.
The maximum speed is achievable at kerb weight with driver (75 kg) plus
125 kg payload. Optional equipment
could reduce the maximum speed of
the vehicle.
Directional tyres
Fit directional tyres such that they roll in the direction of travel. The rolling
direction is indicated by a symbol
(e.g. an arrow) on the sidewall.
Tyre pressure
Check the pressure of cold tyres at
least every 14 days and before any
long journey. Do not forget the spare
wheel. This also applies to vehicles
with tyre pressure monitoring system.
Page 187 of 231
Vehicle care185Trailer towingWhen towing a trailer with a fully
laden vehicle, the tyre pressure must
be increased by 20 kPa/0.2 bar
(3.0 psi) and the maximum speed
limited to 60 mph.
Trailer towing 3 159.
Tyre pressure monitoring
system
The tyre pressure monitoring system
uses radio and sensor technology to
check tyre pressure levels.Caution
Tyre pressure monitoring system
warns only about low tyre pressure condition and does not replace
regular tyre maintenance by the
driver.
All wheels must be equipped with pressure sensors and the tyres must
have the prescribed pressure.
Notice
In countries where the tyre pressure
monitoring system is legally
required, the use of wheels without
pressure sensors will invalidate the
vehicle type approval.
The tyre pressure monitoring system
sensors monitor the air pressure in
the tyres and transmit tyre pressure
readings to a receiver located in the
vehicle.
Tyre pressure chart 3 216.
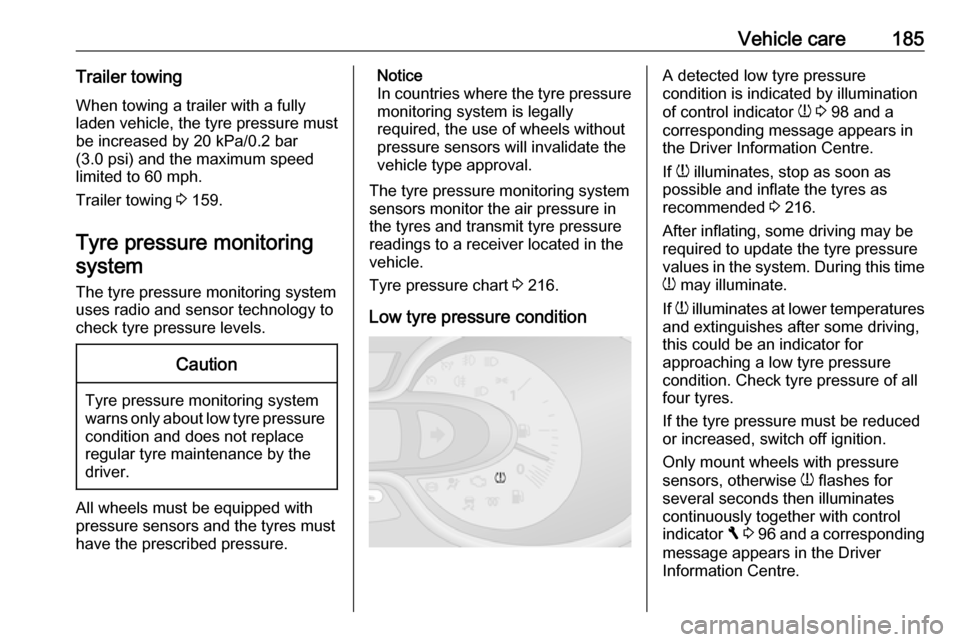
Low tyre pressure conditionA detected low tyre pressure
condition is indicated by illumination
of control indicator w 3 98 and a
corresponding message appears in
the Driver Information Centre.
If w illuminates, stop as soon as
possible and inflate the tyres as
recommended 3 216.
After inflating, some driving may be
required to update the tyre pressure
values in the system. During this time
w may illuminate.
If w illuminates at lower temperatures
and extinguishes after some driving,
this could be an indicator for
approaching a low tyre pressure
condition. Check tyre pressure of all
four tyres.
If the tyre pressure must be reduced
or increased, switch off ignition.
Only mount wheels with pressure
sensors, otherwise w flashes for
several seconds then illuminates
continuously together with control
indicator F 3 96 and a corresponding
message appears in the Driver
Information Centre.
Page 188 of 231

186Vehicle careA spare wheel or temporary spare
wheel is not equipped with pressure
sensors. The tyre pressure
monitoring system is not operational
for these wheels. For the further three wheels, the tyre pressure monitoring
system remains operational.
Control indicator w and the
corresponding message appears at
each ignition cycle until the tyres are
inflated to the correct tyre pressure.
Driver Information Centre 3 100.
Vehicle messages 3 101.
Puncture A puncture or severely under-inflated
tyre is indicated by illumination of
control indicator w together with C
3 96 and a corresponding message
appears in the Driver Information
Centre. Stop vehicle and switch off
engine.
Tyre pressure 3 216.
Tyre repair kit 3 188.
Spare wheel 3 192.
Wheel changing 3 191.Relearn function
After a puncture has been repaired
and the driver has inflated the tyres to
the correct tyre pressure, the tyre
pressure monitoring system needs to recalculate.
Tyre pressure 3 216.
Tyre repair kit 3 188.
During driving, select the tyre
pressure menu in the Driver
Information Centre by pressing button
on end of wiper lever. Press and hold button for approx. five seconds to
initialise recalculation. A
corresponding message appears in
the Driver Information Centre.
Several minutes of driving at a speed above 25 mph may be required to
complete the relearn process. The system can only provide limited
information during this time.
If problems occur during the relearn
process, control indicator w remains
illuminated and a warning message is displayed in the Driver Information
Centre.
Driver Information Centre 3 100.
Vehicle messages 3 101.
General information The use of tyre chains or
commercially available liquid tyre
repair kits can impair the function of
the system. Factory-approved tyre
repair kits can be used.
Tyre repair kit 3 188, Tyre chains
3 188.
External high-power radio equipment
could disrupt the tyre pressure
monitoring system.
Each time the tyres are replaced, the
tyre pressure monitoring system
sensors must be dismounted and
serviced by a workshop.
Page 189 of 231

Vehicle care187Tread depthCheck tread depth at regular
intervals.
Tyres should be replaced for safety
reasons at a tread depth of two to
three mm (four mm for winter tyres).
For safety reasons it is recommended
that the tread depth of the tyres on
one axle should not vary by more than
two mm.
The legally permissible minimum
tread depth (1.6 mm) has been
reached when the tread has worn
down as far as one of the tread wear
indicators (TWI). Their position is
indicated by markings on the
sidewall.
Tyres age, even if they are not used.
We recommend tyre replacement
every six years.
Changing tyre and wheel size
If tyres of a different size than those
fitted at the factory are used, it may be necessary to reprogramme the
speedometer as well as the nominal
tyre pressure and make other vehicle modifications.
After converting to a different tyre
size, have the label with tyre
pressures replaced.9 Warning
Use of unsuitable tyres or wheels
may lead to accidents and will
invalidate the vehicle type
approval.
Wheel covers
Wheel covers and tyres that are
factory approved for the respective
vehicle and comply with all of the
relevant wheel and tyre combination requirements must be used.
If the wheel covers and tyres used are
not factory approved, the tyres must
not have a rim protection ridge.
Wheel covers must not impair brake
cooling.9 Warning
Use of unsuitable tyres or wheel
covers could lead to sudden
pressure loss and thereby
accidents.