transmission VAUXHALL VIVARO 2018 Owner's Manual
[x] Cancel search | Manufacturer: VAUXHALL, Model Year: 2018, Model line: VIVARO, Model: VAUXHALL VIVARO 2018Pages: 233, PDF Size: 5.73 MB
Page 18 of 233
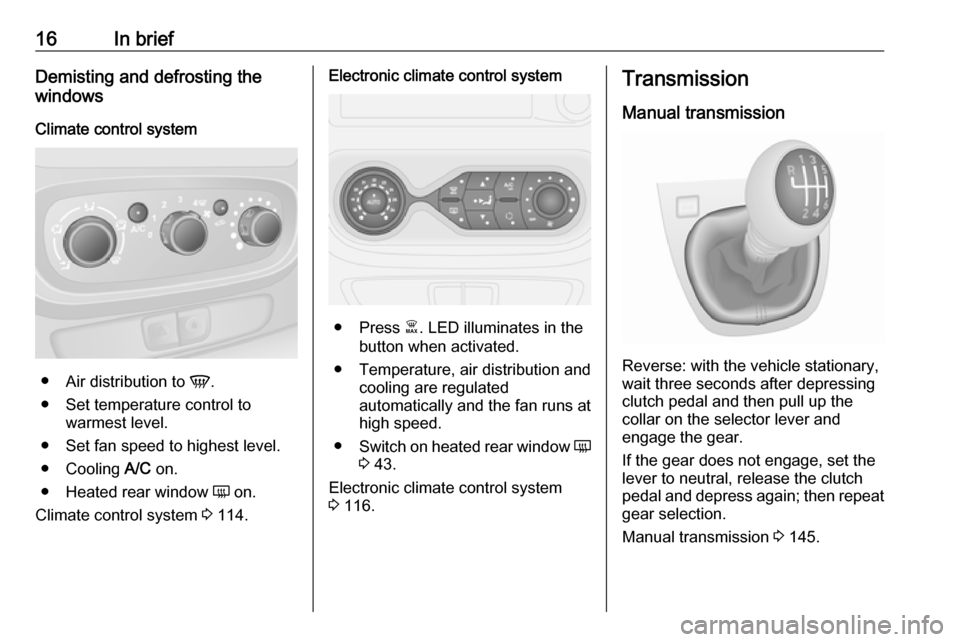
16In briefDemisting and defrosting the
windows
Climate control system
● Air distribution to V.
● Set temperature control to warmest level.
● Set fan speed to highest level.
● Cooling A/C on.
● Heated rear window Ü on.
Climate control system 3 114.
Electronic climate control system
● Press Ê. LED illuminates in the
button when activated.
● Temperature, air distribution and cooling are regulated
automatically and the fan runs at
high speed.
● Switch on heated rear window Ü
3 43.
Electronic climate control system
3 116.
Transmission
Manual transmission
Reverse: with the vehicle stationary,
wait three seconds after depressing
clutch pedal and then pull up the
collar on the selector lever and
engage the gear.
If the gear does not engage, set the
lever to neutral, release the clutch
pedal and depress again; then repeat
gear selection.
Manual transmission 3 145.
Page 124 of 233
122Climate control2 l:Adjusts values up3
OFF:Switch heater off, or press
Y and OFF simultaneously
to confirm selection4 Y:Switch heater on, or press Y
and OFF simultaneously to
confirm selection5 k:Adjusts values down
If no buttons are pressed within
30 seconds the display automatically
turns off.
9 Warning
When refuelling, switch off the
remote control unit as well as the
heater!
The remote control has a maximum
range of 1000 metres. The range may
be reduced due to environmental
conditions and as the battery
becomes weaker.
Remote control (Type B) fault
displaysZ:poor signal – adjust positionFAIL:error during signal
transmission –
move closer or check heater
fuseÜ:battery low – replace battery
Teach remote control (Type B)
Up to four additional remote control
units may also be configured. During
additional teaching processes, the
oldest transmitter will be deleted each
time.
Remove the heater fuse for
five seconds, then refit the fuse.
Within two - six seconds press OFF
for one second. Teaching is
completed.
If the remote has not been used for a long period, press the OFF button six
times at intervals of two seconds,
then press and hold for another
two seconds, then wait two minutes.
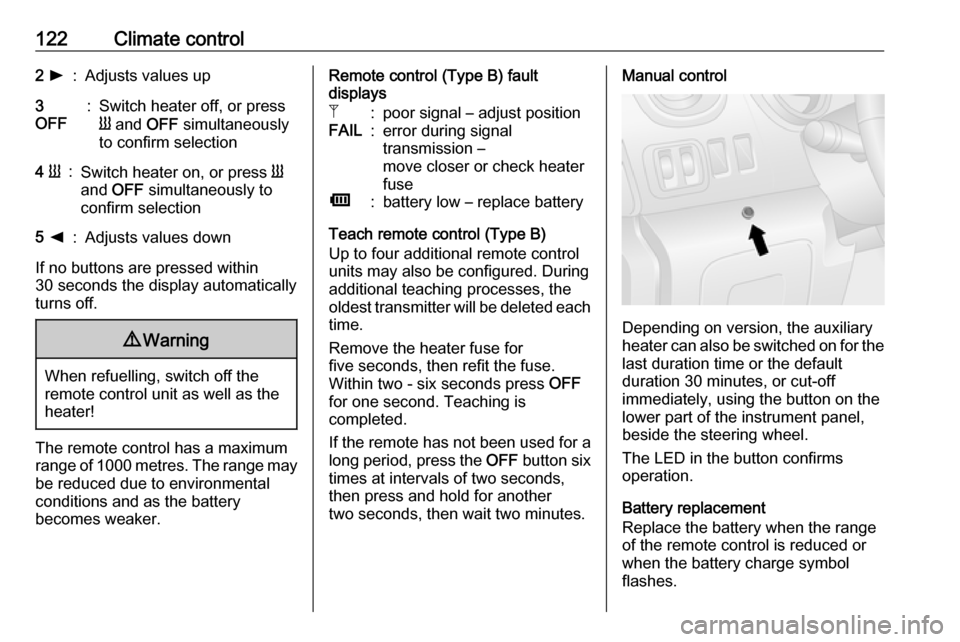
Manual control
Depending on version, the auxiliary
heater can also be switched on for the
last duration time or the default
duration 30 minutes, or cut-off
immediately, using the button on the
lower part of the instrument panel,
beside the steering wheel.
The LED in the button confirms
operation.
Battery replacement
Replace the battery when the range
of the remote control is reduced or when the battery charge symbol
flashes.
Page 130 of 233
128Driving and operatingDriving and
operatingDriving hints ............................... 128
Driving economically ...............128
Control of the vehicle ...............129
Steering ................................... 129
Starting and operating ...............130
New vehicle running-in ............130
Ignition switch positions ...........130
Power button ........................... 130
Starting the engine ..................132
Idle speed control ....................133
Vehicle shutdown ....................133
Overrun cut-off ........................ 134
Stop-start system ....................134
Parking .................................... 137
Engine exhaust .......................... 138
Diesel particle filter ..................138
Catalytic converter ...................138
AdBlue ..................................... 139
Manual transmission ..................145
Brakes ........................................ 145
Antilock brake system .............146
Parking brake .......................... 146Brake assist............................. 147
Hill start assist ......................... 147
Ride control systems .................147
Traction Control system ..........147
Electronic stability program .....148
Driver assistance systems .........150
Cruise control .......................... 150
Speed limiter ........................... 153
Parking assist .......................... 153
Rear view camera ...................155
Fuel ............................................ 158
Fuel for diesel engines ............158
Refuelling ................................ 158
Fuel consumption - CO 2-
Emissions .............................. 159
Trailer hitch ................................ 160
General information .................160
Driving characteristics and towing tips .............................. 160
Trailer towing ........................... 161
Trailer stability assist ...............161Driving hints
Driving economically
ECO mode
ECO mode is a function that
optimises fuel consumption. It affects engine power and torque,
acceleration, gear shift indication,
heating, air conditioning and electrical consumers.
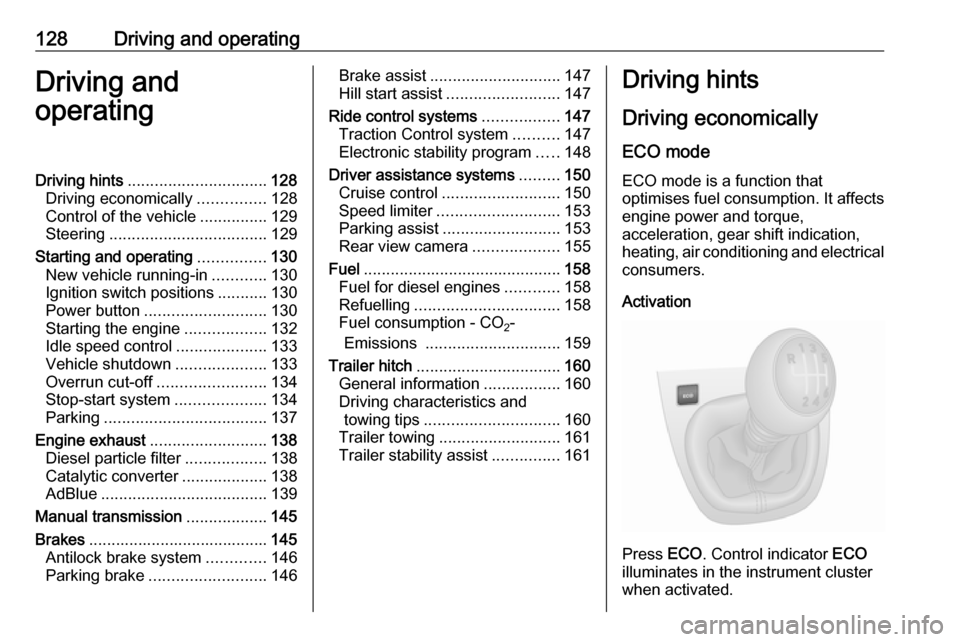
Activation
Press ECO. Control indicator ECO
illuminates in the instrument cluster when activated.
Page 134 of 233
132Driving and operatingThese functions stop working when
the driver's door is opened and the
vehicle is locked.
Notice
Always take the electronic key with you when exiting the vehicle.
The electronic key being left in the
card reader is indicated by a warning
chime 3 102 and a message in the
Driver Information Centre 3 101
when the driver's door is opened.9 Danger
Never leave an electronic key
inside the vehicle when children or animals are left in the vehicle, to
avoid unintended operation of
windows, doors or engine. Risk of
fatal injury.
Fault
If the engine cannot be started, the
cause may be one of the following:
● Fault in electronic key.
● Electronic key out of reception range.
● Battery voltage too low.
● Overload of the central locking system by operating at frequentintervals, the power supply is
interrupted for a short time.
● Interference from higher-power radio waves from other sources.
Battery replacement 3 20.
Central locking system 3 24.
Electronic key system 3 22.
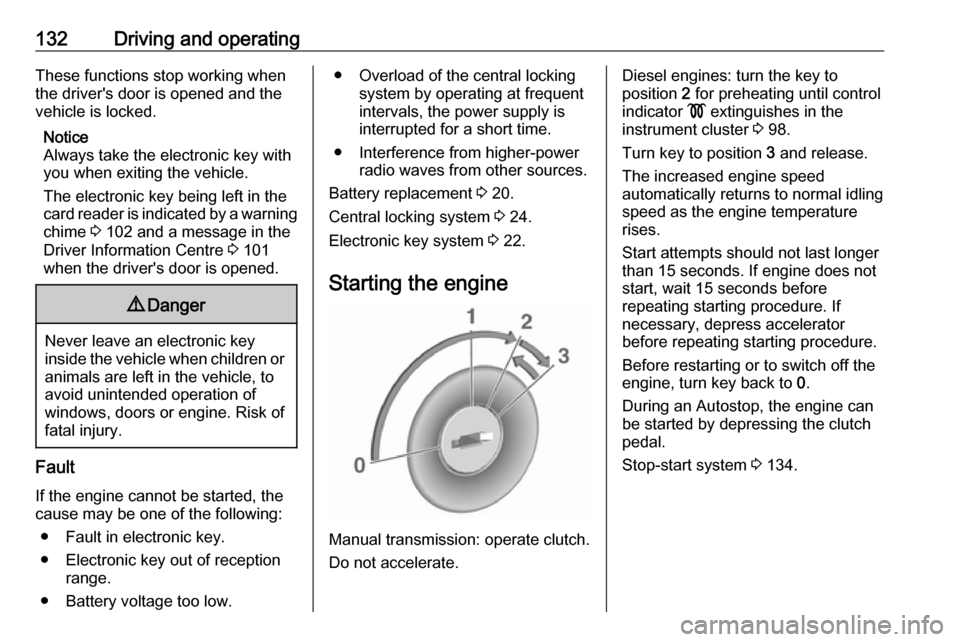
Starting the engine
Manual transmission: operate clutch.
Do not accelerate.
Diesel engines: turn the key to
position 2 for preheating until control
indicator ! extinguishes in the
instrument cluster 3 98.
Turn key to position 3 and release.
The increased engine speed
automatically returns to normal idling
speed as the engine temperature
rises.
Start attempts should not last longer
than 15 seconds. If engine does not
start, wait 15 seconds before
repeating starting procedure. If
necessary, depress accelerator
before repeating starting procedure.
Before restarting or to switch off the
engine, turn key back to 0.
During an Autostop, the engine can
be started by depressing the clutch
pedal.
Stop-start system 3 134.
Page 147 of 233
Driving and operating145Manual transmission
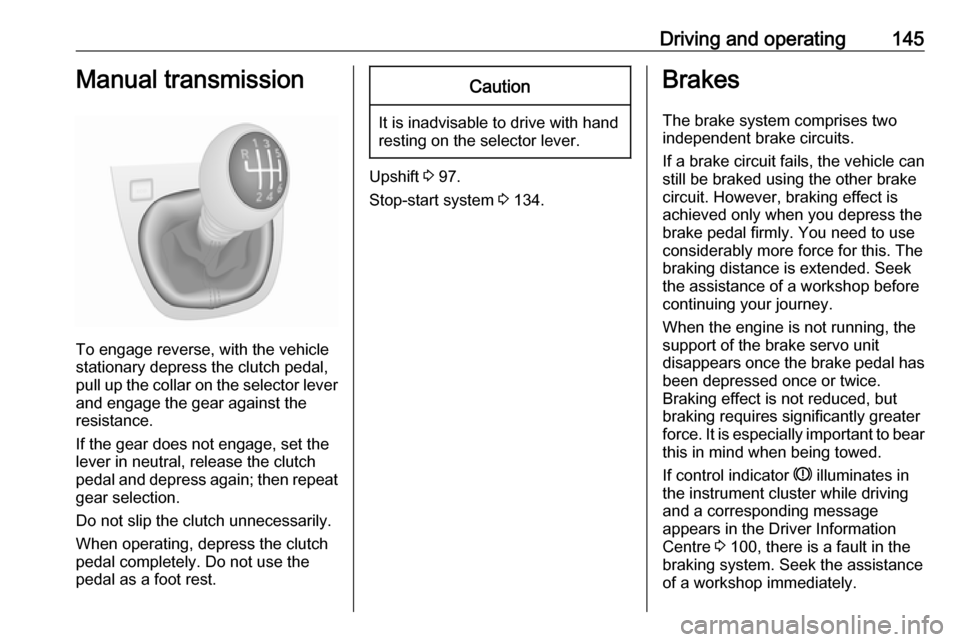
To engage reverse, with the vehicle
stationary depress the clutch pedal, pull up the collar on the selector lever
and engage the gear against the
resistance.
If the gear does not engage, set the
lever in neutral, release the clutch
pedal and depress again; then repeat
gear selection.
Do not slip the clutch unnecessarily.
When operating, depress the clutch pedal completely. Do not use the
pedal as a foot rest.
Caution
It is inadvisable to drive with hand
resting on the selector lever.
Upshift 3 97.
Stop-start system 3 134.
Brakes
The brake system comprises two independent brake circuits.
If a brake circuit fails, the vehicle can
still be braked using the other brake
circuit. However, braking effect is
achieved only when you depress the
brake pedal firmly. You need to use
considerably more force for this. The
braking distance is extended. Seek
the assistance of a workshop before
continuing your journey.
When the engine is not running, the
support of the brake servo unit
disappears once the brake pedal has been depressed once or twice.
Braking effect is not reduced, but
braking requires significantly greater
force. It is especially important to bear this in mind when being towed.
If control indicator R illuminates in
the instrument cluster while driving
and a corresponding message
appears in the Driver Information
Centre 3 100, there is a fault in the
braking system. Seek the assistance
of a workshop immediately.
Page 197 of 233
Vehicle care195Jump starting
Do not start with a quick charger.
A vehicle with a discharged battery
can be started using jump leads and
the vehicle battery of another vehicle.9 Warning
Be extremely careful when starting
with jump leads. Any deviation
from the following instructions can
lead to injuries or damage caused
by battery explosion or damage to the electrical systems of both
vehicles.
9 Warning
Avoid contact of the battery with
eyes, skin, fabrics and painted
surfaces. The fluid contains
sulphuric acid which can cause
injuries and damage in the event
of direct contact.
● Never expose the battery to naked flames or sparks.
● A discharged vehicle battery canalready freeze at a temperature
of 0 °C. Defrost the frozen battery
before connecting jump leads.
● Wear eye protection and protective clothing when
handling a battery.
● Use a booster battery with the same voltage (12 V). Its capacity
(Ah) must not be much less than
that of the discharged battery.
● Use jump leads with insulated terminals and a cross section of
at least 16 mm 2
(25 mm 2
for
diesel engines).
● Do not disconnect the discharged
vehicle battery from the vehicle.
● Switch off all unnecessary electrical consumers.
● Do not lean over the battery during jump starting.
● Do not allow the terminals of one
lead to touch those of the other
lead.
● The vehicles must not come into contact with each other during
the jump starting process.● Apply the parking brake, transmission in neutral.
● Open the positive terminal protection caps of both batteries.
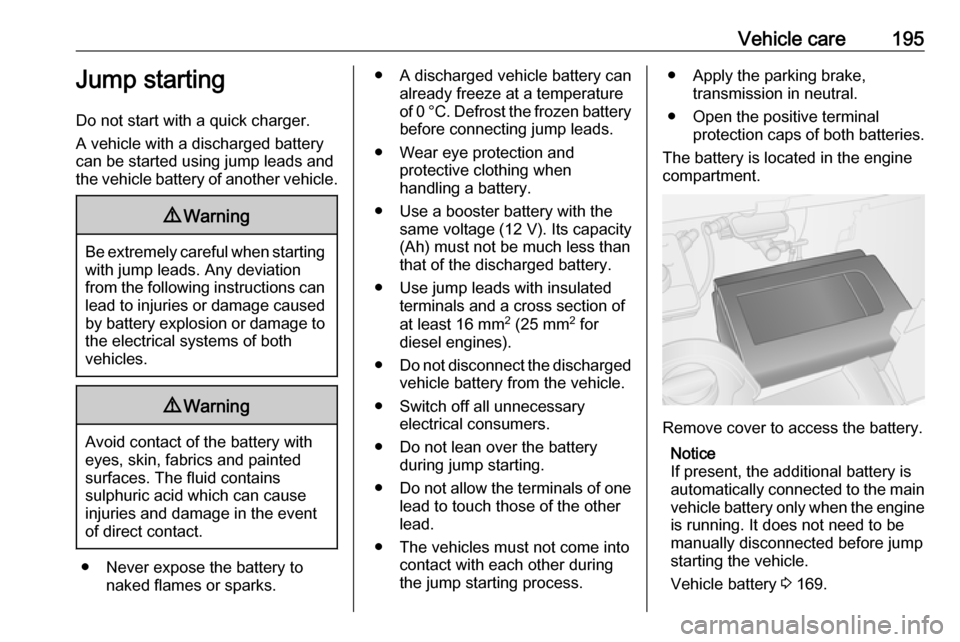
The battery is located in the engine compartment.
Remove cover to access the battery.
Notice
If present, the additional battery is automatically connected to the main vehicle battery only when the engine
is running. It does not need to be manually disconnected before jump
starting the vehicle.
Vehicle battery 3 169.
Page 220 of 233

218Customer informationCustomer
informationCustomer information ................218
Declaration of conformity .........218
REACH .................................... 222
Collision damage repair ...........222
Registered trademarks ............222
Vehicle data recording and pri‐
vacy ........................................... 222
Event data recorders ...............222
Radio Frequency Identification (RFID) ..................................... 223Customer information
Declaration of conformity
Radio transmission systems
This vehicle has systems that
transmit and / or receive radio waves
subject to Directive 1999/5/EC or 2014/53/EU. The manufacturers ofthe systems listed below declare
conformity with Directive 1999/5/EC
or 2014/53/EU . The full text of the EU
declaration of conformity for each
system is available at the following
internet address: www.opel.com/
conformity
Importer is
Opel / Vauxhall, Bahnhofsplatz,
65423 Ruesselsheim am Main,
Germany.
Electronic key transmitter
Continental Automotive
1 Rue de Clairefontaine, 78120
Rambouillet, France
Operation frequency: 433 MHz
Maximum output: 10 mW ERPImmobiliser
Visteon Electronics
04 Rue Nelson Mandela, Zone
Industrielle Borj Cedria, 2055 Bir El
Bey, Tunisia
Operation frequency: 125 kHz
Maximum output:
42 dBµA/m @ 10 m
Immobiliser
Continental Automotive
1 Rue de Clairefontaine, 78120
Rambouillet, France
Operation frequency: 125 kHz
Maximum output:
42 dBµA/m @ 10 m
IntelliLink Touch
Continental Automotive
1 Rue de Clairefontaine, 78120
Rambouillet, France
Operation frequency: N/A
Maximum output: N/A
NAVI 50 IntelliLink / NAVI 80
IntelliLink
LGE
Page 225 of 233

Customer information223● vehicle reactions in particulardriving situations (e.g. inflation ofan airbag, activation of the
stability regulation system)
● environmental conditions (e.g. temperature)
These data are exclusively technical
and help identifying and correcting
errors as well as optimising vehicle
functions.
Motion profiles indicating travelled
routes cannot be created with these
data.
If services are used (e.g. repair
works, service processes, warranty
cases, quality assurance),
employees of the service network
(manufacturer included) are able to
read out this technical information
from the event and error data storage
modules applying special diagnostic
devices. If required, you will receive
further information at these
workshops. After an error has been
corrected, the data are deleted from
the error storage module or they are
constantly overwritten.When using the vehicle, situations
may occur in which these technical
data related to other information
(accident report, damages on the
vehicle, witness statements etc.) may
be associated with a specific person - possibly, with the assistance of an
expert.
Additional functions contractually
agreed upon with the client (e.g.
vehicle location in emergency cases)
allow the transmission of particular vehicle data from the vehicle.
Radio Frequency
Identification (RFID)
RFID technology is used in some vehicles for functions such as tyre
pressure monitoring and ignition
system security. It is also used in
connection with conveniences such
as radio remote controls for door
locking/unlocking and starting, and in-
vehicle transmitters for garage door
openers. RFID technology in
Vauxhall vehicles does not use or
record personal information or link with any other Vauxhall system
containing personal information.
Page 229 of 233

227JJack ............................................ 183
Journey record............................ 103
Jump starting ............................. 195
K
Keys ............................................. 19
Keys, locks ................................... 19
L
Lashing eyes ............................... 77
Lashing straps .............................. 77
Laying up the vehicle ..........163, 169
LED spotlights ............................ 110
Light covers, misted.................... 110
Lighting ....................................... 106
Lighting features .........................112
Light switch ................................ 106
Load compartment ................33, 76
Load compartment cover .............77
Load compartment grille ...............79
Load compartment lighting .........112
Loading information .....................80
Load-through feature ....................74
Low fuel ....................................... 99
Luggage floor net .........................77
M
Malfunction indicator light ............96
Manual adjustment ......................39
Manual anti-dazzle ......................40Manual transmission .................. 145
Maximum speed limiter............... 153
Messages ................................... 101
Mirror adjustment ........................... 8
Mirrors .................................... 39, 40
Misted light covers .....................110
N New vehicle running-in ..............130
Number plate light .....................177
O
Object detection systems ...........153
Odometer ..................................... 89
Oil ............................................... 165
Oil, engine .................. 165, 202, 206
Oil pressure .................................. 98
Outside temperature ....................85
Overcab storage ..........................76
Overrun cut-off ........................... 134
P Parking ................................ 18, 137
Parking assist ............................ 153
Parking brake ............................ 146
Particulate filter ........................... 138
Pedals......................................... 129
Performing work ........................164
Phone controls.............................. 83
Phone holder ................................ 71
Pollen filter ................................. 126Power button........................ 17, 130
Power outlets ............................... 86
Power steering fluid ....................167
Power windows ............................ 42
Preheating ........................... 98, 132
Puncture ..................................... 192
R
Radio Frequency Identification (RFID) ..................................... 223
Radio remote control ...................20
REACH ....................................... 222
Reading lights ............................ 112
Rear air conditioning system .....119
Rear courtesy lights ....................110
Rear door manual lock .................24
Rear doors .............................. 24, 31
Rear fog light ............................... 99
Rear fog lights ....................106, 110
Rear heating system .................. 118
Rear parcel shelf .......................... 77
Rear seats ................................... 49
2nd row seats ............................ 49
3rd row seats............................. 49
Folding ...................................... 49
Installing .................................... 49
Rear seat access ......................49
Removing .................................. 49
Seat cushion adjustment ...........49
Rear seats lights .........................110
Page 230 of 233

228Rear view camera ...................... 155
Rear windows .............................. 42
Rear window wiper/washer .......... 85
Recommended fluids and lubricants ........................ 202, 206
Refuelling ................................... 158 Registered trademarks ...............222
Remote control ............................. 20
Restraining lattice .........................79
Reversing light ........................... 176
Reversing lights .........................110
Ride control systems ..................147
Roof load ...................................... 80
Roof rack ..................................... 80
S Safety belts ................................... 53
Safety net .................................... 78
Seat adjustment ....................... 7, 46
Seat belt ........................................ 8
Seat belt reminder .......................95
Seat belts ..................................... 53
Seat folding .................................. 48
Seat heating ................................. 48
Seat position ................................ 45
Seats ............................................ 74
Selective catalytic reduction .......139
Service ............................... 127, 201
Service display ............................ 91
Service information ....................201Service vehicle soon .................... 96
Side airbag system ......................61
Sidelights .................................... 106
Side turn signal lights ................175
Sliding door .................................. 31
Sliding side door ........................... 31
Spare wheel ............................... 193
Spare wheel security tool ...........183
Speed limiter......................... 89, 153
Speedometer ............................... 89
Starting and operating ................130
Starting off ................................... 17
Starting the engine ...............17, 132
Steering ...................................... 129
Steering column controls ..............83
Steering wheel adjustment ......9, 83
Steering wheel controls ...............83
Stop engine .................................. 96
Stop-start system............ 17, 99, 134
Storage ......................................... 71
Storage box .................................. 74
Storage compartment ...................73
Storage compartments .................71
Sun visors .................................... 43
Symbols ......................................... 4
T
Tablet holder................................. 71
Tachograph ........................ 100, 105
Tachometer ................................. 90Tailgate......................................... 33
Tailgate emergency release .........33
Tail lights ................................... 174
Technical data ............................ 207
Temporary spare wheel ..............193
Three-point seat belt .................... 54
Toll road stickers .......................... 41
Tools .......................................... 183
Top-Tether .................................... 63
Torx key ...................................... 183
Touchscreen ............................... 100
Tow bar....................................... 160
Towing ................................ 160, 196
Towing another vehicle .............197
Towing a trailer ........................... 161
Towing eye ......................... 183, 196
Towing the vehicle .....................196
Traction Control system ............. 147
Trailer coupling ........................... 160
Trailer stability assist .................161
Trailer towing ............................. 161
Transmission ............................... 16
Tread depth ............................... 188
Trip computer ............................ 103
Trip odometer .............................. 89
Turbo engine warm-up ...............132
Turn and lane-change signals ...109
Turn signal ................................... 94
Tyre chains ................................ 189
Tyre changing ............................. 192