remote control VAUXHALL VIVARO 2019 User Guide
[x] Cancel search | Manufacturer: VAUXHALL, Model Year: 2019, Model line: VIVARO, Model: VAUXHALL VIVARO 2019Pages: 231, PDF Size: 5.82 MB
Page 32 of 231
30Keys, doors and windows5 seconds. When closing the rear
doors / tailgate, they are locked
automatically.
Automatic locking 3 30.
Hands-free operation is automatically disabled when e is pressed. To re-
enable hands-free operation, restart
the engine.
Electronic key system 3 21.
Automatic locking Automatic locking after driving off
This security feature can be
configured to automatically lock the
doors and load compartment as soon as the vehicle is driven.
Activation
With the engine running, press and
hold e on the central locking switch for
approx. 5 seconds. An audible signal
confirms activation.Deactivation
With the engine running, press and
hold e on the central locking switch for
approx. 5 seconds. An audible signal
confirms deactivation.
Central locking switch 3 24.
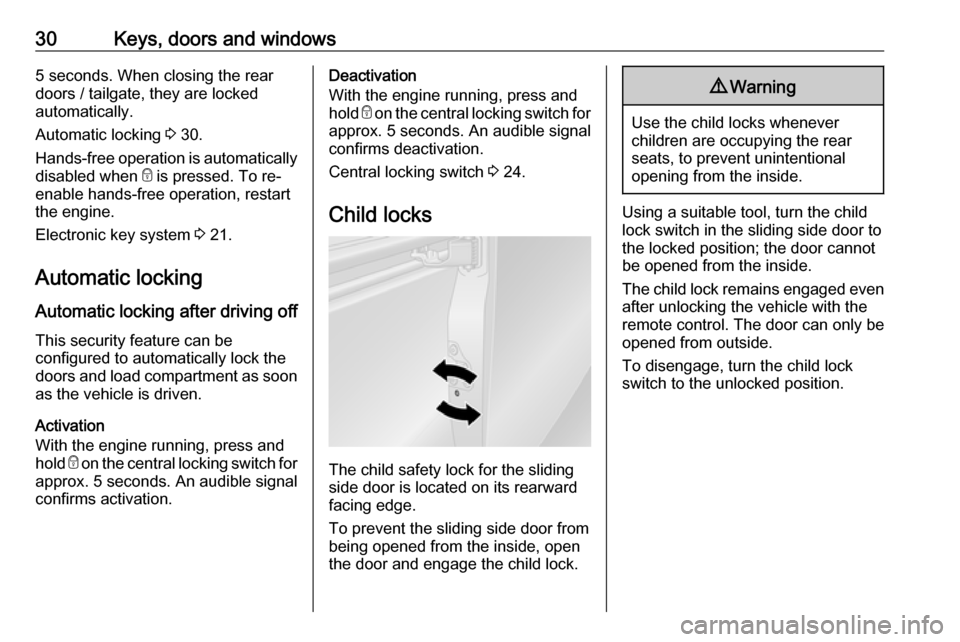
Child locks
The child safety lock for the sliding
side door is located on its rearward
facing edge.
To prevent the sliding side door from being opened from the inside, open
the door and engage the child lock.
9 Warning
Use the child locks whenever
children are occupying the rear
seats, to prevent unintentional
opening from the inside.
Using a suitable tool, turn the child
lock switch in the sliding side door to
the locked position; the door cannot
be opened from the inside.
The child lock remains engaged even after unlocking the vehicle with the
remote control. The door can only be
opened from outside.
To disengage, turn the child lock
switch to the unlocked position.
Page 37 of 231
Keys, doors and windows35Notice
The installation of certain heavy
accessories onto the tailgate may
affect its ability to remain open.Vehicle security
Anti-theft locking system9 Warning
Do not use the system if there are
people in the vehicle! The doorscannot be unlocked from the
inside.
The system deadlocks all doors and the load compartment.
All doors and the load compartment
must be closed or the system cannot
be activated.
Notice
The anti-theft locking system cannot be activated when the hazard
warning lights or sidelights are
switched on.
Activation and deactivation are not possible with the central locking
switch.
Central locking system 3 24.
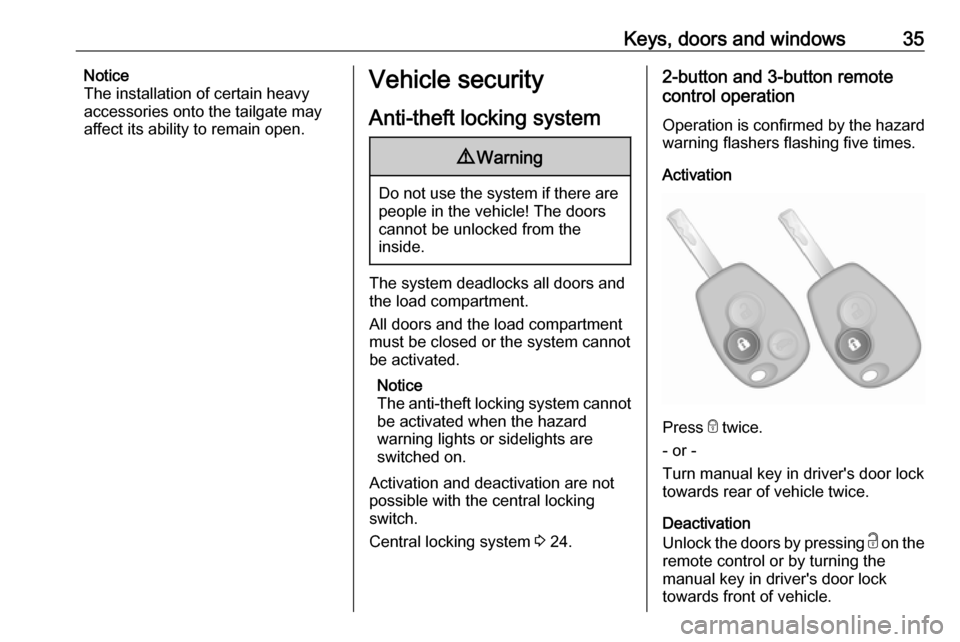
2-button and 3-button remote
control operation
Operation is confirmed by the hazard warning flashers flashing five times.
Activation
Press e twice.
- or -
Turn manual key in driver's door lock
towards rear of vehicle twice.
Deactivation
Unlock the doors by pressing c on the
remote control or by turning the
manual key in driver's door lock
towards front of vehicle.
Page 39 of 231
Keys, doors and windows372-button and 3-button remote control
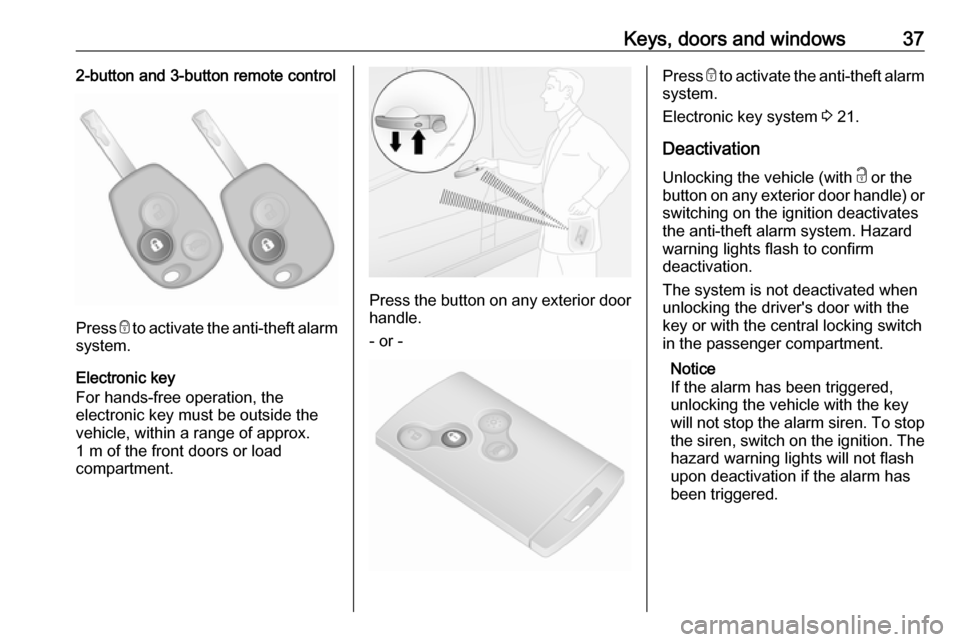
Press e to activate the anti-theft alarm
system.
Electronic key
For hands-free operation, the
electronic key must be outside the
vehicle, within a range of approx.
1 m of the front doors or load
compartment.
Press the button on any exterior door
handle.
- or -
Press e to activate the anti-theft alarm
system.
Electronic key system 3 21.
Deactivation
Unlocking the vehicle (with c or the
button on any exterior door handle) or switching on the ignition deactivates
the anti-theft alarm system. Hazard
warning lights flash to confirm
deactivation.
The system is not deactivated when
unlocking the driver's door with the
key or with the central locking switch
in the passenger compartment.
Notice
If the alarm has been triggered,
unlocking the vehicle with the key
will not stop the alarm siren. To stop the siren, switch on the ignition. The
hazard warning lights will not flash
upon deactivation if the alarm has
been triggered.
Page 40 of 231

38Keys, doors and windowsActivation without monitoring of
passenger compartment
Disable monitoring of the passenger
compartment, e.g. when animals are
being left in the vehicle, or if the
auxiliary heater has been set for a
timed or remote controlled start
3 122.
Press and hold e on the remote
control or electronic key. An audible
signal will sound as confirmation.
The status will remain until the doors
are unlocked.
Alarm When triggered, the alarm sounds via a separate battery-backed power
sounder, and the hazard warning
lights flash simultaneously. The
number and duration of alarm signals are stipulated by legislation.
If the vehicle battery is disconnected
or its power supply is interrupted, the
alarm siren will be triggered. First
deactivate the anti-theft alarm system
if the vehicle battery must be
disconnected.To silence the alarm siren (if
triggered) and therefore deactivate
the anti-theft alarm system, reconnect vehicle battery and unlock the vehicle
or switch on the ignition.
Immobiliser
The immobiliser is part of the ignition
switch and checks whether the
vehicle is allowed to be started with
the key being used.
The immobiliser is activated
automatically after the key has been
removed from the ignition switch and
also if the key is left in the ignition
switch when the engine is turned off.
If the engine cannot be started, switch off the ignition and remove key, wait
approx. two seconds and then repeat
the start attempt. If start attempt is
unsuccessful, attempt to start the
engine using the spare key and seek
the assistance of a workshop.Notice
Radio Frequency Identification
(RFID) tags may cause interference with the key. Do not have it placednear the key when starting the
vehicle.
Notice
The immobiliser does not lock the doors. You should always lock the
vehicle after leaving it and switch on
the anti-theft alarm system 3 24,
3 36.
Page 116 of 231
114LightingLoad compartment lighting
The lower load compartment lights
come on when the load compartment is opened.
Reading lights Front reading light
Operate rocker switch:
press 7:offpress l:on
Glove box lighting
The glovebox light comes on when
the glovebox is opened.
Lighting features
Entry lighting
Welcome lighting
Vehicle lights are switched on for a
short time to facilitate locating the
vehicle when it is dark.
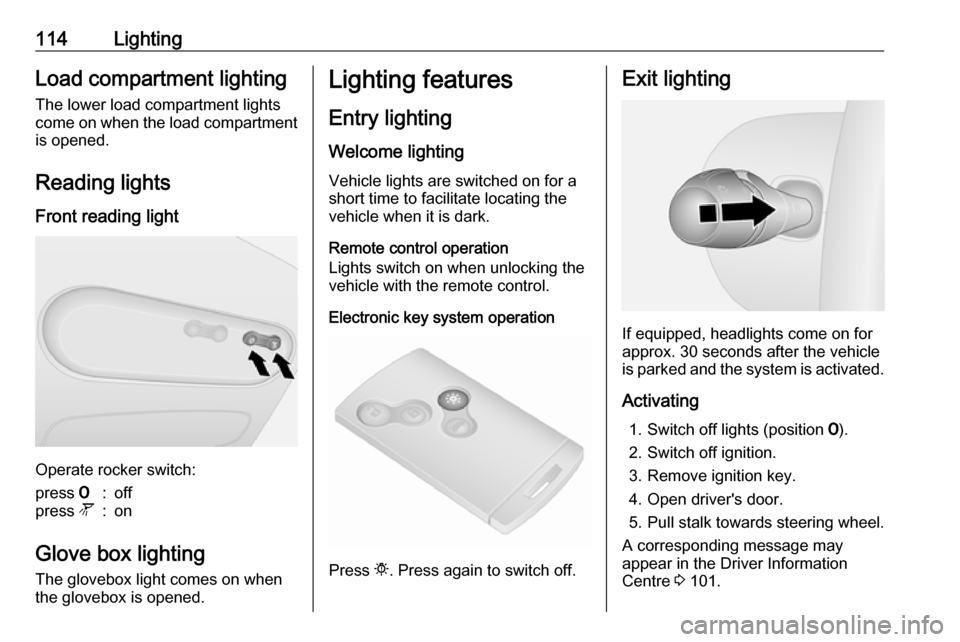
Remote control operation
Lights switch on when unlocking the
vehicle with the remote control.
Electronic key system operation
Press t. Press again to switch off.
Exit lighting
If equipped, headlights come on for
approx. 30 seconds after the vehicle
is parked and the system is activated.
Activating 1. Switch off lights (position 7).
2. Switch off ignition.
3. Remove ignition key.
4. Open driver's door.
5. Pull stalk towards steering wheel.
A corresponding message may
appear in the Driver Information
Centre 3 101.
Page 124 of 231
122Climate controlSet the fan < to regulate the amount
of cooled air to be flown into the rear
passenger compartment.
Auxiliary heater Coolant heater
The engine-independent, fuel-
powered coolant heater provides
rapid heating of the engine coolant to
enable heating of the vehicle interior
without the engine running.9 Warning
Do not operate the system when
refuelling, when dust or
combustible vapours are present
or in enclosed spaces (e.g.
garage).
Before starting or programming the
system to start, turn the vehicle's
climate control system to heat, set the
air distribution to V and turn the fan
on.
Switch off when not required. Heating stops automatically after the
programmed runtime. It will also
cease to operate if the vehicle fuel
level drops too low.
During operation, power from the
vehicle battery is used. The driving
time should therefore be at least as
long as the heating time. For short
journey times, check the vehicle
battery regularly and recharge if
necessary.
To ensure efficient performance,
briefly operate the auxiliary heater
once a month.
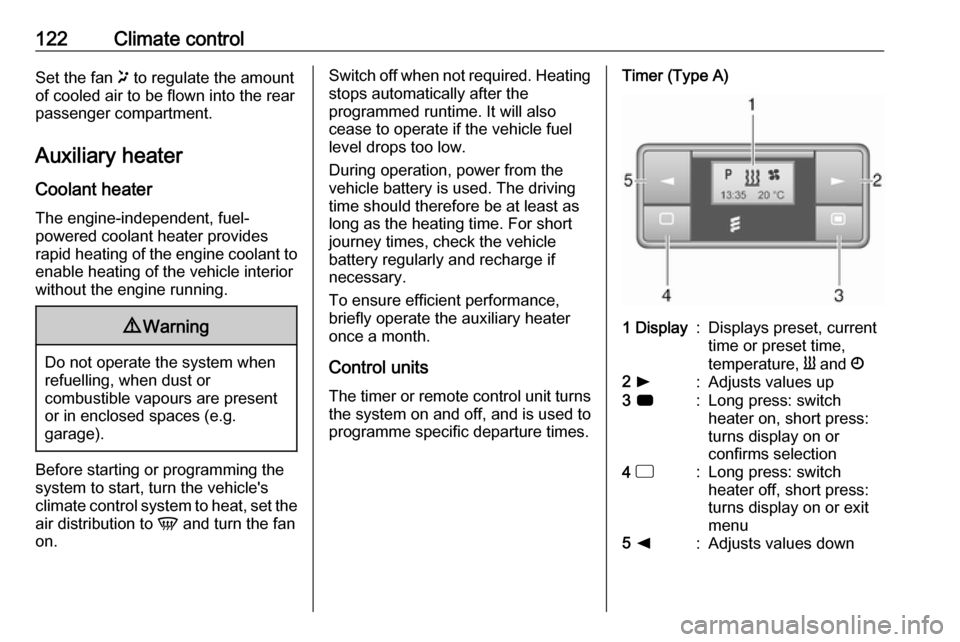
Control units
The timer or remote control unit turns the system on and off, and is used to
programme specific departure times.Timer (Type A)1 Display:Displays preset, current
time or preset time,
temperature, Y and Ö2 l:Adjusts values up3 7:Long press: switch
heater on, short press:
turns display on or
confirms selection4 d:Long press: switch
heater off, short press:
turns display on or exit
menu5 k:Adjusts values down
Page 125 of 231
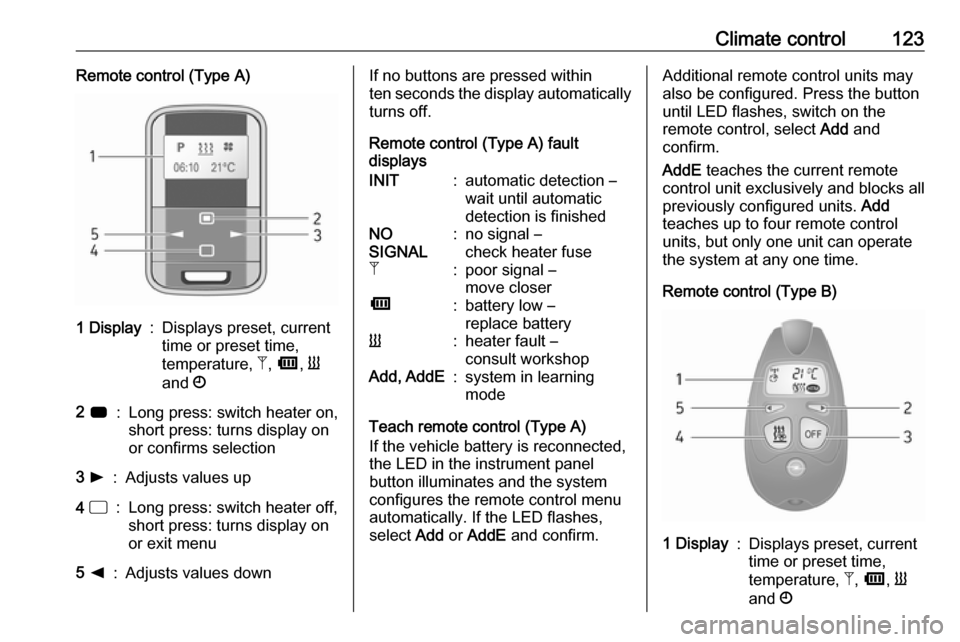
Climate control123Remote control (Type A)1 Display:Displays preset, current
time or preset time,
temperature, Z, Ü , Y
and Ö2 7:Long press: switch heater on,
short press: turns display on
or confirms selection3 l:Adjusts values up4 d:Long press: switch heater off,
short press: turns display on
or exit menu5 k:Adjusts values downIf no buttons are pressed within
ten seconds the display automatically
turns off.
Remote control (Type A) fault
displaysINIT:automatic detection –
wait until automatic
detection is finishedNO
SIGNAL:no signal –
check heater fuseZ:poor signal –
move closerÜ:battery low –
replace batteryY:heater fault –
consult workshopAdd, AddE:system in learning
mode
Teach remote control (Type A)
If the vehicle battery is reconnected, the LED in the instrument panel
button illuminates and the system
configures the remote control menu
automatically. If the LED flashes,
select Add or AddE and confirm.
Additional remote control units may
also be configured. Press the button
until LED flashes, switch on the
remote control, select Add and
confirm.
AddE teaches the current remote
control unit exclusively and blocks all
previously configured units. Add
teaches up to four remote control
units, but only one unit can operate
the system at any one time.
Remote control (Type B)1 Display:Displays preset, current
time or preset time,
temperature, Z, Ü , Y
and Ö
Page 126 of 231
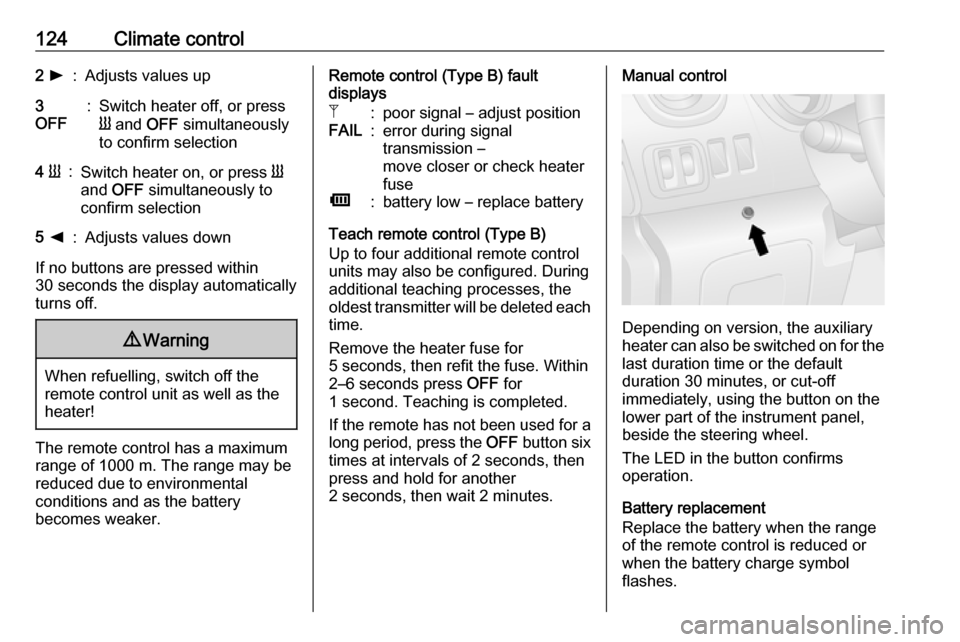
124Climate control2 l:Adjusts values up3
OFF:Switch heater off, or press
Y and OFF simultaneously
to confirm selection4 Y:Switch heater on, or press Y
and OFF simultaneously to
confirm selection5 k:Adjusts values down
If no buttons are pressed within
30 seconds the display automatically
turns off.
9 Warning
When refuelling, switch off the
remote control unit as well as the
heater!
The remote control has a maximum
range of 1000 m. The range may be
reduced due to environmental
conditions and as the battery
becomes weaker.
Remote control (Type B) fault
displaysZ:poor signal – adjust positionFAIL:error during signal
transmission –
move closer or check heater
fuseÜ:battery low – replace battery
Teach remote control (Type B)
Up to four additional remote control
units may also be configured. During
additional teaching processes, the
oldest transmitter will be deleted each
time.
Remove the heater fuse for
5 seconds, then refit the fuse. Within
2–6 seconds press OFF for
1 second. Teaching is completed.
If the remote has not been used for a long period, press the OFF button six
times at intervals of 2 seconds, then
press and hold for another
2 seconds, then wait 2 minutes.
Manual control
Depending on version, the auxiliary
heater can also be switched on for the
last duration time or the default
duration 30 minutes, or cut-off
immediately, using the button on the
lower part of the instrument panel,
beside the steering wheel.
The LED in the button confirms
operation.
Battery replacement
Replace the battery when the range
of the remote control is reduced or when the battery charge symbol
flashes.
Page 127 of 231

Climate control125Open the cover and replace the
battery (Type A: CR 2430, Type B:
2CR 11108, or equivalent), ensuring
the new battery is correctly installed
with the positive ( <) side facing the
positive terminals. Replace the cover securely.
Dispose of old batteries in
accordance with environmental
regulations.
Batteries do not belong in household
waste. They must be disposed of at
an appropriate recycling collection
point.
Operation (Type A)
Heating Y
Select Y in the menu bar and press
G to confirm. The predetermined
heating duration, e.g. L 30, flashes in
the display. The factory setting is 30 minutes.
Adjust the heating duration using k
or l and confirm. The value can be
set from ten to 120 minutes. Due to
the power consumption, note the
heating duration.
To switch off, select Y in the menu bar
again and press d.
Programming P
Up to three preset departure times
can be programmed, either during
one day or over one week.
● Select P in the menu bar and
press G to confirm.
● Select desired preset memory number P1, P2 or P3 and
confirm.
● Select F and confirm.
● Select weekday or weekday group and confirm.
● Select hour and confirm.
● Select minutes and confirm.
● Select Y and confirm.
● Select ECO or HIGH and confirm.
● Select duration and confirm.
● Press d to exit.Repeat the procedure to programme
the other preset memory numbers if
required.
To activate a desired preset memory
number select P1, P2 or P3, then
select On and confirm.
When a program is activated P and
Y will be displayed together.
To deactivate a preset memory,
select P1, P2 or P3, then select Off
and confirm.
Heating stops automatically
5 minutes after the programmed
departure time.
Notice
The remote control system features a temperature sensor which
calculates the runtime according to the ambient temperature and thedesired heating level (ECO or
HIGH). The system starts
automatically between five and
60 minutes prior to the programmed
departure time.
Set time and weekday Þ
If the vehicle battery is disconnected or its voltage is too low, the unit will
need to be reset.
Page 136 of 231
134Driving and operatingTurbo engine warm-up
Upon start-up, engine available
torque may be limited for a short time, especially when the engine
temperature is cold. The limitation is
to allow the lubrication system to fully
protect the engine.
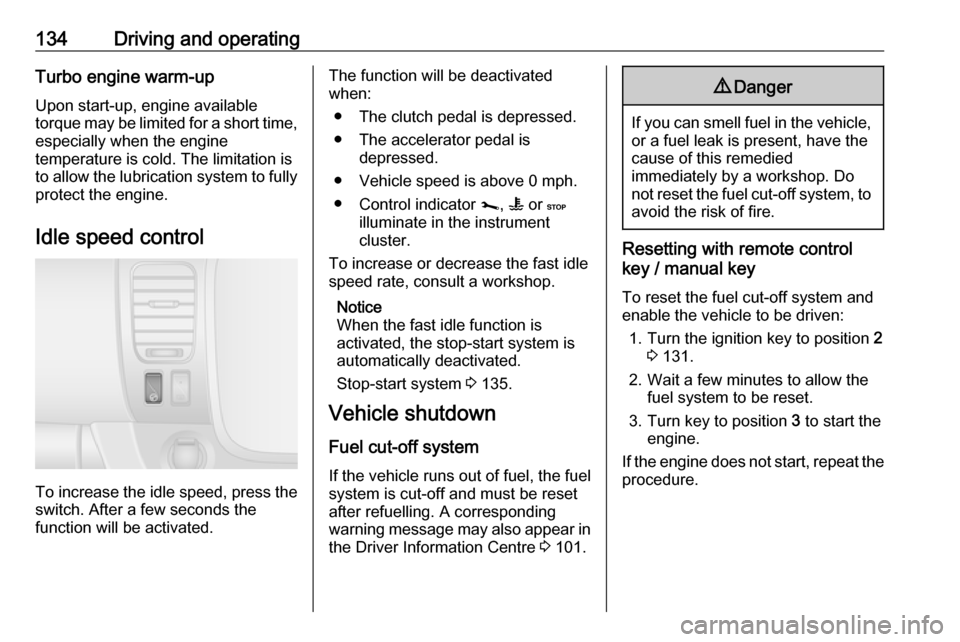
Idle speed control
To increase the idle speed, press the switch. After a few seconds the
function will be activated.
The function will be deactivated
when:
● The clutch pedal is depressed.
● The accelerator pedal is depressed.
● Vehicle speed is above 0 mph. ● Control indicator j, W or C
illuminate in the instrument
cluster.
To increase or decrease the fast idle
speed rate, consult a workshop.
Notice
When the fast idle function is
activated, the stop-start system is
automatically deactivated.
Stop-start system 3 135.
Vehicle shutdown
Fuel cut-off system
If the vehicle runs out of fuel, the fuel
system is cut-off and must be reset
after refuelling. A corresponding
warning message may also appear in the Driver Information Centre 3 101.9 Danger
If you can smell fuel in the vehicle,
or a fuel leak is present, have thecause of this remedied
immediately by a workshop. Do
not reset the fuel cut-off system, to avoid the risk of fire.
Resetting with remote control
key / manual key
To reset the fuel cut-off system and
enable the vehicle to be driven:
1. Turn the ignition key to position 2
3 131.
2. Wait a few minutes to allow the fuel system to be reset.
3. Turn key to position 3 to start the
engine.
If the engine does not start, repeat the
procedure.