Parking VAUXHALL VIVARO C 2020 User Guide
[x] Cancel search | Manufacturer: VAUXHALL, Model Year: 2020, Model line: VIVARO C, Model: VAUXHALL VIVARO C 2020Pages: 289, PDF Size: 10.16 MB
Page 128 of 289
126Instruments and controlsDriving functions
Press _.
Select Driving functions .
In the corresponding submenus the
following settings can be changed:
● Automatic headlamp dipping :
Activates or deactivates high
beam assist.
● Lane departure warning system :
Activates or deactivates lane
departure warning.
● Stop and start : Activates or
deactivates stop-start system
● Cruise control active : Activates or
deactivates adaptive cruise
control.
● Parking sensors : Activates or
deactivates the parking assist
sensors.
● Blind spot sensors : Activates or
deactivates side blind spot alert.
● Traction control : Activates or
deactivates Traction Control system.● Under-inflation initialization :
Initialises the tyre under-inflation
detection system.
● Diagnostic : Shows alert
messages of the diagnostic
system.
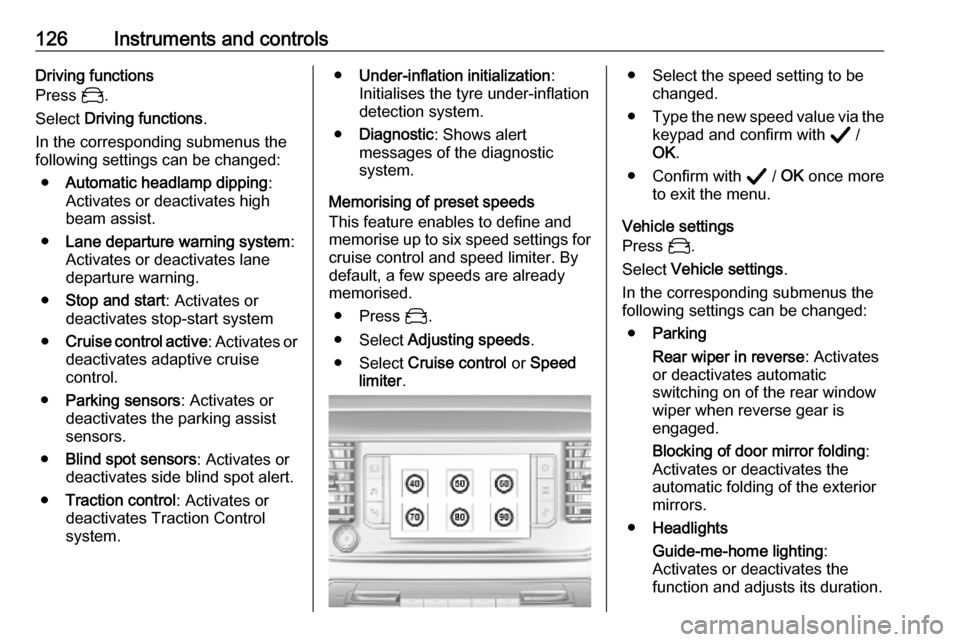
Memorising of preset speeds
This feature enables to define and
memorise up to six speed settings for
cruise control and speed limiter. By
default, a few speeds are already
memorised.
● Press _.
● Select Adjusting speeds .
● Select Cruise control or Speed
limiter .● Select the speed setting to be
changed.
● Type the new speed value via the
keypad and confirm with A /
OK .
● Confirm with A / OK once more
to exit the menu.
Vehicle settings
Press _.
Select Vehicle settings .
In the corresponding submenus the
following settings can be changed:
● Parking
Rear wiper in reverse : Activates
or deactivates automatic
switching on of the rear window
wiper when reverse gear is
engaged.
Blocking of door mirror folding :
Activates or deactivates the
automatic folding of the exterior
mirrors.
● Headlights
Guide-me-home lighting :
Activates or deactivates the
function and adjusts its duration.
Page 140 of 289
138Climate controlClimate controlClimate control systems.............138
Heating and ventilation system 138
Air conditioning system ...........140
Electronic climate control system .................................... 142
Parking heater ......................... 146
Air vents ..................................... 148
Adjustable air vents .................148
Fixed air vents ......................... 149
Glovebox cooler ......................149
Maintenance .............................. 149
Air intake ................................. 149
Air conditioning regular
operation ................................ 150
Service .................................... 150Climate control systems
Heating and ventilation system
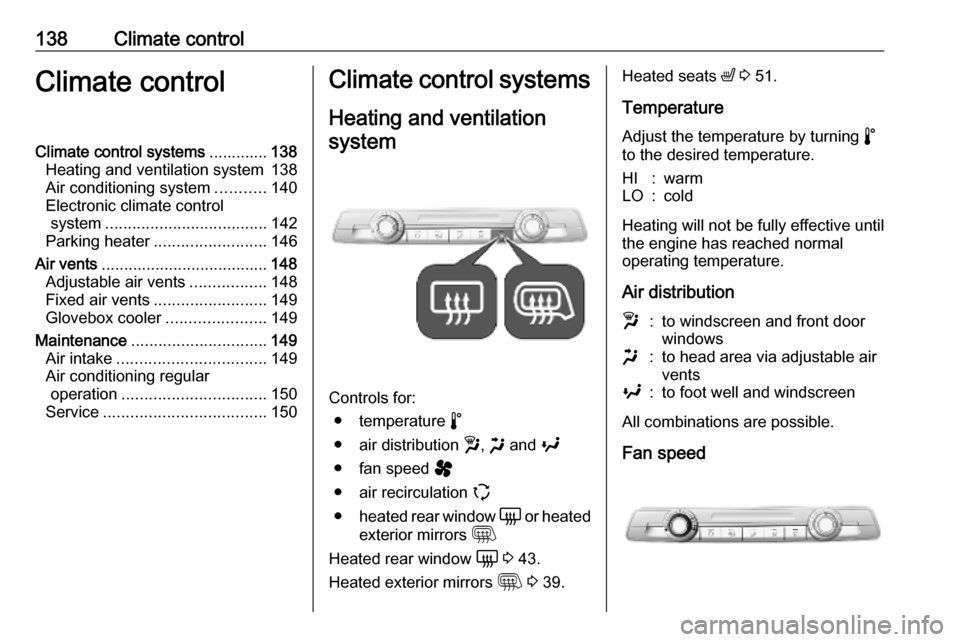
Controls for: ● temperature ñ
● air distribution w, x and y
● fan speed ý
● air recirculation q
● heated rear window è or heated
exterior mirrors m
Heated rear window è 3 43.
Heated exterior mirrors m 3 39.
Heated seats ß 3 51.
Temperature
Adjust the temperature by turning ñ
to the desired temperature.HI:warmLO:cold
Heating will not be fully effective until
the engine has reached normal
operating temperature.
Air distribution
w:to windscreen and front door
windowsx:to head area via adjustable air
ventsy:to foot well and windscreen
All combinations are possible.
Fan speed
Page 148 of 289
146Climate control● Air conditioning and automaticmode are automatically switchedon. The LED in the button A/C
illuminates, AUTO is shown in the
display.
● Temperature and air distribution are set automatically and the fan
runs at high speed.
● Switch on heated rear window è.
● Switch on heated windscreen 9 .
● To return to previous mode, press h again.
Notice
If h is pressed while the engine is
running, an Autostop will be inhibited until h is pressed again.
If h is pressed while the engine is
in an Autostop, the engine will restart
automatically.
Heated rear window è 3 43.
Heated exterior mirrors m 3 39.
Heated windscreen 9 3 44.
Stop-start system 3 156.Deactivation of electronic climate
control system
Press s subsequently until the
electronic climate control system is
deactivated.
Parking heater
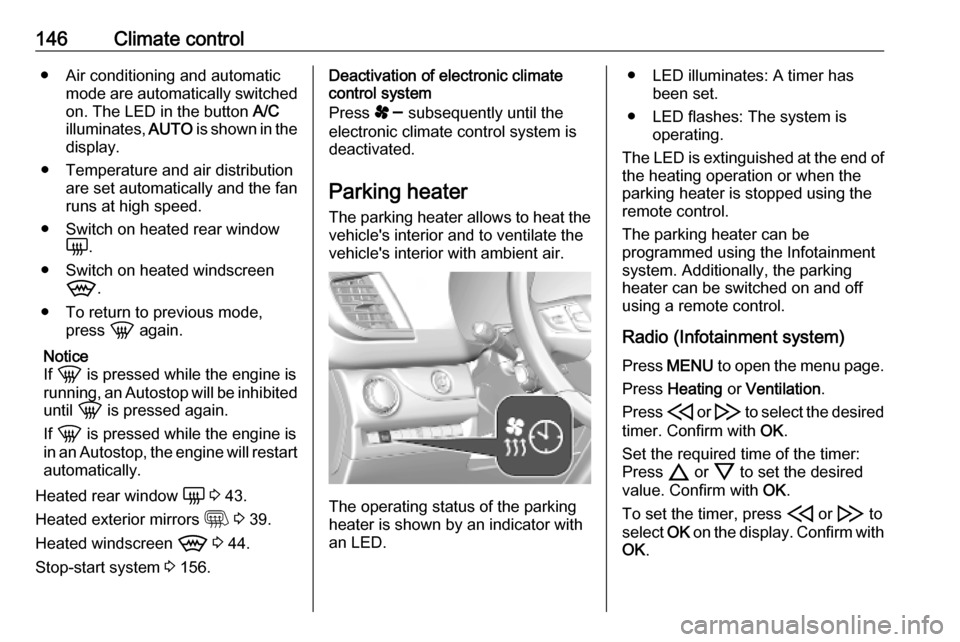
The parking heater allows to heat the vehicle's interior and to ventilate the
vehicle's interior with ambient air.
The operating status of the parking
heater is shown by an indicator with
an LED.
● LED illuminates: A timer has been set.
● LED flashes: The system is operating.
The LED is extinguished at the end of
the heating operation or when the
parking heater is stopped using the
remote control.
The parking heater can be
programmed using the Infotainment
system. Additionally, the parking
heater can be switched on and off
using a remote control.
Radio (Infotainment system) Press MENU to open the menu page.
Press Heating or Ventilation .
Press H or I to select the desired
timer. Confirm with OK.
Set the required time of the timer:
Press 7 or 8 to set the desired
value. Confirm with OK.
To set the timer, press H or I to
select OK on the display. Confirm with
OK .
Page 149 of 289
Climate control147Multimedia / Multimedia NaviPress d.
Press Temperature conditioning .
Activate Temperature conditioning by
pressing ON.
Press Settings .
Select Heating or Ventilation .
Press Time 1 or Time 2 to select the
desired timer.
Define the time of the selected timer.
Press 6 to save the settings and set
the timer.
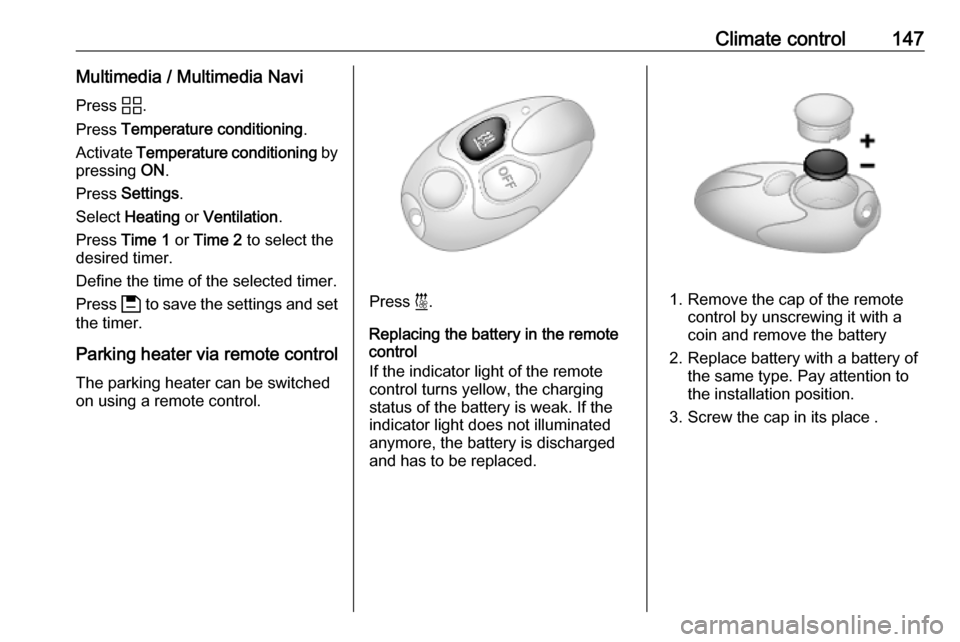
Parking heater via remote control The parking heater can be switched
on using a remote control.
Press i.
Replacing the battery in the remote
control
If the indicator light of the remote
control turns yellow, the charging
status of the battery is weak. If the
indicator light does not illuminated
anymore, the battery is discharged
and has to be replaced.1. Remove the cap of the remote control by unscrewing it with a
coin and remove the battery
2. Replace battery with a battery of the same type. Pay attention to
the installation position.
3. Screw the cap in its place .
Page 153 of 289

Driving and operating151Driving and
operatingDriving hints ............................... 152
Control of the vehicle ...............152
Steering ................................... 152
Starting and operating ...............152
New vehicle running-in ............152
Ignition switch positions ...........152
Power button ........................... 153
Starting the engine ..................154
Overrun cut-off ........................ 156
Stop-start system ....................156
Parking .................................... 159
Engine exhaust .......................... 160
Exhaust filter ............................ 160
Catalytic converter ...................160
AdBlue ..................................... 161
Automatic transmission ..............164
Transmission display ...............165
Gear selection ......................... 165
Manual mode ........................... 166
Electronic driving programmes 167
Fault ........................................ 167
Manual transmission ..................167Brakes........................................ 168
Antilock brake system .............168
Parking brake .......................... 169
Brake assist ............................. 169
Hill start assist ......................... 170
Ride control systems .................170
Electronic Stability Control and Traction Control system .........170
Selective ride control ...............171
Driver assistance systems .........173
Cruise control .......................... 173
Speed limiter ........................... 176
Adaptive cruise control ............179
Forward collision alert .............186
Active emergency braking .......188
Front pedestrian protection .....190
Parking assist .......................... 191
Side blind spot alert .................194
Panoramic view system ...........196
Rear view camera ...................199
Lane departure warning ..........200
Driver alert ............................... 201
Fuel ............................................ 203
Fuel for diesel engines ............203
Refuelling ................................ 204
Trailer hitch ................................ 205
General information .................205
Driving characteristics and towing tips .............................. 205Trailer towing........................... 206
Towing equipment ...................206
Trailer stability assist ...............209
Page 161 of 289
Driving and operating159Parking9Warning
● Do not park the vehicle on an
easily ignitable surface. The
high temperature of the
exhaust system could ignite the
surface.
● Always apply the parking brake.
● If the vehicle is on a level surface or uphill slope, engage
first gear or set the selector
lever to position P (automatic
transmission type A) / N
(automatic transmission type B). On an uphill slope, turn the
front wheels away from the
kerb.
If the vehicle is on a downhill
slope, engage reverse gear or
set the selector lever to position P (automatic transmission type
A) / N (automatic transmission
type B). Turn the front wheels
towards the kerb.
● Close the windows.
● Switch off the engine.
● Remove the ignition key from the ignition switch or switch off
ignition on vehicles with power
button. Turn the steering wheel
until the steering wheel lock is
felt to engage.
● Lock the vehicle.
● Activate the anti-theft alarm system.
● The engine cooling fans may run
after the engine has been
switched off 3 212.
Caution
After running at high engine
speeds or with high engine loads,
operate the engine briefly at a low load or run in neutral for
approx. 30 seconds before
switching off, in order to protect
the turbocharger.
Notice
In the event of an accident with airbag deployment, the engine is
switched off automatically if the
vehicle comes to a standstill within a
certain time.
In countries with extreme low
temperatures it may be necessary to park the vehicle without applied
parking brake. Make sure to park the
vehicle on a level surface.
Page 167 of 289

Driving and operating165Transmission display
The mode or selected gear is shown
in the Driver Information Centre.
In automatic mode, the driving
programme is indicated by D, A or
AUTO .
In manual mode, M and the number
of the selected gear is indicated.
R indicates reverse gear.
N indicates neutral position.
For automatic transmission type A
only: P indicates park position.
Gear selection 3 165.
Gear selectionType A
Turn the gear selector.
P:park position, front wheels are
locked, engage only when the
vehicle is stationary and the
parking brake is appliedR:reverse gear, engage only when
the vehicle is stationaryN:neutralD:automatic modeM:manual mode
The gear selector is locked in P and
can only be moved when the ignition
is on and the brake pedal is applied.
The engine can only be started with
the gear selector in position P or N.
When position N is selected, press
the brake pedal or apply the parking
brake before starting.
Do not accelerate while engaging a
gear. Never depress the accelerator
pedal and brake pedal at the same
time.
When a gear is engaged, the vehicle
slowly begins to creep when the
brake is released.Type B
Turn the gear selector.
Page 168 of 289

166Driving and operatingR:reverse gear, engage only when
the vehicle is stationaryN:neutralA:automatic modeM:manual mode
The engine can only be started with
the gear selector in position N. When
position N is selected, press the brake
pedal and start the engine.
Do not accelerate while engaging a
gear. Never depress the accelerator
pedal and brake pedal at the same
time.
When a gear is engaged, the vehicle
slowly begins to creep when the
brake is released.
Engine braking To utilise the engine braking effect,select a lower gear when driving
downhill.
Parking
Type A:
Apply the parking brake and select P.Type B
Apply the parking brake and select
N or leave the selected gear selector
position.
Manual mode 1. Activate manual mode a) Automatic transmission type A:Manual mode M can be activated
from position D in each driving
situation and speed.
Press button M.
b) Automatic transmission type B:
Move gear selector to position M
if vehicle is at a standstill.
2. Pull steering wheel paddles to select gears manually.
Pull right steering wheel paddle + to
shift to a higher gear.
Pull left steering wheel paddle - to
shift to a lower gear.
Multiple pulls allow gears to be
skipped.
The selected gear is indicated in the
instrument cluster.
If a higher gear is selected when
vehicle speed is too low, or a lower
gear when vehicle speed is too high,
the shift is not executed. This can
cause a message in the Driver
Information Centre.
Page 171 of 289
Driving and operating169ABS starts to regulate brake pressure
as soon as a wheel shows a tendency to lock. The vehicle remains
steerable, even during hard braking.
ABS control is made apparent
through a pulse in the brake pedal
and the noise of the regulation
process.
For optimum braking, keep the brake
pedal fully depressed throughout the
braking process, despite the fact that
the pedal is pulsating. Do not reduce
the pressure on the pedal.
When braking in an emergency, the
hazard warning flashers are switched on automatically depending on the
force of deceleration. They are
switched off automatically the first
time you accelerate.
After starting off, the system performs
a self-test which may be audible.
Control indicator i 3 111.
Fault9 Warning
If there is a fault in the ABS, the
wheels may be liable to lock due
to braking that is heavier than
normal. The advantages of ABS are no longer available. During
hard braking, the vehicle can no longer be steered and may
swerve.
Have the cause of the fault remedied
by a workshop.
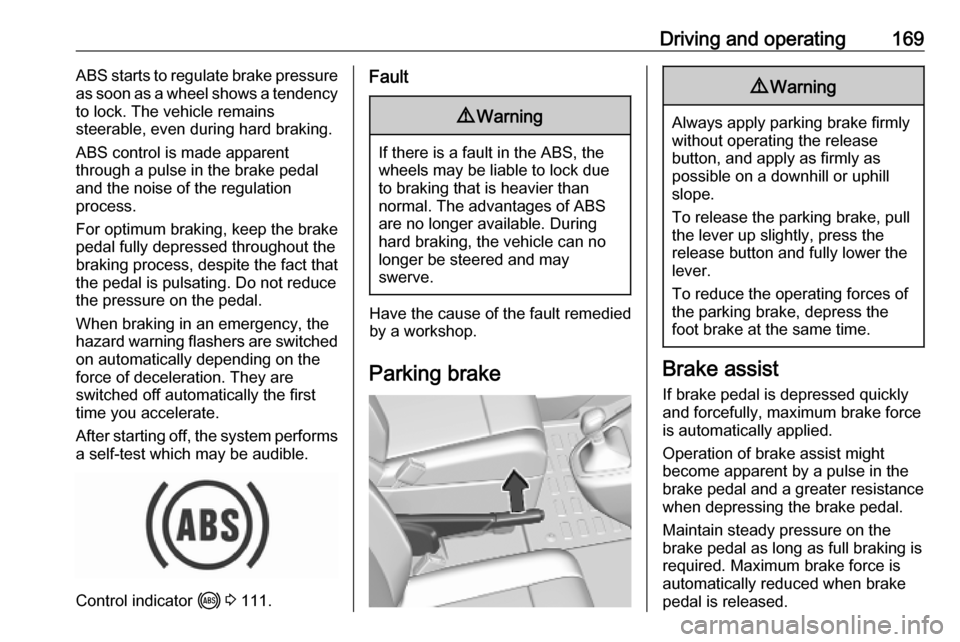
Parking brake
9 Warning
Always apply parking brake firmly
without operating the release
button, and apply as firmly as
possible on a downhill or uphill
slope.
To release the parking brake, pull
the lever up slightly, press the
release button and fully lower the
lever.
To reduce the operating forces of
the parking brake, depress the
foot brake at the same time.
Brake assist
If brake pedal is depressed quickly
and forcefully, maximum brake force
is automatically applied.
Operation of brake assist might
become apparent by a pulse in the
brake pedal and a greater resistance
when depressing the brake pedal.
Maintain steady pressure on the
brake pedal as long as full braking is
required. Maximum brake force is
automatically reduced when brake
pedal is released.
Page 184 of 289
182Driving and operatingPress MEM to request saving of the
suggested speed.
Press MEM once more to confirm and
save the new speed setting.
This speed is the new value for the
cruise control.
Exceeding the set speed
Vehicle speed can be increased by depressing the accelerator pedal.
When the accelerator pedal is
released, the previously stored speed
is resumed. If a slower moving vehicle
is ahead, the following distance
selected by the driver is restored.
If the set speed is exceeded, the
indicated speed setting flashes in the Driver Information Centre and a
warning message appears.9 Warning
Accelerating by the driver
deactivates automatic braking by
the system. This is indicated as a
pop-up warning in the Driver
Information Centre.
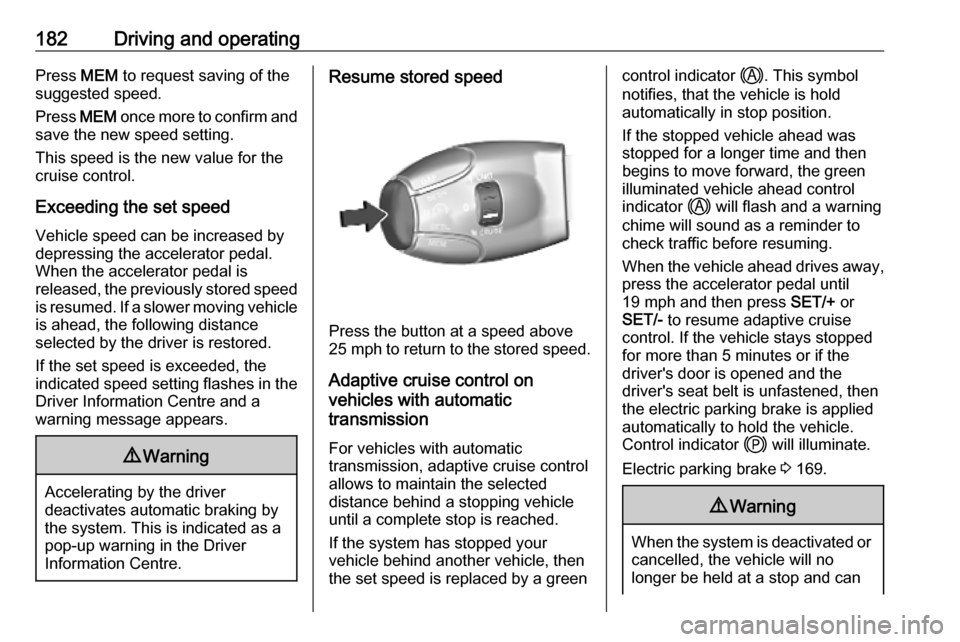
Resume stored speed
Press the button at a speed above
25 mph to return to the stored speed.
Adaptive cruise control on
vehicles with automatic
transmission
For vehicles with automatic
transmission, adaptive cruise control
allows to maintain the selected
distance behind a stopping vehicle
until a complete stop is reached.
If the system has stopped your
vehicle behind another vehicle, then
the set speed is replaced by a green
control indicator .. This symbol
notifies, that the vehicle is hold
automatically in stop position.
If the stopped vehicle ahead was
stopped for a longer time and then
begins to move forward, the green
illuminated vehicle ahead control
indicator . will flash and a warning
chime will sound as a reminder to
check traffic before resuming.
When the vehicle ahead drives away,
press the accelerator pedal until
19 mph and then press SET/+ or
SET/- to resume adaptive cruise
control. If the vehicle stays stopped
for more than 5 minutes or if the
driver's door is opened and the
driver's seat belt is unfastened, then
the electric parking brake is applied
automatically to hold the vehicle.
Control indicator j will illuminate.
Electric parking brake 3 169.9 Warning
When the system is deactivated or
cancelled, the vehicle will no
longer be held at a stop and can