Rear light VAUXHALL VIVARO C 2020 User Guide
[x] Cancel search | Manufacturer: VAUXHALL, Model Year: 2020, Model line: VIVARO C, Model: VAUXHALL VIVARO C 2020Pages: 289, PDF Size: 10.16 MB
Page 128 of 289
126Instruments and controlsDriving functions
Press _.
Select Driving functions .
In the corresponding submenus the
following settings can be changed:
● Automatic headlamp dipping :
Activates or deactivates high
beam assist.
● Lane departure warning system :
Activates or deactivates lane
departure warning.
● Stop and start : Activates or
deactivates stop-start system
● Cruise control active : Activates or
deactivates adaptive cruise
control.
● Parking sensors : Activates or
deactivates the parking assist
sensors.
● Blind spot sensors : Activates or
deactivates side blind spot alert.
● Traction control : Activates or
deactivates Traction Control system.● Under-inflation initialization :
Initialises the tyre under-inflation
detection system.
● Diagnostic : Shows alert
messages of the diagnostic
system.
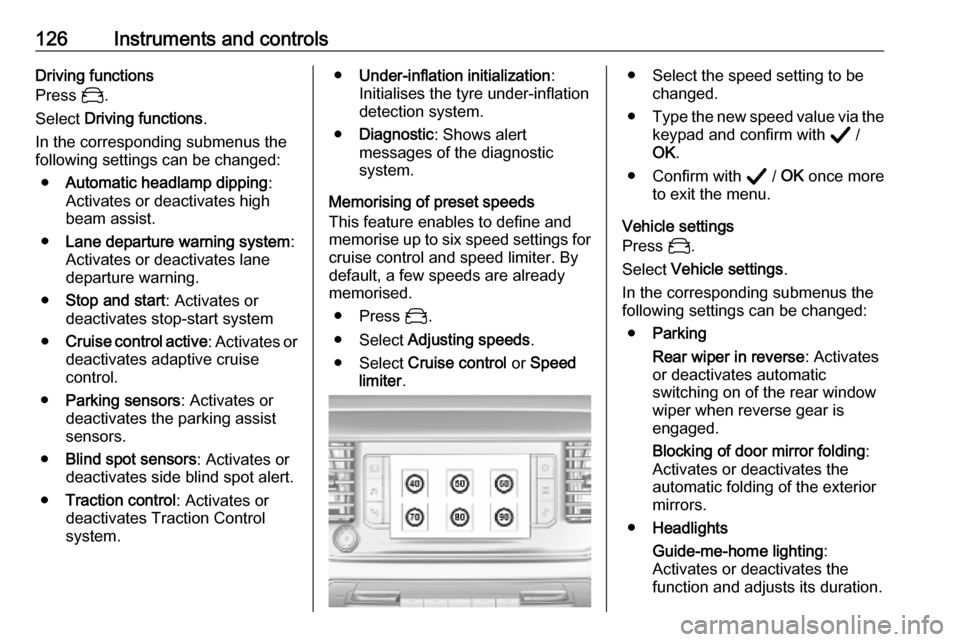
Memorising of preset speeds
This feature enables to define and
memorise up to six speed settings for
cruise control and speed limiter. By
default, a few speeds are already
memorised.
● Press _.
● Select Adjusting speeds .
● Select Cruise control or Speed
limiter .● Select the speed setting to be
changed.
● Type the new speed value via the
keypad and confirm with A /
OK .
● Confirm with A / OK once more
to exit the menu.
Vehicle settings
Press _.
Select Vehicle settings .
In the corresponding submenus the
following settings can be changed:
● Parking
Rear wiper in reverse : Activates
or deactivates automatic
switching on of the rear window
wiper when reverse gear is
engaged.
Blocking of door mirror folding :
Activates or deactivates the
automatic folding of the exterior
mirrors.
● Headlights
Guide-me-home lighting :
Activates or deactivates the
function and adjusts its duration.
Page 131 of 289
Lighting129LightingExterior lighting.......................... 129
Light switch .............................. 129
Automatic light control .............130
High beam ............................... 130
High beam assist .....................130
Headlight flash ......................... 131
Headlight range adjustment ....131
Headlights when driving abroad .................................... 132
Daytime running lights .............132
Cornering lights .......................132
Hazard warning flashers ..........132
Turn lights ................................ 133
Front fog lights ......................... 133
Rear fog light ........................... 133
Reversing lights .......................134
Misted light covers ...................134
Interior lighting ........................... 134
Instrument panel illumination control ..................................... 134
Interior lights ............................ 134
Reading lights .......................... 135
Sunvisor lights ......................... 136
Lighting features ........................136
Centre console lighting ............136Entry lighting ............................ 136
Exit lighting .............................. 136
Vehicle locator lighting ............137
Peripheral lighting ....................137
Battery discharge protection ....137Exterior lighting
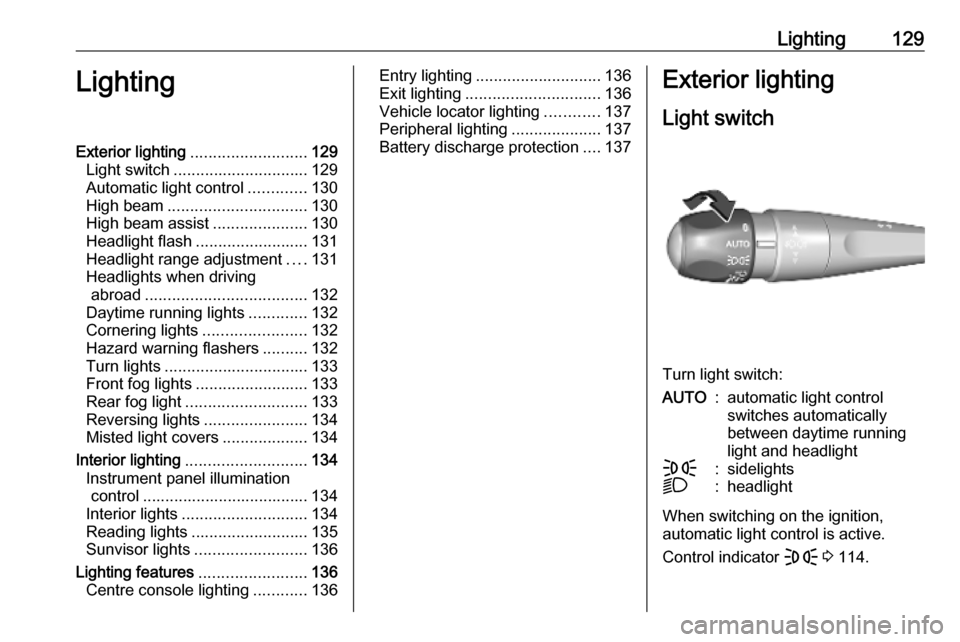
Light switch
Turn light switch:
AUTO:automatic light control
switches automatically
between daytime running
light and headlightF:sidelightsD:headlight
When switching on the ignition,
automatic light control is active.
Control indicator F 3 114.
Page 132 of 289
130LightingTail lightsTail lights are illuminated together
with low / high beam and sidelights.
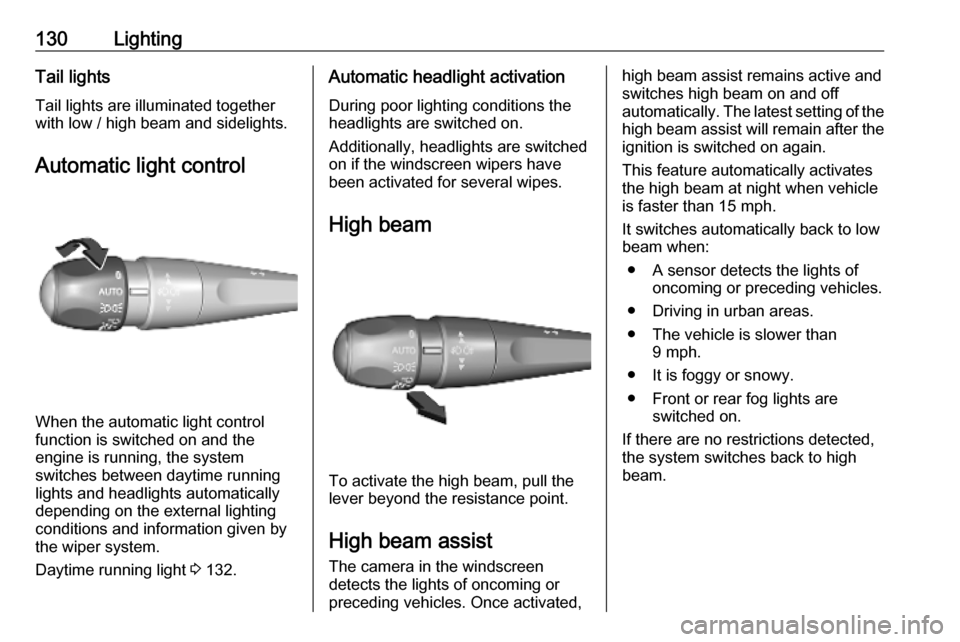
Automatic light control
When the automatic light control
function is switched on and the
engine is running, the system
switches between daytime running
lights and headlights automatically
depending on the external lighting
conditions and information given by
the wiper system.
Daytime running light 3 132.
Automatic headlight activation
During poor lighting conditions the
headlights are switched on.
Additionally, headlights are switched
on if the windscreen wipers have
been activated for several wipes.
High beam
To activate the high beam, pull the
lever beyond the resistance point.
High beam assist The camera in the windscreen
detects the lights of oncoming or
preceding vehicles. Once activated,
high beam assist remains active and switches high beam on and off
automatically. The latest setting of the
high beam assist will remain after the ignition is switched on again.
This feature automatically activates
the high beam at night when vehicle
is faster than 15 mph.
It switches automatically back to low
beam when:
● A sensor detects the lights of oncoming or preceding vehicles.
● Driving in urban areas.
● The vehicle is slower than 9 mph.
● It is foggy or snowy.
● Front or rear fog lights are switched on.
If there are no restrictions detected,
the system switches back to high
beam.
Page 135 of 289
Lighting133Turn lightsup:right turn lightsdown:left turn lights
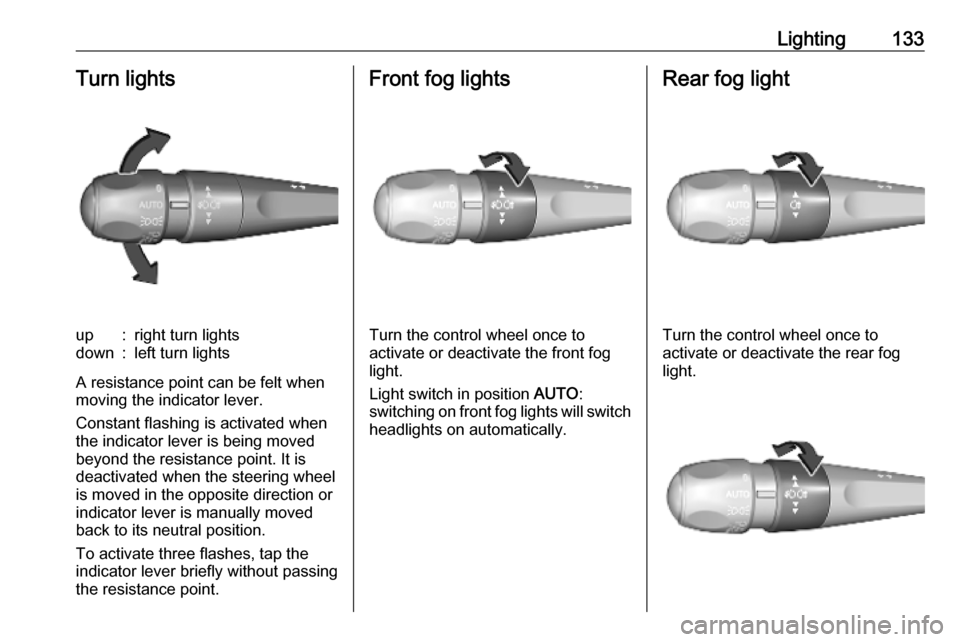
A resistance point can be felt when
moving the indicator lever.
Constant flashing is activated when
the indicator lever is being moved
beyond the resistance point. It is
deactivated when the steering wheel
is moved in the opposite direction or
indicator lever is manually moved
back to its neutral position.
To activate three flashes, tap the indicator lever briefly without passing
the resistance point.
Front fog lights
Turn the control wheel once to
activate or deactivate the front fog
light.
Light switch in position AUTO:
switching on front fog lights will switch headlights on automatically.
Rear fog light
Turn the control wheel once to
activate or deactivate the rear fog
light.
Page 136 of 289
134LightingTurn the control wheel twice to
activate or deactivate the rear fog
light.
Light switch in position AUTO:
switching on rear fog light will switch
headlights on automatically.
Reversing lights
The reversing light comes on when
the ignition is on and reverse gear is
selected.
Misted light covers
The inside of the light housing may
mist up briefly in poor, wet and cold weather conditions, in heavy rain or
after washing. The mist disappears
quickly by itself. To help, switch on the headlights.Interior lighting
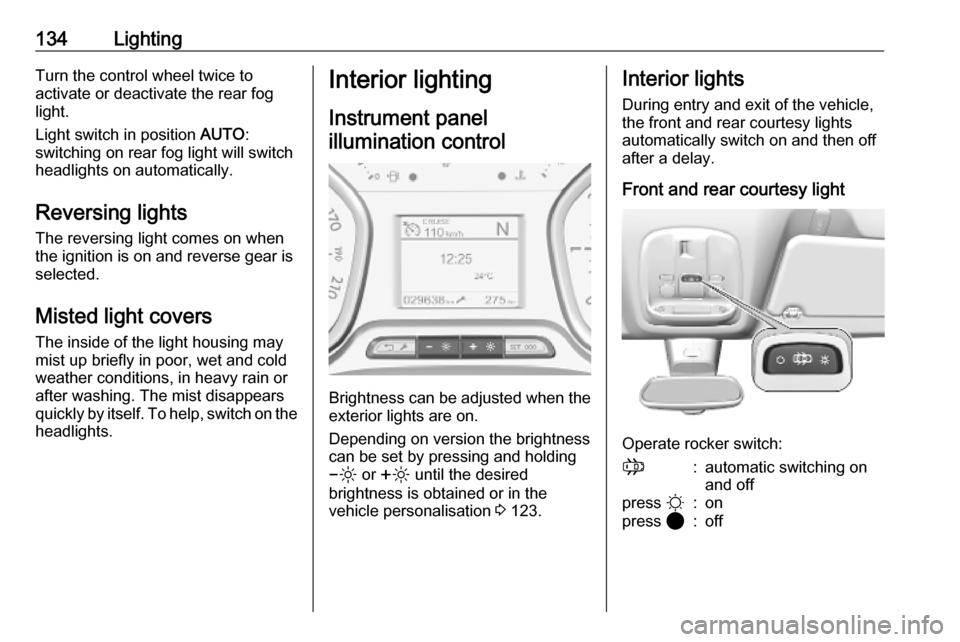
Instrument panel illumination control
Brightness can be adjusted when the exterior lights are on.
Depending on version the brightness
can be set by pressing and holding
0 or ß until the desired
brightness is obtained or in the
vehicle personalisation 3 123.
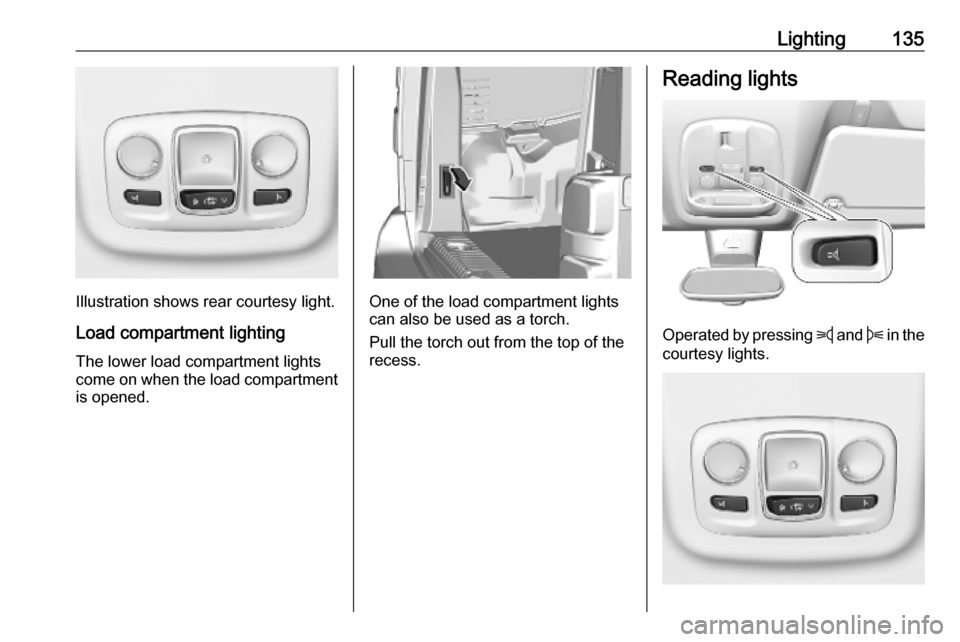
Interior lights
During entry and exit of the vehicle,
the front and rear courtesy lights
automatically switch on and then off
after a delay.
Front and rear courtesy light
Operate rocker switch:
;:automatic switching on
and offpress §:onpress 2:off
Page 137 of 289
Lighting135
Illustration shows rear courtesy light.
Load compartment lighting The lower load compartment lights
come on when the load compartment is opened.One of the load compartment lights
can also be used as a torch.
Pull the torch out from the top of the
recess.
Reading lights
Operated by pressing z and B in the
courtesy lights.
Page 138 of 289

136LightingIllustration shows rear courtesy lights.
Sunvisor lights Illuminates when the cover is opened.Lighting features
Centre console lighting A spotlight integrated in the overheadconsole illuminates the centre
console when headlights are
switched off.
The brightness can be adjusted in the vehicle personalisation 3 123.
Entry lighting
Welcome lighting
Some or all of the following lights are
switched on for a short time by
unlocking the vehicle with the radio
remote control:
● headlights
● tail lights
● interior lights
The number of activated lights
depends on the surrounding light
conditions.
The lighting switches off immediately
when the ignition is switched on.
Starting off 3 18.This function can be activated or
deactivated in the vehicle
personalisation 3 123.
The following lights will additionally
switch on when the driver's door is
opened:
● illumination of some switches
● Driver Information Centre
Exit lighting
The following lights are switched on if
the key is removed from the ignition
switch:
● interior lights
● instrument panel light
They will switch off automatically after
a delay. This function works only in
the dark.
Path lighting Headlights, tail lights and number
plate lights illuminate the surrounding
area for an adjustable time after
leaving the vehicle.
Page 142 of 289
140Climate controlHeated exterior mirrors m 3 39.
Heated windscreen 9 3 44.
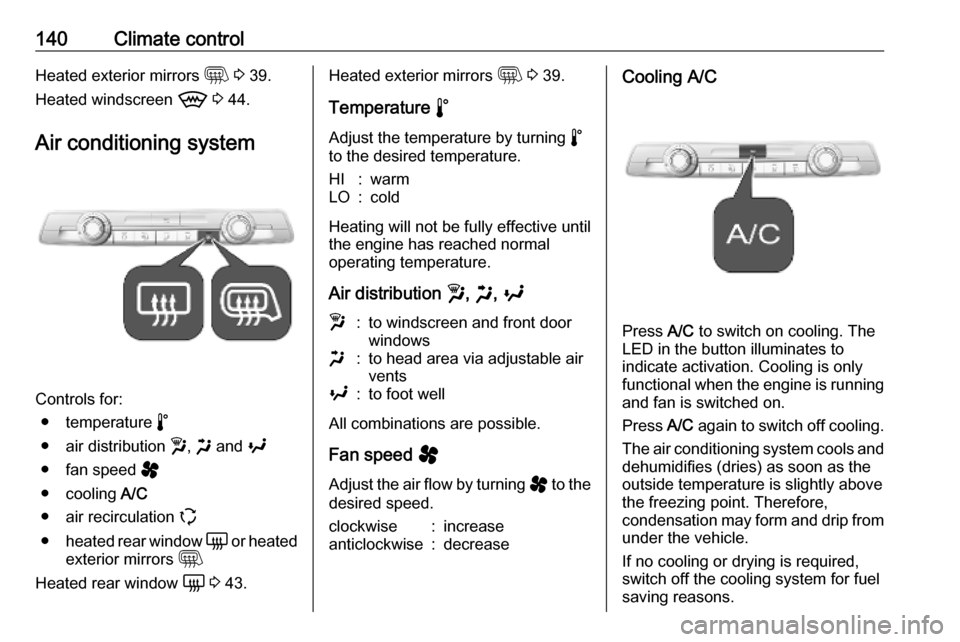
Air conditioning system
Controls for: ● temperature ñ
● air distribution w, x and y
● fan speed ý
● cooling A/C
● air recirculation q
● heated rear window è or heated
exterior mirrors m
Heated rear window è 3 43.
Heated exterior mirrors m 3 39.
Temperature ñ
Adjust the temperature by turning ñ
to the desired temperature.HI:warmLO:cold
Heating will not be fully effective until
the engine has reached normal
operating temperature.
Air distribution w, x , y
w:to windscreen and front door
windowsx:to head area via adjustable air
ventsy:to foot well
All combinations are possible.
Fan speed ý
Adjust the air flow by turning ý to the
desired speed.
clockwise:increaseanticlockwise:decreaseCooling A/C
Press A/C to switch on cooling. The
LED in the button illuminates to
indicate activation. Cooling is only
functional when the engine is running and fan is switched on.
Press A/C again to switch off cooling.
The air conditioning system cools and
dehumidifies (dries) as soon as the
outside temperature is slightly above
the freezing point. Therefore,
condensation may form and drip from
under the vehicle.
If no cooling or drying is required,
switch off the cooling system for fuel
saving reasons.
Page 197 of 289
Driving and operating195ActivationInfo Display without touchscreen
Press T.
Info Display with touchscreen
Activate the function in the vehicle
personalisation.
Vehicle personalisation 3 123.
T illuminates green in the instrument
cluster to confirm the function.
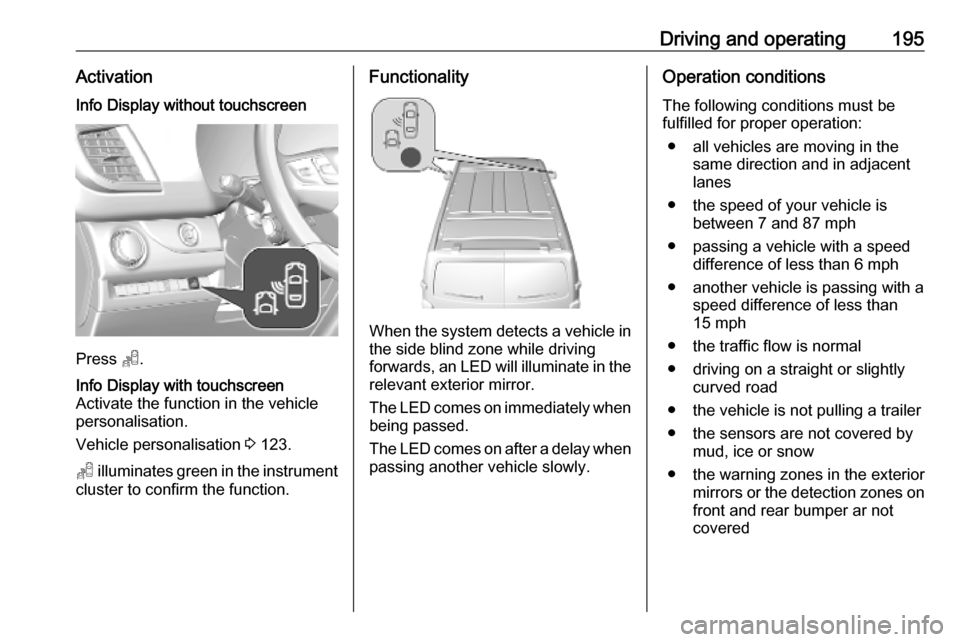
Functionality
When the system detects a vehicle in the side blind zone while driving
forwards, an LED will illuminate in the
relevant exterior mirror.
The LED comes on immediately when being passed.
The LED comes on after a delay when
passing another vehicle slowly.
Operation conditions
The following conditions must be
fulfilled for proper operation:
● all vehicles are moving in the same direction and in adjacent
lanes
● the speed of your vehicle is between 7 and 87 mph
● passing a vehicle with a speed difference of less than 6 mph
● another vehicle is passing with a speed difference of less than
15 mph
● the traffic flow is normal
● driving on a straight or slightly curved road
● the vehicle is not pulling a trailer
● the sensors are not covered by mud, ice or snow
● the warning zones in the exterior mirrors or the detection zones on
front and rear bumper ar not
covered
Page 200 of 289
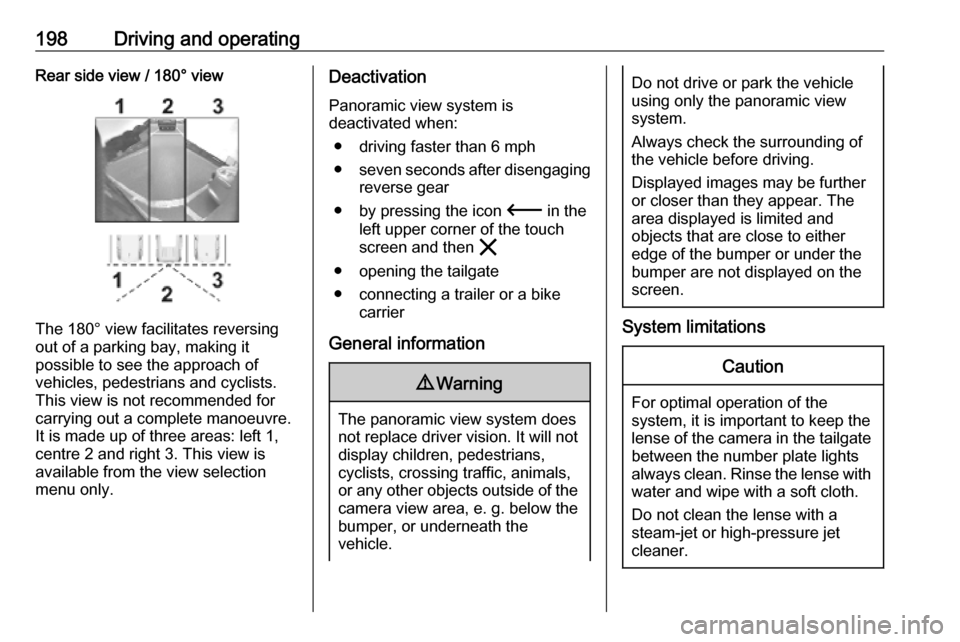
198Driving and operatingRear side view / 180° view
The 180° view facilitates reversing
out of a parking bay, making it
possible to see the approach of
vehicles, pedestrians and cyclists.
This view is not recommended for
carrying out a complete manoeuvre.
It is made up of three areas: left 1,
centre 2 and right 3. This view is
available from the view selection menu only.
Deactivation
Panoramic view system is
deactivated when:
● driving faster than 6 mph
● seven seconds after disengaging
reverse gear
● by pressing the icon 3 in the
left upper corner of the touch
screen and then &
● opening the tailgate
● connecting a trailer or a bike carrier
General information9 Warning
The panoramic view system does
not replace driver vision. It will not display children, pedestrians,
cyclists, crossing traffic, animals,
or any other objects outside of the camera view area, e. g. below the
bumper, or underneath the
vehicle.
Do not drive or park the vehicle
using only the panoramic view
system.
Always check the surrounding of
the vehicle before driving.
Displayed images may be further
or closer than they appear. The
area displayed is limited and
objects that are close to either
edge of the bumper or under the
bumper are not displayed on the
screen.
System limitations
Caution
For optimal operation of the
system, it is important to keep the
lense of the camera in the tailgate between the number plate lightsalways clean. Rinse the lense with water and wipe with a soft cloth.
Do not clean the lense with a
steam-jet or high-pressure jet
cleaner.