parking brake VAUXHALL VIVARO C 2020 User Guide
[x] Cancel search | Manufacturer: VAUXHALL, Model Year: 2020, Model line: VIVARO C, Model: VAUXHALL VIVARO C 2020Pages: 289, PDF Size: 10.16 MB
Page 167 of 289

Driving and operating165Transmission display
The mode or selected gear is shown
in the Driver Information Centre.
In automatic mode, the driving
programme is indicated by D, A or
AUTO .
In manual mode, M and the number
of the selected gear is indicated.
R indicates reverse gear.
N indicates neutral position.
For automatic transmission type A
only: P indicates park position.
Gear selection 3 165.
Gear selectionType A
Turn the gear selector.
P:park position, front wheels are
locked, engage only when the
vehicle is stationary and the
parking brake is appliedR:reverse gear, engage only when
the vehicle is stationaryN:neutralD:automatic modeM:manual mode
The gear selector is locked in P and
can only be moved when the ignition
is on and the brake pedal is applied.
The engine can only be started with
the gear selector in position P or N.
When position N is selected, press
the brake pedal or apply the parking
brake before starting.
Do not accelerate while engaging a
gear. Never depress the accelerator
pedal and brake pedal at the same
time.
When a gear is engaged, the vehicle
slowly begins to creep when the
brake is released.Type B
Turn the gear selector.
Page 168 of 289

166Driving and operatingR:reverse gear, engage only when
the vehicle is stationaryN:neutralA:automatic modeM:manual mode
The engine can only be started with
the gear selector in position N. When
position N is selected, press the brake
pedal and start the engine.
Do not accelerate while engaging a
gear. Never depress the accelerator
pedal and brake pedal at the same
time.
When a gear is engaged, the vehicle
slowly begins to creep when the
brake is released.
Engine braking To utilise the engine braking effect,select a lower gear when driving
downhill.
Parking
Type A:
Apply the parking brake and select P.Type B
Apply the parking brake and select
N or leave the selected gear selector
position.
Manual mode 1. Activate manual mode a) Automatic transmission type A:Manual mode M can be activated
from position D in each driving
situation and speed.
Press button M.
b) Automatic transmission type B:
Move gear selector to position M
if vehicle is at a standstill.
2. Pull steering wheel paddles to select gears manually.
Pull right steering wheel paddle + to
shift to a higher gear.
Pull left steering wheel paddle - to
shift to a lower gear.
Multiple pulls allow gears to be
skipped.
The selected gear is indicated in the
instrument cluster.
If a higher gear is selected when
vehicle speed is too low, or a lower
gear when vehicle speed is too high,
the shift is not executed. This can
cause a message in the Driver
Information Centre.
Page 171 of 289
Driving and operating169ABS starts to regulate brake pressure
as soon as a wheel shows a tendency to lock. The vehicle remains
steerable, even during hard braking.
ABS control is made apparent
through a pulse in the brake pedal
and the noise of the regulation
process.
For optimum braking, keep the brake
pedal fully depressed throughout the
braking process, despite the fact that
the pedal is pulsating. Do not reduce
the pressure on the pedal.
When braking in an emergency, the
hazard warning flashers are switched on automatically depending on the
force of deceleration. They are
switched off automatically the first
time you accelerate.
After starting off, the system performs
a self-test which may be audible.
Control indicator i 3 111.
Fault9 Warning
If there is a fault in the ABS, the
wheels may be liable to lock due
to braking that is heavier than
normal. The advantages of ABS are no longer available. During
hard braking, the vehicle can no longer be steered and may
swerve.
Have the cause of the fault remedied
by a workshop.
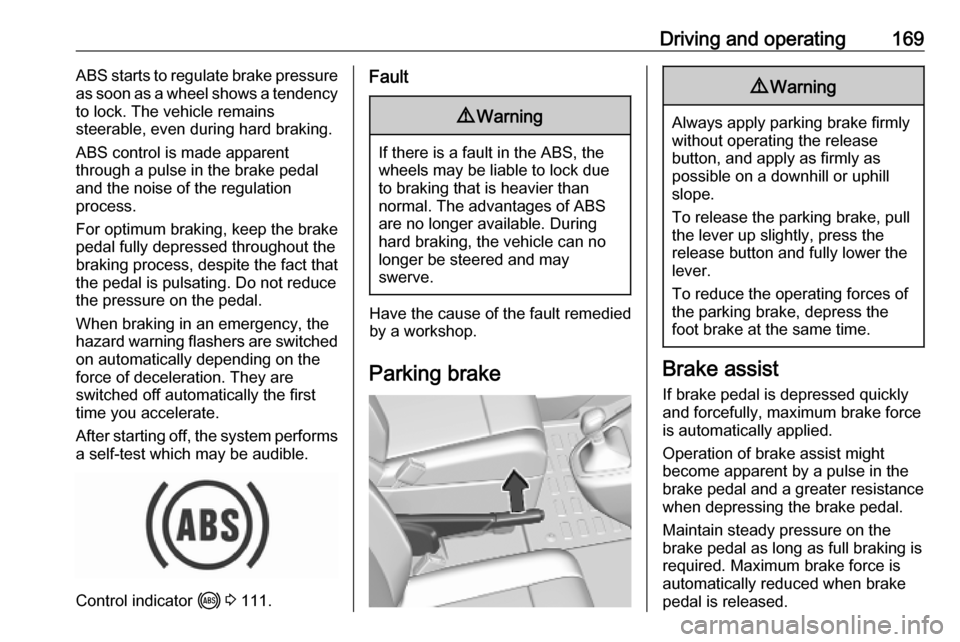
Parking brake
9 Warning
Always apply parking brake firmly
without operating the release
button, and apply as firmly as
possible on a downhill or uphill
slope.
To release the parking brake, pull
the lever up slightly, press the
release button and fully lower the
lever.
To reduce the operating forces of
the parking brake, depress the
foot brake at the same time.
Brake assist
If brake pedal is depressed quickly
and forcefully, maximum brake force
is automatically applied.
Operation of brake assist might
become apparent by a pulse in the
brake pedal and a greater resistance
when depressing the brake pedal.
Maintain steady pressure on the
brake pedal as long as full braking is
required. Maximum brake force is
automatically reduced when brake
pedal is released.
Page 184 of 289
182Driving and operatingPress MEM to request saving of the
suggested speed.
Press MEM once more to confirm and
save the new speed setting.
This speed is the new value for the
cruise control.
Exceeding the set speed
Vehicle speed can be increased by depressing the accelerator pedal.
When the accelerator pedal is
released, the previously stored speed
is resumed. If a slower moving vehicle
is ahead, the following distance
selected by the driver is restored.
If the set speed is exceeded, the
indicated speed setting flashes in the Driver Information Centre and a
warning message appears.9 Warning
Accelerating by the driver
deactivates automatic braking by
the system. This is indicated as a
pop-up warning in the Driver
Information Centre.
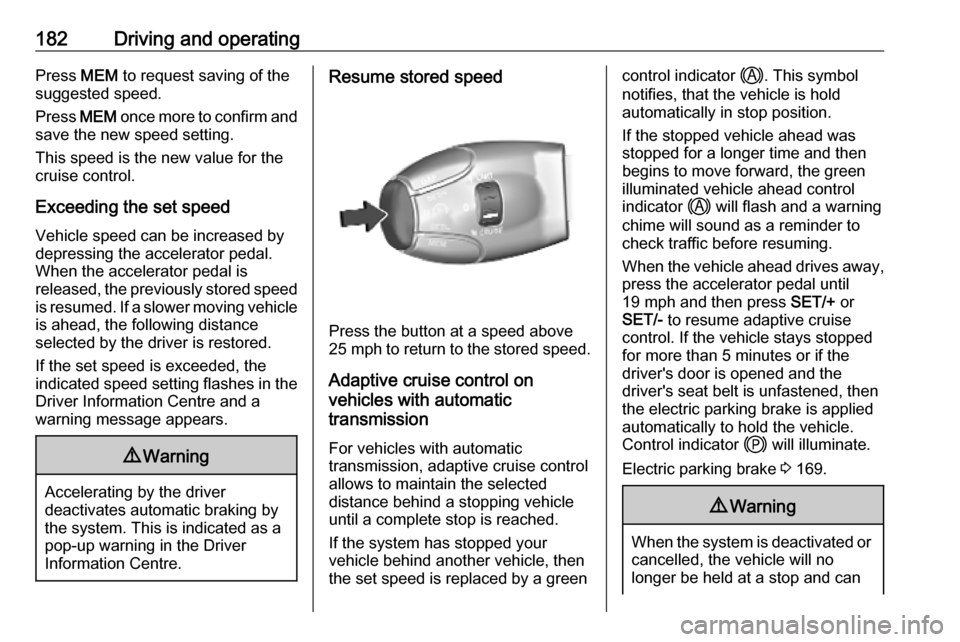
Resume stored speed
Press the button at a speed above
25 mph to return to the stored speed.
Adaptive cruise control on
vehicles with automatic
transmission
For vehicles with automatic
transmission, adaptive cruise control
allows to maintain the selected
distance behind a stopping vehicle
until a complete stop is reached.
If the system has stopped your
vehicle behind another vehicle, then
the set speed is replaced by a green
control indicator .. This symbol
notifies, that the vehicle is hold
automatically in stop position.
If the stopped vehicle ahead was
stopped for a longer time and then
begins to move forward, the green
illuminated vehicle ahead control
indicator . will flash and a warning
chime will sound as a reminder to
check traffic before resuming.
When the vehicle ahead drives away,
press the accelerator pedal until
19 mph and then press SET/+ or
SET/- to resume adaptive cruise
control. If the vehicle stays stopped
for more than 5 minutes or if the
driver's door is opened and the
driver's seat belt is unfastened, then
the electric parking brake is applied
automatically to hold the vehicle.
Control indicator j will illuminate.
Electric parking brake 3 169.9 Warning
When the system is deactivated or
cancelled, the vehicle will no
longer be held at a stop and can
Page 192 of 289

190Driving and operatingspeed range and only responds to
detected vehicles and
pedestrians.
System limitations
In some cases, the active emergencybraking system may provide an
automatic braking in situations that
seem to be unnecessary, for instance
in parking garages, due to traffic signs
in a curve or due to vehicles in
another lane. This is normal
operation, the vehicle does not need
service. Firmly apply the accelerator
pedal to override the automatic
braking if the situation and the
surroundings permit.
In the following cases, active
emergency braking performance is
limited:
● Driving on winding or hilly roads.
● Detecting all vehicles, especially vehicles with a trailer, tractors,
muddy vehicles, etc.
● Detecting a vehicle when weather limits visibility, such as infog, rain, or snow.
● Driving during nighttime.
● The windscreen is damaged or affected by foreign items, e.g.
stickers.
Complete attention is always required
while driving, and the driver should be ready to take action and apply the
brakes and / or steer the vehicle to
avoid crashes.
We recommend to deactivate the
system in the vehicle personalisation
in the following cases:
● when towing a trailer or caravan
● when carrying long objects on roof bars or a roof rack
● when the vehicle is being towed with the engine running
● when tyre chains are fitted
● when a spare wheel is fitted that is smaller than the other wheels
● before using an automatic car wash with the engine running
● before placing the vehicle on a rolling road in a workshop
● if the windscreen has been damaged close to the camera● if the front bumper has beendamaged
● if the brake lamps are not working
Fault
In case the system requires a service, m is illuminated in the instrument
cluster, a message is displayed in the
Driver Information Centre and an
audible signal is given.
If the system does not work as it
should do, vehicle messages are
displayed in the Driver Information
Centre.
Vehicle messages 3 122.
Front pedestrian protection Front pedestrian protection may help
to avoid or reduce the harm caused
by front-end crashes with pedestrians when driving forward.
The system uses the front camera in
the windscreen and a radar sensor in
the front bumper to detect a
pedestrian directly ahead in your path.
Page 193 of 289
Driving and operating191Front pedestrian protection can
detect and alert to pedestrians in a
forward gear at speeds between
3 mph and 37 mph.
During nighttime driving, system
performance is limited.9 Danger
Front pedestrian braking does not
provide an alert or automatically
brake the vehicle, unless it detects
a pedestrian.
The system may not detect
pedestrians, including children,
when the pedestrian is not directly ahead, not fully visible, not
standing upright, or when part of a
group.
Front pedestrian protection includes:
● detecting front pedestrian ahead● front pedestrian alert
Front pedestrian protection is
activated together with forward
collision alert.
Forward collision alert 3 186.
Detecting front pedestrian ahead
A pedestrian ahead is indicated by a
symbol in the instrument cluster.
Front pedestrian alert
When approaching a detected
pedestrian too quickly, a warning
message is displayed in the Driver
Information Centre. A warning chime
is provided.
Cruise control or adaptive cruise control may be disengaged when the
front pedestrian alert occurs.
System limitations
In the following cases, front
pedestrian protection may not detect
a pedestrian ahead or the sensor
performance is limited:
● vehicle speed is out of range from
3 mph to 37 mph in forward gear
● the distance to an pedestrian ahead is more than 40 m
● driving on winding or hilly roads
● driving during nighttime
● weather limits visibility, such as fog, rain, or snow● the sensor in the windscreen is blocked by snow, ice, slush, mud,dirt etc.
● the windscreen is damaged or affected by foreign objects, e.g.
stickers
Parking assist
General information When attaching a trailer or bicycle
carrier to the trailer hitch, the parking
assist is deactivated.9 Warning
The driver bears full responsibility
for the parking manoeuvre.
Always check the surrounding
area when driving backwards or
forwards while using parking
assist system.
Page 213 of 289

Vehicle care211General Information
Accessories and vehicle modifications
We recommend the use of genuine
parts and accessories and factory
approved parts specific for your
vehicle type. We cannot assess or guarantee reliability of other products
- even if they have a regulatory or
otherwise granted approval.
Any modification, conversion or other changes made to standard vehicle
specifications (including, without
limitation, software modifications,
modifications of the electronic control
units) may invalidate the warranty
offered by Vauxhall. Furthermore,
such changes may affect driver
assistance systems, may impact fuel
consumption, CO 2 emissions and
other emissions of the vehicle and
cause the vehicle to no longer
conform to the operating permit,
impacting the validity of your vehicle
registration.Caution
When transporting the vehicle on
a train or on a recovery vehicle, the
mud flaps might be damaged.
Cold protection covers
In order to prevent the accumulation
of snow at the radiator cooling fan, it is recommended to install removable
protection covers.
The protection covers must be
professionally installed, consult a
workshop.
Caution
The protection covers must be removed when one of the
following conditions occurs:
● The ambient temperature is above 10 °C.
● When the vehicle is towed.
● The vehicle is driven at speeds
above 75 mph.
Vehicle storage
Storage for a long period of timeIf the vehicle is to be stored for several
months:
● Wash and wax the vehicle.
● Have the wax in the engine compartment and underbody
checked.
● Clean and preserve the rubber seals.
● Fill up fuel tank completely.
● Change the engine oil.
● Drain the washer fluid reservoir.
● Check the coolant antifreeze and
corrosion protection.
● Adjust tyre pressure to the value specified for full load.
● Park the vehicle in a dry, well ventilated place. Engage first or
reverse gear or set selector lever to P. Prevent the vehicle from
rolling.
● Do not apply the parking brake.
Page 229 of 289
Vehicle care227
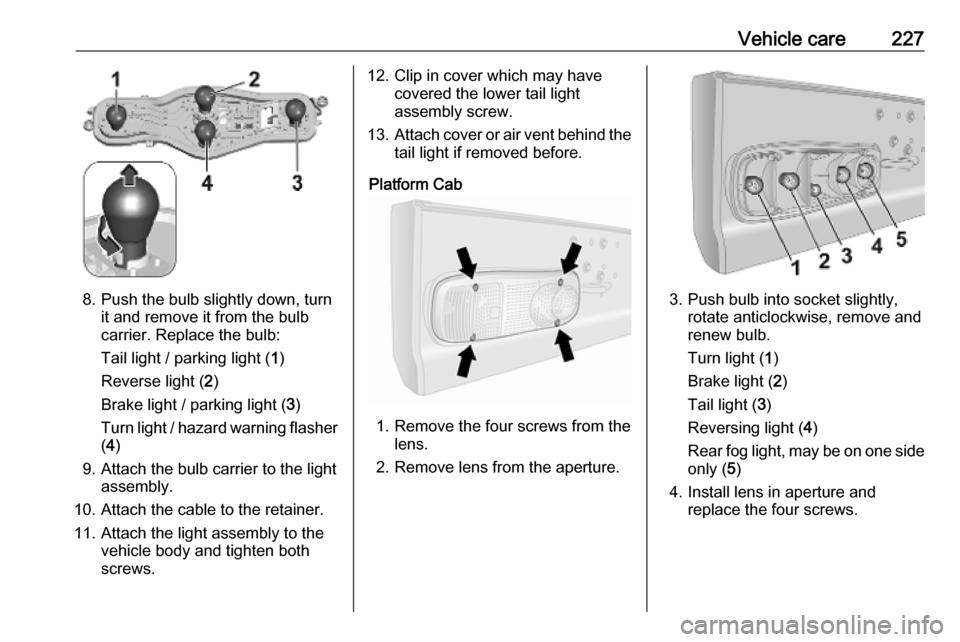
8. Push the bulb slightly down, turnit and remove it from the bulb
carrier. Replace the bulb:
Tail light / parking light ( 1)
Reverse light ( 2)
Brake light / parking light ( 3)
Turn light / hazard warning flasher
( 4 )
9. Attach the bulb carrier to the light assembly.
10. Attach the cable to the retainer.
11. Attach the light assembly to the vehicle body and tighten both
screws.
12. Clip in cover which may have covered the lower tail light
assembly screw.
13. Attach cover or air vent behind the
tail light if removed before.
Platform Cab
1. Remove the four screws from the lens.
2. Remove lens from the aperture.
3. Push bulb into socket slightly, rotate anticlockwise, remove and
renew bulb.
Turn light ( 1)
Brake light ( 2)
Tail light ( 3)
Reversing light ( 4)
Rear fog light, may be on one side
only ( 5)
4. Install lens in aperture and replace the four screws.
Page 240 of 289
238Vehicle careTyre deflation detection
system
The tyre deflation detection systemcontinually checks the rotation speed
of all four wheels and warns on low
tyre pressure condition once vehicle
is driving. This is achieved by
comparing tyre rolling circumference
with reference values and further
signals.
If a tyre loses pressure the control
indicator q illuminates, a warning
chime is given and a warning
message is displayed in the Driver
Information Centre.
In this case reduce speed, avoid
sharp cornering and strong braking.
Stop at next safe opportunity and
check tyre pressure.
Control indicator q 3 113.
After adjusting tyre pressure initialise
system to extinguish the control
indicator and restart system.Caution
Deflation detection system warns
just about low tyre pressure
condition and does not replace
regular tyre maintenance by the
driver.
In case of a system malfunction, the
control indicators q and R
appear at the same time or a
message is displayed in the Driver
Information Centre. Set correct tyre
pressure and reinitialise system. If the
failure continues to be displayed,
contact a workshop. The system is
inoperable when ABS or ESC has a
malfunction or a temporary spare
wheel is used. Once the road tyre has
been refitted, check the tyre pressure with cold tyres and initialise the
system.
System initialisation
After tyre pressure correction or
wheel change, the system must be
initialised to learn new circumference reference values:
1. Always ensure that all four tyres have correct tyre pressure
3 271.
2. Apply parking brake. 3. Start the initialisation procedure:
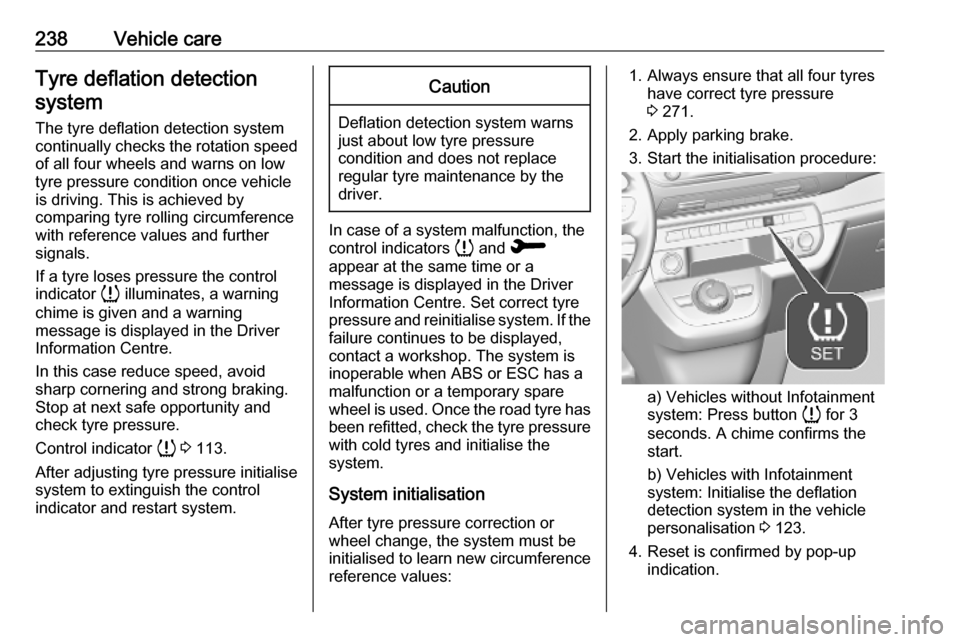
a) Vehicles without Infotainment
system: Press button q for 3
seconds. A chime confirms the
start.
b) Vehicles with Infotainment
system: Initialise the deflation
detection system in the vehicle
personalisation 3 123.
4. Reset is confirmed by pop-up indication.
Page 242 of 289
240Vehicle careWheel coversWheel covers and tyres that are
factory approved for the respective
vehicle and comply with all of the
relevant wheel and tyre combination
requirements must be used.
If the wheel covers and tyres used are
not factory approved, the tyres must
not have a rim protection ridge.
Wheel covers must not impair brake
cooling.9 Warning
Use of unsuitable tyres or wheel
covers could lead to sudden
pressure loss and thereby
accidents.
Vehicles with steel wheels: When
using locking wheel nuts, do not
attach wheel covers.
Tyre chains
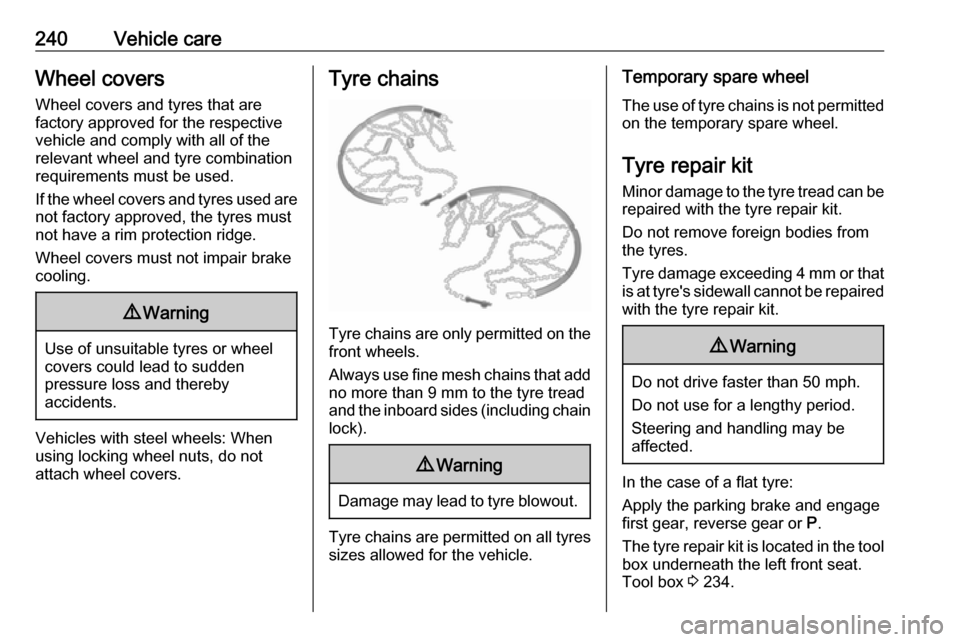
Tyre chains are only permitted on the
front wheels.
Always use fine mesh chains that add no more than 9 mm to the tyre tread
and the inboard sides (including chain
lock).
9 Warning
Damage may lead to tyre blowout.
Tyre chains are permitted on all tyres
sizes allowed for the vehicle.
Temporary spare wheel
The use of tyre chains is not permitted on the temporary spare wheel.
Tyre repair kit
Minor damage to the tyre tread can be
repaired with the tyre repair kit.
Do not remove foreign bodies from
the tyres.
Tyre damage exceeding 4 mm or that
is at tyre's sidewall cannot be repaired with the tyre repair kit.9 Warning
Do not drive faster than 50 mph.
Do not use for a lengthy period.
Steering and handling may be
affected.
In the case of a flat tyre:
Apply the parking brake and engage
first gear, reverse gear or P.
The tyre repair kit is located in the tool
box underneath the left front seat.
Tool box 3 234.