Brake switch VAUXHALL VIVARO C 2020 Owner's Guide
[x] Cancel search | Manufacturer: VAUXHALL, Model Year: 2020, Model line: VIVARO C, Model: VAUXHALL VIVARO C 2020Pages: 289, PDF Size: 10.16 MB
Page 191 of 289

Driving and operating189FunctionalityActive emergency braking is
equipped with a front camera and
operates in forward gear above
walking speed up to 53 mph. The
system detects stationary vehicles
only if the speed does not exceed
50 mph. Pedestrians are detected
only if the speed does not exceed
37 mph.
A precondition is that active
emergency braking is not deactivated
in the vehicle personalisation menu
3 123.
If deactivated, m illuminates in the
instrument cluster and a warning
message is displayed in the Driver
Information Centre.
If the system has been deactivated, it
is reactivated automatically the next
time the ignition is switched on.
The system includes: ● emergency automatic braking
● forward collision alert
● front pedestrian protectionEmergency automatic braking
After activation of brake preparation
system and just before the imminent
collision, this function automatically
applies limited braking to reduce the
impact speed of the collision or
prohibit a crash.
If active emergency braking is
applied, m flashes in the instrument
cluster.
Depending on the situation, the
vehicle may automatically brake
moderately or hard.
Front automatic braking can only
occur if a vehicle or a pedestrian
ahead is detected.
Forward collision alert 3 186
Front pedestrian protection 3 190
Below a speed of 19 mph, emergency automatic braking may slow down thevehicle to a complete stop. If the
speed exceeds 19 mph, emergency
automatic braking reduces the speed.
However, the driver must apply the
brake.Emergency automatic braking may
slow the vehicle to a complete stop to try to avoid a potential crash. If the
vehicle comes to a complete stop,
automatic braking is maintained for
up to 2 seconds.
● Automatic transmission: If the vehicle comes to a complete
stop, keep the brake pedal
depressed to prevent the vehicle
from starting off again.
● Manual transmission: If the vehicle comes to a completestop, the engine may stall.
Operation of the function may be felt
by a slight vibration in the brake
pedal.9 Warning
Emergency automatic braking is
an emergency crash preparation
feature and is not designed to
avoid crashes. Do not rely on the
system to brake the vehicle.
Emergency automatic braking will
not brake outside of its operating
Page 202 of 289

200Driving and operatingSystem limitations
The rear view camera may not
operate properly when:
● the surrounding is dark
● the beam of headlights is shining
directly into the camera lenses
● weather limits visibility such as fog, rain or snow
● the camera lenses are blocked by snow, ice, slush, mud, dirt.Clean the lense, rinse with water,
and wipe with a soft cloth
● the tailgate will be opened
● the vehicle is towing an electrically connected trailer,
bicycle carrier etc.
● the vehicle had a rear end accident
● there are extreme temperature changes
Lane departure warning
The lane departure warning system
observes the lane markings between
which the vehicle is driving via a front camera. The system detects lanechanges and warns the driver in the
event of an unintended lane change
via visual and acoustic signals.
Criteria for the detection of an
unintended lane change are:
● no operation of turn lights
● no brake pedal operation
● no active acceleration
If the driver is active, no warning will
be issued.
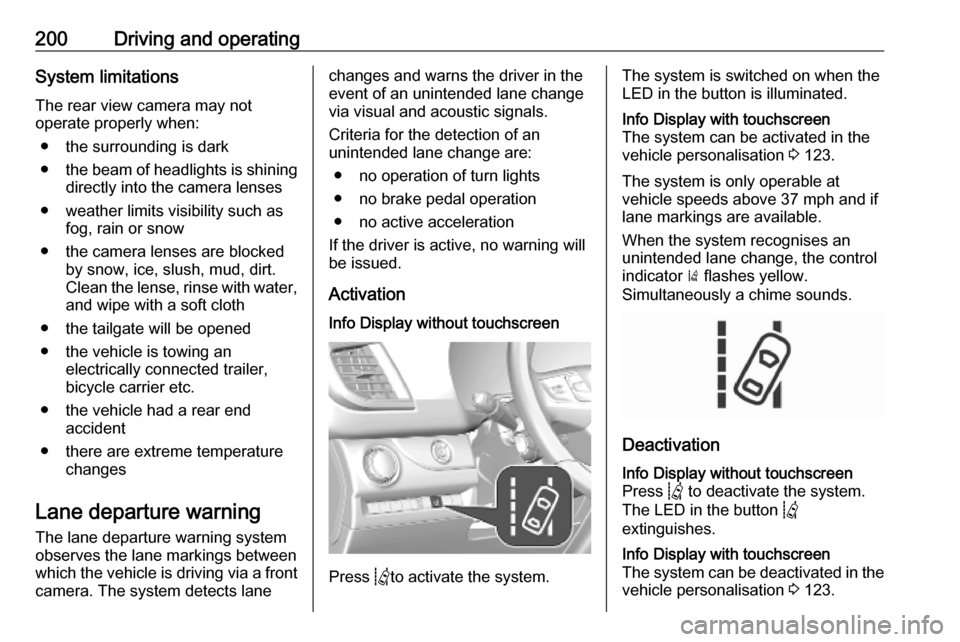
ActivationInfo Display without touchscreen
Press Qto activate the system.
The system is switched on when the
LED in the button is illuminated.Info Display with touchscreen
The system can be activated in the
vehicle personalisation 3 123.
The system is only operable at
vehicle speeds above 37 mph and if
lane markings are available.
When the system recognises an
unintended lane change, the control
indicator ) flashes yellow.
Simultaneously a chime sounds.
Deactivation
Info Display without touchscreen
Press Q to deactivate the system.
The LED in the button Q
extinguishes.Info Display with touchscreen
The system can be deactivated in the
vehicle personalisation 3 123.
Page 218 of 289

216Vehicle careBrakesIn the event of minimum thickness of
the brake lining, a squealing noise
sounds during braking.
Continued driving is possible but
have the brake lining replaced as
soon as possible.
Once new brake linings are installed,
do not brake unnecessarily hard for
the first few journeys.
Brake fluid9 Warning
Brake fluid is poisonous and
corrosive. Avoid contact with eyes, skin, fabrics and painted surfaces.
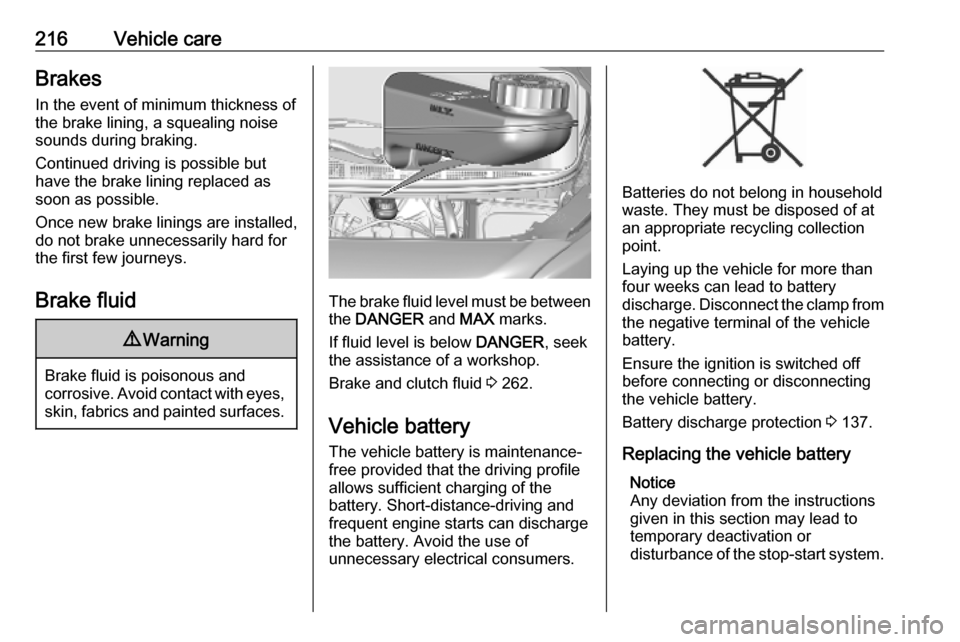
The brake fluid level must be betweenthe DANGER and MAX marks.
If fluid level is below DANGER, seek
the assistance of a workshop.
Brake and clutch fluid 3 262.
Vehicle battery
The vehicle battery is maintenance-
free provided that the driving profile
allows sufficient charging of the
battery. Short-distance-driving and
frequent engine starts can discharge
the battery. Avoid the use of
unnecessary electrical consumers.
Batteries do not belong in household
waste. They must be disposed of at
an appropriate recycling collection
point.
Laying up the vehicle for more than
four weeks can lead to battery
discharge. Disconnect the clamp from the negative terminal of the vehicle
battery.
Ensure the ignition is switched off
before connecting or disconnecting
the vehicle battery.
Battery discharge protection 3 137.
Replacing the vehicle battery Notice
Any deviation from the instructions
given in this section may lead to
temporary deactivation or
disturbance of the stop-start system.
Page 252 of 289

250Vehicle care● A discharged vehicle battery canalready freeze at a temperature
of 0 °C. Defrost the frozen battery before connecting jump leads.
● Wear eye protection and protective clothing when
handling a battery.
● Use a booster battery with the same voltage (12 V). Its capacity
(Ah) must not be much less than
that of the discharged vehicle
battery.
● Use jump leads with insulated terminals and a cross section of
at least 16 mm 2
(25 mm 2
for
diesel engines).
● Do not disconnect the discharged
vehicle battery from the vehicle.
● Switch off all unnecessary electrical consumers.
● Do not lean over the vehicle battery during jump starting.
● Do not allow the terminals of one
lead to touch those of the other
lead.● The vehicles must not come into contact with each other during
the jump starting process.
● Apply the parking brake, transmission in neutral,
automatic transmission in P.
Open the positive terminal protection
caps of both vehicle batteries.
Lead connection order: 1. Connect the red lead to the positive terminal of the booster
battery.
2. Connect the other end of the red lead to the positive terminal of the
discharged battery.
3. Connect the black lead to the negative terminal of the boosterbattery.
4. Connect the other end of the black
lead to a vehicle grounding point
of your vehicle in the engine
compartment.
Route the leads so that they cannot
catch on rotating parts in the engine
compartment.
To start the engine: 1. Start the engine of the vehicle providing the jump.
2. After 5 minutes, start the other engine. Start attempts should be
made for no longer than 15
seconds at an interval of 1 minute.
3. Allow both engines to idle for approx. three minutes with the
leads connected.
4. Switch on electrical consumers e.g. headlights, heated rear
window of the vehicle receiving
the jump start.
5. Reverse above sequence exactly when removing leads.
Page 253 of 289

Vehicle care251Towing
Towing the vehicle
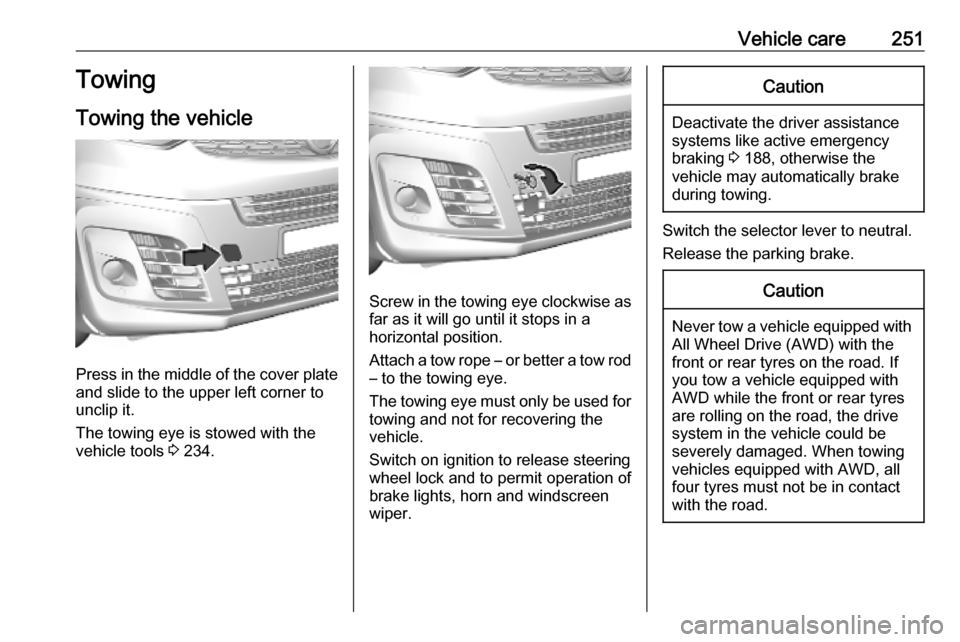
Press in the middle of the cover plate
and slide to the upper left corner to
unclip it.
The towing eye is stowed with the vehicle tools 3 234.
Screw in the towing eye clockwise as
far as it will go until it stops in a
horizontal position.
Attach a tow rope – or better a tow rod
– to the towing eye.
The towing eye must only be used for
towing and not for recovering the
vehicle.
Switch on ignition to release steering
wheel lock and to permit operation of
brake lights, horn and windscreen
wiper.
Caution
Deactivate the driver assistance
systems like active emergency
braking 3 188, otherwise the
vehicle may automatically brake during towing.
Switch the selector lever to neutral.
Release the parking brake.
Caution
Never tow a vehicle equipped with All Wheel Drive (AWD) with the
front or rear tyres on the road. If
you tow a vehicle equipped with
AWD while the front or rear tyres
are rolling on the road, the drive
system in the vehicle could be
severely damaged. When towing
vehicles equipped with AWD, all
four tyres must not be in contact
with the road.
Page 254 of 289

252Vehicle careCaution
Drive slowly. Do not drive jerkily.
Excessive tractive force can
damage the vehicle.
When the engine is not running,
considerably more force is needed to
brake and steer.
To prevent the entry of exhaust gases from the towing vehicle, switch on the
air recirculation and close the
windows.
Vehicles with automatic transmission: The vehicle must be towed facing
forwards, not faster than 50 mph nor further than 60 miles. In all other
cases and when the transmission is
defective, the front axle must be
raised off the ground.
Seek the assistance of a workshop. After towing, unscrew the towing eye.
Insert cap with the flange into the
recess and fix cap by pushing.
Towing another vehicle
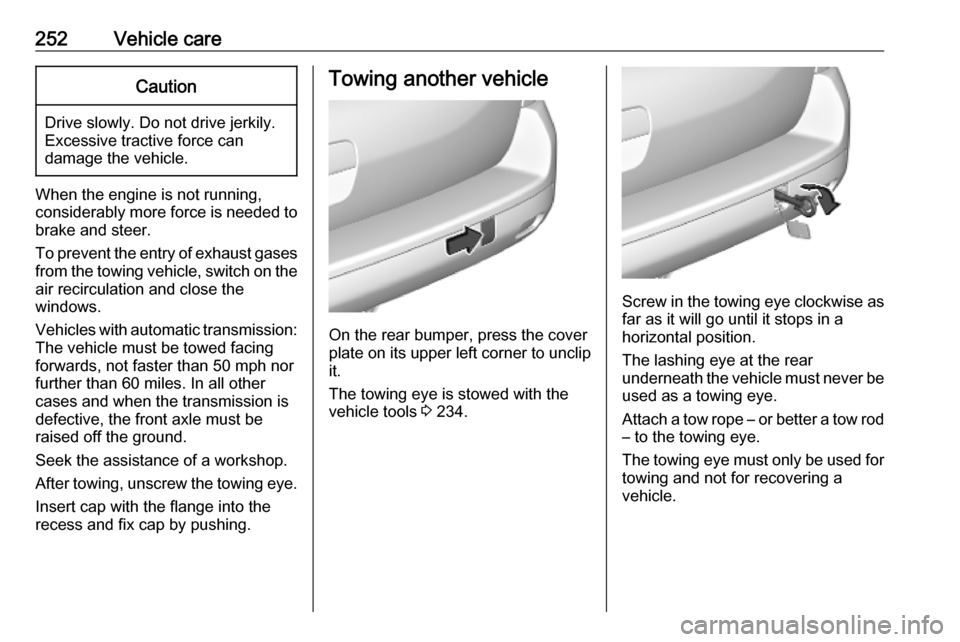
On the rear bumper, press the cover
plate on its upper left corner to unclip it.
The towing eye is stowed with the
vehicle tools 3 234.
Screw in the towing eye clockwise as
far as it will go until it stops in a
horizontal position.
The lashing eye at the rear
underneath the vehicle must never be used as a towing eye.
Attach a tow rope – or better a tow rod
– to the towing eye.
The towing eye must only be used for towing and not for recovering a
vehicle.
Page 286 of 289

284Headlight flash ........................... 131
Headlight range adjustment ......131
Headlights................................... 129 Headlights when driving abroad 132
Head restraint adjustment .............8
Head restraints ............................ 46
Head-up display.......................... 120 Heated mirrors ............................. 39
Heated rear window ..................... 43
Heated windscreen .......................44
Heating ........................................ 51
Heating and ventilation system . 138
High beam ......................... 114, 130
High beam assist ................114, 130
Hill start assist ........................... 170
Hinged doors ................................ 32
Horn ....................................... 13, 94
I
Identification plate .....................264
Ignition switch positions .............152
Immobiliser .................................. 38
Indicators .................................... 104
Info Display ................................. 119
Instrument cluster ......................100
Instrument panel fuse box .........231
Instrument panel illumination control .................................... 134
Instrument panel overview ........... 10
Interior care ............................... 255Interior lighting............................ 134
Interior lights ...................... 134, 230
Interior mirror Rear view camera display .......199
Interior mirrors .............................. 40
Introduction .................................... 3
J Jump starting ............................. 249
K Keys ............................................. 21
Keys, locks ................................... 21
L
Lane departure warning .....112, 200
Lashing eyes ............................... 81
LED headlights ........................... 114
Lighting features .........................136
Light switch ................................ 129
load compartment .......................134
Load compartment ................32, 80
Load compartment cover .............80
load compartment lighting ..........134
Loading ......................................... 50
Loading information .....................90
Low beam ................................... 114
Low fuel ..................................... 113M
Malfunction indicator light ..........110
Manual anti-dazzle ......................40
Manual mode ............................. 166
Manual seat adjustment ...............47
Manual transmission .................. 167
Massage ....................................... 52
mechanical child lock.................... 42 Mirror adjustment ........................... 9
Misted light covers .....................134
Multimedia .................................. 123
Multimedia Navi .......................... 123
N
New vehicle running-in ..............152
Number plate light .....................229
O Object detection systems ...........191
Odometer ................................... 105
Oil, engine .......................... 262, 266
Outside temperature ....................96
Overrun cut-off ........................... 156
P Panoramic roof ............................. 45
Panoramic view system ..............196
Parking ................................ 20, 159
Parking assist ............................ 191
Parking brake ..................... 111, 169
Parking heater ............................ 146