Reverse VAUXHALL VIVARO C 2020 Owner's Guide
[x] Cancel search | Manufacturer: VAUXHALL, Model Year: 2020, Model line: VIVARO C, Model: VAUXHALL VIVARO C 2020Pages: 289, PDF Size: 10.16 MB
Page 229 of 289

Vehicle care227
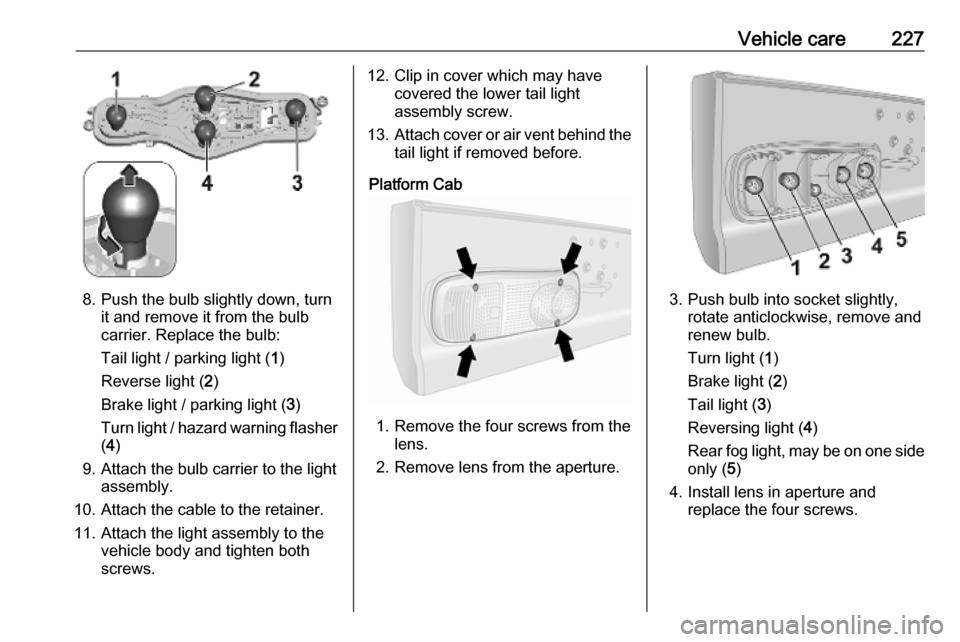
8. Push the bulb slightly down, turnit and remove it from the bulb
carrier. Replace the bulb:
Tail light / parking light ( 1)
Reverse light ( 2)
Brake light / parking light ( 3)
Turn light / hazard warning flasher
( 4 )
9. Attach the bulb carrier to the light assembly.
10. Attach the cable to the retainer.
11. Attach the light assembly to the vehicle body and tighten both
screws.
12. Clip in cover which may have covered the lower tail light
assembly screw.
13. Attach cover or air vent behind the
tail light if removed before.
Platform Cab
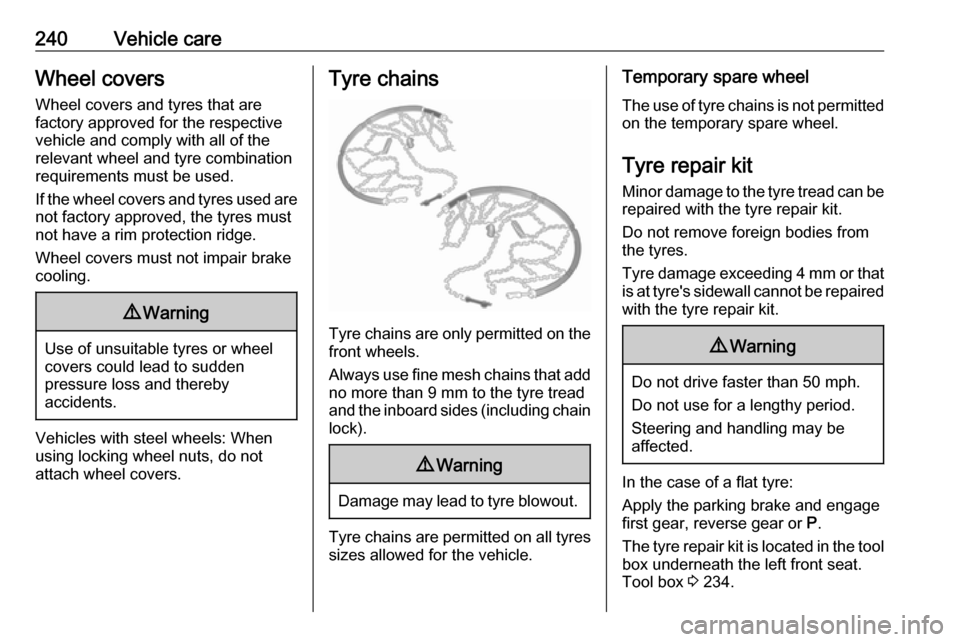
1. Remove the four screws from the lens.
2. Remove lens from the aperture.
3. Push bulb into socket slightly, rotate anticlockwise, remove and
renew bulb.
Turn light ( 1)
Brake light ( 2)
Tail light ( 3)
Reversing light ( 4)
Rear fog light, may be on one side
only ( 5)
4. Install lens in aperture and replace the four screws.
Page 231 of 289

Vehicle care229Wrap a cloth around the tip of a
slot screwdriver to prevent paint
damage. Remove the inner cover
or air vent with the screwdriver.
3. Push the brake light assembly carefully out through the recess.
4. Detach the cable from the retainer
in the light assembly.
5. Remove the socket of the defect bulb by turning it a quarter turn
anti-clockwise.
6. Renew bulb.
7. Install brake light assembly like explained above, in reversed
order.
Number plate light
1. a) vehicles with tailgate:
Insert a thin screwdriver, e.g., in
one of the recesses of the cover and push it outwards to unclip it.
Remove the cover.
b) vehicles with hinged doors:
Insert a screwdriver in one of the
recesses of the cover and lever it
out. Remove the cover.
Page 242 of 289

240Vehicle careWheel coversWheel covers and tyres that are
factory approved for the respective
vehicle and comply with all of the
relevant wheel and tyre combination
requirements must be used.
If the wheel covers and tyres used are
not factory approved, the tyres must
not have a rim protection ridge.
Wheel covers must not impair brake
cooling.9 Warning
Use of unsuitable tyres or wheel
covers could lead to sudden
pressure loss and thereby
accidents.
Vehicles with steel wheels: When
using locking wheel nuts, do not
attach wheel covers.
Tyre chains
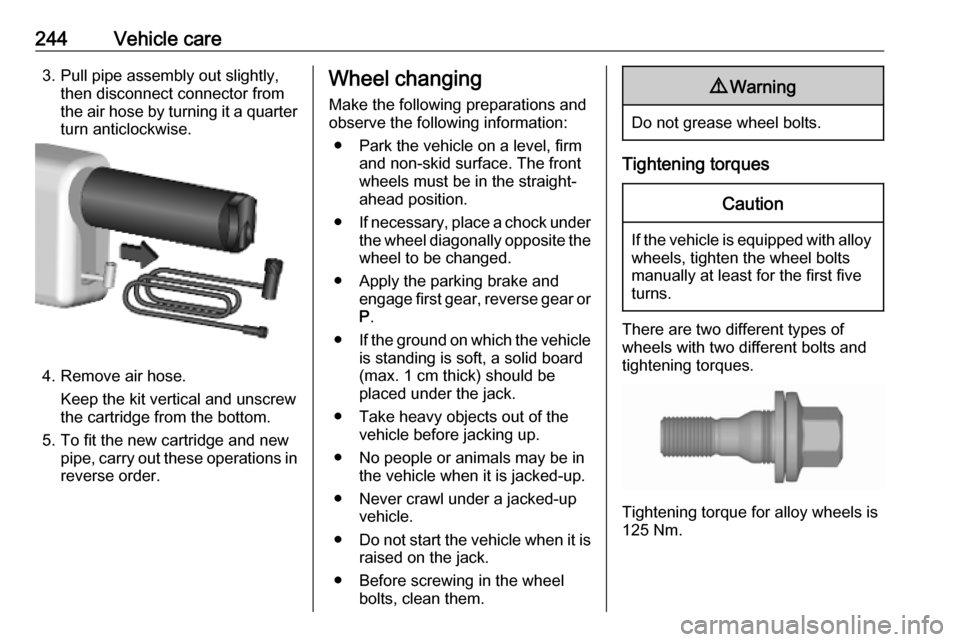
Tyre chains are only permitted on the
front wheels.
Always use fine mesh chains that add no more than 9 mm to the tyre tread
and the inboard sides (including chain
lock).
9 Warning
Damage may lead to tyre blowout.
Tyre chains are permitted on all tyres
sizes allowed for the vehicle.
Temporary spare wheel
The use of tyre chains is not permitted on the temporary spare wheel.
Tyre repair kit
Minor damage to the tyre tread can be
repaired with the tyre repair kit.
Do not remove foreign bodies from
the tyres.
Tyre damage exceeding 4 mm or that
is at tyre's sidewall cannot be repaired with the tyre repair kit.9 Warning
Do not drive faster than 50 mph.
Do not use for a lengthy period.
Steering and handling may be
affected.
In the case of a flat tyre:
Apply the parking brake and engage
first gear, reverse gear or P.
The tyre repair kit is located in the tool
box underneath the left front seat.
Tool box 3 234.
Page 246 of 289

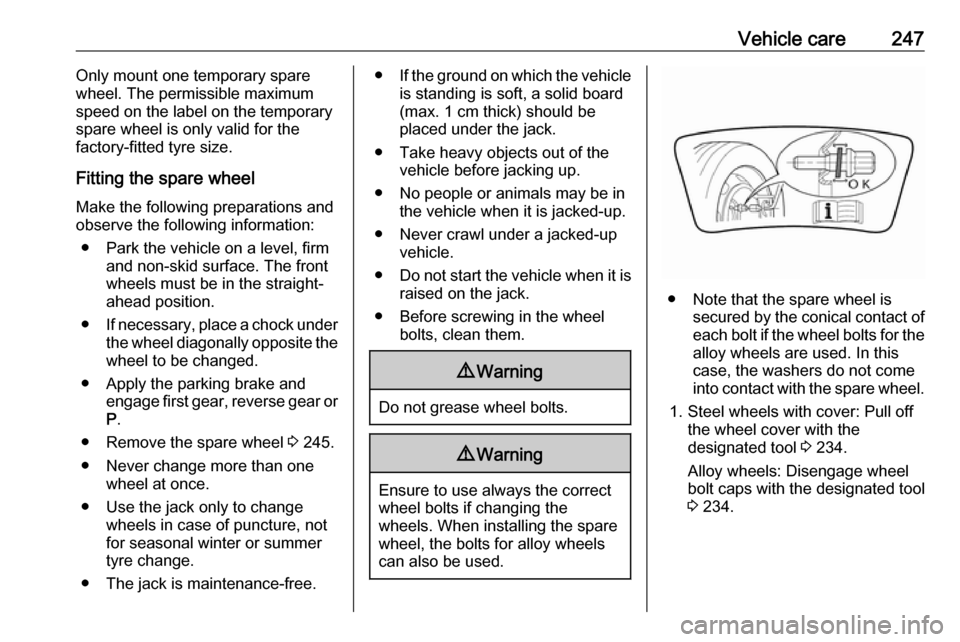
244Vehicle care3. Pull pipe assembly out slightly,then disconnect connector from
the air hose by turning it a quarter
turn anticlockwise.
4. Remove air hose.
Keep the kit vertical and unscrew
the cartridge from the bottom.
5. To fit the new cartridge and new pipe, carry out these operations in
reverse order.
Wheel changing
Make the following preparations and
observe the following information:
● Park the vehicle on a level, firm and non-skid surface. The front
wheels must be in the straight-
ahead position.
● If necessary, place a chock under
the wheel diagonally opposite the
wheel to be changed.
● Apply the parking brake and engage first gear, reverse gear or
P .
● If the ground on which the vehicle
is standing is soft, a solid board
(max. 1 cm thick) should be
placed under the jack.
● Take heavy objects out of the vehicle before jacking up.
● No people or animals may be in the vehicle when it is jacked-up.
● Never crawl under a jacked-up vehicle.
● Do not start the vehicle when it is
raised on the jack.
● Before screwing in the wheel bolts, clean them.9Warning
Do not grease wheel bolts.
Tightening torques
Caution
If the vehicle is equipped with alloy
wheels, tighten the wheel bolts
manually at least for the first five
turns.
There are two different types of
wheels with two different bolts and tightening torques.
Tightening torque for alloy wheels is
125 Nm.
Page 249 of 289

Vehicle care247Only mount one temporary spare
wheel. The permissible maximum
speed on the label on the temporary
spare wheel is only valid for the
factory-fitted tyre size.
Fitting the spare wheel
Make the following preparations and
observe the following information:
● Park the vehicle on a level, firm and non-skid surface. The front
wheels must be in the straight- ahead position.
● If necessary, place a chock under
the wheel diagonally opposite the wheel to be changed.
● Apply the parking brake and engage first gear, reverse gear or
P .
● Remove the spare wheel 3 245.
● Never change more than one wheel at once.
● Use the jack only to change wheels in case of puncture, not
for seasonal winter or summer
tyre change.
● The jack is maintenance-free.● If the ground on which the vehicle
is standing is soft, a solid board
(max. 1 cm thick) should be
placed under the jack.
● Take heavy objects out of the vehicle before jacking up.
● No people or animals may be in the vehicle when it is jacked-up.
● Never crawl under a jacked-up vehicle.
● Do not start the vehicle when it is
raised on the jack.
● Before screwing in the wheel bolts, clean them.9Warning
Do not grease wheel bolts.
9Warning
Ensure to use always the correct
wheel bolts if changing the
wheels. When installing the spare
wheel, the bolts for alloy wheels can also be used.
● Note that the spare wheel is secured by the conical contact ofeach bolt if the wheel bolts for the
alloy wheels are used. In this
case, the washers do not come
into contact with the spare wheel.
1. Steel wheels with cover: Pull off the wheel cover with the
designated tool 3 234.
Alloy wheels: Disengage wheel
bolt caps with the designated tool
3 234.
Page 252 of 289

250Vehicle care● A discharged vehicle battery canalready freeze at a temperature
of 0 °C. Defrost the frozen battery before connecting jump leads.
● Wear eye protection and protective clothing when
handling a battery.
● Use a booster battery with the same voltage (12 V). Its capacity
(Ah) must not be much less than
that of the discharged vehicle
battery.
● Use jump leads with insulated terminals and a cross section of
at least 16 mm 2
(25 mm 2
for
diesel engines).
● Do not disconnect the discharged
vehicle battery from the vehicle.
● Switch off all unnecessary electrical consumers.
● Do not lean over the vehicle battery during jump starting.
● Do not allow the terminals of one
lead to touch those of the other
lead.● The vehicles must not come into contact with each other during
the jump starting process.
● Apply the parking brake, transmission in neutral,
automatic transmission in P.
Open the positive terminal protection
caps of both vehicle batteries.
Lead connection order: 1. Connect the red lead to the positive terminal of the booster
battery.
2. Connect the other end of the red lead to the positive terminal of the
discharged battery.
3. Connect the black lead to the negative terminal of the boosterbattery.
4. Connect the other end of the black
lead to a vehicle grounding point
of your vehicle in the engine
compartment.
Route the leads so that they cannot
catch on rotating parts in the engine
compartment.
To start the engine: 1. Start the engine of the vehicle providing the jump.
2. After 5 minutes, start the other engine. Start attempts should be
made for no longer than 15
seconds at an interval of 1 minute.
3. Allow both engines to idle for approx. three minutes with the
leads connected.
4. Switch on electrical consumers e.g. headlights, heated rear
window of the vehicle receiving
the jump start.
5. Reverse above sequence exactly when removing leads.