side door VAUXHALL VIVARO C 2020 Owner's Guide
[x] Cancel search | Manufacturer: VAUXHALL, Model Year: 2020, Model line: VIVARO C, Model: VAUXHALL VIVARO C 2020Pages: 289, PDF Size: 10.16 MB
Page 117 of 289

Instruments and controls115Forward collision alertI is displayed in the Driver
Information Centre when the distance to the vehicle ahead gets to small.
Forward collision alert 3 186.
Side blind spot alert
T illuminates green.
The system is active 3 194.
Active emergency braking m illuminates or flashes yellow.
Illuminates
The system has been deactivated or
a fault has been detected.
Additionally, a warning message is
displayed in the Driver Information
Centre.
Check the reason of the deactivation
3 188 and in case of a system fault,
seek the assistance of a workshop.
Flashes
The system is actively engaged.Depending on the situation, the
vehicle may automatically brake
moderately or hard.
Forward collision alert 3 186.
Front pedestrian protection 3 190.
Active emergency braking 3 188.
Speed limiter
5 illuminates in the Driver
Information Centre when speed
limiter is active. Set speed is indicated
alongside 5 symbol.
Speed limiter 3 176.
Door open
O illuminates red.
A door, the tailgate or the tailgate
window is open.
If the vehicle is equipped with hinged
doors, O is not illuminated when it is
open.Displays
Driver Information Centre
The Driver Information Centre is
located in the instrument cluster.
Driver Information Centre indicates: ● overall and trip odometer
● digital speed indication
● trip / fuel information menu
● gear shift indication
● service information
● vehicle and warning messages
● driver assistance messages
● pop-up messages
Selecting menus and functions There are several ways to toggle
between the respective menus and
functions:
Page 126 of 289
124Instruments and controls●Comfort
Ambient lighting : Adjusts the
brightness of the ambient
lighting.
Rear wiper in reverse gear :
Activates or deactivates
automatic switching on of the
rear window wiper when reverse
gear is engaged.
● Vehicle
Unlocking boot only : Activation /
deactivation.
Plip action : Driver / all doors.
● Security
Fatigue Detection system :
Activates or deactivates the
driver drowsiness system.
● Driving assistance
Speed recommendation :
Activates or deactivates the
function.Multimedia
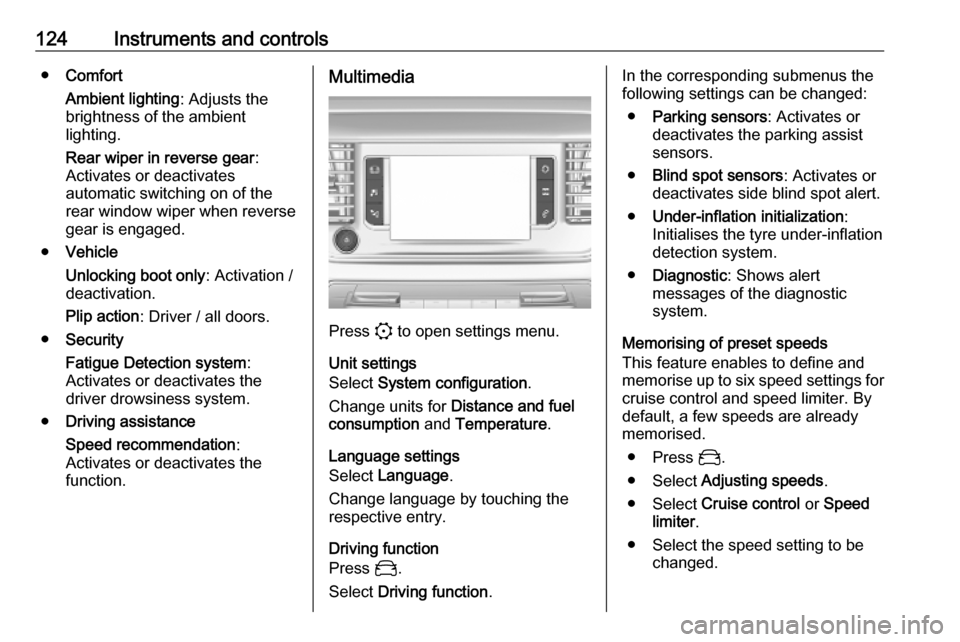
Press : to open settings menu.
Unit settings
Select System configuration .
Change units for Distance and fuel
consumption and Temperature .
Language settings
Select Language .
Change language by touching the
respective entry.
Driving function
Press _.
Select Driving function .
In the corresponding submenus the
following settings can be changed:
● Parking sensors : Activates or
deactivates the parking assist sensors.
● Blind spot sensors : Activates or
deactivates side blind spot alert.
● Under-inflation initialization :
Initialises the tyre under-inflation
detection system.
● Diagnostic : Shows alert
messages of the diagnostic
system.
Memorising of preset speeds
This feature enables to define and
memorise up to six speed settings for
cruise control and speed limiter. By
default, a few speeds are already
memorised.
● Press _.
● Select Adjusting speeds .
● Select Cruise control or Speed
limiter .
● Select the speed setting to be changed.
Page 128 of 289
126Instruments and controlsDriving functions
Press _.
Select Driving functions .
In the corresponding submenus the
following settings can be changed:
● Automatic headlamp dipping :
Activates or deactivates high
beam assist.
● Lane departure warning system :
Activates or deactivates lane
departure warning.
● Stop and start : Activates or
deactivates stop-start system
● Cruise control active : Activates or
deactivates adaptive cruise
control.
● Parking sensors : Activates or
deactivates the parking assist
sensors.
● Blind spot sensors : Activates or
deactivates side blind spot alert.
● Traction control : Activates or
deactivates Traction Control system.● Under-inflation initialization :
Initialises the tyre under-inflation
detection system.
● Diagnostic : Shows alert
messages of the diagnostic
system.
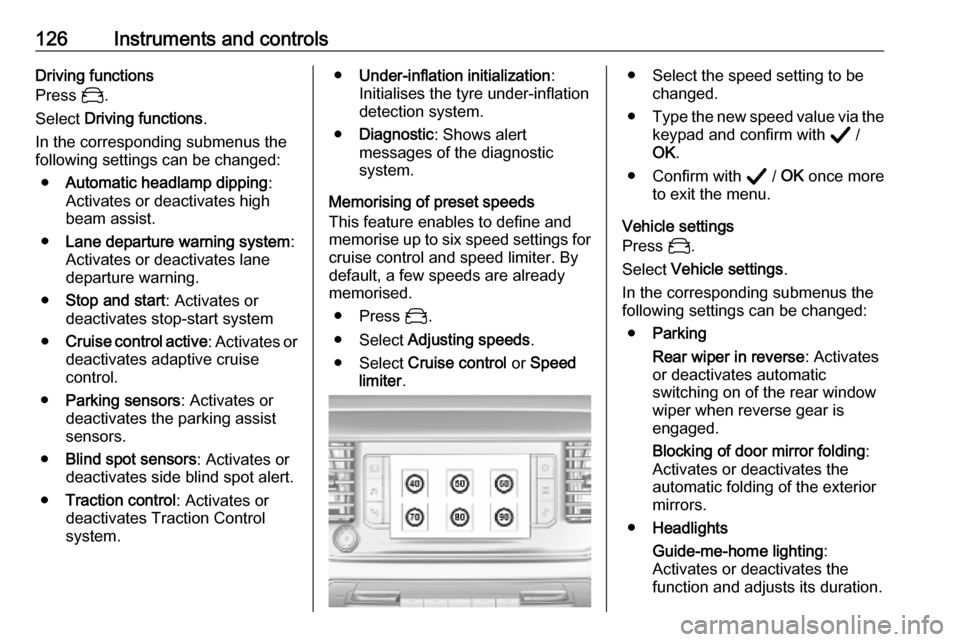
Memorising of preset speeds
This feature enables to define and
memorise up to six speed settings for
cruise control and speed limiter. By
default, a few speeds are already
memorised.
● Press _.
● Select Adjusting speeds .
● Select Cruise control or Speed
limiter .● Select the speed setting to be
changed.
● Type the new speed value via the
keypad and confirm with A /
OK .
● Confirm with A / OK once more
to exit the menu.
Vehicle settings
Press _.
Select Vehicle settings .
In the corresponding submenus the
following settings can be changed:
● Parking
Rear wiper in reverse : Activates
or deactivates automatic
switching on of the rear window
wiper when reverse gear is
engaged.
Blocking of door mirror folding :
Activates or deactivates the
automatic folding of the exterior
mirrors.
● Headlights
Guide-me-home lighting :
Activates or deactivates the
function and adjusts its duration.
Page 141 of 289
Climate control139Adjust the air flow by turning ý to the
desired speed.clockwise:increaseanticklockwise:decrease
Air recirculation system q
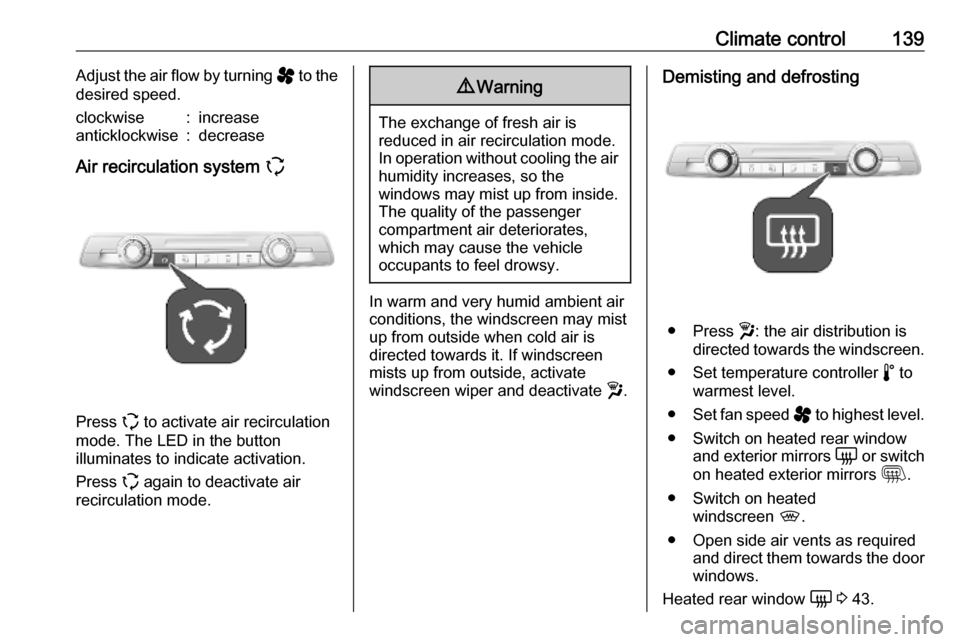
Press q to activate air recirculation
mode. The LED in the button
illuminates to indicate activation.
Press q again to deactivate air
recirculation mode.
9 Warning
The exchange of fresh air is
reduced in air recirculation mode.
In operation without cooling the air humidity increases, so the
windows may mist up from inside.
The quality of the passenger
compartment air deteriorates,
which may cause the vehicle
occupants to feel drowsy.
In warm and very humid ambient air conditions, the windscreen may mist
up from outside when cold air is
directed towards it. If windscreen
mists up from outside, activate
windscreen wiper and deactivate w.
Demisting and defrosting
● Press w: the air distribution is
directed towards the windscreen.
● Set temperature controller ñ to
warmest level.
● Set fan speed ý to highest level.
● Switch on heated rear window and exterior mirrors è or switch
on heated exterior mirrors m.
● Switch on heated windscreen ,.
● Open side air vents as required and direct them towards the doorwindows.
Heated rear window è 3 43.
Page 142 of 289
140Climate controlHeated exterior mirrors m 3 39.
Heated windscreen 9 3 44.
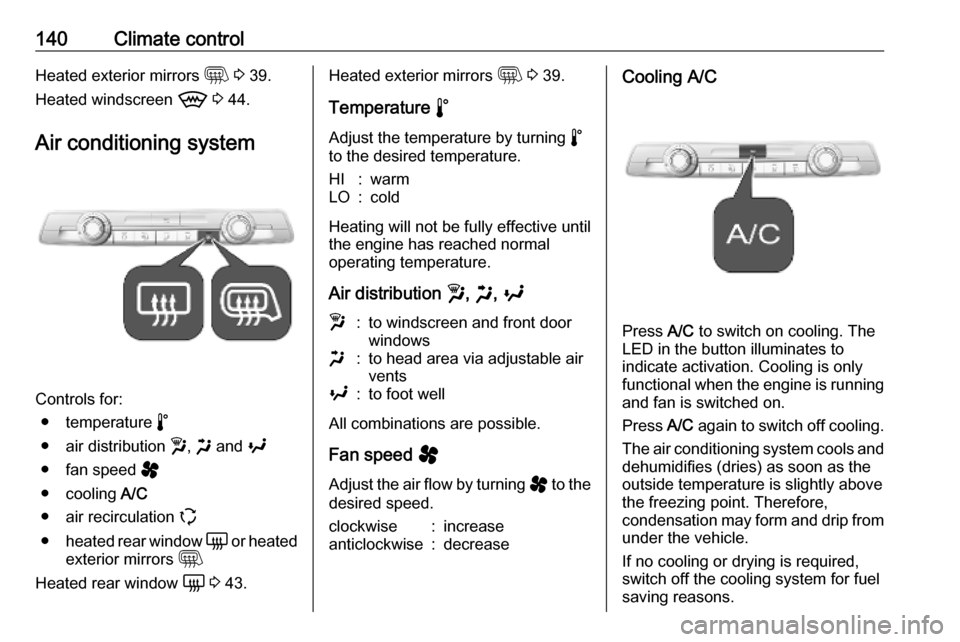
Air conditioning system
Controls for: ● temperature ñ
● air distribution w, x and y
● fan speed ý
● cooling A/C
● air recirculation q
● heated rear window è or heated
exterior mirrors m
Heated rear window è 3 43.
Heated exterior mirrors m 3 39.
Temperature ñ
Adjust the temperature by turning ñ
to the desired temperature.HI:warmLO:cold
Heating will not be fully effective until
the engine has reached normal
operating temperature.
Air distribution w, x , y
w:to windscreen and front door
windowsx:to head area via adjustable air
ventsy:to foot well
All combinations are possible.
Fan speed ý
Adjust the air flow by turning ý to the
desired speed.
clockwise:increaseanticlockwise:decreaseCooling A/C
Press A/C to switch on cooling. The
LED in the button illuminates to
indicate activation. Cooling is only
functional when the engine is running and fan is switched on.
Press A/C again to switch off cooling.
The air conditioning system cools and
dehumidifies (dries) as soon as the
outside temperature is slightly above
the freezing point. Therefore,
condensation may form and drip from
under the vehicle.
If no cooling or drying is required,
switch off the cooling system for fuel
saving reasons.
Page 144 of 289
142Climate control● Switch on cooling A/C, if
required.
● Switch on heated rear window è or heated exterior mirrors
m .
● Switch on heated windscreen 9 .
● Open side air vents as required and direct them towards the doorwindows.
Notice
If the settings for demisting and
defrosting are selected, an
Autostop may be inhibited.
If the settings for demisting and
defrosting are selected while the
engine is in an Autostop, the engine
will restart automatically. Stop-start
system 3 156.
Heated rear window è 3 43.
Heated exterior mirrors m 3 39.
Heated windscreen 9 3 44.
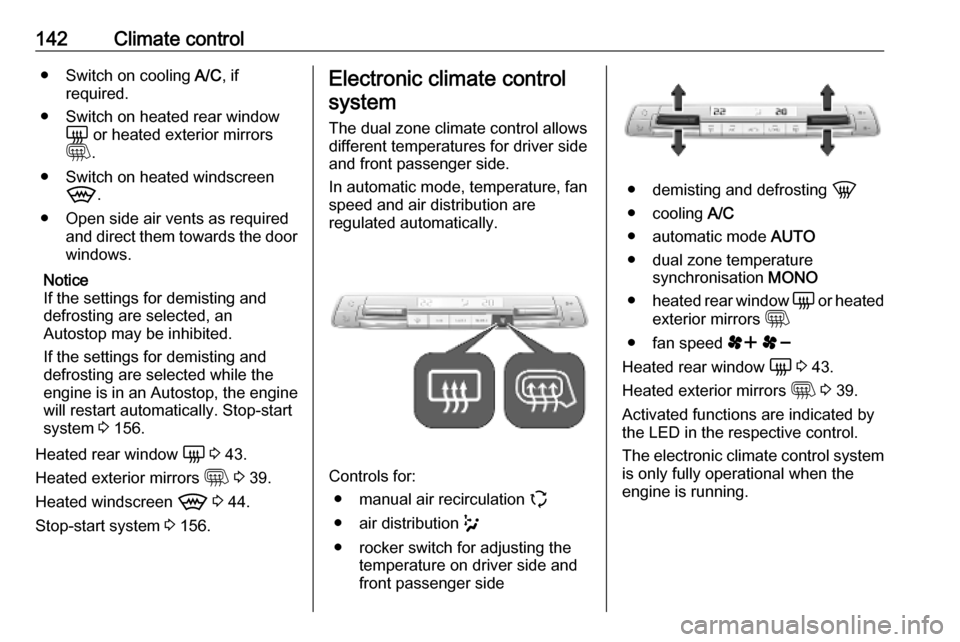
Stop-start system 3 156.Electronic climate control
system
The dual zone climate control allows
different temperatures for driver side
and front passenger side.
In automatic mode, temperature, fan
speed and air distribution are
regulated automatically.
Controls for:
● manual air recirculation q
● air distribution w
● rocker switch for adjusting the temperature on driver side and
front passenger side
● demisting and defrosting h
● cooling A/C
● automatic mode AUTO
● dual zone temperature synchronisation MONO
● heated rear window è or heated
exterior mirrors m
● fan speed r s
Heated rear window è 3 43.
Heated exterior mirrors m 3 39.
Activated functions are indicated by
the LED in the respective control.
The electronic climate control system
is only fully operational when the
engine is running.
Page 146 of 289
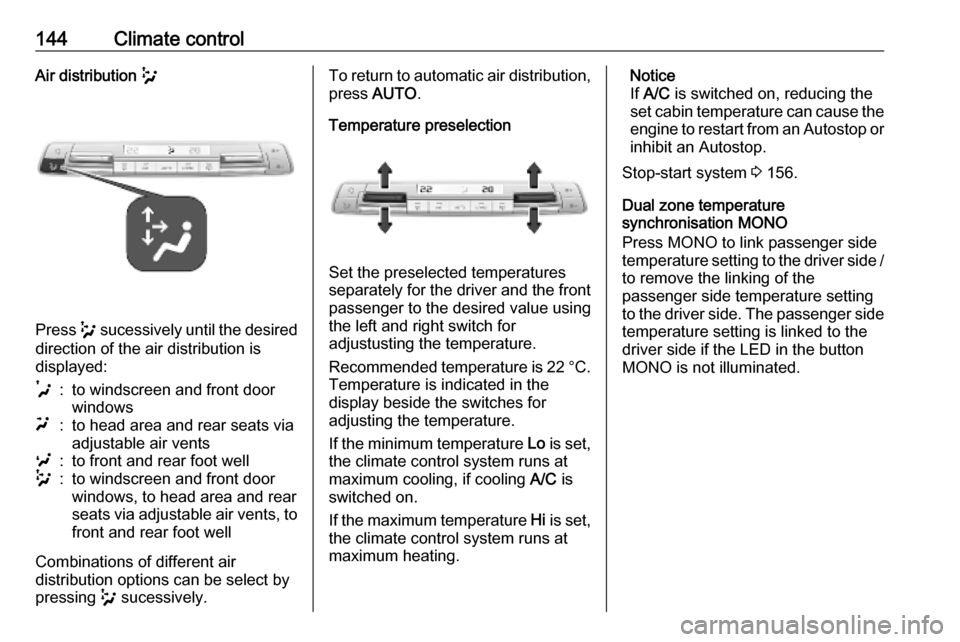
144Climate controlAir distribution w
Press w sucessively until the desired
direction of the air distribution is
displayed:
t:to windscreen and front door
windowsu:to head area and rear seats via
adjustable air ventsv:to front and rear foot wellw:to windscreen and front door
windows, to head area and rear
seats via adjustable air vents, to
front and rear foot well
Combinations of different air
distribution options can be select by
pressing w sucessively.
To return to automatic air distribution,
press AUTO .
Temperature preselection
Set the preselected temperatures
separately for the driver and the front
passenger to the desired value using
the left and right switch for
adjustusting the temperature.
Recommended temperature is 22 °C .
Temperature is indicated in the display beside the switches for
adjusting the temperature.
If the minimum temperature Lo is set,
the climate control system runs at maximum cooling, if cooling A/C is
switched on.
If the maximum temperature Hi is set,
the climate control system runs at
maximum heating.
Notice
If A/C is switched on, reducing the
set cabin temperature can cause the engine to restart from an Autostop or
inhibit an Autostop.
Stop-start system 3 156.
Dual zone temperature
synchronisation MONO
Press MONO to link passenger side
temperature setting to the driver side / to remove the linking of the
passenger side temperature setting
to the driver side. The passenger side temperature setting is linked to the
driver side if the LED in the button
MONO is not illuminated.
Page 155 of 289
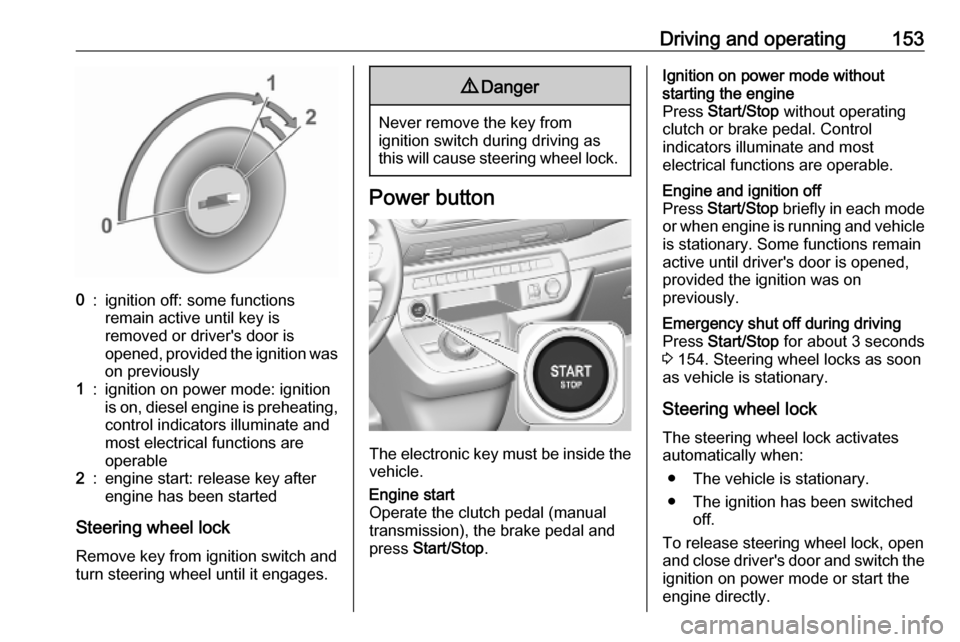
Driving and operating1530:ignition off: some functions
remain active until key is
removed or driver's door is
opened, provided the ignition was
on previously1:ignition on power mode: ignition
is on, diesel engine is preheating, control indicators illuminate and
most electrical functions are
operable2:engine start: release key after
engine has been started
Steering wheel lock
Remove key from ignition switch and
turn steering wheel until it engages.
9 Danger
Never remove the key from
ignition switch during driving as
this will cause steering wheel lock.
Power button
The electronic key must be inside the
vehicle.
Engine start
Operate the clutch pedal (manual
transmission), the brake pedal and
press Start/Stop .Ignition on power mode without
starting the engine
Press Start/Stop without operating
clutch or brake pedal. Control
indicators illuminate and most
electrical functions are operable.Engine and ignition off
Press Start/Stop briefly in each mode
or when engine is running and vehicle
is stationary. Some functions remain
active until driver's door is opened,
provided the ignition was on
previously.Emergency shut off during driving
Press Start/Stop for about 3 seconds
3 154. Steering wheel locks as soon
as vehicle is stationary.
Steering wheel lock
The steering wheel lock activates
automatically when:
● The vehicle is stationary.
● The ignition has been switched off.
To release steering wheel lock, open
and close driver's door and switch the ignition on power mode or start the
engine directly.
Page 156 of 289
154Driving and operating9Warning
If the vehicle battery is discharged,
the vehicle must not be towed,
tow-started or jump-started as the
steering wheel lock cannot be
disengaged.
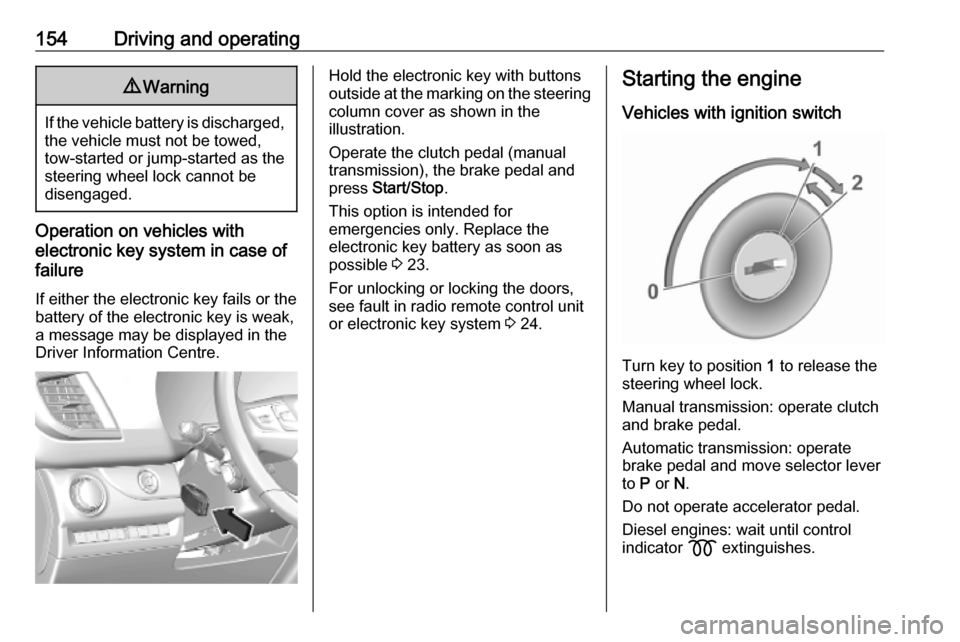
Operation on vehicles with
electronic key system in case of
failure
If either the electronic key fails or the
battery of the electronic key is weak,
a message may be displayed in the
Driver Information Centre.
Hold the electronic key with buttons
outside at the marking on the steering column cover as shown in the
illustration.
Operate the clutch pedal (manual
transmission), the brake pedal and
press Start/Stop .
This option is intended for
emergencies only. Replace the
electronic key battery as soon as
possible 3 23.
For unlocking or locking the doors,
see fault in radio remote control unit
or electronic key system 3 24.Starting the engine
Vehicles with ignition switch
Turn key to position 1 to release the
steering wheel lock.
Manual transmission: operate clutch
and brake pedal.
Automatic transmission: operate
brake pedal and move selector lever
to P or N.
Do not operate accelerator pedal.
Diesel engines: wait until control
indicator z extinguishes.
Page 201 of 289
Driving and operating199The panoramic view system may not
operate properly when:
● The surrounding is dark.
● The sun or the beam of headlights is shining directly into
the camera lenses.
● During nighttime driving.
● Weather limits visibility, such as fog, rain, or snow.
● The camera lenses are blocked by snow, ice, slush, mud, dirt.
● The vehicle is towing a trailer.
● The vehicle had an accident.
● There are extreme temperature changes.
Rear view camera Depending on version, camera is
mounted above the license plate in
the tailgate / left rear door.9 Warning
The rear view camera does not
replace driver vision. Note that
objects that are outside the
camera's field of view and the
parking assist sensors, e.g. below
the bumper or underneath the
vehicle, are not displayed.
Do not reverse or park the vehicle
using only the rear view camera.
Always check the surrounding of
the vehicle before driving.
The view of the camera is displayed
in the Info Display 3 119 or in the
interior mirror 3 40.
The area displayed by the camera is
limited. The distance of the image that
appears on the display differs from
the actual distance.
Switching on Rear view camera is automatically
activated when reverse gear is
engaged.
Switching off
The camera is switched off when a
forward gear is engaged.
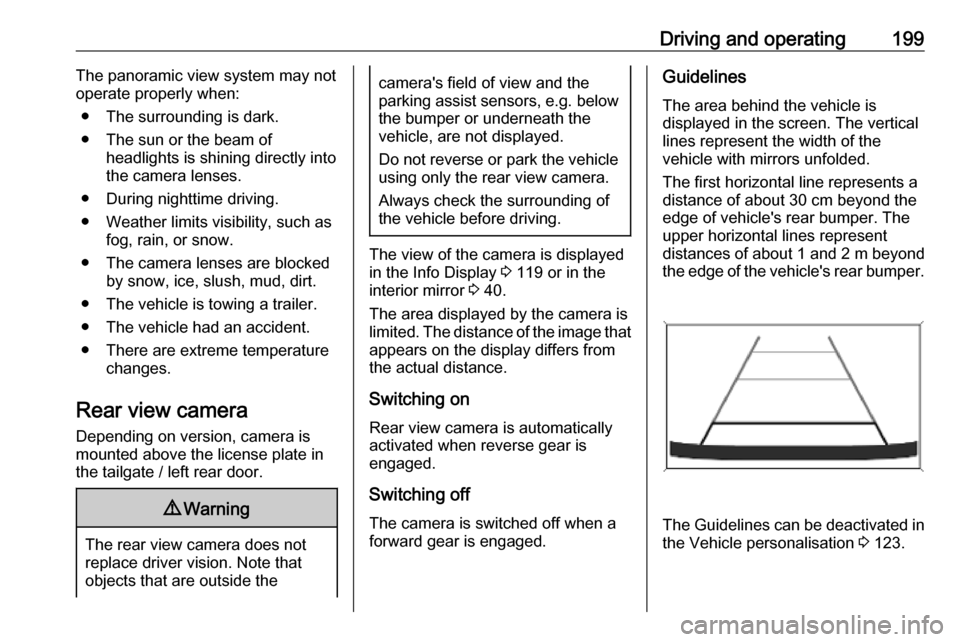
Guidelines
The area behind the vehicle is
displayed in the screen. The vertical
lines represent the width of the
vehicle with mirrors unfolded.
The first horizontal line represents a
distance of about 30 cm beyond the
edge of vehicle's rear bumper. The
upper horizontal lines represent
distances of about 1 and 2 m beyond
the edge of the vehicle's rear bumper.
The Guidelines can be deactivated in
the Vehicle personalisation 3 123.