lock VAUXHALL VIVARO C 2020 Workshop Manual
[x] Cancel search | Manufacturer: VAUXHALL, Model Year: 2020, Model line: VIVARO C, Model: VAUXHALL VIVARO C 2020Pages: 289, PDF Size: 10.16 MB
Page 156 of 289
154Driving and operating9Warning
If the vehicle battery is discharged,
the vehicle must not be towed,
tow-started or jump-started as the
steering wheel lock cannot be
disengaged.
Operation on vehicles with
electronic key system in case of
failure
If either the electronic key fails or the
battery of the electronic key is weak,
a message may be displayed in the
Driver Information Centre.
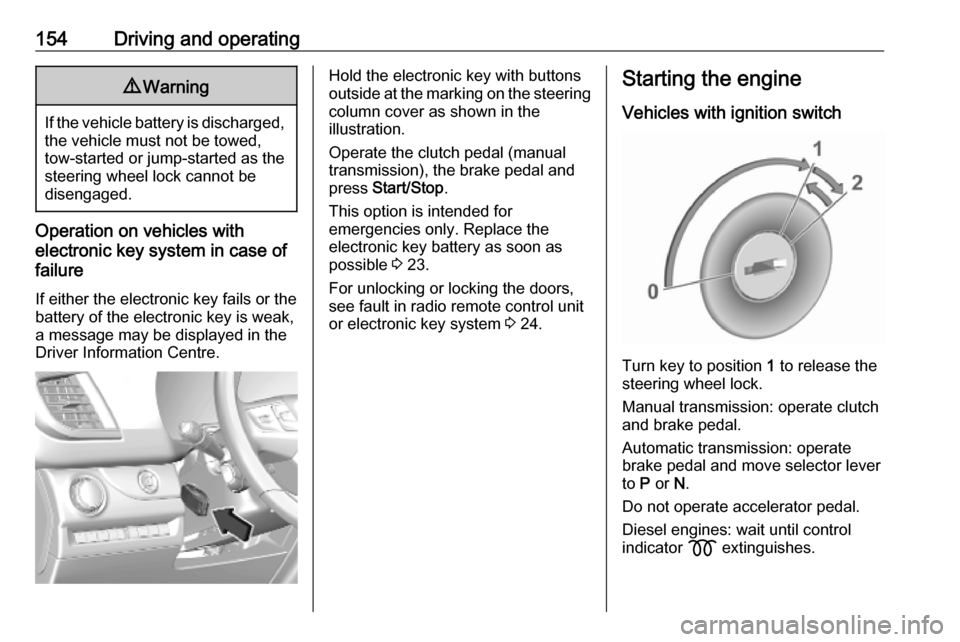
Hold the electronic key with buttons
outside at the marking on the steering column cover as shown in the
illustration.
Operate the clutch pedal (manual
transmission), the brake pedal and
press Start/Stop .
This option is intended for
emergencies only. Replace the
electronic key battery as soon as
possible 3 23.
For unlocking or locking the doors,
see fault in radio remote control unit
or electronic key system 3 24.Starting the engine
Vehicles with ignition switch
Turn key to position 1 to release the
steering wheel lock.
Manual transmission: operate clutch
and brake pedal.
Automatic transmission: operate
brake pedal and move selector lever
to P or N.
Do not operate accelerator pedal.
Diesel engines: wait until control
indicator z extinguishes.
Page 161 of 289
Driving and operating159Parking9Warning
● Do not park the vehicle on an
easily ignitable surface. The
high temperature of the
exhaust system could ignite the
surface.
● Always apply the parking brake.
● If the vehicle is on a level surface or uphill slope, engage
first gear or set the selector
lever to position P (automatic
transmission type A) / N
(automatic transmission type B). On an uphill slope, turn the
front wheels away from the
kerb.
If the vehicle is on a downhill
slope, engage reverse gear or
set the selector lever to position P (automatic transmission type
A) / N (automatic transmission
type B). Turn the front wheels
towards the kerb.
● Close the windows.
● Switch off the engine.
● Remove the ignition key from the ignition switch or switch off
ignition on vehicles with power
button. Turn the steering wheel
until the steering wheel lock is
felt to engage.
● Lock the vehicle.
● Activate the anti-theft alarm system.
● The engine cooling fans may run
after the engine has been
switched off 3 212.
Caution
After running at high engine
speeds or with high engine loads,
operate the engine briefly at a low load or run in neutral for
approx. 30 seconds before
switching off, in order to protect
the turbocharger.
Notice
In the event of an accident with airbag deployment, the engine is
switched off automatically if the
vehicle comes to a standstill within a
certain time.
In countries with extreme low
temperatures it may be necessary to park the vehicle without applied
parking brake. Make sure to park the
vehicle on a level surface.
Page 166 of 289

164Driving and operating
4. Unscrew protective cap from thefiller neck.
5. Open AdBlue canister.
6. Mount one end of the hose on the
canister and screw the other end
on the filler neck.
7. Lift the canister until it is empty, or
until the flow from the canister has stopped. This can take up to 5
minutes.
8. Place the canister on the ground to empty the hose, wait 15 s.
9. Unscrew the hose from the filler neck.
10. Mount the protective cap and turn
clockwise until it engages.
Notice
Dispose of AdBlue canister
according to environmental
requirements. Hose can be reused
after flushing with clear water before
AdBlue dries out.Automatic transmission
The automatic transmission permits
automatic gearshifting (automatic
mode) or manual gearshifting
(manual mode).
Manual shifting is possible in manual
mode.Type A
Move gear selector to position D,
press M next to the selector gear
selector and shift with the steering
wheel paddles + and -.Type B
Move gear selector to M and shift with
the steering wheel paddles + and -.
Manual mode 3 166.
Gear selection 3 165.
Page 167 of 289

Driving and operating165Transmission display
The mode or selected gear is shown
in the Driver Information Centre.
In automatic mode, the driving
programme is indicated by D, A or
AUTO .
In manual mode, M and the number
of the selected gear is indicated.
R indicates reverse gear.
N indicates neutral position.
For automatic transmission type A
only: P indicates park position.
Gear selection 3 165.
Gear selectionType A
Turn the gear selector.
P:park position, front wheels are
locked, engage only when the
vehicle is stationary and the
parking brake is appliedR:reverse gear, engage only when
the vehicle is stationaryN:neutralD:automatic modeM:manual mode
The gear selector is locked in P and
can only be moved when the ignition
is on and the brake pedal is applied.
The engine can only be started with
the gear selector in position P or N.
When position N is selected, press
the brake pedal or apply the parking
brake before starting.
Do not accelerate while engaging a
gear. Never depress the accelerator
pedal and brake pedal at the same
time.
When a gear is engaged, the vehicle
slowly begins to creep when the
brake is released.Type B
Turn the gear selector.
Page 170 of 289
168Driving and operating
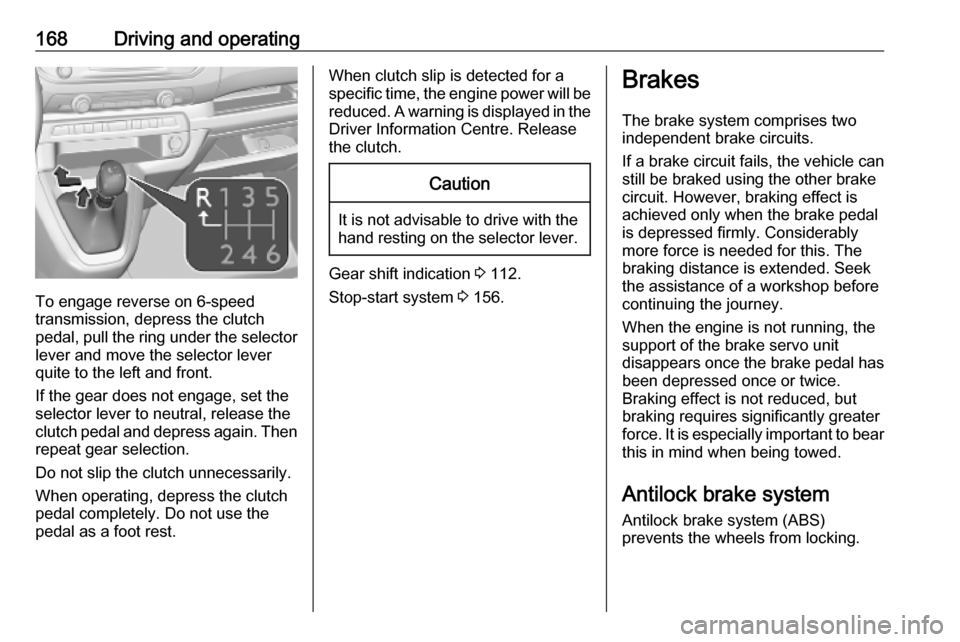
To engage reverse on 6-speed
transmission, depress the clutch
pedal, pull the ring under the selector
lever and move the selector lever
quite to the left and front.
If the gear does not engage, set the
selector lever to neutral, release the
clutch pedal and depress again. Then
repeat gear selection.
Do not slip the clutch unnecessarily.
When operating, depress the clutch
pedal completely. Do not use the
pedal as a foot rest.
When clutch slip is detected for a
specific time, the engine power will be reduced. A warning is displayed in the
Driver Information Centre. Release
the clutch.Caution
It is not advisable to drive with the hand resting on the selector lever.
Gear shift indication 3 112.
Stop-start system 3 156.
Brakes
The brake system comprises two
independent brake circuits.
If a brake circuit fails, the vehicle can
still be braked using the other brake
circuit. However, braking effect is
achieved only when the brake pedal
is depressed firmly. Considerably
more force is needed for this. The
braking distance is extended. Seek
the assistance of a workshop before
continuing the journey.
When the engine is not running, the
support of the brake servo unit
disappears once the brake pedal has been depressed once or twice.
Braking effect is not reduced, but
braking requires significantly greater
force. It is especially important to bear this in mind when being towed.
Antilock brake system
Antilock brake system (ABS)
prevents the wheels from locking.
Page 171 of 289
Driving and operating169ABS starts to regulate brake pressure
as soon as a wheel shows a tendency to lock. The vehicle remains
steerable, even during hard braking.
ABS control is made apparent
through a pulse in the brake pedal
and the noise of the regulation
process.
For optimum braking, keep the brake
pedal fully depressed throughout the
braking process, despite the fact that
the pedal is pulsating. Do not reduce
the pressure on the pedal.
When braking in an emergency, the
hazard warning flashers are switched on automatically depending on the
force of deceleration. They are
switched off automatically the first
time you accelerate.
After starting off, the system performs
a self-test which may be audible.
Control indicator i 3 111.
Fault9 Warning
If there is a fault in the ABS, the
wheels may be liable to lock due
to braking that is heavier than
normal. The advantages of ABS are no longer available. During
hard braking, the vehicle can no longer be steered and may
swerve.
Have the cause of the fault remedied
by a workshop.
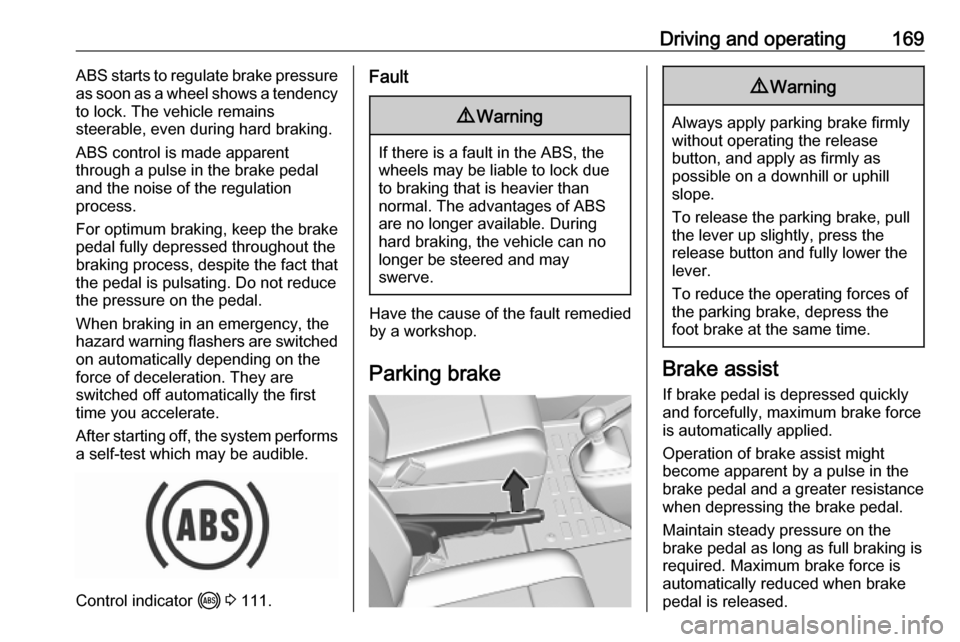
Parking brake
9 Warning
Always apply parking brake firmly
without operating the release
button, and apply as firmly as
possible on a downhill or uphill
slope.
To release the parking brake, pull
the lever up slightly, press the
release button and fully lower the
lever.
To reduce the operating forces of
the parking brake, depress the
foot brake at the same time.
Brake assist
If brake pedal is depressed quickly
and forcefully, maximum brake force
is automatically applied.
Operation of brake assist might
become apparent by a pulse in the
brake pedal and a greater resistance
when depressing the brake pedal.
Maintain steady pressure on the
brake pedal as long as full braking is
required. Maximum brake force is
automatically reduced when brake
pedal is released.
Page 190 of 289

188Driving and operatingapplicable traffic rules, weather
and road conditions etc. at all
times.
Selecting the alert sensitivity
The alert sensitivity has to be set to
close, normal or distant in the vehicle personalisation menu 3 123.
The chosen setting will remain until it
is changed. The alert timing will vary
based on vehicle speed. The faster
the vehicle speed, the farther away
the alert will occur. Consider traffic
and weather conditions when
selecting the alert timing.
Deactivation The system can only be deactivated
by deactivating the active emergency
braking in the vehicle personalisation
3 123.
System limitations
Forward collision alert is designed to
warn on vehicles only, but may react
also to other objects.
In the following cases, forward
collision alert may not detect a vehicle ahead or sensor performance is
limited:
● driving on winding or hilly roads
● driving during nighttime
● weather limits visibility, such as fog, rain, or snow
● the sensor in the windscreen is blocked by snow, ice, slush, mud,dirt etc.
● the windscreen is damaged or affected by foreign objects, e.g.
stickers
Active emergency braking
Active emergency braking can help to reduce the damage and injury from
crashes with vehicles, pedestrians
and obstacles directly ahead, when a
collision can no longer be avoided
either by manual braking or by
steering. Before the active
emergency braking applies, the driver is warned by the forward collision
alert or the front pedestrian protection
alert.Forward collision alert 3 186
Front pedestrian protection 3 190
The feature uses various inputs (e.g.
camera sensor, radar sensor, brake
pressure, vehicle speed) to calculate
the probability of a frontal collision.9 Warning
This system is not intended to
replace the driver responsibility for driving the vehicle and looking
ahead. Its function is limited to
supplemental use only to reduce
the vehicle speed before a
collision.
The system may not react to
animals. After a sudden lane
change, the system needs a
certain time to detect the next
preceding vehicle.
The driver must always be ready
to take action and apply the brakes and steer to avoid collisions.
Page 193 of 289

Driving and operating191Front pedestrian protection can
detect and alert to pedestrians in a
forward gear at speeds between
3 mph and 37 mph.
During nighttime driving, system
performance is limited.9 Danger
Front pedestrian braking does not
provide an alert or automatically
brake the vehicle, unless it detects
a pedestrian.
The system may not detect
pedestrians, including children,
when the pedestrian is not directly ahead, not fully visible, not
standing upright, or when part of a
group.
Front pedestrian protection includes:
● detecting front pedestrian ahead● front pedestrian alert
Front pedestrian protection is
activated together with forward
collision alert.
Forward collision alert 3 186.
Detecting front pedestrian ahead
A pedestrian ahead is indicated by a
symbol in the instrument cluster.
Front pedestrian alert
When approaching a detected
pedestrian too quickly, a warning
message is displayed in the Driver
Information Centre. A warning chime
is provided.
Cruise control or adaptive cruise control may be disengaged when the
front pedestrian alert occurs.
System limitations
In the following cases, front
pedestrian protection may not detect
a pedestrian ahead or the sensor
performance is limited:
● vehicle speed is out of range from
3 mph to 37 mph in forward gear
● the distance to an pedestrian ahead is more than 40 m
● driving on winding or hilly roads
● driving during nighttime
● weather limits visibility, such as fog, rain, or snow● the sensor in the windscreen is blocked by snow, ice, slush, mud,dirt etc.
● the windscreen is damaged or affected by foreign objects, e.g.
stickers
Parking assist
General information When attaching a trailer or bicycle
carrier to the trailer hitch, the parking
assist is deactivated.9 Warning
The driver bears full responsibility
for the parking manoeuvre.
Always check the surrounding
area when driving backwards or
forwards while using parking
assist system.
Page 201 of 289
Driving and operating199The panoramic view system may not
operate properly when:
● The surrounding is dark.
● The sun or the beam of headlights is shining directly into
the camera lenses.
● During nighttime driving.
● Weather limits visibility, such as fog, rain, or snow.
● The camera lenses are blocked by snow, ice, slush, mud, dirt.
● The vehicle is towing a trailer.
● The vehicle had an accident.
● There are extreme temperature changes.
Rear view camera Depending on version, camera is
mounted above the license plate in
the tailgate / left rear door.9 Warning
The rear view camera does not
replace driver vision. Note that
objects that are outside the
camera's field of view and the
parking assist sensors, e.g. below
the bumper or underneath the
vehicle, are not displayed.
Do not reverse or park the vehicle
using only the rear view camera.
Always check the surrounding of
the vehicle before driving.
The view of the camera is displayed
in the Info Display 3 119 or in the
interior mirror 3 40.
The area displayed by the camera is
limited. The distance of the image that
appears on the display differs from
the actual distance.
Switching on Rear view camera is automatically
activated when reverse gear is
engaged.
Switching off
The camera is switched off when a
forward gear is engaged.
Guidelines
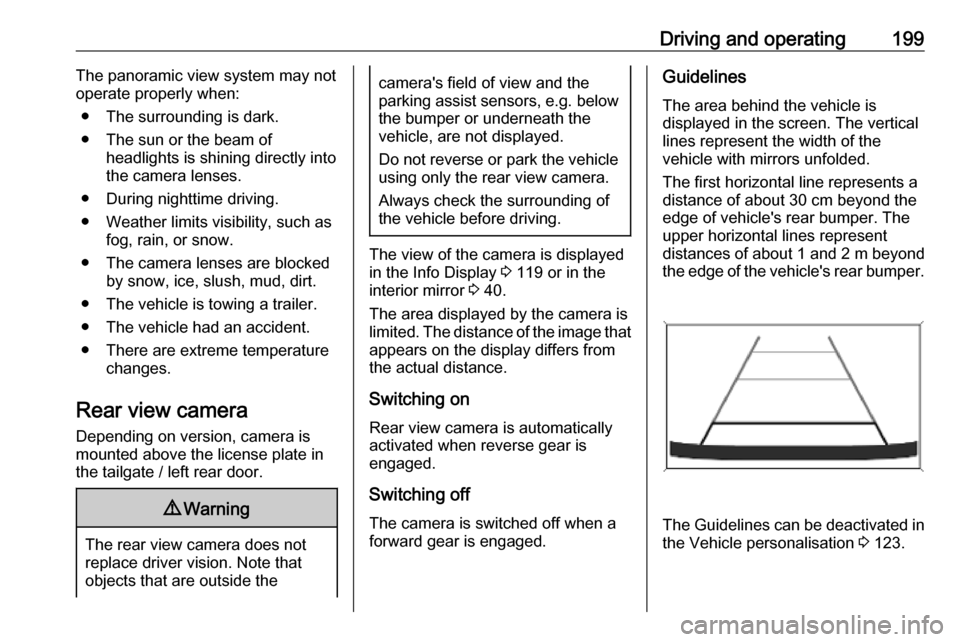
The area behind the vehicle is
displayed in the screen. The vertical
lines represent the width of the
vehicle with mirrors unfolded.
The first horizontal line represents a
distance of about 30 cm beyond the
edge of vehicle's rear bumper. The
upper horizontal lines represent
distances of about 1 and 2 m beyond
the edge of the vehicle's rear bumper.
The Guidelines can be deactivated in
the Vehicle personalisation 3 123.
Page 202 of 289
200Driving and operatingSystem limitations
The rear view camera may not
operate properly when:
● the surrounding is dark
● the beam of headlights is shining
directly into the camera lenses
● weather limits visibility such as fog, rain or snow
● the camera lenses are blocked by snow, ice, slush, mud, dirt.Clean the lense, rinse with water,
and wipe with a soft cloth
● the tailgate will be opened
● the vehicle is towing an electrically connected trailer,
bicycle carrier etc.
● the vehicle had a rear end accident
● there are extreme temperature changes
Lane departure warning
The lane departure warning system
observes the lane markings between
which the vehicle is driving via a front camera. The system detects lanechanges and warns the driver in the
event of an unintended lane change
via visual and acoustic signals.
Criteria for the detection of an
unintended lane change are:
● no operation of turn lights
● no brake pedal operation
● no active acceleration
If the driver is active, no warning will
be issued.
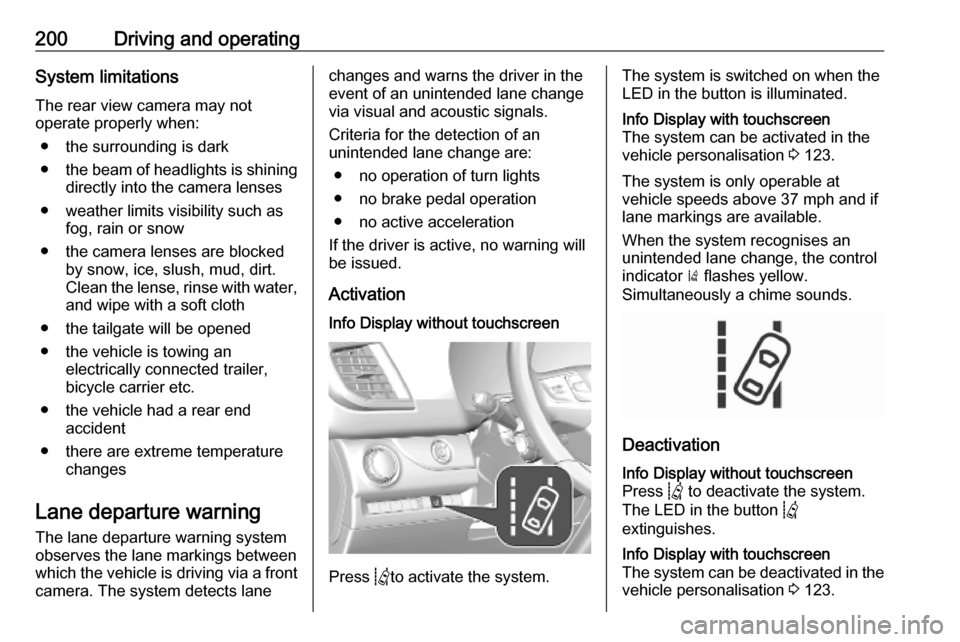
ActivationInfo Display without touchscreen
Press Qto activate the system.
The system is switched on when the
LED in the button is illuminated.Info Display with touchscreen
The system can be activated in the
vehicle personalisation 3 123.
The system is only operable at
vehicle speeds above 37 mph and if
lane markings are available.
When the system recognises an
unintended lane change, the control
indicator ) flashes yellow.
Simultaneously a chime sounds.
Deactivation
Info Display without touchscreen
Press Q to deactivate the system.
The LED in the button Q
extinguishes.Info Display with touchscreen
The system can be deactivated in the
vehicle personalisation 3 123.