wipers VAUXHALL VIVARO C 2020 Owner's Manual
[x] Cancel search | Manufacturer: VAUXHALL, Model Year: 2020, Model line: VIVARO C, Model: VAUXHALL VIVARO C 2020Pages: 289, PDF Size: 10.16 MB
Page 46 of 289

44Keys, doors and windows
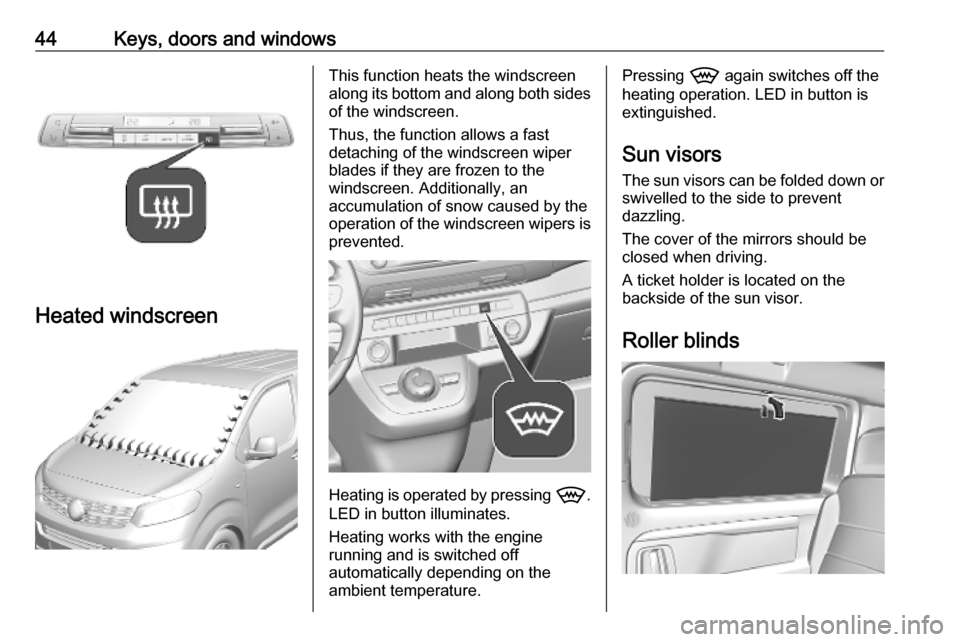
Heated windscreen
This function heats the windscreen
along its bottom and along both sides of the windscreen.
Thus, the function allows a fast
detaching of the windscreen wiper
blades if they are frozen to the
windscreen. Additionally, an
accumulation of snow caused by the
operation of the windscreen wipers is
prevented.
Heating is operated by pressing 9.
LED in button illuminates.
Heating works with the engine
running and is switched off
automatically depending on the
ambient temperature.
Pressing 9 again switches off the
heating operation. LED in button is
extinguished.
Sun visors
The sun visors can be folded down or
swivelled to the side to prevent
dazzling.
The cover of the mirrors should be
closed when driving.
A ticket holder is located on the
backside of the sun visor.
Roller blinds
Page 132 of 289

130LightingTail lightsTail lights are illuminated together
with low / high beam and sidelights.
Automatic light control
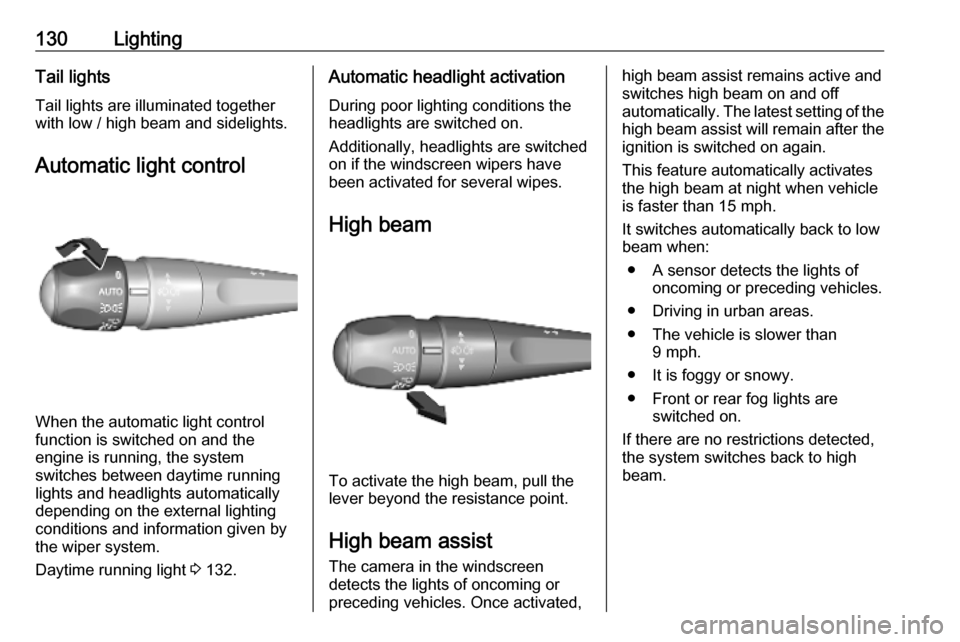
When the automatic light control
function is switched on and the
engine is running, the system
switches between daytime running
lights and headlights automatically
depending on the external lighting
conditions and information given by
the wiper system.
Daytime running light 3 132.
Automatic headlight activation
During poor lighting conditions the
headlights are switched on.
Additionally, headlights are switched
on if the windscreen wipers have
been activated for several wipes.
High beam
To activate the high beam, pull the
lever beyond the resistance point.
High beam assist The camera in the windscreen
detects the lights of oncoming or
preceding vehicles. Once activated,
high beam assist remains active and switches high beam on and off
automatically. The latest setting of the
high beam assist will remain after the ignition is switched on again.
This feature automatically activates
the high beam at night when vehicle
is faster than 15 mph.
It switches automatically back to low
beam when:
● A sensor detects the lights of oncoming or preceding vehicles.
● Driving in urban areas.
● The vehicle is slower than 9 mph.
● It is foggy or snowy.
● Front or rear fog lights are switched on.
If there are no restrictions detected,
the system switches back to high
beam.
Page 220 of 289

218Vehicle care● See the Owner's Manual forfurther information.
● Explosive gas may be present in the vicinity of the vehicle battery.
Heating functionalities Notice
Individual heating functionalities,
such as heated seats or heated
steering wheel, may be temporarily
unavailable in the event of electrical
loading constraints. Functions will
be resumed after some minutes.
Power saving mode
This mode deactivates electrical
consumers to avoid excessive
discharging of the vehicle battery.
These consumers, such as the
Infotainment system, windscreen
wipers, low beam headlights,
courtesy light, etc. can be used for a
total maximum time of about
40 minutes after ignition is switched
off.Deactivating power saving mode
Power saving mode is deactivated
automatically when the engine is
restarted. Run the engine for a
sufficient charge:
● for less than 10 minutes to use the consumers for approx.
5 minutes
● for more than 10 minutes to use the consumers for up to approx.
30 minutes
Diesel fuel system bleeding If the tank has been run dry, the diesel fuel system must be bled. The
bleeding procedure differs between
the engine types 3 268. Fuel up with
at least five litres of diesel before
starting the bleeding procedure.
Engines DV5RUCd, DV5RUC 1. Switch on the ignition.
2. Wait 1 minute and switch off the
ignition.
3. Try to start the engine.
If the engine does not start after a
short time, repeat the procedure.Engines DW10FEU, DW10FD,
DW10FDCU, DW10F
1. Switch on the ignition.
2. Wait 6 seconds and switch off the ignition.
3. Repeat steps 1 and 2 for ten times.
4. Try to start the engine.
If the engine does not start after a
short time, repeat the procedure.
Engine DV6DU1. Open the engine bonnet.
2. If necessary, unclip the engine
style cover to access the priming
pump.
3. Operate the priming pump
repeatedly until resistance is felt
(there may be resistance at the first
press).
4. Try to start the engine. If the engine
does not start after a short time, wait
around 15 seconds before trying
again. If the engine does not start
after a few attempts, repeat step 3
and try again to start the engine.
5. Put the engine style cover in place
and clip it in.
Page 234 of 289

232Vehicle care
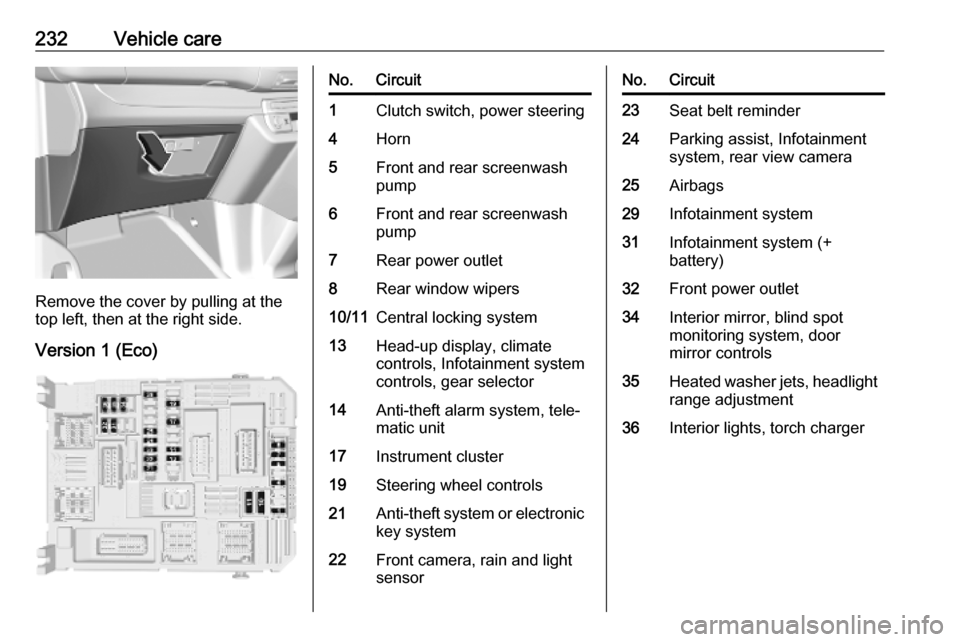
Remove the cover by pulling at the
top left, then at the right side.
Version 1 (Eco)
No.Circuit1Clutch switch, power steering4Horn5Front and rear screenwash
pump6Front and rear screenwash
pump7Rear power outlet8Rear window wipers10/11Central locking system13Head-up display, climate
controls, Infotainment system
controls, gear selector14Anti-theft alarm system, tele‐
matic unit17Instrument cluster19Steering wheel controls21Anti-theft system or electronic key system22Front camera, rain and light
sensorNo.Circuit23Seat belt reminder24Parking assist, Infotainment
system, rear view camera25Airbags29Infotainment system31Infotainment system (+
battery)32Front power outlet34Interior mirror, blind spot
monitoring system, door
mirror controls35Heated washer jets, headlight
range adjustment36Interior lights, torch charger
Page 235 of 289

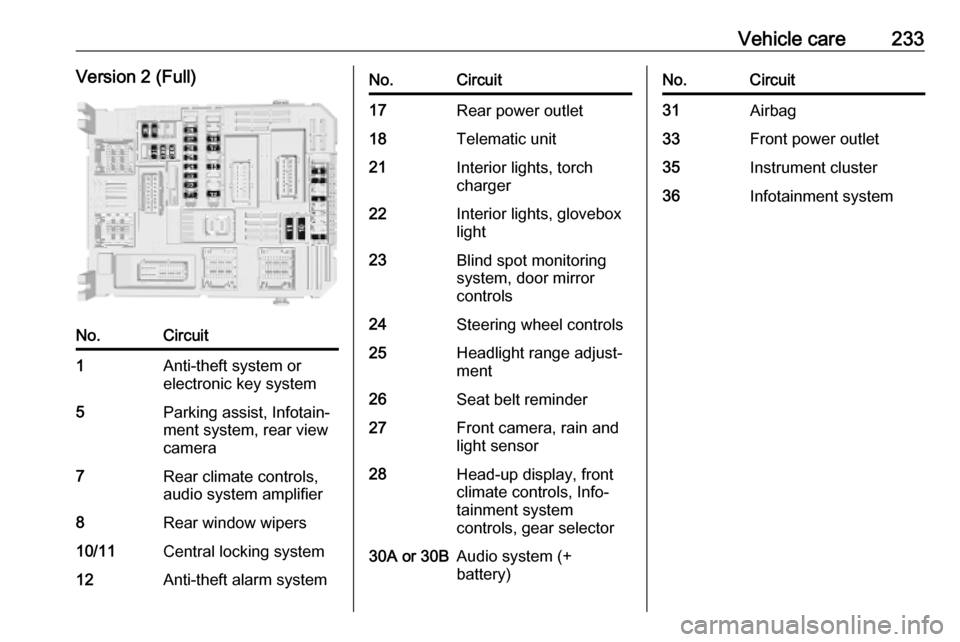
Vehicle care233Version 2 (Full)No.Circuit1Anti-theft system or
electronic key system5Parking assist, Infotain‐
ment system, rear view
camera7Rear climate controls,
audio system amplifier8Rear window wipers10/11Central locking system12Anti-theft alarm systemNo.Circuit17Rear power outlet18Telematic unit21Interior lights, torch
charger22Interior lights, glovebox
light23Blind spot monitoring
system, door mirror
controls24Steering wheel controls25Headlight range adjust‐
ment26Seat belt reminder27Front camera, rain and
light sensor28Head-up display, front
climate controls, Info‐
tainment system
controls, gear selector30A or 30BAudio system (+
battery)No.Circuit31Airbag33Front power outlet35Instrument cluster36Infotainment system
Page 256 of 289

254Vehicle careDo not clean the engine compartmentwith a steam-jet or high-pressure jet
cleaner.
Thoroughly rinse and leather-off the
vehicle. Rinse leather frequently. Use
separate leathers for painted and
glass surfaces: remnants of wax on
the windows will impair vision.
Have the door hinges of all doors
greased by a workshop.
Exterior lights
Headlight and other light covers are
made of plastic. Do not use any
abrasive or caustic agents, do not use
an ice scraper, and do not clean them dry.
Polishing and waxing Wax the vehicle regularly at the latest
when water no longer beads.
Otherwise, the paintwork will dry out.
Polishing is necessary only if the paint
has become dull or if solid deposits
have become attached to it.
Paintwork polish with silicone forms a
protective film, making waxing
unnecessary.Plastic body parts must not be treated with wax or polishing agents.
Windows and wiper blades Switch off wipers before handling in
their areas.
Use a soft lint-free cloth or chamois
leather together with window cleaner
and insect remover.
Use only water-repellent products
approved for the vehicle.
When cleaning the rear window from
inside, always wipe in parallel to the
heating element to prevent damage.
For mechanical removal of ice, use a
sharp-edged ice scraper. Press the
scraper firmly against the glass so
that no dirt can get under it and
scratch the glass.
Clean smearing wiper blades with a
soft cloth and window cleaner.
Remove dirt residues from smearing
wiper blades by using a soft cloth and
window cleaner. Also make sure to
remove any residues such as wax,
insect residues and similar from the
window.Ice residues, pollution and continuous
wiping on dry windows will damage or
even destroy the wiper blades.
Glass panel Never clean with solvents or abrasive
agents, fuels, aggressive media e.g.
paint cleaner, acetone-containing
solutions, acidic or highly alkaline
media or abrasive pads.
Wheels and tyres
Do not use high-pressure jet
cleaners.
Clean rims with a pH-neutral wheel
cleaner.
Rims are painted and can be treated
with the same agents as the body.
Paintwork damageRectify minor paintwork damage witha touch-up pen before rust forms.
Have more extensive damage or rust
areas repaired by a workshop.