transmission VAUXHALL ZAFIRA 2014.5 Owner's Guide
[x] Cancel search | Manufacturer: VAUXHALL, Model Year: 2014.5, Model line: ZAFIRA, Model: VAUXHALL ZAFIRA 2014.5Pages: 219, PDF Size: 7.83 MB
Page 138 of 219
136Driving and operating
Starting off
Depress the foot brake and move the selector lever to A, + or -. The
transmission is in automatic mode
and first gear is engaged. If R is
selected, reverse gear is engaged.
The vehicle starts to move when the
brake is released.
To start off without depressing the
foot brake, accelerate immediately
after engaging a gear.
If neither the accelerator nor the
brake pedal are depressed, no gear is engaged and A or R flashes for a
brief time in the display.
Stopping the vehicle In A, first gear is engaged and the
clutch is released when the vehicle is
stopped. In R, reverse gear remains
engaged.
Engine braking Automatic mode
When driving downhill, the manual
transmission automated does not shift into higher gears until a fairlyhigh engine speed has been reached. It shifts down in good time when
braking.
Manual mode
To utilise the engine braking effect, select a lower gear in good time when
driving downhill.
Rocking the vehicle
Rocking the vehicle is only
permissible if the vehicle is stuck in
sand, mud or snow. Move the selector
lever between R and A in a repeat
pattern. Do not race the engine and avoid sudden acceleration.
Parking Apply the parking brake. The most
recently engaged gear (see
transmission display) remains
engaged. With N, no gear is engaged.
When the ignition is switched off the
transmission no longer responds to
movement of the selector lever.Manual mode
If a higher gear is selected when the
engine speed is too low, or a lower
gear when the speed is too high, the
shift is not executed. This prevents
the engine from running at too low or too high an engine speed.
If engine speed is too low, the
transmission automatically shifts to a
lower gear.
If engine speed is too high, the
transmission only switches to a higher gear via kickdown.
When + or - is selected in automatic
mode, the transmission switches to
manual mode and shifts accordingly.
Electronic driving
programmes ■ Following a cold start, the operating
temperature programme increasesengine speed to quickly bring the
catalytic converter to the required
temperature.
Page 139 of 219

Driving and operating137
■ The adaptive programme tailorsgearshifting to the driving
conditions, e.g. greater load or
gradients.
■ When Sport mode is engaged, shift
times are reduced and the
transmission shifts at higher engine speeds (unless cruise control is
on). Sport mode 3 141.
Winter programme T
Activate the Winter programme if you
have problems starting off on a
slippery road surface.
Activation
Press the T button. The transmission
switches to automatic mode. The
vehicle starts off in 2nd gear. Sport
mode is deactivated.
Deactivation
The Winter programme is switched off by:
■ pressing the T button again
■ turning off the ignition,
■ switching to manual mode (when switched back to automatic mode,
the Winter programme is again
active)
■ when clutch temperature is too highKickdown
If the accelerator pedal is pressed
past the pressure point, the
transmission shifts to a lower gear depending on engine speed.
Fault
To prevent damage to the manual transmission automated, the clutch is
engaged automatically at high clutch
temperatures.
A illuminates in the event of a fault.
Continued driving is possible. Manual
mode cannot be used for shifting.
Page 140 of 219

138Driving and operating
If F appears in the transmission
display, continued driving is not
possible.
Have the cause of the fault remedied
by a workshop.
Interruption of power
supply
The clutch is not disengaged if there
is an interruption of the power supply
when a gear is engaged. The vehicle
cannot move.
If the battery is discharged, start the
vehicle using jump leads 3 186.
If the cause of the fault is not a
discharged battery, seek the
assistance of a workshop.
If the vehicle must be moved out of the flow of traffic, disengage the
clutch as follows:
1. Apply parking brake and switch off
ignition.
2. Open the bonnet 3 154.
3. Clean the transmission around the cap so that no dirt can get intothe opening when the cap is
removed.
4. Rotate cap to slacken and remove
by lifting upwards.
5. Using a flat-head screwdriver, turn the adjusting screw under the
cap clockwise until clear
resistance can be felt. The clutch
has now been disengaged.
6. Refit cleaned cap. The cap must be in full contact with the housing.Caution
Do not turn beyond the resistancesince this could damage the
transmission.
Caution
Towing the vehicle and starting
the engine is not permitted when
the clutch has been disengaged in this way, although the vehicle can
be moved a short distance.
Seek the immediate assistance of a
workshop.
Page 145 of 219
Driving and operating143
With automatic transmission or
manual transmission automated, only
activate cruise control in automatic
mode.
Control indicator m 3 93.
Activation Briefly press the m button: the current
speed is stored and maintained.
Vehicle speed can be increased by
depressing the accelerator pedal.
When the accelerator pedal is
released, the previously stored speed
is resumed.
The speed is saved until the ignition
is switched off.
To resume the saved speed, briefly
press the g button at a speed above
30 km/h.
Increase speed With cruise control active, hold down
button m or briefly press it repeatedly:
speed is increased continuously or in
small increments.
When button m is released the
current speed is stored and
maintained.Reduce speed
With cruise control active, hold down
button g or briefly press it repeatedly:
speed is reduced continuously or in
small increments.
When button g is released the current
speed is stored and maintained.
Deactivation
Briefly press the § button: cruise
control is deactivated.
Automatic deactivation:
■ Vehicle speed below approx. 30 km/h
■ The brake pedal is depressed
■ The clutch pedal is depressed
■ Selector lever in N.Object detection
systems
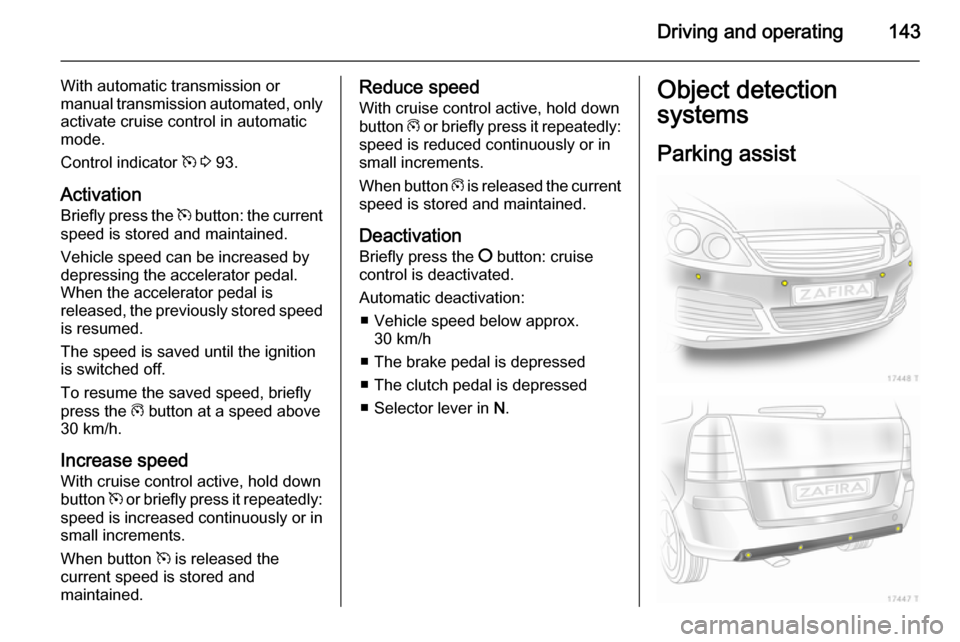
Parking assist
Page 172 of 219
170Vehicle care
No.Circuit13Fog light14Windscreen wiper15Windscreen wiper16Control module electronics,
Open&Start system, ABS,
brake light switch17Diesel fuel filter heating18Starter19Transmission electronics20Air conditioning system21Engine electronics22Engine electronics23Adaptive forward lighting, head‐
light range adjustment24Fuel pump25Transmission electronics26Engine electronics27Power steeringNo.Circuit28Transmission electronics29Transmission electronics30Engine electronics31Adaptive forward fighting, head‐ light range adjustment32Brake system, air conditioning
system, clutch switch33Adaptive forward lighting, head‐
light range adjustment, light
switch34Steering column control unit35Infotainment system36Mobile telephone, Infotainment
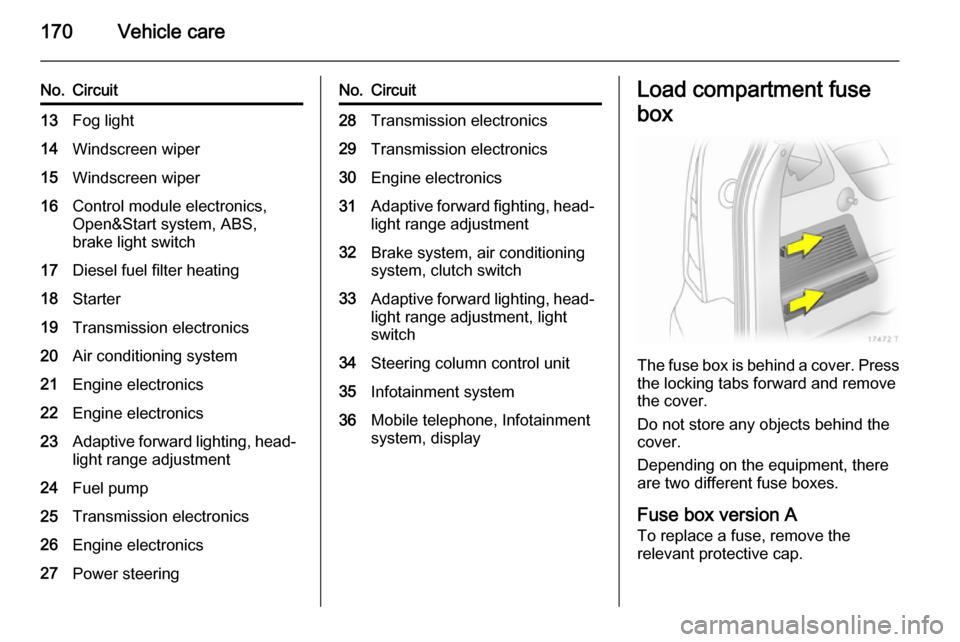
system, displayLoad compartment fuse
box
The fuse box is behind a cover. Press
the locking tabs forward and remove
the cover.
Do not store any objects behind the
cover.
Depending on the equipment, there
are two different fuse boxes.
Fuse box version A
To replace a fuse, remove the
relevant protective cap.
Page 178 of 219
176Vehicle care
The tyre pressure tables show allpossible tyre combinations 3 206.
For the tyres approved for your
vehicle, refer to the EEC Certificate of Conformity provided with your vehicle
or other national registration
documents.
The driver is responsible for correct
adjustment of tyre pressure.9 Warning
If the pressure is too low, this can
result in considerable tyre warm-
up and internal damage, leading to tread separation and even to tyre
blow-out at high speeds.
Tyre pressure monitoring
system
The tyre pressure monitoring system
continually checks the pressure of all
four wheels when vehicle speed
exceeds a certain limit.
All wheels must be equipped with
pressure sensors and the tyres must
have the prescribed pressure.
When a low tyre condition is detected,
A illuminates. If A comes on, stop as
soon as possible and inflate the tyres as recommended in this manual. Tyre pressures 3 206.
After inflating the tyres to the
appropriate pressure, A may stay
illuminated. Pressure change will be
recognized as the vehicles is driven.
Notice
In countries where the tyre pressure
monitoring system is legally
required, the use of wheels without
pressure sensors will invalidate the
vehicle type approval.
The current tyre pressures may be
shown in the Info-Display 3 107.
Vehicle messages, tyre pressure 3 102.
Control indicator w 3 91.
If the tyre pressure shall be reduced
or increased, switch off ignition.
w may come on in cool weather when
the vehicle is first started and then
turn off as the vehicle is driven. Thiscould be an early indicator that the air
pressure is getting low and needs to
be inflated to the proper pressure.
A spare or temporary spare wheel is
not equipped with pressure sensors.
The tyre pressure monitoring system
is not operational for these wheels
and w illuminates.
Winter tyres or additional wheel sets
have to be fitted with sensors,
otherwise the system will not work
and w will indicate malfunction by
flashing one minute and then
illuminate continuously.
The use of commercially available
liquid tyre repair kits can impair the
function of the system. Factory-
approved repair kits can be used.
External high-power radio equipment
could disrupt the tyre pressure
monitoring system.
Unsuited rims can impair the
transmission quality of the tyre
pressure monitoring system sensors.
Page 188 of 219
186Vehicle careJump startingDo not start with quick charger.
A vehicle with a discharged battery
can be started using jump leads and the battery of another vehicle.9 Warning
Be extremely careful when starting
with jump leads. Any deviation
from the following instructions can
lead to injuries or damage caused
by battery explosion or damage to the electrical systems of both
vehicles.
9 Warning
Avoid contact of the battery with
eyes, skin, fabrics and painted
surfaces. The fluid contains
sulphuric acid which can cause
injuries and damage in the event
of direct contact.
■ Never expose the battery to naked flames or sparks.
■ A discharged battery can already freeze at temperatures of 0 °C.
Defrost the frozen battery before
connecting jump leads.
■ Wear eye protection and protective
clothing when handling a battery.
■ Use a booster battery with the same voltage (12 Volts). Its
capacity (Ah) must not be much less than that of the discharged
battery.
■ Use jump leads with insulated terminals and a cross section of at
least 16 mm 2
(25 mm 2
for diesel
engines).
■ Do not disconnect the discharged battery from the vehicle.
■ Switch off all unnecessary electrical
consumers.
■ Do not lean over the battery during jump starting.
■ Do not allow the terminals of one lead to touch those of the other
lead.■ The vehicles must not come into contact with each other during the
jump starting process.
■ Apply the parking brake, transmission in neutral, automatictransmission in P.
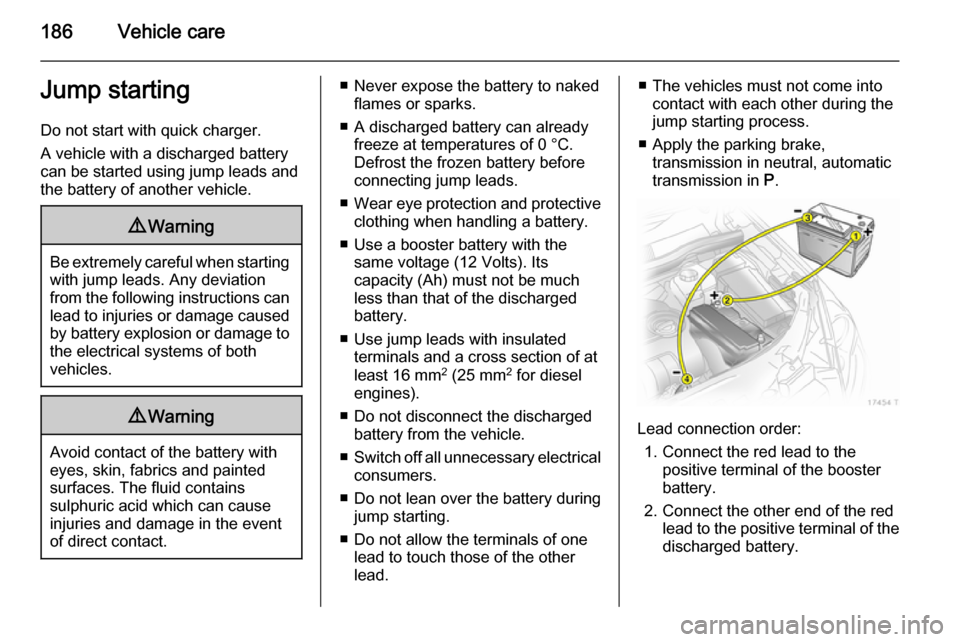
Lead connection order:
1. Connect the red lead to the positive terminal of the booster
battery.
2. Connect the other end of the red lead to the positive terminal of the
discharged battery.
Page 190 of 219
188Vehicle care
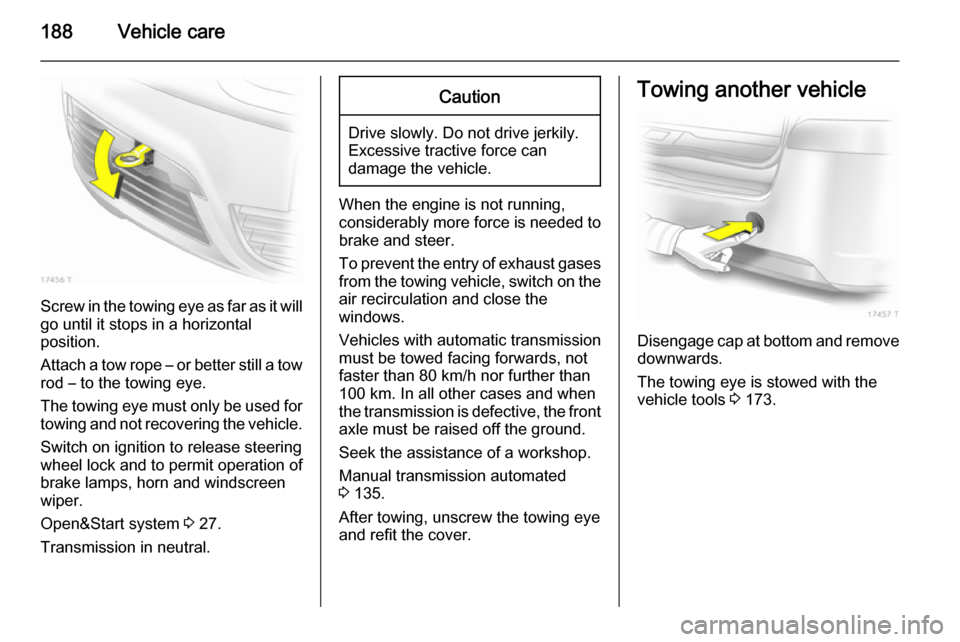
Screw in the towing eye as far as it will
go until it stops in a horizontal
position.
Attach a tow rope – or better still a tow
rod – to the towing eye.
The towing eye must only be used for towing and not recovering the vehicle.
Switch on ignition to release steering
wheel lock and to permit operation of
brake lamps, horn and windscreen
wiper.
Open&Start system 3 27.
Transmission in neutral.
Caution
Drive slowly. Do not drive jerkily.
Excessive tractive force can
damage the vehicle.
When the engine is not running,
considerably more force is needed to
brake and steer.
To prevent the entry of exhaust gases from the towing vehicle, switch on the
air recirculation and close the
windows.
Vehicles with automatic transmission
must be towed facing forwards, not faster than 80 km/h nor further than
100 km. In all other cases and when
the transmission is defective, the front axle must be raised off the ground.
Seek the assistance of a workshop.
Manual transmission automated
3 135.
After towing, unscrew the towing eye
and refit the cover.
Towing another vehicle
Disengage cap at bottom and remove
downwards.
The towing eye is stowed with the
vehicle tools 3 173.
Page 205 of 219

Technical data203
Sales designation1.71.7Engine identifier codeA17DTJA17DTRNumber of cylinders44Piston displacement [cm3
]16861686Engine power [kW]8192at rpm38004000Torque [Nm]260280at rpm23002300Fuel typeDieselDieselOil consumption [l/1000 km]0.60.6PerformanceEngineA17DTJA17DTRMaximum speed [km/h]Manual transmission179189Manual transmission automated––Automatic transmission––
Page 206 of 219

204Technical dataVehicle weight
Kerb weight, basic modelZafiraEngineManual transmissionManual transmission
automatedAutomatic transmissionwithout/with air conditioning
[kg]A18XER, A18XEL1503/15181503/1518–/–A17DTJ, A17DTR1600/1615–/––/–
Additional weight
EngineA18XER, A18XELA17DTJA17DTRExclusiv/Active/Active Plus [kg]1055Design, Elite [kg]231616SRi [kg]201313
Heavy accessories
AccessoriesMoon roofTowing equipmentHeadlight washer systemAdaptive forward lightingWeight [kg]351734