mirror VAUXHALL ZAFIRA TOURER 2014 Owner's Manual
[x] Cancel search | Manufacturer: VAUXHALL, Model Year: 2014, Model line: ZAFIRA TOURER, Model: VAUXHALL ZAFIRA TOURER 2014Pages: 297, PDF Size: 8.87 MB
Page 11 of 297
In brief9Mirror adjustment
Interior mirror
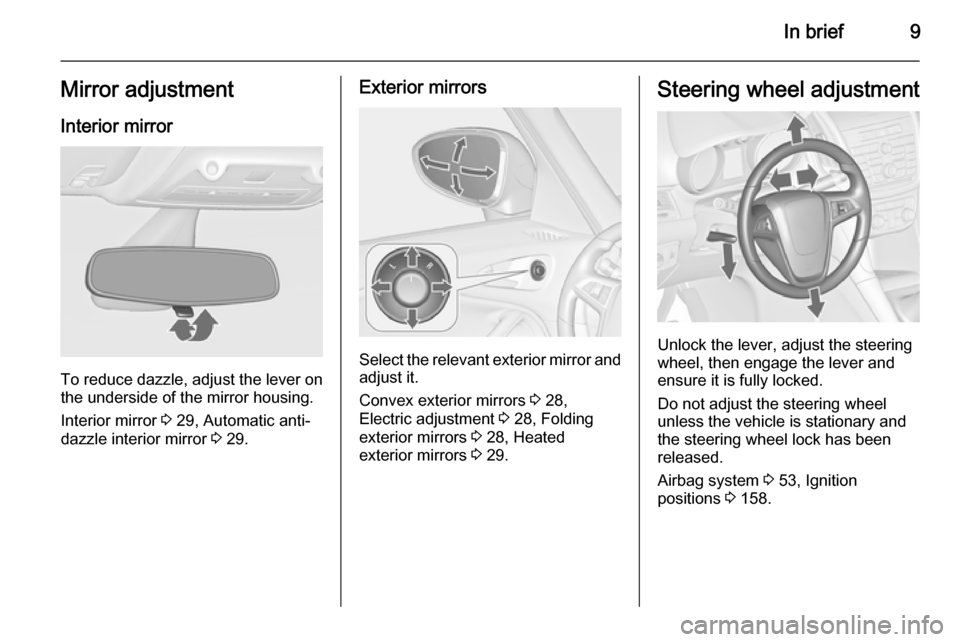
To reduce dazzle, adjust the lever on the underside of the mirror housing.
Interior mirror 3 29, Automatic anti-
dazzle interior mirror 3 29.
Exterior mirrors
Select the relevant exterior mirror and
adjust it.
Convex exterior mirrors 3 28,
Electric adjustment 3 28, Folding
exterior mirrors 3 28, Heated
exterior mirrors 3 29.
Steering wheel adjustment
Unlock the lever, adjust the steering
wheel, then engage the lever and
ensure it is fully locked.
Do not adjust the steering wheel
unless the vehicle is stationary and the steering wheel lock has been
released.
Airbag system 3 53, Ignition
positions 3 158.
Page 13 of 297

In brief11
1Power windows .....................30
2 Exterior mirrors .....................28
3 Cruise control .....................177
Speed limiter ....................... 179
Adaptive cruise control .......180
Forward collision alert .........187
4 Side air vents ...................... 154
5 Windscreen wiper,
windscreen washer
system, headlight washer
system, rear wiper, rear
washer system ......................96
6 Instruments ........................ 102
7 Steering wheel controls .......94
8 Driver Information Centre .... 115
9 Turn and lane-change
signals, headlight flash,
low beam and high beam,
high beam assist .................143
Exit lighting ......................... 146
Parking lights ...................... 144
Buttons for Driver
Information Centre ..............11510Central locking system ..........21
Hazard warning flashers ....143
Sport mode ........................ 175
Tour mode .......................... 175
Fuel selector ....................... 103
Control indicator for airbag deactivation ........................ 109
Control indicator for front
passenger seat belt ...........108
11 Info-Display ........................ 119
12 Centre air vents .................. 154
13 Anti-theft alarm system
status LED ........................... 25
14 Glovebox .............................. 63
Fuse box ............................. 241
15 Climate control system ........ 148
16 AUX input, USB input, SD
card slot ................................ 10
Power outlet ........................ 10017Selector lever, manual
transmission ....................... 170
Automatic transmission ......167
18 Traction Control system .....174
Electronic Stability Control . 175
Lane departure warning .....205
19 Electric parking brake .........172
20 Parking assist ..................... 192
Advanced parking assist .....195
Stop-start button .................160
21 Ignition switch with
steering wheel lock ............158
22 Horn ..................................... 95
Driver airbag ........................ 53
23 Bonnet release lever ..........223
24 Storage compartment ..........65
25 Steering wheel adjustment ..94
26 Light switch ........................ 136
Headlight range
adjustment ......................... 138
Front fog lights ...................143
Page 17 of 297
In brief15
Rear window wiper
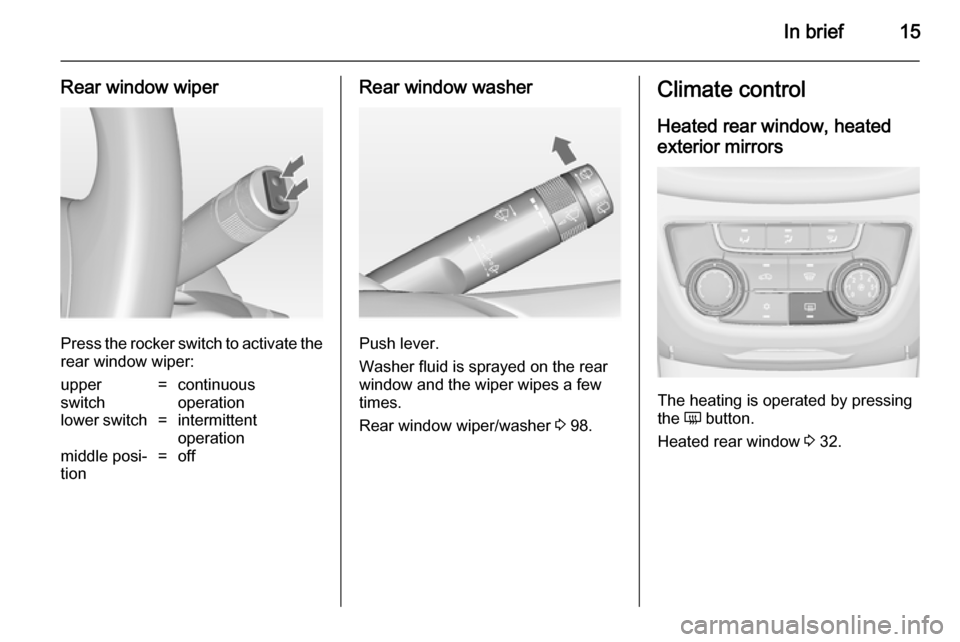
Press the rocker switch to activate the
rear window wiper:
upper
switch=continuous
operationlower switch=intermittent
operationmiddle posi‐
tion=offRear window washer
Push lever.
Washer fluid is sprayed on the rear
window and the wiper wipes a few
times.
Rear window wiper/washer 3 98.
Climate control
Heated rear window, heatedexterior mirrors
The heating is operated by pressing
the Ü button.
Heated rear window 3 32.
Page 19 of 297
In brief17Starting offCheck before starting off ■ Tyre pressure and condition 3 245,
3 283.
■ Engine oil level and fluid levels 3 223.
■ All windows, mirrors, exterior lighting and number plates are free
from dirt, snow and ice and are
operational.
■ Proper position of mirrors, seats, and seat belts 3 28, 3 37,
3 50.
■ Brake function at low speed, particularly if the brakes are wet.Starting the engine
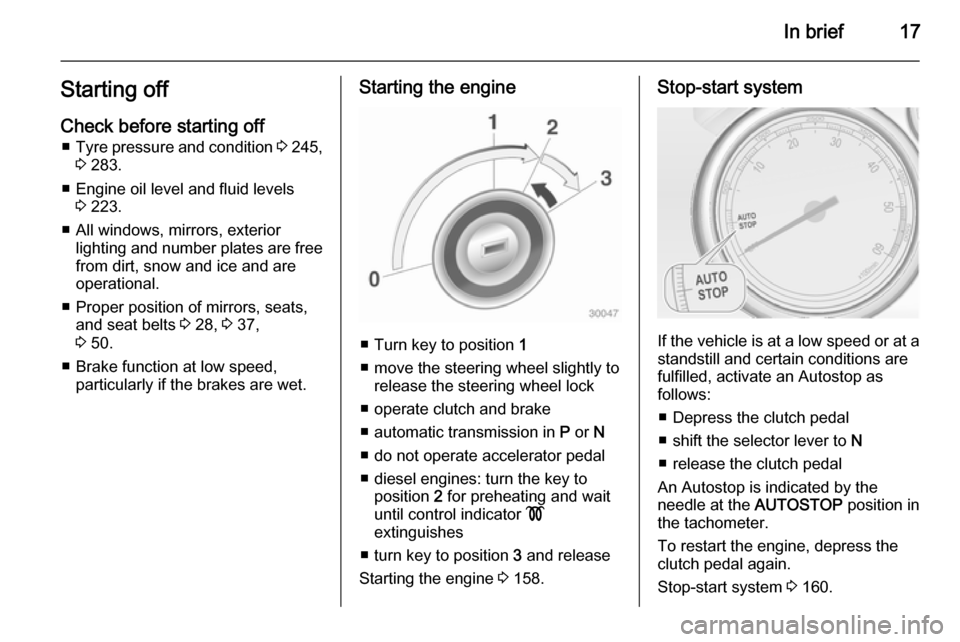
■ Turn key to position 1
■ move the steering wheel slightly to release the steering wheel lock
■ operate clutch and brake
■ automatic transmission in P or N
■ do not operate accelerator pedal
■ diesel engines: turn the key to position 2 for preheating and wait
until control indicator !
extinguishes
■ turn key to position 3 and release
Starting the engine 3 158.
Stop-start system
If the vehicle is at a low speed or at a
standstill and certain conditions are
fulfilled, activate an Autostop as
follows:
■ Depress the clutch pedal
■ shift the selector lever to N
■ release the clutch pedal
An Autostop is indicated by the
needle at the AUTOSTOP position in
the tachometer.
To restart the engine, depress the
clutch pedal again.
Stop-start system 3 160.
Page 21 of 297
Keys, doors and windows19Keys, doors and
windowsKeys, locks ................................... 19
Doors ........................................... 24
Vehicle security ............................ 25
Exterior mirrors ............................ 28
Interior mirrors ............................. 29
Windows ...................................... 30
Roof ............................................. 33Keys, locks
Keys Replacement keys
The key number is specified in the
Car Pass or on a detachable tag.
The key number must be quoted
when ordering replacement keys as it
is a component of the immobiliser
system.
Locks 3 262.
Lock cylinders
Designed to free-wheel if they are
forcefully rotated without the correct
key or if the correct key is not fully
inserted. To reset, turn cylinder with
the correct key until its slot is vertical, remove key and then re-insert it. If the
cylinder still free-wheels, turn the key through 180° and repeat operation.Key with foldaway key section
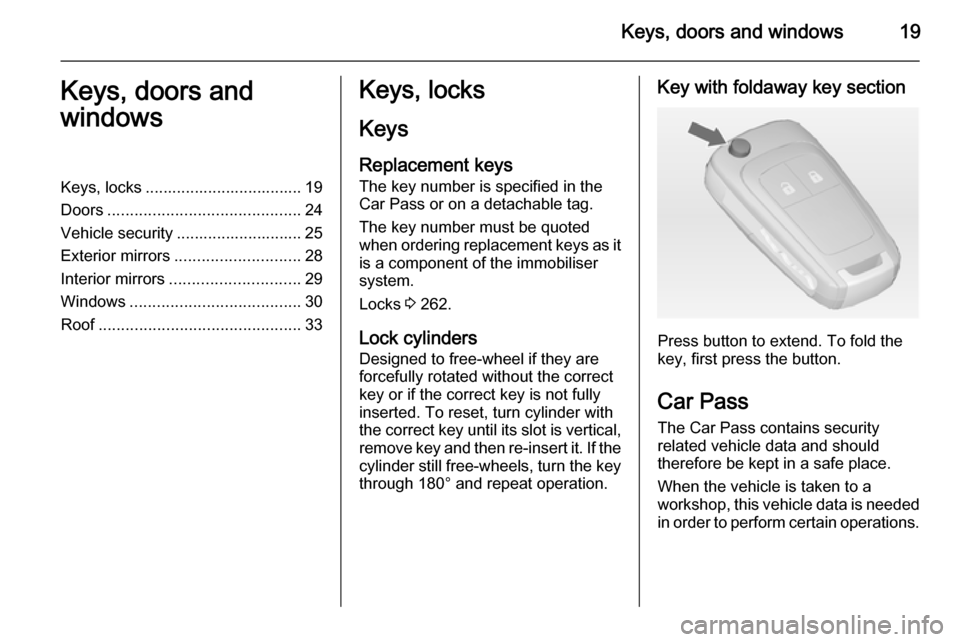
Press button to extend. To fold the
key, first press the button.
Car Pass The Car Pass contains security
related vehicle data and should
therefore be kept in a safe place.
When the vehicle is taken to a
workshop, this vehicle data is needed
in order to perform certain operations.
Page 30 of 297
28Keys, doors and windowsExterior mirrors
Convex shape
The convex exterior mirror contains
an aspherical area and reduces blind spots. The shape of the mirror makes
objects appear smaller, which will
affect the ability to estimate
distances.
Side blind spot alert 3 199.
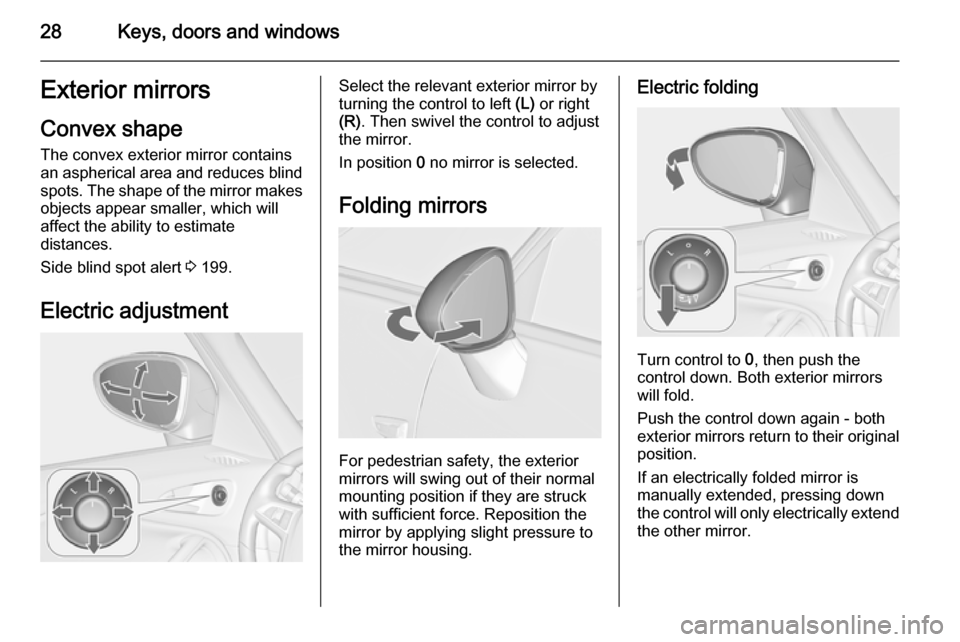
Electric adjustmentSelect the relevant exterior mirror by
turning the control to left (L) or right
(R) . Then swivel the control to adjust
the mirror.
In position 0 no mirror is selected.
Folding mirrors
For pedestrian safety, the exterior
mirrors will swing out of their normal
mounting position if they are struck
with sufficient force. Reposition the
mirror by applying slight pressure tothe mirror housing.
Electric folding
Turn control to 0, then push the
control down. Both exterior mirrors
will fold.
Push the control down again - both
exterior mirrors return to their original position.
If an electrically folded mirror is
manually extended, pressing down
the control will only electrically extend
the other mirror.
Page 31 of 297
Keys, doors and windows29Heated mirrors
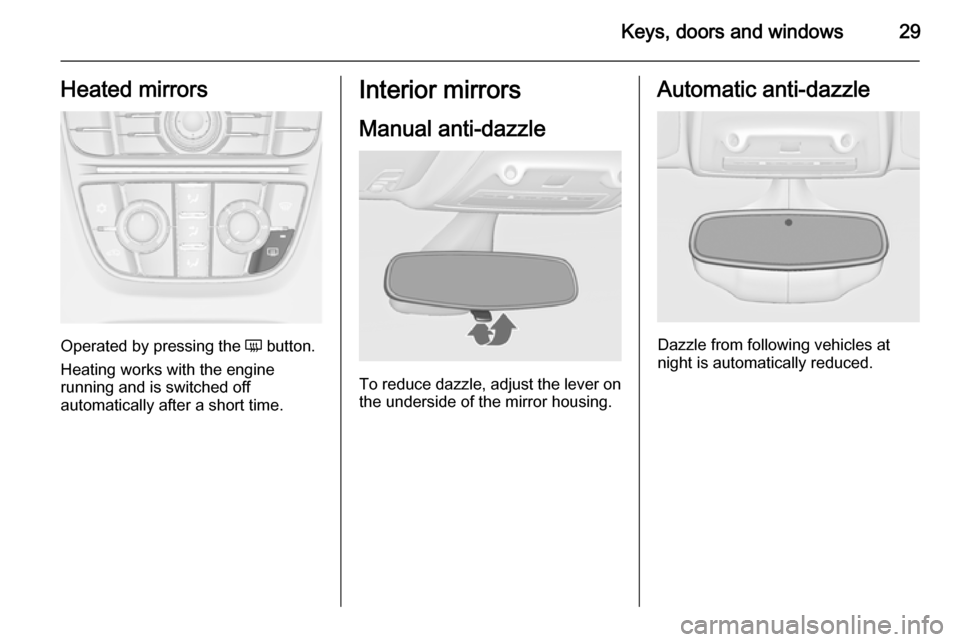
Operated by pressing the Ü button.
Heating works with the engine
running and is switched off
automatically after a short time.
Interior mirrors
Manual anti-dazzle
To reduce dazzle, adjust the lever on the underside of the mirror housing.
Automatic anti-dazzle
Dazzle from following vehicles at
night is automatically reduced.
Page 32 of 297
30Keys, doors and windowsWindows
Windscreen
Heat-reflecting windscreen
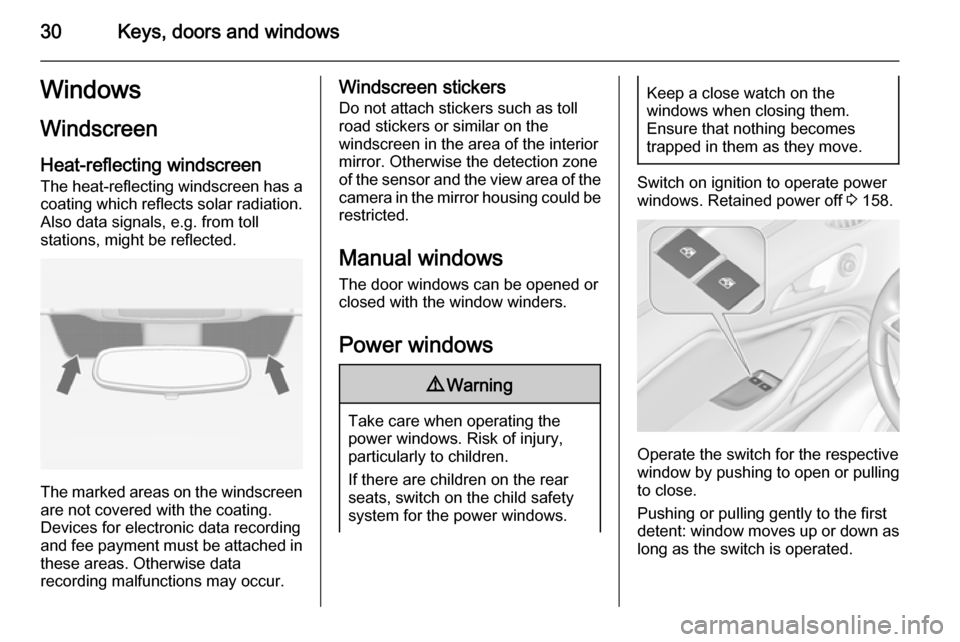
The heat-reflecting windscreen has a
coating which reflects solar radiation. Also data signals, e.g. from toll
stations, might be reflected.
The marked areas on the windscreen are not covered with the coating.
Devices for electronic data recording
and fee payment must be attached in
these areas. Otherwise data
recording malfunctions may occur.
Windscreen stickers
Do not attach stickers such as toll
road stickers or similar on the
windscreen in the area of the interior
mirror. Otherwise the detection zone
of the sensor and the view area of the camera in the mirror housing could be restricted.
Manual windows The door windows can be opened or
closed with the window winders.
Power windows9 Warning
Take care when operating the
power windows. Risk of injury,
particularly to children.
If there are children on the rear seats, switch on the child safety
system for the power windows.
Keep a close watch on the
windows when closing them.
Ensure that nothing becomes
trapped in them as they move.
Switch on ignition to operate power
windows. Retained power off 3 158.
Operate the switch for the respective
window by pushing to open or pulling to close.
Pushing or pulling gently to the first
detent: window moves up or down as
long as the switch is operated.
Page 34 of 297
32Keys, doors and windows
Initialising the power windowsIf the windows cannot be closed
automatically (e.g. after
disconnecting the vehicle battery), a
warning message or a warning code
is displayed in the Driver Information
Centre.
Vehicle messages 3 121.
Activate the window electronics as
follows:
1. Close doors.
2. Switch on ignition.
3. Pull switch until the window is closed and keep pulling for
additional 2 seconds.
4. Repeat for each window.Heated rear window
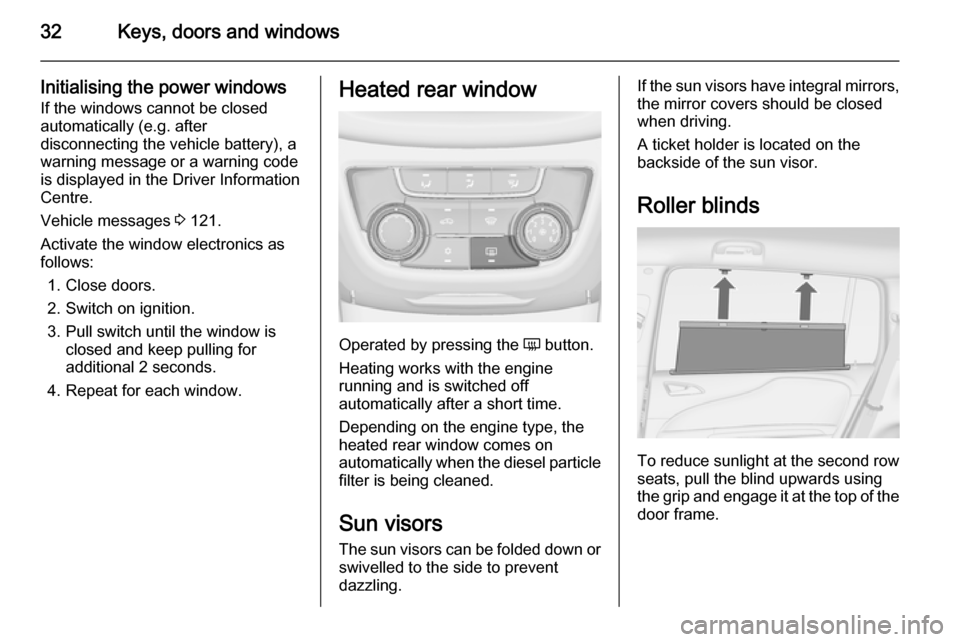
Operated by pressing the Ü button.
Heating works with the engine
running and is switched off
automatically after a short time.
Depending on the engine type, the
heated rear window comes on
automatically when the diesel particle filter is being cleaned.
Sun visors
The sun visors can be folded down or swivelled to the side to prevent
dazzling.
If the sun visors have integral mirrors, the mirror covers should be closed
when driving.
A ticket holder is located on the
backside of the sun visor.
Roller blinds
To reduce sunlight at the second row seats, pull the blind upwards using
the grip and engage it at the top of the
door frame.
Page 201 of 297

Driving and operating199vans). Object identification in the
upper part of these vehicles
cannot be guaranteed.
Objects with a very small reflection
cross section, like objects of
narrow size or soft materials, may
not be detected by the system.
Parking assist will not detect
objects out of the detection range.
Notice
The parking assist system
automatically detects factory-fitted
towing equipment. It is deactivated
when the connector is plugged in.
It is possible that the sensor detects
a non-existing object (echo
disturbance) caused by external
acoustical or mechanic
disturbances.
Advanced parking assist system
may not respond to changes in the
parking space after initiating a
parallel parking manoeuvre.
Notice
Before using the advanced parking
assist the first time, the vehicle has
to be driven at least for 25 miles to
calibrate the system automatically.
Side blind spot alert
The side blind spot alert system
detects and reports objects on either
side of the vehicle, within a specified
"blind spot" zone. The system alerts visually in each exterior mirror, when
detecting objects that may not be
visible in the interior and exterior
mirrors.
The system's sensors are located in
the bumper on the left and right side
of the vehicle.9 Warning
Side blind spot alert does not
replace driver vision.
The system does not detect: ■ Vehicles outside the side blind zones which may be rapidly
approaching.
■ Pedestrians, cyclists or animals.
Before changing a lane, always
check all mirrors, look over the
shoulder and use the turn signal.
When the system detects a vehicle in the side blind zone while driving
forward, either while passing a
vehicle or being passed, an amber warning symbol B will illuminate in
the relevant exterior mirror. If the
driver then activates the turn signal,
the warning symbol B starts flashing
amber as a warning not to change
lanes.