change wheel VAUXHALL ZAFIRA TOURER 2016 Owner's Manual
[x] Cancel search | Manufacturer: VAUXHALL, Model Year: 2016, Model line: ZAFIRA TOURER, Model: VAUXHALL ZAFIRA TOURER 2016Pages: 305, PDF Size: 9.15 MB
Page 13 of 305

In brief111Power windows .....................31
2 Exterior mirrors .....................28
3 Cruise control .....................179
Speed limiter ....................... 180
Adaptive cruise control .......181
Forward collision alert .........188
4 Side air vents ...................... 156
5 Windscreen wiper,
windscreen washer
system, headlight washer
system, rear wiper, rear
washer system ......................98
6 Instruments ........................ 104
7 Steering wheel controls .......97
8 Driver Information Centre .... 116
9 Turn and lane-change
signals, headlight flash,
low beam and high beam,
high beam assist .................145
Exit lighting ......................... 149
Parking lights ...................... 146
Buttons for Driver
Information Centre ..............11610Central locking system ..........21
Hazard warning flashers ....145
Sport mode ........................ 177
Tour mode .......................... 177
Fuel selector ....................... 105
Control indicator for airbag
deactivation ........................ 111
Control indicator for front
passenger seat belt ...........110
11 Info-Display ........................ 120
12 Centre air vents .................. 156
13 Anti-theft alarm system
status LED ........................... 26
14 Glovebox .............................. 66
Fuse box ............................. 242
15 Climate control system ........ 150
16 AUX input, USB input, SD
card slot ................................ 10
Power outlet ........................ 102
17 Selector lever, manual
transmission ....................... 172
Automatic transmission ......16918Traction Control system .....175
Electronic Stability Control . 176
Lane departure warning .....207
19 Electric parking brake .........173
20 Parking assist systems .......194
Stop-start button .................161
21 Ignition switch with
steering wheel lock ............160
22 Horn ..................................... 98
Driver airbag ........................ 57
23 Bonnet release lever ..........224
24 Storage compartment ..........68
25 Steering wheel adjustment ..97
26 Light switch ........................ 138
Headlight range
adjustment ......................... 141
Front fog lights ...................146
Rear fog light ...................... 146
Instrument illumination .......147
Page 68 of 305
66StorageStorageStorage compartments................66
Instrument panel storage ...........66
Glovebox ................................... 66
Cupholders ................................ 67
Front storage ............................. 68
Door panel storage ....................68
Overhead console .....................68
Underseat storage .....................68
Armrest storage .........................69
Centre console storage .............70
Rear carrier system ...................70
Load compartment .......................79
Rear storage .............................. 81
Load compartment cover ...........82
Rear floor storage cover ............83
Load rails and hooks .................88
Lashing eyes ............................. 88
Cargo management system ......88
Safety net .................................. 90
Folding tray ................................ 92
Warning triangle ........................92
First aid kit ................................. 92
Roof rack system .........................93
Roof rack ................................... 93
Loading information .....................94Storage compartments9Warning
Do not store heavy or sharp
objects in the storage
compartments. Otherwise, the
storage compartment lid could
open and vehicle occupants could be injured by objects being thrown
around in the event of hard
braking, a sudden change in
direction or an accident.
Instrument panel storage
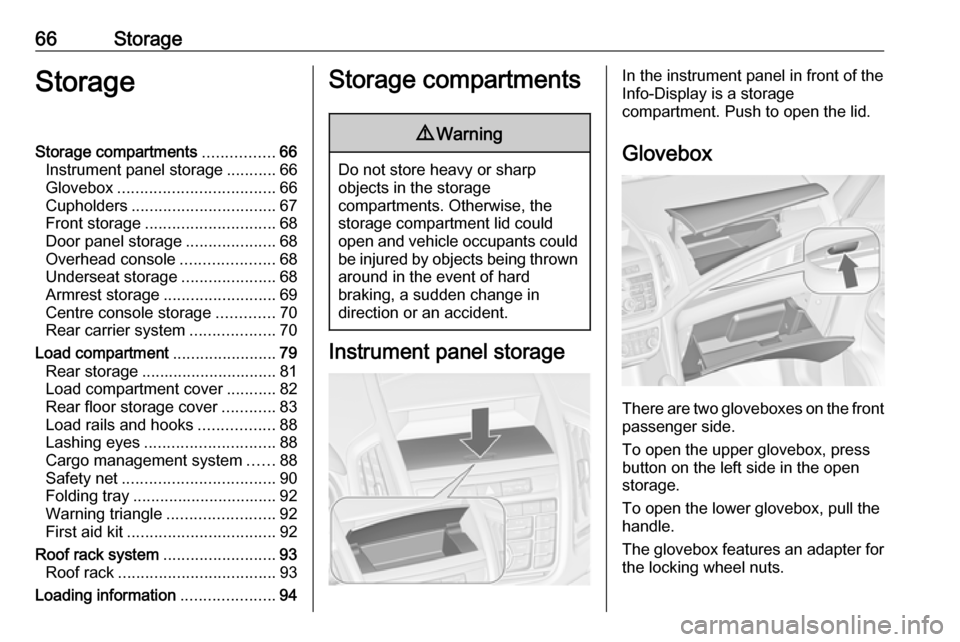
In the instrument panel in front of the
Info-Display is a storage
compartment. Push to open the lid.
Glovebox
There are two gloveboxes on the front
passenger side.
To open the upper glovebox, press
button on the left side in the open
storage.
To open the lower glovebox, pull the handle.
The glovebox features an adapter for the locking wheel nuts.
Page 109 of 305

Instruments and controls107In the Uplevel-Combi-Display, the
remaining oil life duration is displayed
in the Vehicle Information Menu .
In the Midlevel-Display, the remaining
engine oil life duration is displayed by
control indicator I, therefore the
ignition must be switched on, with the engine not running.
The menu and function can be
selected via the buttons on the turn
signal lever.
To display the remaining engine oil life duration:
Press MENU to select the Vehicle
Information Menu .
Turn the adjuster wheel to select
Remaining Oil Life .
The system must be reset every time
the engine oil is changed, to allow
proper functionality. Seek the
assistance of a workshop.
Press SET/CLR to reset. Therefore
the ignition must be switched on, with the engine not running.
When the system has calculated that
engine oil life has been diminished,
Change Engine Oil Soon or a warning
code appears in the Driver
Information Centre. Have engine oil
and filter changed by a workshop
within one week or 300 miles
(whichever occurs first).
Driver Information Centre 3 116.
Service information 3 268.
Control indicators The control indicators described are
not present in all vehicles. The
description applies to all instrument
versions. Depending on the
equipment, the position of the control
indicators may vary. When theignition is switched on, most control indicators will illuminate briefly as afunctionality test.
The control indicator colours mean:red:danger, important reminderyellow:warning, information, faultgreen:confirmation of activationblue:confirmation of activationwhite:confirmation of activation
Page 120 of 305
118Instruments and controlsVehicle Information Menu
Press MENU to select the Vehicle
Information Menu , or on Uplevel-
Combi-Display select X.
Turn the adjuster wheel to select a
submenu. Press SET/CLR to confirm.
Follow the instructions given in the
submenus.
Possible submenus can include,
depending on the version:
● Unit : Displayed units can be
changed.
● Tyre Pressure : Checks tyre
pressure of all wheels during
driving 3 247.
● Tyre Load : Select tyre pressure
category according to the actual
inflated tyre pressure 3 247.
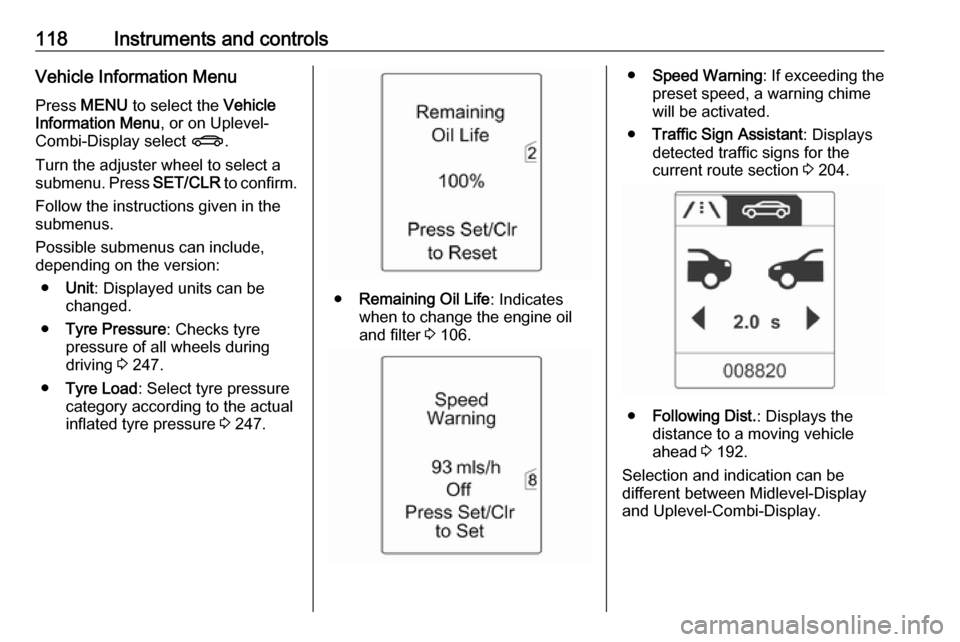
● Remaining Oil Life : Indicates
when to change the engine oil and filter 3 106.
● Speed Warning : If exceeding the
preset speed, a warning chime will be activated.
● Traffic Sign Assistant : Displays
detected traffic signs for the
current route section 3 204.
● Following Dist. : Displays the
distance to a moving vehicle ahead 3 192.
Selection and indication can be
different between Midlevel-Display
and Uplevel-Combi-Display.
Page 126 of 305

124Instruments and controlsNo.Vehicle message56Tyre pressure imbalance on
front axle57Tyre pressure imbalance on
rear axle58Tyres without TPMS sensors
detected59Open then close driver window60Open then close front
passenger window61Open then close rear left
window62Open then close rear right
window65Theft attempted66Service anti-theft alarm system67Service steering wheel lock68Service power steering69Service suspension system70Service level control systemNo.Vehicle message71Service rear axle74Service AFL75Service air conditioning76Service side blind spot alert
system77Service lane departure warning79Top up engine oil81Service transmission82Change engine oil soon83Service adaptive cruise control84Engine power is reduced89Service vehicle soon94Shift to park position before
exiting95Service airbag128Bonnet open134Park assist fault, clean bumper136Service parking assistNo.Vehicle message145Check washer fluid level174Low vehicle battery258Parking assist off
Vehicle messages on the
Uplevel-Combi-Display
The vehicle messages are displayed
as text. Follow the instructions given
in the messages.
Page 147 of 305
Lighting145Automatic high beam activation
operates at a speed above 25 mph
and deactivates below 12 mph.
Intelligent light ranging operates
above 35 mph.
The green control indicator l
illuminates continuously when the
function is activated, the blue one 7
illuminates when high beam switches
on automatically.
Deactivation
Push indicator lever once. It is also deactivated when front fog lights are
switched on.
Dynamic automatic headlightlevelling
To prevent oncoming traffic from
dazzle, headlight levelling is
automatically adjusted based on
inclination information measured by
front and rear axle, acceleration or
deceleration and vehicle speed.Fault in Adaptive forward lighting
system
When the system detects a failure in
the Adaptive forward lighting system,
the system moves to a preset position to avoid dazzling of oncoming traffic.
If this is not possible, the affected
headlight will be automatically
switched off. In any case, one
headlight will stay on. A warning is
displayed in the Driver Information
Centre.
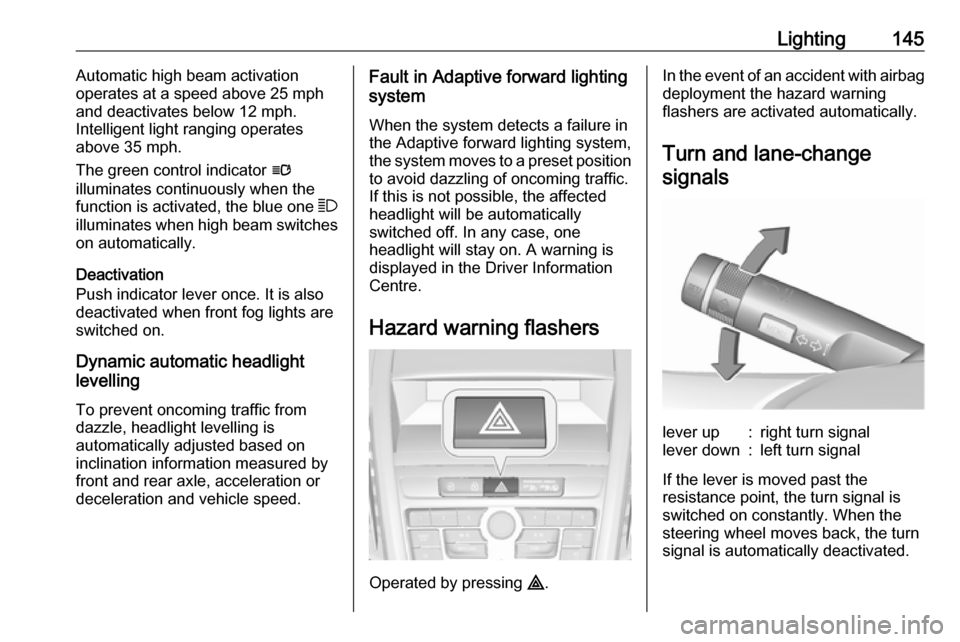
Hazard warning flashers
Operated by pressing ¨.
In the event of an accident with airbag
deployment the hazard warning
flashers are activated automatically.
Turn and lane-changesignalslever up:right turn signallever down:left turn signal
If the lever is moved past the
resistance point, the turn signal is
switched on constantly. When the
steering wheel moves back, the turn
signal is automatically deactivated.
Page 153 of 305
Climate control151Air conditioning system
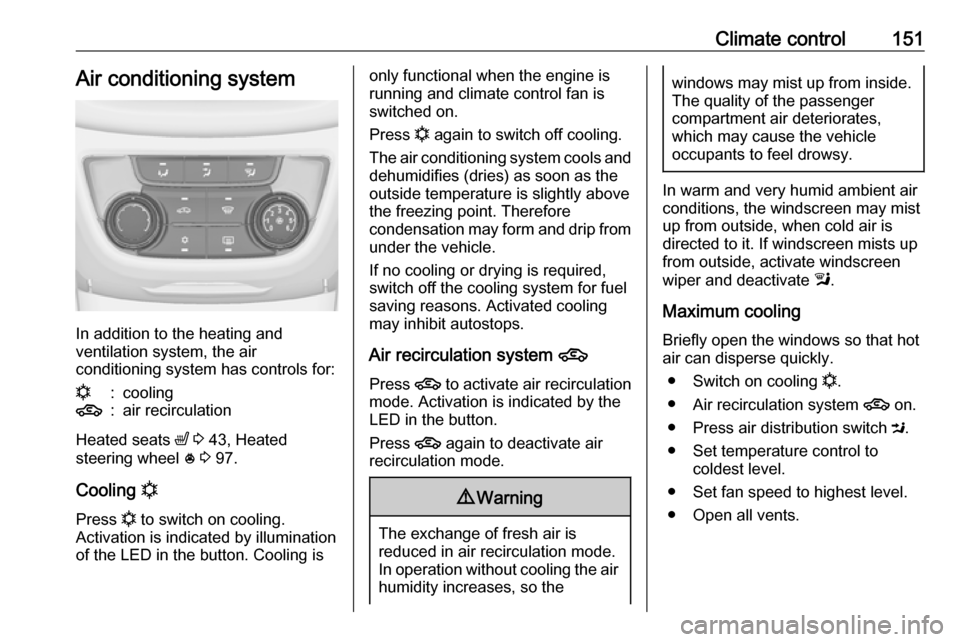
In addition to the heating and
ventilation system, the air
conditioning system has controls for:
n:cooling4:air recirculation
Heated seats ß 3 43, Heated
steering wheel * 3 97.
Cooling n
Press n to switch on cooling.
Activation is indicated by illumination
of the LED in the button. Cooling is
only functional when the engine is
running and climate control fan is
switched on.
Press n again to switch off cooling.
The air conditioning system cools and
dehumidifies (dries) as soon as the
outside temperature is slightly above
the freezing point. Therefore
condensation may form and drip from
under the vehicle.
If no cooling or drying is required,
switch off the cooling system for fuel
saving reasons. Activated cooling
may inhibit autostops.
Air recirculation system 4
Press 4 to activate air recirculation
mode. Activation is indicated by the
LED in the button.
Press 4 again to deactivate air
recirculation mode.9 Warning
The exchange of fresh air is
reduced in air recirculation mode.
In operation without cooling the air humidity increases, so the
windows may mist up from inside.
The quality of the passenger
compartment air deteriorates,
which may cause the vehicle
occupants to feel drowsy.
In warm and very humid ambient air conditions, the windscreen may mist
up from outside, when cold air is
directed to it. If windscreen mists up
from outside, activate windscreen
wiper and deactivate l.
Maximum cooling Briefly open the windows so that hot
air can disperse quickly.
● Switch on cooling n.
● Air recirculation system 4 on.
● Press air distribution switch M.
● Set temperature control to coldest level.
● Set fan speed to highest level.
● Open all vents.
Page 158 of 305
156Climate controldirected towards it. If windscreen
mists up from outside, activate
windscreen wiper and deactivate l.
Basic settings
Some settings can be changed in the
Settings menu in the Info-Display.
Vehicle personalisation 3 129.
Auxiliary heater Air heater
Quickheat is an electric auxiliary air
heater which automatically warms up
the passenger compartment more
quickly.
Air vents
Adjustable air vents
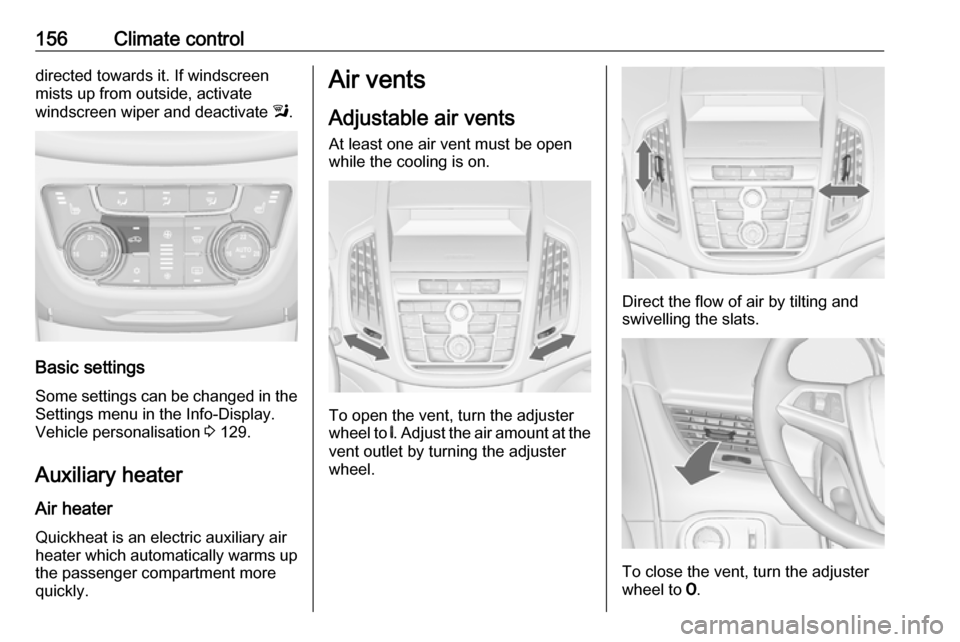
At least one air vent must be open
while the cooling is on.
To open the vent, turn the adjuster
wheel to B. Adjust the air amount at the
vent outlet by turning the adjuster
wheel.
Direct the flow of air by tilting and swivelling the slats.
To close the vent, turn the adjuster
wheel to 7.
Page 183 of 305
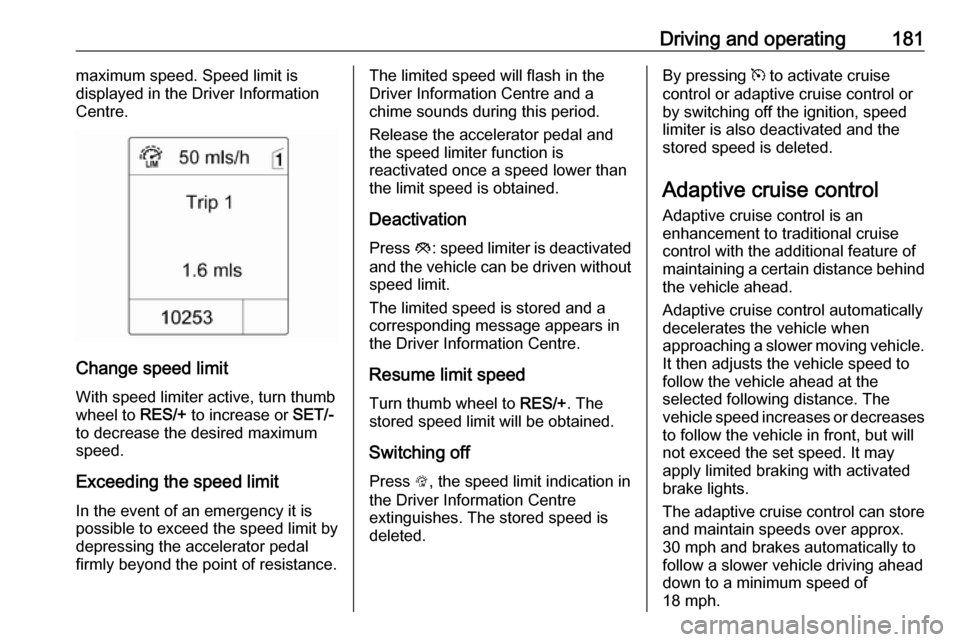
Driving and operating181maximum speed. Speed limit is
displayed in the Driver Information
Centre.
Change speed limit
With speed limiter active, turn thumb
wheel to RES/+ to increase or SET/-
to decrease the desired maximum
speed.
Exceeding the speed limit
In the event of an emergency it is
possible to exceed the speed limit by
depressing the accelerator pedal firmly beyond the point of resistance.
The limited speed will flash in the
Driver Information Centre and a
chime sounds during this period.
Release the accelerator pedal and the speed limiter function is
reactivated once a speed lower than
the limit speed is obtained.
Deactivation Press y: speed limiter is deactivated
and the vehicle can be driven without speed limit.
The limited speed is stored and a
corresponding message appears in
the Driver Information Centre.
Resume limit speed
Turn thumb wheel to RES/+. The
stored speed limit will be obtained.
Switching off
Press L, the speed limit indication in
the Driver Information Centre
extinguishes. The stored speed is
deleted.By pressing m to activate cruise
control or adaptive cruise control or
by switching off the ignition, speed
limiter is also deactivated and the
stored speed is deleted.
Adaptive cruise control
Adaptive cruise control is an
enhancement to traditional cruise control with the additional feature of
maintaining a certain distance behind the vehicle ahead.
Adaptive cruise control automatically
decelerates the vehicle when
approaching a slower moving vehicle. It then adjusts the vehicle speed to
follow the vehicle ahead at the
selected following distance. The
vehicle speed increases or decreases
to follow the vehicle in front, but will
not exceed the set speed. It may
apply limited braking with activated
brake lights.
The adaptive cruise control can store and maintain speeds over approx.
30 mph and brakes automatically to
follow a slower vehicle driving ahead
down to a minimum speed of
18 mph.
Page 188 of 305
186Driving and operatingDriver's attention● Use adaptive cruise control carefully on bends or mountain
roads, as it can lose the vehicle
ahead and require time to detect
it again.
● Do not use the system on slippery roads as it can create
rapid changes in tyre traction
(wheel spinning), so that you
could lose control.
● Do not use adaptive cruise control during rain, snow or
heavy dirt, as the radar sensor
can be covered by a water film,
dust, ice or snow. This reduces or completely suppresses the
visibility. In case of sensor
blockage, clean the sensor
cover.
System limits ● The system's automatic brake force does not permit hard
braking and the braking level
may not be sufficient to avoid a
collision.● After a sudden lane change, the system needs a certain time todetect the next preceding
vehicle. So if a new vehicle is
detected, the system may
accelerate instead of braking.
● Adaptive cruise control does ignore the oncoming traffic.
● Adaptive cruise control does not brake for stopped vehicles,
pedestrians or animals.
Bends
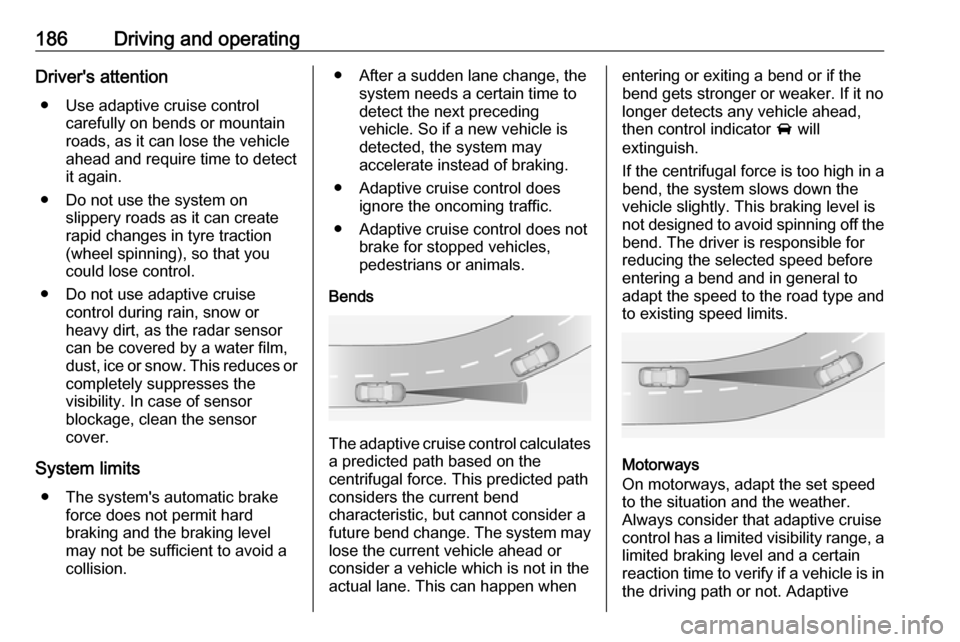
The adaptive cruise control calculates
a predicted path based on the
centrifugal force. This predicted path
considers the current bend
characteristic, but cannot consider a
future bend change. The system may lose the current vehicle ahead or
consider a vehicle which is not in the
actual lane. This can happen when
entering or exiting a bend or if the
bend gets stronger or weaker. If it no
longer detects any vehicle ahead,
then control indicator A will
extinguish.
If the centrifugal force is too high in a bend, the system slows down the vehicle slightly. This braking level is
not designed to avoid spinning off the bend. The driver is responsible for
reducing the selected speed before
entering a bend and in general to
adapt the speed to the road type and
to existing speed limits.
Motorways
On motorways, adapt the set speed
to the situation and the weather.
Always consider that adaptive cruise
control has a limited visibility range, a
limited braking level and a certain
reaction time to verify if a vehicle is in
the driving path or not. Adaptive