parking sensors VAUXHALL ZAFIRA TOURER 2016 Owner's Manual
[x] Cancel search | Manufacturer: VAUXHALL, Model Year: 2016, Model line: ZAFIRA TOURER, Model: VAUXHALL ZAFIRA TOURER 2016Pages: 305, PDF Size: 9.15 MB
Page 115 of 305

Instruments and controls113Upshift[ illuminates green as a control
indicator, or is shown as a symbol in
the Driver Information Centre with
Uplevel-Combi-Display, when
upshifting is recommended for fuel
saving reasons.
On some versions, gearshift
indication is popped-up as a full page
in the Driver Information Centre.
EcoFlex drive assistant 3 126.
Power steering
c illuminates yellow.
Illuminates with power steering
reduced
Power steering is reduced due to
overheating of the system. Control
indicator extinguishes when the
system has cooled down.
Stop-start system 3 161.
Illuminates with power steering disabled
Failure in the power steering system.
Consult a workshop.Lane departure warning
) illuminates green or flashes yellow.
Illuminates green
System is switched on and ready to
operate.
Flashes yellow System recognizes an unintended
lane change.
Ultrasonic parking assist
r illuminates yellow.
Fault in system
or
Fault due to sensors that are dirty or covered by ice or snow
or
Interference due to external sources of ultrasound. Once the source of
interference is removed, the system
will operate normally.
Have the cause of the fault in the
system remedied by a workshop.
Ultrasonic parking assist 3 194.Electronic Stability Control
off
n illuminates yellow.
The system is deactivated.
Electronic Stability Control and Traction Control system
b illuminates or flashes yellow.
Illuminates
A fault in the system is present.
Continued driving is possible. Driving
stability, however, may deteriorate depending on road surface
conditions.
Have the cause of the fault remedied
by a workshop.
Flashes
The system is actively engaged. Engine output may be reduced and the vehicle may be braked
automatically to a small degree.
Electronic Stability Control 3 176,
Traction Control system 3 175.
Page 126 of 305

124Instruments and controlsNo.Vehicle message56Tyre pressure imbalance on
front axle57Tyre pressure imbalance on
rear axle58Tyres without TPMS sensors
detected59Open then close driver window60Open then close front
passenger window61Open then close rear left
window62Open then close rear right
window65Theft attempted66Service anti-theft alarm system67Service steering wheel lock68Service power steering69Service suspension system70Service level control systemNo.Vehicle message71Service rear axle74Service AFL75Service air conditioning76Service side blind spot alert
system77Service lane departure warning79Top up engine oil81Service transmission82Change engine oil soon83Service adaptive cruise control84Engine power is reduced89Service vehicle soon94Shift to park position before
exiting95Service airbag128Bonnet open134Park assist fault, clean bumper136Service parking assistNo.Vehicle message145Check washer fluid level174Low vehicle battery258Parking assist off
Vehicle messages on the
Uplevel-Combi-Display
The vehicle messages are displayed
as text. Follow the instructions given
in the messages.
Page 196 of 305
194Driving and operating
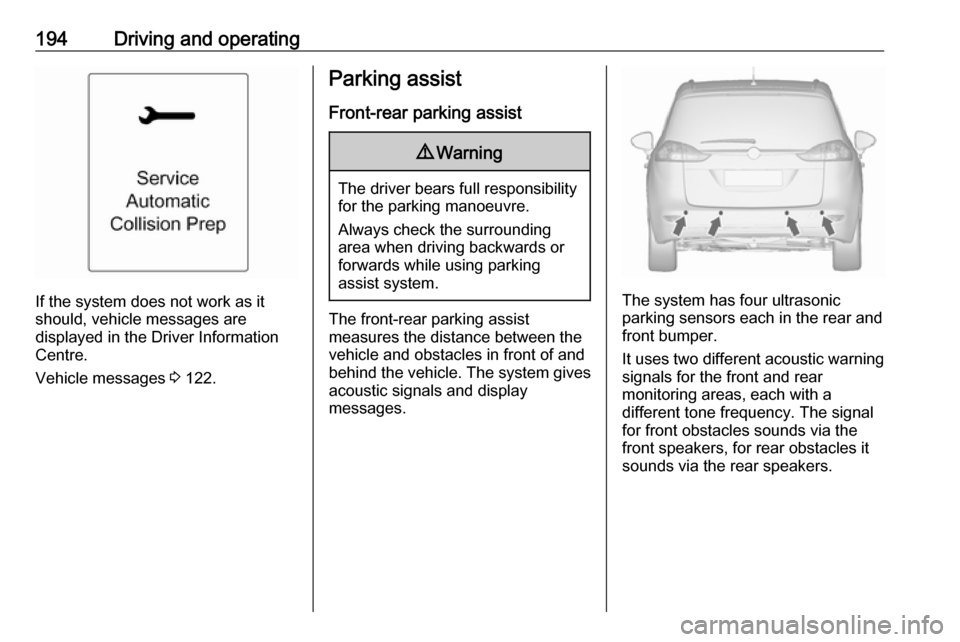
If the system does not work as it
should, vehicle messages are
displayed in the Driver Information
Centre.
Vehicle messages 3 122.
Parking assist
Front-rear parking assist9 Warning
The driver bears full responsibility
for the parking manoeuvre.
Always check the surrounding
area when driving backwards or
forwards while using parking
assist system.
The front-rear parking assist
measures the distance between the vehicle and obstacles in front of and
behind the vehicle. The system gives acoustic signals and display
messages.
The system has four ultrasonic
parking sensors each in the rear and
front bumper.
It uses two different acoustic warning
signals for the front and rear
monitoring areas, each with a
different tone frequency. The signal
for front obstacles sounds via the
front speakers, for rear obstacles it
sounds via the rear speakers.
Page 198 of 305
196Driving and operating
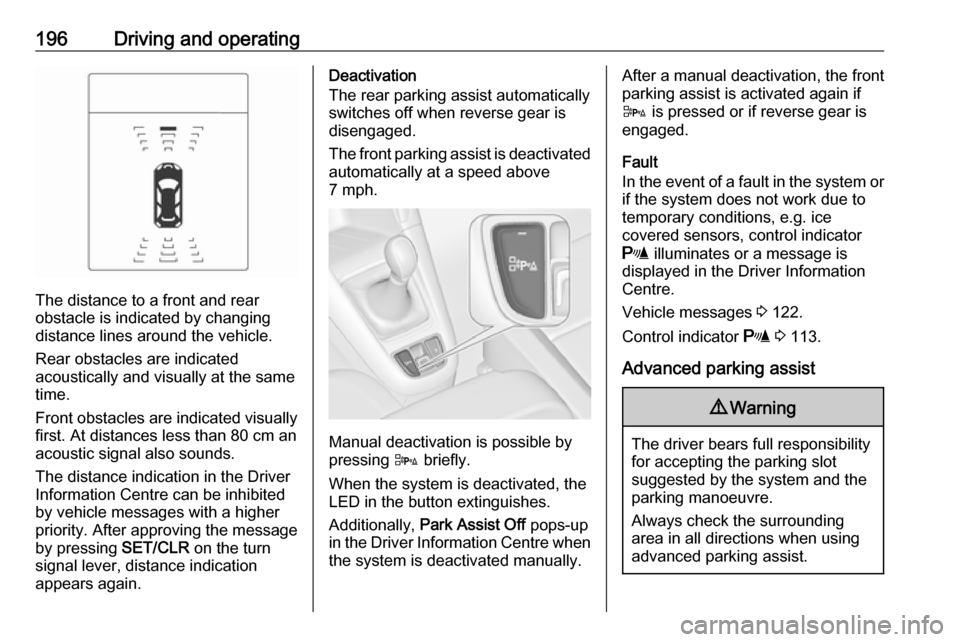
The distance to a front and rear
obstacle is indicated by changing
distance lines around the vehicle.
Rear obstacles are indicated
acoustically and visually at the same
time.
Front obstacles are indicated visually
first. At distances less than 80 cm an
acoustic signal also sounds.
The distance indication in the Driver
Information Centre can be inhibited
by vehicle messages with a higher
priority. After approving the message
by pressing SET/CLR on the turn
signal lever, distance indication
appears again.
Deactivation
The rear parking assist automatically
switches off when reverse gear is
disengaged.
The front parking assist is deactivated
automatically at a speed above
7 mph.
Manual deactivation is possible by
pressing D briefly.
When the system is deactivated, the
LED in the button extinguishes.
Additionally, Park Assist Off pops-up
in the Driver Information Centre when the system is deactivated manually.
After a manual deactivation, the front
parking assist is activated again if
D is pressed or if reverse gear is
engaged.
Fault
In the event of a fault in the system or if the system does not work due to
temporary conditions, e.g. ice
covered sensors, control indicator
r illuminates or a message is
displayed in the Driver Information
Centre.
Vehicle messages 3 122.
Control indicator r 3 113.
Advanced parking assist9 Warning
The driver bears full responsibility
for accepting the parking slot
suggested by the system and the
parking manoeuvre.
Always check the surrounding
area in all directions when using
advanced parking assist.
Page 199 of 305
Driving and operating197
The advanced parking assist system
manoeuvres the driver into a parking slot by giving instructions on the
Driver Information Centre and via
acoustic signals. The driver must
control acceleration, braking, steering
and gearshifting.
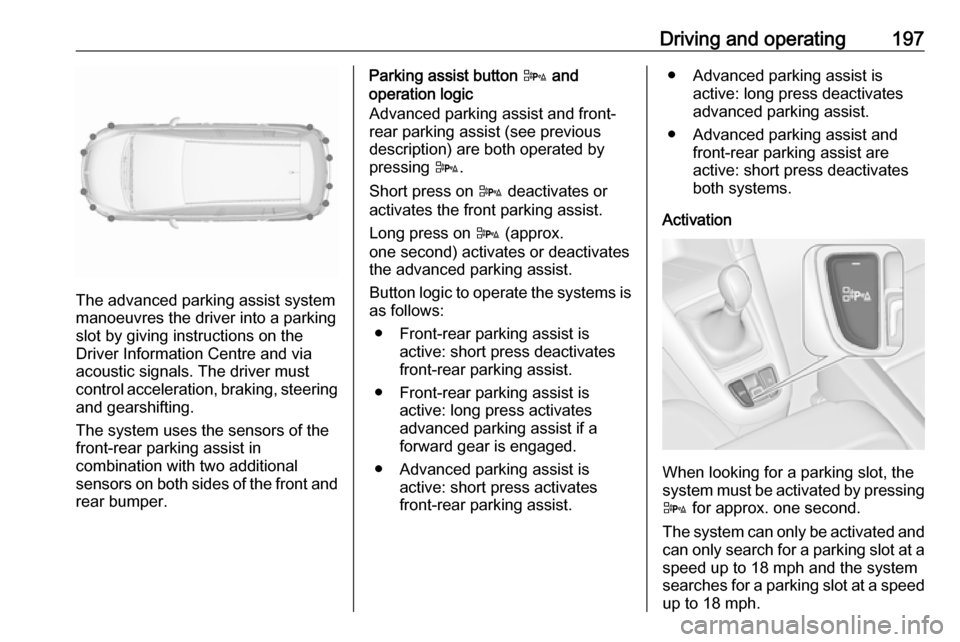
The system uses the sensors of the
front-rear parking assist in
combination with two additional
sensors on both sides of the front and rear bumper.
Parking assist button D and
operation logic
Advanced parking assist and front-
rear parking assist (see previous
description) are both operated by
pressing D.
Short press on D deactivates or
activates the front parking assist.
Long press on D (approx.
one second) activates or deactivates
the advanced parking assist.
Button logic to operate the systems is as follows:
● Front-rear parking assist is active: short press deactivates
front-rear parking assist.
● Front-rear parking assist is active: long press activates
advanced parking assist if a
forward gear is engaged.
● Advanced parking assist is active: short press activates
front-rear parking assist.● Advanced parking assist is active: long press deactivates
advanced parking assist.
● Advanced parking assist and front-rear parking assist are
active: short press deactivates
both systems.
Activation
When looking for a parking slot, the
system must be activated by pressing D for approx. one second.
The system can only be activated and
can only search for a parking slot at a
speed up to 18 mph and the system
searches for a parking slot at a speed up to 18 mph.
Page 202 of 305

200Driving and operatingBasic notes on parking assist
systems9 Warning
Under certain circumstances,
various reflective surfaces on
objects or clothing as well as
external noise sources may cause the system to fail to detect
obstacles.
Special attention must be paid to
low obstacles which can damage
the lower part of the bumper.
Caution
Performance of the system can be reduced when sensors are
covered, e.g. by ice or snow.
Performance of the parking assist
system can be reduced due to
heavy loading.
Special conditions apply if there
are taller vehicles in the vicinity
(e.g. off-road vehicles, mini vans,
vans). Object identification and
correct distance indication in the
upper part of these vehicles
cannot be guaranteed.
Objects with a very small reflection
cross-section, e.g. objects of
narrow size or soft materials, may
not be detected by the system.
Parking assist systems do not
detect objects outside the
detection range.
Notice
The parking assist system can be
activated and deactivated by
changing the settings in the
Info-Display. If a trailer coupling is
attached, it must be selected in the
menu.
Vehicle personalisation 3 129.
Notice
The parking assist system
automatically detects factory-fitted
towing equipment. It is deactivated
when the connector is plugged in.
It is possible that the sensor detects
a non-existing object (echo
disturbance) caused by external acoustical or mechanic
disturbances.
Advanced parking assist system
may not respond to changes in the
parking space after initiating a
parallel parking manoeuvre.
Notice
If engaging a forward gear and
exceeding a certain speed, the rear
parking assist will be deactivated
when the rear carrier system is
extended.
If engaging reverse gear first, the
parking assist will detect the rear
carrier system and provide a buzzing sound. Press D briefly to
deactivate the parking assist.
Notice
After production, the advanced
parking assist requires a calibration.
For optimal parking guidance, a
driving distance of at least 22 miles,
including a number of bends, is
required.
Page 204 of 305
202Driving and operatingby approx. 3 metres. The height of thezone is approx. between 0.5 metres
and 2 metres off the ground.
The system is deactivated if the
vehicle is towing a trailer.
Side blind spot alert is designed to ignore stationary objects such as
guardrails, posts, curbs, walls and
beams. Parked vehicles or oncoming
vehicles are not detected.
Fault
Occasional missed alerts can occur under normal circumstances and will
increase in wet conditions.
Side blind spot alert does not operate when the left or right corners of the
rear bumper are covered with mud,
dirt, snow, ice, slush, or in heavy
rainstorms. Cleaning instructions
3 264.
In the event of a fault in the system or if the system does not work due to
temporary conditions, a message is
displayed in the Driver Information
Centre. Seek the assistance of a
workshop in case of a permanent fault.Rear view camera
The rear view camera assists the
driver when reversing by displaying a view of the area behind the vehicle.
The view of the camera is displayed
in the Colour-Info-Display.9 Warning
The rear view camera does not
replace driver vision. Note that
objects that are outside the
camera's field of view and the
advanced parking assist sensors,
e.g. below the bumper or
underneath the vehicle, are not
displayed.
Do not reverse the vehicle by only looking at the Info-Display and
check the surrounding area
behind and around the vehicle
before reversing.
Activation
Rear view camera is automatically
activated when reverse gear is
engaged.
Functionality
The camera is mounted in the tailgate handle and has a viewing angle of
130°.
Page 205 of 305
Driving and operating203Due to the high position of the
camera, the rear bumper can be seen
on the display as a guide to position.
The area displayed by the camera is
limited. The distance of the image that
appears on the display differs from
the actual distance.
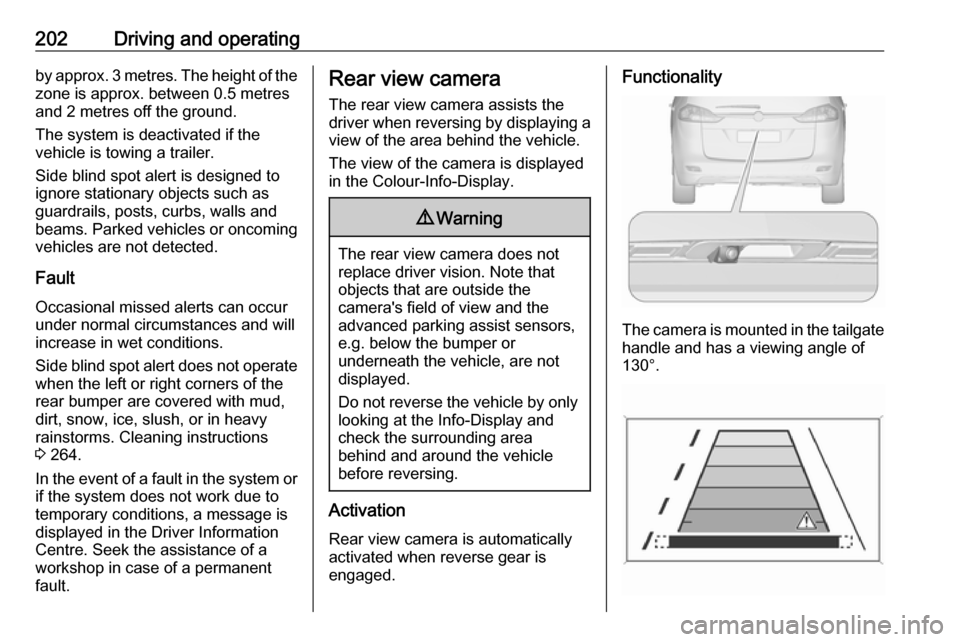
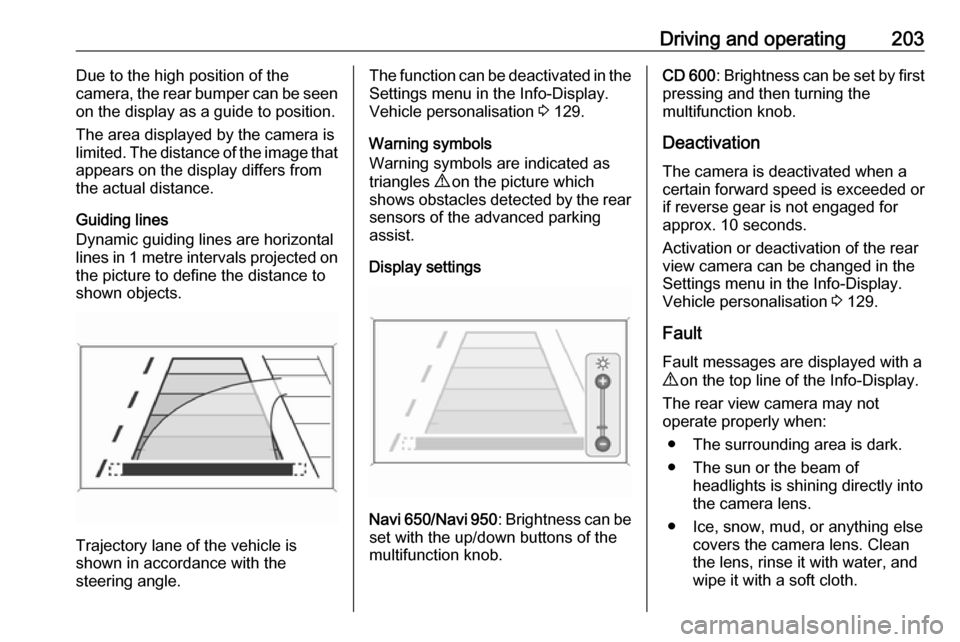
Guiding lines
Dynamic guiding lines are horizontal
lines in 1 metre intervals projected on
the picture to define the distance to
shown objects.
Trajectory lane of the vehicle is
shown in accordance with the
steering angle.
The function can be deactivated in the
Settings menu in the Info-Display.
Vehicle personalisation 3 129.
Warning symbols
Warning symbols are indicated as
triangles 9 on the picture which
shows obstacles detected by the rear sensors of the advanced parking
assist.
Display settings
Navi 650 /Navi 950 : Brightness can be
set with the up/down buttons of the
multifunction knob.
CD 600 : Brightness can be set by first
pressing and then turning the
multifunction knob.
Deactivation The camera is deactivated when a
certain forward speed is exceeded or
if reverse gear is not engaged for
approx. 10 seconds.
Activation or deactivation of the rear
view camera can be changed in the Settings menu in the Info-Display.
Vehicle personalisation 3 129.
Fault
Fault messages are displayed with a
9 on the top line of the Info-Display.
The rear view camera may not
operate properly when:
● The surrounding area is dark.
● The sun or the beam of headlights is shining directly into
the camera lens.
● Ice, snow, mud, or anything else covers the camera lens. Clean
the lens, rinse it with water, and
wipe it with a soft cloth.
Page 251 of 305
Vehicle care249Each time the tyres are replaced, tyre
pressure monitoring system sensors
must be dismounted and serviced. For the screwed sensor, replace
valve core and sealing ring. For
clipped sensor, replace complete
valve stem.
Vehicle loading status
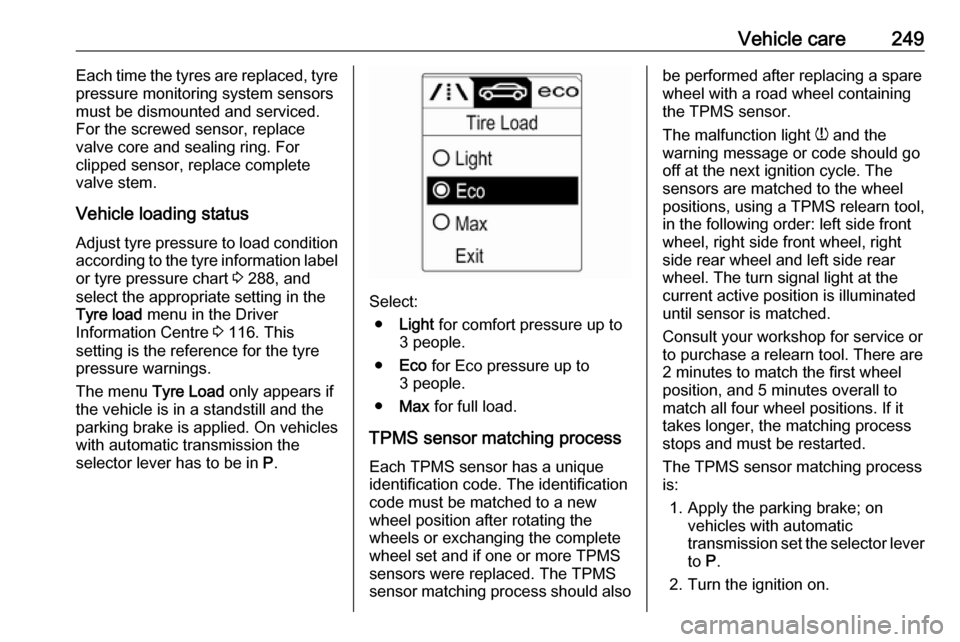
Adjust tyre pressure to load condition according to the tyre information labelor tyre pressure chart 3 288, and
select the appropriate setting in the
Tyre load menu in the Driver
Information Centre 3 116. This
setting is the reference for the tyre
pressure warnings.
The menu Tyre Load only appears if
the vehicle is in a standstill and the
parking brake is applied. On vehicles
with automatic transmission the
selector lever has to be in P.
Select:
● Light for comfort pressure up to
3 people.
● Eco for Eco pressure up to
3 people.
● Max for full load.
TPMS sensor matching process Each TPMS sensor has a unique
identification code. The identification
code must be matched to a new
wheel position after rotating the
wheels or exchanging the complete
wheel set and if one or more TPMS
sensors were replaced. The TPMS sensor matching process should also
be performed after replacing a spare
wheel with a road wheel containing
the TPMS sensor.
The malfunction light w and the
warning message or code should go
off at the next ignition cycle. The
sensors are matched to the wheel
positions, using a TPMS relearn tool,
in the following order: left side front
wheel, right side front wheel, right
side rear wheel and left side rear
wheel. The turn signal light at the
current active position is illuminated
until sensor is matched.
Consult your workshop for service or
to purchase a relearn tool. There are
2 minutes to match the first wheel
position, and 5 minutes overall to
match all four wheel positions. If it
takes longer, the matching process
stops and must be restarted.
The TPMS sensor matching process
is:
1. Apply the parking brake; on vehicles with automatic
transmission set the selector lever
to P.
2. Turn the ignition on.