ignition VAUXHALL ZAFIRA TOURER 2017.5 User Guide
[x] Cancel search | Manufacturer: VAUXHALL, Model Year: 2017.5, Model line: ZAFIRA TOURER, Model: VAUXHALL ZAFIRA TOURER 2017.5Pages: 291, PDF Size: 8.9 MB
Page 30 of 291
28Keys, doors and windowsImmobiliser
The system is part of the ignition
switch and checks whether the
vehicle is allowed to be started with
the key being used.
The immobiliser is activated
automatically after the key has been
removed from the ignition switch.
If the control indicator d flashes when
the ignition is on, there is a fault in the
system; the engine cannot be started. Switch off the ignition and repeat the
start attempt.
If the control indicator continues
flashing, attempt to start the engine
using the spare key and seek the
assistance of a workshop.
Notice
The immobiliser does not lock the
doors. You should always lock the
vehicle after leaving it and switch on
the anti-theft alarm system 3 22,
3 26.
Control indicator d 3 115.Exterior mirrors
Convex shape The convex exterior mirror contains
an aspherical area and reduces blind spots. The shape of the mirror makes
objects appear smaller, which will
affect the ability to estimate
distances.
Side blind spot alert 3 189.
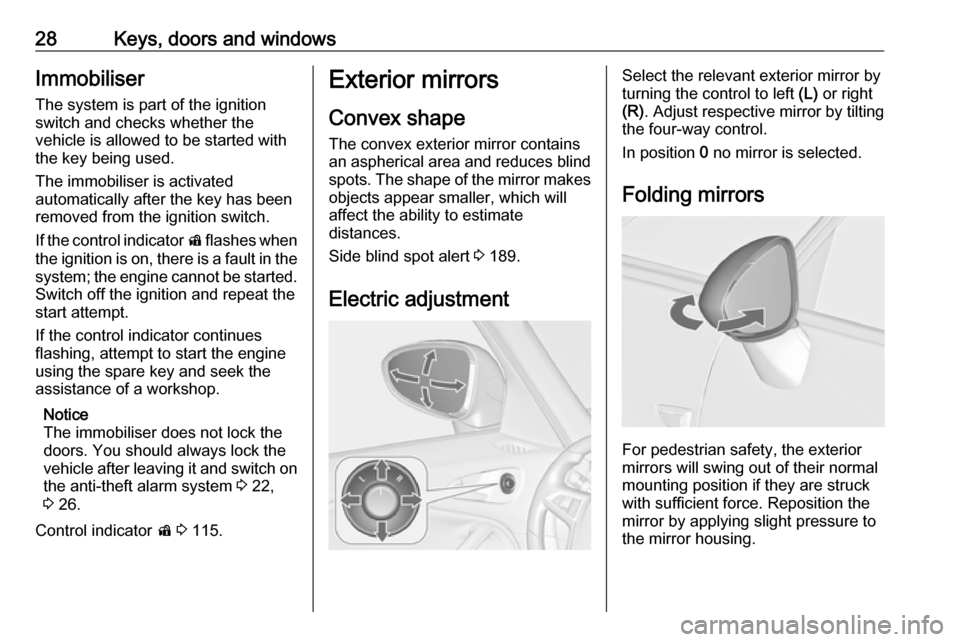
Electric adjustmentSelect the relevant exterior mirror by
turning the control to left (L) or right
(R) . Adjust respective mirror by tilting
the four-way control.
In position 0 no mirror is selected.
Folding mirrors
For pedestrian safety, the exterior
mirrors will swing out of their normal
mounting position if they are struck
with sufficient force. Reposition the
mirror by applying slight pressure tothe mirror housing.
Page 33 of 291
Keys, doors and windows31Power windows9Warning
Take care when operating the
power windows. Risk of injury,
particularly to children.
If there are children on the rear seats, switch on the child safety
system for the power windows.
Keep a close watch on the
windows when closing them.
Ensure that nothing becomes
trapped in them as they move.
Switch on ignition to operate power
windows. Retained power off 3 151.
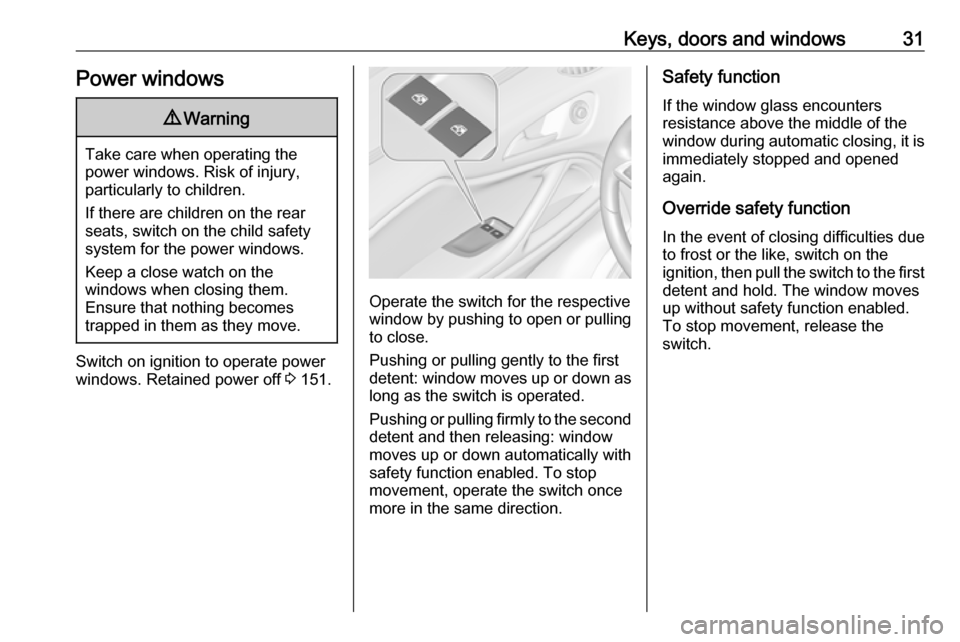
Operate the switch for the respective
window by pushing to open or pulling to close.
Pushing or pulling gently to the first
detent: window moves up or down as long as the switch is operated.
Pushing or pulling firmly to the second
detent and then releasing: window
moves up or down automatically with
safety function enabled. To stop
movement, operate the switch once
more in the same direction.
Safety function
If the window glass encounters
resistance above the middle of the
window during automatic closing, it is
immediately stopped and opened again.
Override safety function In the event of closing difficulties due
to frost or the like, switch on the
ignition, then pull the switch to the first
detent and hold. The window moves
up without safety function enabled.
To stop movement, release the
switch.
Page 34 of 291
32Keys, doors and windowsChild safety system for rear
windows
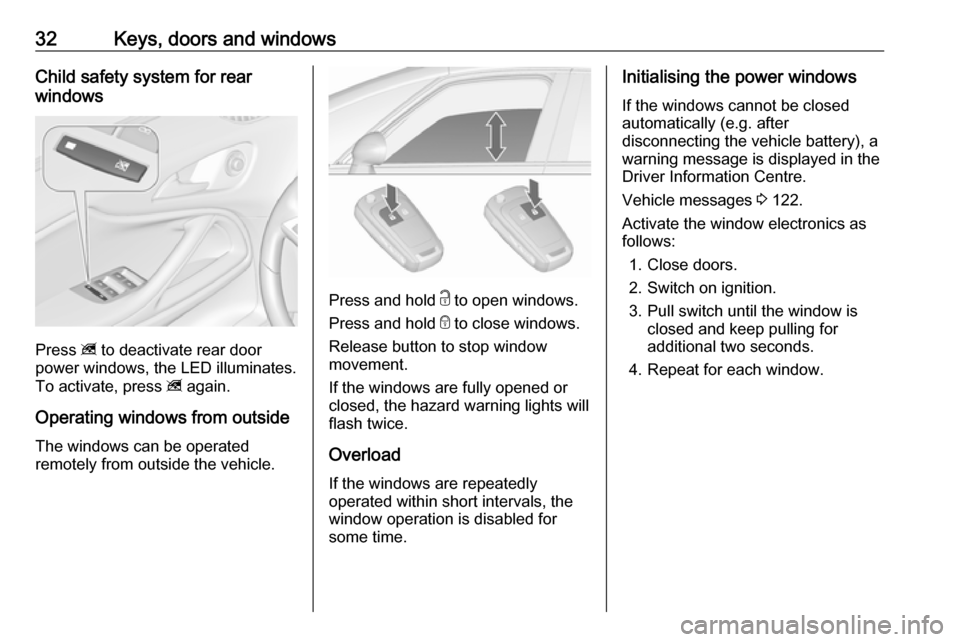
Press z to deactivate rear door
power windows, the LED illuminates.
To activate, press z again.
Operating windows from outside
The windows can be operated
remotely from outside the vehicle.
Press and hold c to open windows.
Press and hold e to close windows.
Release button to stop window
movement.
If the windows are fully opened or
closed, the hazard warning lights will
flash twice.
Overload
If the windows are repeatedly
operated within short intervals, the
window operation is disabled for
some time.
Initialising the power windows
If the windows cannot be closed
automatically (e.g. after
disconnecting the vehicle battery), a
warning message is displayed in the
Driver Information Centre.
Vehicle messages 3 122.
Activate the window electronics as
follows:
1. Close doors.
2. Switch on ignition.
3. Pull switch until the window is closed and keep pulling for
additional two seconds.
4. Repeat for each window.
Page 36 of 291
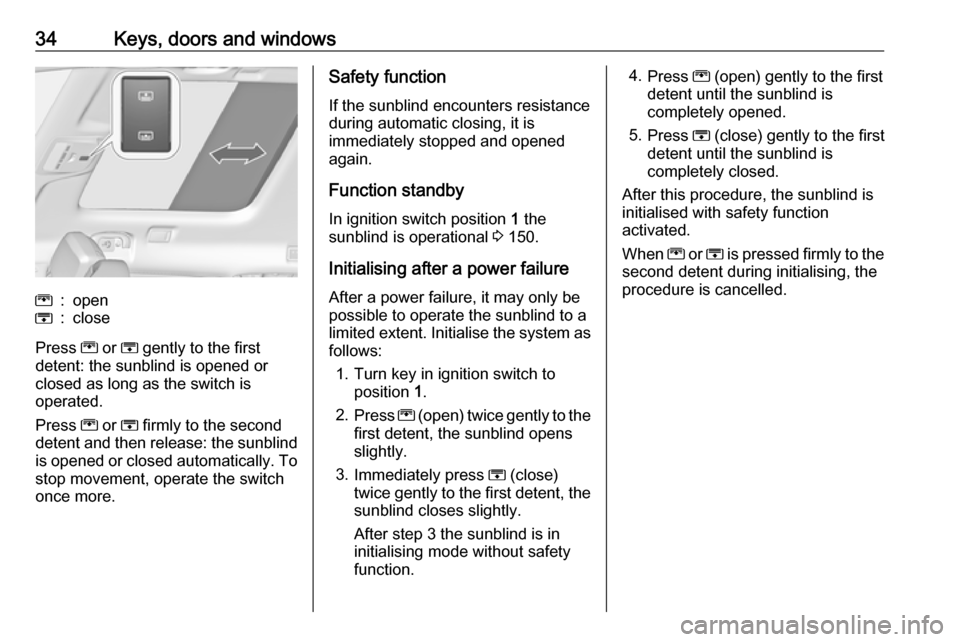
34Keys, doors and windowsG:openH:close
Press G or H gently to the first
detent: the sunblind is opened or
closed as long as the switch is
operated.
Press G or H firmly to the second
detent and then release: the sunblind
is opened or closed automatically. To stop movement, operate the switch
once more.
Safety function
If the sunblind encounters resistance
during automatic closing, it is
immediately stopped and opened
again.
Function standby
In ignition switch position 1 the
sunblind is operational 3 150.
Initialising after a power failure
After a power failure, it may only be
possible to operate the sunblind to a limited extent. Initialise the system as follows:
1. Turn key in ignition switch to position 1.
2. Press G (open) twice gently to the
first detent, the sunblind opens
slightly.
3. Immediately press H (close)
twice gently to the first detent, the sunblind closes slightly.
After step 3 the sunblind is in
initialising mode without safety
function.4. Press G (open) gently to the first
detent until the sunblind is
completely opened.
5. Press H (close) gently to the first
detent until the sunblind is
completely closed.
After this procedure, the sunblind is
initialised with safety function
activated.
When G or H is pressed firmly to the
second detent during initialising, the
procedure is cancelled.
Page 58 of 291
56Seats, restraintsMT: QATT tuża trażżin għat-tfal li
jħares lejn in-naħa ta’ wara fuq sit
protett b’AIRBAG ATTIV quddiemu;
dan jista’ jikkawża l-MEWT jew
ĠRIEĦI SERJI lit-TFAL.
GA: Ná húsáid srian sábháilteachta
linbh cúil RIAMH ar shuíochán a
bhfuil mála aeir ag feidhmiú os a
chomhair. Tá baol BÁIS nó GORTÚ
DONA don PHÁISTE ag baint leis.
Beyond the warning required by
ECE R94.02, for safety reasons a
forward-facing child restraint system
must only be used subject to the
instructions and restrictions in the
table 3 62.9 Danger
Do not use a child restraint system
on the passenger seat with active
front airbag.
The airbag label is located on both
sides of the front passenger sun visor.
Airbag deactivation 3 58.
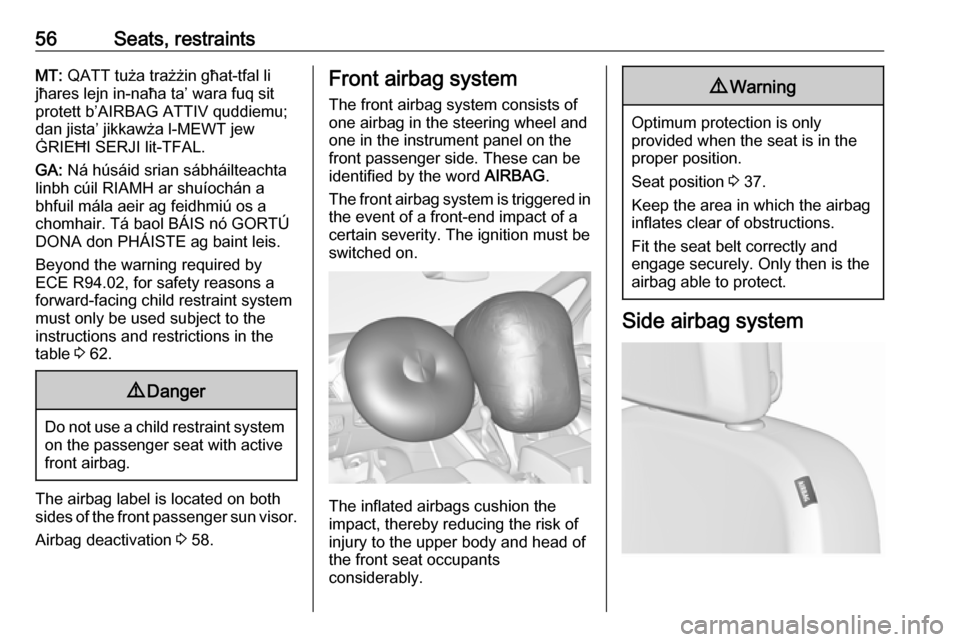
Front airbag system
The front airbag system consists of
one airbag in the steering wheel and
one in the instrument panel on the
front passenger side. These can be
identified by the word AIRBAG.
The front airbag system is triggered in
the event of a front-end impact of a
certain severity. The ignition must be
switched on.
The inflated airbags cushion the
impact, thereby reducing the risk of
injury to the upper body and head of
the front seat occupants
considerably.
9 Warning
Optimum protection is only
provided when the seat is in the
proper position.
Seat position 3 37.
Keep the area in which the airbag
inflates clear of obstructions.
Fit the seat belt correctly and
engage securely. Only then is the
airbag able to protect.
Side airbag system
Page 59 of 291
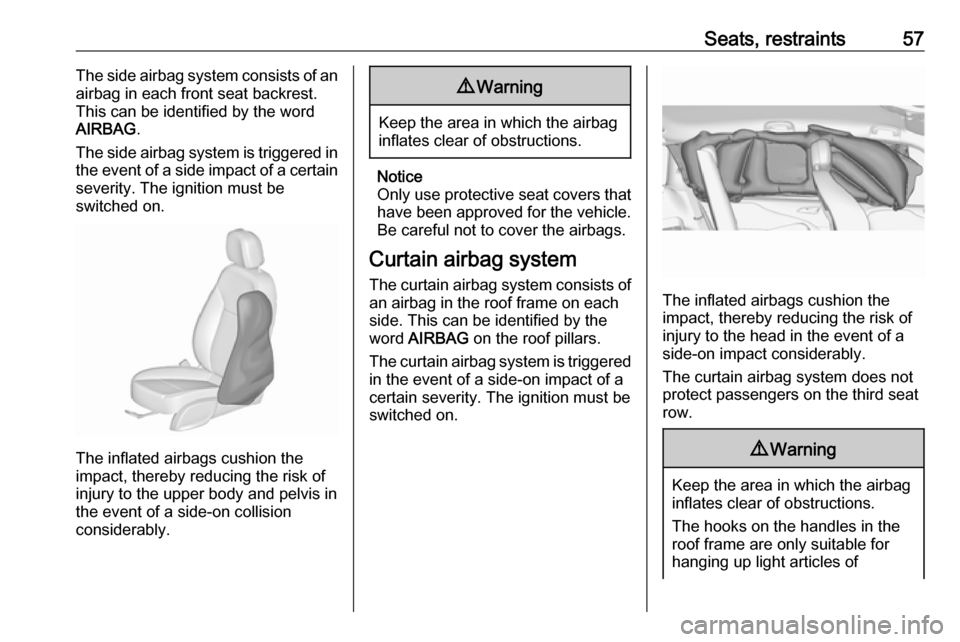
Seats, restraints57The side airbag system consists of an
airbag in each front seat backrest.
This can be identified by the word
AIRBAG .
The side airbag system is triggered in
the event of a side impact of a certain severity. The ignition must be
switched on.
The inflated airbags cushion the
impact, thereby reducing the risk of
injury to the upper body and pelvis in
the event of a side-on collision
considerably.
9 Warning
Keep the area in which the airbag
inflates clear of obstructions.
Notice
Only use protective seat covers that have been approved for the vehicle.Be careful not to cover the airbags.
Curtain airbag system
The curtain airbag system consists of an airbag in the roof frame on each
side. This can be identified by the
word AIRBAG on the roof pillars.
The curtain airbag system is triggered
in the event of a side-on impact of a
certain severity. The ignition must be
switched on.
The inflated airbags cushion the
impact, thereby reducing the risk of
injury to the head in the event of a
side-on impact considerably.
The curtain airbag system does not
protect passengers on the third seat
row.
9 Warning
Keep the area in which the airbag
inflates clear of obstructions.
The hooks on the handles in the
roof frame are only suitable for
hanging up light articles of
Page 60 of 291
58Seats, restraintsclothing, without coat hangers. Do
not keep any items in these
clothes.
Airbag deactivation
The front passenger airbag systemhas to be deactivated if a child
restraint system is to be fitted on this
seat. The side airbag and curtain
airbag systems, the belt
pretensioners and all driver airbag
systems will remain active.
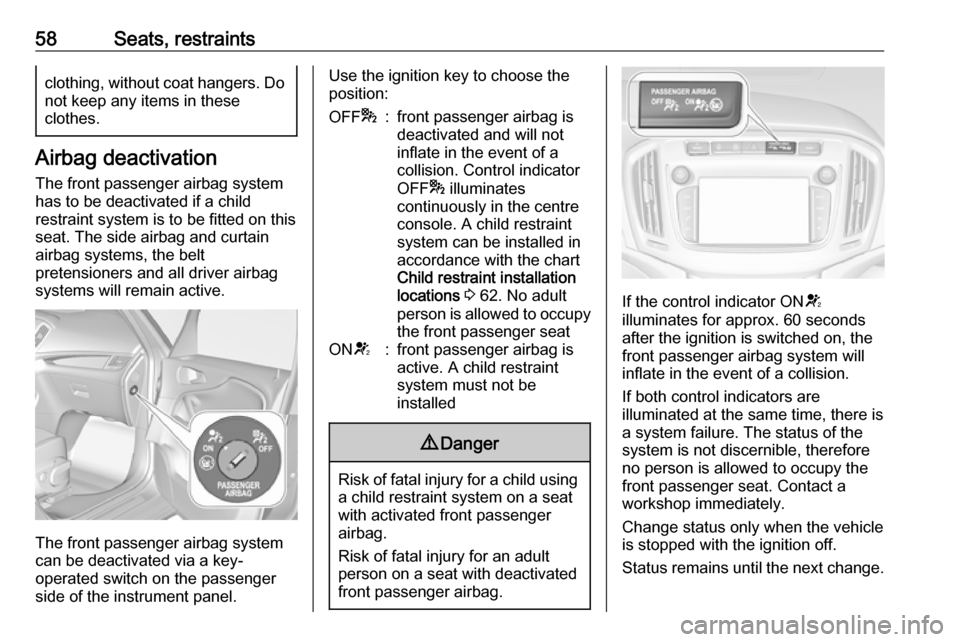
The front passenger airbag system
can be deactivated via a key-
operated switch on the passenger side of the instrument panel.
Use the ignition key to choose theposition:OFF *:front passenger airbag is
deactivated and will not
inflate in the event of a
collision. Control indicator
OFF * illuminates
continuously in the centre
console. A child restraint
system can be installed in
accordance with the chart
Child restraint installation
locations 3 62. No adult
person is allowed to occupy
the front passenger seatON V:front passenger airbag is
active. A child restraint
system must not be
installed9 Danger
Risk of fatal injury for a child using
a child restraint system on a seat
with activated front passenger
airbag.
Risk of fatal injury for an adult
person on a seat with deactivated
front passenger airbag.
If the control indicator ON V
illuminates for approx. 60 seconds
after the ignition is switched on, the
front passenger airbag system will
inflate in the event of a collision.
If both control indicators are
illuminated at the same time, there is
a system failure. The status of the
system is not discernible, therefore
no person is allowed to occupy the
front passenger seat. Contact a
workshop immediately.
Change status only when the vehicle
is stopped with the ignition off.
Status remains until the next change.
Page 103 of 291

Instruments and controls101
Adjust the settings as desired.
Set date
To adjust the date settings, select Set
Date . Adjust the settings as desired.
Time format
To choose the desired time format,
select 12 hr / 24 hr Format . A
submenu is displayed. Activate 12
Hour or 24 Hour .
Power outlets
A 12 Volt power outlet is located in the
front console. Fold the cover
downwards.
Further 12 Volt power outlets are
located in the rear console
and at the left sidewall in the load
compartment.
Do not exceed the maximum power
consumption of 120 watts.
With ignition off, the power outlets are
deactivated. Additionally the power
outlets are deactivated in the event of
low vehicle battery voltage.
Electrical accessories that are
connected must comply with the
electromagnetic compatibility
requirements laid down in
DIN VDE 40 839.
Page 104 of 291
102Instruments and controlsDo not connect any current-delivering
accessories, e.g. electrical charging
devices or batteries.
Do not damage the outlet by using
unsuitable plugs.
Stop-start system 3 153.
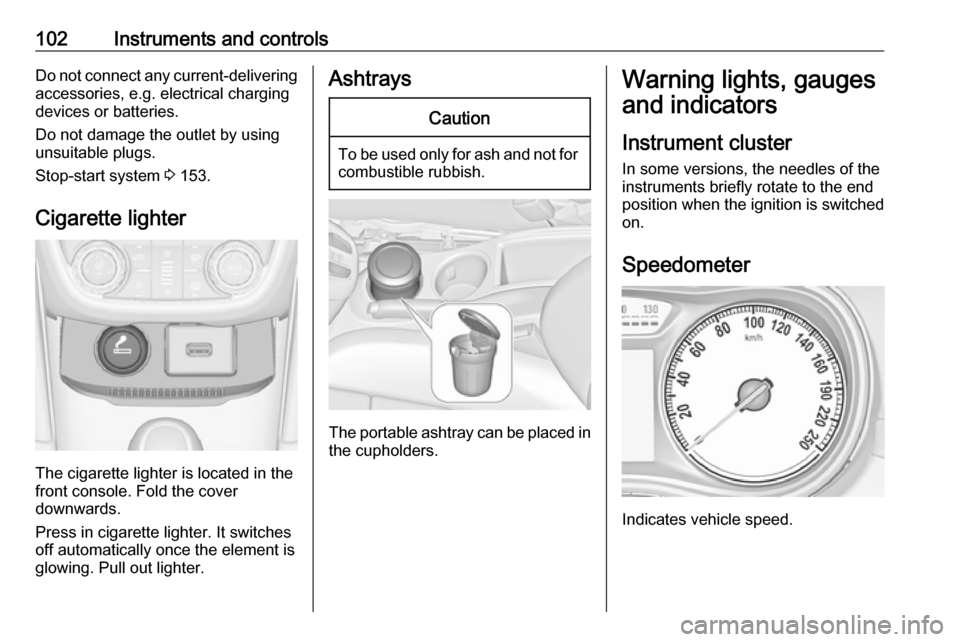
Cigarette lighter
The cigarette lighter is located in the
front console. Fold the cover
downwards.
Press in cigarette lighter. It switches off automatically once the element is
glowing. Pull out lighter.
AshtraysCaution
To be used only for ash and not for combustible rubbish.
The portable ashtray can be placed in
the cupholders.
Warning lights, gauges
and indicators
Instrument cluster
In some versions, the needles of the
instruments briefly rotate to the end
position when the ignition is switched on.
Speedometer
Indicates vehicle speed.
Page 107 of 291
Instruments and controls105As soon as the natural gas tank is
empty, petrol operation is
automatically engaged until the
ignition is switched off.
Fuel for natural gas operation 3 199.
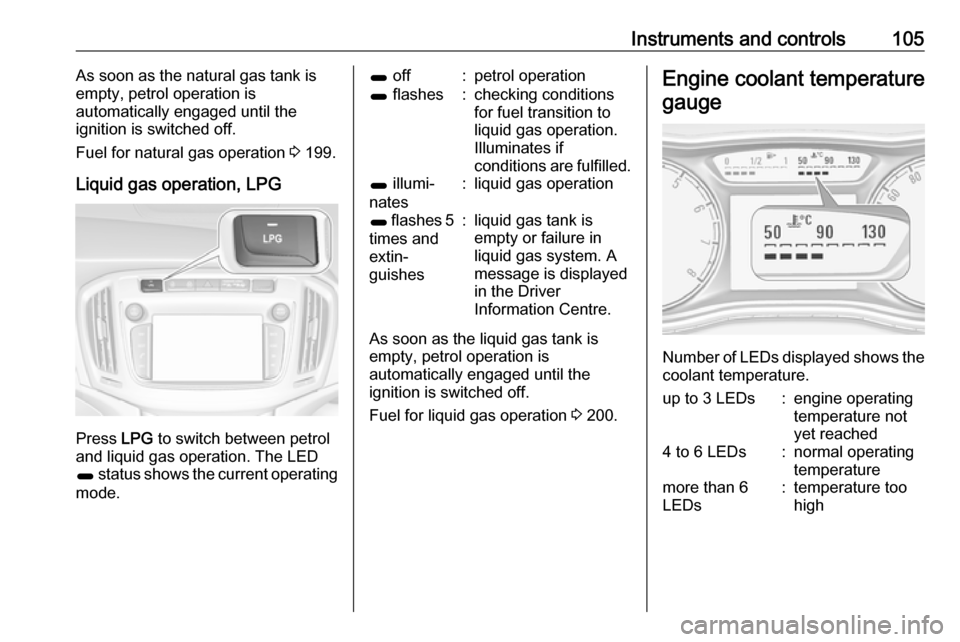
Liquid gas operation, LPG
Press LPG to switch between petrol
and liquid gas operation. The LED
1 status shows the current operating
mode.
1 off:petrol operation1 flashes:checking conditions
for fuel transition to
liquid gas operation.
Illuminates if
conditions are fulfilled.1 illumi‐
nates:liquid gas operation1 flashes 5
times and
extin‐
guishes:liquid gas tank is
empty or failure in
liquid gas system. A
message is displayed
in the Driver
Information Centre.
As soon as the liquid gas tank is
empty, petrol operation is
automatically engaged until the
ignition is switched off.
Fuel for liquid gas operation 3 200.
Engine coolant temperature
gauge
Number of LEDs displayed shows the coolant temperature.
up to 3 LEDs:engine operating
temperature not
yet reached4 to 6 LEDs:normal operating
temperaturemore than 6
LEDs:temperature too
high