clock VOLKSWAGEN CARAVELLE 1992 T4 / 4.G Owners Manual
[x] Cancel search | Manufacturer: VOLKSWAGEN, Model Year: 1992, Model line: CARAVELLE, Model: VOLKSWAGEN CARAVELLE 1992 T4 / 4.GPages: 164, PDF Size: 25 MB
Page 23 of 164
Downloaded from www.Manualslib.com manuals search engine
CONTROLS AND
EQUIPMENT
Seat
stop
(3)*
the second battery* is located under the •ft seat. To get to the battery the seat can
:e
cashed forward past the normal stop:
• Dush seat fully forward
• Dul stop outwards and push seat
further
":~.vard.
Pivoting
seats*
me release mechanism of both seats is lo rded on each seat base at bottom
right.
Seats
are released by pulling up the lever.
E::^
seats are turned anti-clockwise so
:~at it might be necessary to push the seat
':".vard slightly or open the doors.
Attention
When
vehicle
is
moving
the
seats
must
be
facing
forward
and be
properly
secured.
Two-seater
passenger bench*
To
lower the backrest, press locking knob to
the rear.
When lowered, the backrest is locked. The locking knob must therefore be pressed
again to
lift
backrest up.
Attention
For
safety
reasons the
backrest
must
always
be locked
when
ve
hicle
is in
motion.
Head
restraints
The head restraints should be ac _s:e; body
size
- see page 19.
Seat
heating*
Seat
cushion and backrest of
front
seats can
be heated electrically when ignition is on. Further details are given under "Switches",
page 51.
Armrests*
The armrests on the
front
seats can be hinged up if they are not required.
The angle of the armrests can be adjusted
as
required
with
a knurled knob, underneath
the armrest.
2!
www.vwT4camper.info - a useful website for owners and enthusiasts of VW T4 Transporter Campervans
Page 42 of 164
Downloaded from www.Manualslib.com manuals search engine
CONTROLS AND EQUIPMENT
Instruments
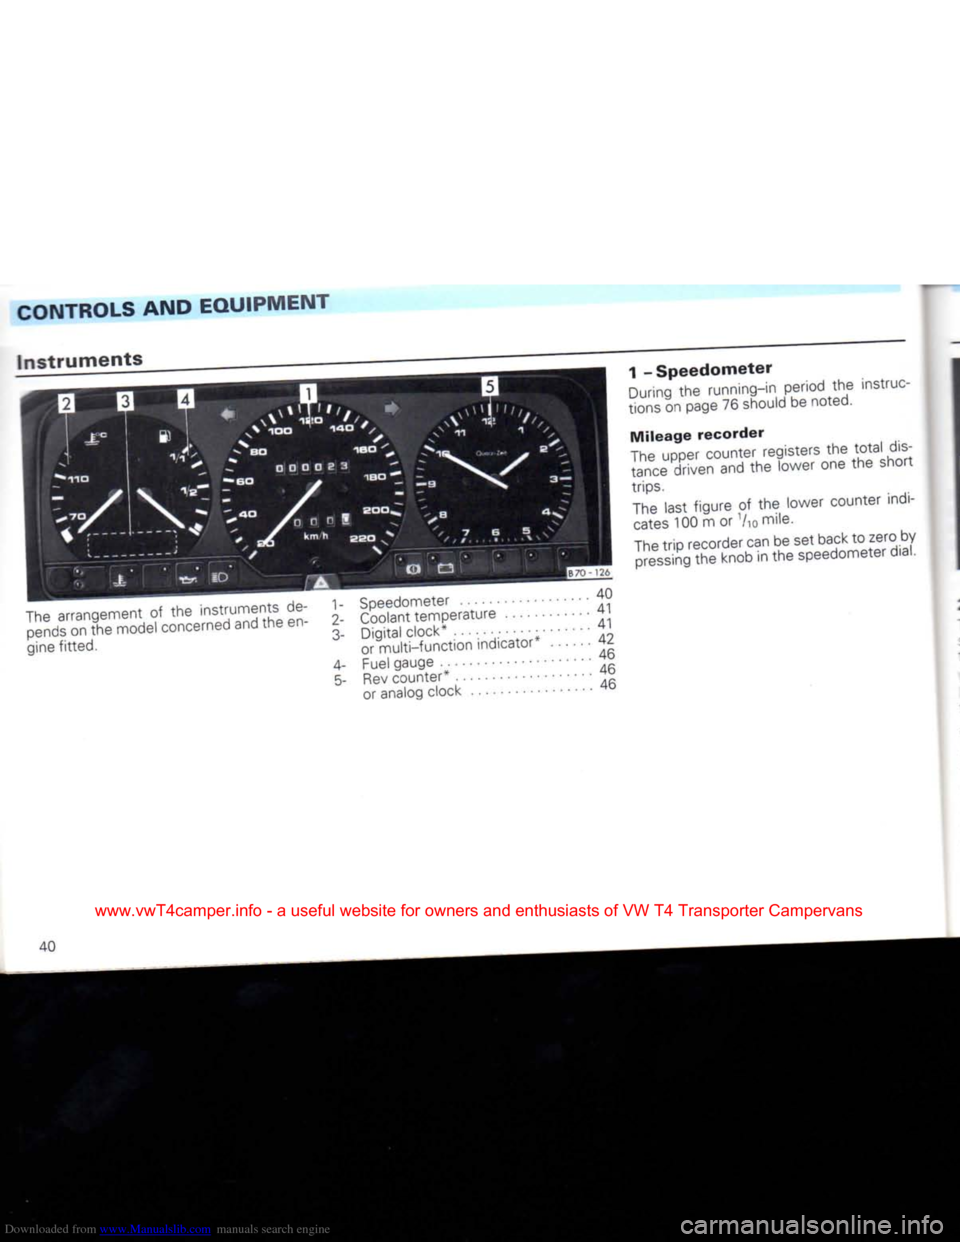
The arrangement of the instruments de pends on the model concerned and the en
gine fitted. 70 - 126
1-
Speedometer 40
2-
Coolant temperature 41
3- Digital clock* 41 or multi-function indicator* 42
4-
Fuel gauge 46 5- Rev counter* 46 or analog clock 46 1 - Speedometer
During the running-in period the instruc
tions on page 76 should be noted.
Mileage recorder
The upper counter registers the total dis
tance driven and the lower one the short
trips.
The last figure of the lower counter
indi
cates 100 m or Vio mile.
The trip recorder can be set back to zero by pressing the knob in the speedometer
dial.
40
www.vwT4camper.info - a useful website for owners and enthusiasts of VW T4 Transporter Campervans
Page 43 of 164
Downloaded from www.Manualslib.com manuals search engine
CONTROLS AND EQUIPMENT
2
-
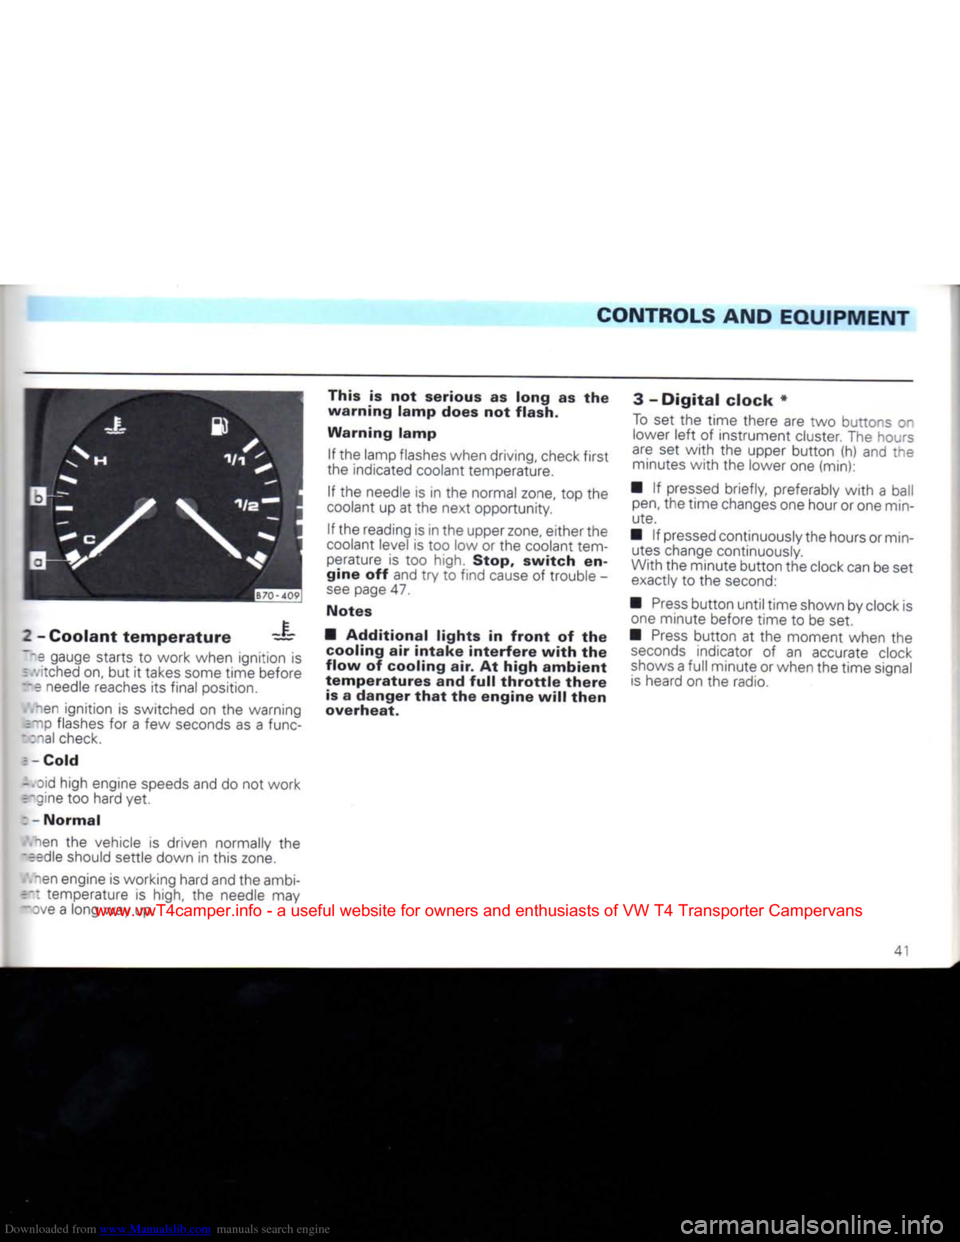
Coolant temperature
—
~~s
gauge starts
to
work
when ignition
is
=
.vitched on,
but it
takes some time before
~e needle reaches
its
final position.
-en ignition
is
switched
on the
warning
c~ip flashes
for a few
seconds
as a
func-
•
:nal check.
5
- Cold
-. Did
high
engine speeds and
do not
work
r-gine
too
hard
yet.
:
- Normal
nen
the
vehicle
is
driven normally
the
~eedle
should settle
down
in
this zone.
-en engine
is
working hard and the ambi-
r~t
temperature
is
high,
the
needle
may
-ove
a
long
way up. This is not serious as long as the
warning lamp does not flash.
Warning lamp
If
the lamp flashes when driving, check first
the indicated coolant temperature.
If the
needle
is in the
normal zone,
top the
coolant
up at the
next
opportunity.
If
the reading
is
in the upper zone, either the
coolant level
is too low or the
coolant tem
perature
is too
high.
Stop,
switch
en
gine off
and
try to
find cause
of
trouble
-
see
page 47.
Notes
•
Additional
lights
in
front
of the cooling air intake interfere
with
the
flow
of cooling air. At
high
ambient
temperatures and
full
throttle
there is a danger that the engine
will
then
overheat.
3
-
Digital clock
*
To
set the
time there
are two
buttons
on
lower left
of
instrument cluster.
The
hours
are
set
with
the
upper button
(h) and the
minutes
with
the
lower one
(min):
•
If
pressed briefly, preferably
with
a ball
pen,
the time changes one hour
or
one min
ute.
•
If
pressed continuously the hours
or
min
utes
change continuously.
With
the minute button the clock can be set exactly
to the
second:
•
Press button until time shown
by
clock
is
one minute before time
to be set.
•
Press button
at the
moment when
the
seconds
indicator
of an
accurate clock
shows a full minute
or
when the time signal
is
heard
on the
radio.
41
www.vwT4camper.info - a useful website for owners and enthusiasts of VW T4 Transporter Campervans
Page 45 of 164
Downloaded from www.Manualslib.com manuals search engine
CONTROLS AND EQUIPMENT
call up the data the memories are se-
r ::ed by means of the switch A in the wiper
- Single journey memory
'- - Total journey memory
_~e
"allowing data can be obtained from the ~ r~iories:
• Driving time • -verage fuel consumption
• Distance driven
• -verage speed
E-asing the
memories
:~ the ignition switched on, both mem-
: es can be erased separately in each
: :ch position by pressing switch A : --sed the appropriate detent position to 0
::; tion for longer than one
second.
" :~.e battery is disconnected for any rea-
::" the stored information is automatically
Ksed.
The displays
When
the ignition is switched on
"MF11"
or
"MFI 2" appears in the display according to
which memory is switched on.
No symbol -
Time
The
time is shown even when the ignition is switched off.
The
time can be set
with
the buttons (h and min) on the lower
left
of instrument cluster
- see "Digital
Clock"
page 41.
—'— -
Driving
time
In
switch
position 1 the driving time
which has elapsed since ignition was
switched on or the memory cancelled is indicated - see previous page also "Single
journey memory".
In
switch
position 2 the total driving
time for all individual journeys is indicated -
see
previous page also "Total journey mem
ory".
The
maximum time in both switch positions
is
99 hours 59 minutes. When this figure is
exceeded
the indication starts at zero again. MPG
(1/100
km) -
Average
fuel
consumption
The
average consumption is indicated not
the actual consumption at the time of read
ing.
The
average fuel consumption is indicated,
after switching on the ignition or erasing the memory being
used,
after a distance of
about 100 metres. Up to this point a dash
appears
instead of a figure. When vehicle is moving the indicated value is up-dated
every 5
seconds.
In
switch
position 1 the average
con
sumption for the single journey is indicated.
In
switch
position 2 the average
con
sumption indicated is
that
obtained during
all
single journeys - see "Total journey memory" on previous page
also.
Note
The
amount of fuel used is not indicated.
43
www.vwT4camper.info - a useful website for owners and enthusiasts of VW T4 Transporter Campervans
Page 48 of 164
Downloaded from www.Manualslib.com manuals search engine
CONTROLS
AND EQUIPMENT
4
-
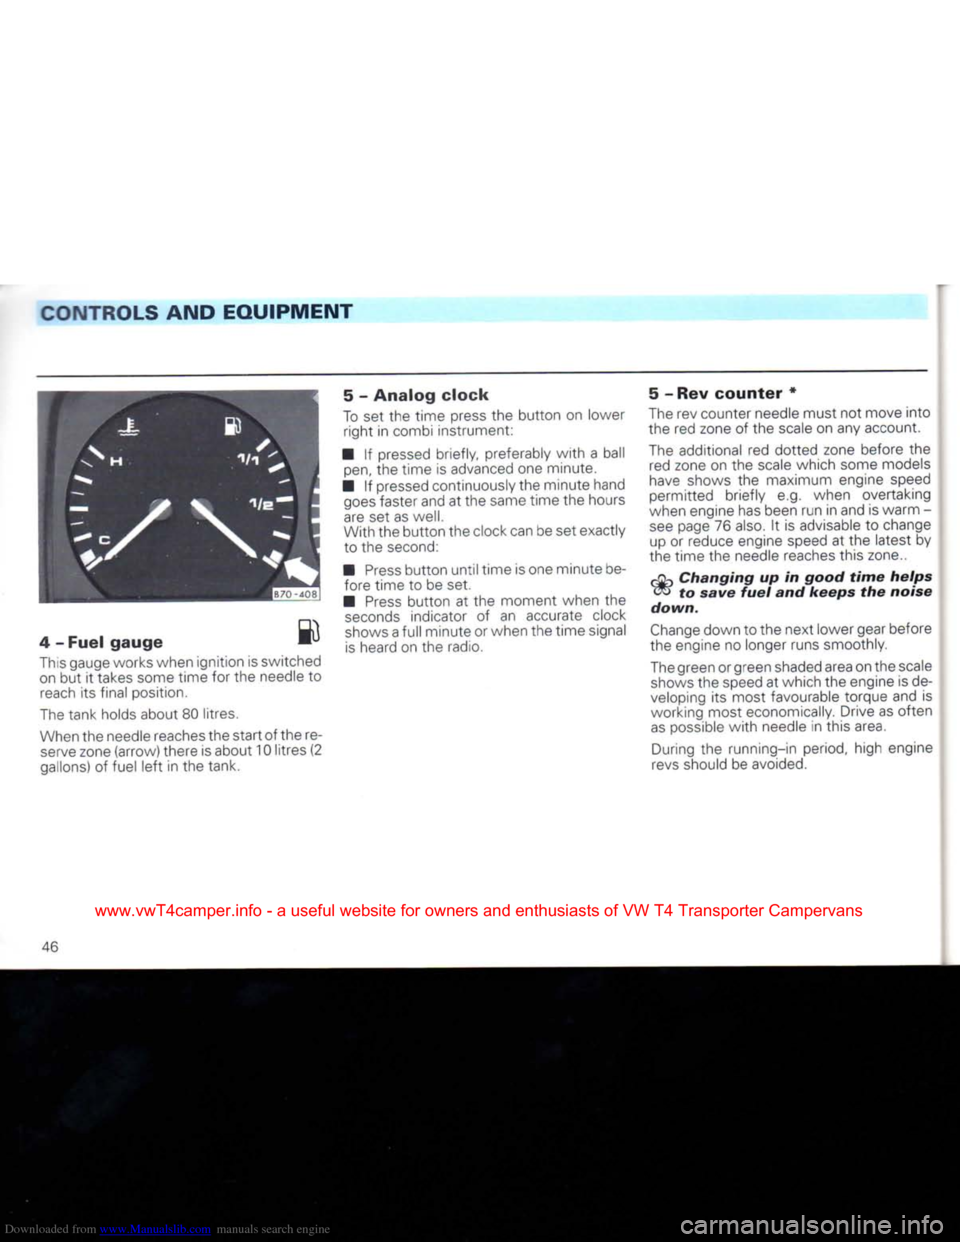
Fuel gauge
^u
This gauge works
when
ignition
is
switched on
but it
takes some time for
the
needle
to
reach
its
final
position.
The tank holds about
80
litres.
When
the needle reaches the start of the
re
serve
zone
(arrow)
there is about 10 litres
(2
gallons)
of
fuel left
in the
tank. 5
-
Analog clock
To
set the
time press
the
button
on
lower
right
in
combi instrument:
•
If
pressed briefly, preferably with
a
ball
pen,
the
time
is
advanced
one
minute.
•
If
pressed continuously the minute hand goes faster and
at
the same time
the
hours
are
set as
well.
With
the button the clock can
be set
exactly to
the
second:
•
Press
button until time is one minute be fore time
to be set.
•
Press
button
at the
moment
when
the
seconds indicator
of an
accurate clock
shows
a
full
minute or
when
the time signal is heard
on the
radio. 5
-
Rev counter
*
The
rev
counter needle must not move into
the
red
zone
of the
scale
on any
account.
The additional
red
dotted zone before
the
red zone
on the
scale which some models
have
shows
the
maximum engine speed
permitted
briefly
e.g.
when
overtaking
when
engine
has
been run in and
is
warm
-
see page
76
also.
It is
advisable
to
change up
or
reduce engine speed
at the
latest
by
the time
the
needle reaches this
zone..
rijp
Changing
up in good time helps
<-^>
to
save
fuel and keeps the noise
down.
Change down
to
the next lower gear before
the engine
no
longer runs smoothly.
The green or green shaded area on the scale shows the speed
at
which
the
engine
is de
veloping
its
most favourable torque
and is
working
most economically. Drive
as
often as possible with needle
in
this area.
During
the
running-in
period,
high engine
revs
should
be
avoided.
46
www.vwT4camper.info - a useful website for owners and enthusiasts of VW T4 Transporter Campervans
Page 63 of 164
Downloaded from www.Manualslib.com manuals search engine
CONTROLS AND
EQUIPMENT
Air conditioner* in passenger compartment Recirculating air switch*
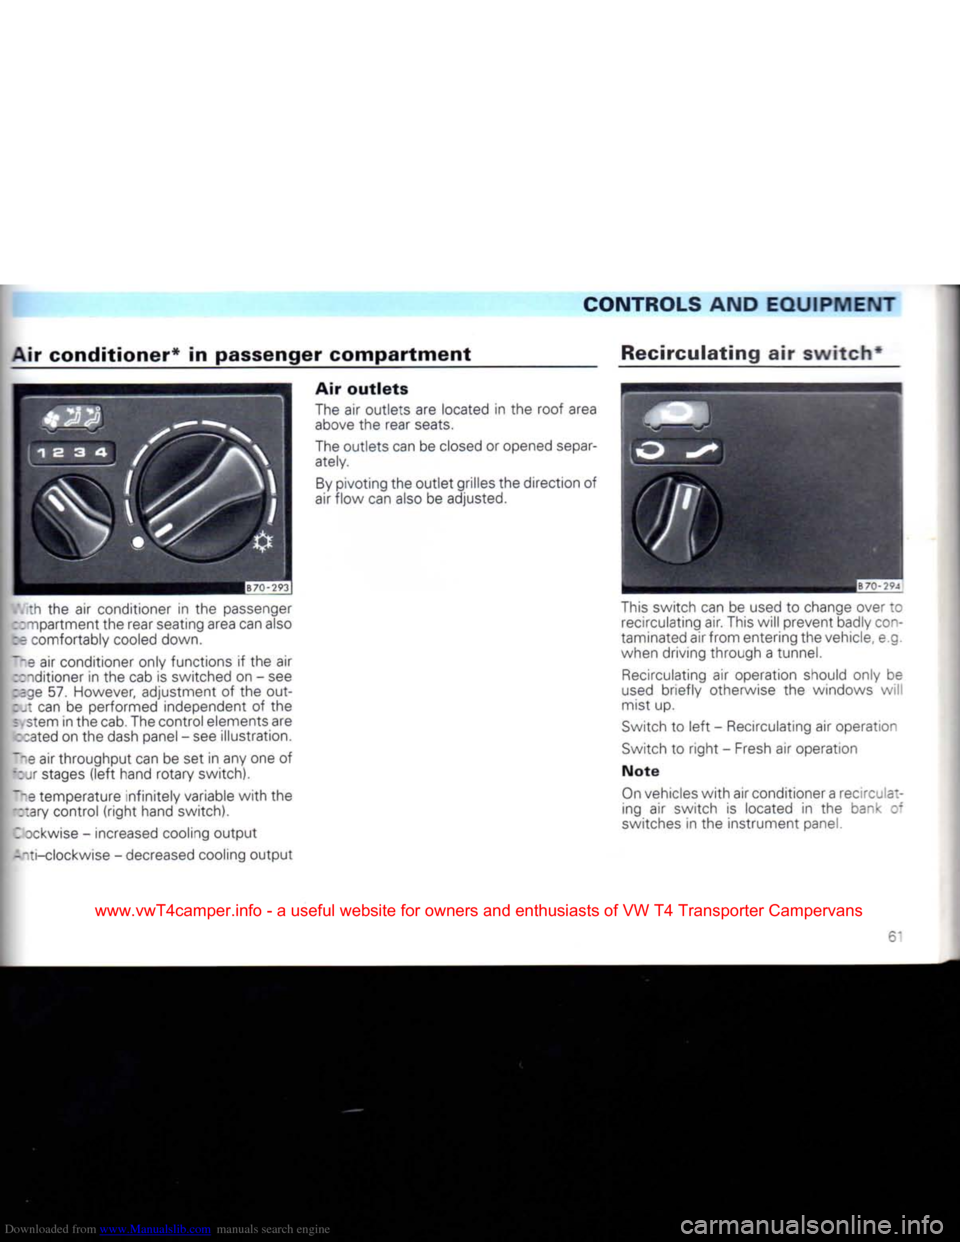
th the air conditioner in the passenger
:: apartment the rear seating area can also
:e comfortably cooled down.
air conditioner only functions if the air
:: iditioner in the cab is switched on - see
:;ge 57. However, adjustment of the out-
: can be performed independent of the
I stem in the cab. The control elements are : rated on the dash panel - see illustration.
air throughput can be set in any one of
;: J stages (left hand rotary switch).
Th e temperature infinitely variable with the ::ary control (right hand switch).
I Dckwise - increased cooling output
--ti-clockwise - decreased cooling output Air outlets
The air outlets are located in the roof area
above the rear seats.
The outlets can be closed or opened separ
ately.
By pivoting the outlet grilles the direction of
air flow can also be adjusted.
This switch can be used to change over to recirculating air. This will prevent badiy con-
taminated air from entering the vehicle, e.g.
when driving through a tunnel.
Recirculating air operation should only be
used briefly otherwise the windows wil
mist up.
Switch to left - Recirculating air operation
Switch to right - Fresh air operation
Note
On vehicles with air conditioner a recirculating air switch is located in the bank of
switches in the instrument panel.
www.vwT4camper.info - a useful website for owners and enthusiasts of VW T4 Transporter Campervans
Page 64 of 164
Downloaded from www.Manualslib.com manuals search engine
CONTROLS AND EQUIPMENT
Additional
heater*
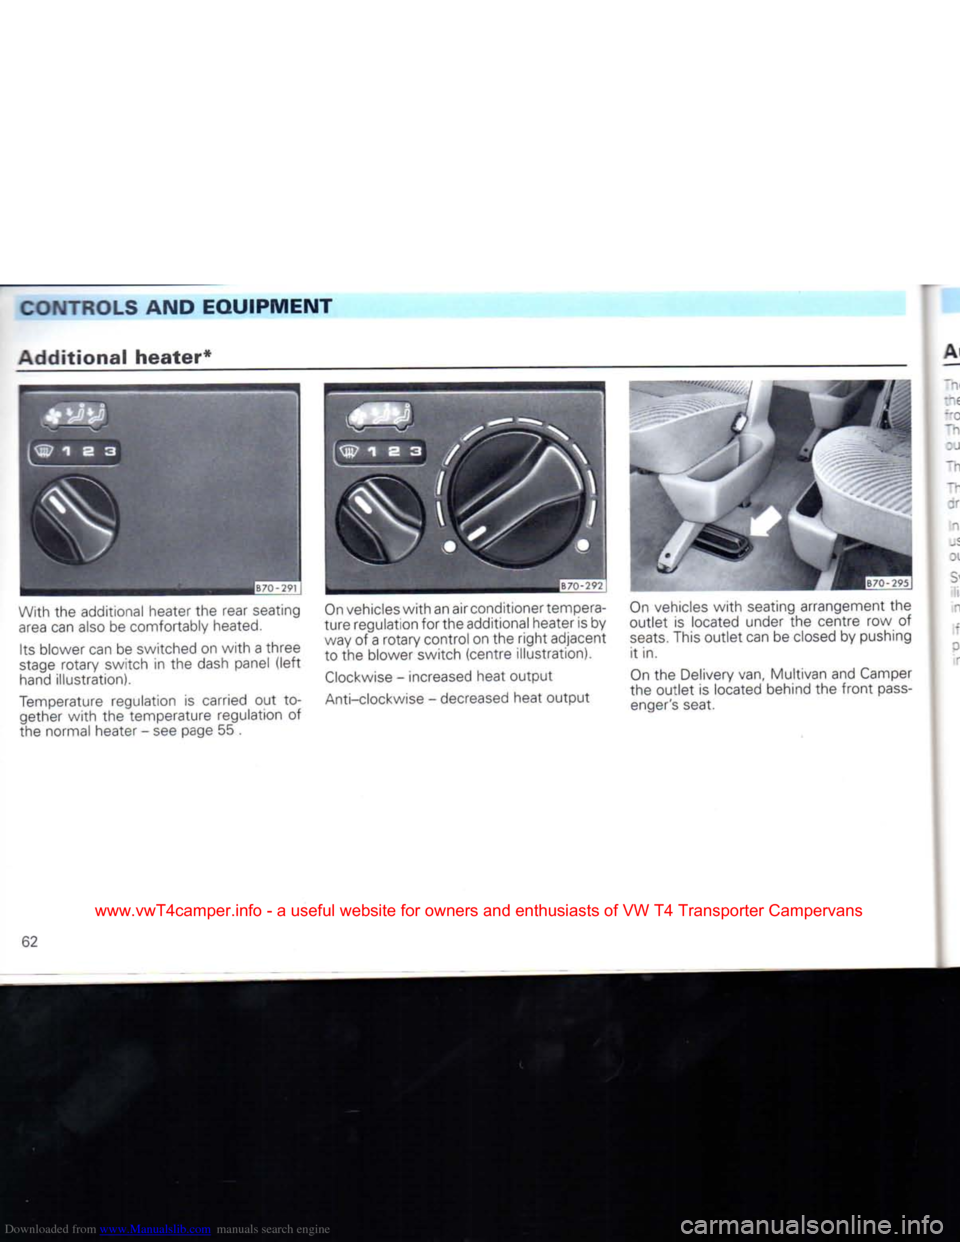
With the additional heater the rear seating
area
can also be comfortably heated.
Its blower can be switched on
with
a three
stage
rotary switch in the dash panel
(left
hand illustration).
Temperature regulation is carried out to gether
with
the temperature regulation of
the normal heater - see page 55 .
On
vehicles
with
an airconditionertempera-
ture regulation forthe additional heater is by way of a rotary control on the
right
adjacent
to the blower switch (centre illustration).
Clockwise
- increased heat output
Anti-clockwise
- decreased heat output
On
vehicles
with
seating arrangement the
outlet is located under the centre row of
seats.
This outlet can be closed by pushing it in.
On
the Delivery van, Multivan and Camper
the outlet is located behind the
front
pass
enger's
seat.
62
www.vwT4camper.info - a useful website for owners and enthusiasts of VW T4 Transporter Campervans
Page 72 of 164
Downloaded from www.Manualslib.com manuals search engine
CONTROLS AND
EQUIPMENT
Sun
roof*
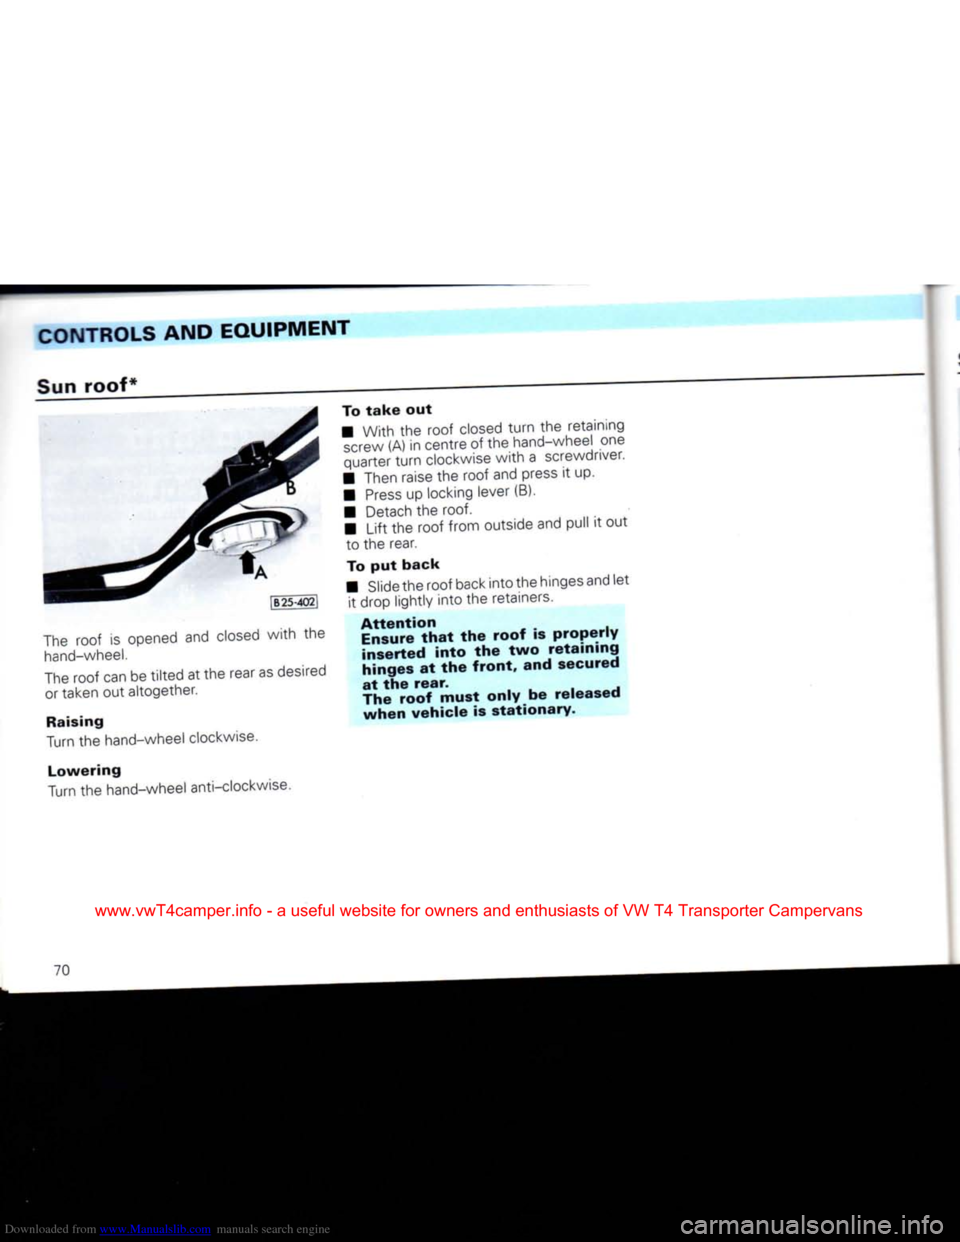
The roof is opened and closed
with
the
hand-wheel.
The roof can be
tilted
at the rear as desired or taken out altogether.
Raising
Turn the hand-wheel clockwise.
Lowering
Turn the hand-wheel anti-clockwise.
To take
out
• With the roof closed
turn
the retaining
screw
(A) in centre of the hand-wheel one
quarter
turn
clockwise
with
a screwdriver.
• Then raise the roof and press it up.
•
Press
up locking lever (B).
• Detach the
roof.
•
Lift
the roof from outside and pull it out to the rear.
To
put
back
• Slide the roof back
into
the hinges and let it drop lightly
into
the retainers.
Attention Ensure that
the
roof
is
properly
inserted into
the two
retaining
hinges
at the
front,
and
secured
at
the
rear.
The roof must only
be
released when vehicle
is
stationary.
70
www.vwT4camper.info - a useful website for owners and enthusiasts of VW T4 Transporter Campervans
Page 73 of 164
Downloaded from www.Manualslib.com manuals search engine
CONTROLS AND
EQUIPMENT
Sliding/tilting
roof*
! I I
[B
70-3201
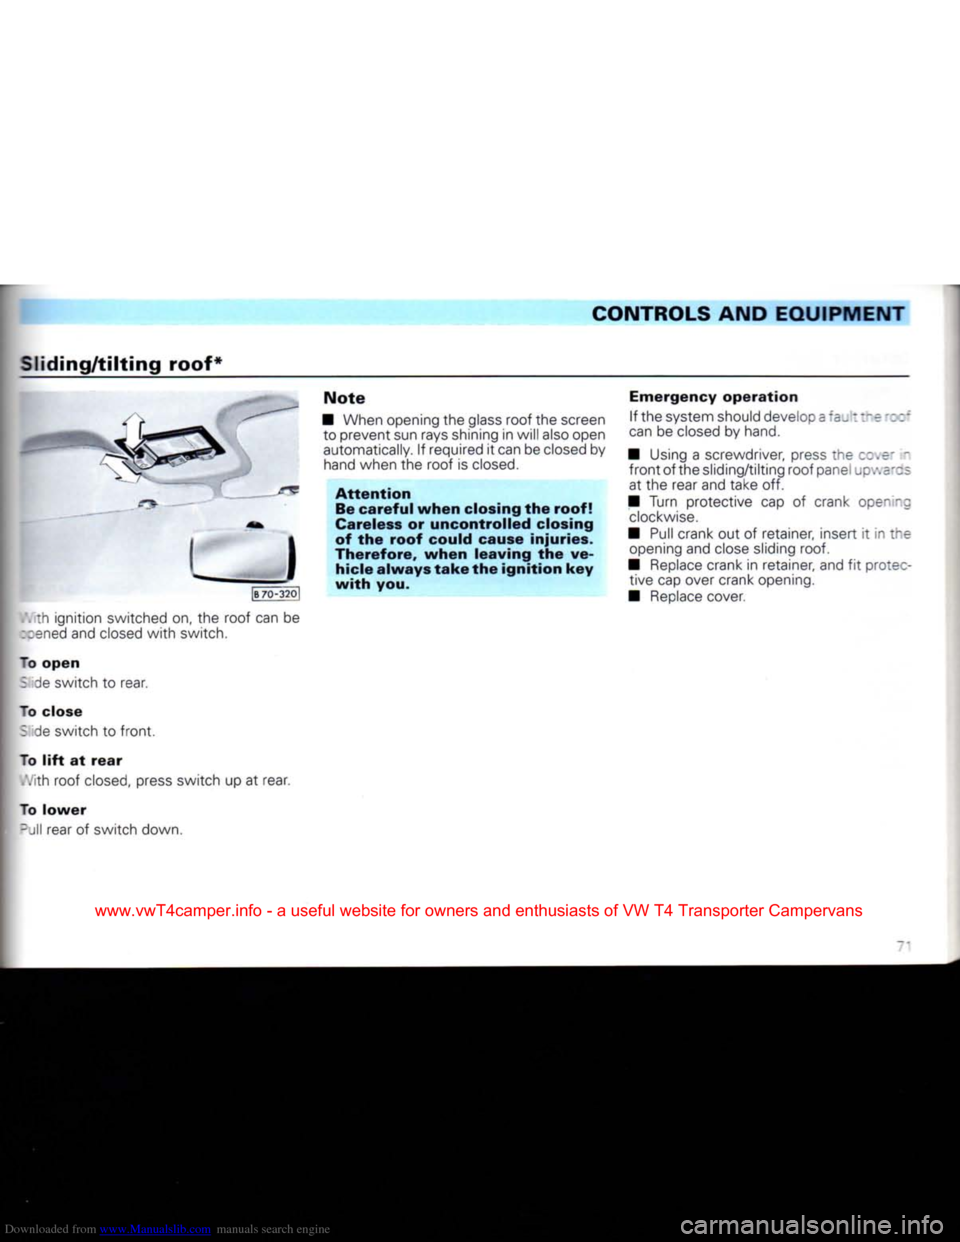
. th ignition switched on, the roof can be
::ened
and closed
with
switch.
~o
open
: de switch to rear.
To close : de switch to
front.
To
lift
at
rear
,','ith
roof closed, press switch up at rear.
To
lower
-JII
rear of switch down.
Note
• When opening the glass roof the screen to prevent sun rays shining in will also open
automatically. If required it can be closed by hand when the roof is closed.
Attention
Be
careful
when
closing the
roof!
Careless or
uncontrolled
closing
of the
roof
could cause
injuries.
Therefore,
when
leaving
the ve
hicle
always
take
the
ignition
key
with
you.
Emergency
operation
If the system should develop a t:~e
can
be closed by hand.
• Using a screwdriver, press the cove' -
front
of the sliding/tilting roof panel upv.e'os at the rear and take off.
• Turn protective cap of crank opening
clockwise.
• Pull crank out of retainer, insert it in i^e opening and close sliding
roof.
• Replace crank in retainer, and fit protec tive cap over crank opening.
• Replace cover.
www.vwT4camper.info - a useful website for owners and enthusiasts of VW T4 Transporter Campervans
Page 122 of 164
Downloaded from www.Manualslib.com manuals search engine
DO-IT-YOURSELF
Changing
wheels
Park
the vehicle as far as possible away
from the
traffic
flow, if necessary switch on emergency warning lights and place the
warning triangle in position - note legal re
quirements.
• All vehicles occupants should leave the vehicle and move to a safe area (e.g. behind
the barrier).
• Apply handbrake firmly. If the car is on a
slope,
block one of the wheels on the oppo
site side
with
a stone or some similar object.
• Take the tools out of the vehicle.
• Take spare wheel out of carrier at rear of vehicle - see previous page.
JB70
- 121J
•
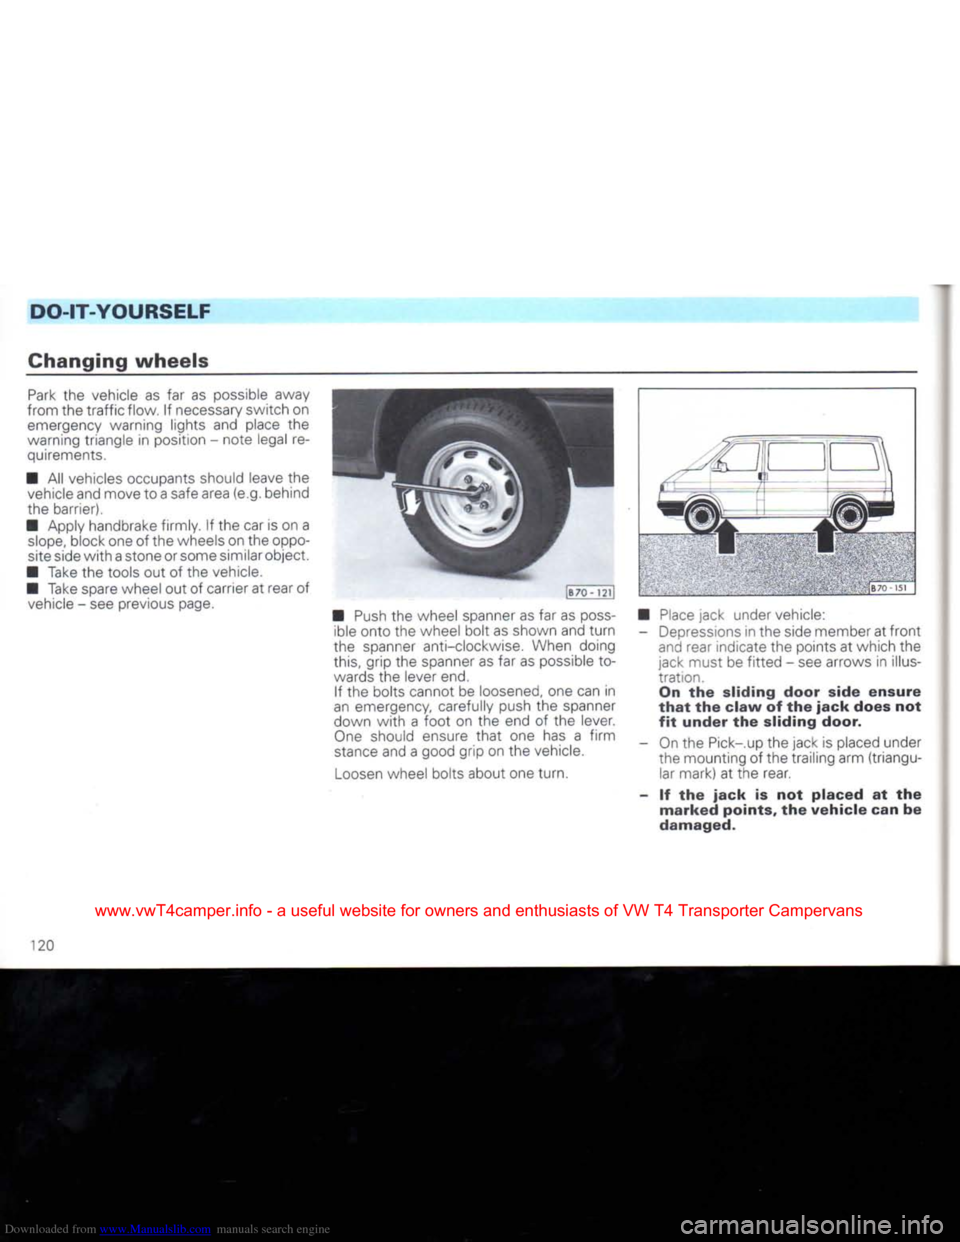
Push
the wheel spanner as far as
poss
ible onto the wheel bolt as shown and
turn
the spanner anti-clockwise. When doing this, grip the spanner as far as possible to
wards the lever end.
If the bolts cannot be loosened, one can in
an emergency, carefully push the spanner
down
with
a
foot
on the end of the lever.
One
should ensure
that
one has a
firm
stance
and a good grip on the vehicle.
Loosen
wheel bolts about one turn. 8"" 1 •>!
•
Place
jack under vehicle: - Depressions in the side member at
front
and rear indicate the points at which the
jack must be
fitted
- see arrows in illus
tration. On the sliding door side
ensure
that
the
claw
of the
jack
does not
fit
under
the sliding door.
- On the Pick-.up the jack is placed under the mounting of the trailing arm (triangular mark) at the rear.
- If the
jack
is not
placed
at the
marked
points, the
vehicle
can be
damaged.
120
www.vwT4camper.info - a useful website for owners and enthusiasts of VW T4 Transporter Campervans