tire size VOLKSWAGEN CORRADO 1993 User Guide
[x] Cancel search | Manufacturer: VOLKSWAGEN, Model Year: 1993, Model line: CORRADO, Model: VOLKSWAGEN CORRADO 1993Pages: 920, PDF Size: 6.92 MB
Page 273 of 920

* SUSPENSION UNIFORM INSPECTION GUIDELINES *
Article Text (p. 62)
1993 Volkswagen Corrado
For Volkswagen Technical Site: http://vw.belcom.ru
Copyright © 1998 Mitchell Repair Information Company, LLC
Wednesday, March 22, 2000 08:45PM
specifications ³ ³
ÄÄÄÄÄÄÄÄÄÄÄÄÄÄÄÄÄÄÄÄÄÄÄÄÄÄÄÄÄÄÅÄÄÄÄÄÄÅÄÄÄÄÄÄÄÄÄÄÄÄÄÄÄÄÄÄÄÄÄÄÄÄÄÄÄÄÄÄÄÄMixed tire size designations
³ A ³ Require rotation or
on same axle
³ ³ replacement.
ÄÄÄÄÄÄÄÄÄÄÄÄÄÄÄÄÄÄÄÄÄÄÄÄÄÄÄÄÄÄÅÄÄÄÄÄÄÅÄÄÄÄÄÄÄÄÄÄÄÄÄÄÄÄÄÄÄÄÄÄÄÄÄÄÄÄÄÄÄÄMixed tread types (all season,
³ A ³ Require rotation or
performance, mud and snow)
³ ³ replacement.
on same axle
³ ³
ÄÄÄÄÄÄÄÄÄÄÄÄÄÄÄÄÄÄÄÄÄÄÄÄÄÄÄÄÄÄÅÄÄÄÄÄÄÅÄÄÄÄÄÄÄÄÄÄÄÄÄÄÄÄÄÄÄÄÄÄÄÄÄÄÄÄÄÄÄÄNumber of punctures exceeds
³ B ³ Require replacement.
manufacturer's limit
³ ³
ÄÄÄÄÄÄÄÄÄÄÄÄÄÄÄÄÄÄÄÄÄÄÄÄÄÄÄÄÄÄÅÄÄÄÄÄÄÅÄÄÄÄÄÄÄÄÄÄÄÄÄÄÄÄÄÄÄÄÄÄÄÄÄÄÄÄÄÄÄÄOut of balance
³ B ³ Require rebalance of tire/wheel
³ ³ assembly.
ÄÄÄÄÄÄÄÄÄÄÄÄÄÄÄÄÄÄÄÄÄÄÄÄÄÄÄÄÄÄÅÄÄÄÄÄÄÅÄÄÄÄÄÄÄÄÄÄÄÄÄÄÄÄÄÄÄÄÄÄÄÄÄÄÄÄÄÄÄÄPly separation
³ A ³ Require replacement.
ÄÄÄÄÄÄÄÄÄÄÄÄÄÄÄÄÄÄÄÄÄÄÄÄÄÄÄÄÄÄÅÄÄÄÄÄÄÅÄÄÄÄÄÄÄÄÄÄÄÄÄÄÄÄÄÄÄÄÄÄÄÄÄÄÄÄÄÄÄÄPull or lead, caused by tire
³ A ³ Require rotation or
³ ³ replacement.
ÄÄÄÄÄÄÄÄÄÄÄÄÄÄÄÄÄÄÄÄÄÄÄÄÄÄÄÄÄÄÅÄÄÄÄÄÄÅÄÄÄÄÄÄÄÄÄÄÄÄÄÄÄÄÄÄÄÄÄÄÄÄÄÄÄÄÄÄÄÄRadial and bias or bias-belted
³ B ³ Require rotation or
ply tires on same axle
³ ³ replacement.
ÄÄÄÄÄÄÄÄÄÄÄÄÄÄÄÄÄÄÄÄÄÄÄÄÄÄÄÄÄÄÅÄÄÄÄÄÄÅÄÄÄÄÄÄÄÄÄÄÄÄÄÄÄÄÄÄÄÄÄÄÄÄÄÄÄÄÄÄÄÄRadials are on the front and
³ B ³ Require rotation or
not on the rear
³ ³ replacement. See note (2).
ÄÄÄÄÄÄÄÄÄÄÄÄÄÄÄÄÄÄÄÄÄÄÄÄÄÄÄÄÄÄÅÄÄÄÄÄÄÅÄÄÄÄÄÄÄÄÄÄÄÄÄÄÄÄÄÄÄÄÄÄÄÄÄÄÄÄÄÄÄÄRun flat damage
³ A ³ Require replacement.
ÄÄÄÄÄÄÄÄÄÄÄÄÄÄÄÄÄÄÄÄÄÄÄÄÄÄÄÄÄÄÅÄÄÄÄÄÄÅÄÄÄÄÄÄÄÄÄÄÄÄÄÄÄÄÄÄÄÄÄÄÄÄÄÄÄÄÄÄÄÄShoulder cut
³ A ³ Require replacement.
ÄÄÄÄÄÄÄÄÄÄÄÄÄÄÄÄÄÄÄÄÄÄÄÄÄÄÄÄÄÄÅÄÄÄÄÄÄÅÄÄÄÄÄÄÄÄÄÄÄÄÄÄÄÄÄÄÄÄÄÄÄÄÄÄÄÄÄÄÄÄShoulder puncture
³ A ³ Require replacement.
ÄÄÄÄÄÄÄÄÄÄÄÄÄÄÄÄÄÄÄÄÄÄÄÄÄÄÄÄÄÄÅÄÄÄÄÄÄÅÄÄÄÄÄÄÄÄÄÄÄÄÄÄÄÄÄÄÄÄÄÄÄÄÄÄÄÄÄÄÄÄShoulder with plug
³ A ³ Require replacement.
ÄÄÄÄÄÄÄÄÄÄÄÄÄÄÄÄÄÄÄÄÄÄÄÄÄÄÄÄÄÄÅÄÄÄÄÄÄÅÄÄÄÄÄÄÄÄÄÄÄÄÄÄÄÄÄÄÄÄÄÄÄÄÄÄÄÄÄÄÄÄSidewall bulge
³ A ³ Require replacement.
ÄÄÄÄÄÄÄÄÄÄÄÄÄÄÄÄÄÄÄÄÄÄÄÄÄÄÄÄÄÄÅÄÄÄÄÄÄÅÄÄÄÄÄÄÄÄÄÄÄÄÄÄÄÄÄÄÄÄÄÄÄÄÄÄÄÄÄÄÄÄSidewall cut
³ A ³ Require replacement.
ÄÄÄÄÄÄÄÄÄÄÄÄÄÄÄÄÄÄÄÄÄÄÄÄÄÄÄÄÄÄÅÄÄÄÄÄÄÅÄÄÄÄÄÄÄÄÄÄÄÄÄÄÄÄÄÄÄÄÄÄÄÄÄÄÄÄÄÄÄÄSidewall indentation
³ ³ No service required/suggested.
ÄÄÄÄÄÄÄÄÄÄÄÄÄÄÄÄÄÄÄÄÄÄÄÄÄÄÄÄÄÄÅÄÄÄÄÄÄÅÄÄÄÄÄÄÄÄÄÄÄÄÄÄÄÄÄÄÄÄÄÄÄÄÄÄÄÄÄÄÄÄSidewall puncture
³ A ³ Require replacement.
ÄÄÄÄÄÄÄÄÄÄÄÄÄÄÄÄÄÄÄÄÄÄÄÄÄÄÄÄÄÄÅÄÄÄÄÄÄÅÄÄÄÄÄÄÄÄÄÄÄÄÄÄÄÄÄÄÄÄÄÄÄÄÄÄÄÄÄÄÄÄSidewall with plug
³ A ³ Require replacement.
ÄÄÄÄÄÄÄÄÄÄÄÄÄÄÄÄÄÄÄÄÄÄÄÄÄÄÄÄÄÄÅÄÄÄÄÄÄÅÄÄÄÄÄÄÄÄÄÄÄÄÄÄÄÄÄÄÄÄÄÄÄÄÄÄÄÄÄÄÄÄSpeed rating designations
³ B ³ Suggest rotation or
different on same axle
³ ³ replacement.
ÄÄÄÄÄÄÄÄÄÄÄÄÄÄÄÄÄÄÄÄÄÄÄÄÄÄÄÄÄÄÅÄÄÄÄÄÄÅÄÄÄÄÄÄÄÄÄÄÄÄÄÄÄÄÄÄÄÄÄÄÄÄÄÄÄÄÄÄÄÄTire and wheel assembly has
³ B ³ Require repair or replacement
excessive run-out
³ ³ of appropriate part. See note
³ ³ (3) below.
ÄÄÄÄÄÄÄÄÄÄÄÄÄÄÄÄÄÄÄÄÄÄÄÄÄÄÄÄÄÄÅÄÄÄÄÄÄÅÄÄÄÄÄÄÄÄÄÄÄÄÄÄÄÄÄÄÄÄÄÄÄÄÄÄÄÄÄÄÄÄTires with more than 1/4"
³ B ³ Require replacement.
Page 276 of 920
* SUSPENSION UNIFORM INSPECTION GUIDELINES *
Article Text (p. 65)
1993 Volkswagen Corrado
For Volkswagen Technical Site: http://vw.belcom.ru
Copyright © 1998 Mitchell Repair Information Company, LLC
Wednesday, March 22, 2000 08:45PMÄÄÄÄÄÄÄÄÄÄÄÄÄÄÄÄÄÄÄÄÄÄÄÄÄÄÄÄÄÅÄÄÄÄÄÄÅÄÄÄÄÄÄÄÄÄÄÄÄÄÄÄÄÄÄÄÄÄÄÄÄÄÄÄÄÄÄÄÄÄThreads stripped (threads
³ A ³ Require replacement of
missing)
³ ³ component with stripped threads.
ÄÄÄÄÄÄÄÄÄÄÄÄÄÄÄÄÄÄÄÄÄÄÄÄÄÄÄÄÄÁÄÄÄÄÄÄÁÄÄÄÄÄÄÄÄÄÄÄÄÄÄÄÄÄÄÄÄÄÄÄÄÄÄÄÄÄÄÄÄÄNOTE: (1) Some manufacturers require replacement of all studs on that
wheel if two or more studs or nuts on the same wheel are
broken or missing.
(2) Only required if removing wheel.
ÄÄÄÄÄÄÄÄÄÄÄÄÄÄÄÄÄÄÄÄÄÄÄÄÄÄÄÄÄÄÄÄÄÄÄÄÄÄÄÄÄÄÄÄÄÄÄÄÄÄÄÄÄÄÄÄÄÄÄÄÄÄÄÄÄÄÄÄÄÄ WHEELS
WARNING: Mounting a regular tire on a high-pressure compact spare
wheel is not permitted. Attempting to mount a tire of one
diameter on a wheel of a different diameter or flange type
may result in serious injury or death. If the wheel
identification stamp is not legible, or cannot be found,
DO NOT use the wheel until the size and type have been
properly identified. Wheels of different diameter, offset,
or width cannot be mixed on the same axle. Bead seat tapers
cannot be interchanged.
WHEELS
ÄÄÄÄÄÄÄÄÄÄÄÄÄÄÄÄÄÄÄÄÄÄÄÄÄÄÄÂÄÄÄÄÄÄÂÄÄÄÄÄÄÄÄÄÄÄÄÄÄÄÄÄÄÄÄÄÄÄÄÄÄÄÄÄÄÄÄÄÄÄCondition
³ Code ³ Procedure
ÄÄÄÄÄÄÄÄÄÄÄÄÄÄÄÄÄÄÄÄÄÄÄÄÄÄÄÅÄÄÄÄÄÄÅÄÄÄÄÄÄÄÄÄÄÄÄÄÄÄÄÄÄÄÄÄÄÄÄÄÄÄÄÄÄÄÄÄÄÄBead leaking, caused by
³ A ³ Require repair or replacement.
wheel rim flange
³ ³ See caution below.
ÄÄÄÄÄÄÄÄÄÄÄÄÄÄÄÄÄÄÄÄÄÄÄÄÄÄÄÁÄÄÄÄÄÄÁÄÄÄÄÄÄÄÄÄÄÄÄÄÄÄÄÄÄÄÄÄÄÄÄÄÄÄÄÄÄÄÄÄÄÄCAUTION: DO NOT attempt to correct a bent wheel rim.
ÄÄÄÄÄÄÄÄÄÄÄÄÄÄÄÄÄÄÄÄÄÄÄÄÄÄÄÂÄÄÄÄÄÄÂÄÄÄÄÄÄÄÄÄÄÄÄÄÄÄÄÄÄÄÄÄÄÄÄÄÄÄÄÄÄÄÄÄÄÄBent wheel hub mounting
³ A ³ Require replacement.
surface
³ ³
ÄÄÄÄÄÄÄÄÄÄÄÄÄÄÄÄÄÄÄÄÄÄÄÄÄÄÄÅÄÄÄÄÄÄÅÄÄÄÄÄÄÄÄÄÄÄÄÄÄÄÄÄÄÄÄÄÄÄÄÄÄÄÄÄÄÄÄÄÄÄBent wheel rim, causing
³ B,2 ³ Suggest replacement.
vibration
³ ³ See caution above.
ÄÄÄÄÄÄÄÄÄÄÄÄÄÄÄÄÄÄÄÄÄÄÄÄÄÄÄÅÄÄÄÄÄÄÅÄÄÄÄÄÄÄÄÄÄÄÄÄÄÄÄÄÄÄÄÄÄÄÄÄÄÄÄÄÄÄÄÄÄÄBroken
³ A ³ Require replacement.
ÄÄÄÄÄÄÄÄÄÄÄÄÄÄÄÄÄÄÄÄÄÄÄÄÄÄÄÅÄÄÄÄÄÄÅÄÄÄÄÄÄÄÄÄÄÄÄÄÄÄÄÄÄÄÄÄÄÄÄÄÄÄÄÄÄÄÄÄÄÄCast wheel porous, causing
³ A ³ Require repair or replacement.
a leak
³ ³
ÄÄÄÄÄÄÄÄÄÄÄÄÄÄÄÄÄÄÄÄÄÄÄÄÄÄÄÅÄÄÄÄÄÄÅÄÄÄÄÄÄÄÄÄÄÄÄÄÄÄÄÄÄÄÄÄÄÄÄÄÄÄÄÄÄÄÄÄÄÄClip-on balance weight is
³ B,2 ³ Suggest replacement.
incorrect type for wheel
³ ³ rim flange
³ ³
ÄÄÄÄÄÄÄÄÄÄÄÄÄÄÄÄÄÄÄÄÄÄÄÄÄÄÄÅÄÄÄÄÄÄÅÄÄÄÄÄÄÄÄÄÄÄÄÄÄÄÄÄÄÄÄÄÄÄÄÄÄÄÄÄÄÄÄÄÄÄCorrosion, affecting
³ A ³ Require replacement.
structural integrity
³ ³
ÄÄÄÄÄÄÄÄÄÄÄÄÄÄÄÄÄÄÄÄÄÄÄÄÄÄÄÅÄÄÄÄÄÄÅÄÄÄÄÄÄÄÄÄÄÄÄÄÄÄÄÄÄÄÄÄÄÄÄÄÄÄÄÄÄÄÄÄÄÄCorrosion build-up on wheel
³ A ³ Require repair.
hub mounting surface
³ ³
ÄÄÄÄÄÄÄÄÄÄÄÄÄÄÄÄÄÄÄÄÄÄÄÄÄÄÄÅÄÄÄÄÄÄÅÄÄÄÄÄÄÄÄÄÄÄÄÄÄÄÄÄÄÄÄÄÄÄÄÄÄÄÄÄÄÄÄÄÄÄ
Page 373 of 920

A/C SYSTEM GENERAL SERVICING
Article Text (p. 5)
1993 Volkswagen Corrado
For Volkswagen Technical Site: http://vw.belcom.ru
Copyright © 1998 Mitchell Repair Information Company, LLC
Wednesday, March 22, 2000 08:48PM
Because R-134a is not interchangeable with R-12, separate
sets of hoses, manifold gauge set and recovery/recycling equipment are
required to service vehicles. This is necessary to avoid cross-
contaminating and damaging system.
All equipment used to service systems using R-134a must meet
SAE standard J1991. The service hoses on the manifold gauge set must
have manual (turn wheel) or automatic back-flow valves at the service
port connector ends. This will prevent refrigerant from being released
into the atmosphere.
For identification purposes, R-134a service hoses must have a
Black stripe along its length and be clearly labeled SAE J2196/R-134a.
The low pressure test hose is Blue with a Black stripe. The high
pressure test hose is Red with a Black stripe, and the center test
hose is Yellow with a Black stripe.
NOTE: Refrigerant R-12 service hoses will ONLY be labeled SAE
J2196.
R-134a manifold gauge sets can be identified by one or all of
the following:
* Labeled FOR USE WITH R-134a on set
* Labeled HFC-134 or R-134a on gauge face
* Light Blue color on gauge face
In addition, pressure/temperature scales on R-134a gauge sets
are different from R-12 manifold gauge sets.
SYSTEM SERVICE VALVES
SCHRADER-TYPE VALVES
NOTE: Although similar in construction and operation to a tire
valve, NEVER replace a Schrader-type valve with a tire valve.
Schrader valve is similar in construction and operation to a
tire valve. When a test gauge hose with built-in valve core depressor
is attached, Schrader stem is pushed inward to the open position and
allows system pressure to reach gauge.
If test hose does not have a built-in core depressor, an
adapter must be used. Never attach hose or adapter to Schrader valve
unless it is first connected to manifold gauge set.
Refrigerant R-12 Schrader-type valve cores have TV5 thread
size. Refrigerant R-134a Schrader-type valve cores use M6 (Metric)
threads. R-134a valve cores can be easily identified by use of "O"
rings and external spring. See Fig. 1.
SERVICE VALVE LOCATIONS
SERVICE VALVE LOCATIONS TABLEÄÄÄÄÄÄÄÄÄÄÄÄÄÄÄÄÄÄÄÄÄÄÄÄÄÄÄÄÄÄÄÄÄÄÄÄÄÄÄÄÄÄÄÄÄÄÄÄÄÄÄÄÄÄÄÄÄÄÄÄÄÄVehicle High Low
Page 409 of 920
ANTI-LOCK BRAKE SAFETY PRECAUTIONS
Article Text
1993 Volkswagen Corrado
For Volkswagen Technical Site: http://vw.belcom.ru
Copyright © 1998 Mitchell Repair Information Company, LLC
Wednesday, March 22, 2000 08:57PM
ARTICLE BEGINNING
GENERAL INFORMATION
Anti-Lock Brake Safety Precautions
* PLEASE READ THIS FIRST *
This article is intended for general information purposes
only. This information may not apply to all makes and models. If
vehicle is equipped with Anti-Lock Brake System (ABS), refer to
appropriate ANTI-LOCK BRAKE SYSTEM article in the BRAKES section for
description, operation, depressurizing, testing, system bleeding,
trouble shooting and servicing of specific system.
WARNING: Failure to depressurize ABS could lead to physical injury.
ANTI-LOCK BRAKE SAFETY PRECAUTIONS
WARNING: Failure to depressurize ABS could lead to physical injury.
* NEVER open a bleeder valve or loosen a hydraulic line
while ABS is pressurized.
* NEVER disconnect or reconnect any electrical connectors
while ignition is on. Damage to ABS control unit may result.
* DO NOT attempt to bleed hyudarulic system without first
referring to the appropriate ANTI-LOCK BRAKE SYSTEM article
in the BRAKES section.
* Only use specially designed brake hoses/lines on ABS equipped
vehicles.
* DO NOT tap on speed sensor components (sensor, sensor rings).
Sensor rings must be pressed into hubs, NOT hammered into
hubs. Striking these components can cause demagnetization or
a loss of polarization, affecting the accuracy of the speed
signal returning to the ABS control unit.
* DO NOT mix tire sizes. Increasing the width, as long as tires
remain close to the original diameter, is acceptable. Rolling
diameter must be identical for all 4 tires. Some
manufacturers recommend tires of the same brand, style and
type. Failure to follow this precaution may cause inaccurate
wheel speed readings.
* DO NOT contaminate speed sensor components with grease. Only
use recommended coating, when system calls for an
anti-corrosion coating.
* When speed sensor components have been removed, ALWAYS check
sensor-to-ring air gaps when applicable. These specifications
can be found in each appropriate article.
* ONLY use rocommended brake fluids. DO NOT use silicone brake
fluids in an ABS equipped vehicle.
* When instlling transmittion devices (CB's, telephones, etc.)
on ABS equipped vehicles, DO NOT locate the antenna near the
ABS control unit (or any control unit).
Page 411 of 920
ANTI-LOCK BRAKE SYSTEM
Article Text
1993 Volkswagen Corrado
For Volkswagen Technical Site: http://vw.belcom.ru
Copyright © 1998 Mitchell Repair Information Company, LLC
Wednesday, March 22, 2000 08:57PM
ARTICLE BEGINNING
1993 BRAKES
Volkswagen Anti-Lock
Corrado SLC
ANTI-LOCK BRAKE SAFETY PRECAUTIONS
* NEVER open a bleeder valve or loosen a hydraulic line while
ABS is pressurized
* NEVER disconnect or reconnect any electrical connectors while
ignition is on. Damage to ABS control unit may result.
* DO NOT attempt to bleed hydraulic system without first
referring to the appropriate article.
* Only use specially designed brake hoses/lines on ABS-equipped
vehicles.
* DO NOT tap on speed sensor components (sensor, sensor rings).
Speed rings must be pressed, NOT hammered into hubs. Striking
these components can cause demagnetization or a loss of
polarization, affecting the accuracy of the speed signal
returning to the ABS control unit.
* DO NOT mix tire sizes. Increasing the width, as long as tires
remain close to the original diameter, is acceptable. Rolling
diameter must be identical for all 4 tires. Some
manufacturers recommend tires of the same brand, style and
type. Failure to follow this precaution may cause inaccurate
wheel speed readings.
* DO NOT contaminate speed sensor components with grease. Only
use recommended anti-corrosion coating.
* When speed sensor components have been removed, ALWAYS check
sensor-to-ring air gaps when applicable. These specifications
can be found in each appropriate article.
* ONLY use recommended brake fluids. DO NOT use silicone brake
fluids in an ABS-equipped vehicle.
* When installing transmitting devices (CB's, telephones, etc.)
on ABS-equipped vehicles, DO NOT locate the antenna near the
ABS control unit (or any control unit).
* Disconnect all on-board computers, when using electric
welding equipment.
* DO NOT expose the ABS control unit to prolonged periods of
high heat (185øF/85øC for 2 hours is generally considered a
maximum limit).
DESCRIPTION
A Teves Anti-Lock Brake System (ABS) is used. See Fig. 1.
This system reduces the chance of wheel lock-up during heavy braking.
The system consists of 4 wheel speed sensors, Electronic Control Unit
(ECU), hydraulic modulator/pump and solenoid valves, ANTILOCK and
BRAKE warning lights. There are 2 relays located at fuse/relay panel,
Page 538 of 920

ENGINE OVERHAUL PROCEDURES - GENERAL INFORMATION
Article Text (p. 9)
1993 Volkswagen Corrado
For Volkswagen Technical Site: http://vw.belcom.ru
Copyright © 1998 Mitchell Repair Information Company, LLC
Wednesday, March 22, 2000 09:09PMFig. 6: Measuring Valve Stem-to-Guide Clearance - Typical
This Graphic For General Information Only
Lower valve approximately 1/16" below valve seat. Push valve
stem against valve guide as far as possible. Adjust dial indicator to
zero. Push valve stem in opposite direction and note reading.
Clearance must be within specification.
If valve guide clearance exceeds specification, valves with
oversize stems may be used or valve guide must be replaced. On some
applications, a false guide is installed, then reamed to proper
specification. Valve guide reamer set is used to ream valve guide to
obtain proper clearance for new valve.
Reaming Valve Guide
Select proper reamer for valve stem. Reamer must be of
proper length to provide clean cut through entire length of valve
guide. Install reamer in valve guide and rotate to cut valve guide.
See Fig. 7.Fig. 7: Reaming Valve Guides - Typical
This Graphic For General Information Only
Page 541 of 920
ENGINE OVERHAUL PROCEDURES - GENERAL INFORMATION
Article Text (p. 12)
1993 Volkswagen Corrado
For Volkswagen Technical Site: http://vw.belcom.ru
Copyright © 1998 Mitchell Repair Information Company, LLC
Wednesday, March 22, 2000 09:09PM
Valve Seat Replacement
Replacement of valve seat inserts is done by cutting out
the old insert and machining an oversize insert bore. Replacement
oversize insert is usually chilled and the cylinder head is sometimes
warmed. Valve seat is pressed into the head. This operation requires
specialized machine shop equipment.
Valve Seat Concentricity
Using dial gauge, install gauge pilot in valve guide.
Position gauge arm on the valve seat. Adjust dial indicator to zero.
Rotate arm 360 degrees and note reading. Runout should not exceed
specification.
To check valve-to-valve seat concentricity, coat valve face
lightly with Prussian Blue dye. Install valve and rotate it on valve
seat. If pattern is even and entire seat is coated at valve contact
point, valve is concentric with the seat.
REASSEMBLY
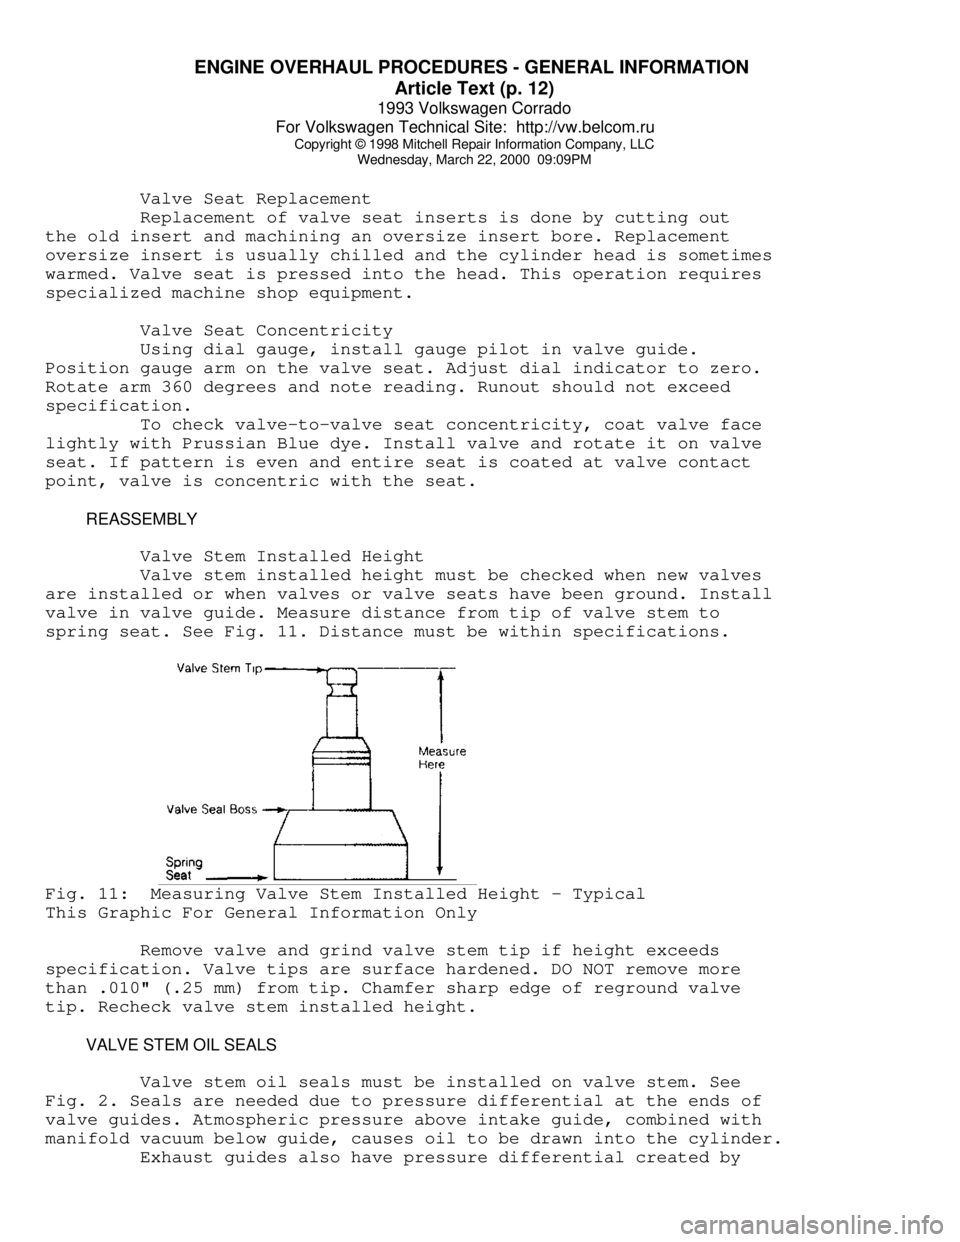
Valve Stem Installed Height
Valve stem installed height must be checked when new valves
are installed or when valves or valve seats have been ground. Install
valve in valve guide. Measure distance from tip of valve stem to
spring seat. See Fig. 11. Distance must be within specifications.Fig. 11: Measuring Valve Stem Installed Height - Typical
This Graphic For General Information Only
Remove valve and grind valve stem tip if height exceeds
specification. Valve tips are surface hardened. DO NOT remove more
than .010" (.25 mm) from tip. Chamfer sharp edge of reground valve
tip. Recheck valve stem installed height.
VALVE STEM OIL SEALS
Valve stem oil seals must be installed on valve stem. See
Fig. 2. Seals are needed due to pressure differential at the ends of
valve guides. Atmospheric pressure above intake guide, combined with
manifold vacuum below guide, causes oil to be drawn into the cylinder.
Exhaust guides also have pressure differential created by
Page 598 of 920
H - TESTS W/O CODES
Article Text (p. 2)
1993 Volkswagen Corrado
For Volkswagen Technical Site: http://vw.belcom.ru
Copyright © 1998 Mitchell Repair Information Company, LLC
Wednesday, March 22, 2000 09:11PM
* For Cabriolet, see: D - ADJUSTMENTS
* For Corrado SLC, see: D - ADJUSTMENTS
* For EuroVan, see: D - ADJUSTMENTS
* For Fox, see: D - ADJUSTMENTS
* For Golf, GTI, Jetta, see: D - ADJUSTMENTS
* For Passat GL 2.0L 4-Cylinder, see: D - ADJUSTMENTS - 4-CYL
* For Passat GLX 2.8L VR6, see: D - ADJUSTMENTS - VR6
I - SYS/COMP TESTS ARTICLES MENU
NOTE: For the appropriate I - SYS/COMP TESTS article, go to:
* For Cabriolet, see: I - SYSTEM/COMPONENT TESTS
* For Corrado SLC, see: I - SYSTEM/COMPONENT TESTS
* For EuroVan, see: I - SYSTEM/COMPONENT TESTS
* For Fox, see: I - SYSTEM/COMPONENT TESTS
* For Golf, GTI, Jetta, see: I - SYSTEM/COMPONENT TESTS
* For Passat GL 2.0L 4-Cylinder, see:
I - SYSTEM/COMPONENT TESTS - 4-CYL
* For Passat GLX 2.8L VR6, see:
I - SYSTEM/COMPONENT TESTS - VR6
SYMPTOMS
SYMPTOM DIAGNOSIS
Symptom checks cannot be used properly unless the problem is
actually happening while the vehicle is being tested. To reduce
diagnostic time, ensure battery voltage is okay and starter motor
turns engine over before attempting to diagnose a symptom.
Check engine mechanical condition (compression pressure,
valve timing, etc.), wiring harness and connections (terminals not
corroded or pushed back), and vacuum hose (not disconnected or
leaking).
Also check for correct tire sizes, as recommended by
manufacturer. Ensure wheels rotate freely (brake drag or bad wheel
bearings). Ensure no speed reducing accessories are installed.
Symptoms available for diagnosis include the following.
* Engine Does Not Start Or Is Difficult To Start When Cold
* Engine Does Not Start Or Is Difficult To Start When Warm
* Uneven Idle Or No Idle With Cold Engine Or During Warm-Up
* Engine Starts But Stalls
* Idle Speed Exceeds Specification
* Poor Acceleration With Cold Engine Or During Warm-Up
* Engine Stalls While Driving
* Poor Performance
* Engine Run-On (Dieseling)
* High Fuel Consumption
* Engine Knock
* Engine Runs Unevenly Over Entire Speed Range
Page 648 of 920

MAINTENANCE INFORMATION
Article Text
1993 Volkswagen Corrado
For Volkswagen Technical Site: http://vw.belcom.ru
Copyright © 1998 Mitchell Repair Information Company, LLC
Wednesday, March 22, 2000 09:14PM
ARTICLE BEGINNING
1990-94 MAINTENANCE
Volkswagen Maintenance Information
Corrado G60 (1990-92)
SLC (1992-94 USA)
VR6 (1992-94 Canada)
* PLEASE READ THIS FIRST *
NOTE: For scheduled maintenance intervals and the related fluid
capacities, fluid specifications and labor times for major
service intervals, see SCHEDULED SERVICES article in this
section. Warranty information and specifications for fluid
capacities, lubrication specifications, wheel and tire size,
and battery type are covered in this article.
MODEL IDENTIFICATION
VIN LOCATION
The Vehicle Identification Number (VIN) is located on the
left side of the dash panel at the base of the windshield. The VIN
chart explains the code characters.
VIN CODE ID EXPLANATION
Numbers preceding the explanations in the legend below refer
to the sequence of characters as listed on VIN identification label.
See VIN example below.ÚÄÄÄÄÄÄÄÄÄÄÄÄÄÄÄÄÄÄÄÄÄÄÄÄÄÄÄÄÄÄÄÄÄÄÄÄÄÄÄÄÄÄÄÄÄÄÄÄÄÄÄÄÄÄÄÄÄÄÄÄÄ¿
³ (VIN) W V W A B 0 5 3 2 M H 0 9 9 7 1 7
³
³ 1 2 3 4 5 6 7 8 9 10 11 12 13 14 15 16 17
³
ÀÄÄÄÄÄÄÄÄÄÄÄÄÄÄÄÄÄÄÄÄÄÄÄÄÄÄÄÄÄÄÄÄÄÄÄÄÄÄÄÄÄÄÄÄÄÄÄÄÄÄÄÄÄÄÄÄÄÄÄÄÄÙ1 - Manufacturing Country
W * Germany
1 * United States
3 * Mexico
9 * Brazil
2-3 - Manufacturer
VW * Volkswagen
4 - Series
D * 2-Door G60 (1990-92)
E * 2-Door SLC (1992-94 USA)
E * 2-Door VR6 (1992-94 Canada)
Page 658 of 920
MAINTENANCE INFORMATION
Article Text (p. 11)
1993 Volkswagen Corrado
For Volkswagen Technical Site: http://vw.belcom.ru
Copyright © 1998 Mitchell Repair Information Company, LLC
Wednesday, March 22, 2000 09:14PM
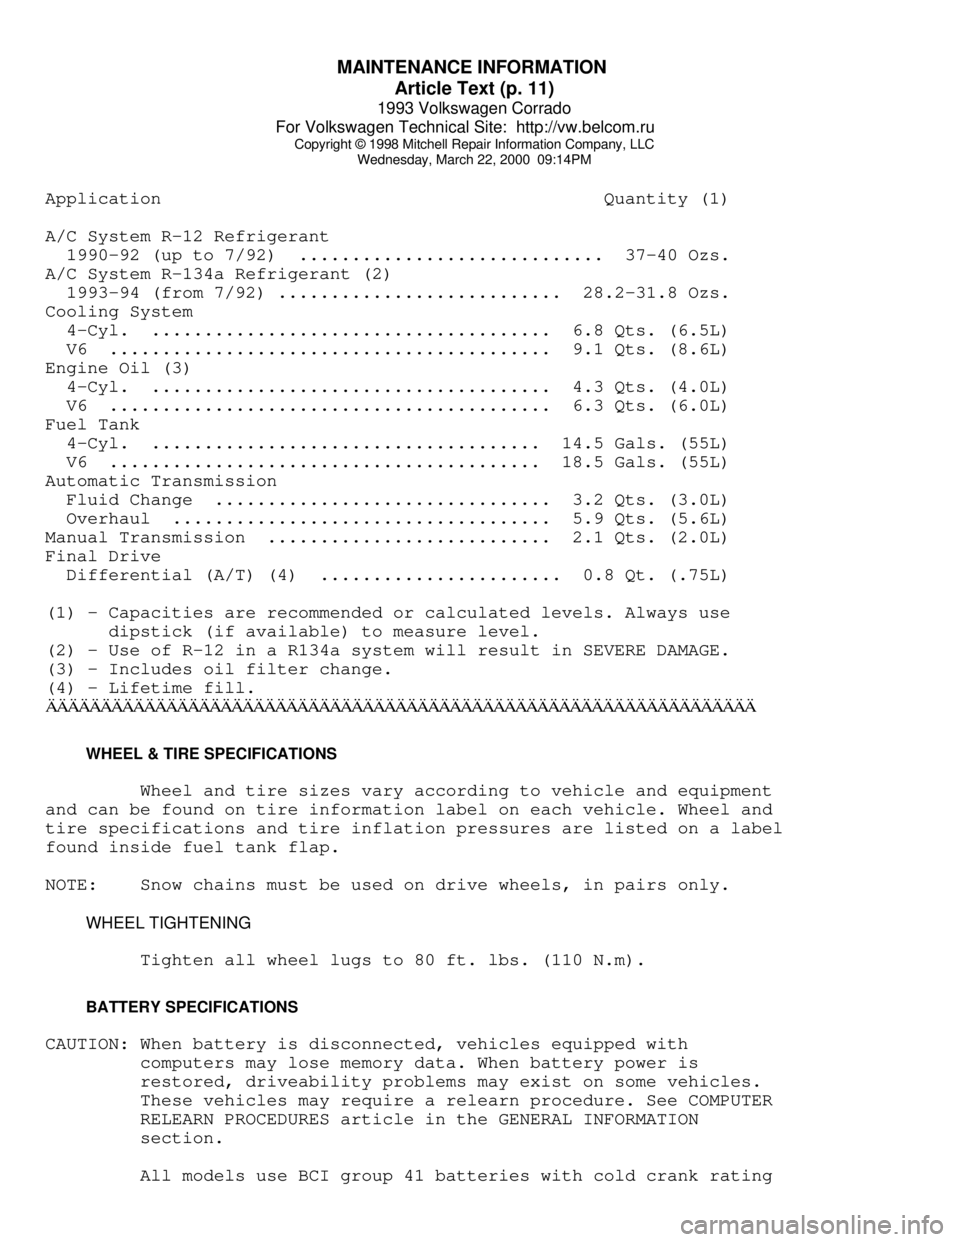
Application Quantity (1)
A/C System R-12 Refrigerant
1990-92 (up to 7/92) ............................. 37-40 Ozs.
A/C System R-134a Refrigerant (2)
1993-94 (from 7/92) ........................... 28.2-31.8 Ozs.
Cooling System
4-Cyl. ...................................... 6.8 Qts. (6.5L)
V6 .......................................... 9.1 Qts. (8.6L)
Engine Oil (3)
4-Cyl. ...................................... 4.3 Qts. (4.0L)
V6 .......................................... 6.3 Qts. (6.0L)
Fuel Tank
4-Cyl. ..................................... 14.5 Gals. (55L)
V6 ......................................... 18.5 Gals. (55L)
Automatic Transmission
Fluid Change ................................ 3.2 Qts. (3.0L)
Overhaul .................................... 5.9 Qts. (5.6L)
Manual Transmission ........................... 2.1 Qts. (2.0L)
Final Drive
Differential (A/T) (4) ....................... 0.8 Qt. (.75L)
(1) - Capacities are recommended or calculated levels. Always use
dipstick (if available) to measure level.
(2) - Use of R-12 in a R134a system will result in SEVERE DAMAGE.
(3) - Includes oil filter change.
(4) - Lifetime fill.ÄÄÄÄÄÄÄÄÄÄÄÄÄÄÄÄÄÄÄÄÄÄÄÄÄÄÄÄÄÄÄÄÄÄÄÄÄÄÄÄÄÄÄÄÄÄÄÄÄÄÄÄÄÄÄÄÄÄÄÄÄÄÄÄÄ WHEEL & TIRE SPECIFICATIONS
Wheel and tire sizes vary according to vehicle and equipment
and can be found on tire information label on each vehicle. Wheel and
tire specifications and tire inflation pressures are listed on a label
found inside fuel tank flap.
NOTE: Snow chains must be used on drive wheels, in pairs only.
WHEEL TIGHTENING
Tighten all wheel lugs to 80 ft. lbs. (110 N.m).
BATTERY SPECIFICATIONS
CAUTION: When battery is disconnected, vehicles equipped with
computers may lose memory data. When battery power is
restored, driveability problems may exist on some vehicles.
These vehicles may require a relearn procedure. See COMPUTER
RELEARN PROCEDURES article in the GENERAL INFORMATION
section.
All models use BCI group 41 batteries with cold crank rating