fuel pressure VOLKSWAGEN CORRADO 1993 Repair Manual
[x] Cancel search | Manufacturer: VOLKSWAGEN, Model Year: 1993, Model line: CORRADO, Model: VOLKSWAGEN CORRADO 1993Pages: 920, PDF Size: 6.92 MB
Page 116 of 920
* ENGINE SYSTEMS UNIFORM INSPECTION GUIDELINES *
Article Text (p. 19)
1993 Volkswagen Corrado
For Volkswagen Technical Site: http://vw.belcom.ru
Copyright © 1998 Mitchell Repair Information Company, LLC
Wednesday, March 22, 2000 08:41PM
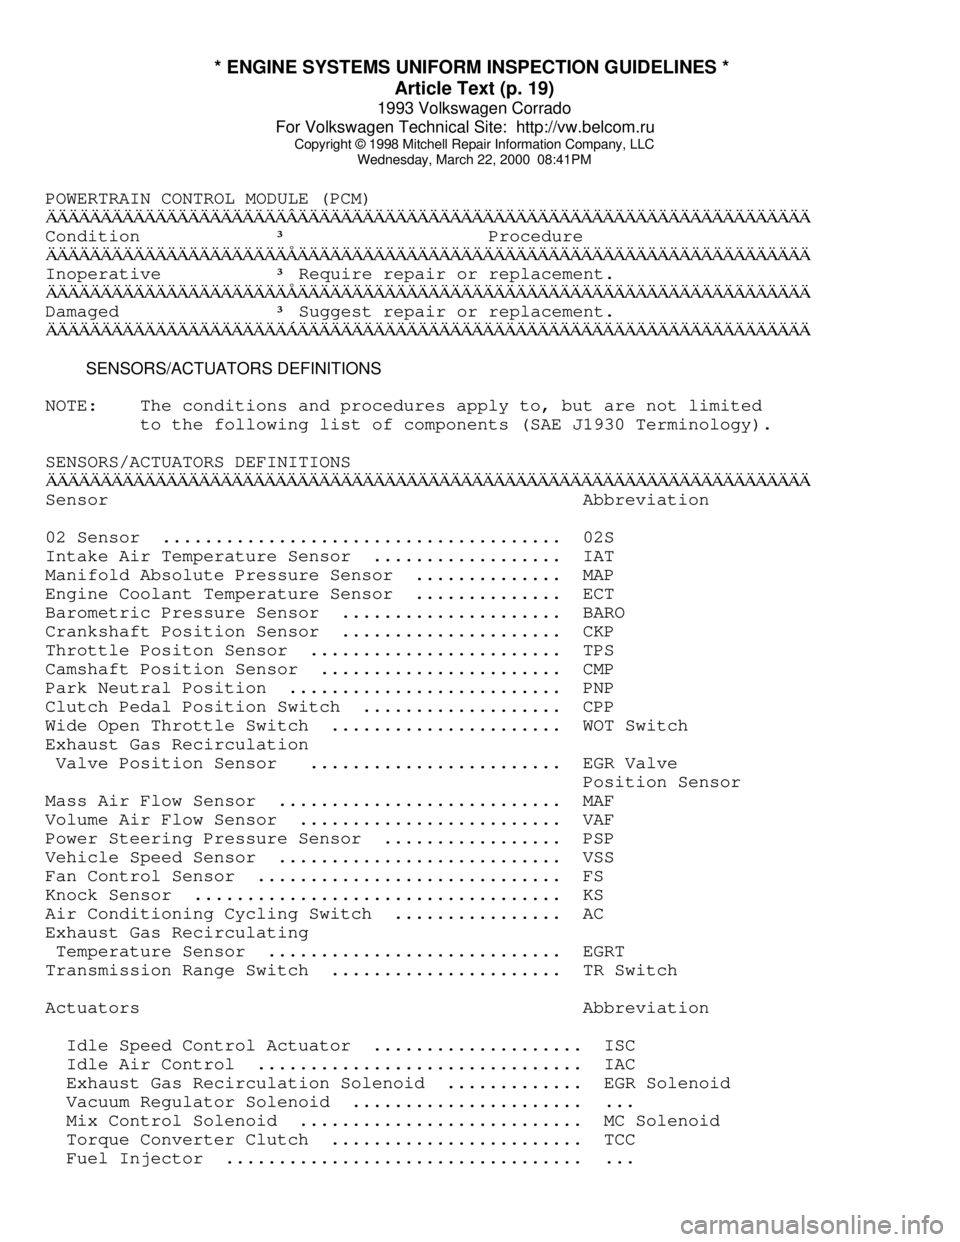
POWERTRAIN CONTROL MODULE (PCM)ÄÄÄÄÄÄÄÄÄÄÄÄÄÄÄÄÄÄÄÄÄÄÂÄÄÄÄÄÄÄÄÄÄÄÄÄÄÄÄÄÄÄÄÄÄÄÄÄÄÄÄÄÄÄÄÄÄÄÄÄÄÄÄÄÄÄÄÄÄÄCondition
³ Procedure
ÄÄÄÄÄÄÄÄÄÄÄÄÄÄÄÄÄÄÄÄÄÄÅÄÄÄÄÄÄÄÄÄÄÄÄÄÄÄÄÄÄÄÄÄÄÄÄÄÄÄÄÄÄÄÄÄÄÄÄÄÄÄÄÄÄÄÄÄÄÄInoperative
³ Require repair or replacement.
ÄÄÄÄÄÄÄÄÄÄÄÄÄÄÄÄÄÄÄÄÄÄÅÄÄÄÄÄÄÄÄÄÄÄÄÄÄÄÄÄÄÄÄÄÄÄÄÄÄÄÄÄÄÄÄÄÄÄÄÄÄÄÄÄÄÄÄÄÄÄDamaged
³ Suggest repair or replacement.
ÄÄÄÄÄÄÄÄÄÄÄÄÄÄÄÄÄÄÄÄÄÄÁÄÄÄÄÄÄÄÄÄÄÄÄÄÄÄÄÄÄÄÄÄÄÄÄÄÄÄÄÄÄÄÄÄÄÄÄÄÄÄÄÄÄÄÄÄÄÄ SENSORS/ACTUATORS DEFINITIONS
NOTE: The conditions and procedures apply to, but are not limited
to the following list of components (SAE J1930 Terminology).
SENSORS/ACTUATORS DEFINITIONS
ÄÄÄÄÄÄÄÄÄÄÄÄÄÄÄÄÄÄÄÄÄÄÄÄÄÄÄÄÄÄÄÄÄÄÄÄÄÄÄÄÄÄÄÄÄÄÄÄÄÄÄÄÄÄÄÄÄÄÄÄÄÄÄÄÄÄÄÄÄÄSensor Abbreviation
02 Sensor ...................................... 02S
Intake Air Temperature Sensor .................. IAT
Manifold Absolute Pressure Sensor .............. MAP
Engine Coolant Temperature Sensor .............. ECT
Barometric Pressure Sensor ..................... BARO
Crankshaft Position Sensor ..................... CKP
Throttle Positon Sensor ........................ TPS
Camshaft Position Sensor ....................... CMP
Park Neutral Position .......................... PNP
Clutch Pedal Position Switch ................... CPP
Wide Open Throttle Switch ...................... WOT Switch
Exhaust Gas Recirculation
Valve Position Sensor ........................ EGR Valve
Position Sensor
Mass Air Flow Sensor ........................... MAF
Volume Air Flow Sensor ......................... VAF
Power Steering Pressure Sensor ................. PSP
Vehicle Speed Sensor ........................... VSS
Fan Control Sensor ............................. FS
Knock Sensor ................................... KS
Air Conditioning Cycling Switch ................ AC
Exhaust Gas Recirculating
Temperature Sensor ............................ EGRT
Transmission Range Switch ...................... TR Switch
Actuators Abbreviation
Idle Speed Control Actuator .................... ISC
Idle Air Control ............................... IAC
Exhaust Gas Recirculation Solenoid ............. EGR Solenoid
Vacuum Regulator Solenoid ...................... ...
Mix Control Solenoid ........................... MC Solenoid
Torque Converter Clutch ........................ TCC
Fuel Injector .................................. ...
Page 128 of 920

* ENGINE SYSTEMS UNIFORM INSPECTION GUIDELINES *
Article Text (p. 31)
1993 Volkswagen Corrado
For Volkswagen Technical Site: http://vw.belcom.ru
Copyright © 1998 Mitchell Repair Information Company, LLC
Wednesday, March 22, 2000 08:41PMÄÄÄÄÄÄÄÄÄÄÄÄÄÄÄÄÄÄÄÄÄÄÄÄÄÄÄÁÄÄÄÄÄÄÄÄÄÄÄÄÄÄÄÄÄÄÄÄÄÄÄÄÄÄÄÄÄÄÄÄÄÄÄÄÄÄÄÄÄÄFUEL ACCUMULATOR/DAMPENER
ÄÄÄÄÄÄÄÄÄÄÄÄÄÄÄÄÄÄÄÄÄÄÂÄÄÄÄÄÄÄÄÄÄÄÄÄÄÄÄÄÄÄÄÄÄÄÄÄÄÄÄÄÄÄÄÄÄÄÄÄÄÄÄÄÄÄÄÄÄÄCondition
³ Procedure
ÄÄÄÄÄÄÄÄÄÄÄÄÄÄÄÄÄÄÄÄÄÄÅÄÄÄÄÄÄÄÄÄÄÄÄÄÄÄÄÄÄÄÄÄÄÄÄÄÄÄÄÄÄÄÄÄÄÄÄÄÄÄÄÄÄÄÄÄÄÄInoperative
³ Require replacement.
ÄÄÄÄÄÄÄÄÄÄÄÄÄÄÄÄÄÄÄÄÄÄÅÄÄÄÄÄÄÄÄÄÄÄÄÄÄÄÄÄÄÄÄÄÄÄÄÄÄÄÄÄÄÄÄÄÄÄÄÄÄÄÄÄÄÄÄÄÄÄLeaking
³ Require replacement.
ÄÄÄÄÄÄÄÄÄÄÄÄÄÄÄÄÄÄÄÄÄÄÅÄÄÄÄÄÄÄÄÄÄÄÄÄÄÄÄÄÄÄÄÄÄÄÄÄÄÄÄÄÄÄÄÄÄÄÄÄÄÄÄÄÄÄÄÄÄÄDamaged
³ Suggest replacement.
ÄÄÄÄÄÄÄÄÄÄÄÄÄÄÄÄÄÄÄÄÄÄÁÄÄÄÄÄÄÄÄÄÄÄÄÄÄÄÄÄÄÄÄÄÄÄÄÄÄÄÄÄÄÄÄÄÄÄÄÄÄÄÄÄÄÄÄÄÄÄFUEL PRESSURE REGULATOR
ÄÄÄÄÄÄÄÄÄÄÄÄÄÄÄÄÄÄÄÄÄÄÄÄÂÄÄÄÄÄÄÄÄÄÄÄÄÄÄÄÄÄÄÄÄÄÄÄÄÄÄÄÄÄÄÄÄÄÄÄÄÄÄÄÄÄÄÄÄÄCondition
³ Procedure
ÄÄÄÄÄÄÄÄÄÄÄÄÄÄÄÄÄÄÄÄÄÄÄÄÅÄÄÄÄÄÄÄÄÄÄÄÄÄÄÄÄÄÄÄÄÄÄÄÄÄÄÄÄÄÄÄÄÄÄÄÄÄÄÄÄÄÄÄÄÄInoperative
³ Require repair or replacement.
ÄÄÄÄÄÄÄÄÄÄÄÄÄÄÄÄÄÄÄÄÄÄÄÄÅÄÄÄÄÄÄÄÄÄÄÄÄÄÄÄÄÄÄÄÄÄÄÄÄÄÄÄÄÄÄÄÄÄÄÄÄÄÄÄÄÄÄÄÄÄLeaking
³ Require repair or replacement.
ÄÄÄÄÄÄÄÄÄÄÄÄÄÄÄÄÄÄÄÄÄÄÄÄÅÄÄÄÄÄÄÄÄÄÄÄÄÄÄÄÄÄÄÄÄÄÄÄÄÄÄÄÄÄÄÄÄÄÄÄÄÄÄÄÄÄÄÄÄÄDamaged
³ Suggest replacement.
ÄÄÄÄÄÄÄÄÄÄÄÄÄÄÄÄÄÄÄÄÄÄÄÄÅÄÄÄÄÄÄÄÄÄÄÄÄÄÄÄÄÄÄÄÄÄÄÄÄÄÄÄÄÄÄÄÄÄÄÄÄÄÄÄÄÄÄÄÄÄRestricted/contaminated
³ Suggest repair. Further inspection required.
³ See NOTE: below.
ÄÄÄÄÄÄÄÄÄÄÄÄÄÄÄÄÄÄÄÄÄÄÄÄÁÄÄÄÄÄÄÄÄÄÄÄÄÄÄÄÄÄÄÄÄÄÄÄÄÄÄÄÄÄÄÄÄÄÄÄÄÄÄÄÄÄÄÄÄÄNOTE: Some components may be serviceable; check for accepted
cleaning procedure.
ÄÄÄÄÄÄÄÄÄÄÄÄÄÄÄÄÄÄÄÄÄÄÄÄÄÄÄÄÄÄÄÄÄÄÄÄÄÄÄÄÄÄÄÄÄÄÄÄÄÄÄÄÄÄÄÄÄÄÄÄÄÄÄÄÄÄÄÄÄÄFUEL RAIL
ÄÄÄÄÄÄÄÄÄÄÄÄÄÄÄÄÄÄÄÄÄÄÂÄÄÄÄÄÄÄÄÄÄÄÄÄÄÄÄÄÄÄÄÄÄÄÄÄÄÄÄÄÄÄÄÄÄÄÄÄÄÄÄÄÄÄÄÄÄÄCondition
³ Procedure
ÄÄÄÄÄÄÄÄÄÄÄÄÄÄÄÄÄÄÄÄÄÄÅÄÄÄÄÄÄÄÄÄÄÄÄÄÄÄÄÄÄÄÄÄÄÄÄÄÄÄÄÄÄÄÄÄÄÄÄÄÄÄÄÄÄÄÄÄÄÄRestricted
³ Require repair or replacement.
ÄÄÄÄÄÄÄÄÄÄÄÄÄÄÄÄÄÄÄÄÄÄÅÄÄÄÄÄÄÄÄÄÄÄÄÄÄÄÄÄÄÄÄÄÄÄÄÄÄÄÄÄÄÄÄÄÄÄÄÄÄÄÄÄÄÄÄÄÄÄLeaking
³ Require repair or replacement.
ÄÄÄÄÄÄÄÄÄÄÄÄÄÄÄÄÄÄÄÄÄÄÅÄÄÄÄÄÄÄÄÄÄÄÄÄÄÄÄÄÄÄÄÄÄÄÄÄÄÄÄÄÄÄÄÄÄÄÄÄÄÄÄÄÄÄÄÄÄÄDamaged
³ Suggest replacement.
ÄÄÄÄÄÄÄÄÄÄÄÄÄÄÄÄÄÄÄÄÄÄÁÄÄÄÄÄÄÄÄÄÄÄÄÄÄÄÄÄÄÄÄÄÄÄÄÄÄÄÄÄÄÄÄÄÄÄÄÄÄÄÄÄÄÄÄÄÄÄFUEL DISTRIBUTOR
ÄÄÄÄÄÄÄÄÄÄÄÄÄÄÄÄÄÄÄÄÄÄÄÄÂÄÄÄÄÄÄÄÄÄÄÄÄÄÄÄÄÄÄÄÄÄÄÄÄÄÄÄÄÄÄÄÄÄÄÄÄÄÄÄÄÄÄÄÄÄCondition
³ Procedure
ÄÄÄÄÄÄÄÄÄÄÄÄÄÄÄÄÄÄÄÄÄÄÄÄÅÄÄÄÄÄÄÄÄÄÄÄÄÄÄÄÄÄÄÄÄÄÄÄÄÄÄÄÄÄÄÄÄÄÄÄÄÄÄÄÄÄÄÄÄÄInoperative
³ Require repair or replacement. Further
³ inspection required. See NOTE: below.
ÄÄÄÄÄÄÄÄÄÄÄÄÄÄÄÄÄÄÄÄÄÄÄÄÅÄÄÄÄÄÄÄÄÄÄÄÄÄÄÄÄÄÄÄÄÄÄÄÄÄÄÄÄÄÄÄÄÄÄÄÄÄÄÄÄÄÄÄÄÄOut of specification
³ Require repair or replacement.
ÄÄÄÄÄÄÄÄÄÄÄÄÄÄÄÄÄÄÄÄÄÄÄÄÅÄÄÄÄÄÄÄÄÄÄÄÄÄÄÄÄÄÄÄÄÄÄÄÄÄÄÄÄÄÄÄÄÄÄÄÄÄÄÄÄÄÄÄÄÄLeaking
³ Requires repair or replacement.
ÄÄÄÄÄÄÄÄÄÄÄÄÄÄÄÄÄÄÄÄÄÄÄÄÅÄÄÄÄÄÄÄÄÄÄÄÄÄÄÄÄÄÄÄÄÄÄÄÄÄÄÄÄÄÄÄÄÄÄÄÄÄÄÄÄÄÄÄÄÄ
Page 293 of 920
2.8L IN-LINE V6 (VR6)
Article Text (p. 2)
1993 Volkswagen Corrado
For Volkswagen Technical Site: http://vw.belcom.ru
Copyright © 1998 Mitchell Repair Information Company, LLC
Wednesday, March 22, 2000 08:47PM
ADJUSTMENTS
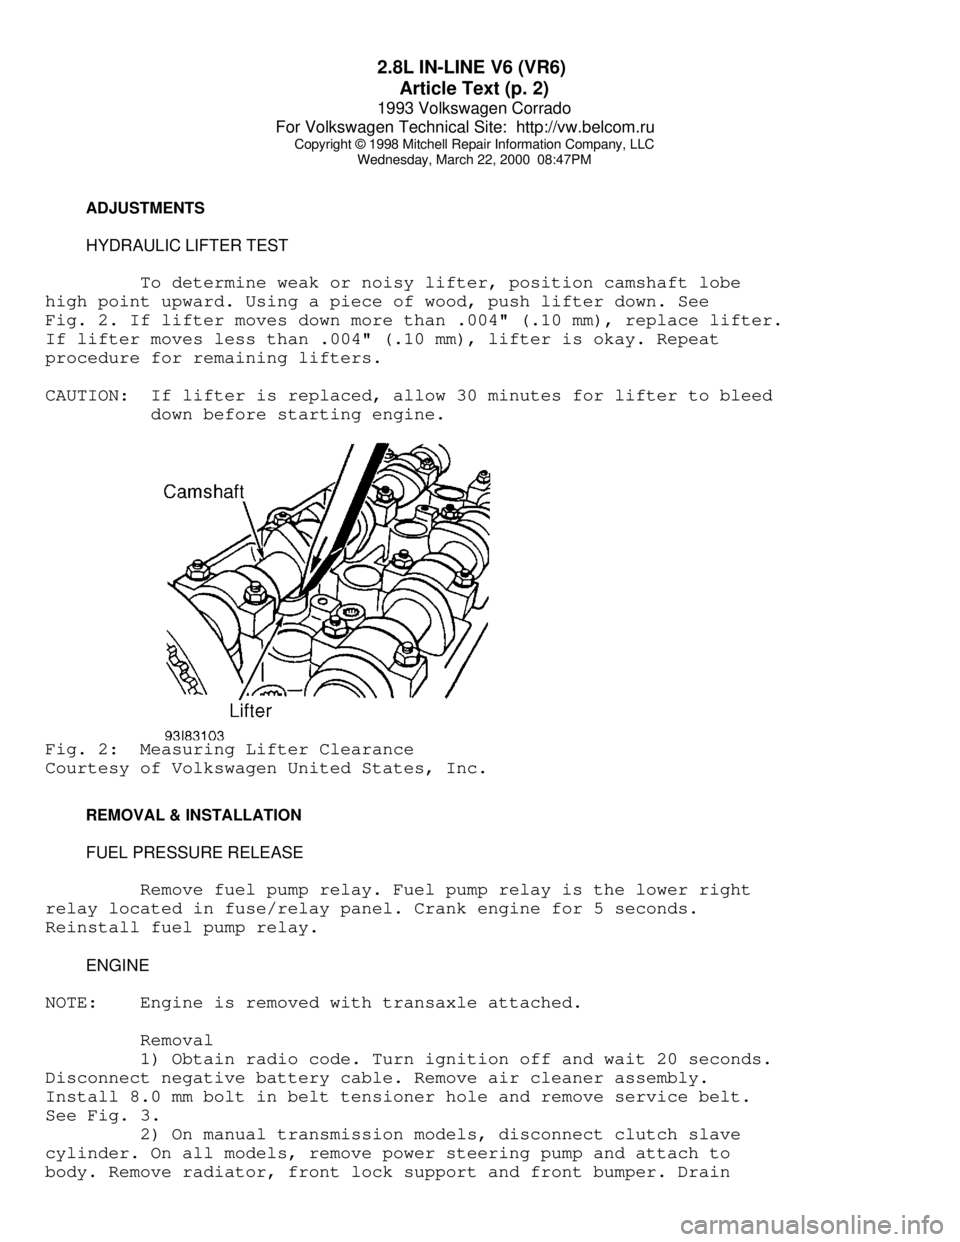
HYDRAULIC LIFTER TEST
To determine weak or noisy lifter, position camshaft lobe
high point upward. Using a piece of wood, push lifter down. See
Fig. 2. If lifter moves down more than .004" (.10 mm), replace lifter.
If lifter moves less than .004" (.10 mm), lifter is okay. Repeat
procedure for remaining lifters.
CAUTION: If lifter is replaced, allow 30 minutes for lifter to bleed
down before starting engine.Fig. 2: Measuring Lifter Clearance
Courtesy of Volkswagen United States, Inc.
REMOVAL & INSTALLATION
FUEL PRESSURE RELEASE
Remove fuel pump relay. Fuel pump relay is the lower right
relay located in fuse/relay panel. Crank engine for 5 seconds.
Reinstall fuel pump relay.
ENGINE
NOTE: Engine is removed with transaxle attached.
Removal
1) Obtain radio code. Turn ignition off and wait 20 seconds.
Disconnect negative battery cable. Remove air cleaner assembly.
Install 8.0 mm bolt in belt tensioner hole and remove service belt.
See Fig. 3.
2) On manual transmission models, disconnect clutch slave
cylinder. On all models, remove power steering pump and attach to
body. Remove radiator, front lock support and front bumper. Drain
Page 307 of 920

2.8L IN-LINE V6 (VR6)
Article Text (p. 16)
1993 Volkswagen Corrado
For Volkswagen Technical Site: http://vw.belcom.ru
Copyright © 1998 Mitchell Repair Information Company, LLC
Wednesday, March 22, 2000 08:47PM
TORQUE SPECIFICATIONS
TORQUE SPECIFICATIONS TABLEÄÄÄÄÄÄÄÄÄÄÄÄÄÄÄÄÄÄÄÄÄÄÄÄÄÄÄÄÄÄÄÄÄÄÄÄÄÄÄÄÄÄÄÄÄÄÄÄÄÄÄÄÄÄÄÄÄÄÄÄApplication Ft. Lbs. (N.m)
A/C Bracket-To-Engine Bolt ....................... 22 (30)
Axle Shaft-To-Transaxle Drive Flange Bolt ........ 33 (45)
Camshaft Bearing Cap Bolt ........................ 15 (20)
Camshaft Sprocket Bolt .......................... 74 (100)
Clutch Cover Bolt ................................ 15 (20)
Connecting Rod Bolt ................... 22 (30) + 1/4 Turn
Crankshaft Main Bearing Cap Bolt ...... 22 (30) + 1/2 Turn
Cylinder Head Bolt (1)
Step 1 ......................................... 30 (40)
Step 2 ......................................... 44 (60)
Step 3 ....................... Additional 1/4 (90
ø) Turn
Step 4 ....................... Additional 1/4 (90
ø) Turn
Engine Bracket (Front) ........................... 44 (60)
Engine Bracket (To Body) ......................... 33 (45)
Engine-To-Transaxle 10-mm Bolt ................... 44 (60)
Engine-To-Transaxle 12-mm Bolt ................... 55 (80)
Exhaust Manifold-To-Cylinder Head Bolt & Nut ..... 18 (25)
Exhaust Pipe-To-Catalytic Converter Bolt ......... 18 (25)
Exhaust Pipe-To-Manifold Nut ..................... 30 (40)
Flywheel-To-Crankshaft Bolt ........... 44 (60) + 1/4 Turn
Intake Manifold .................................. 18 (25)
Intermediate Shaft Sprocket Bolt ................ 74 (100)
Oil Pan Bolt ..................................... 15 (20)
Oil Pan Drain Plug ............................... 37 (50)
Oil Pressure Switch .............................. 18 (25)
Oil Pump Cover Long Bolt ............................. (2)
Oil Pump Cover Short Bolt ........................ 18 (25)
Power Steering Pump Bracket Bolt ................. 18 (25)
Pressure Plate Bolt .............................. 15 (20)
Starter Mount Bolt ............................... 18 (25)
Timing Belt Tensioner Nut ........................ 15 (20)
Torque Converter-To-Carrier Plate Bolt ........... 22 (30)
Vibration Damper Bolt .......................... 332 (450)
Water Pump Pulley Bolt ........................... 15 (20)
Water Pump Housing-To-Engine Bolt ................ 15 (20)
INCH Lbs. (N.m)
Fuel Rail Bolt (Lower) ............................ 89 (10)
Timing Belt Idler Bolt ........................... 89 (10)
Valve Cover Retaining Nut ........................ 89 (10)
Water Pump-To-Housing ........................... 115 (13)
(1) - Never reuse cylinder head bolt(s) when servicing.
(2) - Tighten bolt to 89 INCH lbs. (10 N.m).
ÄÄÄÄÄÄÄÄÄÄÄÄÄÄÄÄÄÄÄÄÄÄÄÄÄÄÄÄÄÄÄÄÄÄÄÄÄÄÄÄÄÄÄÄÄÄÄÄÄÄÄÄÄÄÄÄÄÄÄÄ
Page 392 of 920
AA - USING THIS SECTION (GENERAL HELP INFORMATION)
Article Text (p. 6)
1993 Volkswagen Corrado
For Volkswagen Technical Site: http://vw.belcom.ru
Copyright © 1998 Mitchell Repair Information Company, LLC
Wednesday, March 22, 2000 08:49PM
1) If no self-diagnostics available, or no trouble codes
present, identify symptom.
2) See trouble shooting procedure to repair complaint. See H
- TESTS W/O CODES
TEST SYSTEM
1) Perform necessary systems and component tests. See I -
SYS/COMP TESTS.
2) Verify that complaint is repaired.
SAFETY PRECAUTIONS
* Always refer to Engine Tune-Up Decal in engine compartment before
performing tune-up. If manual and decal differ, always use decal
specifications.
* DO NOT allow or create a condition of misfire in more than one
cylinder for an extended period of time. Damage to converter may
occur due to loading converter with unburned air/fuel mixture.
* Always turn ignition off and disconnect negative battery cable
BEFORE disconnecting or connecting computer or other electrical
components.
* DO NOT drop or shock electrical components such as computer,
airflow meter, etc.
* DO NOT use fuel system cleaning compounds that are not
recommended by the manufacturer. Damage to gaskets, diaphragm
materials and catalytic converter may result.
* Before performing a compression test or cranking engine using a
remote starter switch, disconnect coil wire from distributor and
secure it to a good engine ground, or disable ignition.
* Before disconnecting any fuel system component, ensure fuel
system pressure is released.
* Use a shop towel to absorb any spilled fuel to prevent fire.
* DO NOT create sparks or have an open flame near battery.
* If any EFI components such as hoses or clamps are replaces,
ensure they are replaced with components designed for EFI use.
* Always reassemble throttle body components with new gaskets, "O"
rings and seals.
* If equipped with an inertia switch, DO NOT reset switch until
fuel system has been inspected for leaks.
* Wear safety goggles when drilling or grinding.
* Wear proper clothing which protects against chemicals and other
hazards.
END OF ARTICLE
Page 397 of 920

ABBREVIATIONS
Article Text (p. 5)
1993 Volkswagen Corrado
For Volkswagen Technical Site: http://vw.belcom.ru
Copyright © 1998 Mitchell Repair Information Company, LLC
Wednesday, March 22, 2000 08:49PM³EST ³Electronic Spark Timing ³
³ETR
³Emergency Tensioning Retractor ³
³EVAP
³Fuel Evaporative System ³
³EVIC
³Electronic Vehicle Information Center ³
³EVO
³Electronic Variable Orifice ³
³EVP
³EGR Valve Position Sensor ³
³EVR
³EGR Valve Regulator ³
³EVRV
³Electronic Vacuum Regulator Valve ³
³Elect.
³Electronic ³
³Eng.
³Engine ³
³Evap.
³Evaporative ³
³Exc.
³Except ³
ÀÄÄÄÄÄÄÄÄÄÄÄÄÄÄÄÄÄÁÄÄÄÄÄÄÄÄÄÄÄÄÄÄÄÄÄÄÄÄÄÄÄÄÄÄÄÄÄÄÄÄÄÄÄÄÄÄÄÄÄÄÄÄÄÄÄÄÄÄÙ "F" ABBREVIATION TABLE
"F" ABBREVIATION TABLE
ÚÄÄÄÄÄÄÄÄÄÄÄÄÄÄÄÄÄÂÄÄÄÄÄÄÄÄÄÄÄÄÄÄÄÄÄÄÄÄÄÄÄÄÄÄÄÄÄÄÄÄÄÄÄÄÄÄÄÄÄÄÄÄÄÄÄÄÄÄ¿
³ABBREVIATION
³DEFINITION ³
ÃÄÄÄÄÄÄÄÄÄÄÄÄÄÄÄÄÄÅÄÄÄÄÄÄÄÄÄÄÄÄÄÄÄÄÄÄÄÄÄÄÄÄÄÄÄÄÄÄÄÄÄÄÄÄÄÄÄÄÄÄÄÄÄÄÄÄÄÄ´
³ø F
³Fahrenheit (Degrees) ³
³F/B
³Fuse Block ³
³FBC
³Feedback Carburetor ³
³FI
³Fuel Injector or Fuel Injection ³
³FICD
³Fast Idle Control Device ³
³FIPL
³Fuel Injector Pump Lever ³
³FP
³Fuel Pump ³
³FPM
³Fuel Pump Monitor ³
³FPR-VSV
³Fuel Pressure Regulator Vacuum Switching Valve ³
³FWD
³Front Wheel Drive ³
³Fed.
³Federal ³
³Ft. Lbs.
³Foot Pounds ³
ÀÄÄÄÄÄÄÄÄÄÄÄÄÄÄÄÄÄÁÄÄÄÄÄÄÄÄÄÄÄÄÄÄÄÄÄÄÄÄÄÄÄÄÄÄÄÄÄÄÄÄÄÄÄÄÄÄÄÄÄÄÄÄÄÄÄÄÄÄÙ "G" ABBREVIATION TABLE
"G" ABBREVIATION TABLE
ÚÄÄÄÄÄÄÄÄÄÄÄÄÄÄÄÄÄÂÄÄÄÄÄÄÄÄÄÄÄÄÄÄÄÄÄÄÄÄÄÄÄÄÄÄÄÄÄÄÄÄÄÄÄÄÄÄÄÄÄÄÄÄÄÄÄÄÄÄ¿
³ABBREVIATION
³DEFINITION ³
ÃÄÄÄÄÄÄÄÄÄÄÄÄÄÄÄÄÄÅÄÄÄÄÄÄÄÄÄÄÄÄÄÄÄÄÄÄÄÄÄÄÄÄÄÄÄÄÄÄÄÄÄÄÄÄÄÄÄÄÄÄÄÄÄÄÄÄÄÄ´
³g
³grams ³
³GND or GRND
³Ground ³
³GRN
³Green ³
³GRY
³Gray ³
³Ga.
³Gauge ³
³Gals.
³gallons ³
³Gov.
³Governor ³
ÀÄÄÄÄÄÄÄÄÄÄÄÄÄÄÄÄÄÁÄÄÄÄÄÄÄÄÄÄÄÄÄÄÄÄÄÄÄÄÄÄÄÄÄÄÄÄÄÄÄÄÄÄÄÄÄÄÄÄÄÄÄÄÄÄÄÄÄÄÙ "H" ABBREVIATION TABLE
Page 400 of 920

ABBREVIATIONS
Article Text (p. 8)
1993 Volkswagen Corrado
For Volkswagen Technical Site: http://vw.belcom.ru
Copyright © 1998 Mitchell Repair Information Company, LLC
Wednesday, March 22, 2000 08:49PM
"M" ABBREVIATION TABLEÚÄÄÄÄÄÄÄÄÄÄÄÄÄÄÄÄÄÂÄÄÄÄÄÄÄÄÄÄÄÄÄÄÄÄÄÄÄÄÄÄÄÄÄÄÄÄÄÄÄÄÄÄÄÄÄÄÄÄÄÄÄÄÄÄÄÄÄÄ¿
³ABBREVIATION
³DEFINITION ³
ÃÄÄÄÄÄÄÄÄÄÄÄÄÄÄÄÄÄÅÄÄÄÄÄÄÄÄÄÄÄÄÄÄÄÄÄÄÄÄÄÄÄÄÄÄÄÄÄÄÄÄÄÄÄÄÄÄÄÄÄÄÄÄÄÄÄÄÄÄ´
³mA
³Milliamps ³
³mV
³Millivolts ³
³mfd.
³Microfarads ³
³mm
³Millimeters ³
³M/T
³Manual Transaxle or Transmission ³
³MA PFI
³Mass Air Sequential Port Fuel Injection system ³
³MA or MAF
³Mass Airflow ³
³MAF
³Mass Air Flow sensor ³
³MAFS
³Mass Airflow Sensor ³
³MAP
³Manifold Absolute Pressure sensor ³
³MAT
³Manifold Air Temperature ³
³MCU
³Microprocessor Control Unit ³
³MCV
³Mixture Control Valve ³
³MEM-CAL
³Memory Calibration Chip ³
³MFI
³Multiport Fuel Injection ³
³MIL
³Malfunction Indicator Light ³
³MLP
³Manual Lever Position ³
³MPFI
³Multi Point Fuel Injection ³
³MPH
³Miles Per Hour ³
³MPI
³Multi-Point (Fuel) Injection ³
³Man.
³Manual ³
³Mech.
³Mechanical ³
³Mem.
³Memory ³
³Mtr.
³Motor ³
ÀÄÄÄÄÄÄÄÄÄÄÄÄÄÄÄÄÄÁÄÄÄÄÄÄÄÄÄÄÄÄÄÄÄÄÄÄÄÄÄÄÄÄÄÄÄÄÄÄÄÄÄÄÄÄÄÄÄÄÄÄÄÄÄÄÄÄÄÄÙ "N" ABBREVIATION TABLE
"N" ABBREVIATION TABLE
ÚÄÄÄÄÄÄÄÄÄÄÄÄÄÄÄÄÄÂÄÄÄÄÄÄÄÄÄÄÄÄÄÄÄÄÄÄÄÄÄÄÄÄÄÄÄÄÄÄÄÄÄÄÄÄÄÄÄÄÄÄÄÄÄÄÄÄÄÄ¿
³ABBREVIATION
³DEFINITION ³
ÃÄÄÄÄÄÄÄÄÄÄÄÄÄÄÄÄÄÅÄÄÄÄÄÄÄÄÄÄÄÄÄÄÄÄÄÄÄÄÄÄÄÄÄÄÄÄÄÄÄÄÄÄÄÄÄÄÄÄÄÄÄÄÄÄÄÄÄÄ´
³N.m
³Newton-Meter ³
³NA
³Not Available ³
³NDS
³Neutral Drive Switch ³
³NGS
³Neutral Gear Switch ³
³NOx
³Oxides of Nitrogen ³
³NPS
³Neutral Pressure Switch ³
³No.
³Number ³
³Nos.
³Numbers ³
ÀÄÄÄÄÄÄÄÄÄÄÄÄÄÄÄÄÄÁÄÄÄÄÄÄÄÄÄÄÄÄÄÄÄÄÄÄÄÄÄÄÄÄÄÄÄÄÄÄÄÄÄÄÄÄÄÄÄÄÄÄÄÄÄÄÄÄÄÄÙ "O" ABBREVIATION TABLE
"O" ABBREVIATION TABLE
ÚÄÄÄÄÄÄÄÄÄÄÄÄÄÄÄÄÄÂÄÄÄÄÄÄÄÄÄÄÄÄÄÄÄÄÄÄÄÄÄÄÄÄÄÄÄÄÄÄÄÄÄÄÄÄÄÄÄÄÄÄÄÄÄÄÄÄÄÄ¿
³ABBREVIATION
³DEFINITION ³
ÃÄÄÄÄÄÄÄÄÄÄÄÄÄÄÄÄÄÅÄÄÄÄÄÄÄÄÄÄÄÄÄÄÄÄÄÄÄÄÄÄÄÄÄÄÄÄÄÄÄÄÄÄÄÄÄÄÄÄÄÄÄÄÄÄÄÄÄÄ´
Page 401 of 920
ABBREVIATIONS
Article Text (p. 9)
1993 Volkswagen Corrado
For Volkswagen Technical Site: http://vw.belcom.ru
Copyright © 1998 Mitchell Repair Information Company, LLC
Wednesday, March 22, 2000 08:49PM³O ³Oxygen ³
³O.D.
³Outside Diameter ³
³O/S
³Oversize ³
³O2
³Oxygen ³
³OC
³Oxidation Catalyst ³
³OCC
³Output Circuit Check ³
³OD
³Overdrive ³
³ODO
³Odometer ³
³OHC
³Overhead Camshaft ³
³ORG
³Orange ³
³OSC
³Output State Check ³
³Opt.
³Option or Optional ³
³oz.
³Ounce ³
³ozs.
³Ounces ³
ÀÄÄÄÄÄÄÄÄÄÄÄÄÄÄÄÄÄÁÄÄÄÄÄÄÄÄÄÄÄÄÄÄÄÄÄÄÄÄÄÄÄÄÄÄÄÄÄÄÄÄÄÄÄÄÄÄÄÄÄÄÄÄÄÄÄÄÄÄÙ "P" ABBREVIATION TABLE
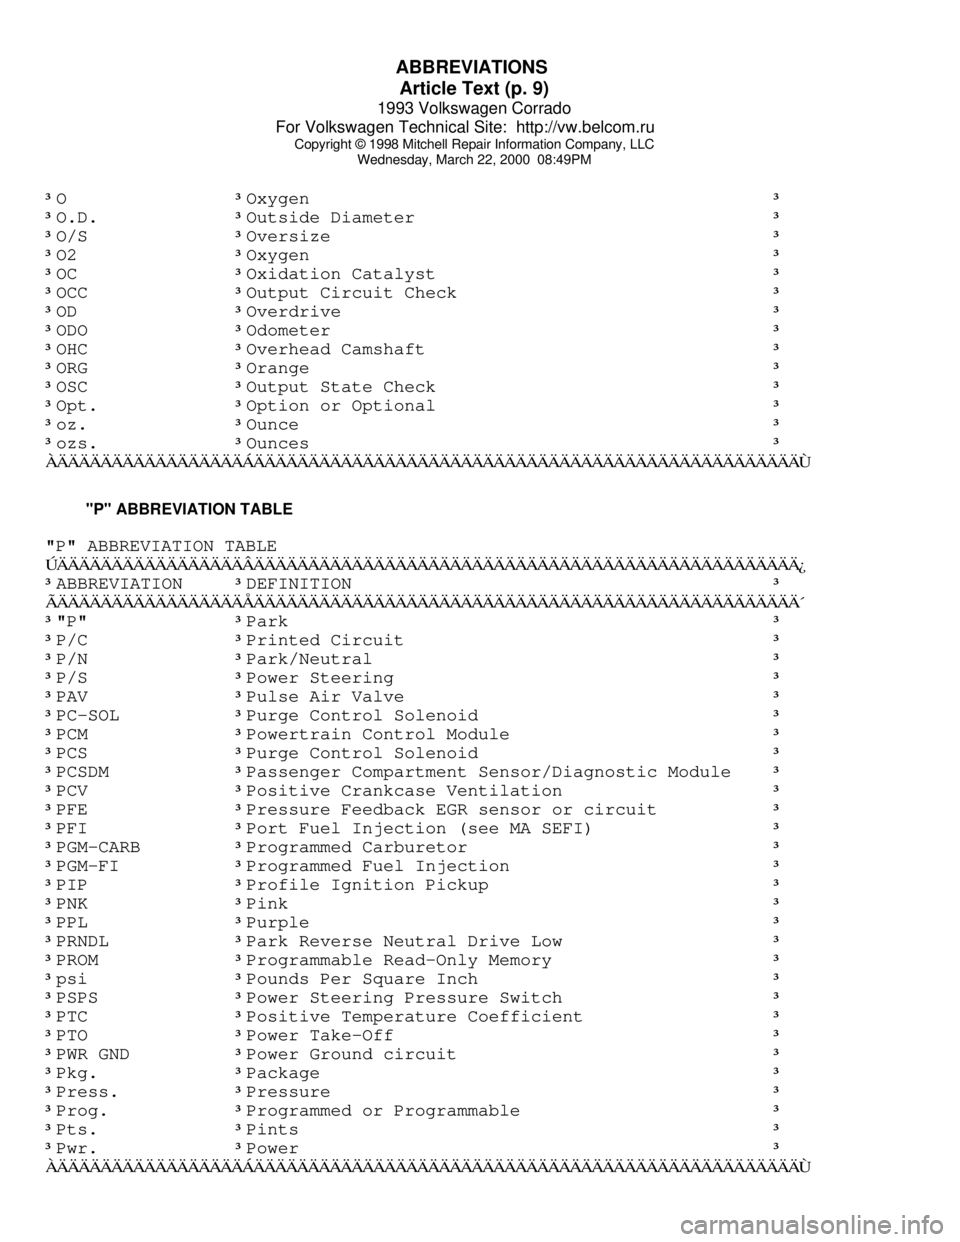
"P" ABBREVIATION TABLE
ÚÄÄÄÄÄÄÄÄÄÄÄÄÄÄÄÄÄÂÄÄÄÄÄÄÄÄÄÄÄÄÄÄÄÄÄÄÄÄÄÄÄÄÄÄÄÄÄÄÄÄÄÄÄÄÄÄÄÄÄÄÄÄÄÄÄÄÄÄ¿
³ABBREVIATION
³DEFINITION ³
ÃÄÄÄÄÄÄÄÄÄÄÄÄÄÄÄÄÄÅÄÄÄÄÄÄÄÄÄÄÄÄÄÄÄÄÄÄÄÄÄÄÄÄÄÄÄÄÄÄÄÄÄÄÄÄÄÄÄÄÄÄÄÄÄÄÄÄÄÄ´
³"P"
³Park ³
³P/C
³Printed Circuit ³
³P/N
³Park/Neutral ³
³P/S
³Power Steering ³
³PAV
³Pulse Air Valve ³
³PC-SOL
³Purge Control Solenoid ³
³PCM
³Powertrain Control Module ³
³PCS
³Purge Control Solenoid ³
³PCSDM
³Passenger Compartment Sensor/Diagnostic Module ³
³PCV
³Positive Crankcase Ventilation ³
³PFE
³Pressure Feedback EGR sensor or circuit ³
³PFI
³Port Fuel Injection (see MA SEFI) ³
³PGM-CARB
³Programmed Carburetor ³
³PGM-FI
³Programmed Fuel Injection ³
³PIP
³Profile Ignition Pickup ³
³PNK
³Pink ³
³PPL
³Purple ³
³PRNDL
³Park Reverse Neutral Drive Low ³
³PROM
³Programmable Read-Only Memory ³
³psi
³Pounds Per Square Inch ³
³PSPS
³Power Steering Pressure Switch ³
³PTC
³Positive Temperature Coefficient ³
³PTO
³Power Take-Off ³
³PWR GND
³Power Ground circuit ³
³Pkg.
³Package ³
³Press.
³Pressure ³
³Prog.
³Programmed or Programmable ³
³Pts.
³Pints ³
³Pwr.
³Power ³
ÀÄÄÄÄÄÄÄÄÄÄÄÄÄÄÄÄÄÁÄÄÄÄÄÄÄÄÄÄÄÄÄÄÄÄÄÄÄÄÄÄÄÄÄÄÄÄÄÄÄÄÄÄÄÄÄÄÄÄÄÄÄÄÄÄÄÄÄÄÙ
Page 433 of 920
BRAKE SYSTEM
Article Text (p. 2)
1993 Volkswagen Corrado
For Volkswagen Technical Site: http://vw.belcom.ru
Copyright © 1998 Mitchell Repair Information Company, LLC
Wednesday, March 22, 2000 08:57PM
3) Submerge other end of hose in clean glass jar partially
filled with clean brake fluid. Pump brake pedal several times, then
hold down. Open bleeder valve. Holding pedal down, close bleeder
valve. Release brake pedal.
4) Repeat procedure until brake fluid shows no signs of air
bubbles. When bleeding rear brakes, push lever of pressure regulator
in direction of rear axle.
5) After bleeding ABS vehicles, turn ignition on. Allow pump
to run until it shuts off. If pump runs longer than 2 minutes, allow
pump to cool for 10 minutes. On all vehicles, ensure master cylinder
reservoir is full.
ADJUSTMENTS
BRAKE PRESSURE REGULATOR
CAUTION: DO NOT adjust pressure regulator with brake pedal depressed.
1) Depress brake pedal once firmly. Release brake pedal
quickly, watching for regulator lever to move when pedal is released.
If regulator lever does not move when pedal is released, replace
regulator. If regulator lever moved, go to next step.
2) Ensure vehicle fuel tank is full, luggage compartment is
empty and a driver is in driver seat. Raise and support vehicle. Using
Pressure Gauges (US 1016), attach one gauge to right rear brake
cylinder or caliper. If vehicle is ABS-equipped, go to next step. If
vehicle is not ABS-equipped, go to step 4).
3) Using Distributor "T" (803 611 755) and an additional 8"
(203 mm) of brakeline, connect one gauge in front of pressure
regulator. Bleed pressure gauge and hoses through valve on gauges.
Lower vehicle. Bounce rear of vehicle several times. Go to step 5).
4) Attach Pressure Gauges (US 1016) to left front brake
caliper. Bleed pressure gauge and hoses through valve on gauges. Lower
vehicle. Bounce rear of vehicle several times.
5) Pump brake pedal several times. Press on brake pedal until
reading on front gauge shows pressure given for first reading in the
BRAKE PRESSURES table. Hold brake pressure to specification. Rear
gauge reading should be within specification given for first reading
in the BRAKE PRESSURES table.
6) Increase pressure on brake pedal until reading on front
gauge shows pressure given for second reading in the BRAKE PRESSURES
table. Hold brake pressure to specification. Rear gauge reading should
be within specification given for second reading in BRAKE PRESSURES
table. If pressures are within specification, brake pressure regulator
is functioning properly. If pressures are not within specification, go
to next step.
7) If pressure is too high, decrease spring pressure on
regulator. If pressure is too low, increase spring pressure on
regulator. If adjusting spring pressure on regulator does not bring
pressures within specification, replace pressure regulator. Disconnect
gauges, and bleed brakes.
Page 442 of 920
C - SPECIFICATIONS
Article Text (p. 2)
1993 Volkswagen Corrado
For Volkswagen Technical Site: http://vw.belcom.ru
Copyright © 1998 Mitchell Repair Information Company, LLC
Wednesday, March 22, 2000 08:58PM
Spark Plugs .................................. 30,000
(1) - Discard mini-fuel filter at 1000-mile maintenance
interval. Install new copper gaskets.ÄÄÄÄÄÄÄÄÄÄÄÄÄÄÄÄÄÄÄÄÄÄÄÄÄÄÄÄÄÄÄÄÄÄÄÄÄÄÄÄÄÄÄÄÄÄÄÄÄÄÄÄÄÄÄBELT ADJUSTMENT
ÄÄÄÄÄÄÄÄÄÄÄÄÄÄÄÄÄÄÄÄÄÄÄÄÄÄÄÄÄÄÄÄÄÄÄÄÄÄÄÄÄÄÄÄÄÄÄÄÄÄÄÄÄÄÄApplication Specification
Serpentine Belt ................................. (1)
(1) - Serpentine belt tension is automatically adjusted
by the tensioner.
ÄÄÄÄÄÄÄÄÄÄÄÄÄÄÄÄÄÄÄÄÄÄÄÄÄÄÄÄÄÄÄÄÄÄÄÄÄÄÄÄÄÄÄÄÄÄÄÄÄÄÄÄÄÄÄ MECHANICAL CHECKS
ENGINE COMPRESSION
COMPRESSION SPECIFICATIONS
ÄÄÄÄÄÄÄÄÄÄÄÄÄÄÄÄÄÄÄÄÄÄÄÄÄÄÄÄÄÄÄÄÄÄÄÄÄÄÄÄÄÄÄÄÄÄÄÄÄÄÄÄÄÄÄApplication Specification
Compression Ratio ............................ 10.0:1
Compression
Pressure ........... 157-186 psi (11.0-13.0 kg/cm
ý)
Minimum Compression Pressure ... 106 psi (7.5 kg/cm
ý)
Maximum Variation
Between Cylinders ............. 43 psi (3.0 kg/cm
ý)
ÄÄÄÄÄÄÄÄÄÄÄÄÄÄÄÄÄÄÄÄÄÄÄÄÄÄÄÄÄÄÄÄÄÄÄÄÄÄÄÄÄÄÄÄÄÄÄÄÄÄÄÄÄÄÄ VALVE CLEARANCE
NOTE: All models are equipped with hydraulic lifters. No
adjustments are required.
IGNITION SYSTEM
IGNITION COIL
IGNITION COIL RESISTANCE - Ohms @ 68
øF (20øC)
ÄÄÄÄÄÄÄÄÄÄÄÄÄÄÄÄÄÄÄÄÄÄÄÄÄÄÄÄÄÄÄÄÄÄÄÄÄÄÄÄÄÄÄÄÄÄÄÄÄÄÄÄÄÄÄApplication Primary Secondary
Corrado SLC (1) ........ ..... .............. .....
(1) - Ignition coil pack, new for 1993, is located on
left side of cylinder head. When ignition coil is
triggered, spark is supplied to 2 spark plugs at
one time. One spark plug fires during compression
stroke and the other plug fires during exhaust