bonnet VOLKSWAGEN GOLF 1993 1H / 3.G Owners Manual
[x] Cancel search | Manufacturer: VOLKSWAGEN, Model Year: 1993, Model line: GOLF, Model: VOLKSWAGEN GOLF 1993 1H / 3.GPages: 156, PDF Size: 6.36 MB
Page 5 of 156
Downloaded from www.Manualslib.com manuals search engine CONTROLS AND EQUIPMENT
Dashboard and Controls ..... 4
. ey s, Cen tral locking . . .... 6, 7
::"tl-thef t warning system .... 8
Joors .......................... .... 9
oot lid .... ........... . . . . . 10
::Iectric windows .. . .. 10
• ~Irrors . . ..... . ... 12
Seal belts 13
"" rbag System . . . . . 18
Safe ty for children .. ... 21
ead restraints . . . . . .. 24
= ro nt seats . . . . . . . . . . . .. 25
Rear seat . . . 27
L u ggage compartment ... . ... . ...... 28
M esh partition (Estate) ...... 29
L u ggage compartment cover /
F olding/sliding cover
... 30
Pedals, Hand brake .. 31
Manual gearbox .... ... .... 31
Automati c gearbox . . . .. .......... 32
H eig ht-adjustable steering wheel ..... 35
I gnition lock. . . . . .. 35
Starting/stopp ing engine 36, 38
\lIstrumellts .. .... 39
Warning lamps ....... 46
Switches . . . . . . . . . . . . . . 50
Turn signal and dip lever ............. 53
Cruise control system ........... 54
Wi ndscreen wipe r and washer system 55
Heating an d ventilation .. . ...... 56
Air cond itioner ......' 59
Sliding/ti ltin g roof. . . . . . . . . . . . ... 65
Sun visors / Interior lights 66,67
Cigarette lighter, Ash tray ..... 68
Shelves and boxes . . . . . . . . . . . ... 69
Roof rack / Roof ra ilings ... 70
DRIVING TIPS
The firs t 1500 km -and after wards .... 71
Driving economically and ecologically .. 72
Brakes. . . . . . . . . . . . . . . . 75
Tra iler tow ing . .. ..... . .... ... ...... 77
Driving a four- wheel drive vehicle .. 79
GENERAL MAINTENANCE
Filling the tan k, Fuel. 81, 82
Care of vehicle ........ .. . . 85
Bonnet . . ... 90
Engine compartment .. ...... .... .... 91
Engine oil ..... .......... ........... 92
Automatic transmission fluid (ATF)* ... 96
Power-assisted steering .. 96
Cooling system . . . . . . . . . . .. . 97
B rake fluid ...... 99
Battery . . . . .. 100
Spark plugs. V-belts . . . . . . . . . 102
Washer system
... . .. 103
Windscreen w iper blades . . . 104
Dust a
nd pollen filter * . 104
Wheel s . 105
D riving abroad ..... ............... 110
Accessories, modifications and
renewa l ot parts .............. III
Mobile telephones and tw o-way rad ios 111
DO -lT-YOURSELF
First -aid kit, Warn ing triangle ........ 112
Storage of vehicle tools, spare wheel
a n d ball coupling trailer bracket ...... 113
Vehicle tools, Spare wheel 114
CONTENTS
Changing w heels . 116
F uses . ........ .. .. . . . ... . .... 119
Changing bulbs. . .... .. . 121
Installing radio . . . . .. 127
E mergency starting .. .. 128
Tow starting / to wing . . .. 129
L ift ing vehicle ......... 131
SPECIAL INFORMATION
Body ..... .... . .......... 132
Environmental compatibility ... 133
TECHNICAL DATA
Engine data . .. , .... .... . 134
P er forman ce .. ... ... ... . .. 136
Fuel consump tion .. 137
Wh eels
. . 139
T yre pressures
.. .. ... .. . . .. ... 1 4 1
Weights ... 143
Trailer weights .. 144
Dimensions. ...... .. ... 145
Capacities " ..... 146
Vehicle identification data ... 147
ALPHABETICAL INDEX
Alph abetical index ... 148
3
Page 7 of 156
Downloaded from www.Manualslib.com manuals search engine __CONTROLS AND EQUIPMENT
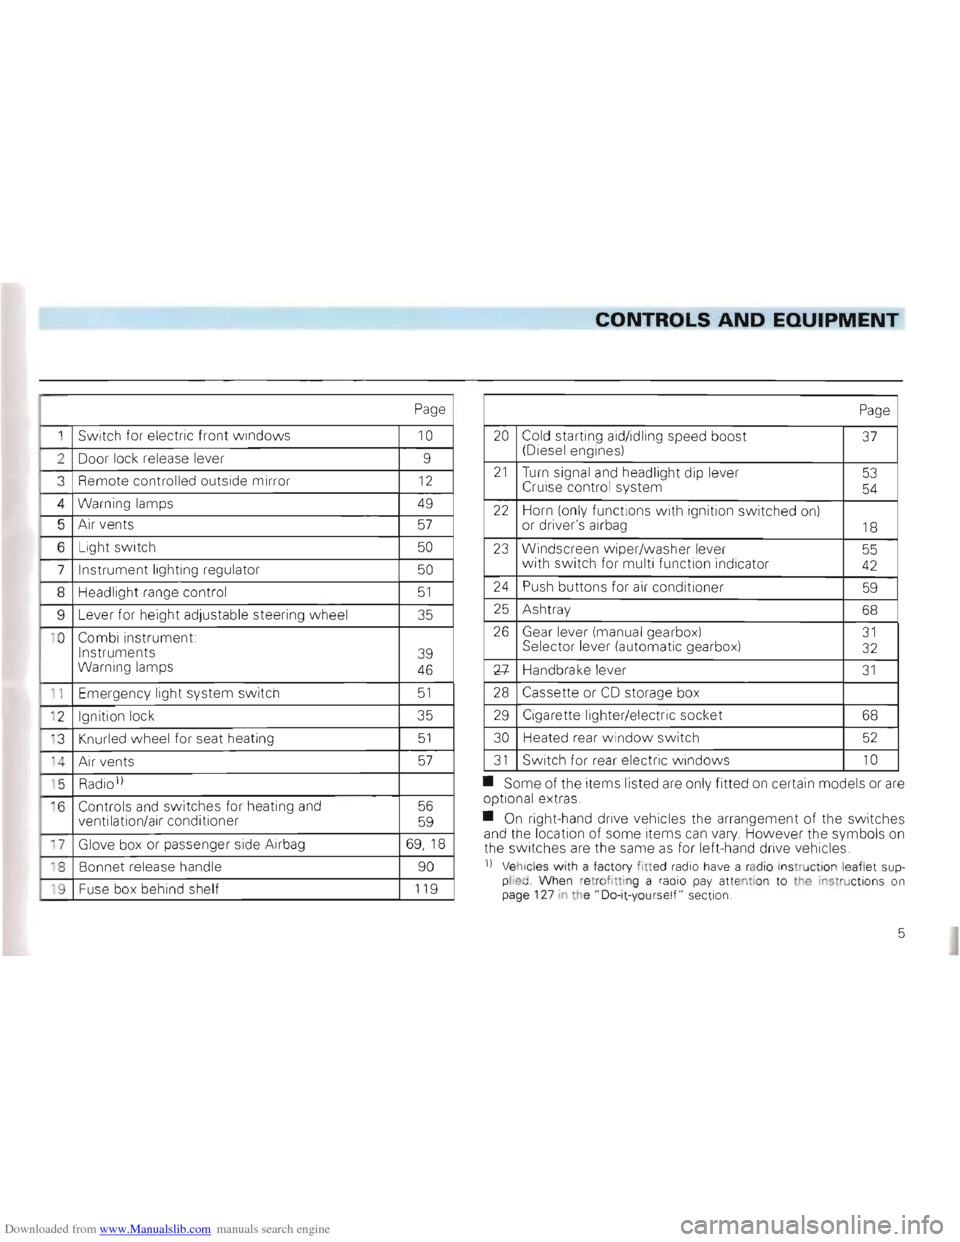
Page
1 Switch for electric front windows 10
2 Door lock release lever 9
3
Remote controlled outside mirror 12
4 Warning lamps 49
5 Air vents 57
6 Light switch 50
7 Instrument lighting regulator 50
8 Headlig ht range control 51
9 Lever for heig ht adjustable steeri ng w heel 35
1 0
Combi instrument:
Instruments
Warning lamps
39
46
1 1 Emer gency light system switch 51
' 2 Ignition lock 35
' 3
Knurled wheel for seat heating 51
'4 A ir ve nts 57
' 5 Radio 1)
·6 Controls and switches for heating and
ventilation/air conditioner 56
59
17 Glove box or passenger side Airbag 69,1 8
18 Bonnet release handle 90
'9 Fuse box behind shelf 119
Page
20 Cold starting aid/idling speed boost (Diesel engines) 37
21 Turn signal and headlight dip lever
Cruise control system 53
54
22 Horn (on ly functions with ign ition switched on)
or driver's airbag 18
23 Windscreen w iper/washer lever
w ith switch for multi function indica tor 55 42
24 Push buttons for air conditi oner 59
25 Ash tray 68
26 Gear lever (manua l ge arbox) Sel ector lever (automa tic gea rbox) 31 32
Xl-Handbrake leve r 31
28 Cassette or CD storage box
29 Cigarette lighter/elec tric soc ket 68
30
Heated rear windo w switch 52
31 Switch for rear electric w indows 10
• Some of the items listed are only fitted on certain models or are op tional extras .
• On right-hand drive vehicles the
arrangement of the switches
and the location of some items can vary. However the symbo ls on
th e switc hes are the same as for left-hand drive vehic les.
n Vehicl es with a facto ry fitted radio have a rad io ins truction le aflet supplied Whe n re trof ittin g a radio pay atte ntion to the instructions on
page 127 in the" Do-it-yours elf " sect ion.
5
Page 10 of 156
Downloaded from www.Manualslib.com manuals search engine CONTROLS AND EQUIPMENT
Anti-theft warning
system*
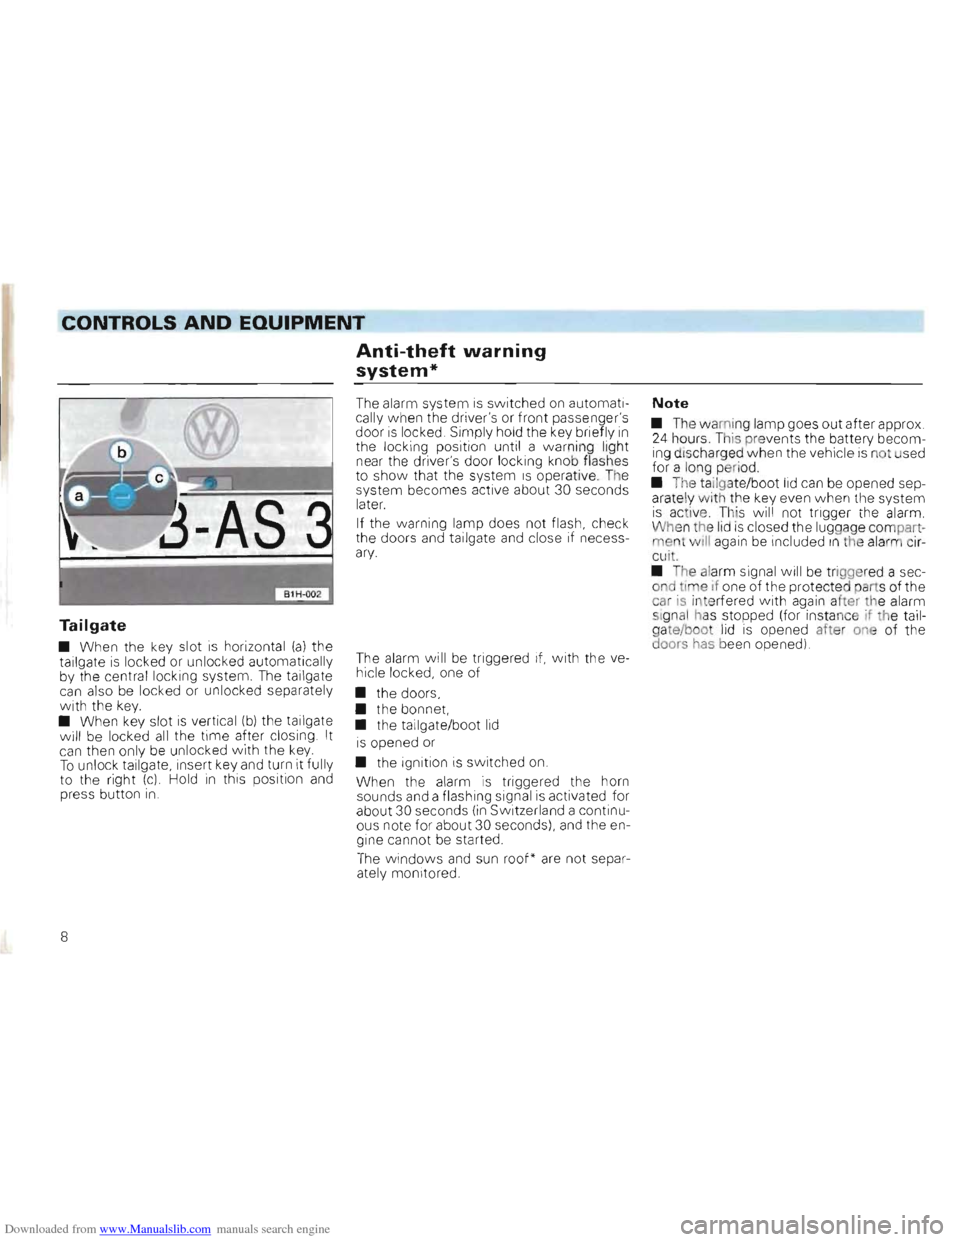
Tailgate
• When the key slot is horizont al (a) the
tailgate is locked or unloc ked automatically
by the central locking system. The tallgate can also be locked or unloc ked separately with the key. • When key slot is vertical (b) the tailgate
will be locke d all the time after closing . It can the n only be unlocked with the key. To unlock tailgate , insert key and turn It fully
to the right (c) Hold in this position and press button in .
The alarm system is switched on automatically when the driver's or front passenger's door is locked. Simply hold the key briefly in the locking position until a warni ng light
near the driver's door locking knob flashes
t o show that the system IS operative. The
system becomes active about 30 seconds
lat
er.
If the warning lamp does not flash, check
the doors and tailgate and close if necessary.
The alarm will be triggered if, with the ve
hicle locked, one of
• the doors,
• the bonnet,
• the tailgate/boot
lid
is opened or
• the ignition is switched
on.
When the alarm is triggered the horn
sounds and a flashi ng signal is activated for
about 30 seconds (in Switz erland a continu
ous note for about 30 seconds), and the en
gine cannot be started .
The windows and sun roof* are not separ
ately monitored .
Note
• The wa mi ng lamp goes out after approx . 24 hours. T hiS pre ven ts the battery becom
ing disc harged when the vehicle is not used for a long peri od
• The
tailgate/boo t lid can be opened sep
arate ly wi th the key even w hen the system is active . This wi ll not trigger the alarm .
Whe n the lid is closed the luggag e compartment wili again be included In the alarm circu it.
•
The alarm signal will be triggered a sec
ond time if one of the protecte d part s of the
car
is inte rfered w ith again aher th e alarm
si gnal has stopped (for insta nce if the tailgate/boo t lid is opened after one of the
doors has been opened)
8
Page 90 of 156
Downloaded from www.Manualslib.com manuals search engine GENERAL MAINTENANCE
Cleaning seat belts
Keep belts clean because they ma y not
retract properly if very dirty .
Dirt y be
lts can be cleaned by was hing w ith
a mild soap solutio n without taking the belts
out of the vehicle.
Note
Inert ia reel belts should be completel y dry
before they are allowed to roll up.
Attention Do not have the belts cleaned chemically because the cleaning compounds damage the webbing material. Ensure that the belts do not come into contact with corrosive fluids.
Steel wheels
The wheels and the whee l tr ims should be
cle aned thoroughly at regular inter vals w hen the vehicle is being washed. This w ill
prevent brake dust , dirt and road salt from
accu mulating on the wheel. Persistent
ingr ained brake dust can be removed With an industrial grim e remov er. P aint damage
should be repaired before rust can form.
Alloy wheels
In order to maintain th e smart appearan ce
of all oy wheels for a long period, regular
car e is necessary . In particular, salt and brake pad dust must be washed off th or ough
ly
at leas t every tw o w eeks otherwise
the surface of the alloy Will be damaged
After being w ashed, the w heels shou ld be treated with an acid-free cleaner for al loy wheels. About every three months it is necessary to give wheels a good rubbing
w ith hard wax. Paint polish or other abrasiv e
solutions must not
be used. If the protecti ve
paint coat has been damaged , eg. by stone
impact, the damaged spots should be dealt with as soon as possible.
Cleaning and anti-corrosion
treatment of engine compart
ment
Attention Before doing any work in the engine compartment it is essential to read the notes on page 91!
The leaves, blossoms etc . w hich drop into
the water box (underneath the engine
bonnet
in f ront of the windscreen) should
be cleaned out occasional ly This w ill pre
v ent the water drain holes becoming
blocked
and -on veh ic les w ithout a fresh air
filter -foreign bodies entering the vehicle
interior v
ia the heating and ventilat ion sys
tem.
Attention For safety reasons pull out ignition key before reaching into the water box. Otherwise if the windscreen wipers are switched on unintentionally the movement of the wiper linkage could cause injury.
The engine compartment an d th e outsi de
surface of the power unit are given anti-cor
rosion treatment at the factor y.
In th e winter w hen the vehicle is being
driven frequ entl y on salted roads, good anti
corrosion treatment is very important. For
th is reason the entire engin e comp
artment and the plen um chamber should be thor
ough ly cleaned before and after the salting
period
and then preserved so that the salt cannot have a damag ing effect
The ignition must be switched off before washing the engine.
If the engine compartment is cle aned at any
time with greas e removing solution s 1) or if
one has the engine washed, the anti-cor
rosion compound is nearly alwa ys removed as wel l. It is the refore essential to ask for
durable preserv ation of all surfaces, seams,
joints and components in the engine compartment to be carried out. This applies also
1) Only the corre e clean ing solutions may be use d -on no aecoun petrol or Diesel.
88
Page 92 of 156
Downloaded from www.Manualslib.com manuals search engine GENERAL MAINTENANCE
Bonnet
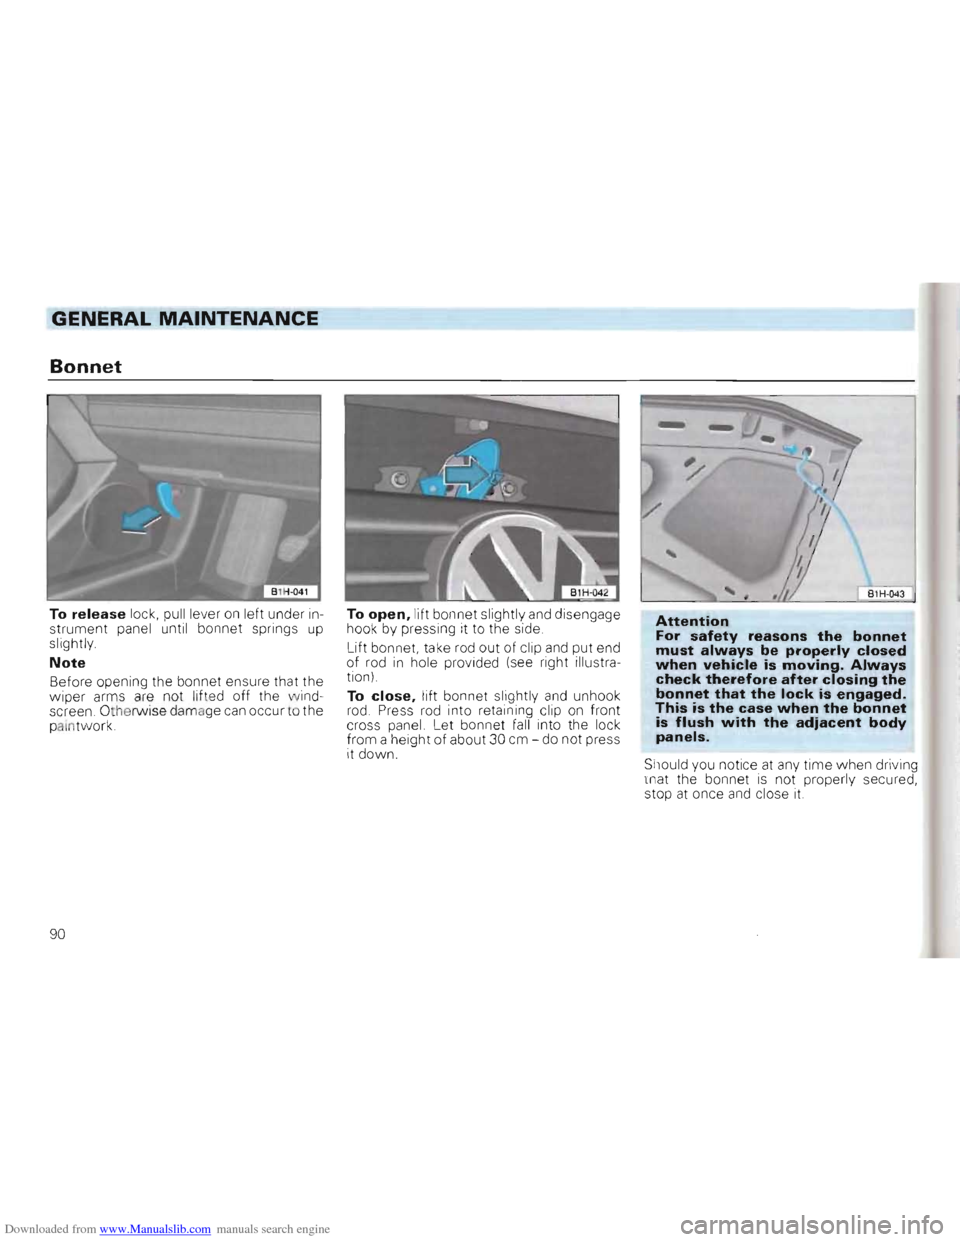
To release lock, pull lever on left under in
strument panel until bonnet springs up slightly.
Note
Before opening the bo nnet ensure that the
wiper arms are not lifted off the wind
screen. Othe rwise damage can occur to the
palntwork. To
open, lift
bonnet slightly and disengage
hook by pressing it to the side.
Lift bonnet, take rod out of
clip
and put end
of rod in hole provided (see right illustra
tion)
To
close, lift bonnet slightly and unhoo k
rod. Press rod into retaining cl ip on front
cross panel. Let bonnet fall into the lock
from a height of about 30 cm -do not press
it down.
B1H -043
Attention For safety reasons the bonnet must always be properly closed when vehicle is moving. Always check therefore after closing the bonnet that the lock is engaged. This is the case when the bonnet is flush with the adiacent body panels.
Should you notice at any time when driving
that the bonnet is not properly secured,
stop at once and close it.
90
Page 116 of 156
Downloaded from www.Manualslib.com manuals search engine -----------------------DO-lT-YOURSELF
Vehicle tools Spare wheel
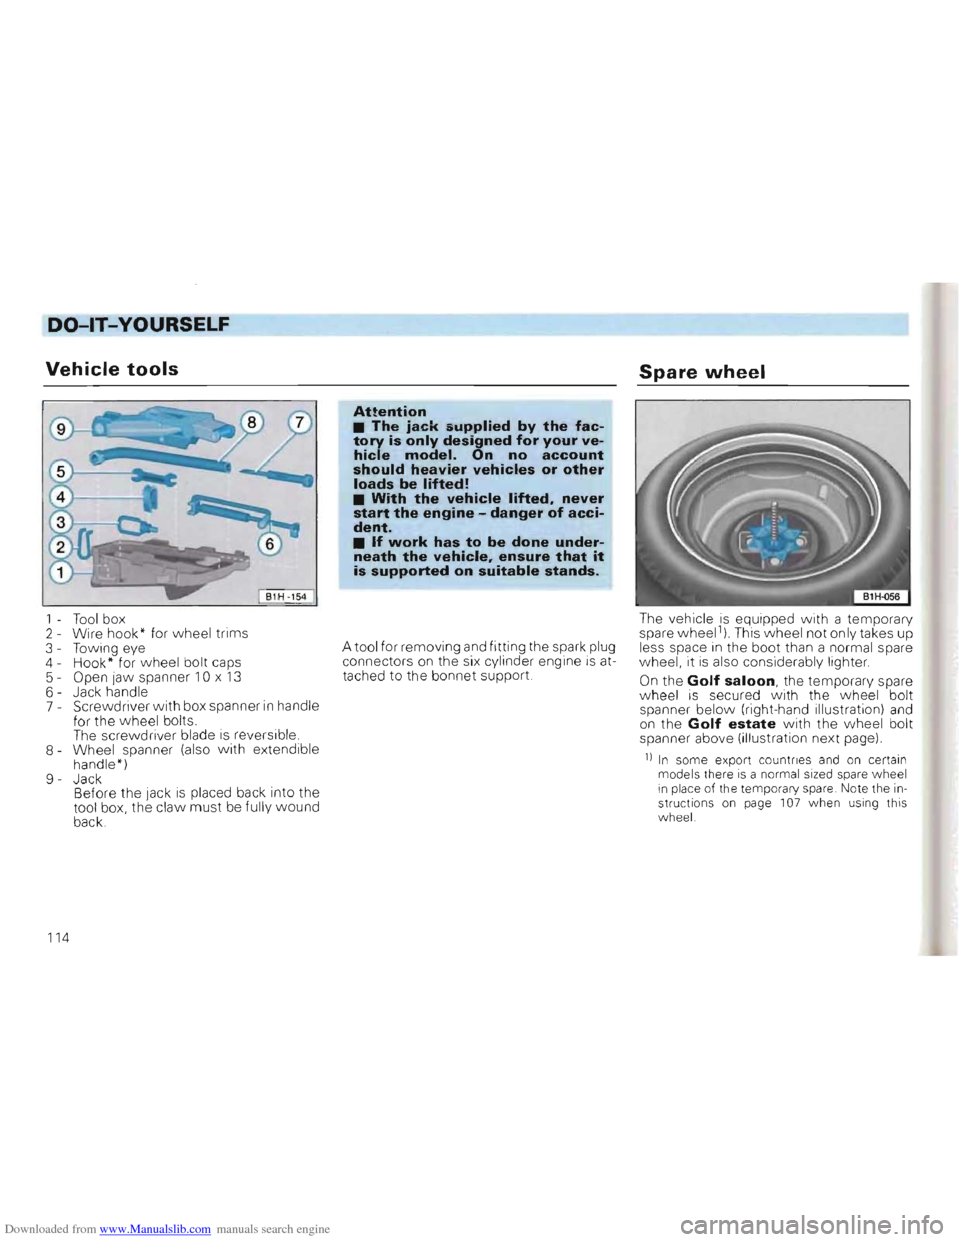
1 - Too l box
2 - Wire hook" for wheel trim s
3 - Towing eye
4 - Hook* for w heel bolt caps
5 - Open
Jaw spanner 10 x 13 6 -Jack handle
7 -Screwdriver with box spanner in handle
for the wheel bolts.
The scre
wdriver blade is reversible.
8 Wheel spanner (a lso with extendible
handle ")
9 Jack
Bef ore the
Jack is place d back into the
tool box, the claw must be fully wound
back.
Attention • The jack supplied by the factory is only designed for your vehicle model. On no account should heavier vehicles or other loads be lifted! • With the vehicle lifted. never start the engine -danger of accident. • If work has to be done underneath the vehicle. ensure that it is supported on suitable stands.
A tool for removing and fitting the spark plug
co nne ctors on the six cy linder engine is attac hed to the bonnet support. The
vehicle is
equippe d with a temporary spare wheel1
) This wheel not only takes up
less space in the boot than a norm al spare
w heel , it is a l
so considerabl y lighter .
On the Golf saloon, the temporary spare wheel is secured with the wheel bolt spanner below (right-hand illustration) and on the Golf estate with the vvheel bolt
spanner above (illustration next page).
11 In some export countries and on certain mod els there is a norma l sized spare wheel in place of the temporary spare. Note the in
structio ns o n page 107 when USing this
w heel.
114
Page 124 of 156
Downloaded from www.Manualslib.com manuals search engine DO-lT-YOURSELF
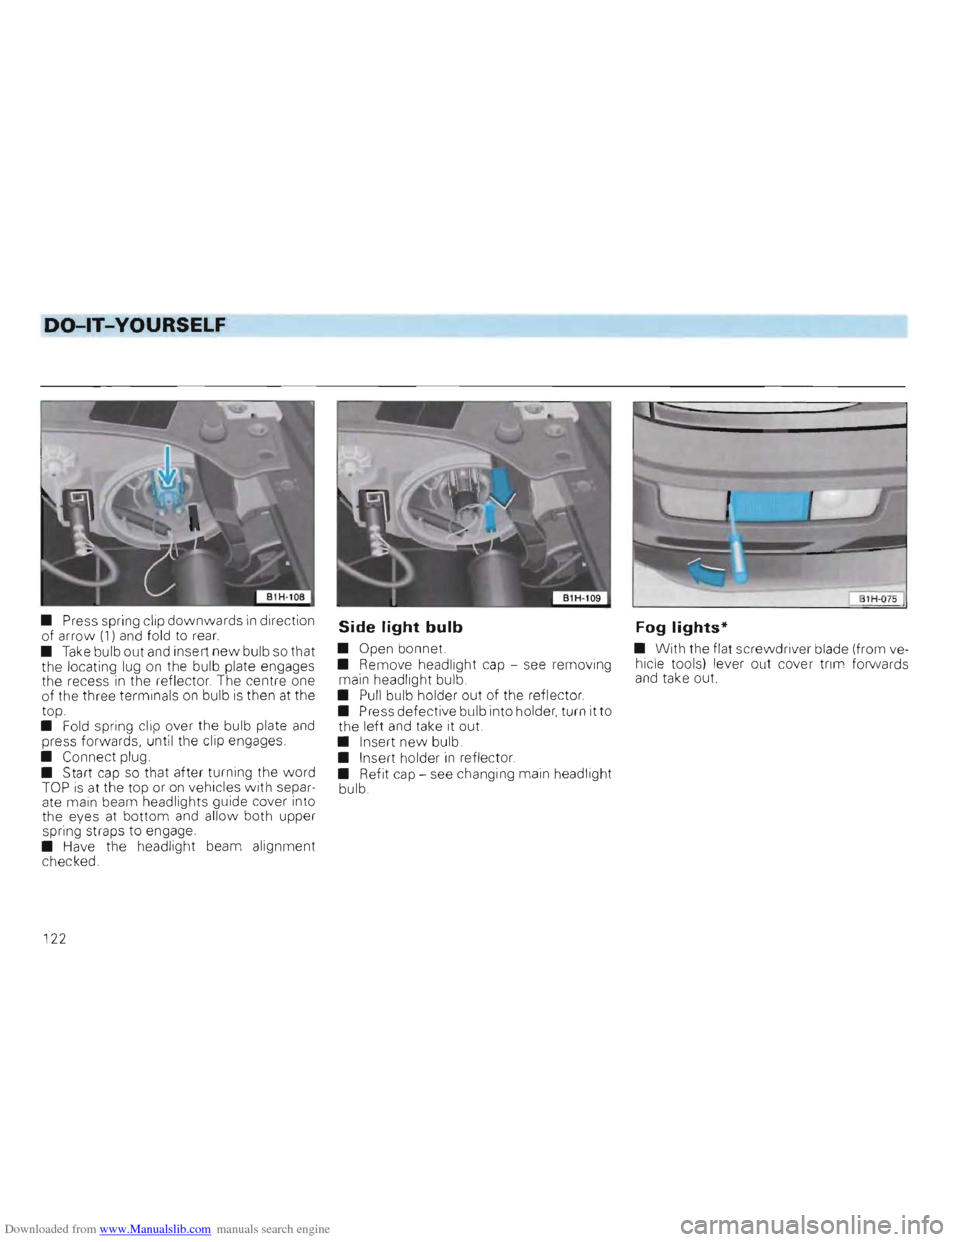
• Press spring clip downwards in direction
of arro\lv (1) and fold to rear.
• Take bulb out and insert new bulb so that
the locating lug on the bulb plate engages
the recess in the reflector. The centre one
of the three terminals on bulb is then at the
top.
• Fold spring clip over the bulb plate
and press forwards, until the clip engages .
• Connect plug.
• Start
cap so that after turning the word TOP is at the top or on vehicles with separ
ate main beam headlights guide cover into
the eyes at bottom
and allo w both upper
spring str aps to engage .
•
Have the headlight beam alignment
chec ked .
Side light bulb Fog lights*
• Open bonnet. •
With the flat screwdriver blade (from ve
• Remove headlight cap -see removing hicle
tools) lever out cover trim forwa rds
main headlight bulb. and take out.
• Pull bulb holder out of the reflector.
• Press defective bulb into holder , turn it to
the left
and take it out.
• Insert
new bulb.
• Insert holder in reflector.
• Refit cap -see chang ing main headlight
bulb.
122
Page 150 of 156
Downloaded from www.Manualslib.com manuals search engine ALPHABETICAL INDEX
A Acceleration figu res . . .... . . .
Accessories
Adjusting washer jets
A ir conditioner
.. ....... .
Airbag
Alloy w heels
Analog clock
..
Anti-freeze.
Anti-dazzle inside mirror
Anti-knock properties of the fuel
Anti-locking brake system
(ABS)
Anti-theft warning system
Aq uaplaning .... ..... .
Ashtray .......... . .
ATF.
Automatic gearbox.
Automatic tra ns mission fluid
Automati c was h plants .... . . . .
Axle weights. . ....... .
B Battery . . . ....... . . . . .
Belt height adjustment ... .. . . .
Blower ...
Bonnet.
B rake fluid.
Brake pad wear indicat or
Brake servo .
Brake system
Brake warni
ng I'amp .
B rakes
B ulb changing.
Burglar alarm .
1
36
111
103
59
18
88
41
97
12
82
76
8
106
68
96
32
96
85
143
100
15
56, 59
90
99
48
75
99
48
75
121
8
C Capacities .. . . .... . 146
Care 85
Care of body . . . . . . . . . . . . . 85
Care of vehicle 85
Cavity preservation 89
Central locking system 7
Cetane Number . . . . . . . . . . 84
Changing bulb s . . . . . . . . . . 1
21
Changing wheels 116
Chassis number 147
Child safety . 21
Child seats ........ . . . . . . . 21
Chi ld-proo f catch ......... 9
Cigarette lig hter 68
Cigarette lig h ter socket. 68
Cleaning and anti -corrosion treatment of
engine compartment . . . . . . . . 88
Clean ing veh ic le . . . . . . . . . . 85
C limat ronic 62
Clock .. 41
Cockpit . . . . . . . . . . 4
Cold starting aid 37
Compression rat io 134
Cons umption figures. . 137
Coolant additive 97
Coolant level 46, 97
Coolant tempera ture gauge 45
Cool ing system . . . . . . . . . . 97
Cruise control system 54
Cubic capacity 134
D Dash panel 4
Defrosting windows 57,60,62
Diesel fuel 84
Dimensions. 145
Dip lever 53
Direction indicators 48, 53
Do-it-yourself ......... .
112
Door locks . ..... . . 9
Doors . .. 9
Driver's seat
25
Driving abroad .... . 110
Driving economically 72
Driving tips ...... . ... ..... ..... . 71
Driving with four-wheel drive 79
Dust and pollen filter ...... . .. . . 104
1 48