lock VOLKSWAGEN GOLF 1994 Owner's Manual
[x] Cancel search | Manufacturer: VOLKSWAGEN, Model Year: 1994, Model line: GOLF, Model: VOLKSWAGEN GOLF 1994Pages: 274, PDF Size: 28.67 MB
Page 156 of 274
Furthermore, your aut horized Volkswagen
dealer stocks a range of tires and wheels.
plac ed in pairs and not
ways
vehicle handl ing , always
b uy replacemen t radial tires that have the
same specifications with regard to tire size ,
design , load carrying capacit
y, sp eed rating ,
tr ead pattern , trea d depth , e tc . This also
plies to Volksw agen recommended nate replaceme nt tires.
Make s
ure that the new tires also meet the
specifications listed on the located on the insid e of the fuel tank fl ap or on the er's door lock jamb (right rear door on the four door model).
Tire specifications
Never mix tires of different design
such as steel belted radials with
radial bias belted or bias
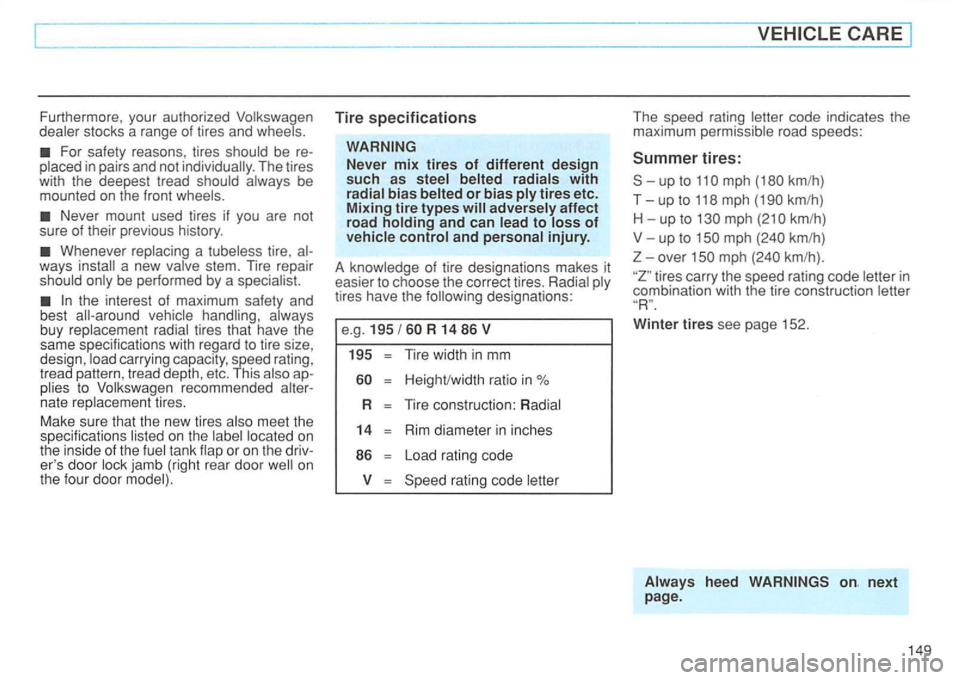
tires have the designations:
e.g.
R 14 86 V
195
T ir e width in mm
rating code letter
The s peed ra tin g letter code indicates th e
maximum permissible road speeds :
mph
mph
over km/h) .
tires carry the speed ra tin g code letter in
combi nat ion with the tire construc tio n letter
Winter tires see page 152.
Alw ays heed
Page 163 of 274
------------------------------------------------------------------------~
Jack and
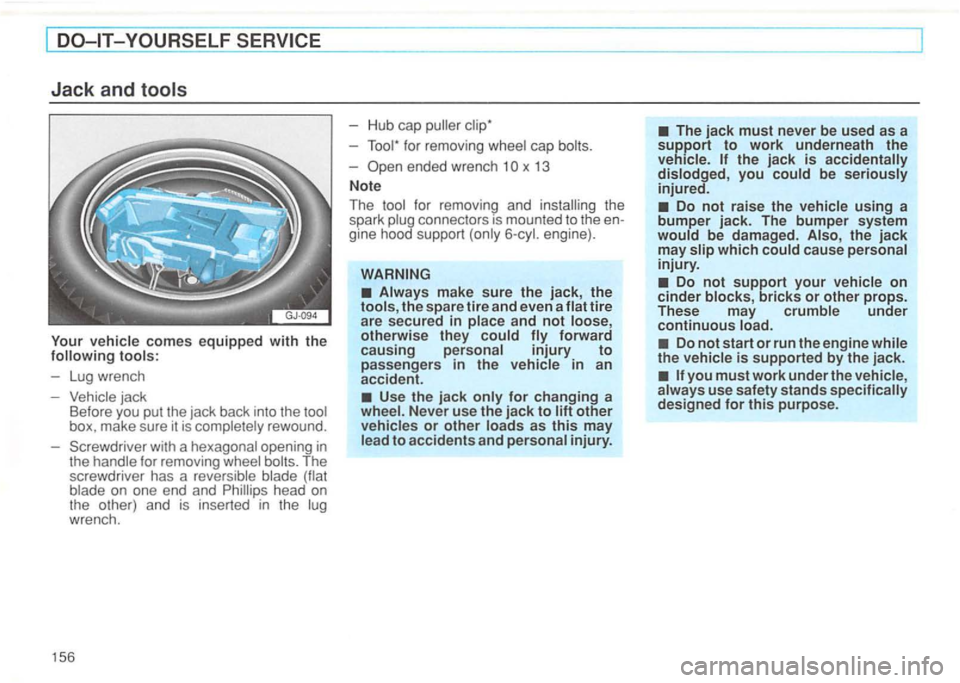
vehicle comes equipped with the
Vehicle jack
Before you put the jack back into the tool
box. make sure it is completely rewound.
Screwdriver with a hexagonal opening
in the handle for removing wheel
x 13
Note
The
Always make sure the jack, the
tools, the spare tire and even a flat tire
are secured in place and
not loose,
otherwise they could forward
causing personal injury to passengers in the vehicle in an
accident.
Use the jack only for changing a
The jack must never be used as a support to work underneath the
vehicle . the jack is accidentally
dislodged , you could be seriously injured.
Do not raise the vehicle using a
bumper jack. The bumper system
would be damaged. Also, the jack may slip which could cause personal
injury.
Do not support your vehicle on cinder blocks, bricks or other props.
These may crumble under
continuous load.
Do not start or run the engine while
the vehicle is supported by the jack.
Page 188 of 274
is located on the instrument
shows the month and year of
production and the vehic le identification
number of your
(perforation) as
Weight Rating (GA WR).
The engine number
is locate d on the fro nt face of the eng ine
b lock . just
when you stand on the right side of the and
DATA
3 TYP/lYPE ..
1 6 7
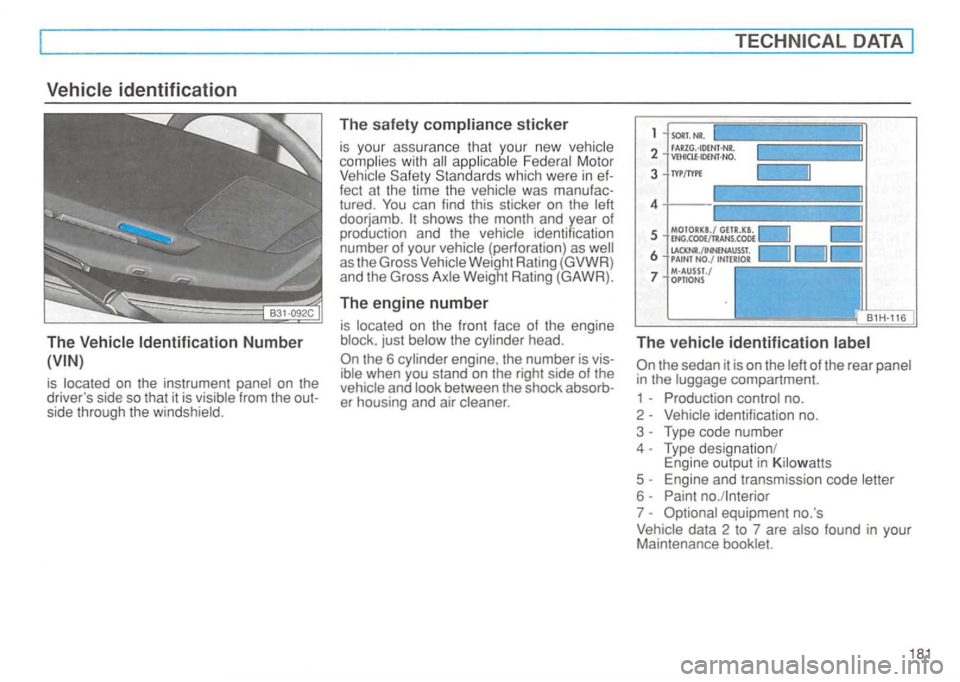
The vehicle identification label
in the luggage compartment.
1 - Production control no.
2 -
identification no.
3 - Type code numbe r
4 - Type designati on/
Engine output in Kilo watts
5 - Engine and transmission code letter
6 - Paint no./lnterior
7 -
found in your
Maintenance booklet.
181
Page 259 of 274
CD changer contro l
balance fader
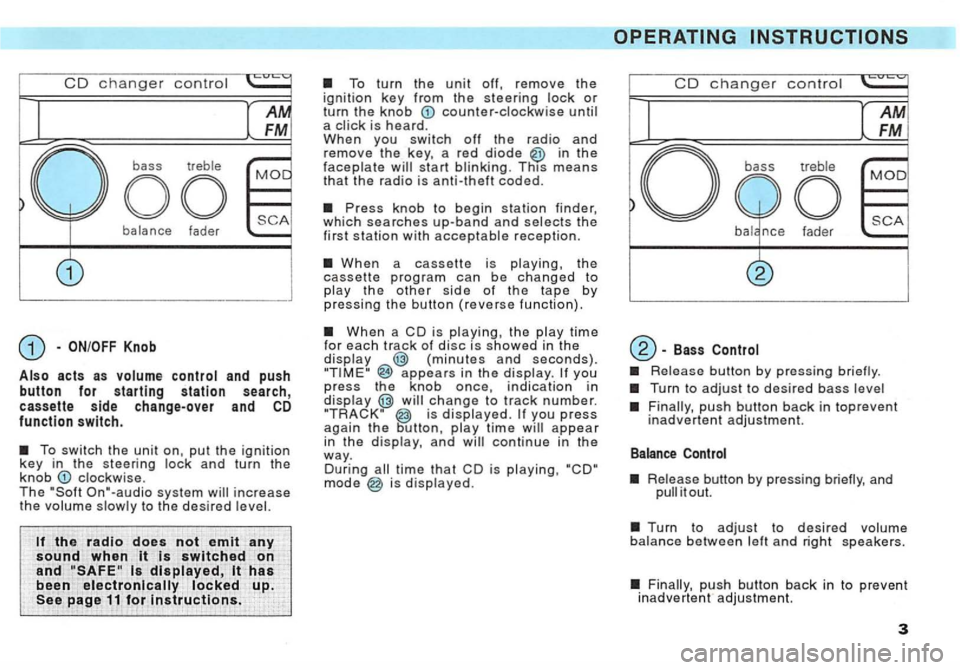
and push button for starting station search, cassette side change-over and CD function switch.
The On"-audio system
the radio does not emit any
sound when it is switched on
and
counter-clockwise until a
in the faceplate
When a cassette is playing, the cassette program can be changed to play the other side of the tape by p ressing the button (reverse function).
When a CD is playing, th e p lay time for each track of disc i s showed in the display (minutes and seconds}. appears in the display. you press the knob once, indication in display is displayed. you press again t h e continue in the way. During is displayed.
CD changer control
-Bass
Release button by pressing briefly.
Turn to adjust to desire d bass level
push button back in toprevent inadvertent adjustment.
Release button by pressing briefly, and it out.
Turn to adjust to desired volume balance between left and righ t speakers.
Finally , push button back in to preve nt inadvertent adjustment.
3
Page 267 of 274
Anti - Theft
When you switch off the radio and remove the key, a red diode in the faceplate will start blinking. This means that the radio is anti-theft coded. T h e Anti-theft Coding will electronically prevent unauthorized persons from opera ting the unit it has been removed fro m the vehicle.
Whenever:
will appear in the frequency display when the radio is switch ed on. The unit will only work again if t h e correct code has been ente re d .
This code number and the radio seria l
number are on the "Radio
the electronic Jock-up
appear in the frequency display w hen the ra dio is switched on.
To cancel the el ec tronic lock-u p, you must enter the correct code number.
that the
Turn on the radio the word appears in the display.
Press the and
t o be the inp ut code number.
Use station b uttons to 4 to input the code number on your Radio
to 9 .
the code is shown on the display, press the and
appea rs in the frequency display.
Release buttons! afterward a frequency be displayed. ' The radio can now be used again.
you inadvertently input the
be shown in the display.
you input another incorrect number your radio be locked up approximately o ne ho ur. The radio will not play. Leave the radio switched on. After an hour. t he display with the number of a ttem pts goes out and you can cancel the electronic lock-up as described above.
This two attempts, one hour lock-u p applies.
Note: