VOLKSWAGEN GOLF 2000 Owners Manual
GOLF 2000
VOLKSWAGEN
VOLKSWAGEN
https://www.carmanualsonline.info/img/18/55625/w960_55625-0.png
VOLKSWAGEN GOLF 2000 Owners Manual
Trending: window, steering, warning light, rims, load capacity, tires, handbrake
Page 401 of 474
PREMIUM
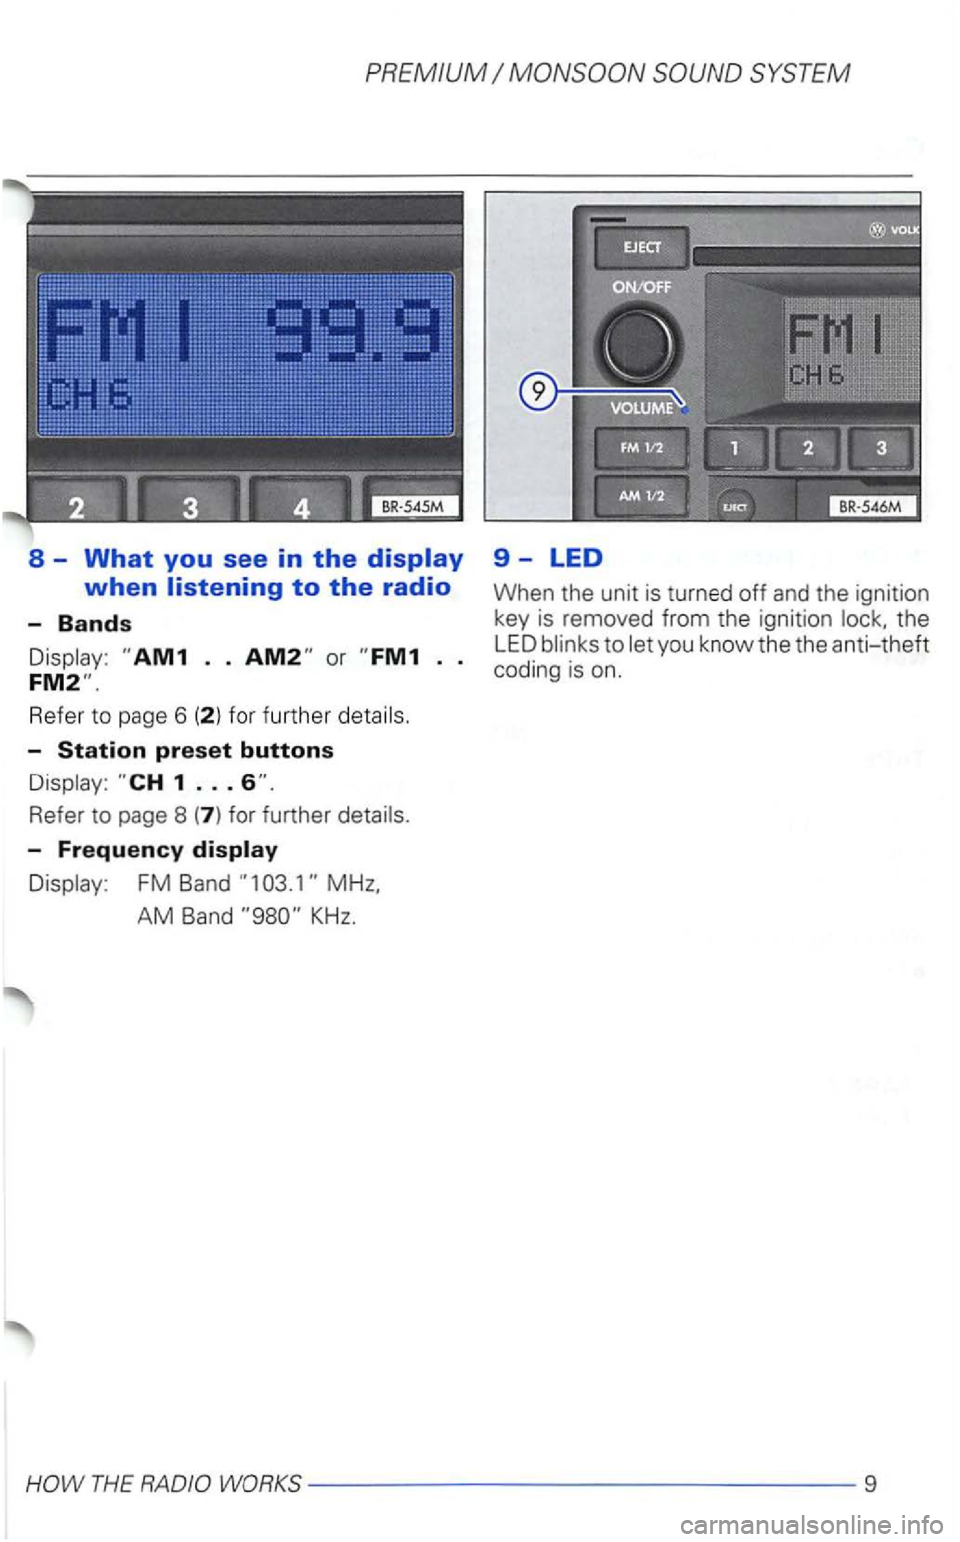
Refe r to page 6 (2 ) fo r fur ther
-Station preset buttons
-Frequency
FM Band
the
LED
THE WORKS----------------9
Page 402 of 474
Cassette
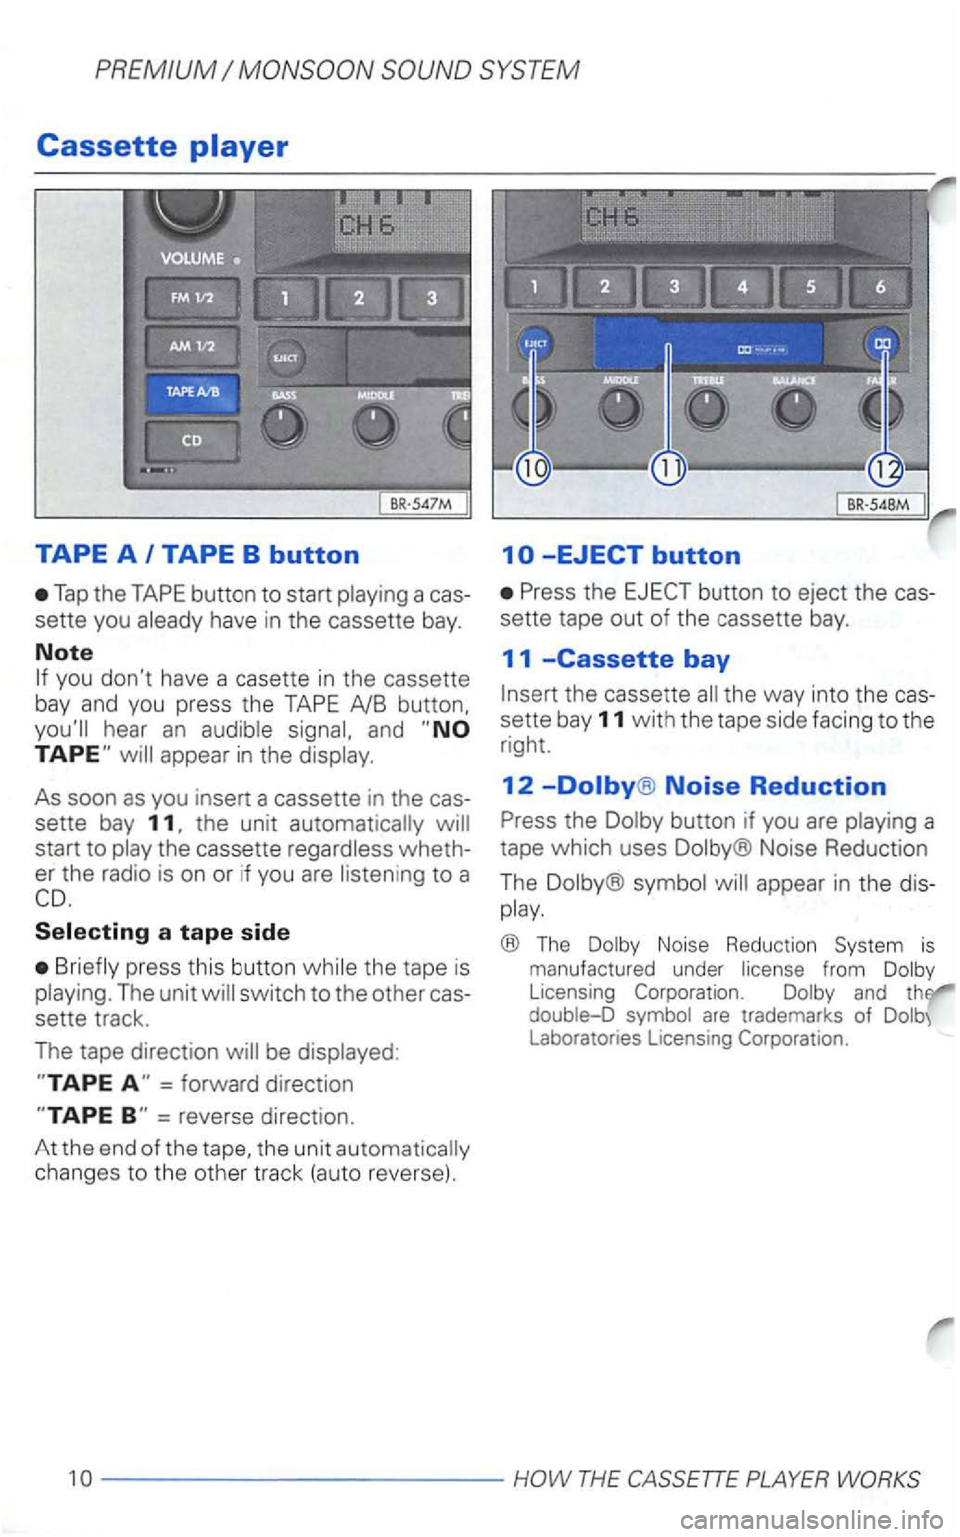
Tap the TAPE button to start a cas
sette you
you don't have a casette in the cassette
bay and you press the TAPE
and
the unit start to
Selecting a tape side
the tape is
switch to the other cas
sette track.
The tape direction
be displayed :
= reverse direction.
Press the
the way into the cas
sette bay
11 with the tape side facing to the
right.
12 -Dolby® Noise Reduction
Press the button if you are
Noise Reduction
The
® The Dolby Noise Reduction System is manufactured under license from Dolby Licensing Corporation. Dolby and double-D
- - ----------HOW THE
Page 403 of 474
PREMIUM
Fast Forward
(FR-FF)
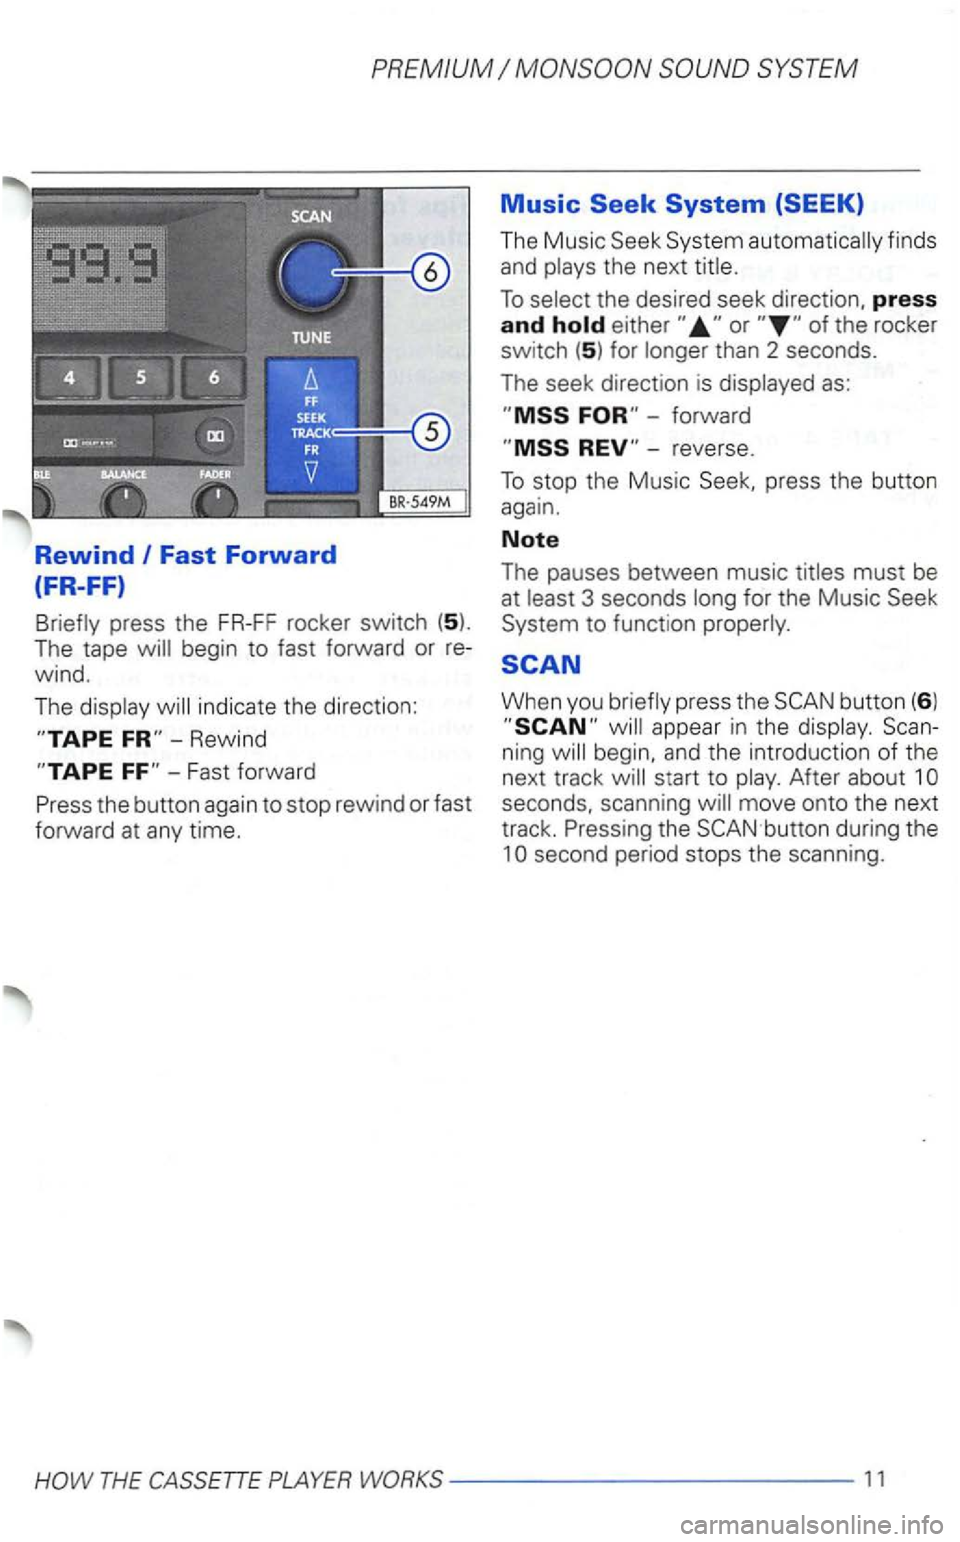
press the FR-FF rocker switch (5).
T he tape
indica te th e direc tion:
Rewind
fi nds
and
To the desired seek direction , press
and than 2 seconds.
The seek direction is
forward
-reverse.
T o stop the Music Seek, press the button
again.
Note
The pauses between music
SCAN
When you press the button (6 ) appear in t he Scan
ning
begin, and t he introduction of the
next track
move onto the next
track. Press ing the button during the
WORKS------------11
Page 404 of 474
What you see in the display
when listening to a cassette
-
Appears when Dolby® Noise Reduction is
selected.
-
Appears when metal cassettes are played.
-
Shows you which side of the tape is currentbeing played.
page for further details.
® The is manufactu red under from
cas
settes.
To ensure that your cassette player
operates properly, only use name-brand
cassettes.
15 F
it using a wet-type
THE
Page 405 of 474
PREMIUM
CD
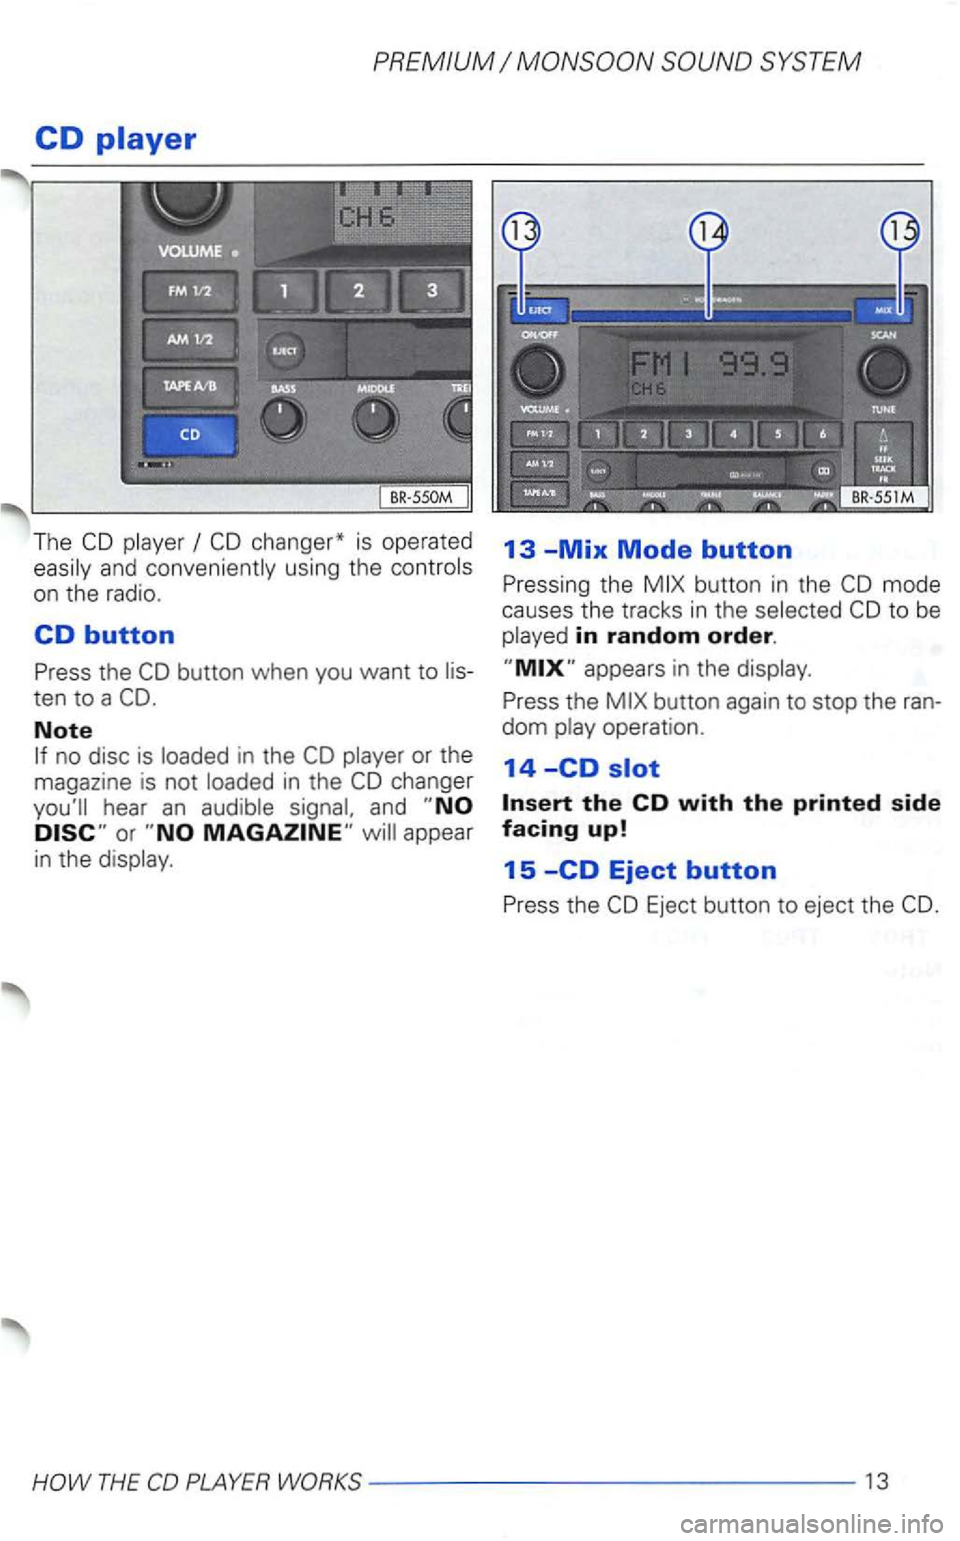
The and conveniently using the
on the radio .
CD button
Press the button when you want to
Note
and appear
in the
13 -Mix Mode button
Pressing the button in the
to be in random order.
Press the
13
Page 406 of 474
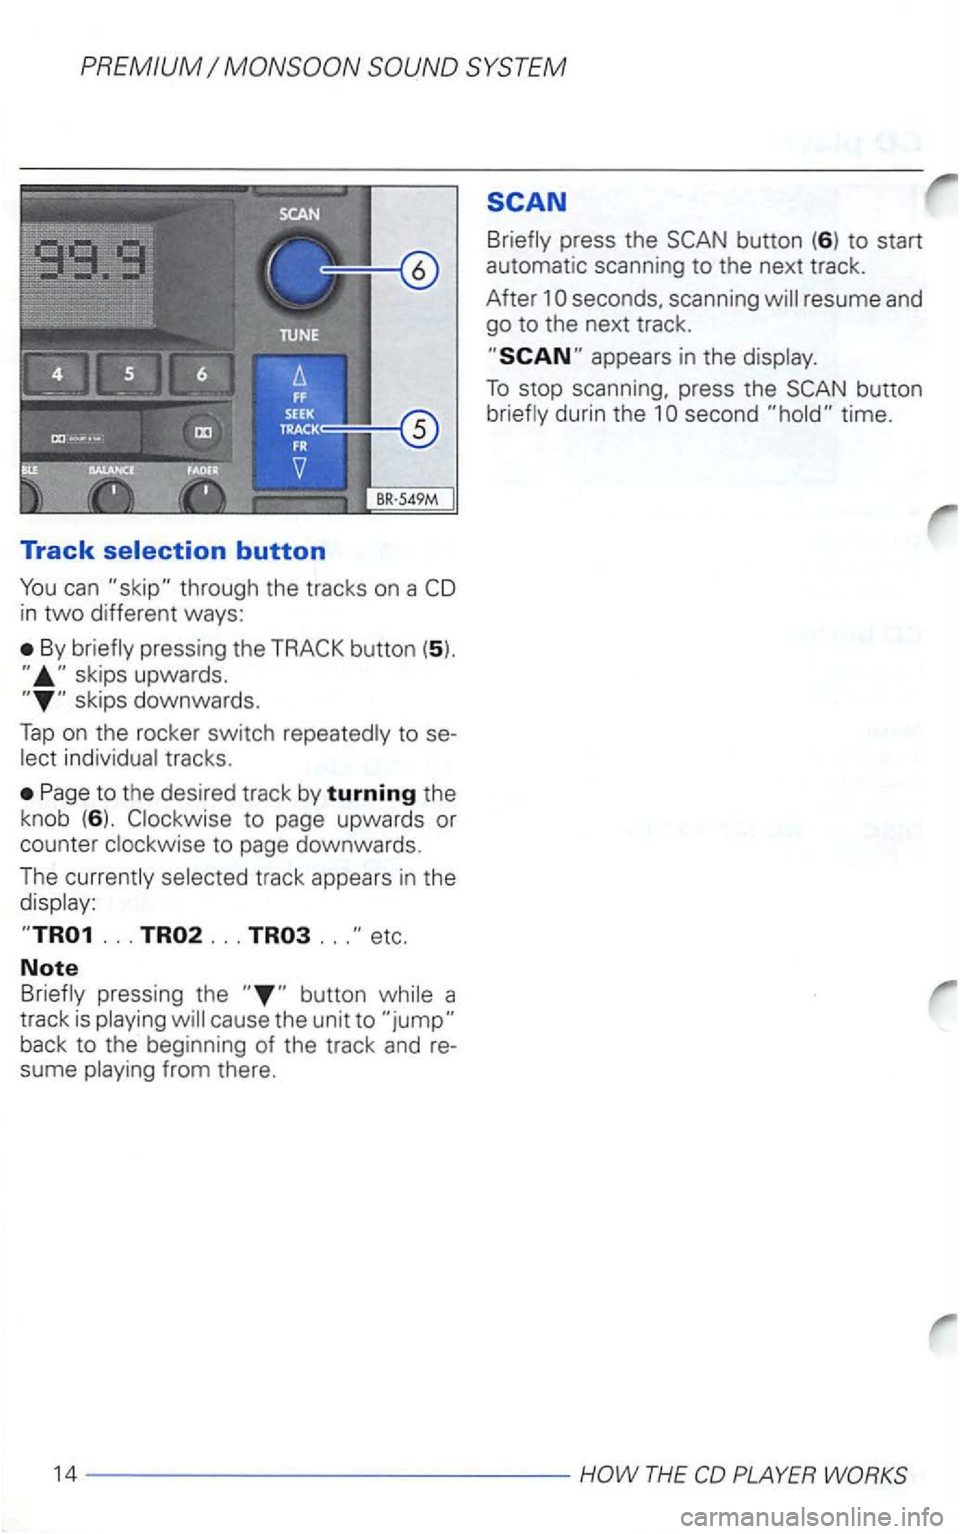
Track
in two different ways:
By
to the desired track by turning the
knob (6
). to page downwards.
The
... ... ... etc.
Note
back to the beginning of the track and re
sume
press the
To stop scanning, press the button time.
14 ---------------
Page 407 of 474
SYSTEM
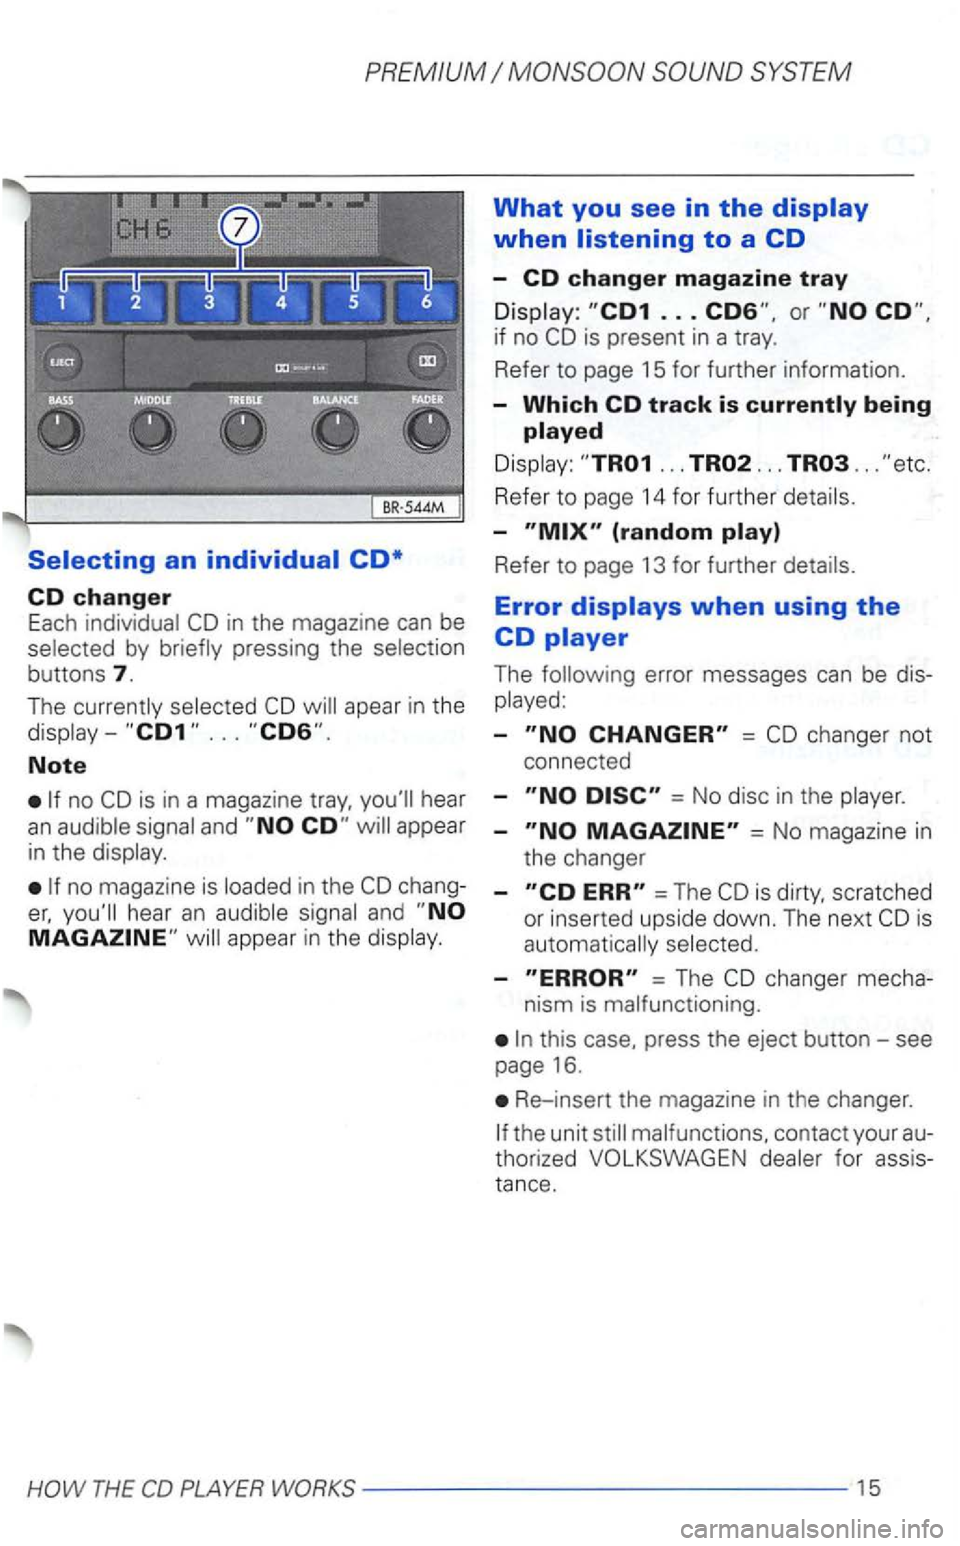
Selecting an individual CD*
CD changer Each in the magazine can be by
buttons 7.
The apear in the
Note
is in a magazine hear an
no magazine is chang
and
What you see in the display
when listening to a CD
-CD changer magazine tray
is present in a tray.
Refer
to page 15 for further information.
-Which CD track is
... ... ...
Refer to page 14 for further
-
Refer to page 13 for further
Error displays when using the
CD player
The
-=
= No disc in the
-= No magazi ne in
the changer
-=The scratched
or inserted upside down. The next
-= The changer mecha-
nism is malfunctioning.
this case, press the eject button-see
page 16.
Re-insert the magazine in the changer.
for assis
tan
ce.
Page 408 of 474
CD changer*
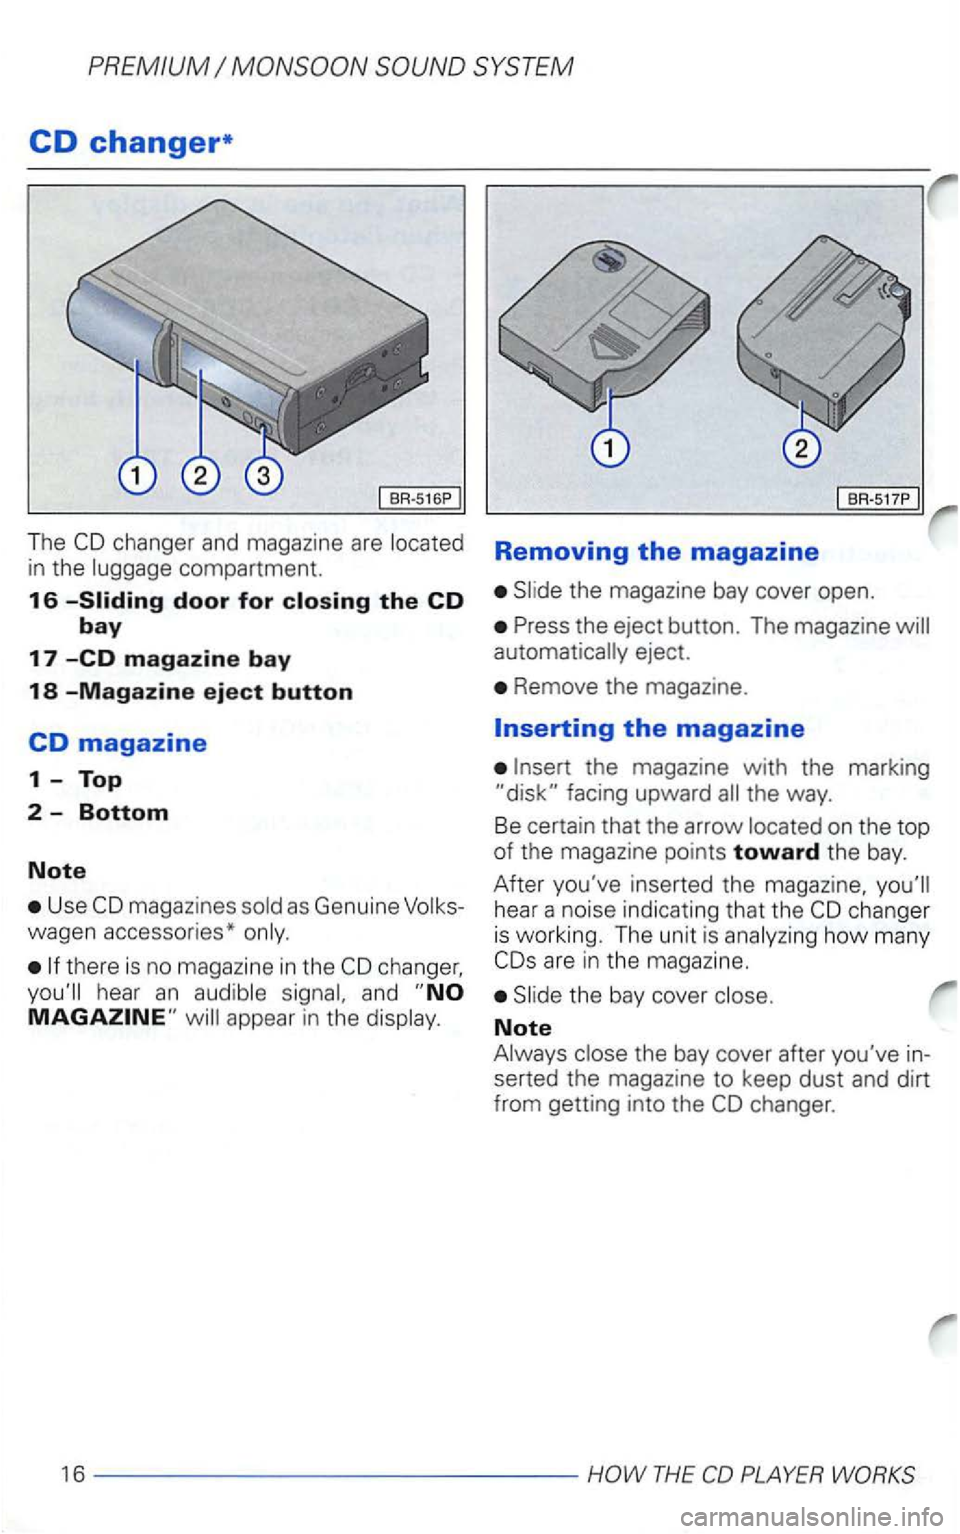
The compartment.
16
Use
there is no magazine in the
and
BR-517P
Removing the magazine
eject.
Remove the magazine.
on the top of the magazine points toward the bay.
After you've inserted
the magazine,
how many
Note
the bay cover after you've in
serted the magazine to keep dust and dirt
from getting into the
Page 409 of 474
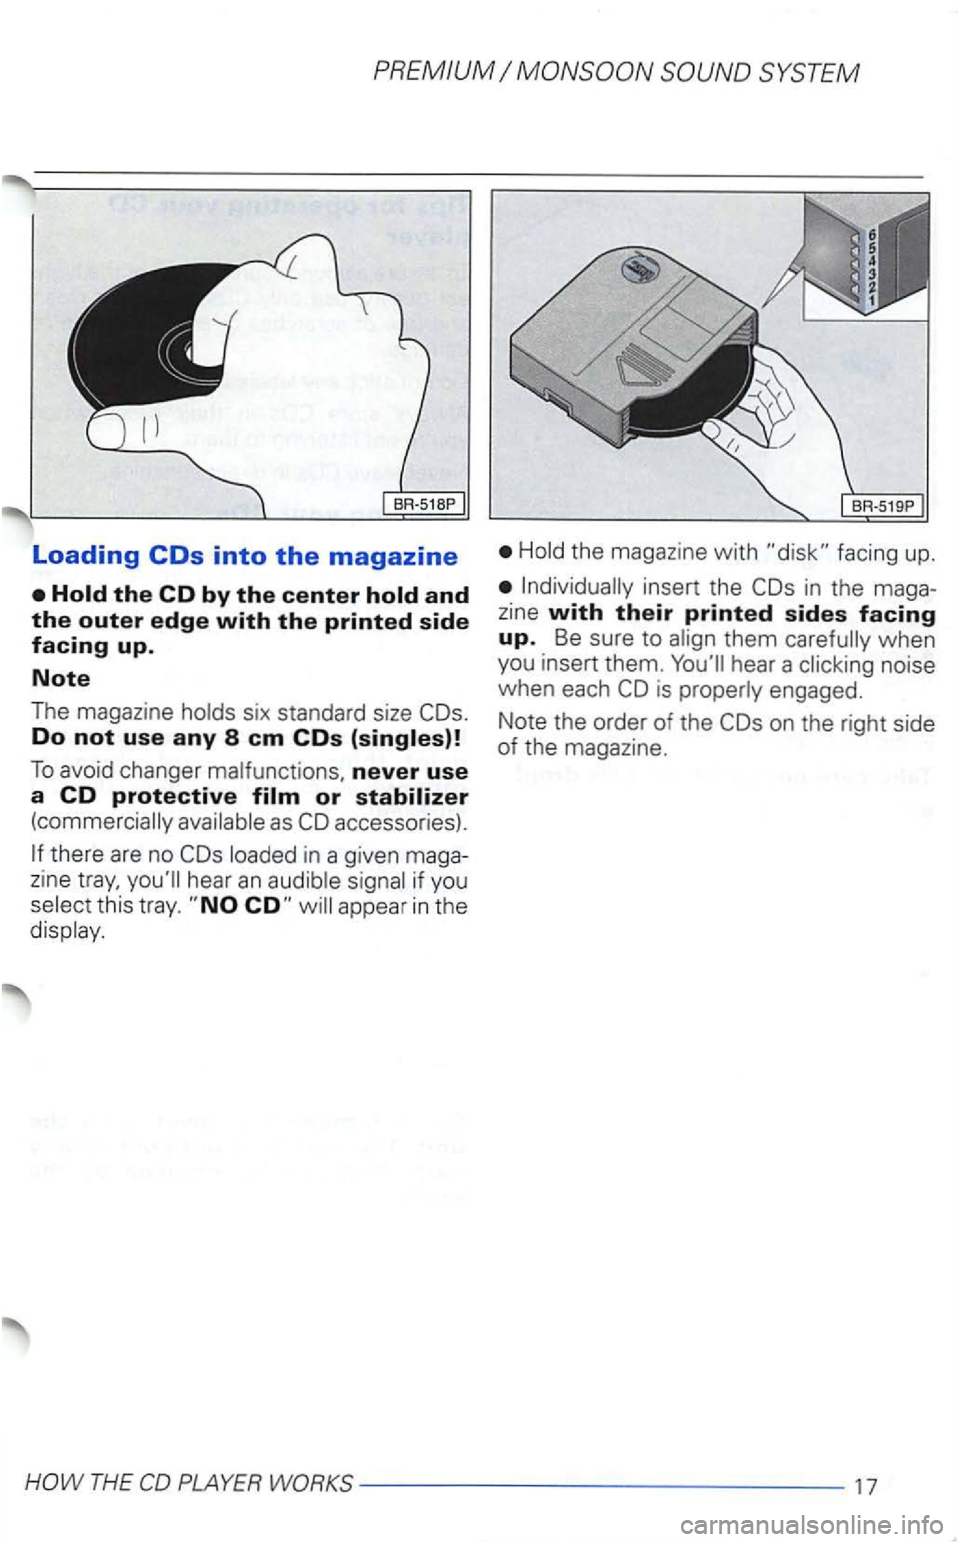
Loading
Do not use any 8 em COs
To avoid changer never use a CD protective
there are no in a given maga
zine hear an
this tray. appear in the
the magazine with facing up.
in the maga
z ine with their printed sides facing up. Be sure to when
you insert them. hear a noise
when each is engaged.
Note the order of the
on the right side of the magazine.
THE
Page 410 of 474
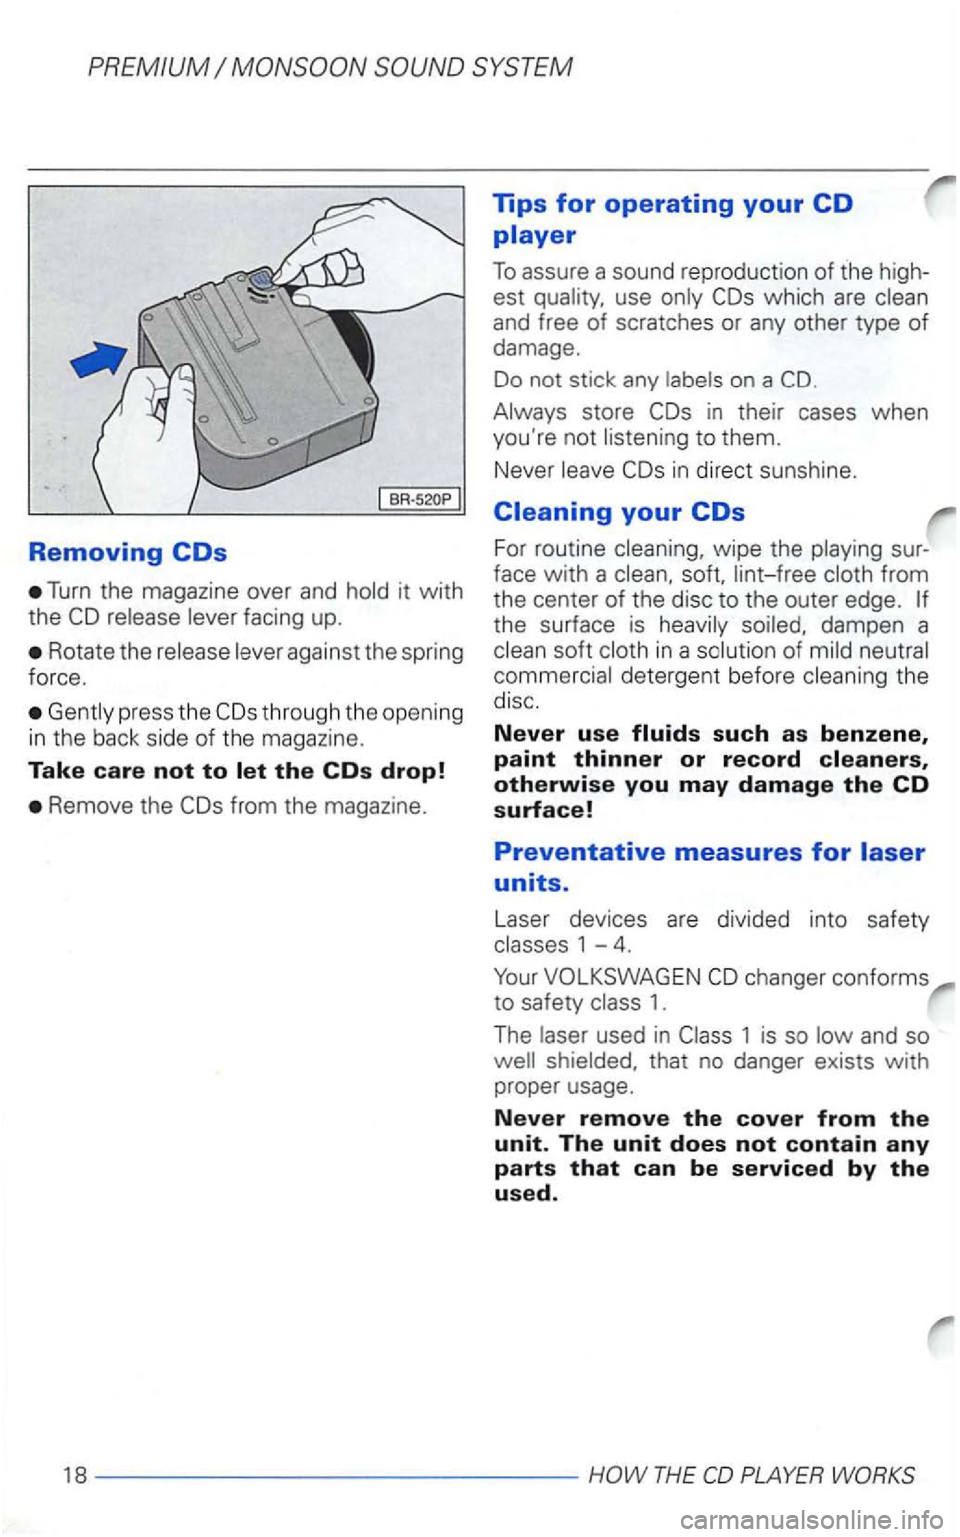
Removing
Turn the magazine over and hold it with
the
Rotate the release lever against the spring
force.
Gent ly press the
Remove the
which are clean
and free of scratches or any other type of damage.
Do not stick any labels on a
Always store
in direct sunshine.
Cleaning your
For routine cleaning, wipe the playing sur
face
with a clean, soft, lint-free cloth from
the center of the disc to the outer edge.
the surface is heavily soiled, dampen a
clean soft cloth in a solution of mild neutral
commercial detergent before cleaning the disc.
Never use
changer conforms
to safety class 1.
The laser used in
THE
Trending: warning light, automatic transmission, child seat, navigation system, oil type, washer fluid, service schedule
