ECO mode VOLKSWAGEN GOLF 2000 Owners Manual
[x] Cancel search | Manufacturer: VOLKSWAGEN, Model Year: 2000, Model line: GOLF, Model: VOLKSWAGEN GOLF 2000Pages: 474, PDF Size: 88.1 MB
Page 94 of 474
What You
A list of Volkswagen bulletins for 1985
and later model
els.
Easy -to-understand highlights of
tins which describe repairs and
pairs. These highligh ts may also contain
owne r use and care information .
Ordering information on how to buy
specific bulletins .
Ordering and price informat ion for
Volkswagen Repai r Manuals on paper
Ordering and price information for
Volkswagen Electrical Wiring Diagrams.
Ordering and price information for crofilmed Product Service Information.
Order ing and price information for rent and past model year Owner's
Maintenance Manuals
Warranty Manuals
Radio Manuals
How to
Instead of buying all bulletins issued by
Volkswagen of America, Inc .. you can buy
bulletins for a particular model or model
year.
To do this you will first need the
for each
additional bulletin requested in that order.
Caution
These
nance can adversely affect the safety of your vehicle, possibly
leading to accident or injury. They may also impair the economy,
Page 235 of 474
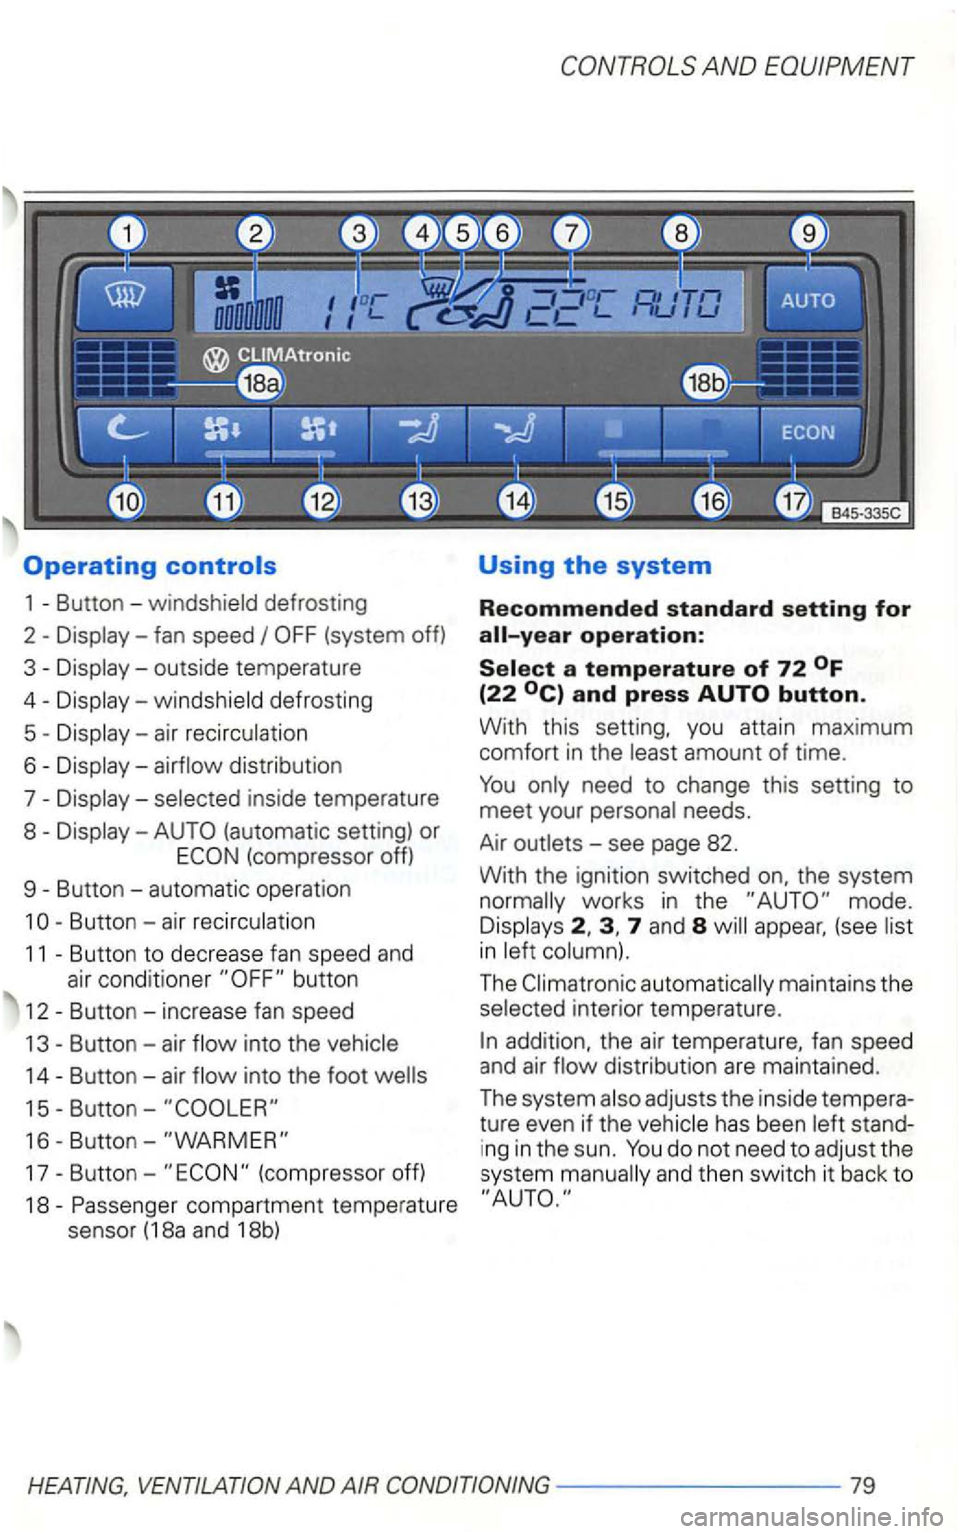
Operating
1
fan speed
distribution
7
inside temperature
8
(automatic setting) or (compressor off)
9
Button -automatic operation
1
button
12
Button - air into the
14 Button -air into the foo t
15-Button-
16 -Button-
(compressor off)
18
compartmen t temperature
senso r (18a and 18b)
AND EQUIPMENT
Using the system
Recommended standard setting for
need to change this setting to
meet your needs.
Air
mode . 7 and 8 appear, (see
The interior tempe rature.
79
Page 320 of 474
AND
Engine
at the
factory with a permanent coolant which
does not need
to be changed. The coolant
consists of a mixture of water and the ma
nufacturer's coolant additive
G 12 ABO -antifreeze on a glycol base with anti-corro
sion additives
models). This mixture assures the necessa
ry frost protection
and protects com
ponents in the engine's cooling system
from corrosion and scaling.
to antifreeze protec
tion and cooling efficiency .
For year-round driving, antifreeze is added at
the factory for temperatures down to:
ditives (for example G 11 ).
You can recognize G12 ABO in the
expansion tank by its red color.
AND FILLING
Page 397 of 474
Radio
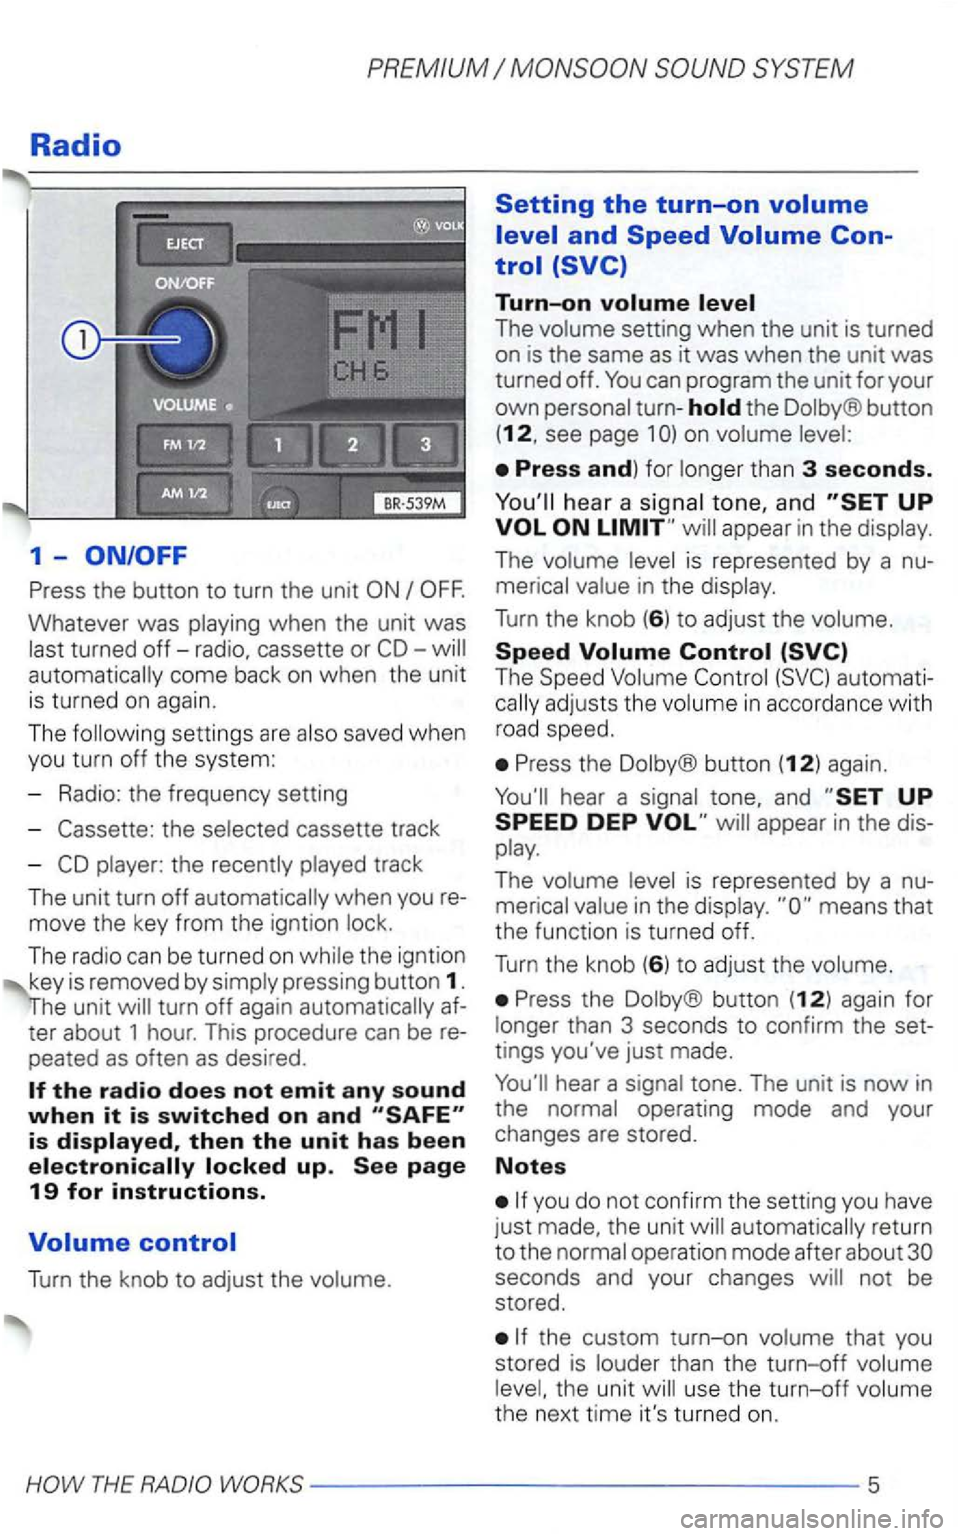
1-
Press the button to turn the unit
Whatever was playing when the unit was
last turned
off-radio, cassette or automatically come back on when the unit
is turned on again.
The following settin gs are also saved when
you turn off the system:
- Radio: the frequency setting
-
the selected cassette track
-
player: the recently played track
The unit turn
off automatically when you
move the key from the igntion lock.
The radio can be turned
on while the igntion
key is removed by simply pressing button 1.
turn off again automatically
peated as often as desired .
Turn the knob to adjust the volume.
Setting the turn-on
Turn-on
The volume setting when the unit is turned
on is the same as it was when the unit was turned off.
the Dolby® button
(12, see page 1
hea r a signal tone, and appear in the display.
The volume level is represented by a
The Speed Volume
Press the Dolby® button (12) again.
Press the Dolby ® button (12) again for
longer than 3 seconds to confirm the
tings you've just made.
automatically return
to the normal operation mode after about
the custom turn-on volume that you
stored is louder than the turn-off volume
level, the unit will use the
turn-off volume
the next time it's turned on.
Page 423 of 474
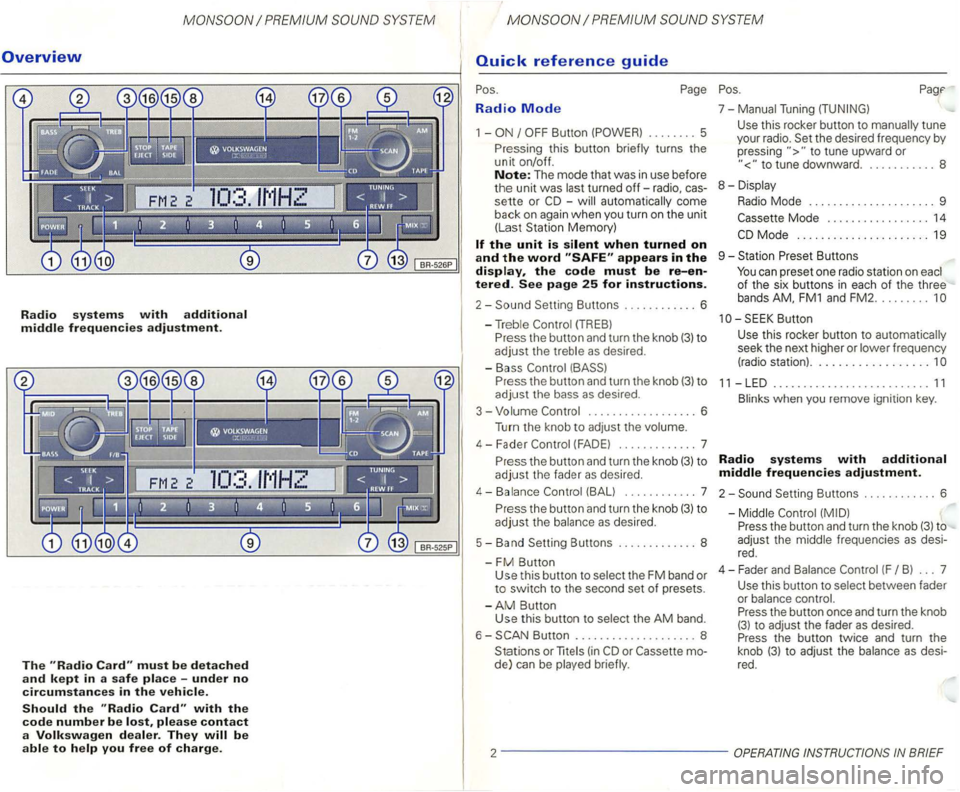
Overview
Radio systems with additional middle frequencies adjustment.
The must be detached
and kept in a safe place -under no
circumstances in the vehicle.
Should the with the
code number be please contact
a Volkswagen dealer. They
Radio Mode
1 -
-automatically come
back
on again when you turn on the unit
(Las t Station Memory)
appears in the display, the code must be re-entered. See page 25 for instructions.
2-
P ress the button and turn the knob (3) to
adjust the bass as desired .
3 - Volume
.................. 6
Turn the knob to
adjust the volume.
4 - F ader
(FAD E) ............. 7
P r
ess the button and turn the knob (3) to
adjust the fader as desired.
4-Balance (BALl ... ......... 7
P r
ess the button and turn the knob (3) to
adjust the balance as desired.
5 - Band Setting Buttons ..
........... 8
-
FM Button Use this button to select the FM band or to switch to the second set of presets.
-
AM Button
Use this button to selec t the AM band.
6 -
Button .................... 8
Stations or
lite (in
to tune upward or
to tune downward. . .......... 8
8 - Displa y
Radio Mode . . . . . . . . . . . . . . . . . . . . . 9
Mode . . . . . . . . . . . . . . . . . 14
Butt on
Use
this rocker button to automatica lly
seek the next higher or lower frequency
(radio station) ..................
11 -LED .......................... 11
Blinks when you remove ignition key.
Radio systems with additional
middle frequencies adjustment.
2-Setting Buttons ............ 6
-Middle
Press the button and turn the knob (3) to
adjust the middle frequenc ies
as desi
red .
4 - Fader an d Balance
(F B ) ... 7
Use this button to select between fader
or balance control.
Press the button once and turn the knob
(3) to adjust the fader as desired.
Press the button twice and turn the
knob
(3) t o adjust the balance as desi
red.
2 -------------
Page 424 of 474
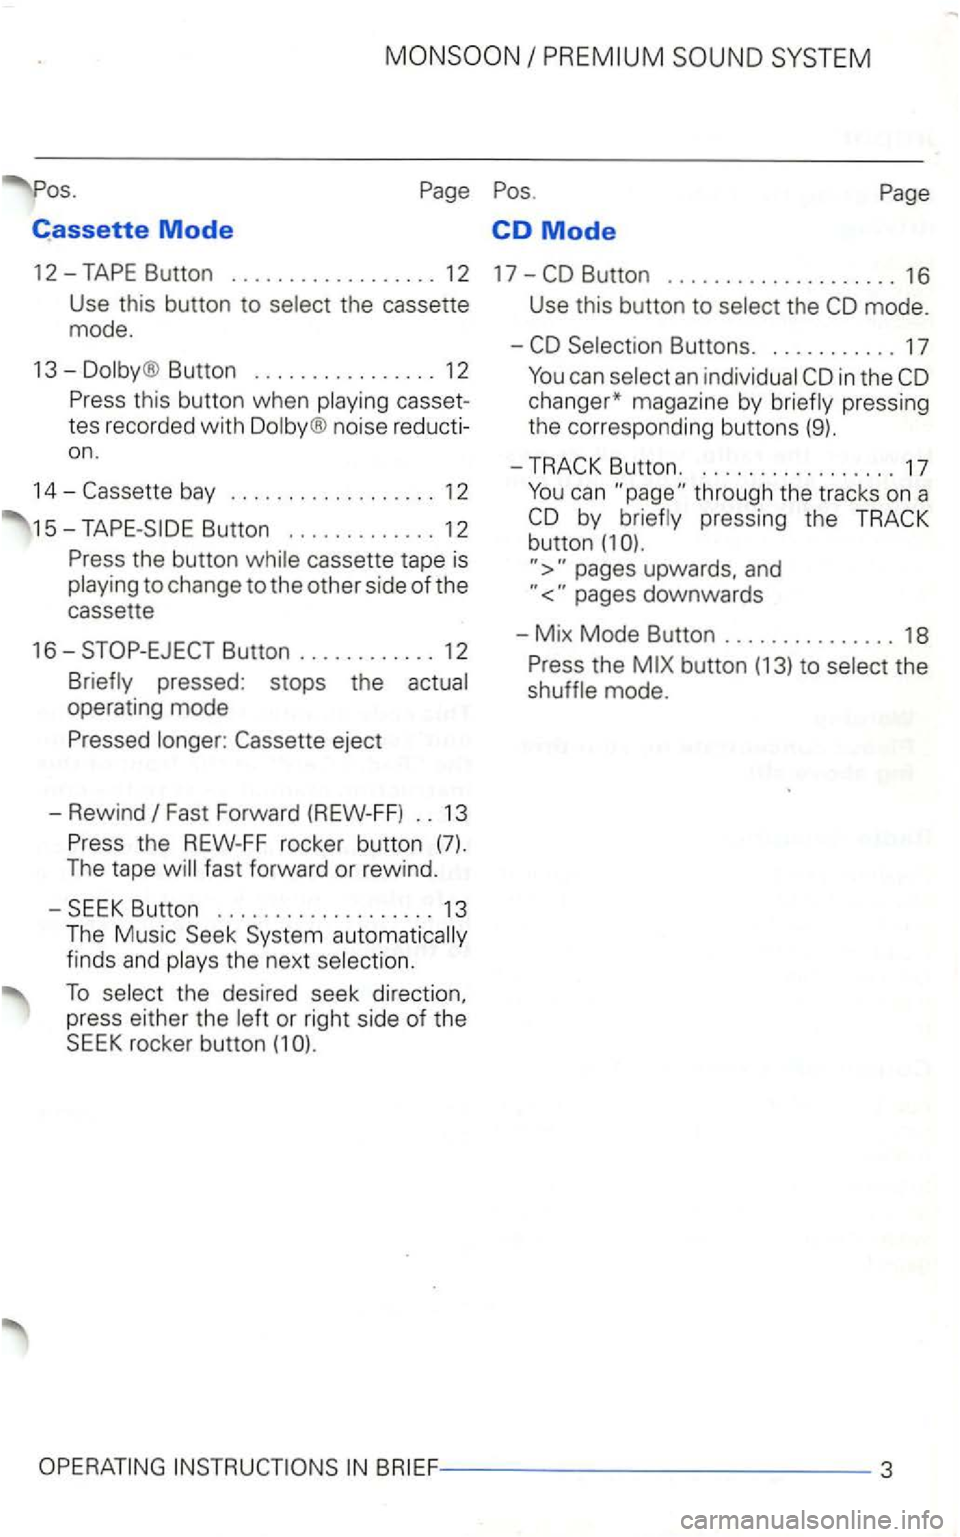
Cassette Mode CD Mode
12-
Button ................ 12
casset
tes recorded with
noise reducti
on .
14-
cassette tape is to change to the other side of the
cassette
16-
Fast Forward (REW-FF) .. 13
the next
To the desired seek direction,
press either the or right side of the SEEK rocker button (1
Use this button to the
in the
pressing the button (1
upwards, and
the mode.
Page 426 of 474
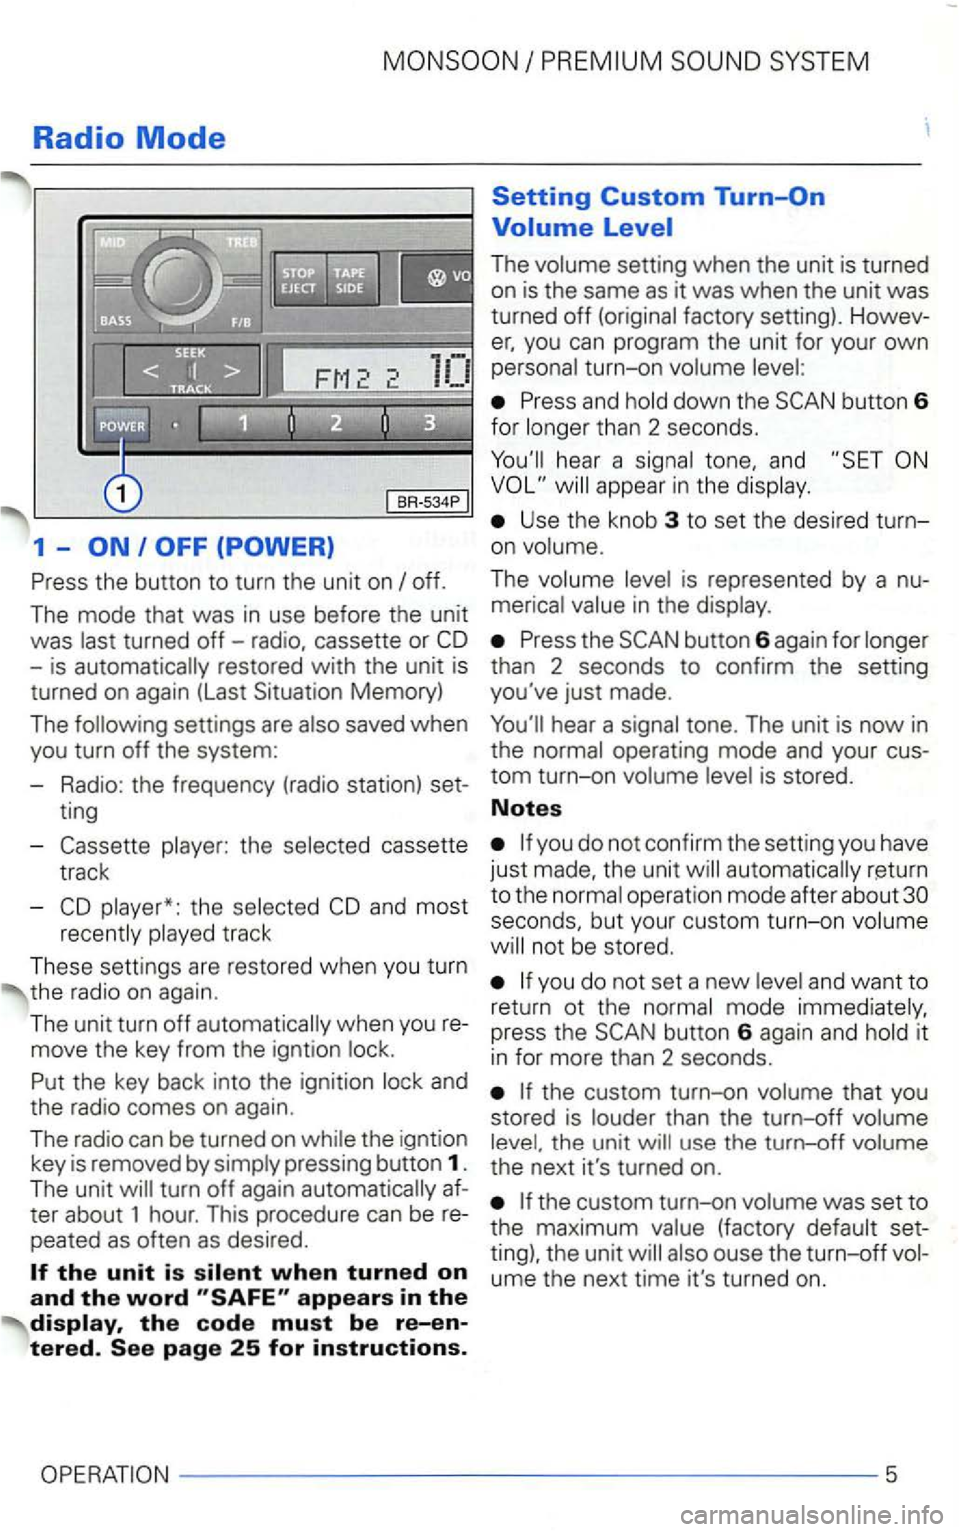
Radio Mode
1 -
the
track
These settings are restored when you turn
the radio on
again .
The unit turn off
and
the radio comes on aga
in.
The
radi o can b e turn ed on the igntion
key is removed by
The
you can program the unit for your own turn-on
Press and
hear a tone, and
Use the knob 3 to set the desired turn
on
The
Press the
operation mode after about seconds, but your custom turn-on
not be stored.
you do not set a new and want to
return ot the it
i n for more than 2 seconds.
th e u nit
ume the next time it's turned on.
5
Page 427 of 474
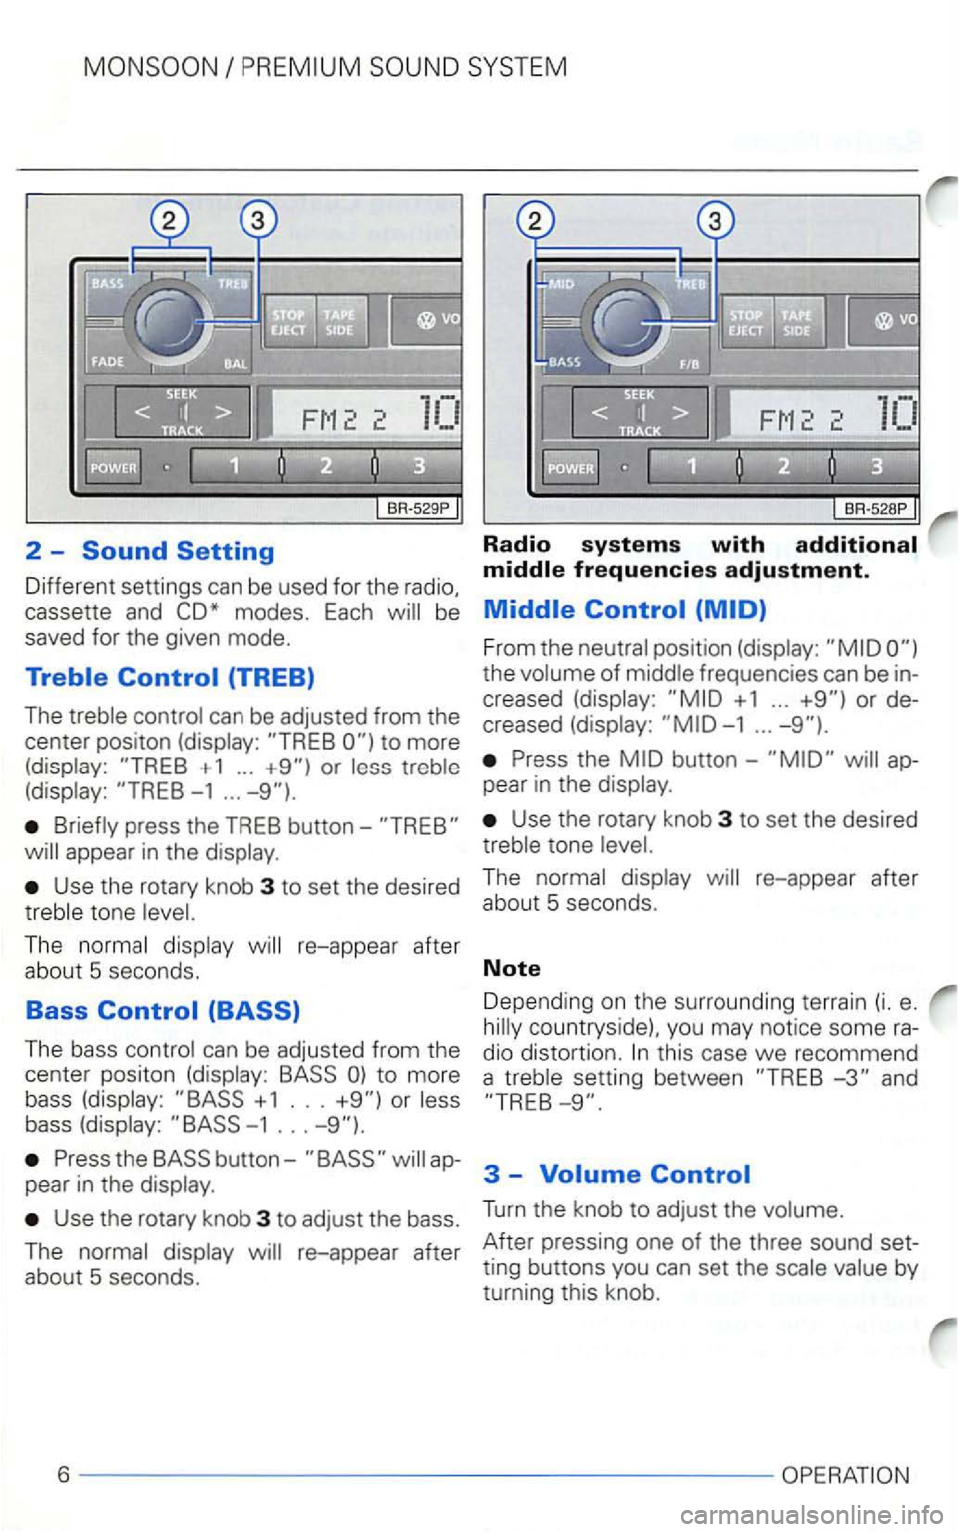
2 -Radio systems with
Different settings can be used for the radio,
saved for the given mode.
+ 1 ... or -1 ...
press the TREB button-
Use the rotary knob 3 to set the desired
The
The bass
or
button-appear in the
Use the rotary knob 3 to adjust the bass.
The
+ 1 ...
the
Use the rotary knob 3 to set the desired tone
this case we recommend
a setting between and
3 -
Turn the knob to adjust the
by
turning this knob.
6
Page 437 of 474
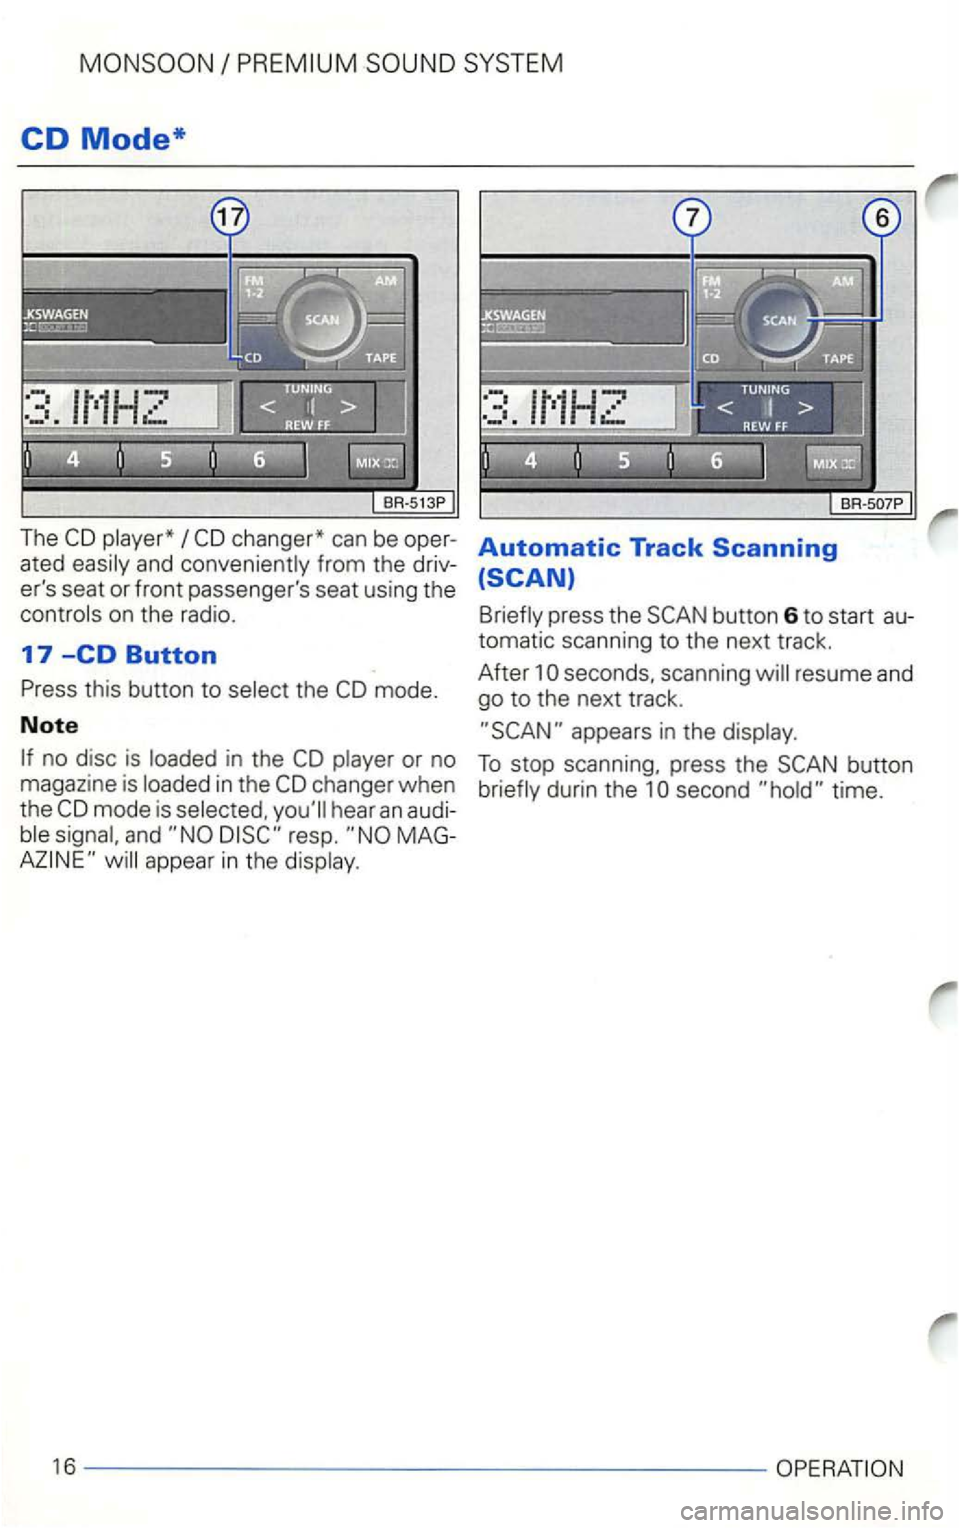
CD Mode*
The
mode.
Note
no disc is in the
in the
mode is and resp .
Automatic Track Scanning
button 6 to start au
tomatic scanning to the next track.
After seconds. scanning
To stop scanning, press the button
second
Page 439 of 474
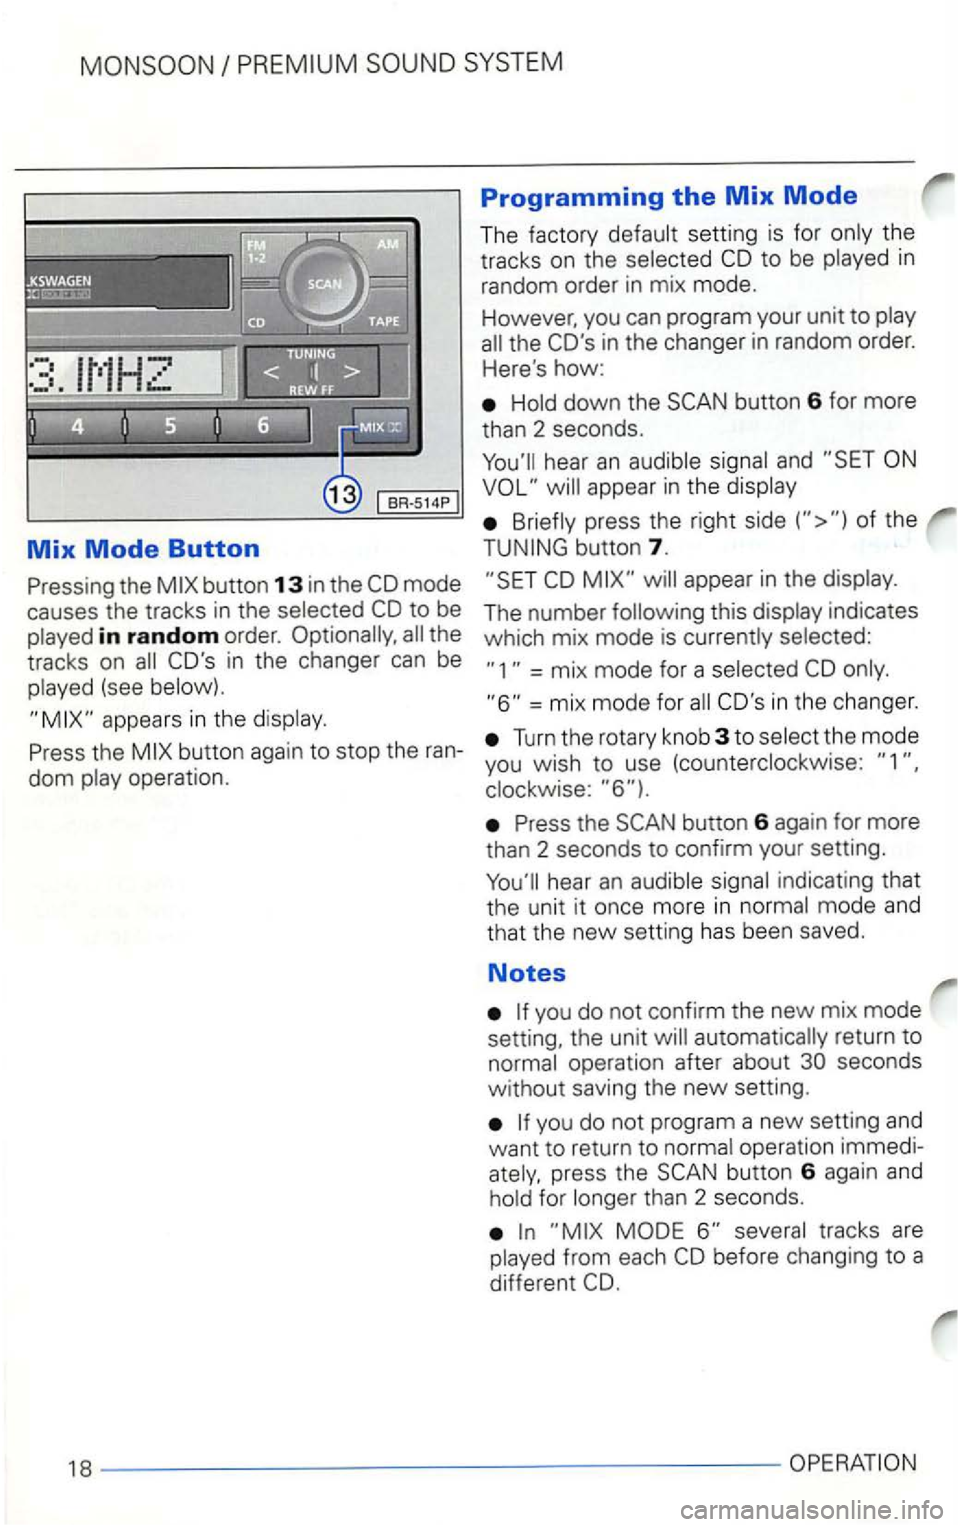
Mix Mode Button
the
in random order. the
tracks on
(see
Programming the Mix Mode
The factory CD to be in
random order in mix mode.
However, you can program your unit to
the CO's in the changer in random order.
Here
's how:
button 6 for more
than 2 seconds.
appear in the
of the
button 7.
appear in the
indicates
which mix mode is
= mix mode for a
=mix mode for CO's in the changer.
Turn the rotary knob 3 to
button 6 again for more
than 2 seconds to confirm your setting.
you do not confirm the new mix mode
setting, the unit
operation immedipress the button 6 again and for than 2 seconds.