Illustration VOLKSWAGEN GOLF 2002 Owners Manual
[x] Cancel search | Manufacturer: VOLKSWAGEN, Model Year: 2002, Model line: GOLF, Model: VOLKSWAGEN GOLF 2002Pages: 474, PDF Size: 88.1 MB
Page 98 of 474
Vehicle Equipment
This the equipment
of the equipment may be
*
tain on others or
not
Illustrations
Each in the
ture and
may or may not have. depending on the are
right.
imagine
thing is
the you find the
the
features
of your pear in this
like this throughout this manuaL
Texts printed in
Page 114 of 474
SAFETY FIRST
Fastening the safety
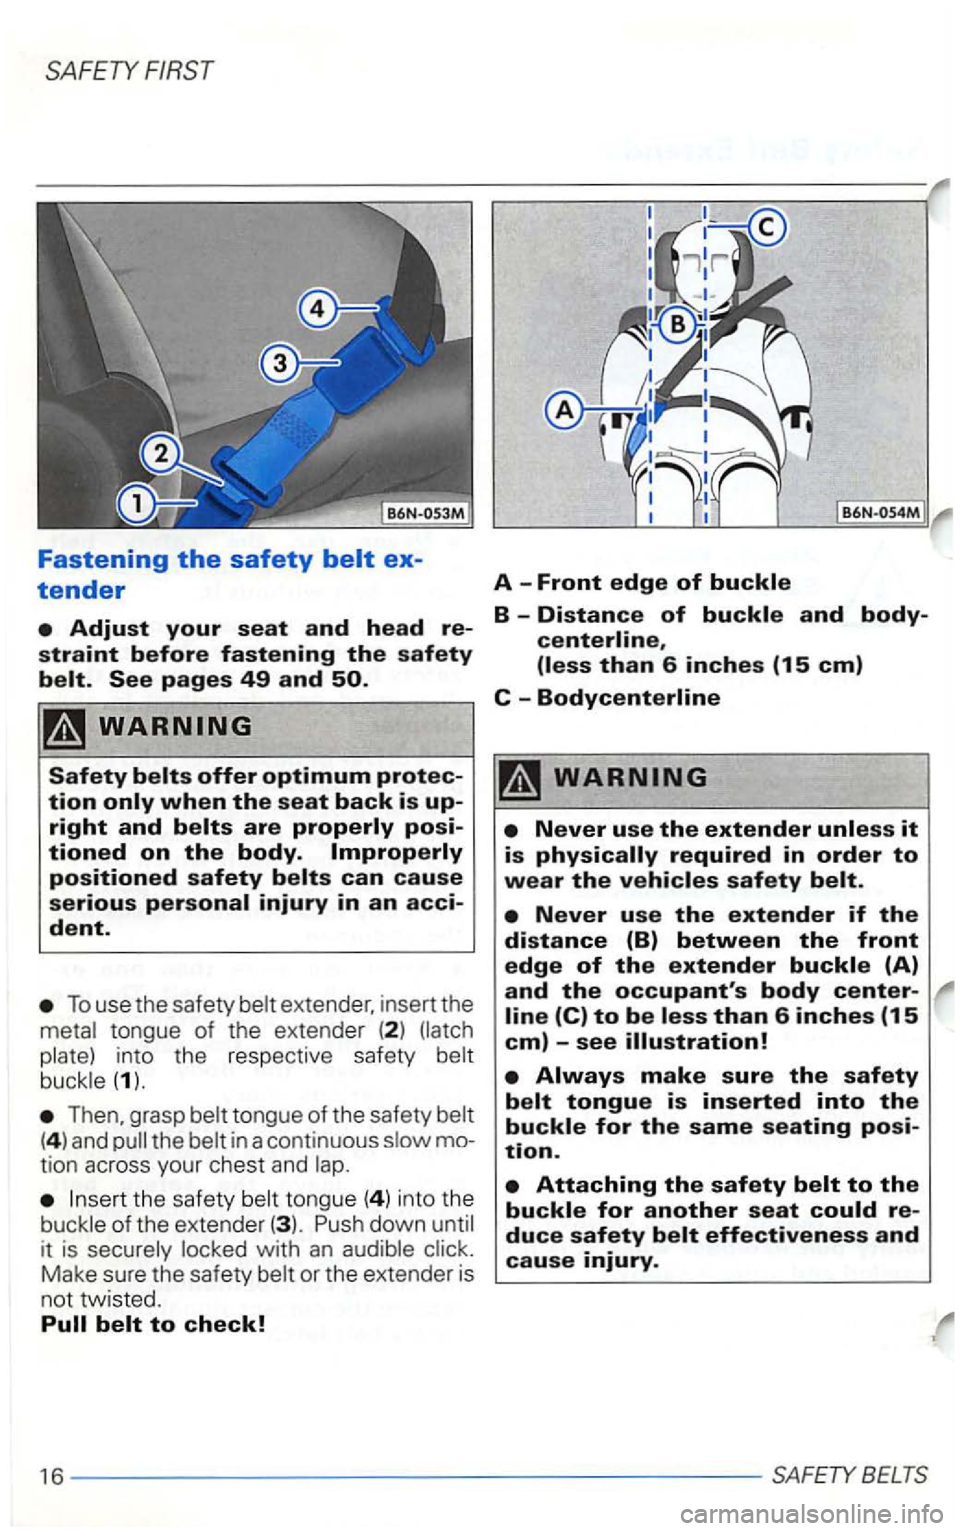
tender A -Front edge of buckle
B -Distance of buckle and body-
dent.
To use the safety extender, insert the
into the respective safety (1).
Then, grasp
(4 ) and in a continuous tion across your chest and
with an Make sure the safety or the extender is
not tw isted.
line (C) to be less than 6 inches (15 em)-see illustration!
duce safety belt effectiveness and cause injury.
16------- -------------
Page 138 of 474
SAFETY
Tether Anchors
restraint anchors (tether anchors)
the instructions provided by the manufacturer of
the
year wagen have tether anchors as standard equipment. T
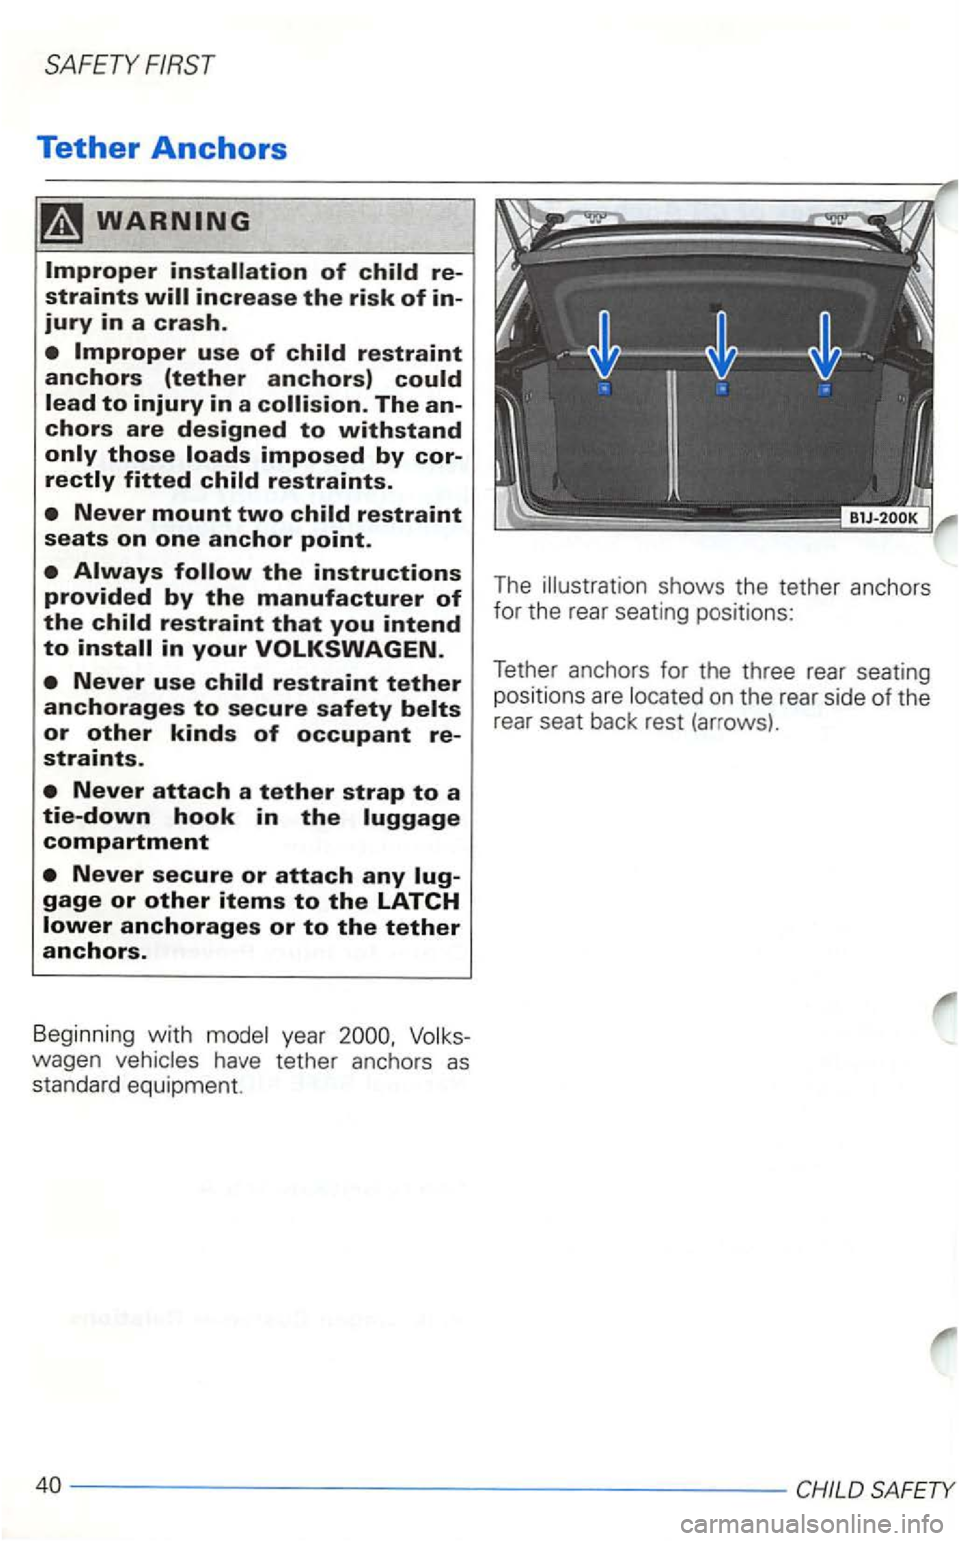
he illustration shows the tether anchors
for the rear seating positions:
Tether anchors for the three rear seating
posit ions are
on the rear side of the
rear seat back rest (arrows).
------------ -------- - CHILD
Page 149 of 474
B45-421K
Driver's seat
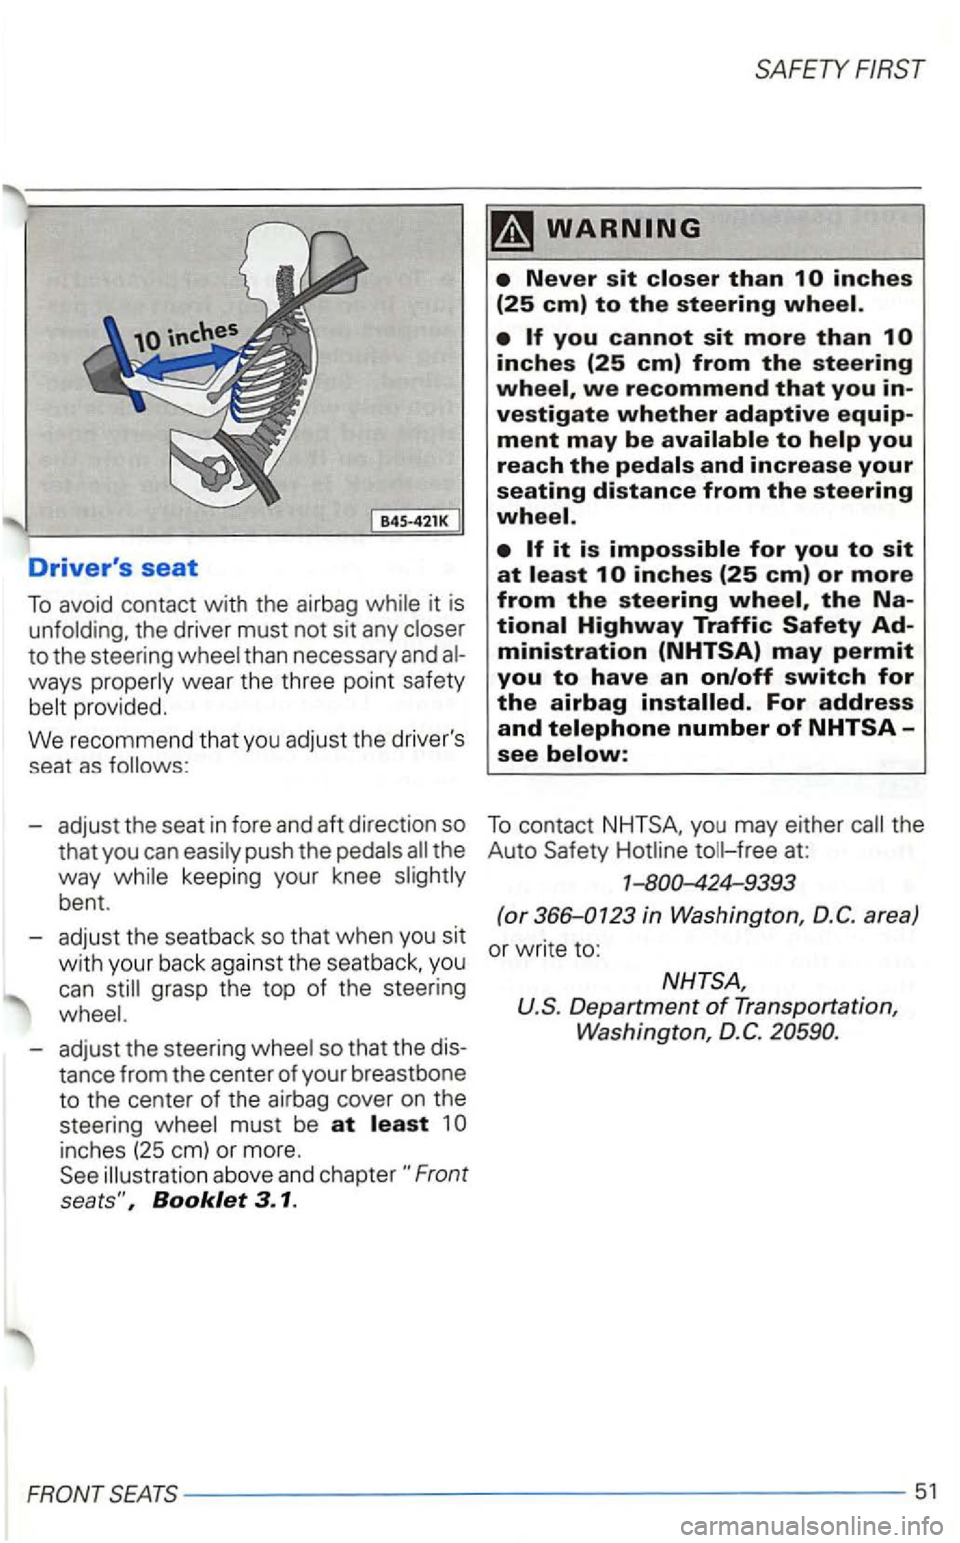
To av oid contact with the airbag while it is
unfold ing, the driver must not sit any closer
to the steering wheel than necessary and
ways properly wear the three point safety
belt provided .
We recommend that you adjust the driver's
seat as fo llows :
- adjust the seat in fore and
aft direct ion so
that you can easily push the pedals
tance from the center of your breastbone to the center of the airbag cover on the
steering wheel must be at 1
inches (25 em) or more. illustration above and chapter
ministration (NHTSA) may permit you to have an on/off switch for
the airbag For address and
To contact you may either
Department of D.C.
FRONTSEATS---------- -------------------- -------------51
Page 159 of 474
Please read this important information before reading
your booklet.
tended to be offered at the time of pr inting.
Some of the equipment may be at
a
date or not at
*
Please note that items marked with an asterisk may be standard on certain models . op tional on others or
not
Notes about Environment
Texts identified by this symbol and written in italics are
important notes regarding
the environment and how you can help protect it.
Each illustration in the manual shows a fea
ture and
may or may not have , depe nding on the
The illus trations are simply to show you how a feature and its function.
At the back of this book, you tensive Alphabetical This help
you to find informat ion quickly by using key
words .
page, you find the
of the
features of your i n the order th ey
right. forward. backward , etc.), you
should imagine yourself
as sitting in the facing in the driving direction .
be
one of th e W arning and indicato r
lig hts marked with a
minates turn off the turn on th e e mergen cy flasher and use
other warning devices to
Page 164 of 474
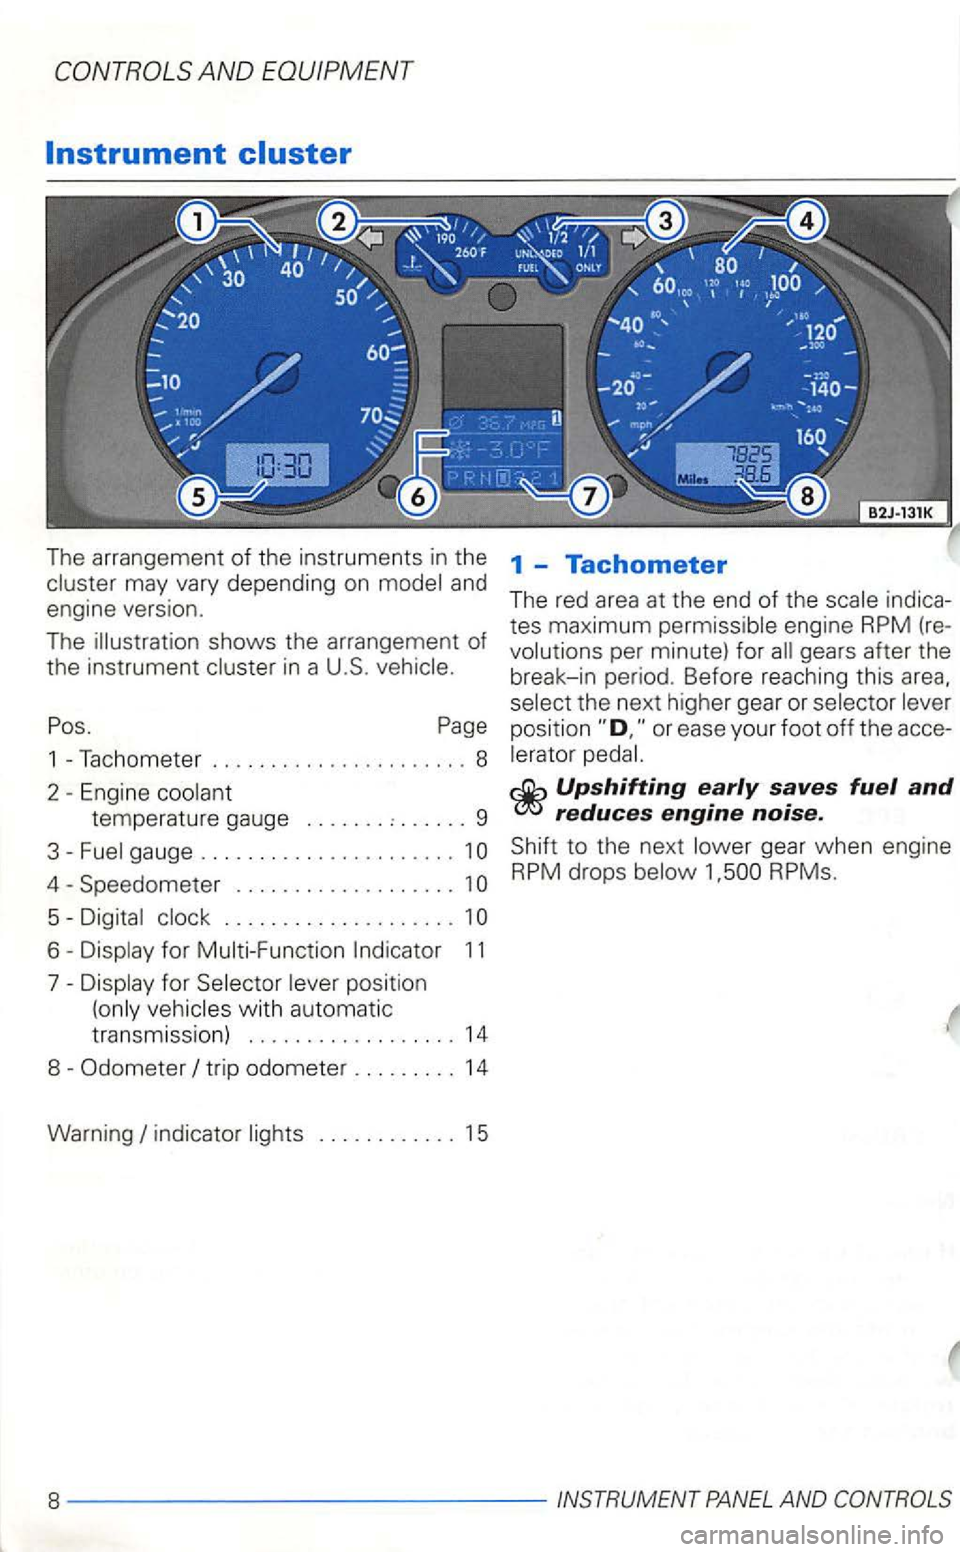
The arrangement of the instruments in the may vary depending on model and engine version.
The illustration shows the arrangement
of the instrumen t in a U.S.
Pos. Page
1 -Tachometer ...................... 8
2
Engine coo lant
temperature gauge ....... : ...... 9
3-Fuel gauge ......................
Speedometer . . . . . . . . . . . . . . . . . . . 1
Digital clock .................... 1
Display for Selector lever position
(only
indicator lights ............ 15
1 -Tachometer
The red area at th e end of the scale indica
tes maximum permissible engine RPM (
re
volutio ns per minute) for all gears after th e
break-in period. Before reachi ng this
selec t the next higher gear or selector lever
position
Upshifting early saves fuel and reduces engine noise.
Shift to the next lower gear when engine RPM drops below
Page 167 of 474
6 -
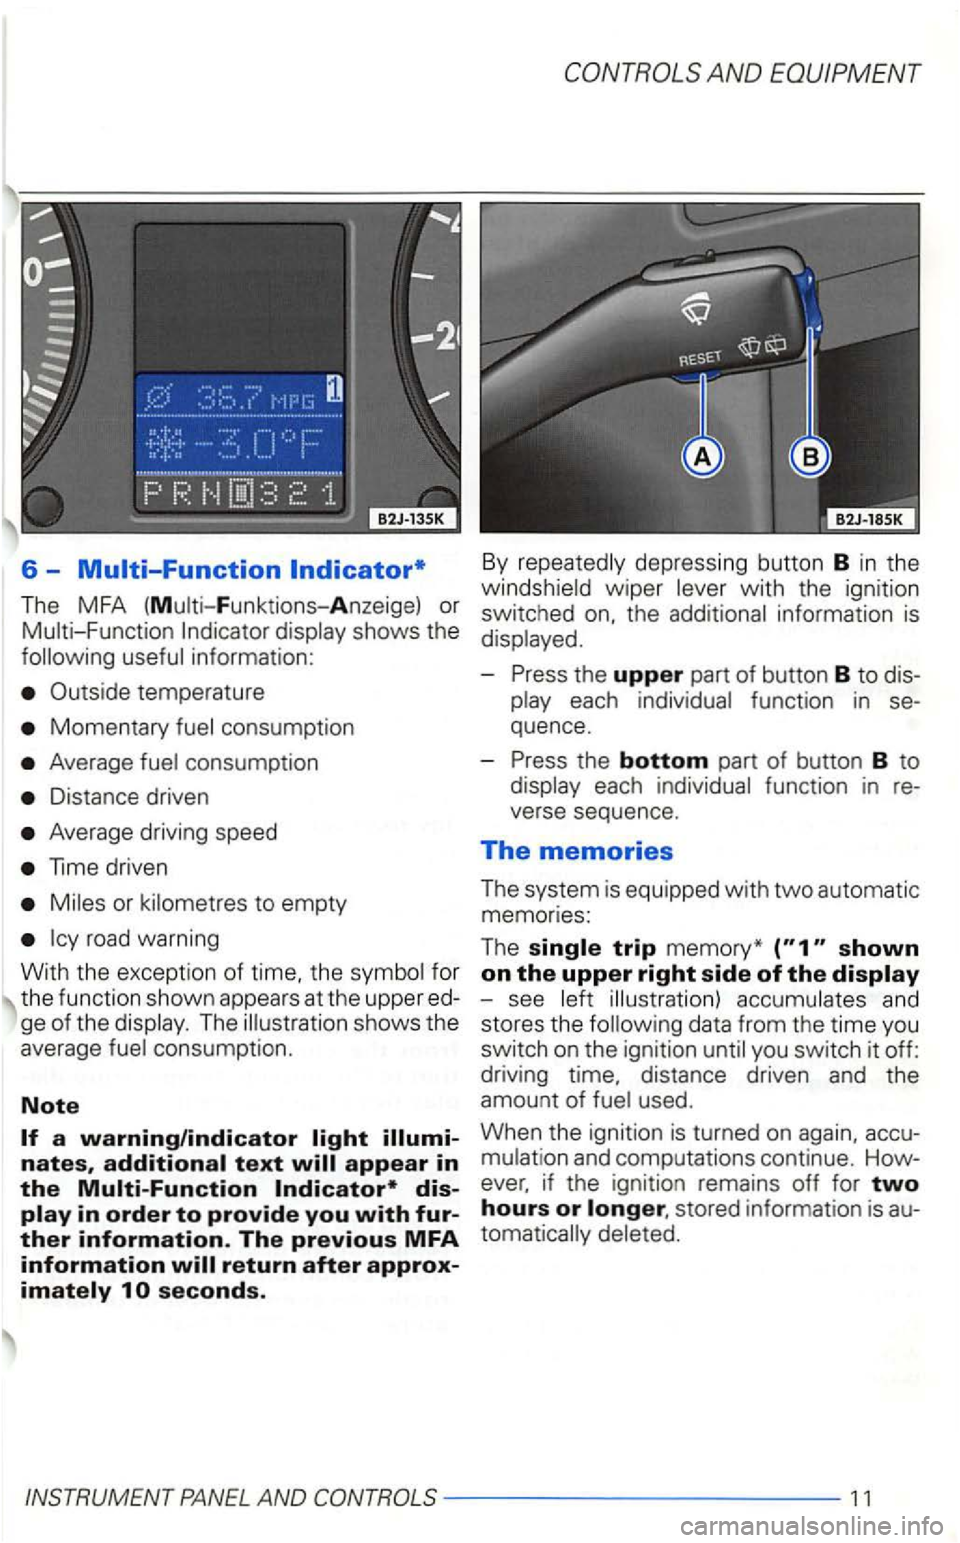
The MFA (Multi-F unktions- Anzeige) or shows the
Outside temperature
Momentary consumption
Average consumption
Distance driven
Average driving speed
or
The illustration shows the
average consumption.
Note
dis
depressing button B in the with the ignition
switched
-
function in re
verse sequence .
The memories
The system is equipped with two automatic
memories:
The
used.
When the ignition
is turned on again, accu
Page 183 of 474
Remote
acti
vating or deactivating the anti-theft
system)
- Use the
feat ure
( open the driver's door
-th e rear
- Act ivating the
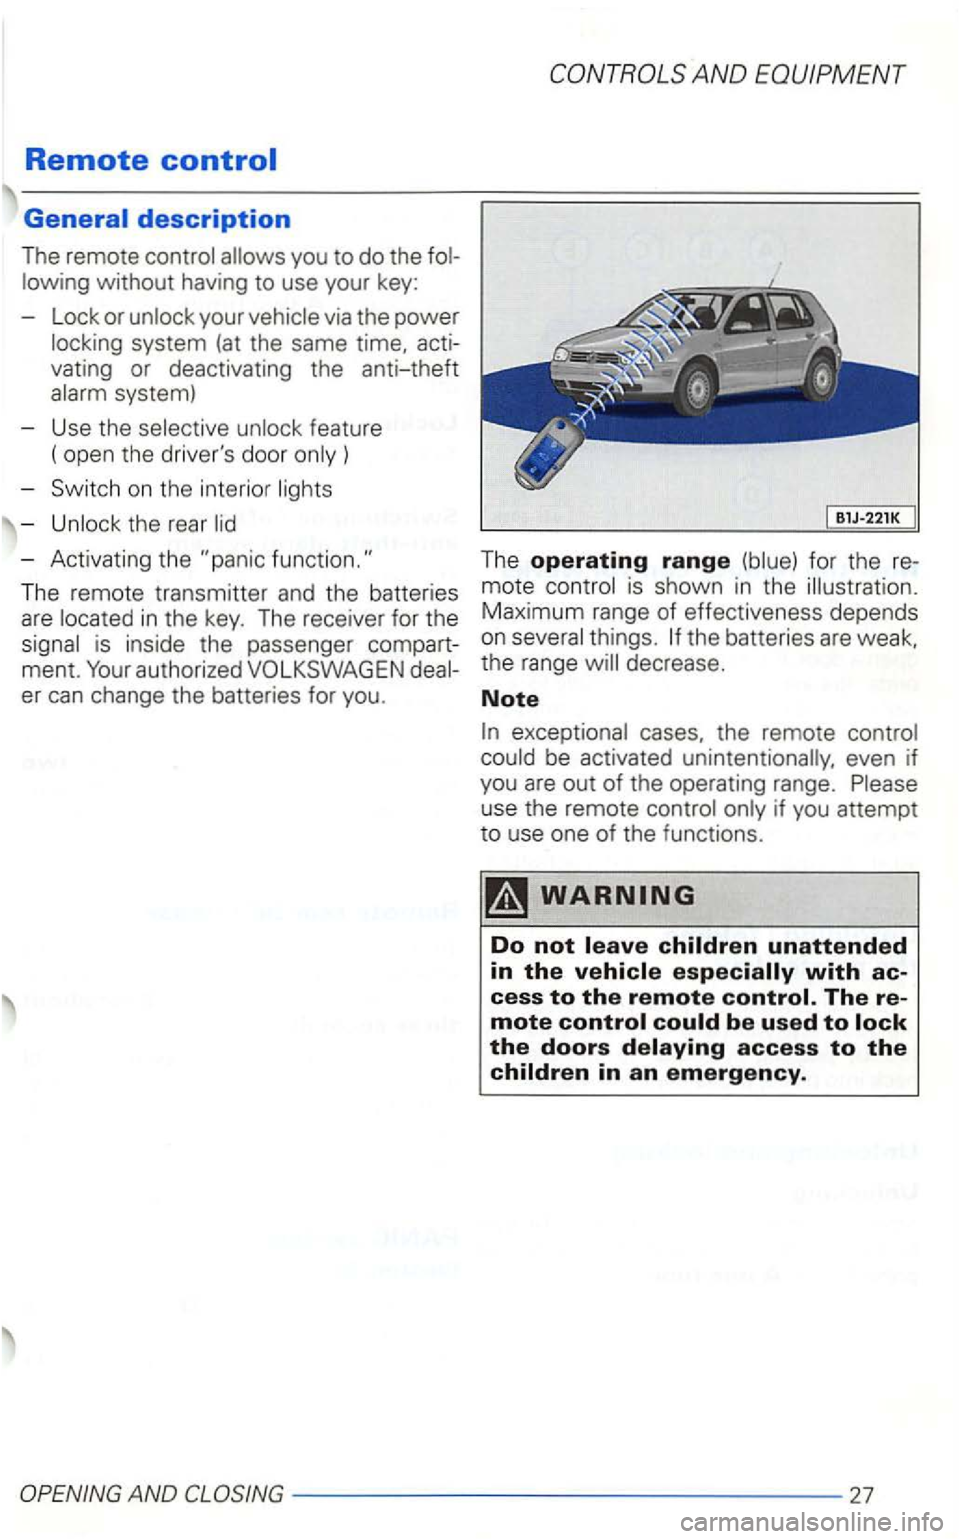
The remote transmitter and the batter ies mote is shown in the illustration.
are
the range
be activated unintentionally, even if
you are out of the operating range.
mote
AND 27
Page 192 of 474
AND
Power windows*
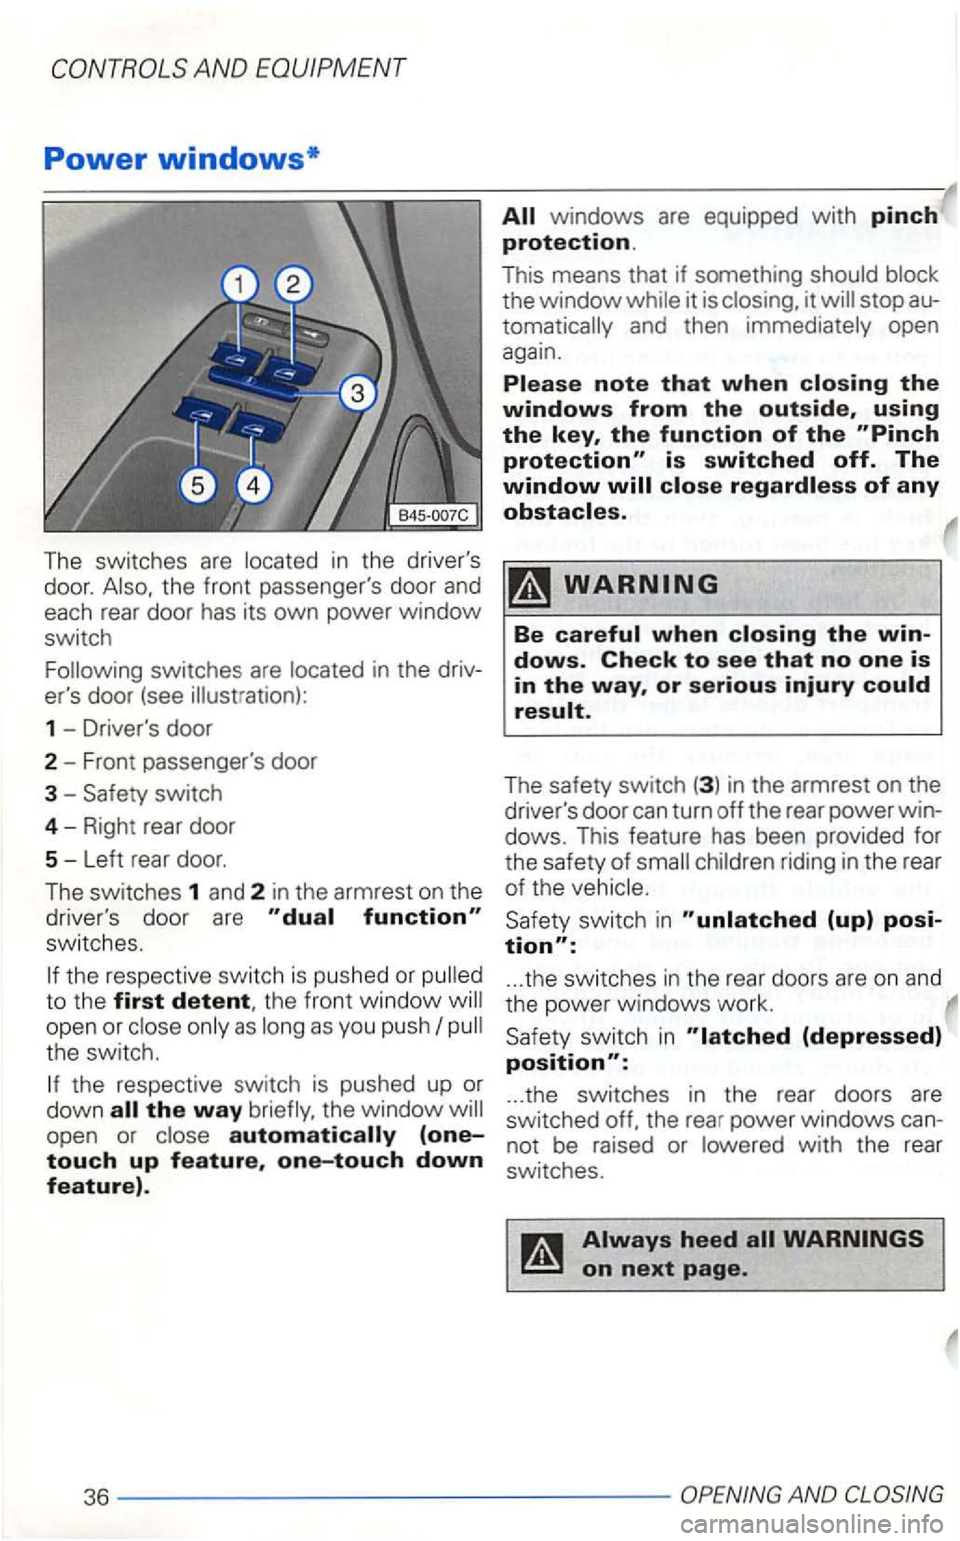
The switches are located in the driver's
door.
the front passenger's door and
each rear door has it s own power window
switch
Following switches are located in the driv
er's door (see illustration) :
1 -Dri ver's door
2-Front passenger's door
3 -
switch
4-Right rear door
5 -Left rear door.
The switches
1 and 2 in the armrest on the
driver's door
are
switches.
the respective switch is pushed or
open or
windows are equipped with pinch
protection.
This means that if something should block
the window while it is it
or serious injury
The safety switch (3 ) in the armrest on the
driver's door can turn off the rear power win
dows. This feature has been provided for
the safety
of
switch in
... the switch es in the rear doors are on and
the power windows
work.
switc h in
... the switches in the rear doors are switched off, the rear power windows can
not be raised or lowered with the rear
switches.
Page 226 of 474
Ashtray*
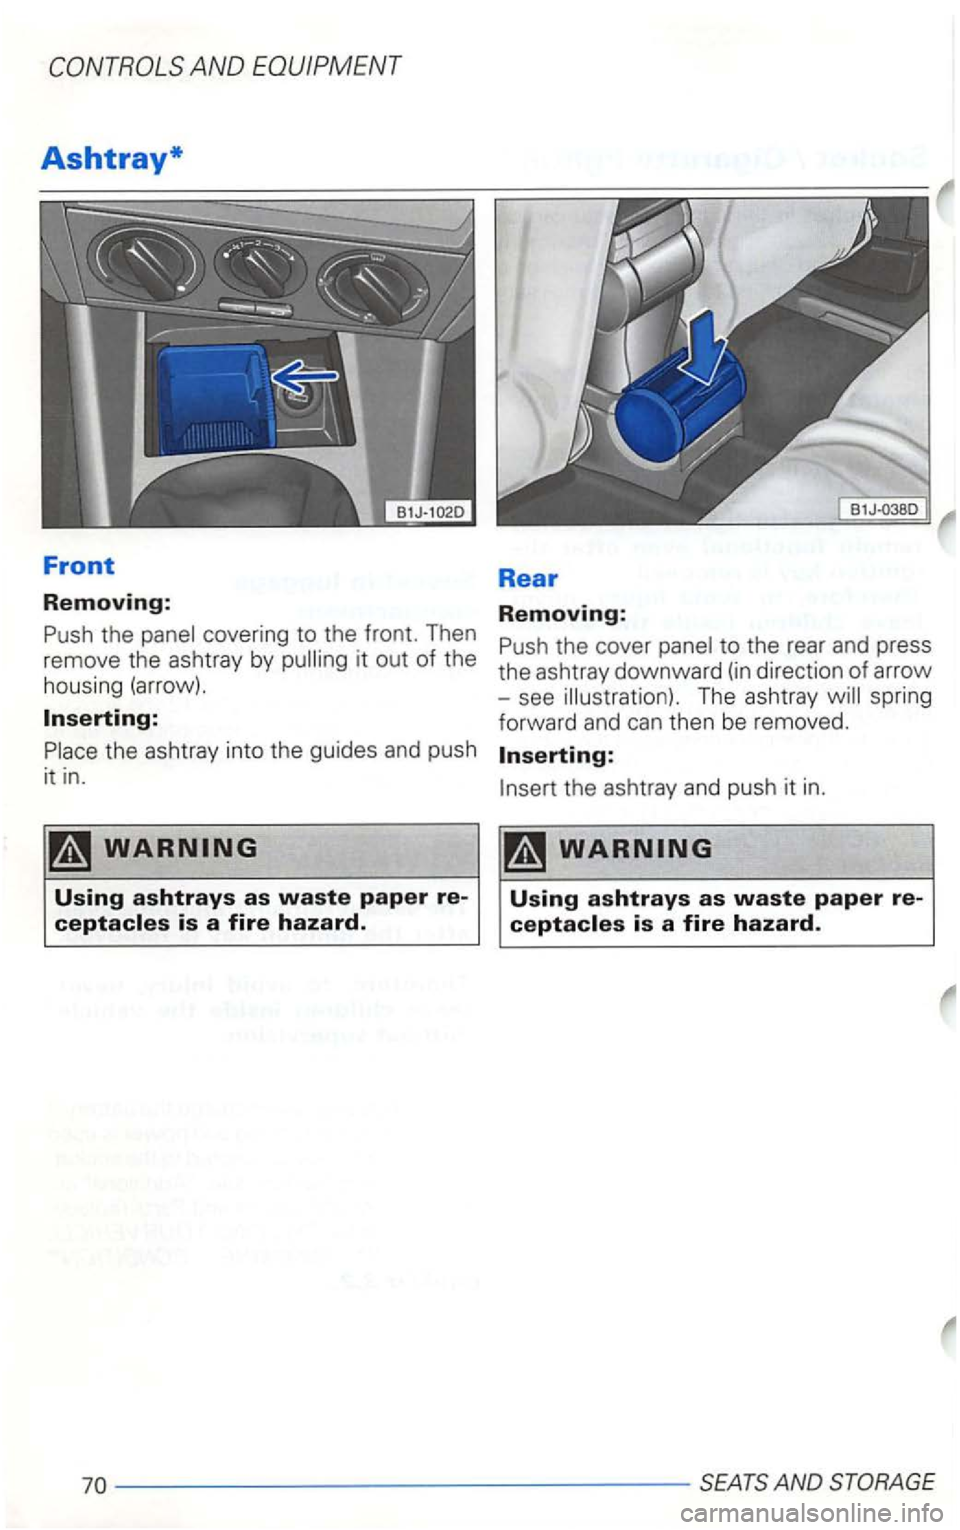
Front
Removing:
Push the panel covering to the front. Then
remove the ashtray by
it out of the
housing (arrow).
Rear
Removing:
Push the cover panel to the rear and press
the ashtray downward
(in direction of arrow
- see illustration). The ashtray will spring
forward and can then be removed.
Place the asht r
ay into the guides and push
it in. the ashtray and push it in.