VOLKSWAGEN GOLF 2003 Owners Manual
GOLF 2003
VOLKSWAGEN
VOLKSWAGEN
https://www.carmanualsonline.info/img/18/55622/w960_55622-0.png
VOLKSWAGEN GOLF 2003 Owners Manual
Trending: air conditioning, spark plugs, technical data, engine coolant, emergency towing, ECO mode, alternator
Page 201 of 474
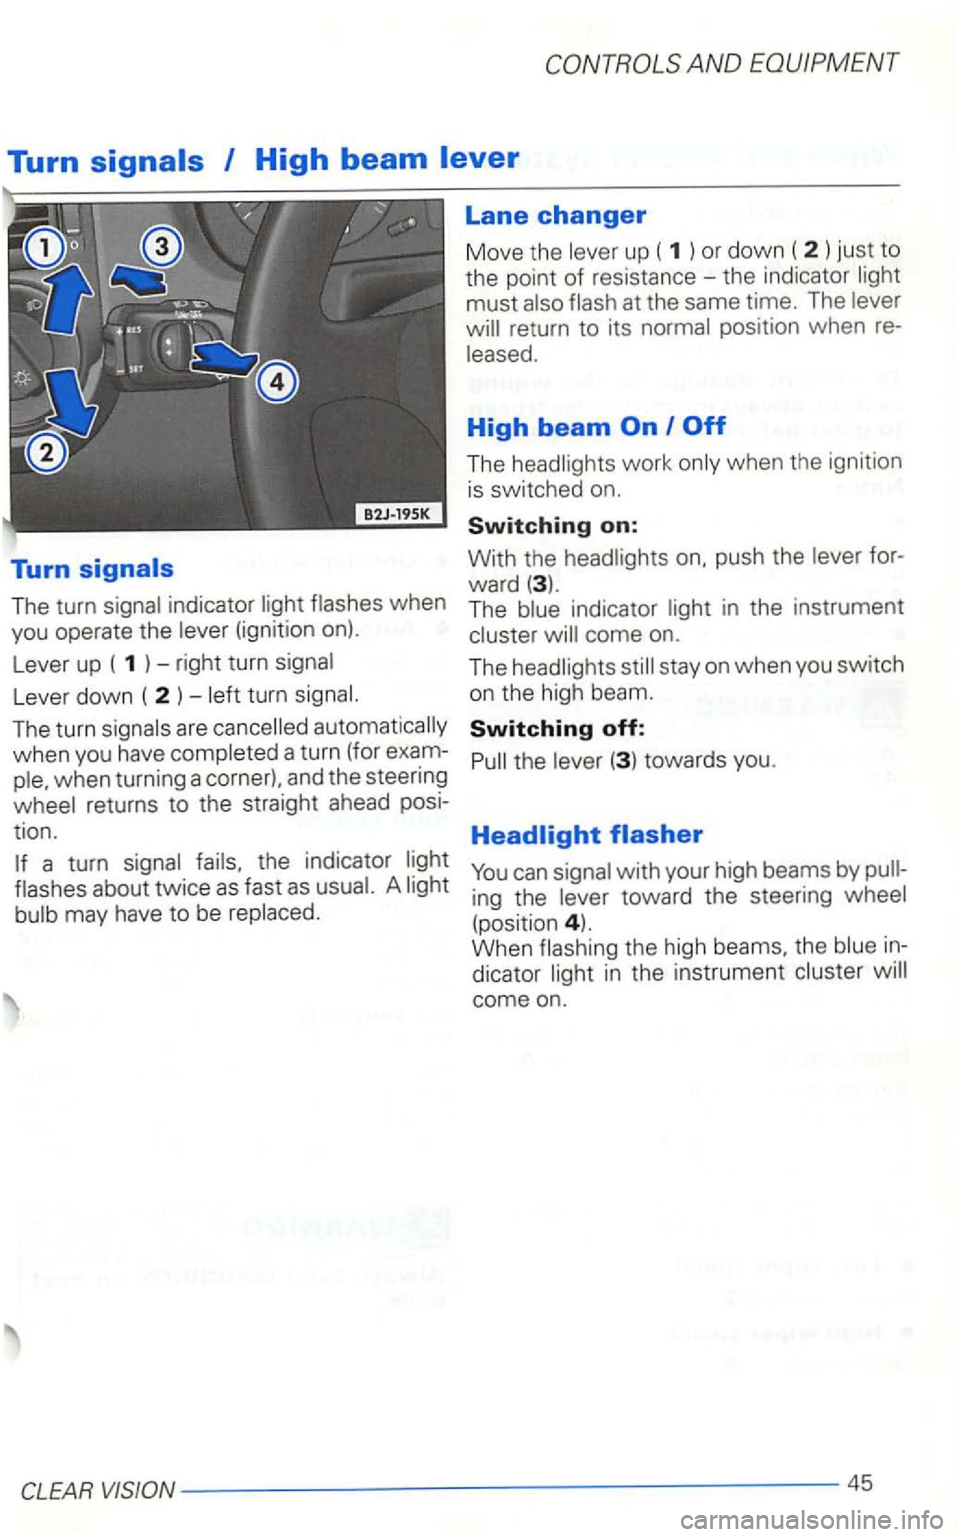
Turn
The turn when
you operate the
(ignition on).
L ever
up ( 1 ) -right turn
Lever down ( 2 ) -
automatically
when you have
the indicator
about twice as fast as
Lane changer
Move the
return to its position when re
High beam I
The
indicator in the instrument
come on.
The
You can with your high beams by
(position 4). When
come on.
Page 202 of 474
Filling washer container,
see
washer AND Booklet 3.2. f or further details.
Replacing wiper see page 46.
on page 47.
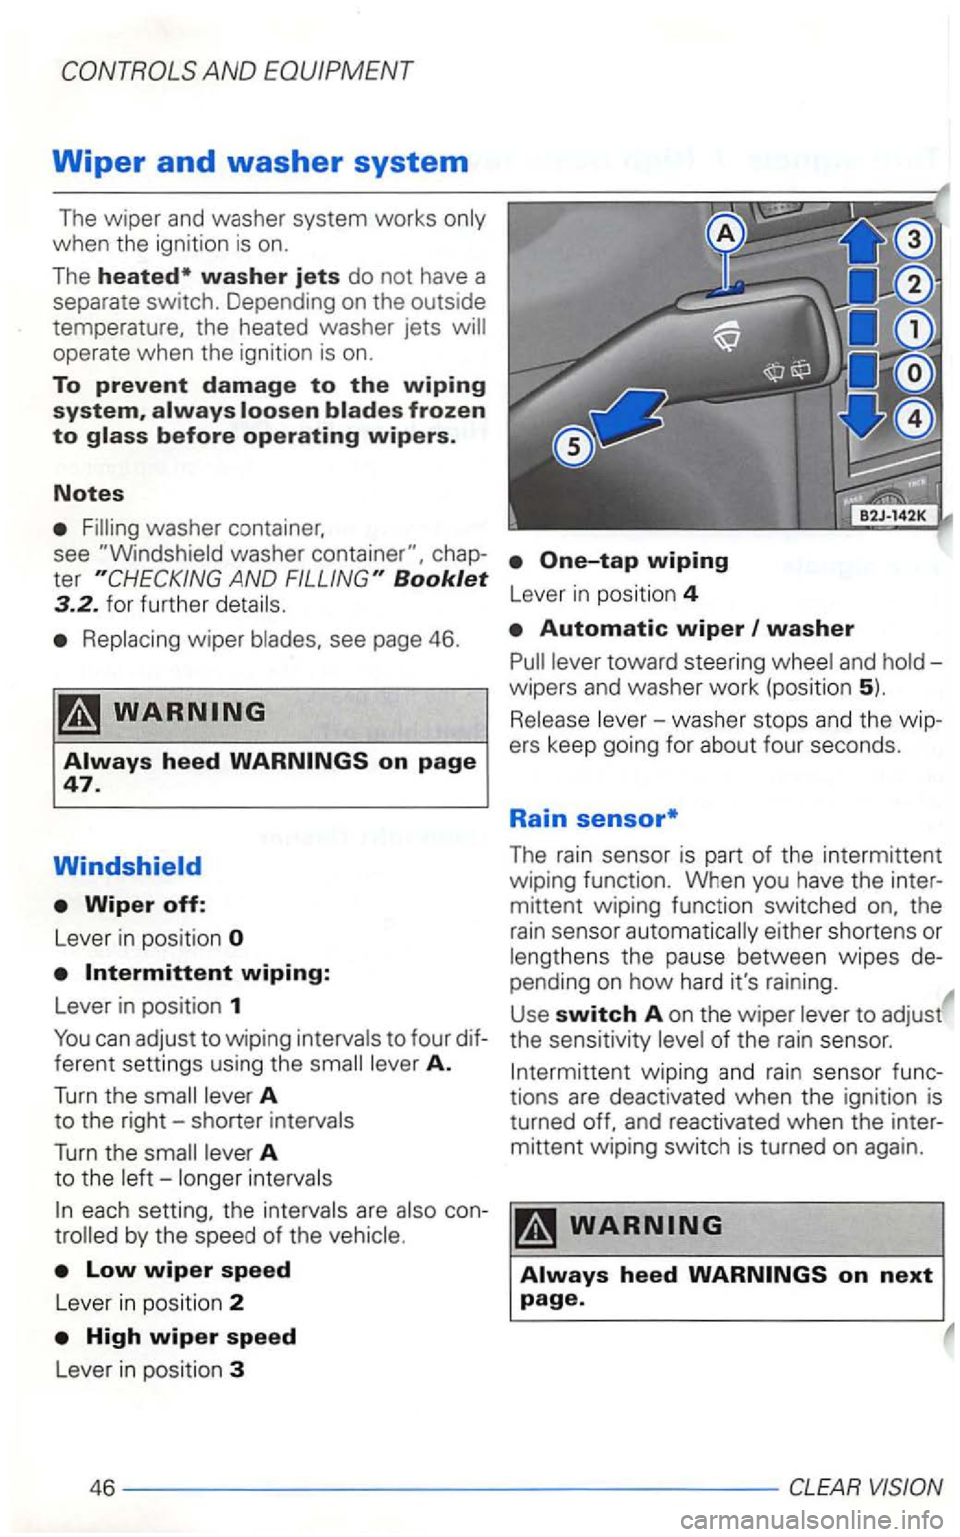
Wiper off:
Lever in pos it ion
the rain senso r automatically either shortens or
l engthens the pause between wipes de
pending on how
hard it's ra ining.
U se
switch A on the wiper lever to adjust
the sensitivi ty leve l of the rain sensor.
Int ermittent wipi
ng and rain sensor func
tions are deact ivated when the ignition is
turned
Page 203 of 474
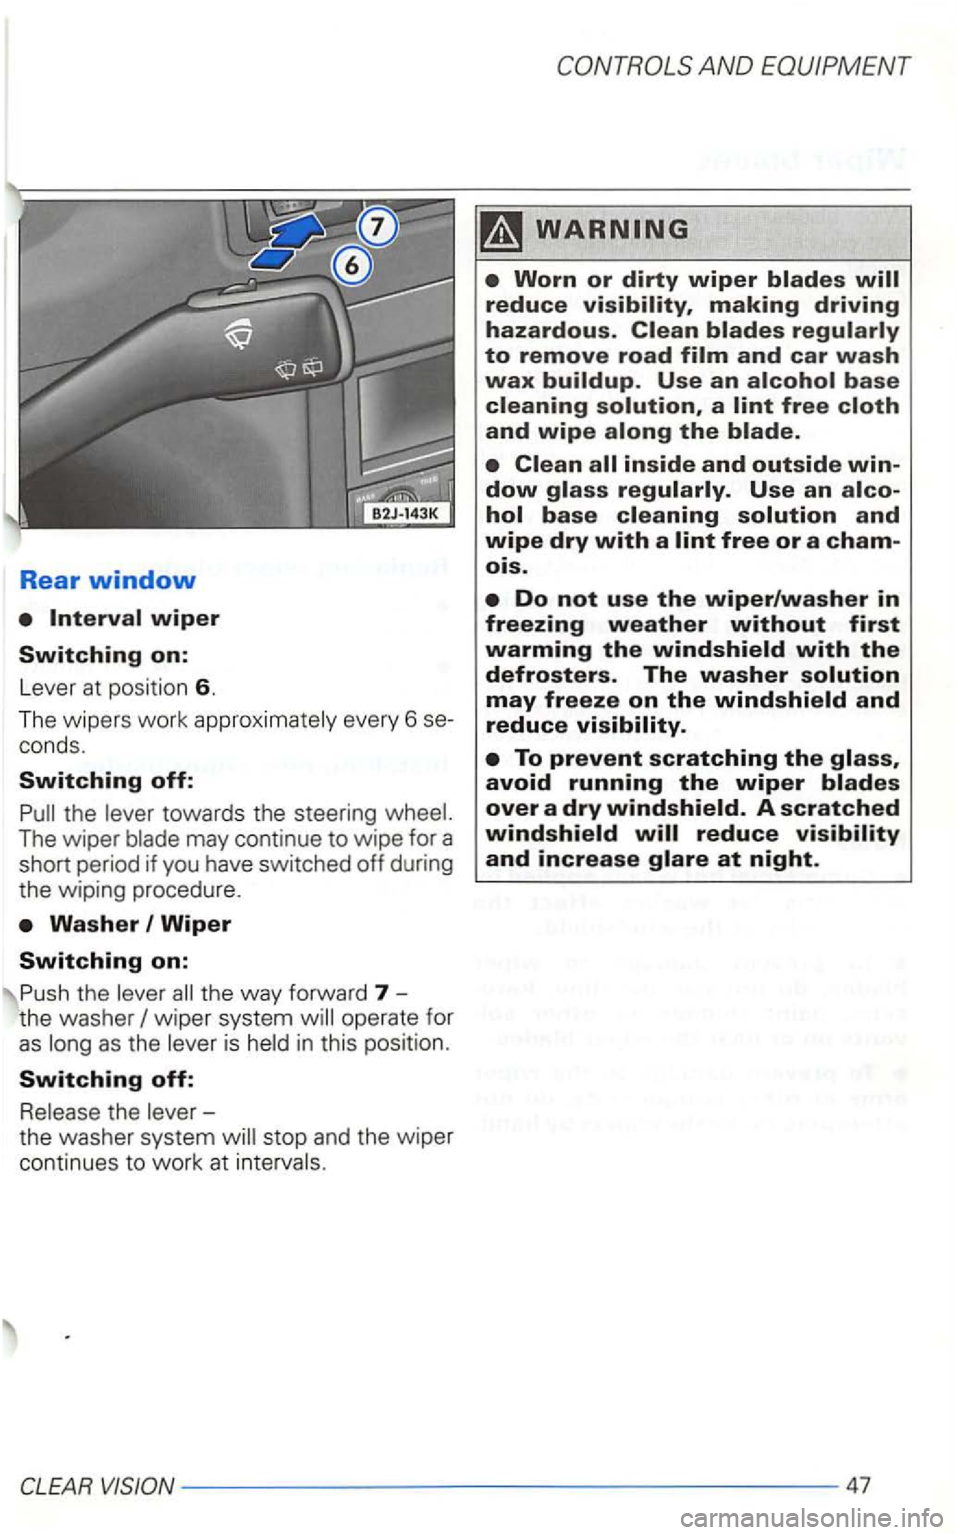
Rear window
wiper
Switching on:
Lever at posi tion 6.
The wipers work approxima tely every
6
conds .
Switching off:
Washer I Wiper
Switching on:
the way forwa rd 7 the was her
the washer system
Use an
and wipe dry with a free or a
Do not use the wiper/washer in freezing weather without first warming the
To prevent scratching the avoid running the wiper
A scratched
VISION--------------------47
Page 204 of 474
Wiper
Wiper
the are very dirty, for
the wiper
be caused by residue on the
the
at your
to remove the residue.
To prevent damage to the wiping system, always loosen blades frozen
to
er
once or twice a year if necessary . er for
Notes
To prevent damage to wiper blades, do not use gasoline,
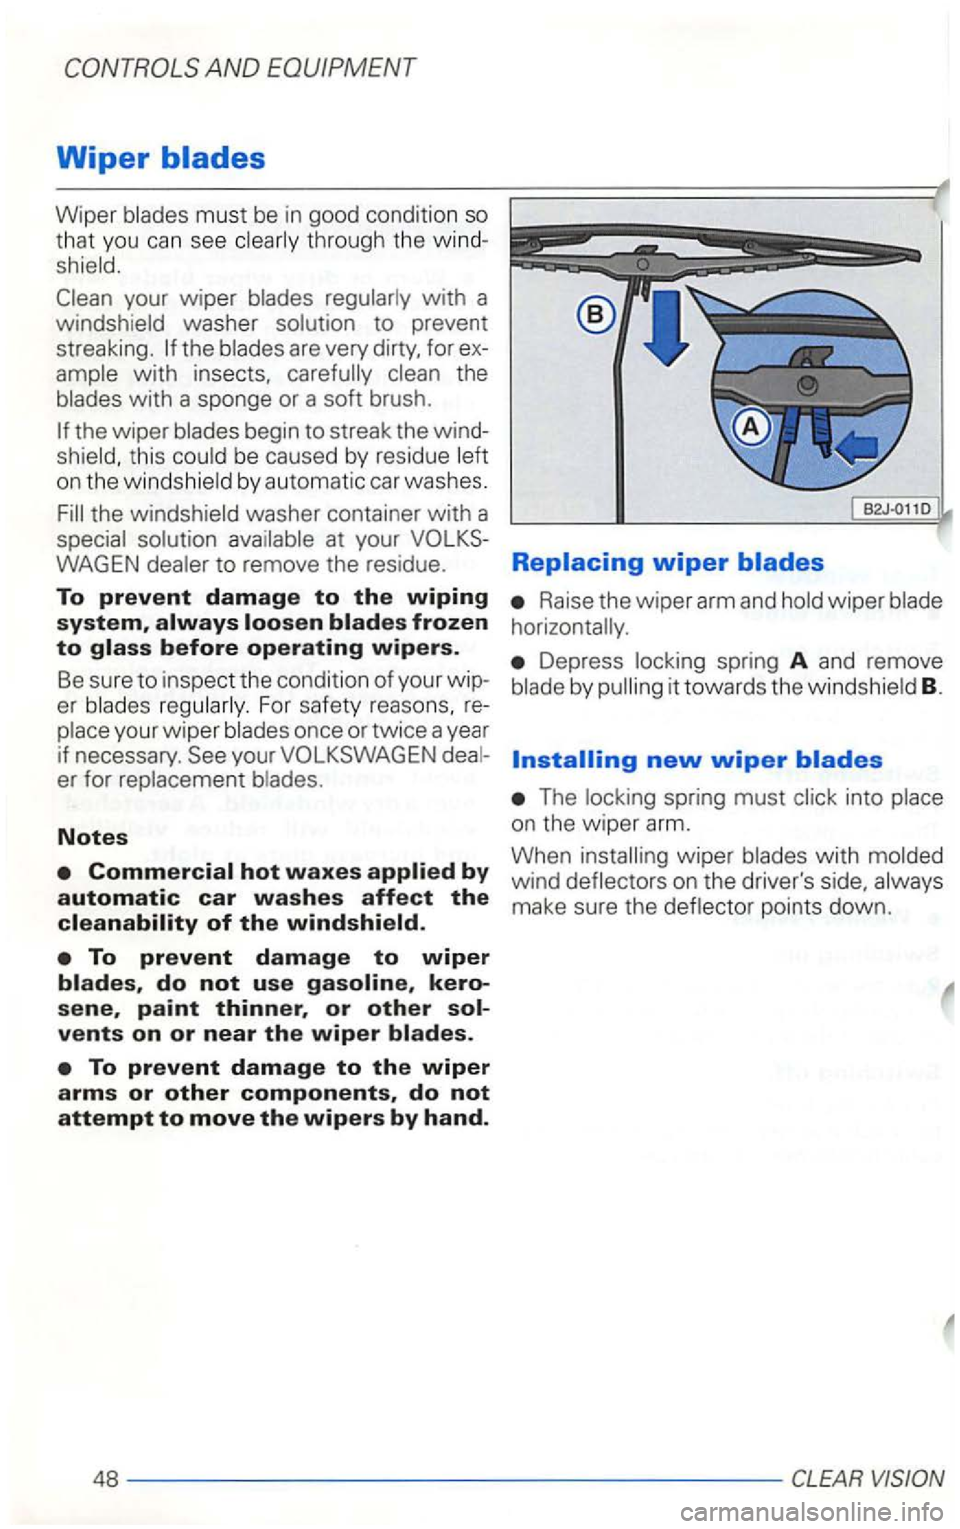
Raise the wiper arm and
Depress spring A and remove B.
The into
with
wind on the driver's side,
make sure the points down.
48
--------------------CLEAR
Page 205 of 474
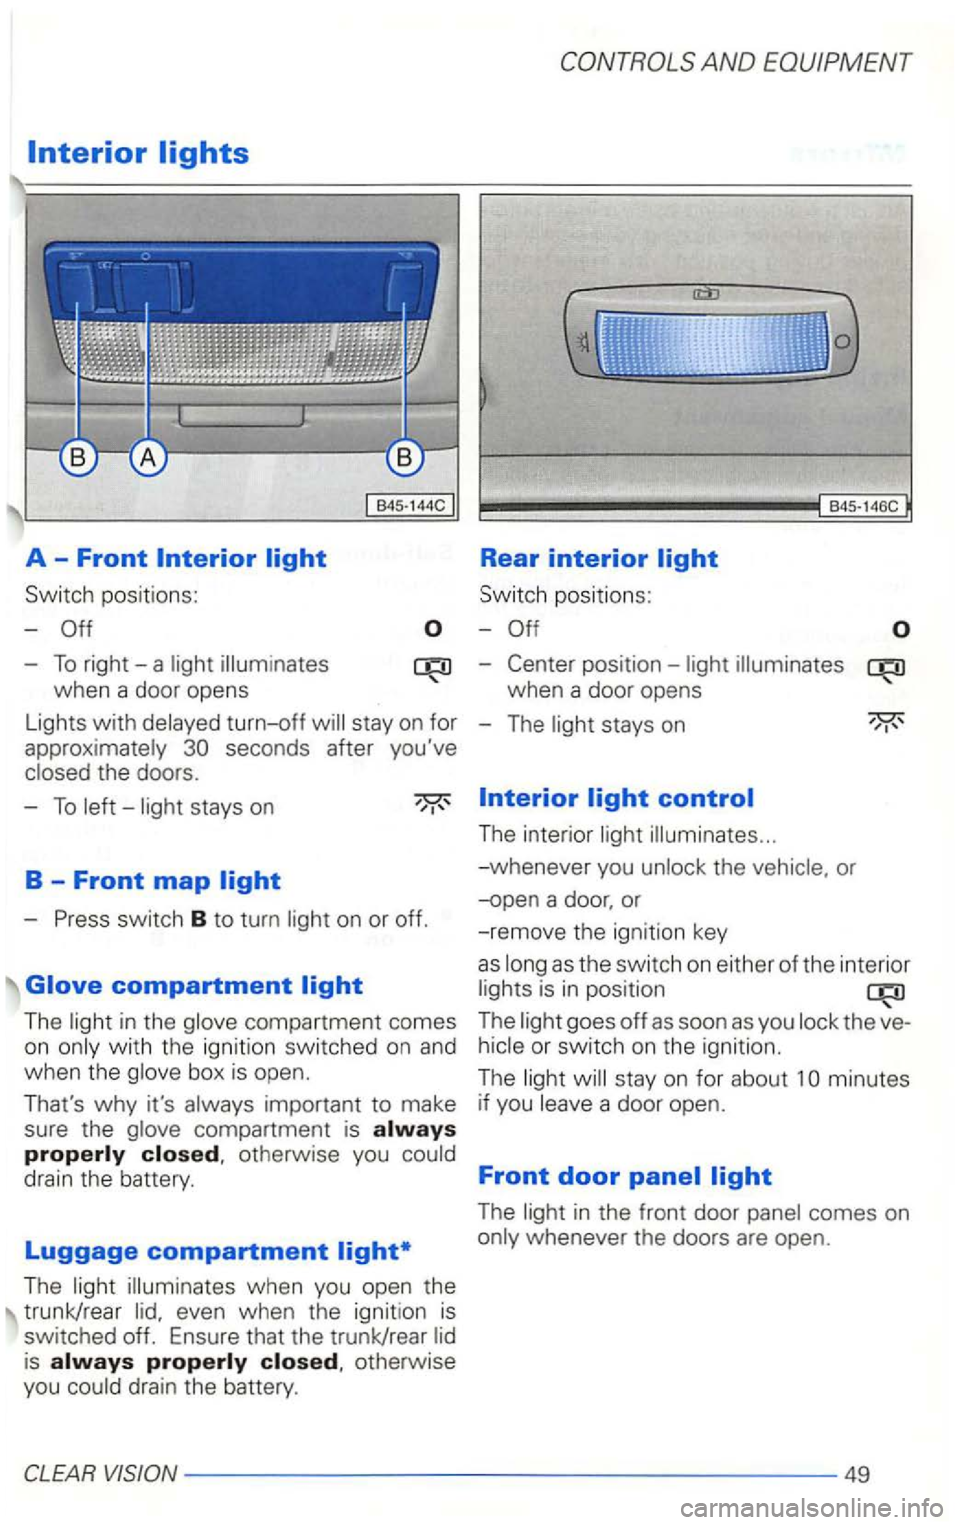
Switch positions:
-
-To right-a
Lights with turn-off
Sw itch positions :
-
-
when a door opens
-
The s tays on
-To stays on
-
The in the
impor tant to make
sure the
compartment is otherwise you
The when you open the
trunk/rear
is otherwise
you
drain the battery .
The interior ...
-whenever you
as the switch on either of th e interior
is in position
The goes off as soo n as you the ve
stay on f or about 1 minutes
if you
The whenever the doors are open .
CLEAR VISION
--------------------49
Page 206 of 474
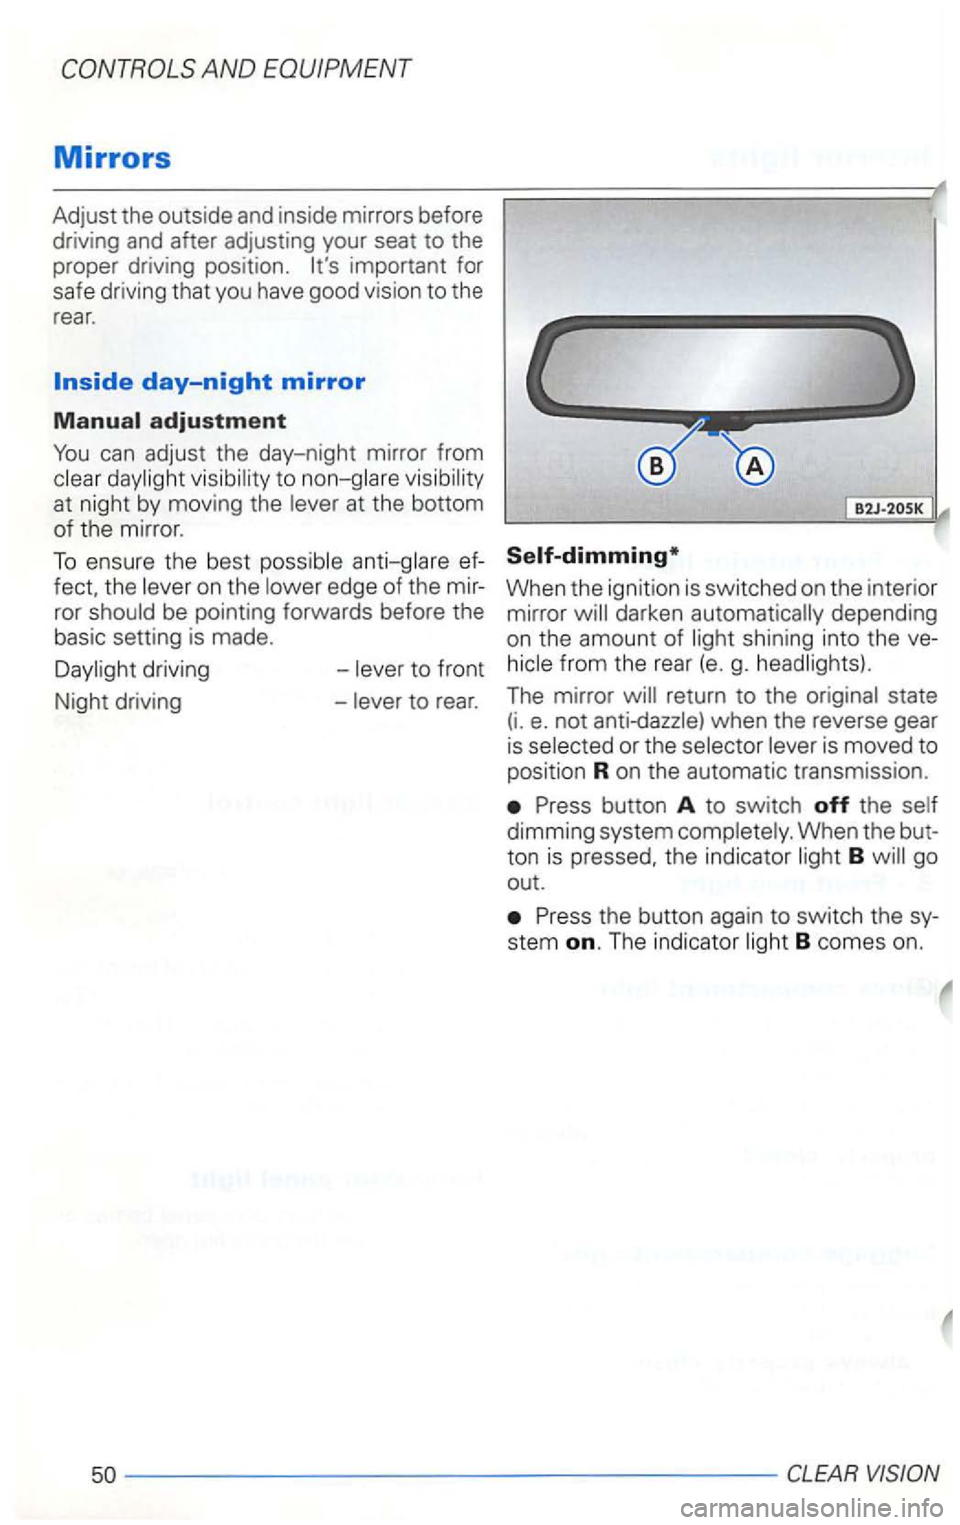
can adjust the day-night mirror from
at night by mov ing the
edge of the mir
ror
be pointing forwards before the
basic setting is made. When the ignition is switched on the interior
mirror darken automatically depending
on the amount of shining into the ve
from the rear (e. g.
return to the
or the is moved to
position
R on the automatic transmission.
dimming system B go
out.
the button again to switch the sy
stem on. The indicator B comes on.
50--------------------
Page 207 of 474
Outside mirrors
The outside mirrors are hinged and yield
when pushed from either direction.
Adjust the outside mirrors so that the side
of your own vehicle
can just be seen. This
setting ensures the best possible field of
view
and enables you to check the mirror
setting at a glance.
appear smaller and farther away than when seen in a flat mirror.
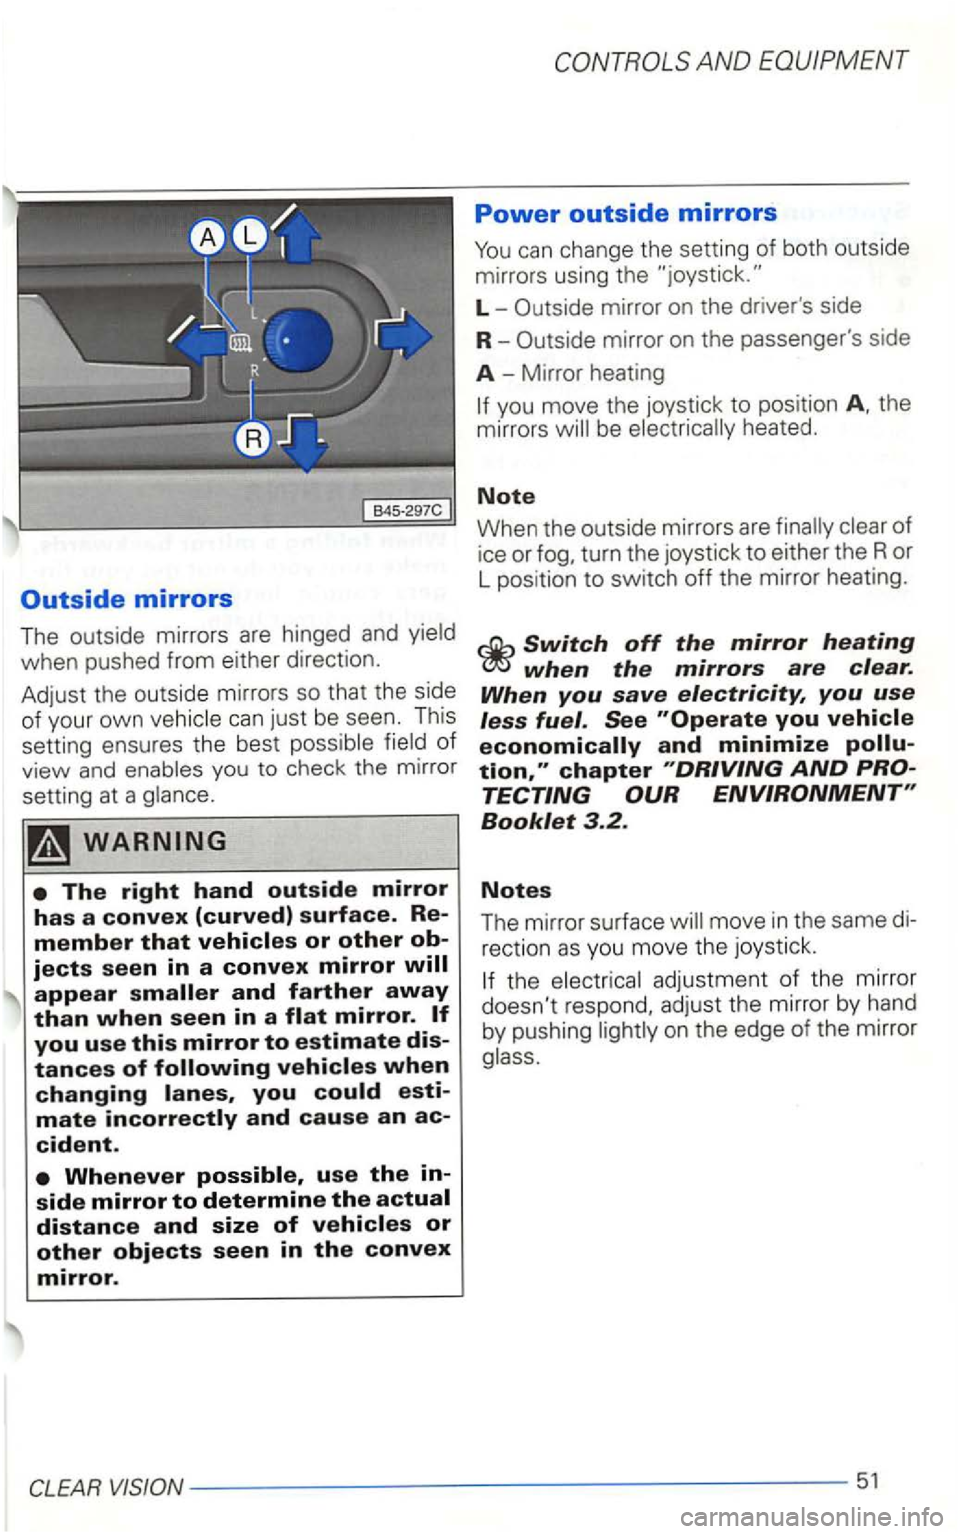
L -
mirror on the passenger's side
A -Mirror heating
If you move the joystick to position
when the mirrors are clear.
When you save electricity, you use
less fuel. See
Page 208 of 474
you adjust the driver's outside mirror
(l ) using the the passenger's
mirror
the
on the edge of the mirror
glass.
Page 209 of 474
Coat hooks
coat hooks are integrated into the rear
tended for your convenience.
The
ing. Do not
which may interfere with the side airbag
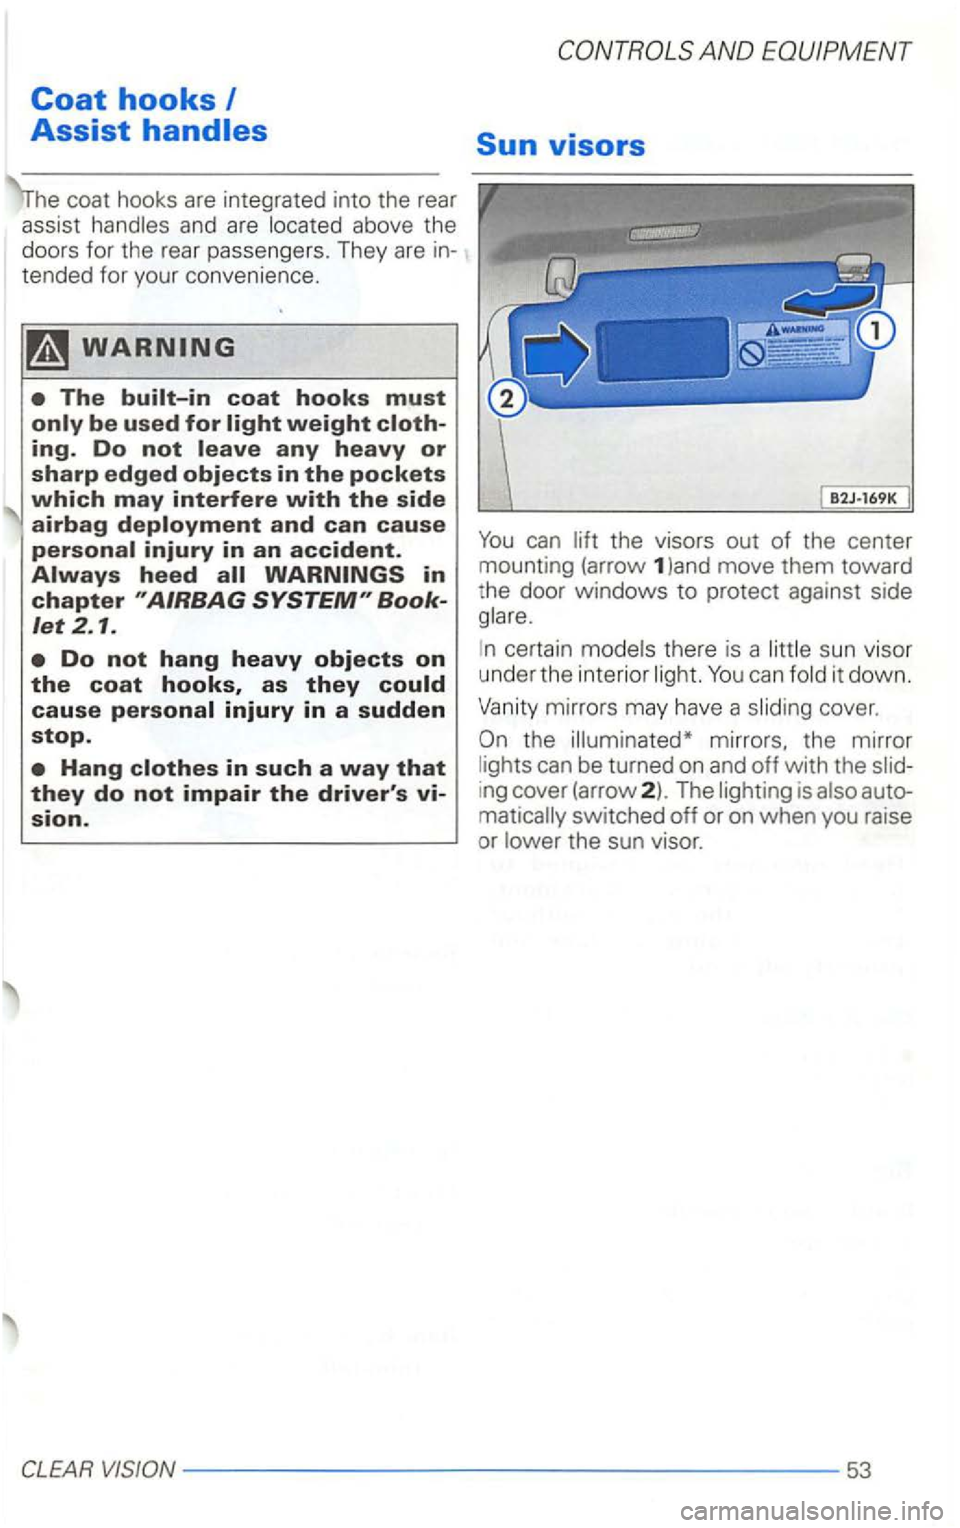
certain can
cover.
mirrors, the mirror can be turned on and off with the ing cover (arrow 2). The is
VISION--------------------53
Page 210 of 474
Head restraints
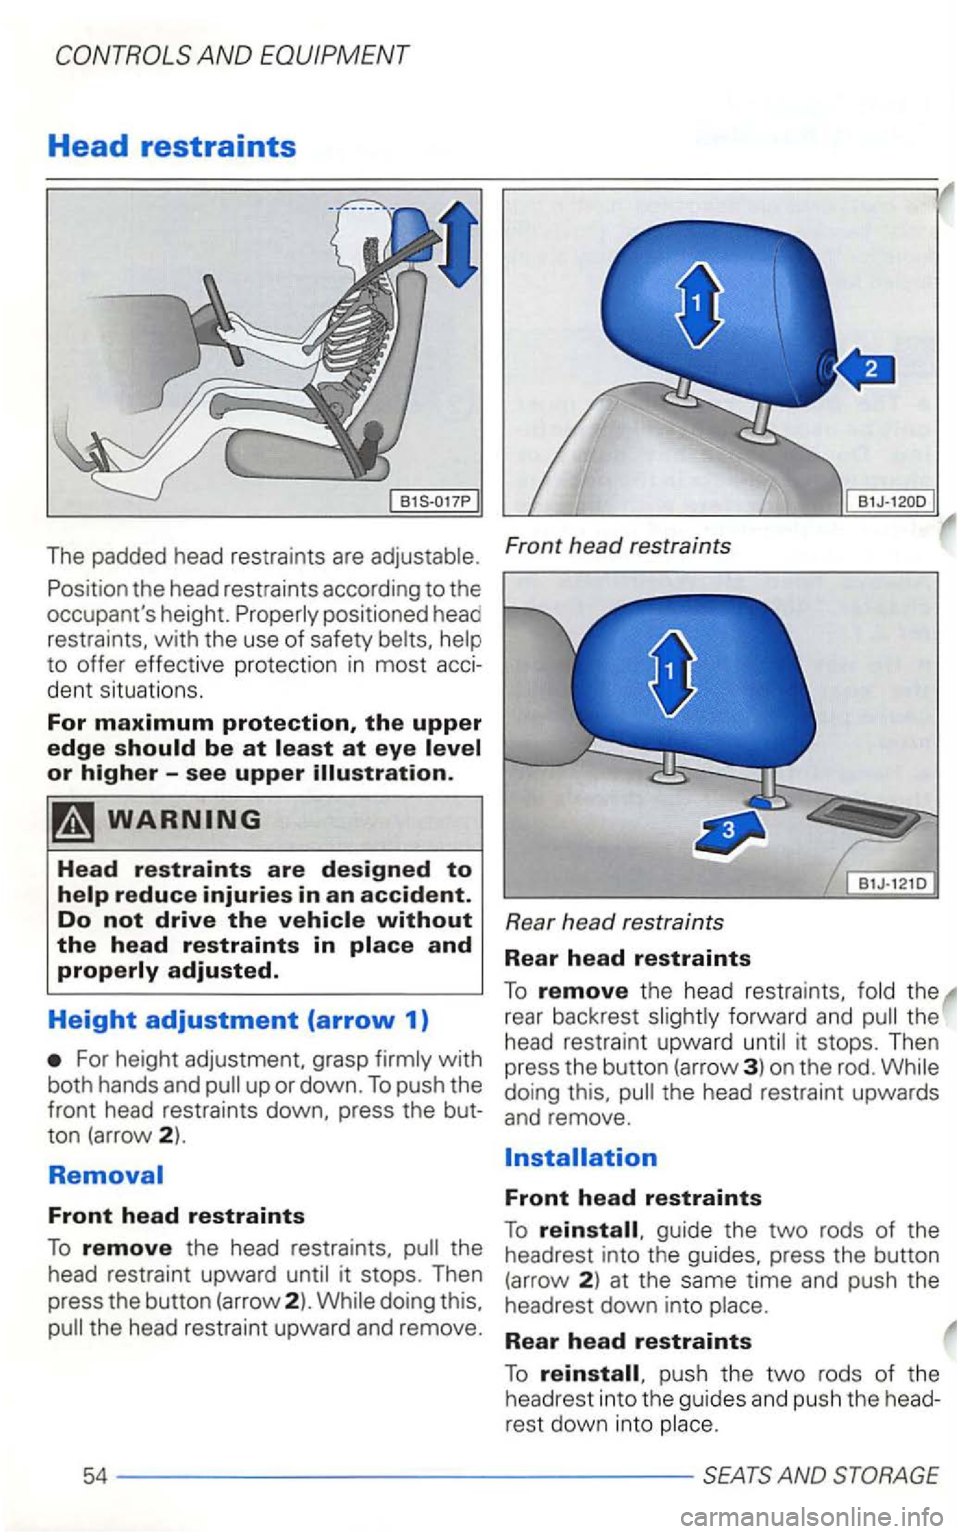
The padded head restraints are adjustable .
Position the head restraints according to the
occupant's height.
dent situations .
For maximum protection, the upper edge
For height adjustment, grasp with
both hands and
up or down . To push the
front head restraints down, press the
Front head restraints
To remove the head restraints,
doing this.
the head restraint upward and remove.
Front head restraints
R
ear head restraints
Rear head restraints
To remove the head restraints,
it stops. Then
p ress the button (arro w 3) on the rod. doing this. the head restraint upwards
and remove.
Front head restraints
To guide the two rods of the
headrest into the guides. press the button
(arrow 2) at the same time and push the
headrest down into
Rear head restraints
To push the two rods of the
headrest into the guides and push the
54-----------------
Trending: clock, check engine, alarm, battery, radio, washer fluid, reset
