steering wheel VOLKSWAGEN GOLF 2008 User Guide
[x] Cancel search | Manufacturer: VOLKSWAGEN, Model Year: 2008, Model line: GOLF, Model: VOLKSWAGEN GOLF 2008Pages: 444, PDF Size: 92.7 MB
Page 132 of 444
BAG light does not go off when an adult is sitting on the front
passenger scat after taking the s te p s described
above, make sure the adult i s properl y seated
and r estrai ned at one of the rear seating posi
tions.
Have the a irba g sys te m inspecte d by your authorized Volkswagen dealer or qualified
workshop before transporting anyon e o n th e
front passenger seat.
be turn ed off, and th e BAG light on.
o r th e front passe nger sa fety belt its elf is buckled and th e
f ru nt seat i s not occ upied . th e co me on.
Repair, care and
re moving, servicing or repairing a
Never cover, obstruct, or change the
steeri ng wheel horn pad or airbag cover or the in strument panel or m odify them in any
Never attach any o bj ects such as cup holders or te lephone mountings to the surfaces covering the airbag units.
For cleaning the horn pad or instrument panel, use only a soft, dry cloth or one moi st
e ned w ith plain water. Solvents or cleaners
co uld damage the airbag cover or change the
s tiffn ess or strengt h of the material so that the
a irbag cannot deploy and protect properly.
Never repair, adjust, or change any parts of the a irba g system.
All work on the steering wheel, instrument panel, front seats or ele ctri cal sys tem (in-
44 Airbag system
{ continu ed )
eluding the installation of audio equipment ,
ce llular te lephones and C B radios, etc.) must be performed by a qualified tech nici an who
h as the training and special equipment neces
sary.
For any work on the airbag s ys te m , we strongly recommend that yo u see you r authorized Volkswagen dealer or qualified work
shop.
Never modify the front bumper or parts of the vehicl e body.
Alwa ys make sure that the s ide airbag can inflate witho ut interference:
Neve r scat covers or rep lacement upholstery over the front scat backs that have no t been specifically approved by Volkswagen.
Never use additional seat cushions that cover the areas where t11e sid e a irba gs in
flate .
Damage to the original scat cove rs or to
th o scam in the area of tho side airbag module must always be re p ai red immediate ly by an authorized Volkswagen deale r or qualified workshop.
The airbag sy stem can be activated only
o n ce. After an airba g has inflated, it must be replaced.
trained t echnician who has th e necessary
too ls and diagnostic equipment to properly
Page 165 of 444
belts 13, 19
Extender 23
How can I adjust the heigh t o f my safery
belt? 25
How
do you put on you r safery belt
correct l
y? 19
Improperly worn 26
Installing child restraint 63
Not worn
16
belt position 21
instructio ns 17
Specia l consid erations for pregnant
women 22
Switc hab le locki ng feature 65
Unfa stening safe ty belt s 25
Warning light
14 What happen s to occupants not wearing
safety
belt s? 16 Why assume the co rrect seatin g
position? 28
W hy safery belts protec t? 17
Why wear safery belts? 15, 28
belts protect 17
Monitoring the Advanced Airbag
43
seatin g positi on for the driver 4
seating position for the front
passenger 5
belt extender 23
Curtain airbags 52
Seating capacity 13
Sea ting position Distance between driver and steering
wheel 4
Driver 4
Front
passenger 5
Improper seat in g positi on s
4
Rear
passe ngers 6
air bags 46
Description 46
Ho w
they work?
in structio n s 48
airbags
Desc ripti
on
How they work? 5 1
instructions 52
Steer ing w hee l
Distance
to the driver 4
Sw itchable locking f
eature
Activating 65
Deactivating 67
T
Tether anchors 68
T
ether strap 69
Tie -
downs 12
Torn or f rayed safety bel ts 1 7
Trunk
u
Unfasten ing
belts 25
Upholstery
v
Ventil ation slit s ll
w
Wa rning light
belts 14
Wa rnin g lights
Page 173 of 444
Booklet 3.1 Controls and Equipment
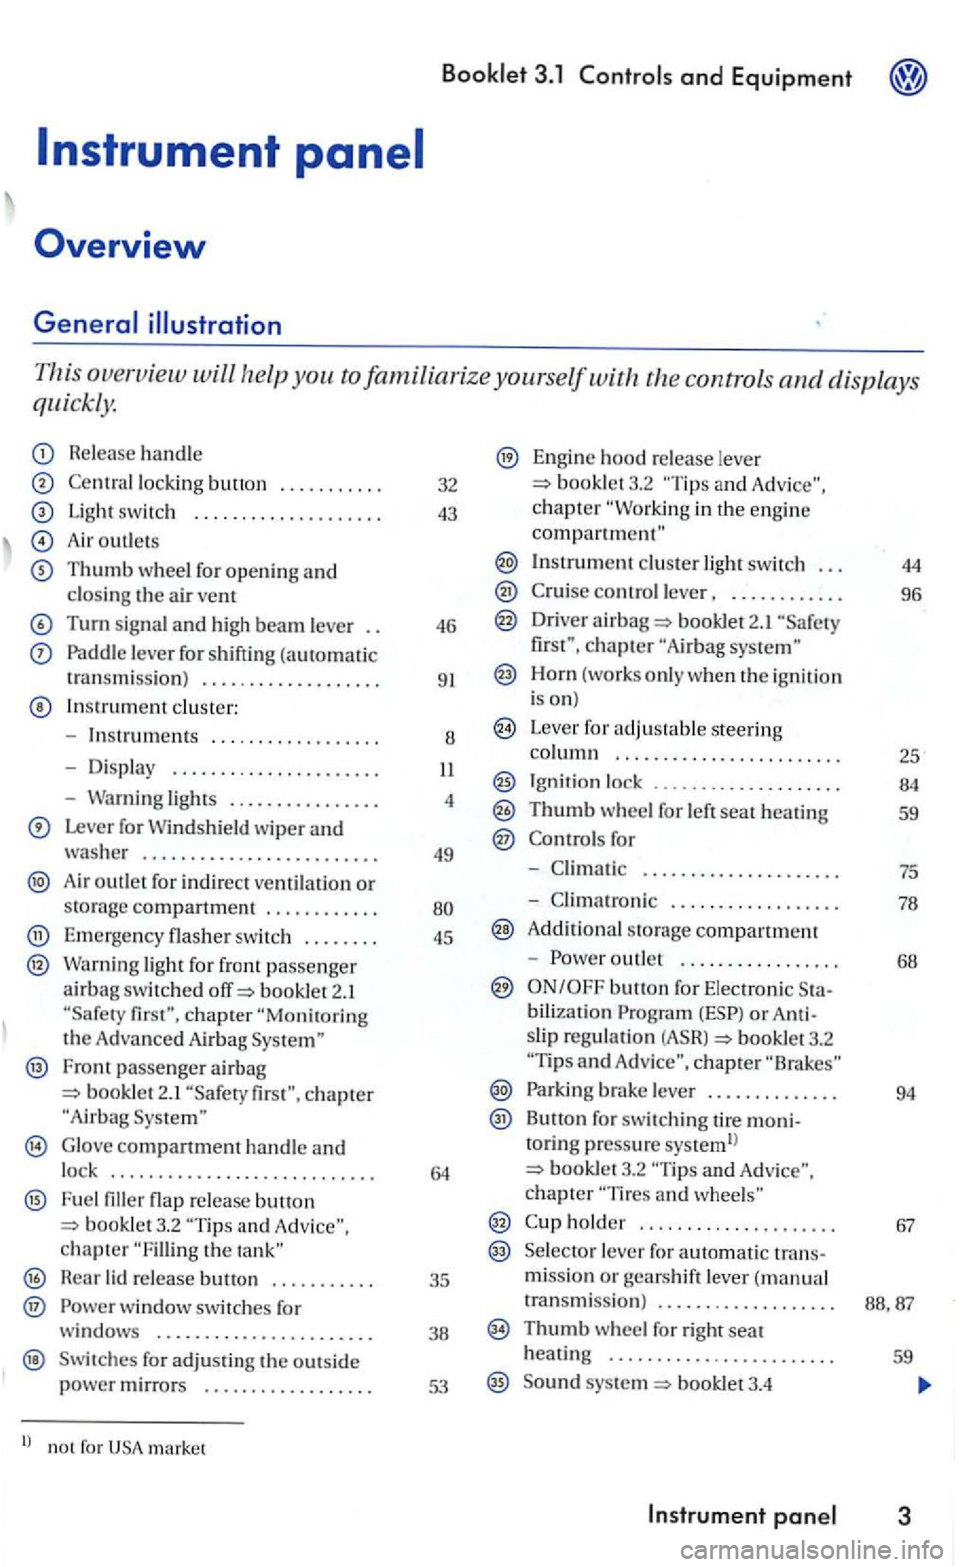
This overview will the controls and displays
quickly.
Release handle
lock ing button ...... .... .
Light switc h ................... .
Air outlet s
Thumb wheel for opening and closin g the a ir vent
Turn signal and high beam leve r
Paddle leve r for shifting (automatic
t ransmiss ion ) .................. .
In strument cluste r:
- Instru
ments ... ...........• ...
- Dis pla y ..
-Warning lights ............... .
Lever for Windshield wiper and washer ........................ .
Air outlet for in d irect ventilatio n or storag e compartment ........... .
Emerge ncy flasher sw itch ....... .
Warning light for front passenge r airbag switc hed booklet 2.1
Fron t passenger airbag bookle t 2.1
G lo ve compartment handle and lock ........................... .
F u e l flap re lease button and chapter the
H ear lid re lease .......... .
® w indow switches for
windows ...................... .
Swit ches for adjus ti n g the outs id e power mirrors ................. .
l) no t for market 32
43
46
9
1
8
4
49
45
35
38
53
Engine hood re lease lever booklet3.2 and c h a pter in the engin e compartment"
Instrument cluster light switch . . . 44
control lever, . . . . . . . . . . . . 96
Driver airba g 2.1 chapter
Horn (works o nly when the ig niti on
i s on)
Leve r for adjus table steering column . . . . . . . . . . .. . . . . . . . . . . . . 25
Ignit ion lock ...... 00............ 84
Thumb wheel for left seat heating 59
for
-. . . . . . . . . . . . . . . . . . . . . 75
- Climatro nic . . . . . . . . . . . . . . . . . . 78
A ddit iona l s torage compartment
-
outle t . . . . . . . . . . . . . . . . . 68
bilization or slip regulatio n booklet3.2 and chapte r
Parki ng brake lever . . . . . . . . . . . . . . 94
Button for switc hing tire moni-toring p ressure systemll booklet3.2 chapter
holder . . . . . . . . . . . . . . . . . . . . . 67
Se lecto r lever fo r automatic trans-missio n or gears h ift lever ( m anual
transmissi o n) . . . . . . . . . . . . . . . . . . .
Thumb w heel for right seat
heatin g . . . . . . . . . . . . . . . . . . . . . . . . 59
Sound syste m booklet3.4
Page 183 of 444
3.1 and Equipment
Failure to heed warning light s and other important vehicl e information can lead to a
breakdown in traffi c, collis io n and se rious personal injury.
Never ignore warni ng lights and warning m essages !
Wheneve r stall ed or stopped for repair,
m ove the vehicle a safe distance off the road,
s top th e e ngin e, and turn on th e emergency flas he r a nd use other warn ing dev ices to warn approaching traffic.
Before workin g in the engine compartment, always read and heed all WARNLNGS bookle t 3.2 in the engine The engi ne compartmen t of motor ve hicl e is a potentially dangerous area and can cause serio us personal injury .
Note
Failure to observe warning lights or wa rning
text s can cause damage to you r veh icle.
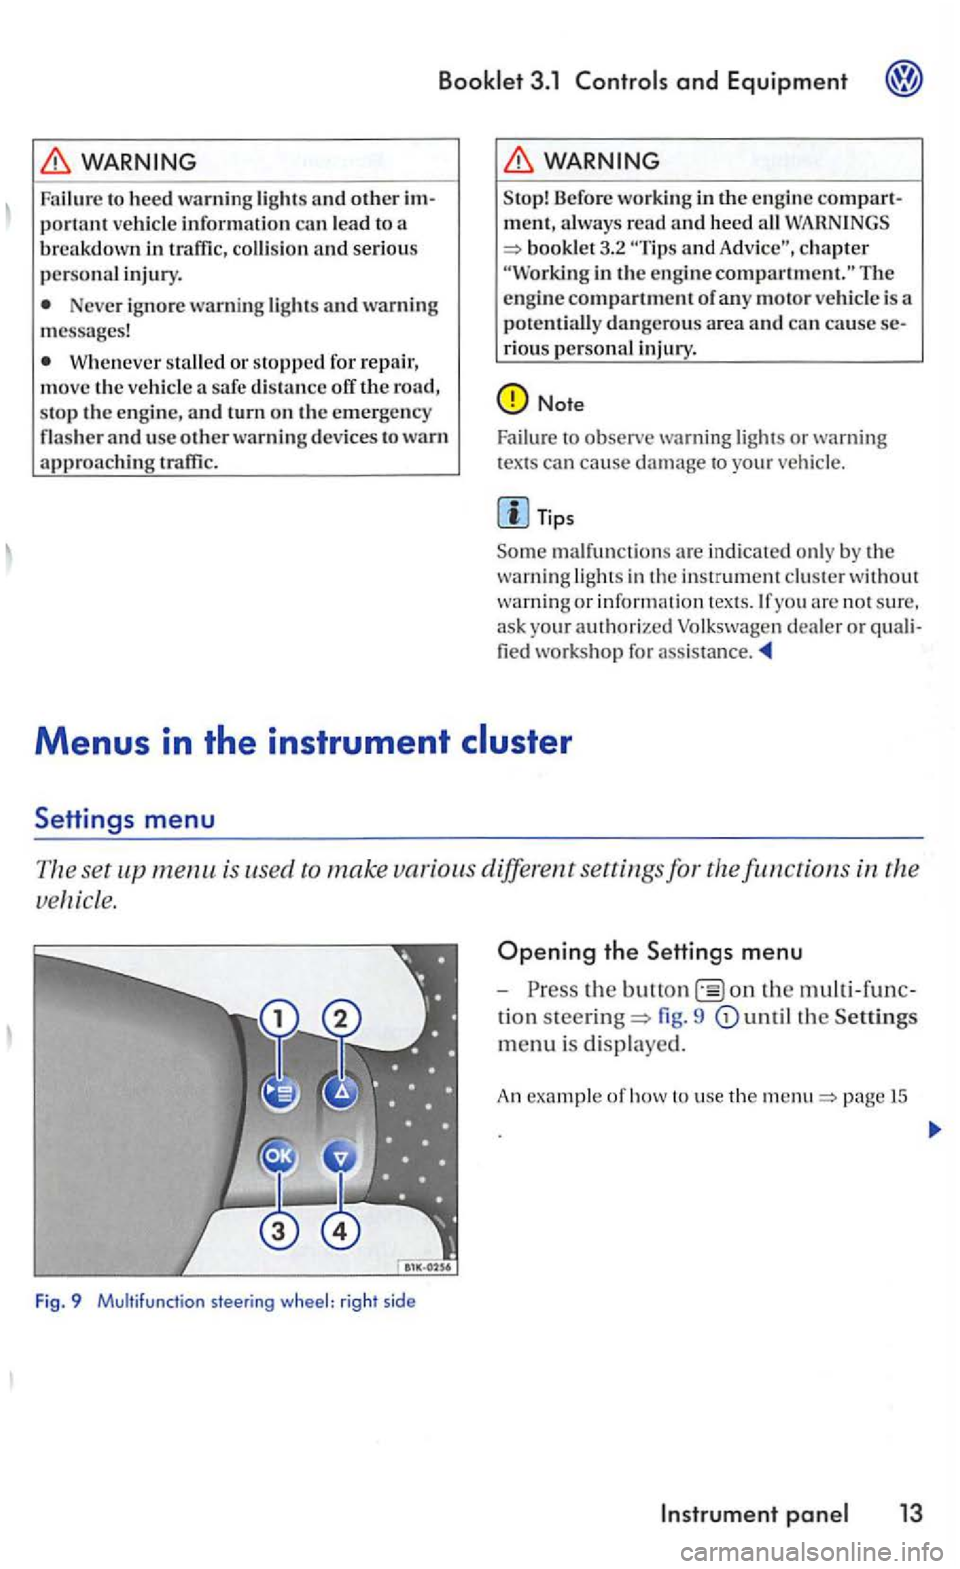
is used to make various different settings for the
Fig. 9 Multifunction steering wheel: right sid e
Opening the Settings menu
-the on the
tion steering= fig. 9
page 15
Page 185 of 444
Booklet 3.1 and Equipment
Co mfo rt indi c.
Factory settin g
Bac k
Display off
WARNING
Driver distraction can cause accidents and rious personal injury.
Neve r select menus w hen the ve hicl e is mov ing.
Tip s
The menus sh own in the display depends on the ve hicl e electron ics and the options i nstalle d on your ve hicle. you are not sure, ask you r thorized Volkswagen d ealer or qualified
authorized Volk swagen dealer or
T he menu can only be ope ned w hen th e ve hicl e is at a stan dstill.
Appl ies to with display area in the instrumen t and the
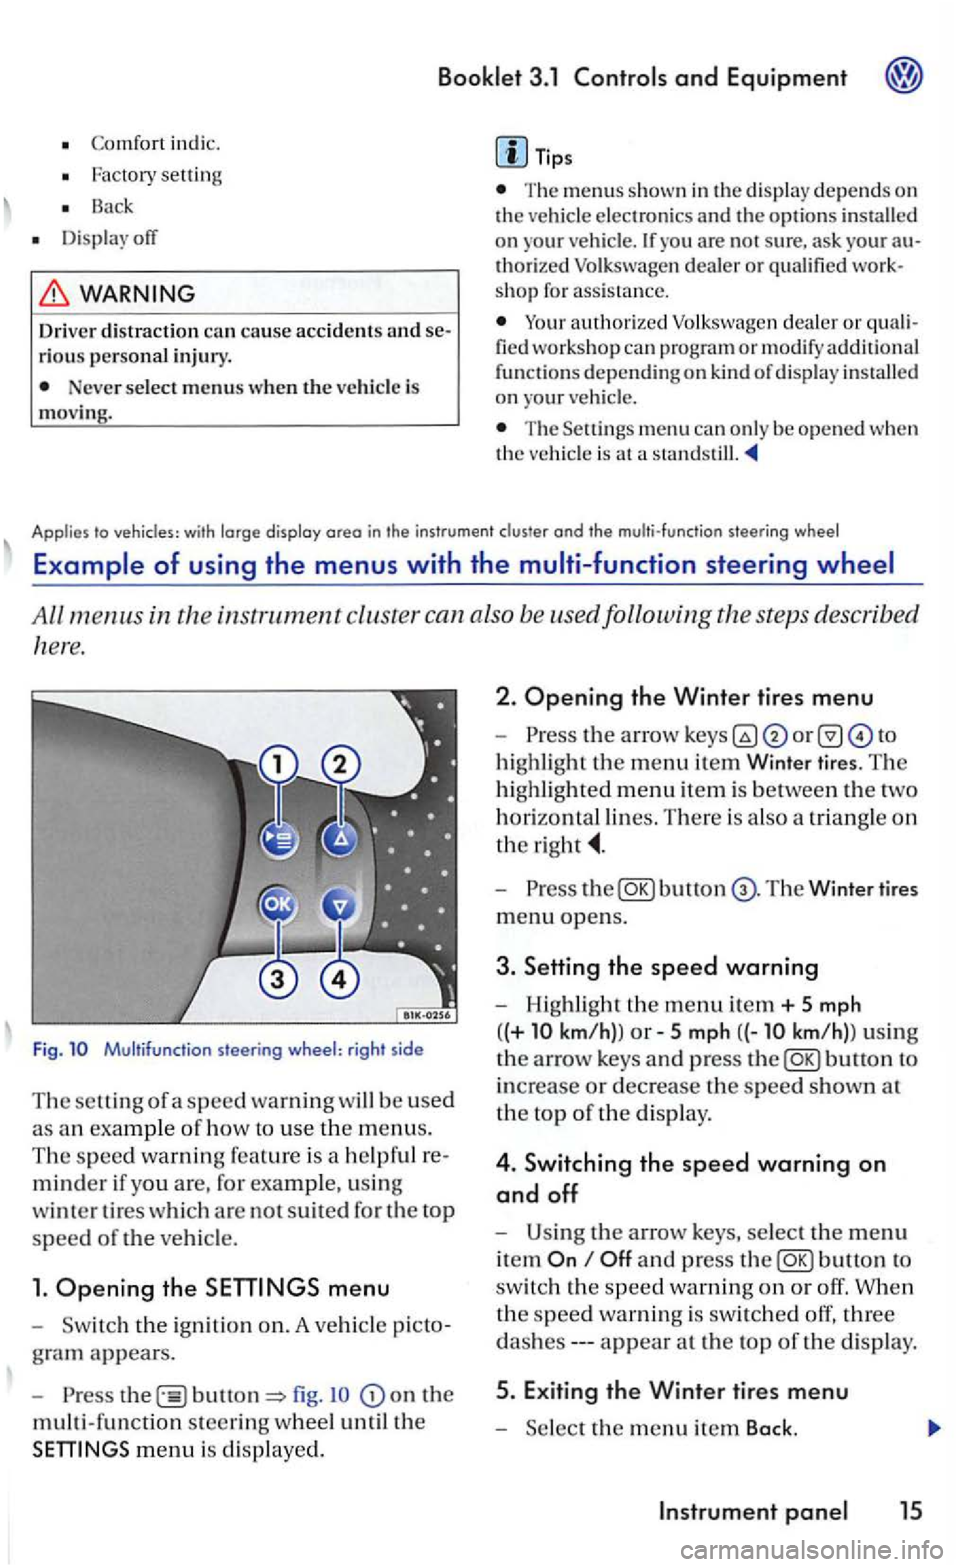
All m enus in the instrument cluste r can also be used following the step s describ ed
here.
F ig. Multifunction steering wheel: right side
Th e
minder if yo u are, for example, u sin g
w int
er tir es which are not suit ed for th e top
speed of the ve hicle.
1. Opening the
the ign itio n on. A ve hicle
fig . on the
multi-funct ion steerin g w heel until the
Opening the Winter tires menu
-or to
highlight
the m enu item Winter tires . The
highl ighted menu item is between th e two
horizo ntal lines. Th ere is a lso a triang le on
the
-bu tto n T he Winter tires
m enu opens.
3. Setting the speed warning
- Highligh t the menu ite m + 5 mph
( (+
km/h)) 5 km/ h)l u sin g
th e
arrow keys and press
and p ress button to
switc h th e
speed warnin g on or off . When
th e s pee d wa rnin g is
swit ch ed off, three
appear at th e top of the displa y.
th e m enu item Back.
Page 186 of 444
3.1 and Equipment
T he function will generate ibl e has
r e a ched th e set speed.
The examp le menu Winter tires
+ 5 mph
Tips
Function
The name of the dis pl ayed menu
Displays the speed currently set or dashes if the fun ction is switched off .
Switches the fun ction on or off.
the set value by 5 mph km/h ).
Decre a ses the set value by 5 mph km/h).
The Winte r tires menu and th e last d isplaye d menu opens again.
The m enus s hown in the disp lay depends on the on
your are not sure. ask your rized Volkswage n dealer or qualified workshop for assis tance.
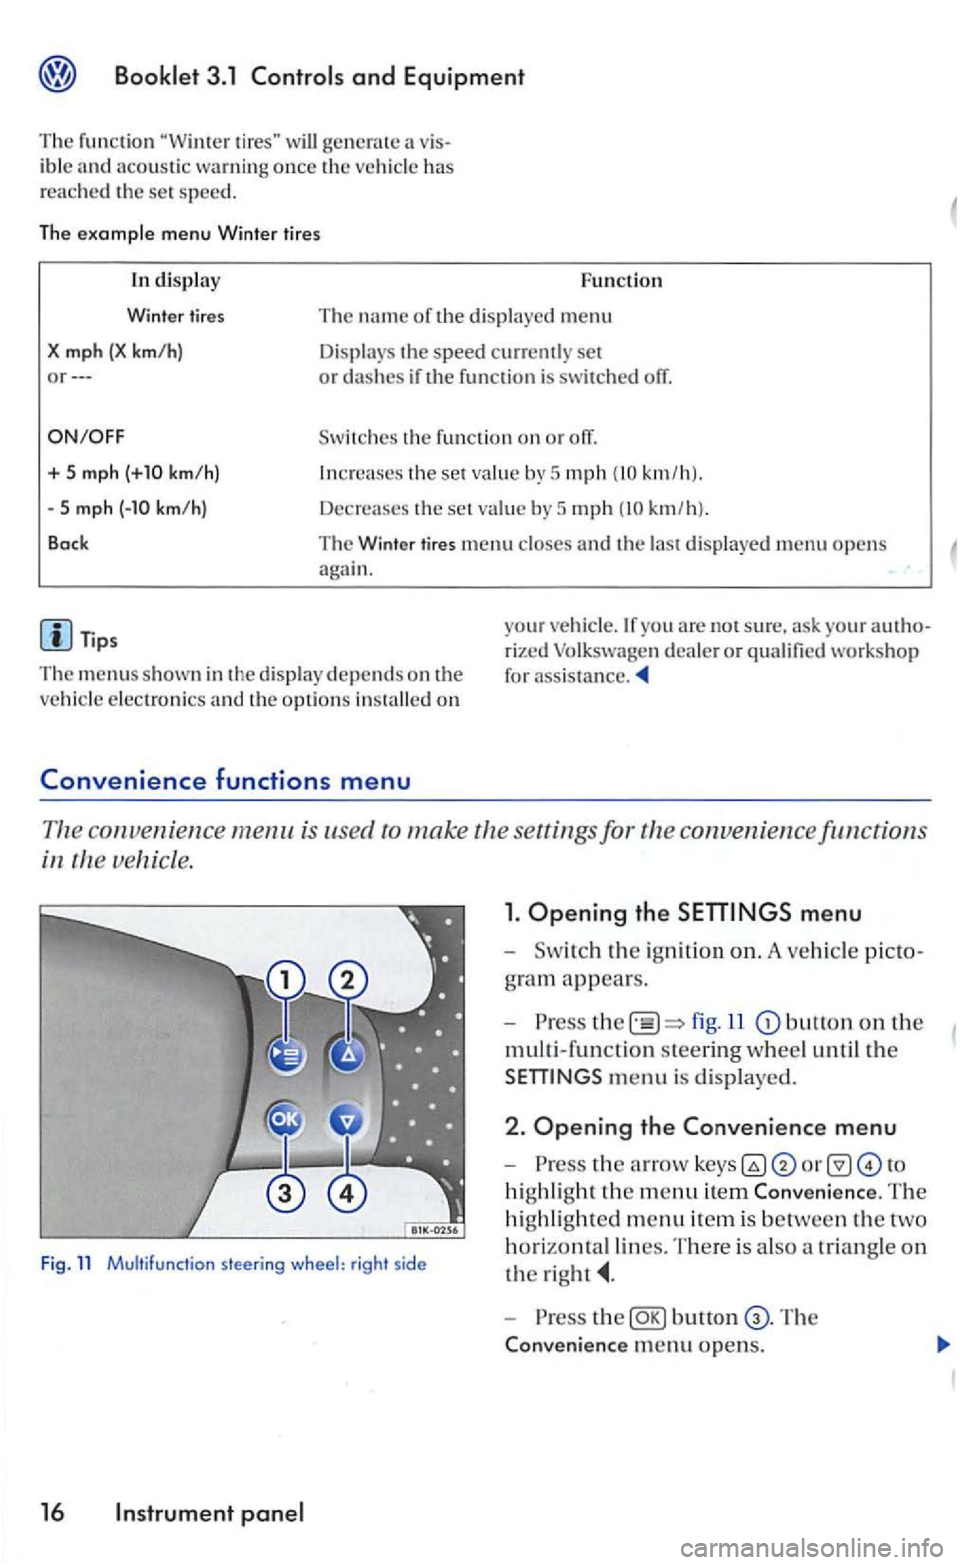
convenien ce menu is use d to make the
ve hicle.
Fig. 11 Multifunction steering wheel: right side
16
fig.ll button on the
multi-function steering w heel until the
the arro w to
highli ght the menu item Conveni ence. The
hi ghl ig
hted menu it e m is between th e
horizonta l lines. T here is a lso a triangle on
the
-the The
Conven i
ence menu opens.
Page 187 of 444
Convenience
Door open
ATA confirm
Conv. mode
Mirrors
adjust
Fa cto ry setti ng
Back
Booklet 3.1 and Equipment
Function
The ve hicle locks doors w he n the veh icle is m ov ing and unl ocks the doors w hen the key is remo ved from the ig n ition lock.
The activation of the q ui red.
Co nve
nience operation of the po wer windows: determines if the drive rs doo r window , windows or no window s ho ul d be ope ned when th e ve hicle is unlocke d. This function can only be activa te d
via the drive r's door.
The front passenger sid e mirror be adjusted automatically
of these fu nctio ns to the ori gin al factory ring s.
men u.
The menus shown in the dis p lay de pends on th e
ve hicle electron ics and the option s
Lights & Vision menu
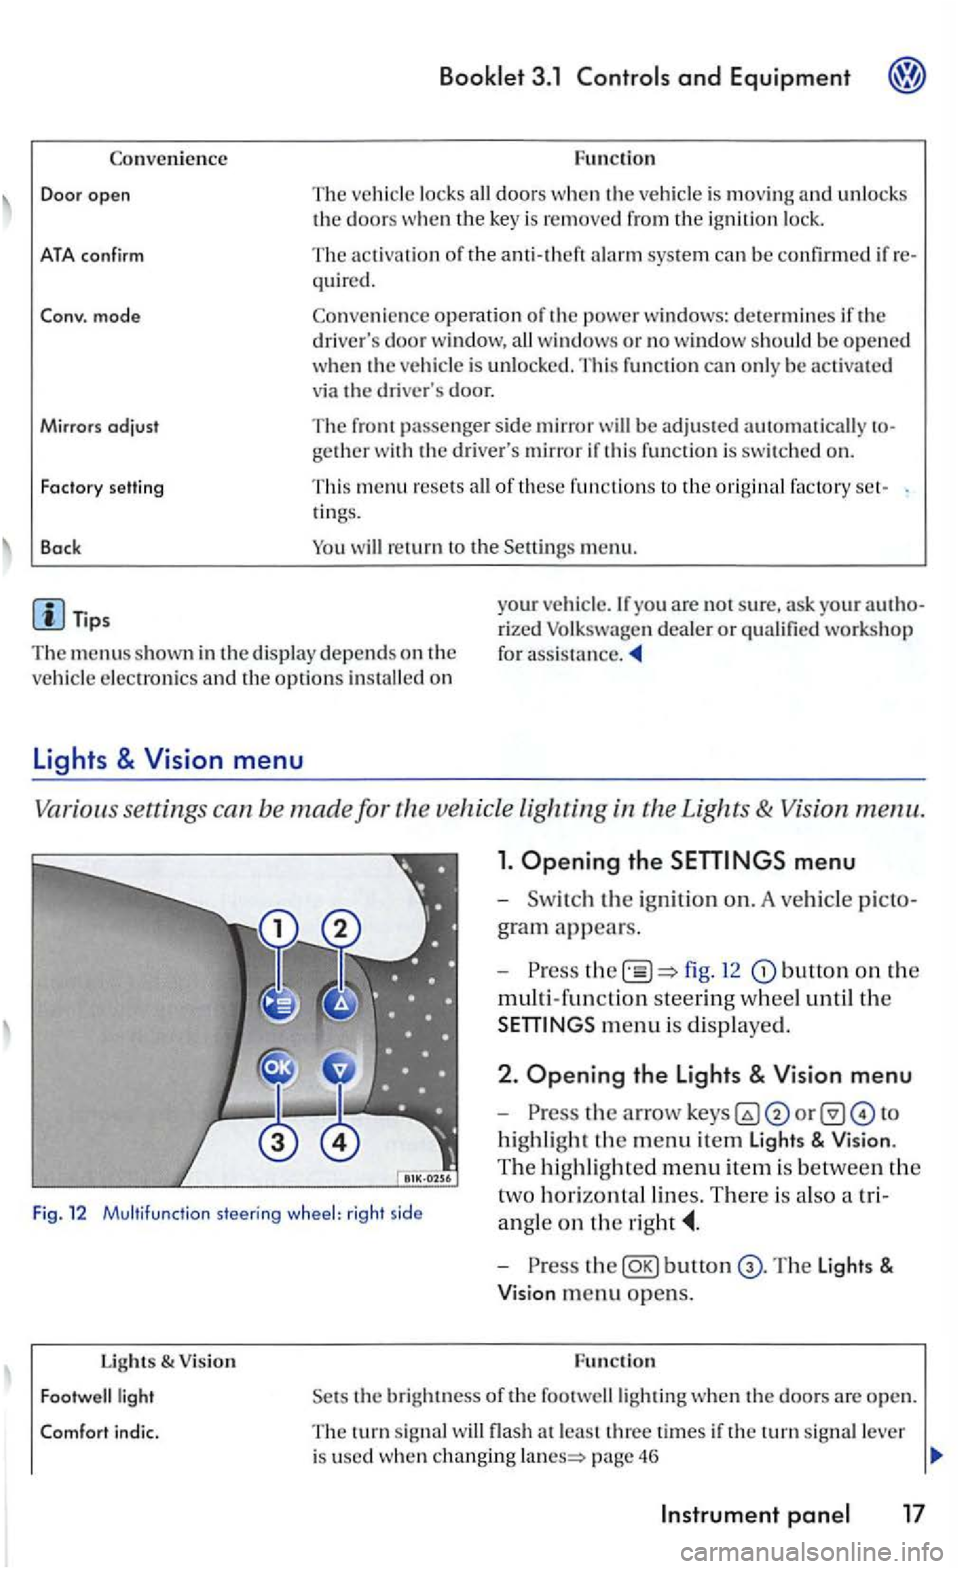
Vario us se ttings can be made for vehicle Lighting
1. Opening the
fig. 12 button on the
multi-fun ction steering w hee l until th e
m enu is dis played .
Fig. 12 Multifu nctio n steering wheel: rig ht side
2 . Opening the Lights & Vision menu
-
highli ght the m enu item Light s & Vision .
T he hi ghli gh te d m e
nu item is be tween the
t
wo h orizontal lin es. There is als o a tri
a n gle
on the
Lights & V ision
bunon
the bright ness of the footwelllighting when th e doo rs a re open.
T he turn sig nal flash a t le ast thre e time s if the tu rn sig nal lever
i s used whe n changing page 46
Page 188 of 444
Booklet 3 .1 Controls and Equipment
Functio n lights & Vision
Factory setting This menu resets all of these functio ns to the original factory tings.
Back Heturn to the m enu.
Tips
The menus shown in the dis play depends o n ve hicle electronics and the options installed on
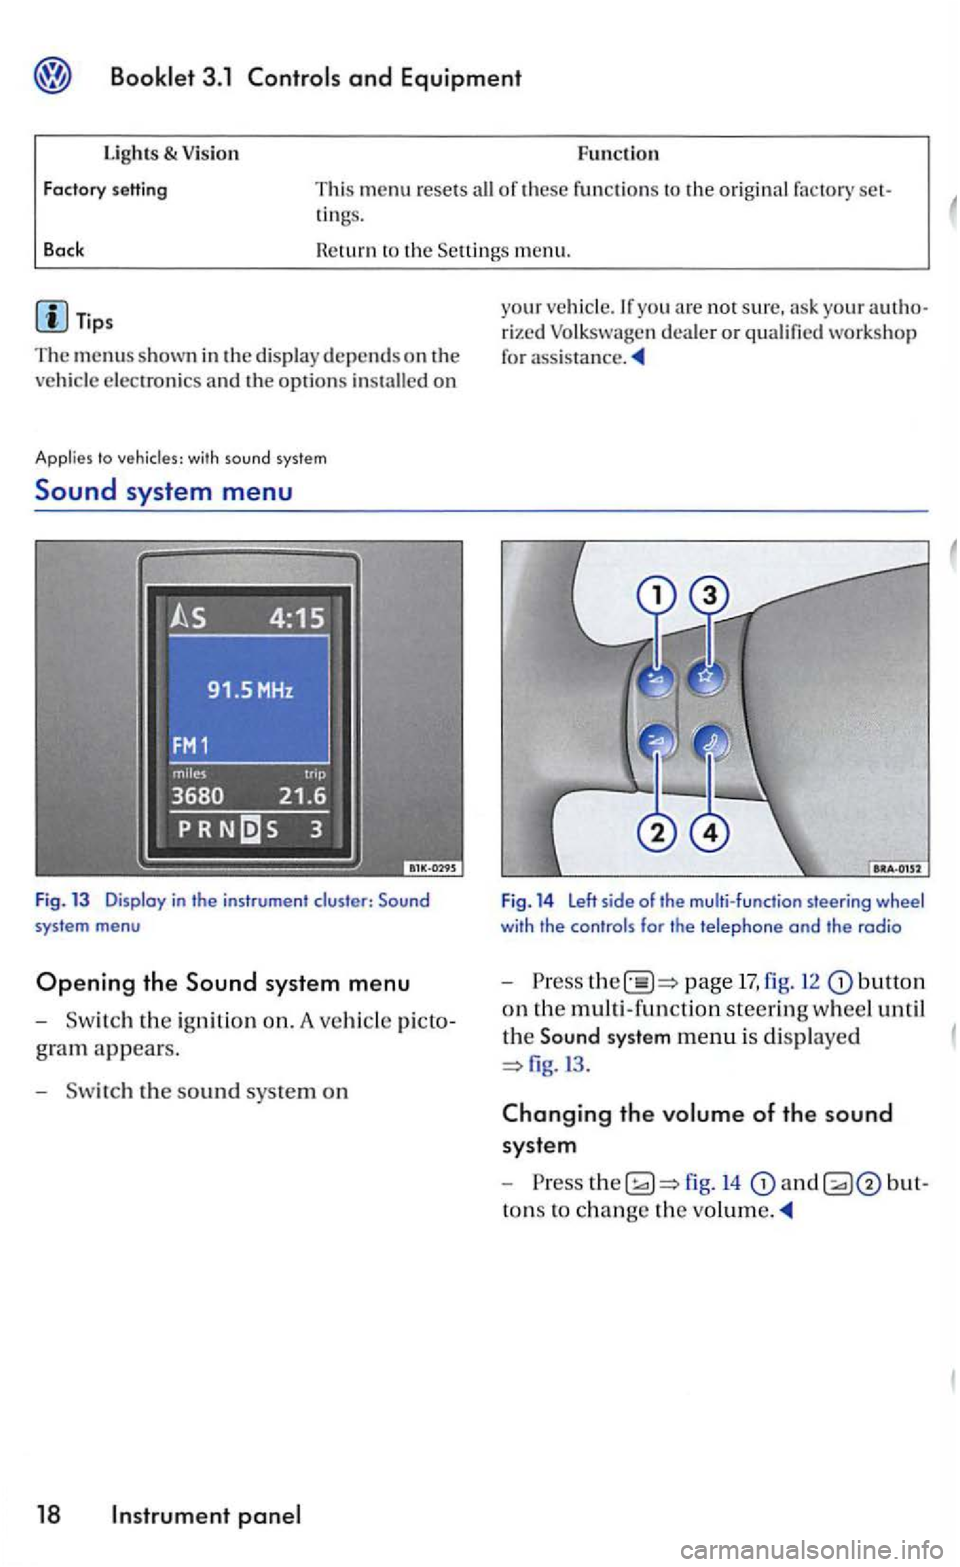
Applies to with sound system
Sound system menu
Fig. 13 Display in the instrument cluster:
gram appears.
- Sw itch the s
ound sys te m on
18 panel
your veh icle.lfyou arc not sure, your rized Volk swage n dea ler or qualified workshop
for
Fig. 14 Left side of the multi-function steering wheel with the controls for the telephone and the radio
-Press page 17, fig. 12 butto n
on th e multi -functio n steerin g wheel until
th e
Sound system menu is di splaye d
fig.l3 .
Changing the volume of the sound
syste m
-
to ns to ch ange the
Page 190 of 444
and Equipment
Applies to with multi-function indicotor
Multi -Function
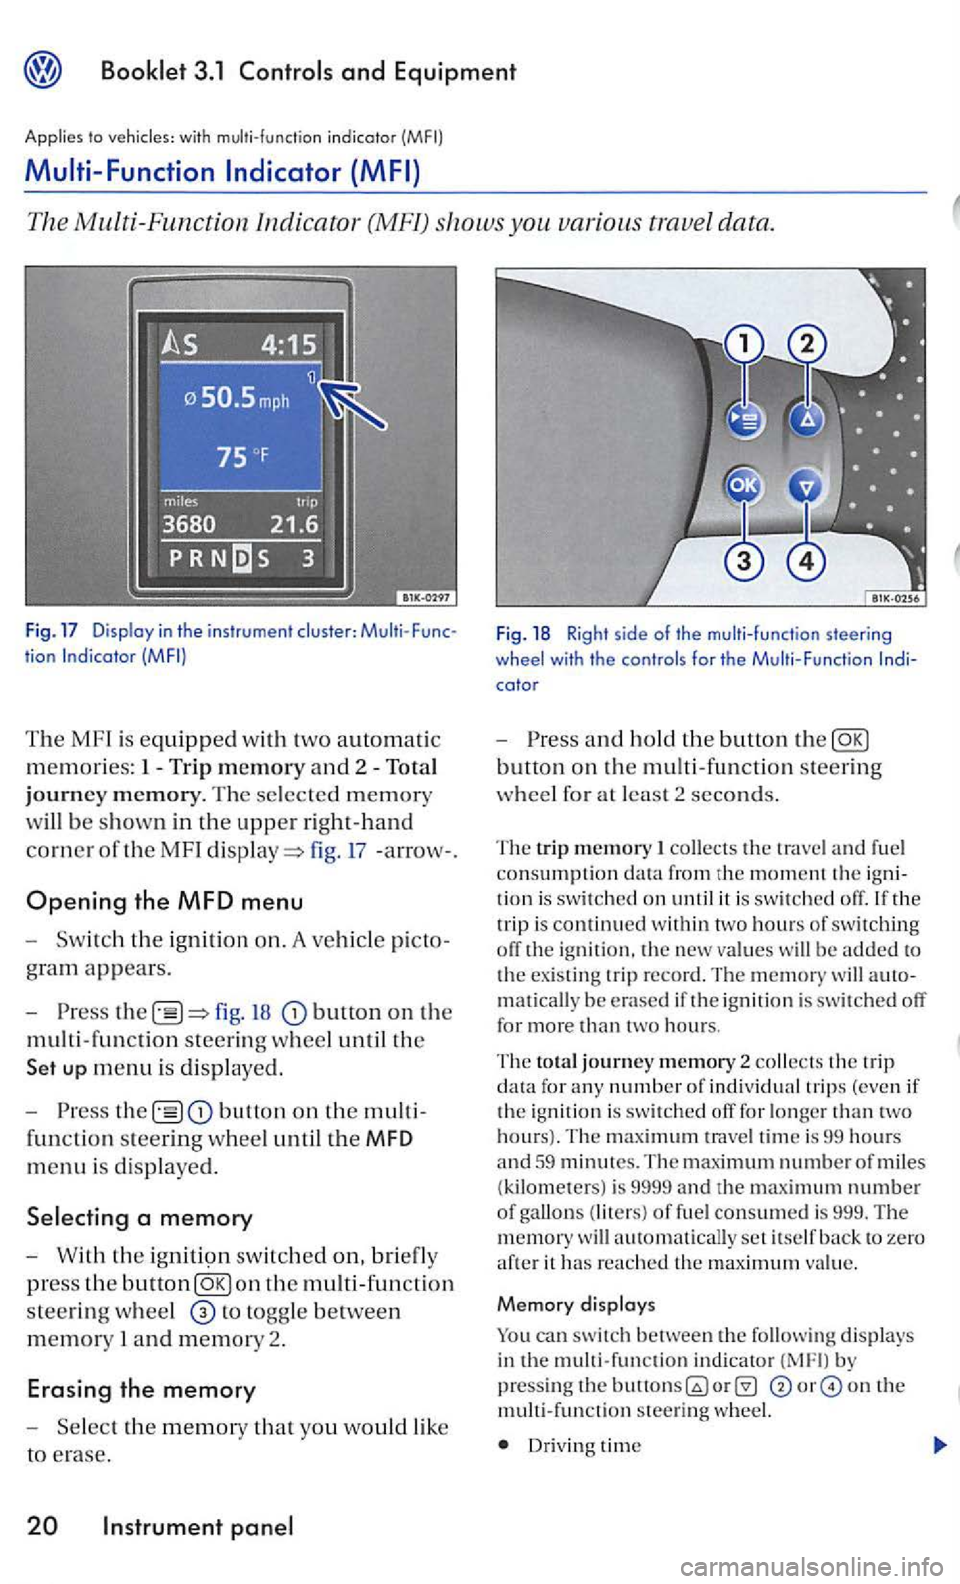
The Multi -Function Indica tor (MF!) shows you various trave l data .
tion
The MF l is equipped with two automatic
m e
mories: 1- Trip m emory and 2 -To ta l
j o
urney m em ory. The se lected memory
w
ill be s hown in the uppe r r ight-hand
co rner
oft he MF I fig. 17 -arrow- .
Opening the MFD menu
t h e ig nition on. A ve hicle picto
gram appears.
fig. button on the
m ult i- fun c
tion steering wheel until th e
up menu is di spl ay ed.
the button on th e multi
functio n st
eering wheel until the MFD
menu is displaye d .
W ith th e ig n iti9n switch ed on, briefly
press the button
to togg le between
mem ory I and memory 2.
Erasing the memory
Fig. 18 Righ t s ide of the multi-func tion steering
wheel with th e controls for the M ult i-Function
a n d ho ld t he butto n th e
collects the trave l a nd fuel
consumption the trip i s continued w ith in tw o hours of switching off the ig nition. th e new value s w ill be added to
t h e existing trip r ecord. The m emory will matically be e rased if i gnition i s switch ed off for more than two hours.
The to ta l journey m em ory 2 collects the trip data fo r any number of individ ual trip s (even if
t h e ignition is swi tched off for longer than tw o hours). T he trave l tim e is 99 hours and 59 minutes. The maximum number of miles (kilometers) is 9999 and th e maximum number of gallon s (liters) of fue l consumed is 999. The w ill automatically set itself back to zero aft e r it has re a ched th e maximu m value.
M emory d isplays
can switch between the follow in g displays in th e multi-function indicator b y pressin g the on th e mult i-func tion s teering wheel.
Dr iv in g time
Page 191 of 444
and Equipment
Average ruel co nsumption
Miles to empty
Distance trave le d
Average speed
S peed warning
min Driving time
Th e
displa y shows the amount or time that has gone by s ince the ig nition was sw itched on.
The m aximum displa y va lue in both memories
i s 99 hours and 59 minutes. The memory will reset itselrback to zero once thi s va lue has been rea ch ed.
gallons miles km) Current fuel con
sum ption
Th e di spla y w
ill sh ow the consumptio n in gallons (liters) per
book le t3.2 and chapter
0 gallons/100 miles (0 km) Average fuel
consumption
T he ave rage ruel c
onsumption will appear you have drive n approximately ya rds
(meters). Dashes w ill appear in th e displa y that time. The di spla y
Miles Miles {kilometer s) to empty
Th e m il
es ( kilom ete rs) to empty is calc ulated
u sing th e ru el ta nk contents and current ru el consumption. shows how rar the ve hicl e can travel u sin g the same speed and dri ving co ndi
ti o ns as
yo u have
dri ven approxi mately yards ( mete rs).
Dashe s w ill appear in the dis p lay until that time. The disp lay will b e updated every 5 seconds
while the ve hicle is m ov ing.
Speed warning
Th e s
peed wa rning can be set so yo u will see and hear wa rnin g whe n yo u reach the desired speed . For example. this settin g co uld be used to
l e t yo u know iryou exceed the posted speed
limit. When you r eac h the desired sp eed. press on th e multi
fun ction steering wheel. and hold th e button to erase th e sto re d speed.
temperature di splay
T he t e
mperature range is F to to At outside tempera ture s be tween-F and and a (ice warning) appears in addition to the outs id e tempera ture di splay. Thi s symbol ro r approximately 5 seconds and
F
W he n the ve hicl e is s tanding still o r tra velin g at
very low speed s, the temperature di spla yed may be slig htl y hi gh er than the actual outsid e te m
p erature as a result or heat radiate d rrom the engin e.
Roads and bridges can be dangerously icy even the outside air temperature is above r r eez ing.
Jryou use th e outside temperature di sp la y
t o tell you about rrost conditions, remember that roads can even ice over at temperatures above F (+
A lways remember, eve n if the
Neve r rely exclu siv el y on this the outsid e temperature display.
Always reduce your s peed and dri ve with special care under weathe r conditions w hen the c hances that you will encounter icy road surfaces a re greater.
In strument 21