warning lights VOLKSWAGEN GOLF 2008 User Guide
[x] Cancel search | Manufacturer: VOLKSWAGEN, Model Year: 2008, Model line: GOLF, Model: VOLKSWAGEN GOLF 2008Pages: 444, PDF Size: 92.7 MB
Page 177 of 444
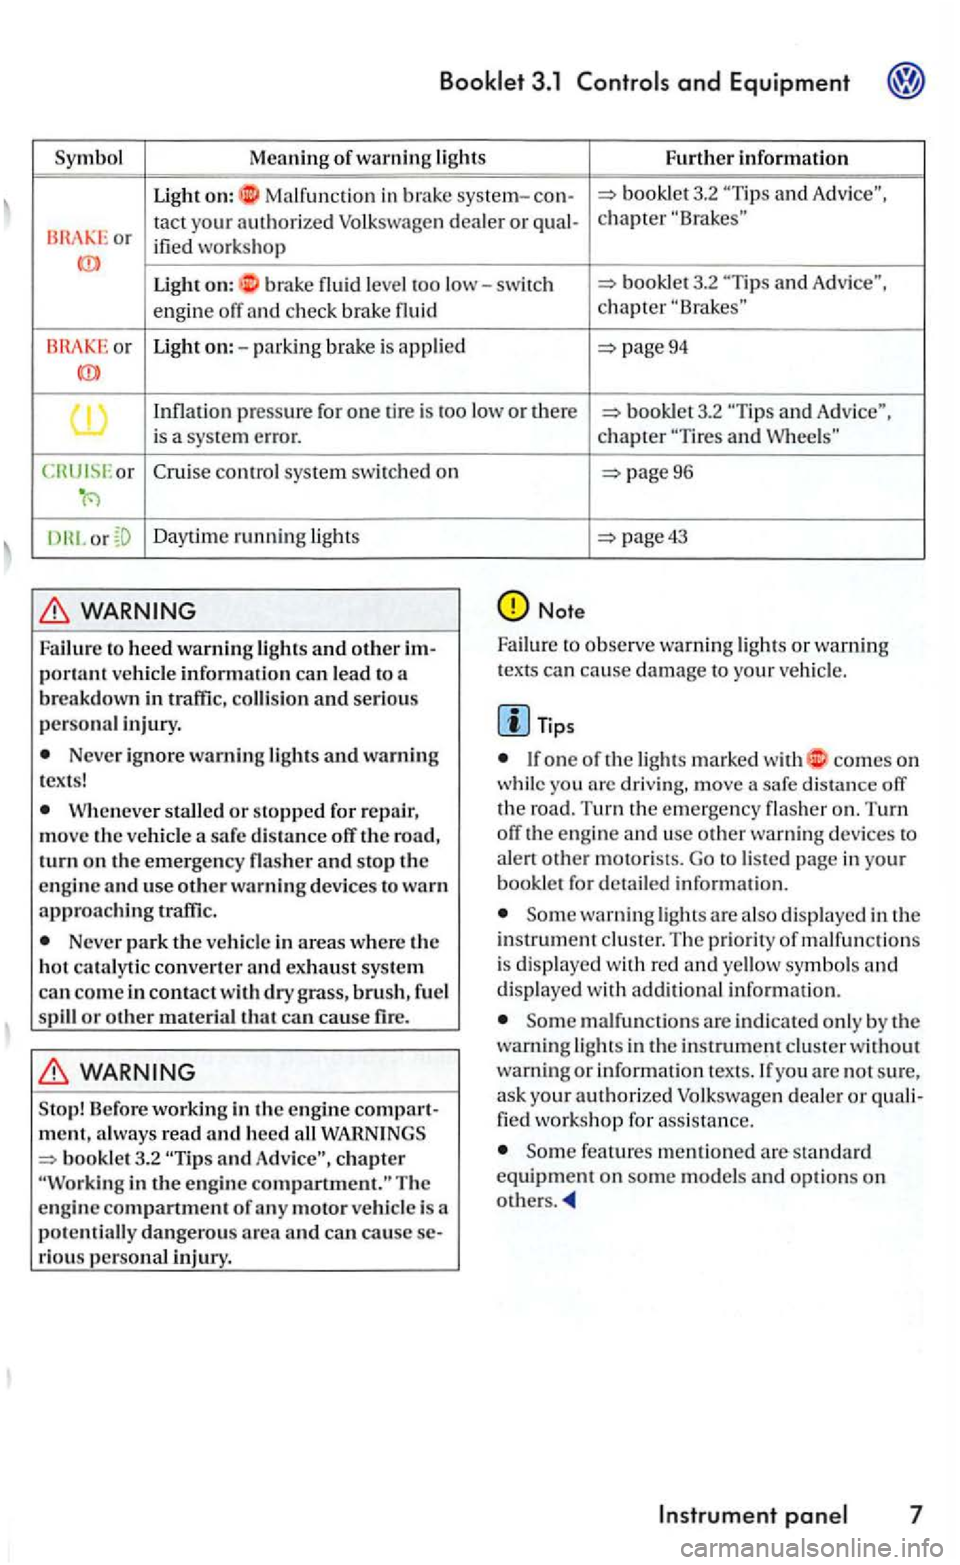
Symbol Meaning o
f warning lights Furt h er informati o n
Ligh t on: Ma lfun ction in brake system-3.2 and
or tact your a u thorized Volk swage n dealer or ified wo rks ho p
Ligh t on: b rake leve l too low-switc h 3.2 and
engin e off and ch ec k b rak e chapter
Light on:-pa rkin g brake is appli ed page94
pressure for one tir e is too lo w o r th ere an d Adv ice",
i s a sys te m err or.
or
Cru ise con trol system switc h ed on
D ayt im e ru nning ligh ts
Failure to heed warnin g lights and o ther p o rl ant vehicle informati o n ca n lead t o a
b reakdow n in traffic , and serious
perso na l in jury.
Ne ver ig no re warning lights a nd warning
t e x ts !
stal led or stoppe d for re p air, m ove th e v eh icle a sa fe dis ta n ce off th e road,
turn on t h e em erge ncy flash er and stop the
e n gi ne and use o th e r warnin g d evices to warn approachin g traffi c.
Ne ver park the ve hicle in areas where the ho t cataly tic co nvcrlc r and exh au st sys tem can co m e i n contact w ith dry gra ss, brus h , fu el
s pill or oth er materi al that ca n cause fire.
Sto p ! B efore workin g in the en g ine m ent , a lwa ys rea d and heed all 3.2 in the engin e comparlmcnt." The
e ngine c ompartment of any motor vehicle i s a
p ote n tiall y da ngerou s area and can ca u se rious personal in jury.
chapter and
page96
page43
Note
Failure to observ e wa rnin g lig hts or wa rning texts can ca use damage to you r ve hicle .
If one of the lig hts marked with comes on while you arc driv ing. move a safe distance off
th e road. Turn the em ergency flas her on. T urn off the engine and usc other warni ng devices to
ale rt other motoris ts. Go to listed page in your bookle t for detailed informat ion.
Some warning lights are also displayed in the instr ument cluster. Th e priority of m alfun ctions is dis played with re d and yellow symbols and
disp layed with additio na l informa tion.
Some malfu nction s arc in dicated only by th e
warni ng lights in the instrument cluster without warn ing or i nformation texts. If you are not sure ,
as k you r authorized Volkswagen dealer or worksho p for ass istance.
Some features menti oned are s tandard equipment on some mod els and optio ns on others .
Instrument 7
Page 182 of 444
and Equipment
Servic e Dis play
the Ma in te n ance n o t perform ed
b y a n au th or ize d
possib le to your aut ho rized deale r o r qualifie d work s h o p and have th e te na nce re m inder reset.
Applies to vehicles: With Multi-function indica tor
Tips
Do no t reset t he d is p lay b etween se rv ice va ls; d o in g so will re s ul t in an incorrec t
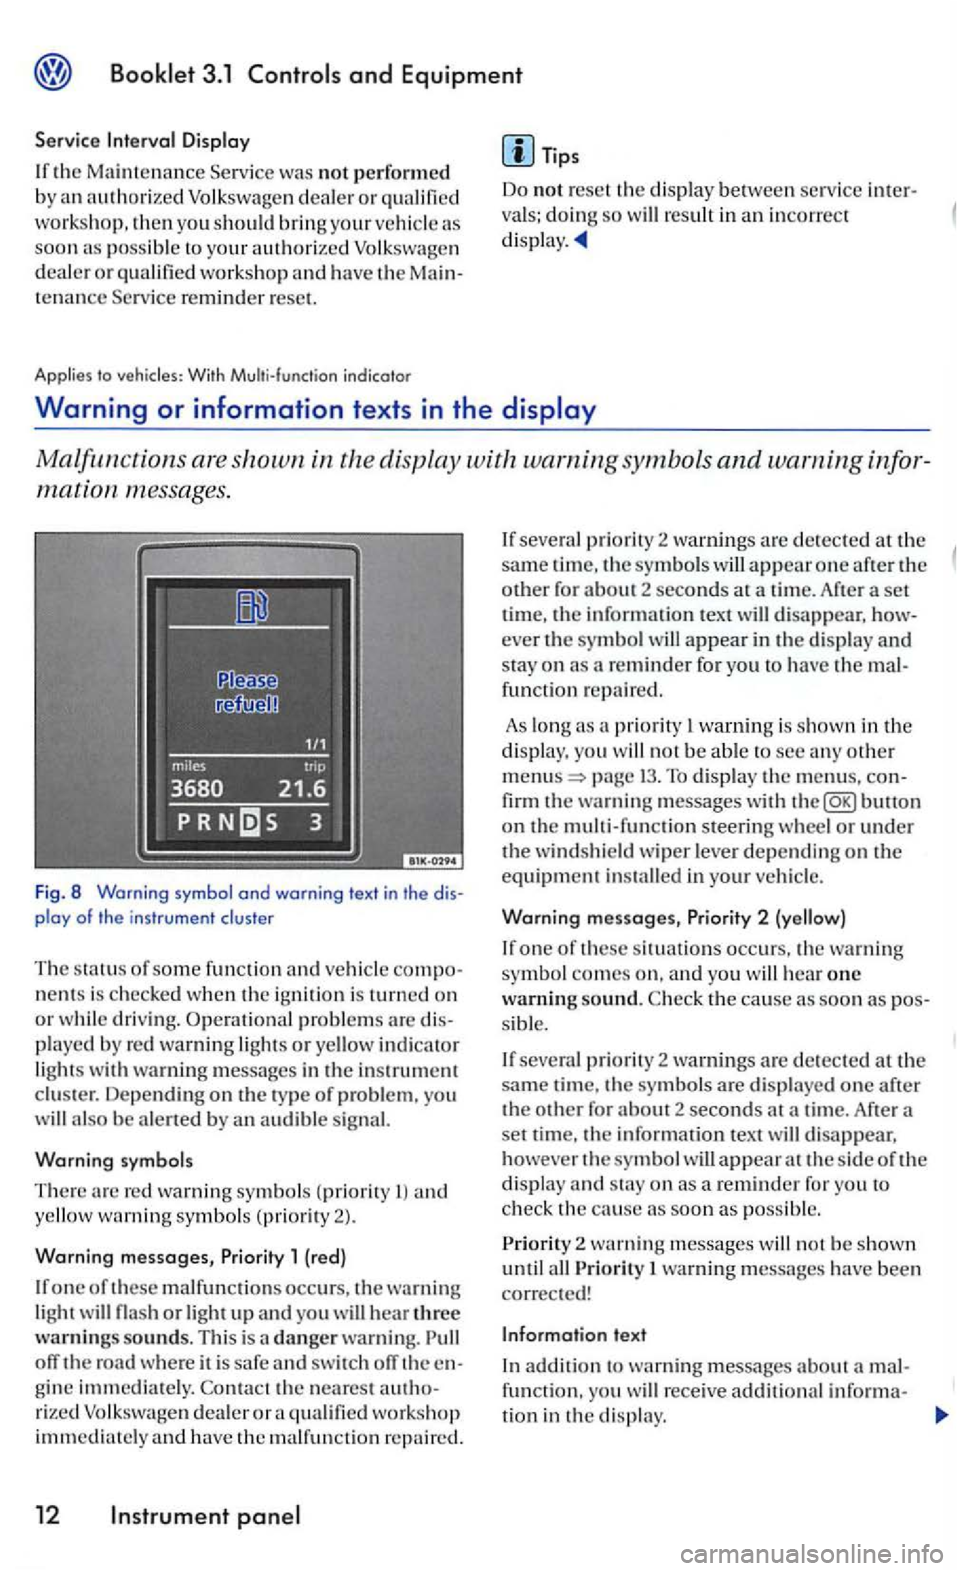
play o f t he instrument cluster
T he stat us o f
some funct io n and ne nt s is ch ec ke d when th e ig n iti on is turne d o n
o r d riv in g. proble m s played b y re d w arning lights or yellow indicator lights w ith warning m essages in the instrument
c lu ster. Depending o n th e type o f pro ble m , yo u be alerte d b y an audibl e sig nal.
Warning symb ol s
T he re
re d warn in g symbols (pri ority a nd yellow warning sy mbols (pri orit y 2).
W arni ng mess
ages, P rio rit y 1 (re d)
o ne of these malfunc ti o ns occu rs, th e warnin g
li ght w ill or light up and you will hear three warnings sounds. T hi s is danger warning. o ff th e roa d whe re it is safe and sw it c h ofT the g in e im medi ate ly. th e nearest rized qualifie d wo rk s h o p immediately and have the malfunctio n re pai red.
12
priority 2 warnings d ete cte d at th e
same tim e. the symbols w ill one after the other f or about 2 seconds at a time. Af te r a set time, the in fo rmation tex t will d isappear, ever the symbol w ill appear i n the dis play and stay o n as a r eminder f or you to have th e fu nctio n re p a ir ed .
A s lo ng as
p rio rit y w arni ng is sh o w n in the displ ay. yo u will not be a ble to sec any other
messages w ith th e button
o n the multi-funct io n steerin g w heel or under the windsh ie ld wip er l eve r dep endin g o n th e
equipment i n stalle d in your vehicl e.
Warnin g messages, Prior ity 2 (yellow)
you will one warning so und. sib le .
se ve ra l priority 2 warni ngs are dete c te d at t he
same tim e, the symbo ls are dis pl aye d o ne afte r the oth e r for abou t 2 second s at a time. Aft er se t time, the info rm ation text will disappear,
h owe ve r th e symbol w ill appear at the sid e of th e
d is p la y and sta y o n as a re m inder for you to check th e c ause soon as possib le.
2 messages no t b e shown until all warning messages h ave bee n correcte d !
text
additio n to wa rnin g m essages about a fu nction, yo u receive additio na l informa-
t io n in th e dis pla y.
(
Page 183 of 444
3.1 and Equipment
Failure to heed warning light s and other important vehicl e information can lead to a
breakdown in traffi c, collis io n and se rious personal injury.
Never ignore warni ng lights and warning m essages !
Wheneve r stall ed or stopped for repair,
m ove the vehicle a safe distance off the road,
s top th e e ngin e, and turn on th e emergency flas he r a nd use other warn ing dev ices to warn approaching traffic.
Before workin g in the engine compartment, always read and heed all WARNLNGS bookle t 3.2 in the engine The engi ne compartmen t of motor ve hicl e is a potentially dangerous area and can cause serio us personal injury .
Note
Failure to observe warning lights or wa rning
text s can cause damage to you r veh icle.
is used to make various different settings for the
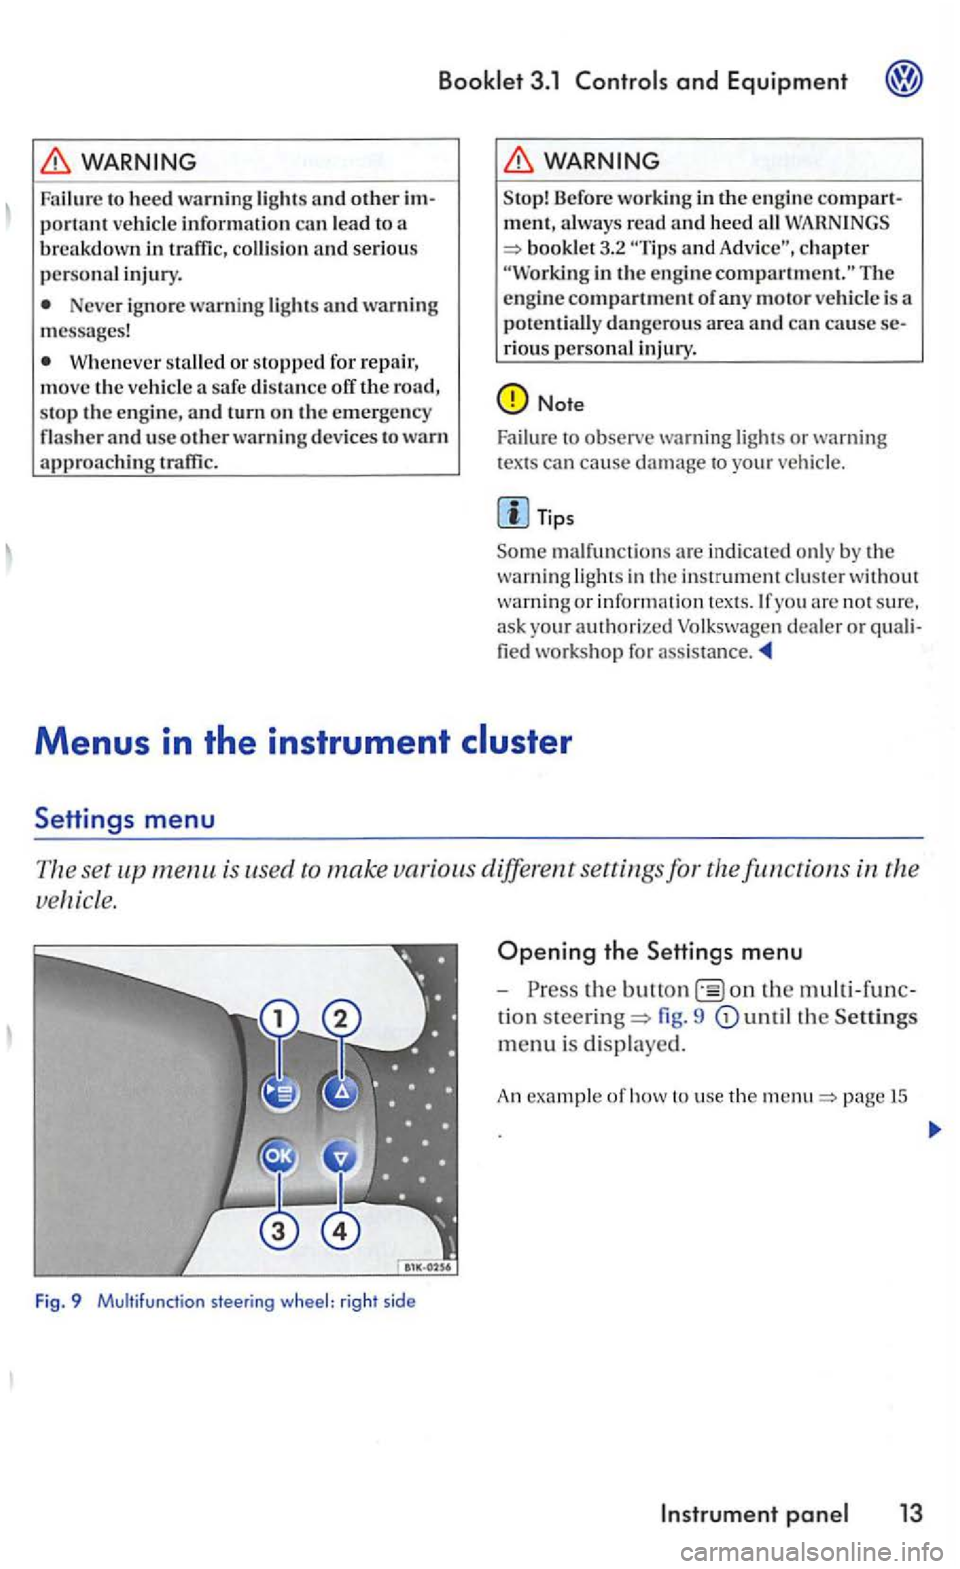
Fig. 9 Multifunction steering wheel: right sid e
Opening the Settings menu
-the on the
tion steering= fig. 9
page 15
Page 213 of 444
and Equipment
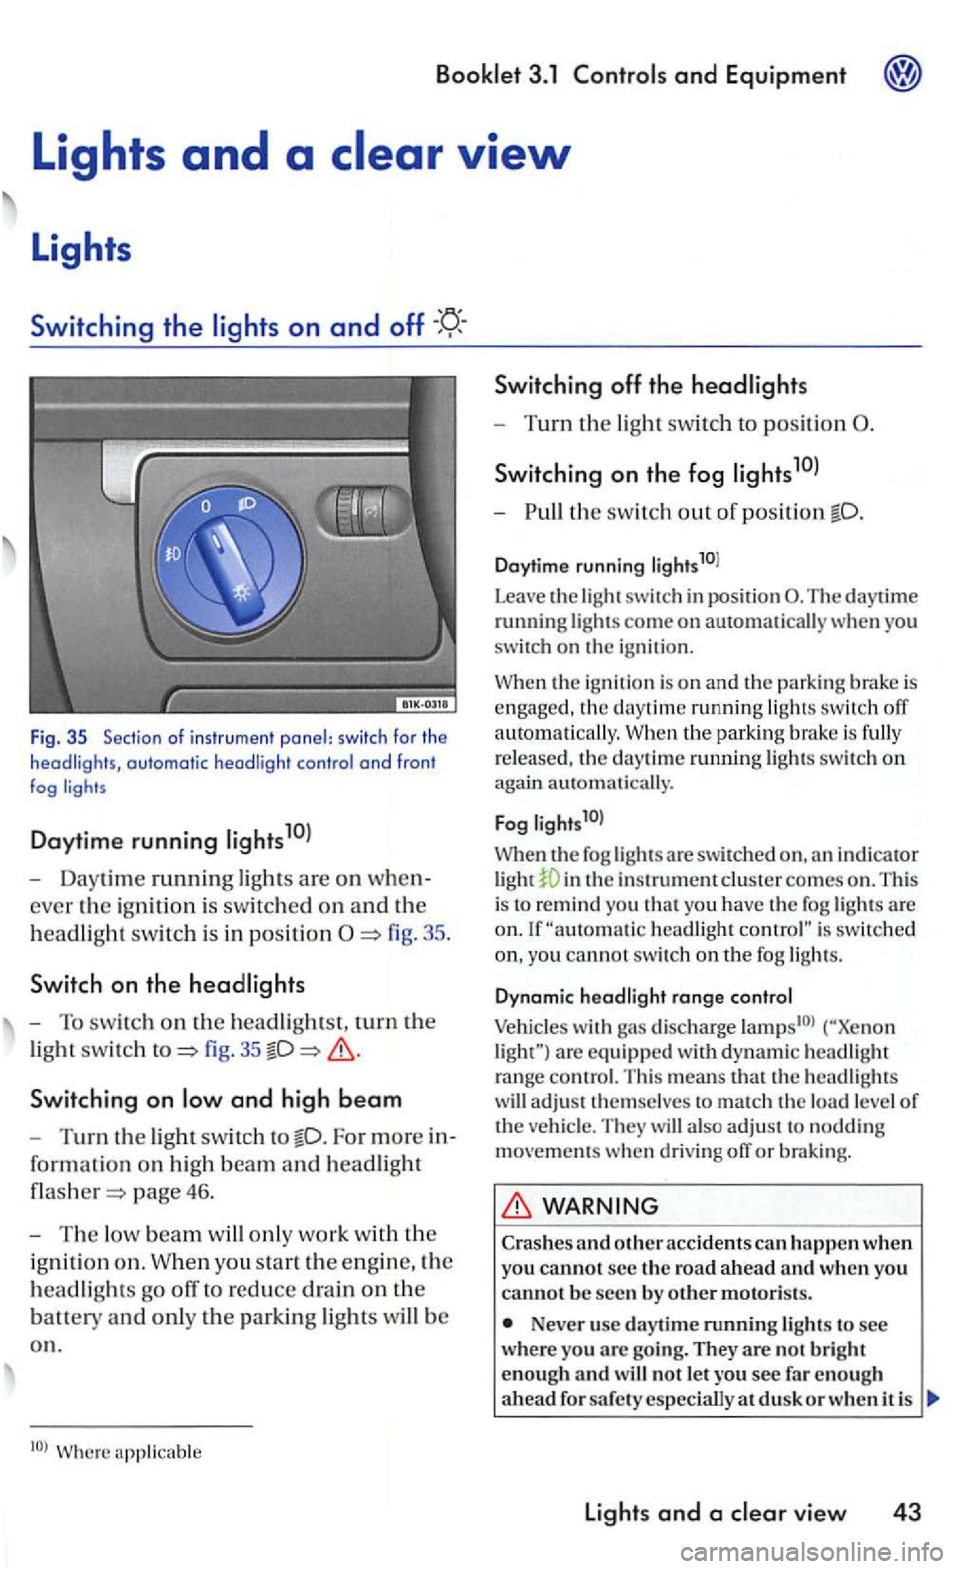
Fig . 35 Sec tio n of i nstr u m ent panel: switc h fo r th e headligh ts, automatic headli ght contro l a nd fron t fog
Daytime running
- Daytime running ligh ts are on when
ever the ig ni tio n i s sw itc hed on an d th e
h
eadlig ht swit c h i s in positi on
fig. 35
Switchin g on
For more in
for ma
tion on hig h beam an d headlight
page 46.
-The low beam w ill only work w it h th e
i g ni
tion o n . W hen you sta rt the e ngin e, the
h
eadlights go off to reduce drain on the
batt ety an d only th e parkin g lights will b e
o n .
Switching off th e headlights
- Turn the light swit ch to position
S wi tch ing on the fog
-th e switch out o f position
Daytime running li g hts10l
Leave
the light switch in posit ion The daytime running lights come on automatically you
switch on the igni tio n.
the ignition is o n and the parking brake is engaged , the daytime running ligh ts switch off
a uto m atically. the park in g bra ke is fully
r e leased , th e daytime ru nning lights swit c h on again automati cally.
F
og l ights1 0l
When th e fog lights a re swit ch ed in th e instrument clus te r comes on . This
i s to remind you t h at yo u have the fog lights are headlight is switc hed
yo u cannot switc h on th e fog ligh ts.
D ynam ic hea d light range co ntrol
Vehicles with gas discharge are eq uip ped w ith d yn am ic headlig h t range contro l. T his means that th e headlig hts
w ill adjust t hemselves to match th e load level of the ve hicl e. They will also ad ju st to noddin g movements when d riving off or braking.
WARNING
Crashes and o ther acc idents can h appen when you cannot s e c the ro a d a head and w hen you canno t b e seen by o th er motoris ts.
Never use day tim e running lights to see wher e you arc goi ng. They are no t b rig h t
enough an d w ill not le t you see fa r en o ug h
a head d usk o r w hen i t is
lights and a vie w 43
Page 215 of 444
3.1
Emergency switch
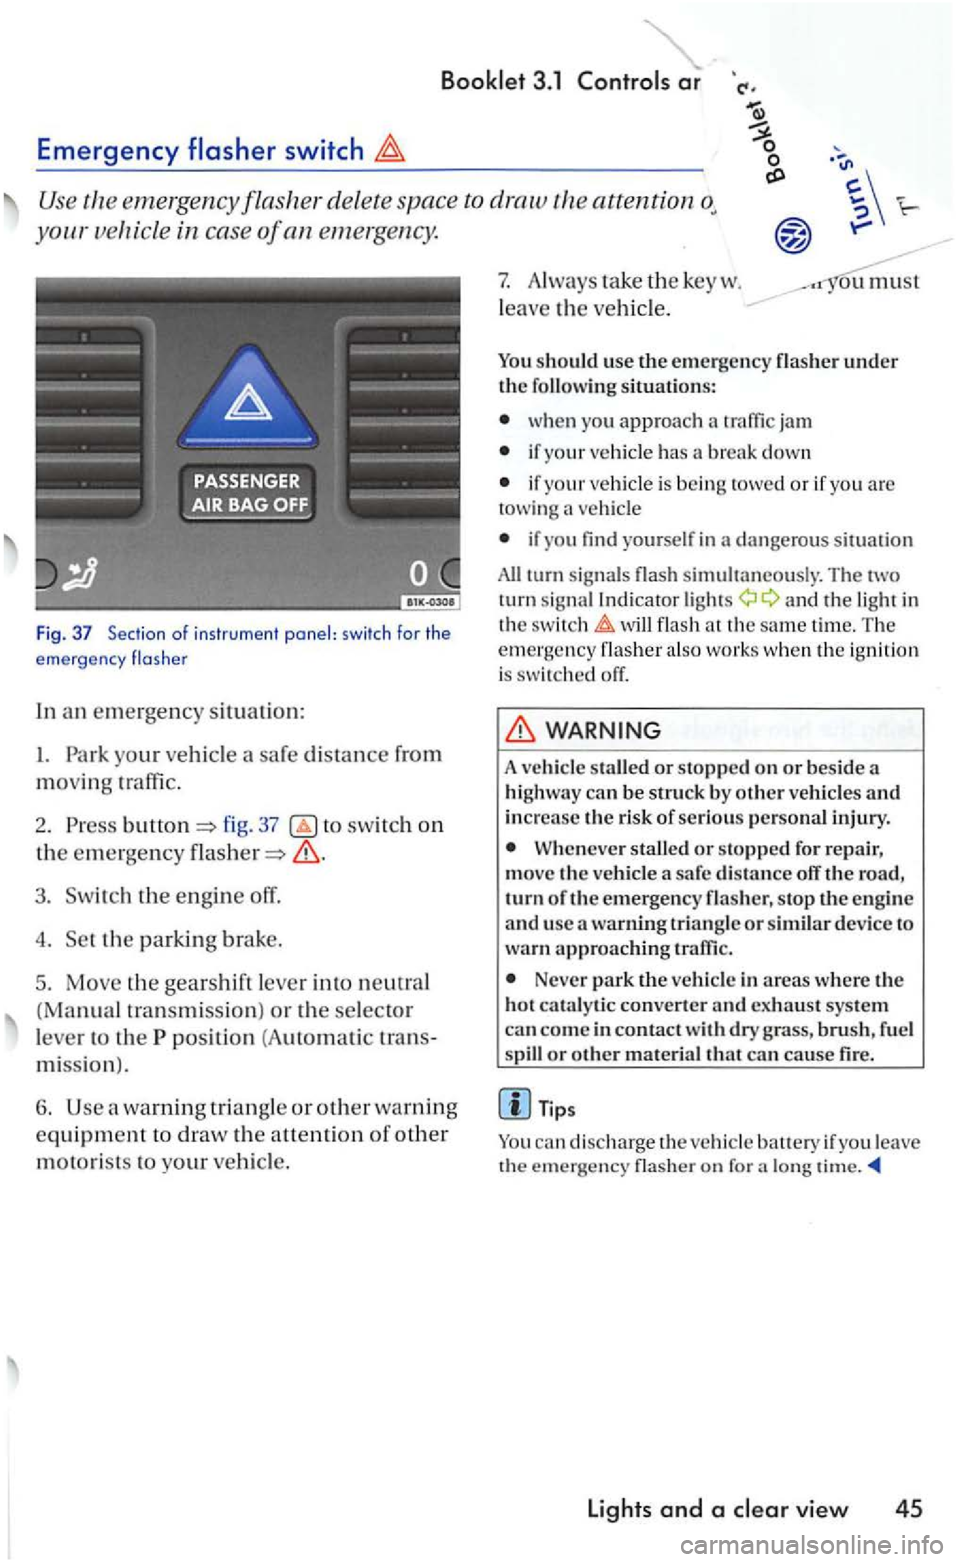
Use the eme1gency flasher del ete space to attention
your icle in cas e of an emerge ncy.
Fig. 37 Section o f ins trume nt panel: swi tch for the
e mergency flas he r
In an em ergen cy situation:
I. Park your vehicl e
fig. 37 switch on
the emergency
3. Switch the engine off.
4. Set the parkin g brake.
5. Move the gea rshift lever into neutral
(Manual tra nsmiss ion ) or the selector
l e ve r to the
position (A uto m ati c tran s
mi ssio n
).
6. Use warning tria ng le or other warning
equipme nt to draw the a uention of other
motorists to your vehicl e.
7. Always ta ke the key w .
l
eave the ve hicl e.
ou must
You should use th e e mergency
wh en you approach
if your vehicle has a break down
if your vehicle is bein g towed or if yo u are towing vehicl e
if yo u find yourself in dange ro us s ituation
All turn sig nal s simultaneously. Th e tw o
turn sig nal Indi cator a nd the light in
the t im e. Th e emergency also wo rk s w he n th e ig n ition is switch ed off.
WARNING
A vehicle staUed or stopp ed on or bes ide a
hi ghway can b e struck by o ther ve hicle s and increase the risk of se rious pe rso nal injury.
When eve r stalled or stopped for re pair,
mov e th e vehicle a safe dis ta n ce off the road, turn o f th e emerg ency flas her, s top the e n gin e
a nd usc a warning triangl e or similar device to wa rn ap proac hing traffic .
Never park the ve hicle in areas where the
hot cat a ly tic converter and exhaust syste m
can co me in contact dry grass , brush , f uel or othe r mate rial that can cause fire.
a lo ng
lights and a
Page 216 of 444
and Equipment
and high beam
signa l and high leve r also operates
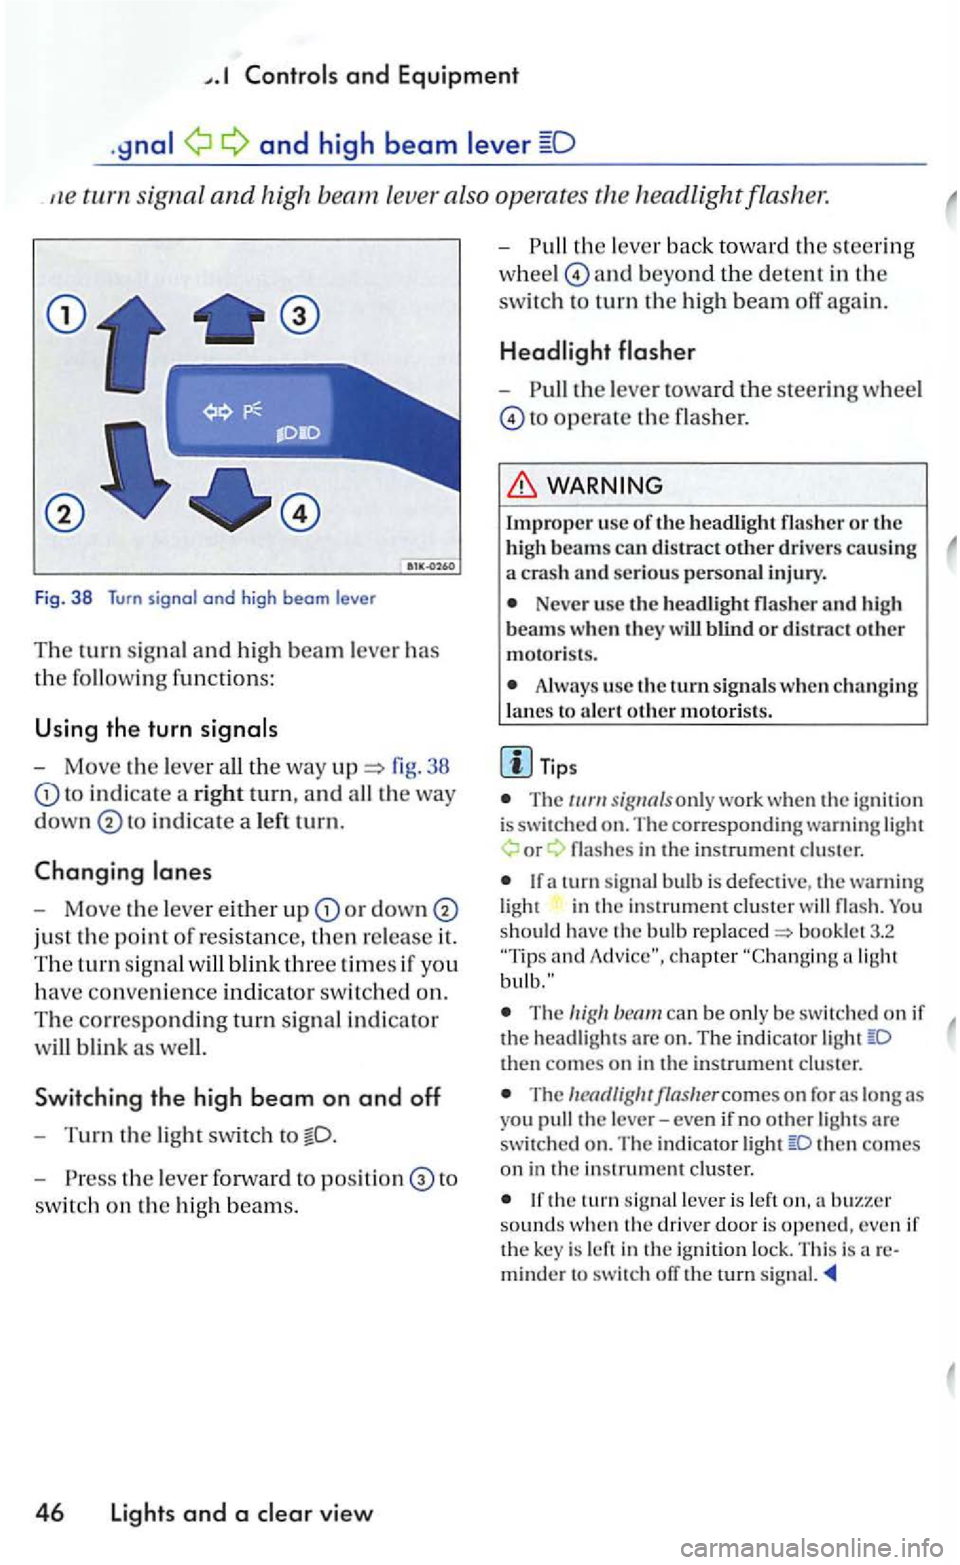
Fig. 38 Turn signal and high beam le ve r
Th e turn signal a n d hi gh beam lever has
the followin g functions:
U sing the turn
- Move the lever 38
to in d icate a rig ht tu rn, and
in dicate a le ft tu rn.
Changing
-Move the leve r either u p or down
just the point of resistance, then re lease it.
The tu rn sig n al
Sw itchin g the high b eam on and off
-Turn the light swit ch to
- P ress the lever forward to to
switc h on the hig h beam s.
4 6 Lights and a view
-th e lever back to wa rd th e s teering
w hee l
and beyond the dete n t in the
switc h to turn th e high beam off again.
-the lever toward the steeri ng wheel
to operate the flasher.
Impro per usc of th e headli ght flasher o r the
h igh beams can distract other drive rs causing a crash an d serious personal injury.
Neve r use the headli gh t flasher and h igh
beam s w hen th ey w ill blind o r distract other motoris ts .
Always use the turn s ig nals w hen ch a nging
l a nes to a le rt oth e r m otori sts .
T ips
T he only work whe n the ig nition is switched on. The co rre sponding warning or
in the in strument cluster
and
The can be only be sw itc hed on if the head ligh ts are o n . The indi cator then comes on in the instrument cluster.
The
then co mes on in the in strument cluster.
the tu rn leve r is left sounds w hen th e driver door is opened, even if the key is left in the ign ition lock. This is areminder to switch ofT the rurn signal.
Page 221 of 444
Rear window wiper
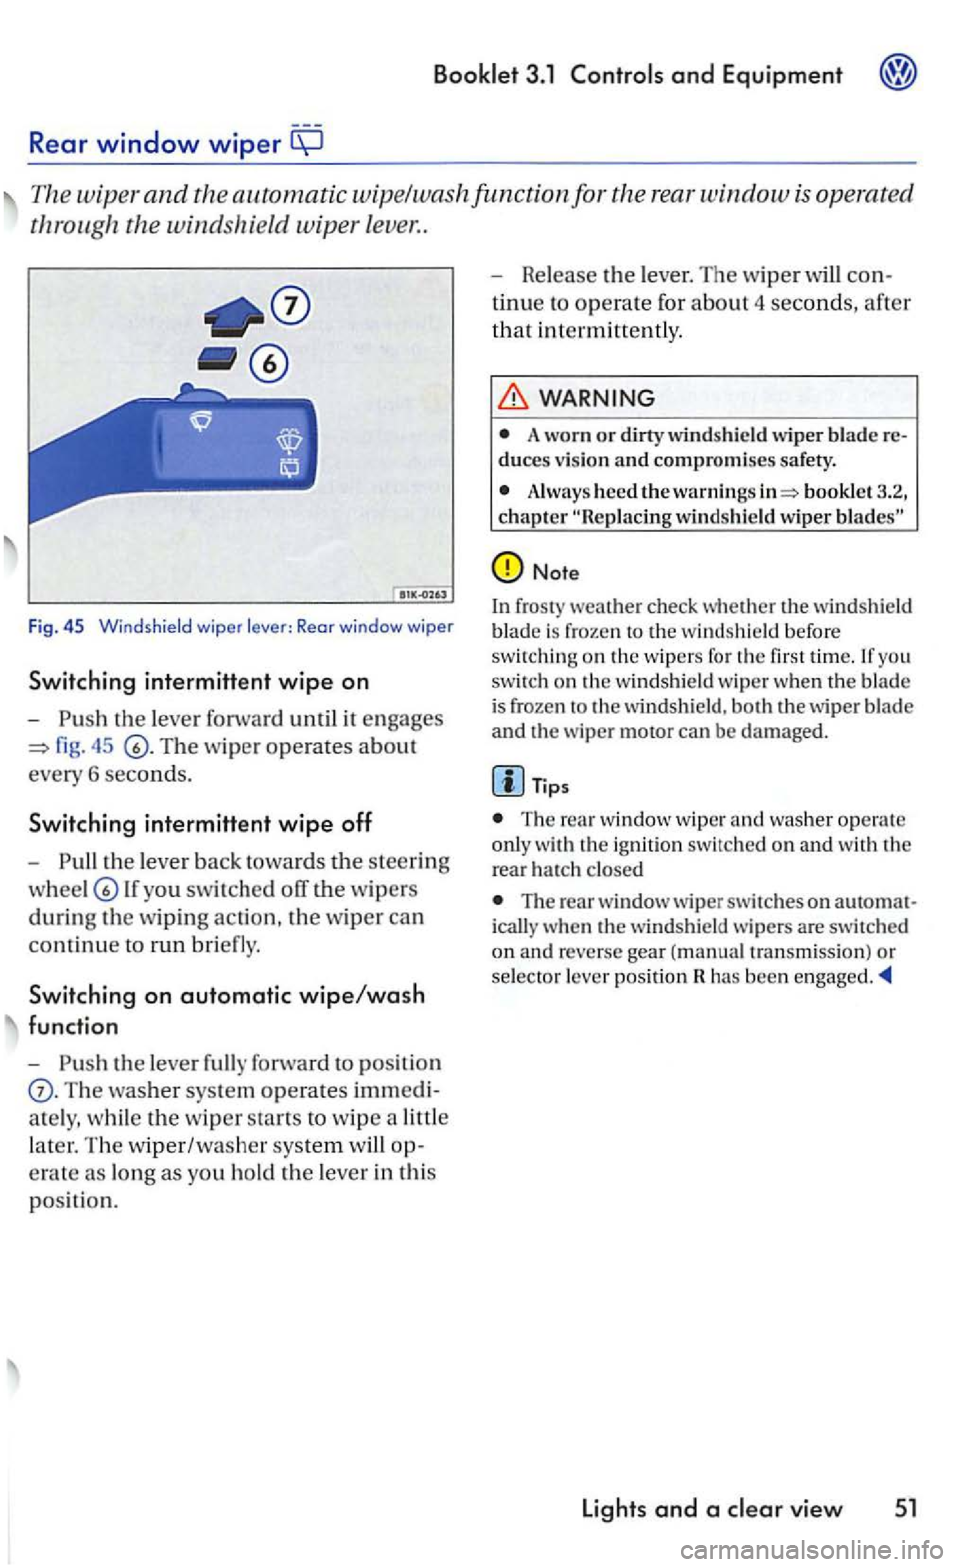
The wiper and the automatic wipe/wa sh func tion for the rear w indow
fig. 45
th e lev er back tow ard s th e s teering
lf you swit ch ed off the w ipers
during th e w ipin g action , th e w iper ca n
c
ontinu e to run bri efly.
Switching on automatic wipe/wash
function
-
Th e washer sys te m operates imm edi
a te ly , w hi le
the w ip er sta rts to wip e a littl e
l
ater. Th e w iper/washe r system op
e rat e as long
as you ho ld the le ver in th is
p os itio n. -
Release th
e le ver. The wip er will con
t
inue to operate for abou t 4 seconds, afte r
th
at i n termitt en tly .
WARNING
A worn or dirty wind shield wiper blade re duces v ision and compromises safety.
Alway s heed the warni ngs booklet 3.2, chapter
Note
In fros ty weat he r check whether the win dshield
b lade is froze n the w indshi eld befo re swit chin g on th e w ipers for you switch on th e w indshield wip e r when th e blade is frozen th e w ind shi eld, bot h th e wiper b lade
and the wiper motor can be damage d.
Tips
The window wi per and was her ope rat e
o nl y the rear h a tc h closed
The rear w indow wiper swi tc hes on auto m at
i c all y w hen th e windsh ie ld w ip ers are switc hed
o n an d reverse gear (manual tra n sm iss ion) or selec to r l ever pos ition has been
Lights and a
Page 222 of 444
with headlight washer system
l1eadlig ht
49, 44 is pulled toward s the ste ering
w heel -while low or high beams turned on. llowever, insect
WARNING
A lways read and heed the ..
Note
To avoid make sure that the headlight washers work properly in winter. Keep the n ozzle in the bumper free of snow and remove any ice with de-icer
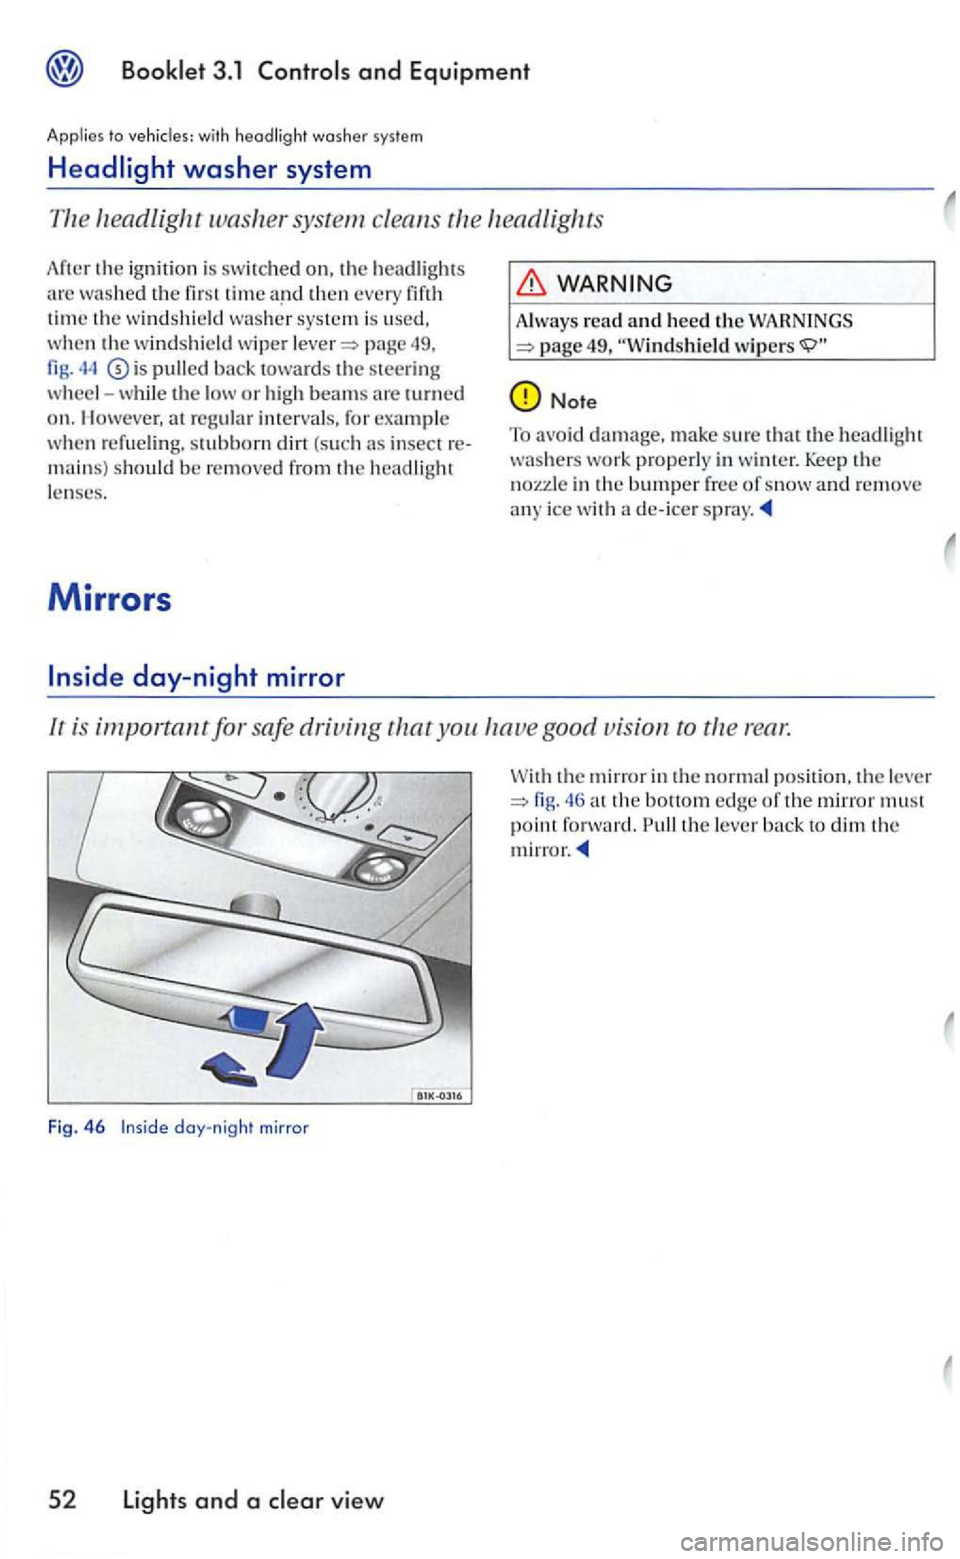
lr is important for safe driving you good vision ro rear.
Fig. 46 day-night mirror
5 2 Lights and a view
the mirror in the normal position. th e le ve r the bottom edge of th e mirror must point forward. the lever
Page 223 of 444
Applies to with power outside mirrors
Outside mirrors
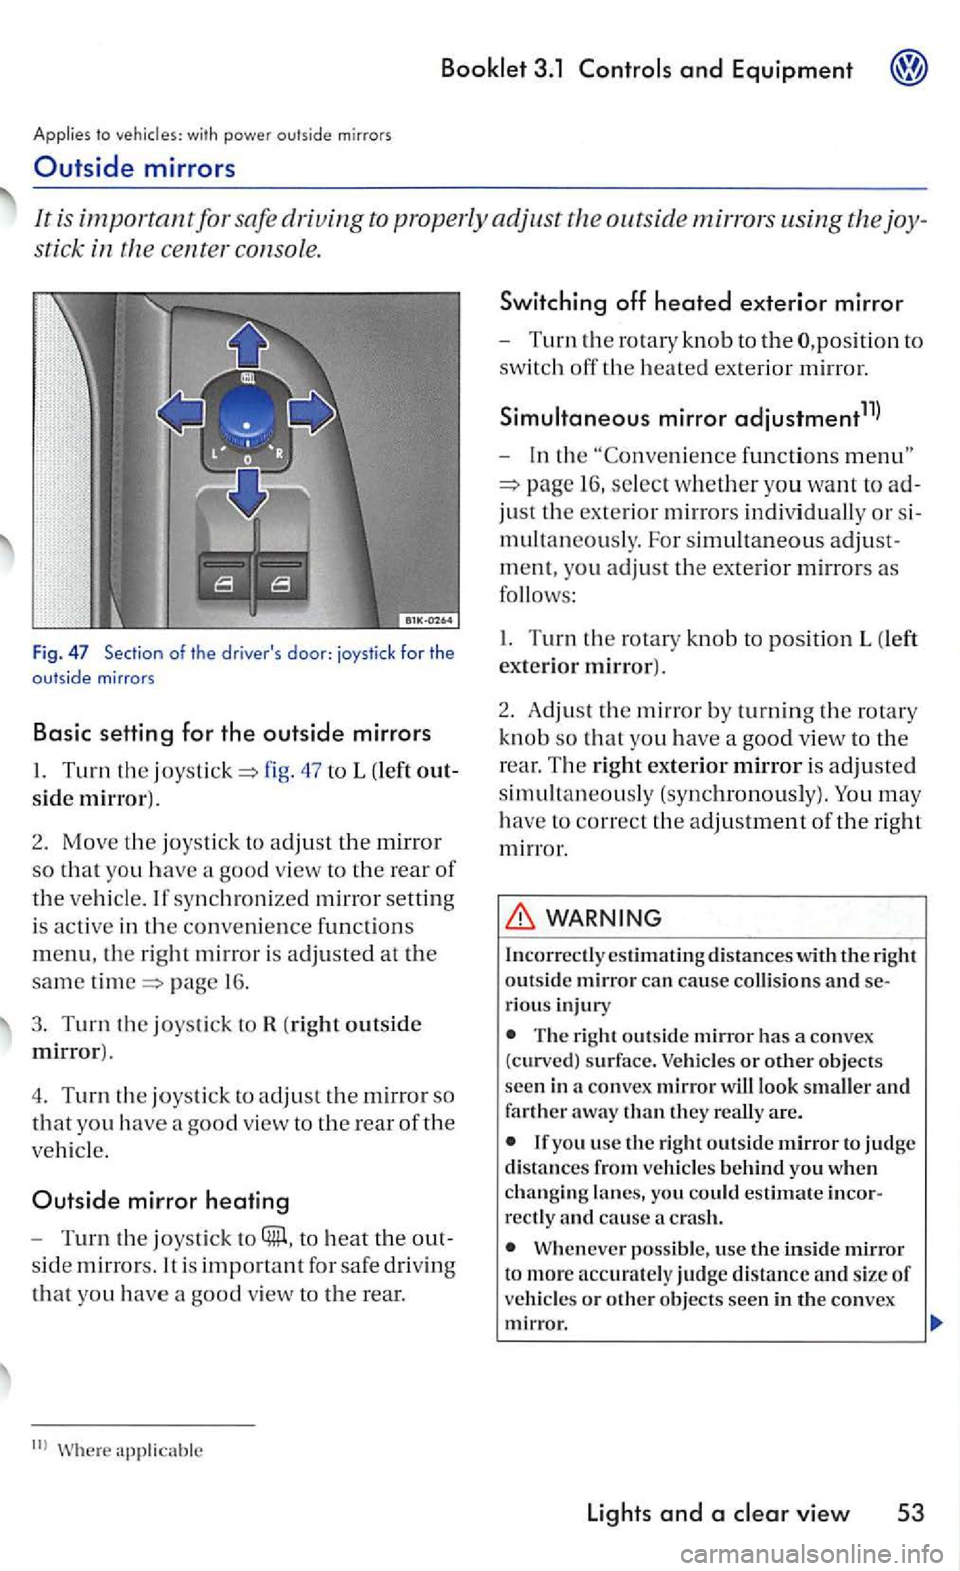
It is important for safe driving to properly adjust outsid e mirrors using the joy
stic k in the ce nter consol e.
Fig . 47 Section of the driver's door: joystick for the outside mirrors
Basic setting for the outside mirrors
47 to L (left out
side mirror).
2. Mov e the joystic k to adjus t th e mirror
so tha t yo u have a good view to th e rear of
the vehicl e. If synch roni zed mirror setting
i s
active in the conve nience fun ctions
menu, the right m irr or is adjusted at the
same page 1 6 .
3. Turn the joystick to R (right outside
mirror).
4. T
urn the joystick to adjust th e mirror so
that yo u have a good view to the rear of the
ve hicl e.
Outside mirror heating
-Turn the joysti ck to to heat the out
s id e
mirrors. It is fo r safe driv in g
that yo u have a goo d view to the rear.
functions
16 , select w hether yo u want to ad
just th e ex terior mirrors indi vidual ly or s i
m ultan
eously. For simultaneo us adjust
m ent, you
adjust th e exterior mirrors as
follows :
I. Turn the rotary kn o b to pos ition L (left
exte rio r mirror).
2 .
Adjust th e m irr or by turning th e rotary
kn ob
so that yo u have a goo d vie w to the
r ear. T
he right exterior mirror is adjusted
simultaneou sly (synchronously). You may
h ave to correct th e adjustment of the right
mirror .
WARNING
Incorrectl y estim ating d is ta n ces with the right outsid e mirror can cause co llision s and serious injury
The right outs id e mirror has a convex
(curved) s urfa ce. Vehicles or other objects
seen in a co nvex mirror will look smaller and farther away than they re all y are.
you usc the right outside m irror to judge distances from vehicle s behind you when changin g lanes, yo u could estimate incorrectly and cause crash.
Wheneve r possible, use the inside mirror t o more accurately judge distance and s ize of ve hicl es or other objects seen in th e convex mirror.
lights and a
Page 257 of 444
3.1 and Equipment
with
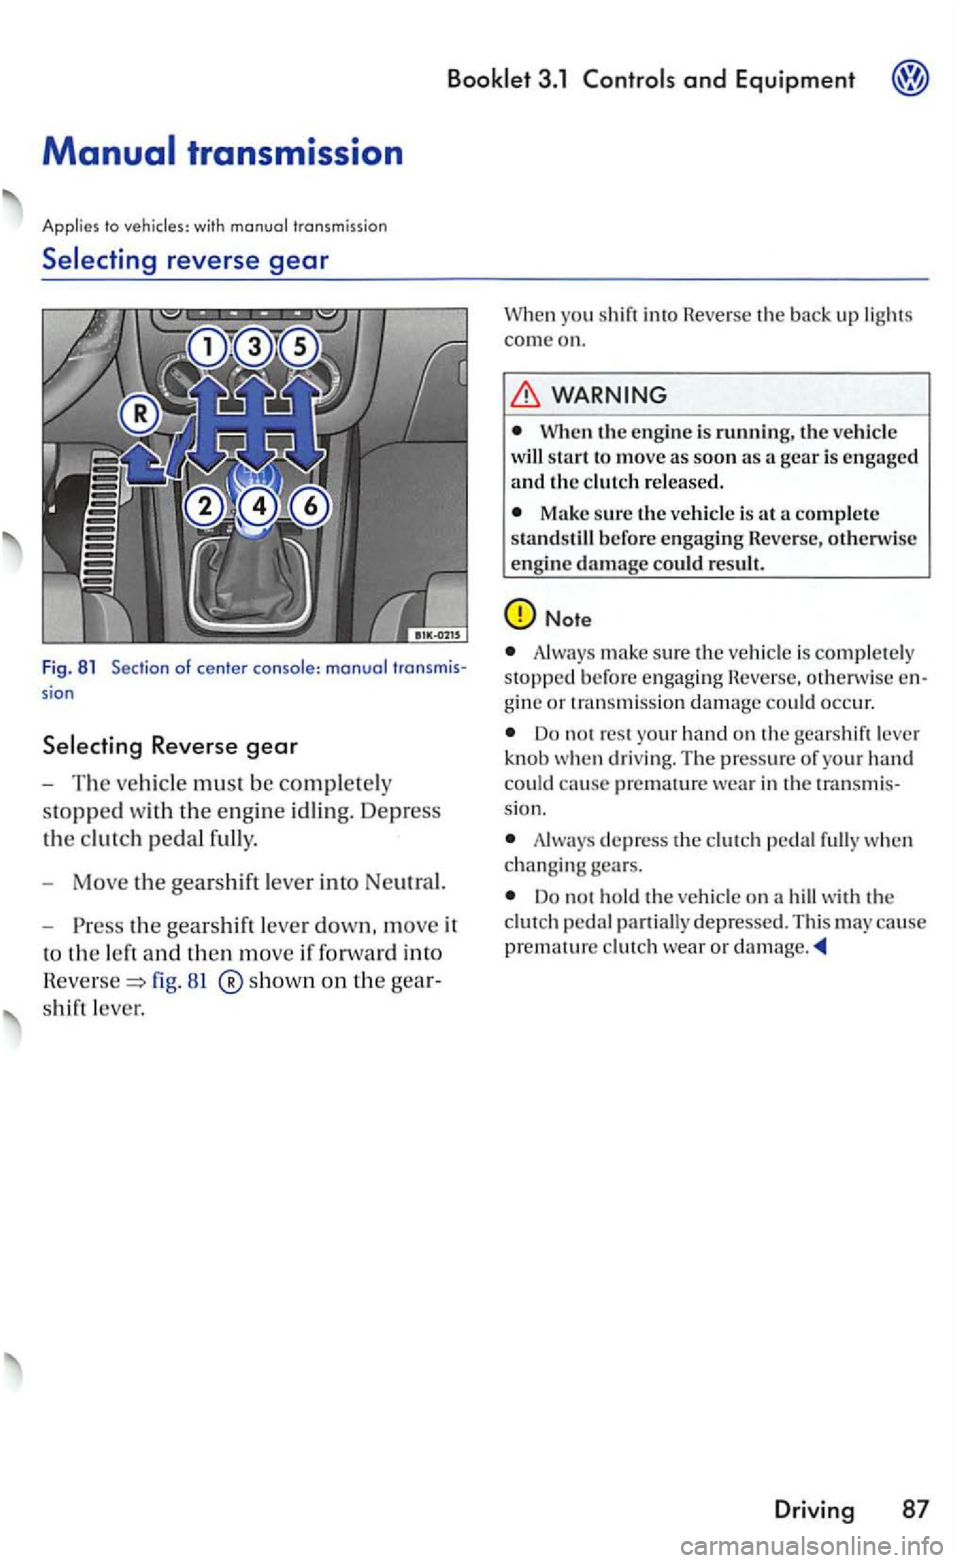
Selecting reverse gear
Fig . 81 Section of center sion
81 ®show n on th e
shift leve r.
you shif t in to Rever se th e bac k up lights
c om e on.
WARNING
When the e ngine is run n in g, t he start t o m ove as soo n as a gear is e ngaged
a nd the
Make sure the ve hicl e is at a comple te
s tandstil l b efor e engagin g Rev ers e, oth erw is e
e ng in e da mage c oul d re sult .
Always make sure the is com ple te ly stopped befo re e ngaging Reverse. othen vise
Do n o t res t your ha nd on the gears h ift leve r
knob when dri ving. The press ure of your hand
could ca use premat ure wea r in th e transmis
s ion.
Always dep ress the ped al full y w hen ch anging gears.
Do not hold the on a hill with t he peda l part ially depresse d. T his may cause
p remature clu tch wea r o r damage .
Drivi ng 87