lights VOLKSWAGEN GOLF 2008 Owner's Manual
[x] Cancel search | Manufacturer: VOLKSWAGEN, Model Year: 2008, Model line: GOLF, Model: VOLKSWAGEN GOLF 2008Pages: 444, PDF Size: 92.7 MB
Page 216 of 444
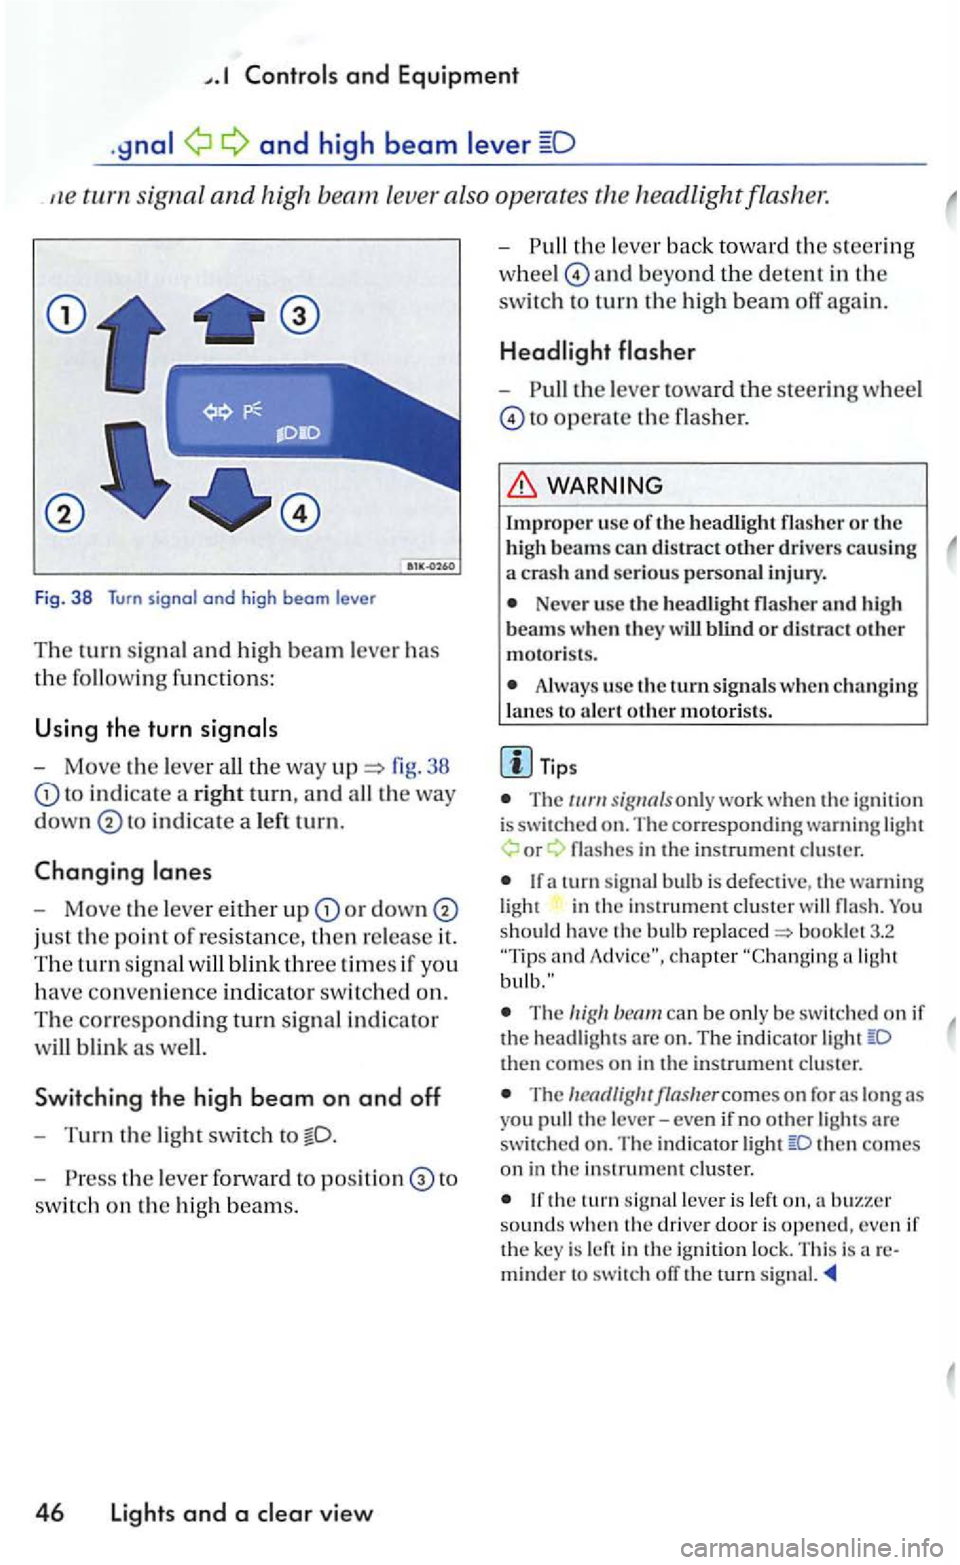
and Equipment
and high beam
signa l and high leve r also operates
Fig. 38 Turn signal and high beam le ve r
Th e turn signal a n d hi gh beam lever has
the followin g functions:
U sing the turn
- Move the lever 38
to in d icate a rig ht tu rn, and
in dicate a le ft tu rn.
Changing
-Move the leve r either u p or down
just the point of resistance, then re lease it.
The tu rn sig n al
Sw itchin g the high b eam on and off
-Turn the light swit ch to
- P ress the lever forward to to
switc h on the hig h beam s.
4 6 Lights and a view
-th e lever back to wa rd th e s teering
w hee l
and beyond the dete n t in the
switc h to turn th e high beam off again.
-the lever toward the steeri ng wheel
to operate the flasher.
Impro per usc of th e headli ght flasher o r the
h igh beams can distract other drive rs causing a crash an d serious personal injury.
Neve r use the headli gh t flasher and h igh
beam s w hen th ey w ill blind o r distract other motoris ts .
Always use the turn s ig nals w hen ch a nging
l a nes to a le rt oth e r m otori sts .
T ips
T he only work whe n the ig nition is switched on. The co rre sponding warning or
in the in strument cluster
and
The can be only be sw itc hed on if the head ligh ts are o n . The indi cator then comes on in the instrument cluster.
The
then co mes on in the in strument cluster.
the tu rn leve r is left sounds w hen th e driver door is opened, even if the key is left in the ign ition lock. This is areminder to switch ofT the rurn signal.
Page 217 of 444
Bookle t 3.1 and Equipment
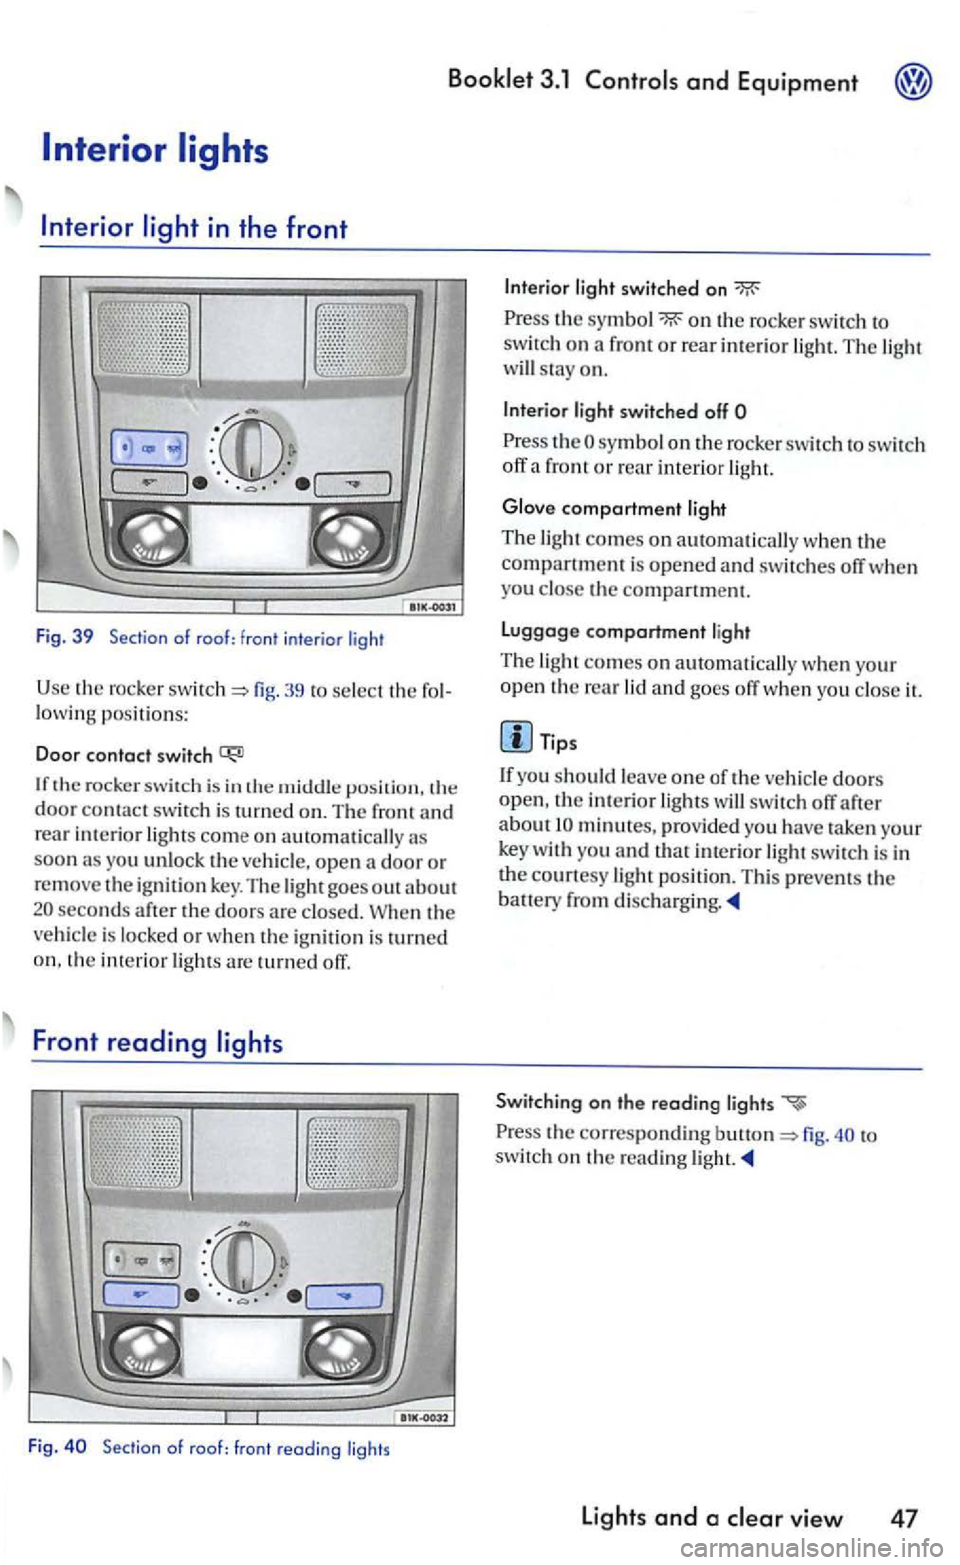
39 to select the lowing positions:
Doo r contact switch
door contac t swi tch is turned on. The front rear interior lights come on automatically as soon as you unlock the
seconds the doors are is locked or is o n. the interior are turned orr.
Front reading
th e on the rocker switch o n a front or rear interior The light will stay on.
light switched off
!h e sy mbol on the rocke r switc h to switch off a front or rear interior light.
Glove compartment ligh t
The light comes on
yo u the compartment.
Luggage compartment light
Th e light comes on au tomat ically when your open the rear lid and goes orr when you it.
Tips
doors
open, !he incerior orr after
is in
Switching on the reoding lights
to
switc h on !h e reading light.
Light s and a clear view 47
Page 218 of 444
and Equipment
Background
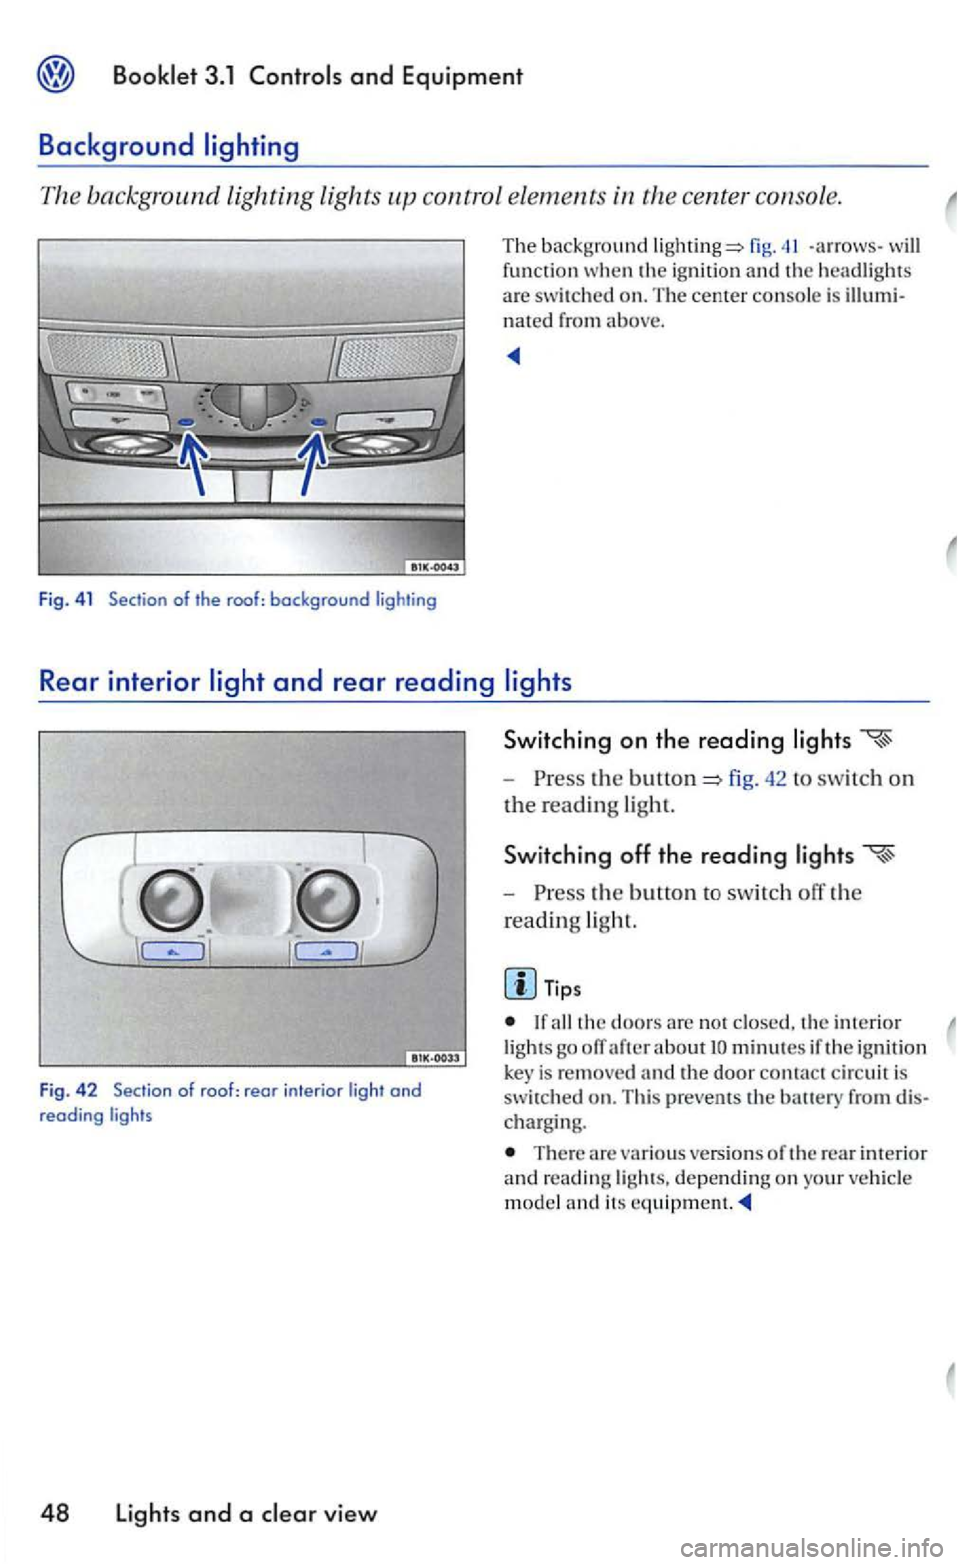
The background lighting lights control elements
fig. -arrows -the ignit io n and headlights
a re swit ch ed on. The cente r console is nated from above.
Rear interior
J
Switching on the reading
-the fig. 42 to swi tc h on
t h e read ing ligh t.
Switching off the reading
-the b utto n to switch off the
read ing
light.
Tips
the doo rs are n o t interio r
Fig . 42 Sec tion of roof : rear in te rior light and reading ligh ts
48 Lights and a view
lig hts go ofT after about minutes if the ig n ition is re m ove d and the door contact c ircuit is switched on. Thi s prevems th e
There are variou s versions of the rear interior reading ligh ts. dependin g on your m odel and its
Page 219 of 444
The su n viso r for th e drive r a nd the fro nt senger can be pulled out of its re taining clip in the of the vehicle and lUrned fig.
The mirrors in the sun viso rs have covers. yo u open the cover® . the light in
the com es on.
Tip s
Before you leave your vehicle , make sure that the make-up mirror cover in th e visor is closed.
the ignition key is re m oved, the light in the headliner goes out after about minutes.
This prevents th e
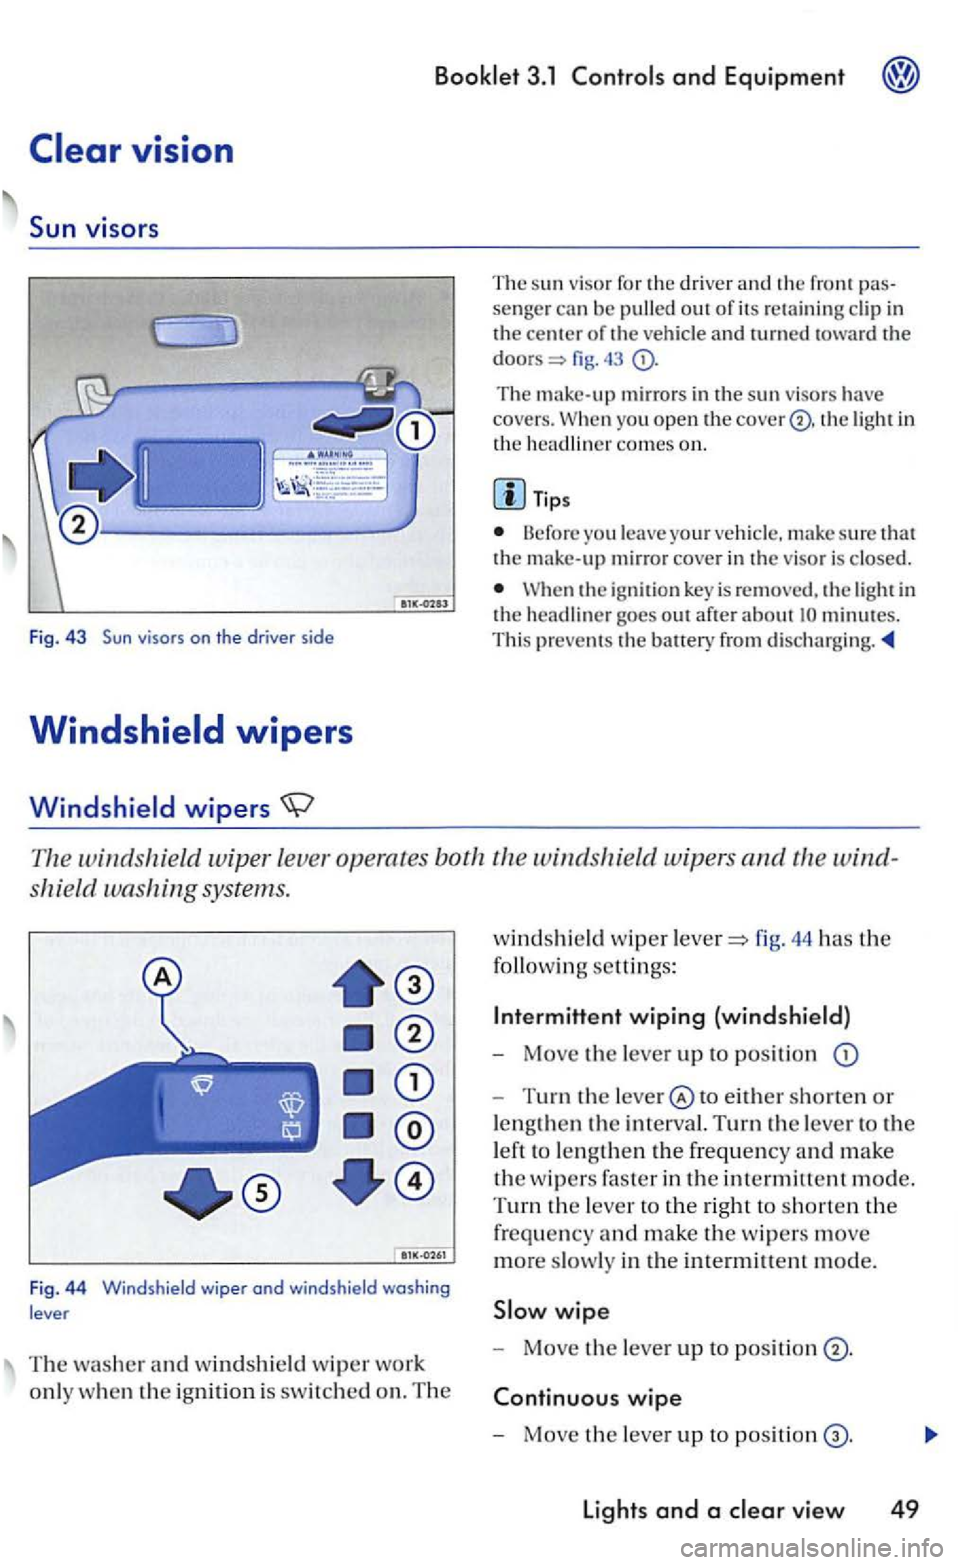
windshie ld wiper leve r operates both the windshield wip ers and
shield washing systems.
Fig . 4 4 Windshield wiper ond windshield washing
lever
T he washer and windshield w ip er wo rk
onl y w hen
the ignition is switch ed on. The
windshi eld wip er fig. 44 has the
following settings:
Inte rmittent wiping (windshield)
- Move the lever up to position
-Turn the to either shorten or
lengt hen
the in terval. Turn the lever to the
l eft to le n g
then the frequency and make
the w ipers faste r in the intermittent mode.
T
urn the lever to the right to shorten the
frequency and make the w ipers move
more slowly in the intermittent mode.
wipe
- Move the lever up to positi on
wipe
- Mo ve the lever up to positi on
Lights and a
Page 221 of 444
Rear window wiper
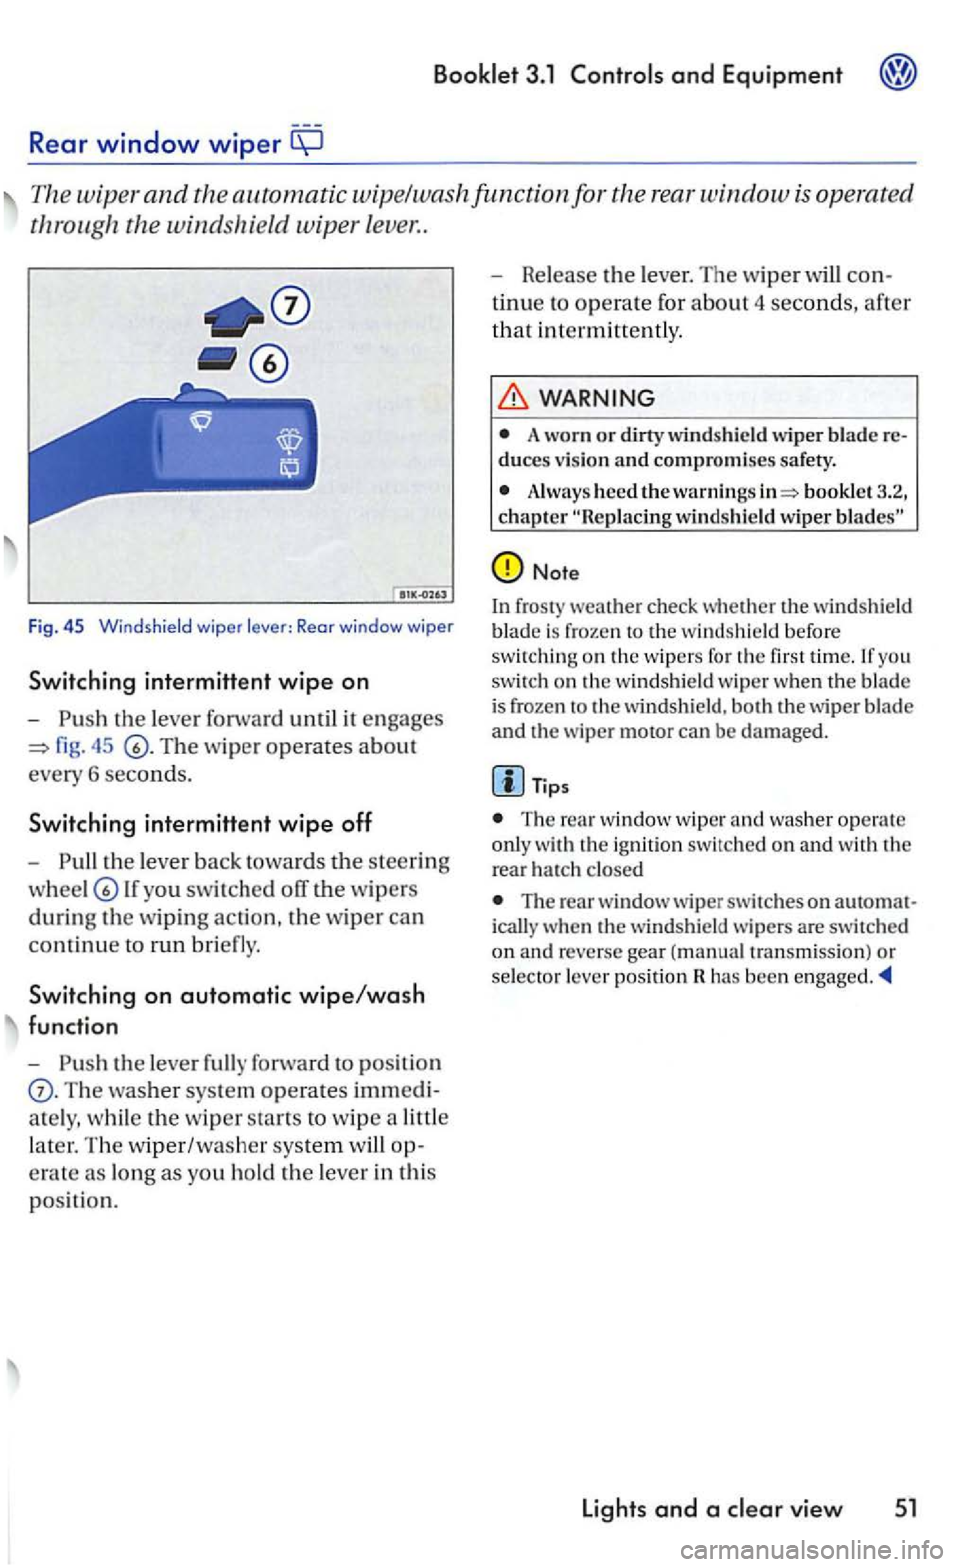
The wiper and the automatic wipe/wa sh func tion for the rear w indow
fig. 45
th e lev er back tow ard s th e s teering
lf you swit ch ed off the w ipers
during th e w ipin g action , th e w iper ca n
c
ontinu e to run bri efly.
Switching on automatic wipe/wash
function
-
Th e washer sys te m operates imm edi
a te ly , w hi le
the w ip er sta rts to wip e a littl e
l
ater. Th e w iper/washe r system op
e rat e as long
as you ho ld the le ver in th is
p os itio n. -
Release th
e le ver. The wip er will con
t
inue to operate for abou t 4 seconds, afte r
th
at i n termitt en tly .
WARNING
A worn or dirty wind shield wiper blade re duces v ision and compromises safety.
Alway s heed the warni ngs booklet 3.2, chapter
Note
In fros ty weat he r check whether the win dshield
b lade is froze n the w indshi eld befo re swit chin g on th e w ipers for you switch on th e w indshield wip e r when th e blade is frozen th e w ind shi eld, bot h th e wiper b lade
and the wiper motor can be damage d.
Tips
The window wi per and was her ope rat e
o nl y the rear h a tc h closed
The rear w indow wiper swi tc hes on auto m at
i c all y w hen th e windsh ie ld w ip ers are switc hed
o n an d reverse gear (manual tra n sm iss ion) or selec to r l ever pos ition has been
Lights and a
Page 222 of 444
with headlight washer system
l1eadlig ht
49, 44 is pulled toward s the ste ering
w heel -while low or high beams turned on. llowever, insect
WARNING
A lways read and heed the ..
Note
To avoid make sure that the headlight washers work properly in winter. Keep the n ozzle in the bumper free of snow and remove any ice with de-icer
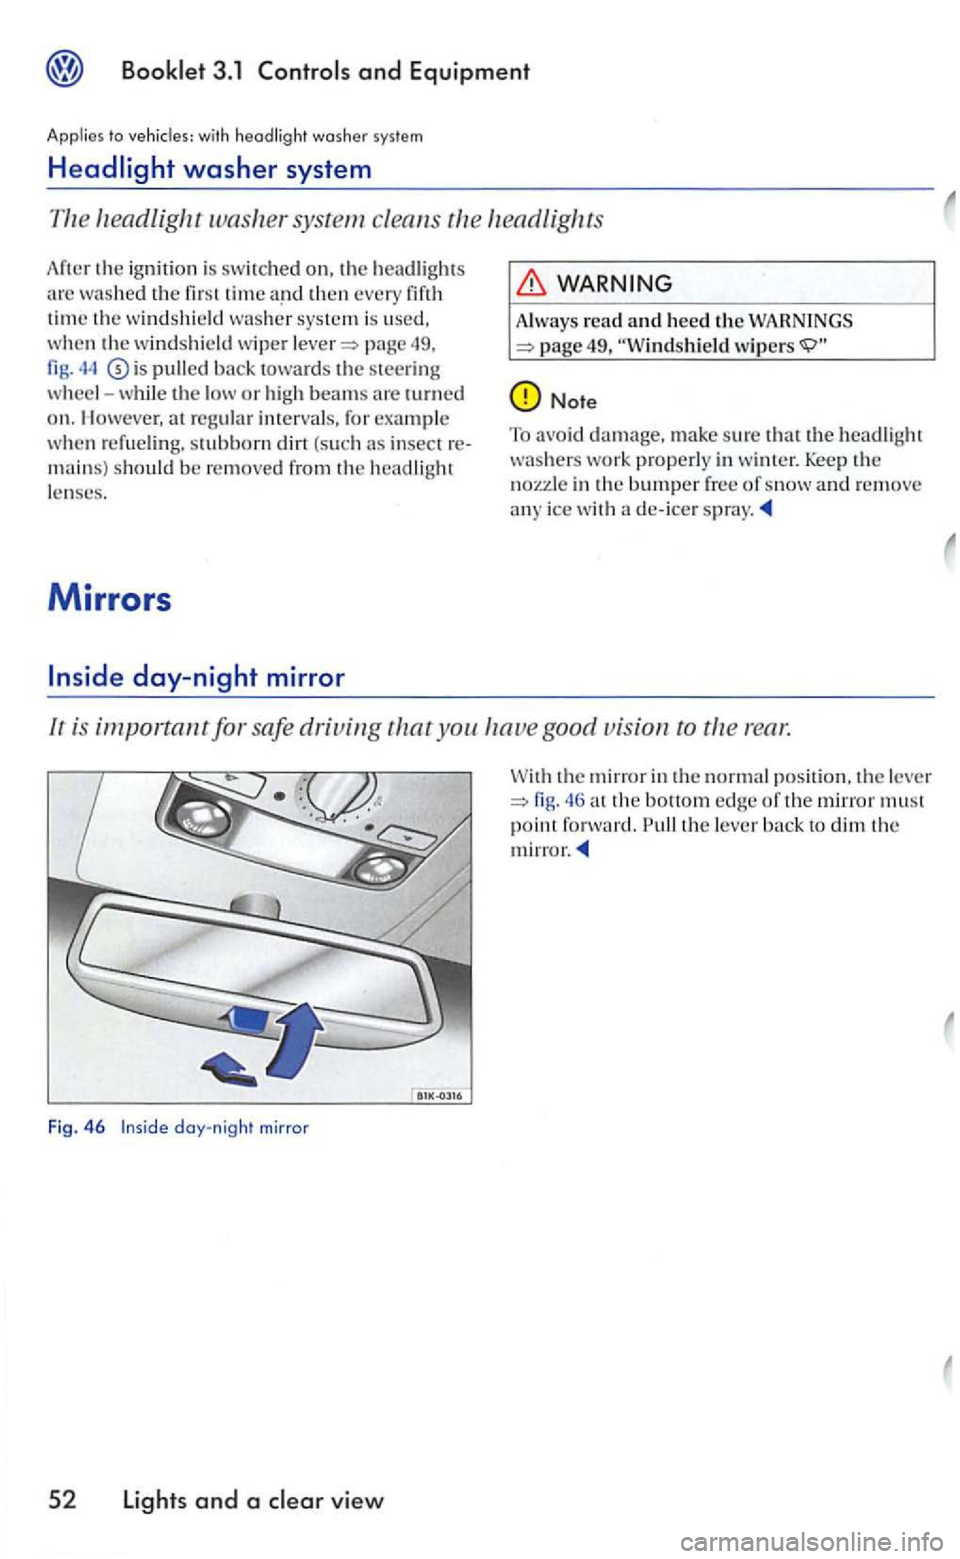
lr is important for safe driving you good vision ro rear.
Fig. 46 day-night mirror
5 2 Lights and a view
the mirror in the normal position. th e le ve r the bottom edge of th e mirror must point forward. the lever
Page 223 of 444
Applies to with power outside mirrors
Outside mirrors
It is important for safe driving to properly adjust outsid e mirrors using the joy
stic k in the ce nter consol e.
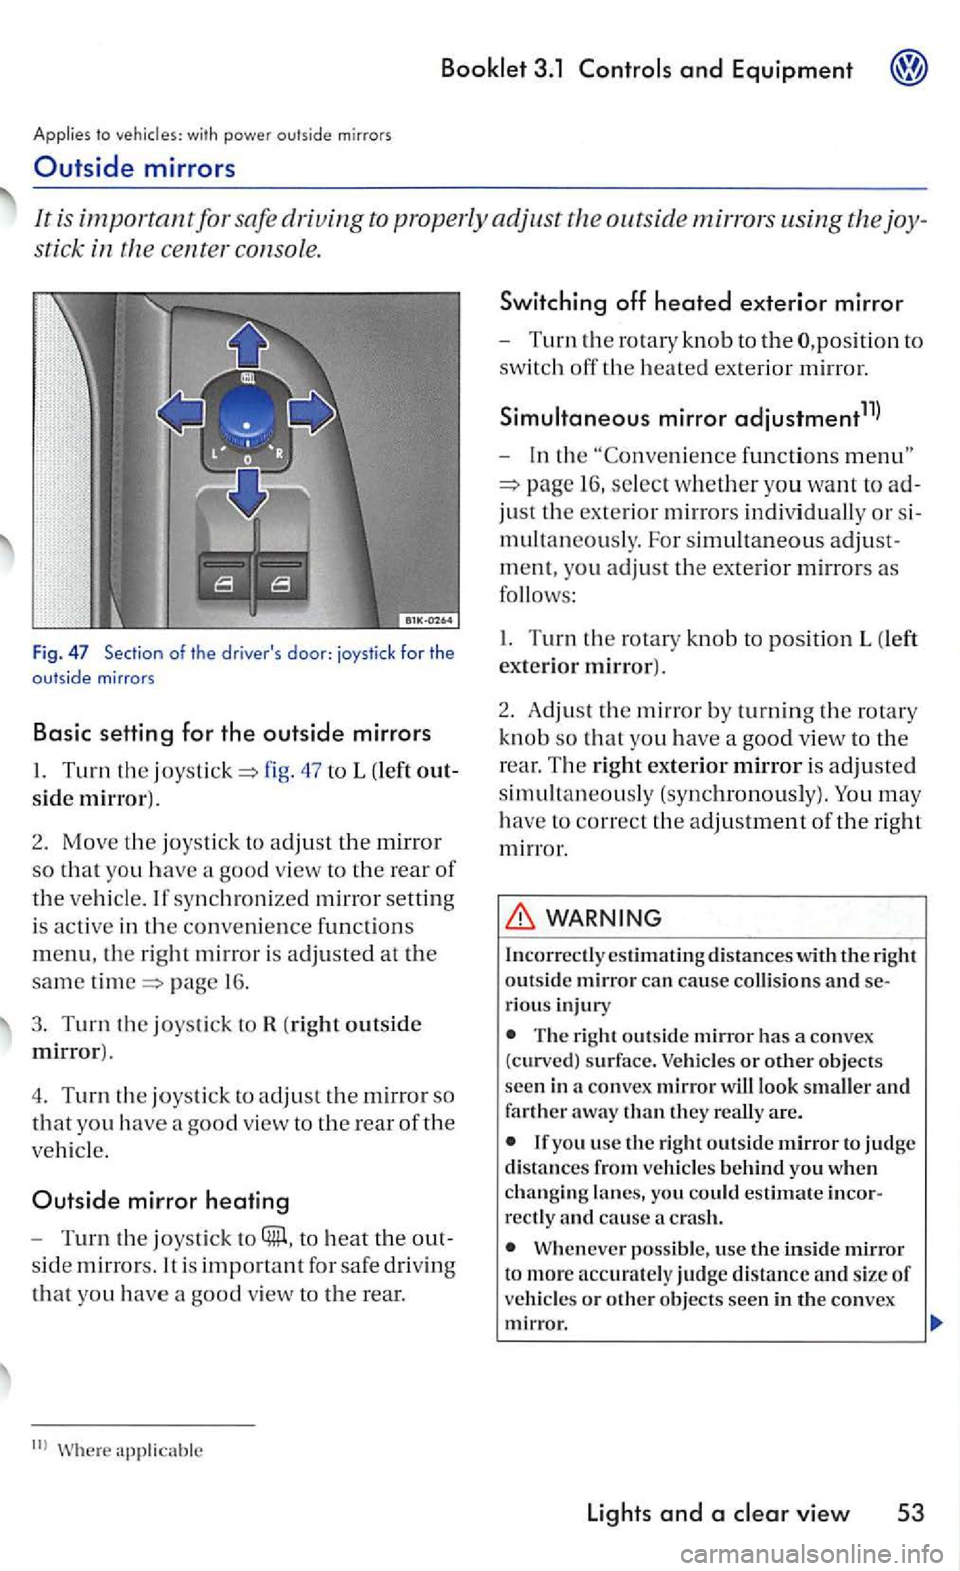
Fig . 47 Section of the driver's door: joystick for the outside mirrors
Basic setting for the outside mirrors
47 to L (left out
side mirror).
2. Mov e the joystic k to adjus t th e mirror
so tha t yo u have a good view to th e rear of
the vehicl e. If synch roni zed mirror setting
i s
active in the conve nience fun ctions
menu, the right m irr or is adjusted at the
same page 1 6 .
3. Turn the joystick to R (right outside
mirror).
4. T
urn the joystick to adjust th e mirror so
that yo u have a good view to the rear of the
ve hicl e.
Outside mirror heating
-Turn the joysti ck to to heat the out
s id e
mirrors. It is fo r safe driv in g
that yo u have a goo d view to the rear.
functions
16 , select w hether yo u want to ad
just th e ex terior mirrors indi vidual ly or s i
m ultan
eously. For simultaneo us adjust
m ent, you
adjust th e exterior mirrors as
follows :
I. Turn the rotary kn o b to pos ition L (left
exte rio r mirror).
2 .
Adjust th e m irr or by turning th e rotary
kn ob
so that yo u have a goo d vie w to the
r ear. T
he right exterior mirror is adjusted
simultaneou sly (synchronously). You may
h ave to correct th e adjustment of the right
mirror .
WARNING
Incorrectl y estim ating d is ta n ces with the right outsid e mirror can cause co llision s and serious injury
The right outs id e mirror has a convex
(curved) s urfa ce. Vehicles or other objects
seen in a co nvex mirror will look smaller and farther away than they re all y are.
you usc the right outside m irror to judge distances from vehicle s behind you when changin g lanes, yo u could estimate incorrectly and cause crash.
Wheneve r possible, use the inside mirror t o more accurately judge distance and s ize of ve hicl es or other objects seen in th e convex mirror.
lights and a
Page 257 of 444
3.1 and Equipment
with
Selecting reverse gear
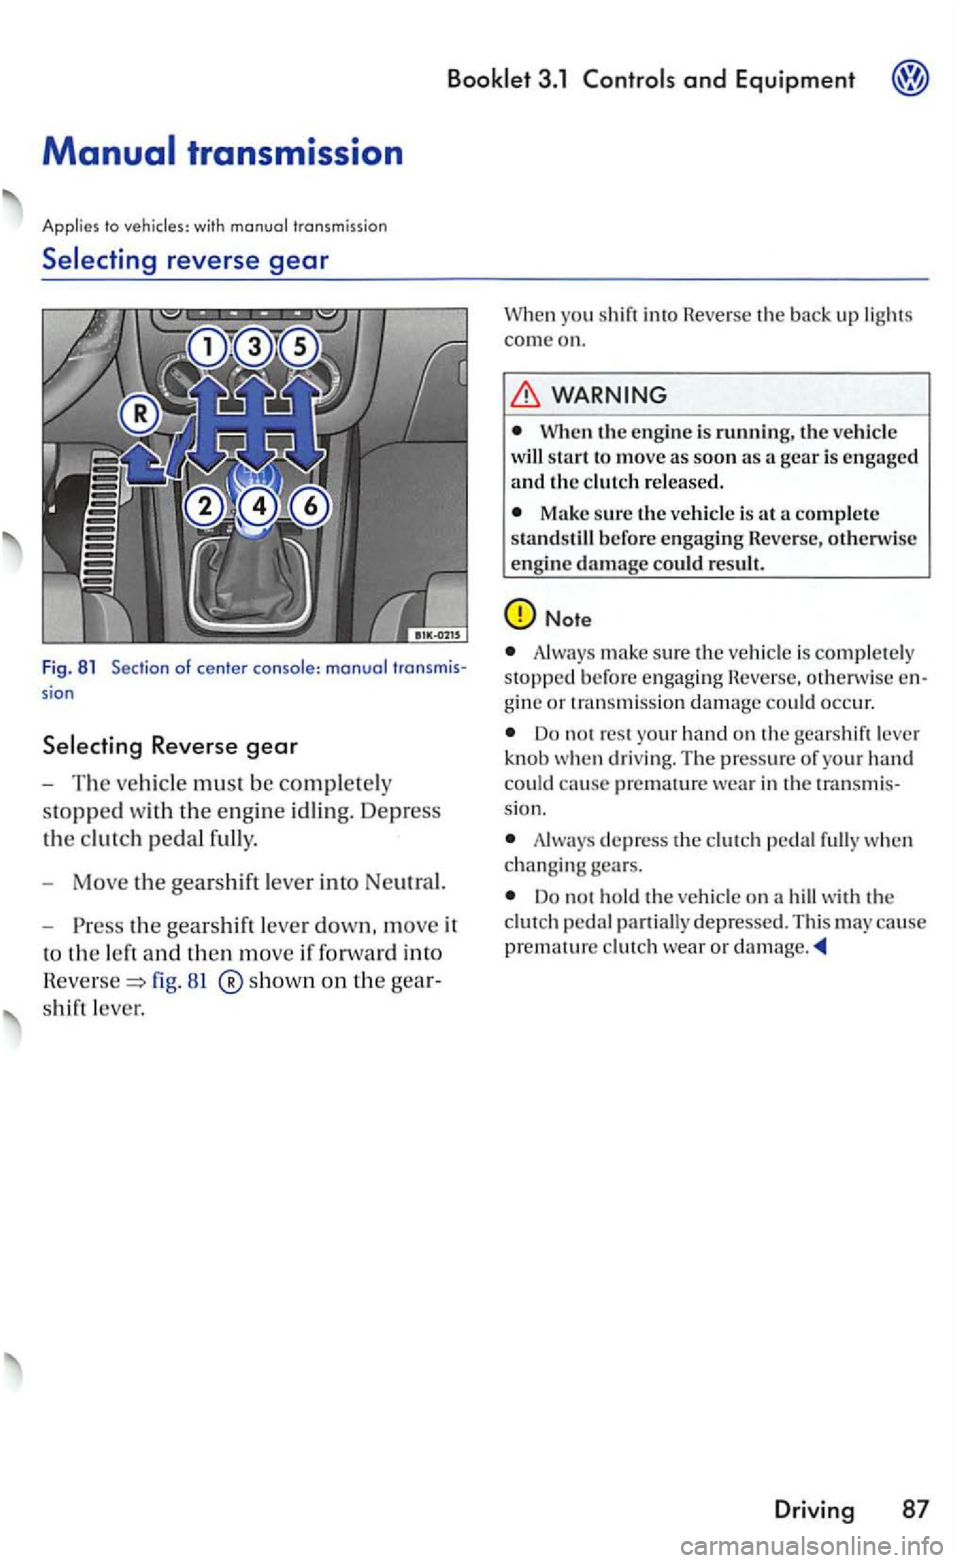
Fig . 81 Section of center sion
81 ®show n on th e
shift leve r.
you shif t in to Rever se th e bac k up lights
c om e on.
WARNING
When the e ngine is run n in g, t he start t o m ove as soo n as a gear is e ngaged
a nd the
Make sure the ve hicl e is at a comple te
s tandstil l b efor e engagin g Rev ers e, oth erw is e
e ng in e da mage c oul d re sult .
Always make sure the is com ple te ly stopped befo re e ngaging Reverse. othen vise
Do n o t res t your ha nd on the gears h ift leve r
knob when dri ving. The press ure of your hand
could ca use premat ure wea r in th e transmis
s ion.
Always dep ress the ped al full y w hen ch anging gears.
Do not hold the on a hill with t he peda l part ially depresse d. T his may cause
p remature clu tch wea r o r damage .
Drivi ng 87
Page 269 of 444
3.1 and Equipment
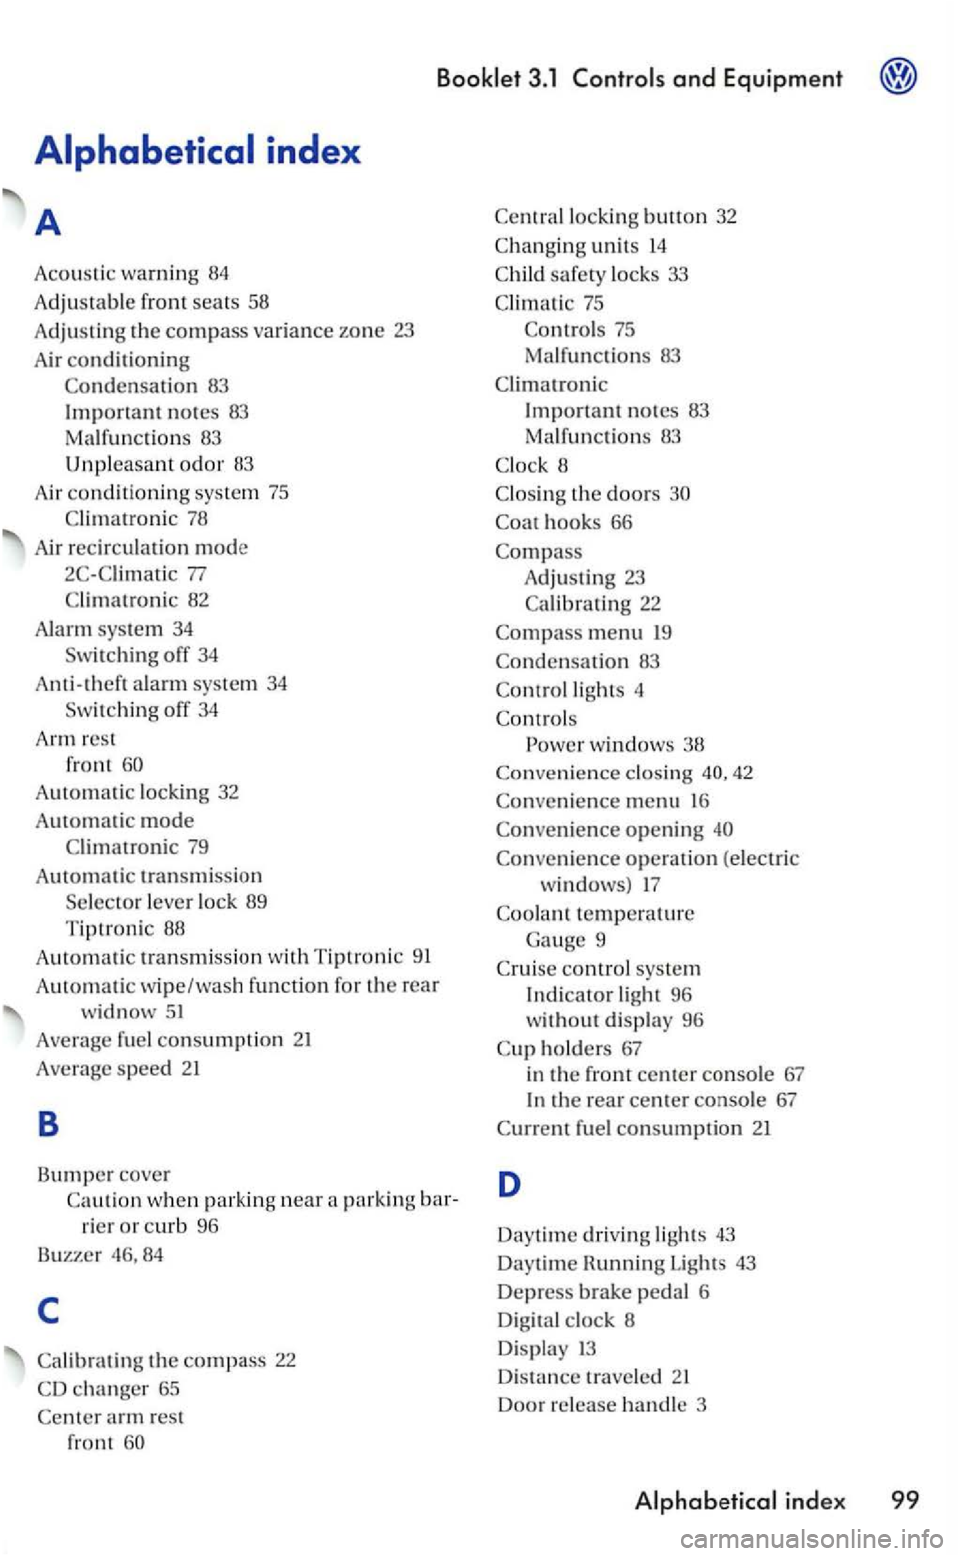
Average fuel consumpti on 21
Average spe ed
B
Bumper cove r
Ca ution when parkin g near a parking
rier or curb 96
Buzzer 46,
84
c
Calibrating the compass 22
CD changer 65
Center arm rest
fro nt
Child safety loc ks 33
Clima tic 75
Controls 75
Malfu nctions 83
Climatronic
Important notes 83
Ma lfunc ti
ons 83
C
lock 8
Clos ing the
doors
Coat hooks 66
Compass
Adjusting 23
Calibrating 22
Compass menu 19
Condensation 83
Control lights 4
Controls
w indows 38
Convenience closi ng
D istance tra veled
Doo r re lease handle 3
ind ex 99
Page 270 of 444
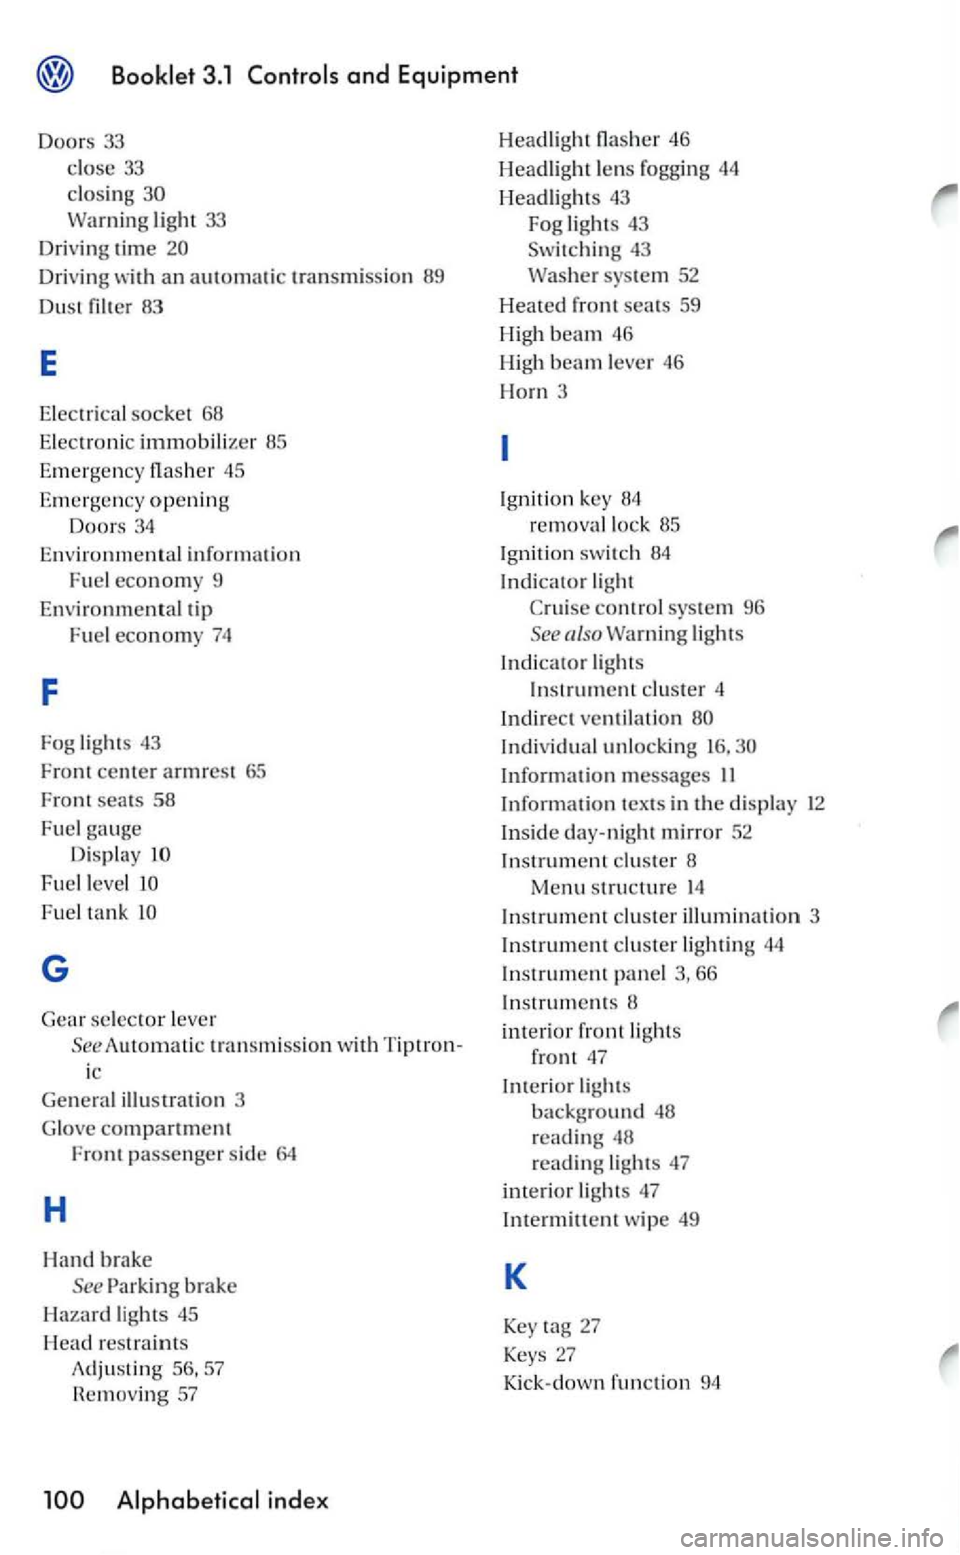
light 33
Dri v
ing time
Dri vin g wi th an t rans missio n 89
Du st filter 83
E
E le c trical socket 68
E l
ectro n ic immobilizer 85
Emergency fla sh er 45
Emergen cy opening
Doors 34
Env
ironme n tal informatio n
Fuel econom y 9
Environmen tal tip
Fuel economy 74
F
Fog light s 43
Front center armrest 65
Front seats 58
Fuel gauge Display
Fuel level
F u el ta n k
G
Gear se lector lever
See A
utomatic trans m ission wit h Tip tron
ic
illu stration 3
G l
ove compartment Front passenger sid e 64
H
Hand brake
See Parking brake
Hazard lights 45
H
ead restraints
Adjusting 57
R em
oving 57
46
Headlight lens fogging 44
Headlights 43
Fog
lights 43 Switching 43
syste m 52
H
eated f r ont seats 59
H ig h
beam 46
High
beam lever 46
Horn 3
I g niti on key
removal lock 85
I gni ti
on switch 84
Indicator light
control sy stem 96
See also
Indi vid ual unlocking
In formati o n messages
66
In struments
inte rio r front lights
front '1 7
Interio r lights
backg round 48
reading 48
readin g lig ht s 47
imerio r ligh ts 47
In te
rmitt ent wipe 49
K
Key 27
Keys 27
Kick-down functi on 94