tow VOLKSWAGEN GOLF 2009 Owners Manual
[x] Cancel search | Manufacturer: VOLKSWAGEN, Model Year: 2009, Model line: GOLF, Model: VOLKSWAGEN GOLF 2009Pages: 516, PDF Size: 105.12 MB
Page 10 of 516
Parts not scheduled for inspection or replacement
Any part, which is not scheduled for inspection or
replacement at maintenance intervals specified in the Maintenance booklet, is covered
by this warranty for the
uled maintenance is covered for the duration of these warranties.
A part
in accordance with Volkswagen 's
instructions or required scheduled maintenance is
warranted until the next scheduled replacement
terval for the duration of these warranties.
Damage to non-warranty parts
your model is within the United Emissions Warranties , Canadian can submit a warranty claim. Proof of ed residence is required . the Canad ian
dealer cannot submit your warranty claim, you may
be asked to pay for the repair .
your return to
the United please present the invoice to your United
stances to tow or drive your model the
nearest authorized Volkswagen dealer. The
dealer
had comp leted the repair(s ). Reimbursemen t
dealer:
A sta temen t explaining the circumsta nces that
prevented you from gettin g to an authorized
Paid receipt(s),
Repair order(s) , and
Part(s) removed from your model
Damage caused by tampering, use of improper fuel, abuse, and improper maintenance
Th ese limited warranties do not cover any damage
to the vehicle caused by tampering with emiss ion controls , use of conta ining lead, or fuel not
meet ing the specifications set forth in the Owner's
Manua l, and abuse , neglect or improper
warranties
Any warranty, including any warranty of merchantability or warranty of fitness for a particular purpose, is limited in duration to the stated period of these written warranties.
and consequential damages
These limited warranties do not cover any denta l or consequential damages, including but not
states do not
Notice
Page 58 of 516
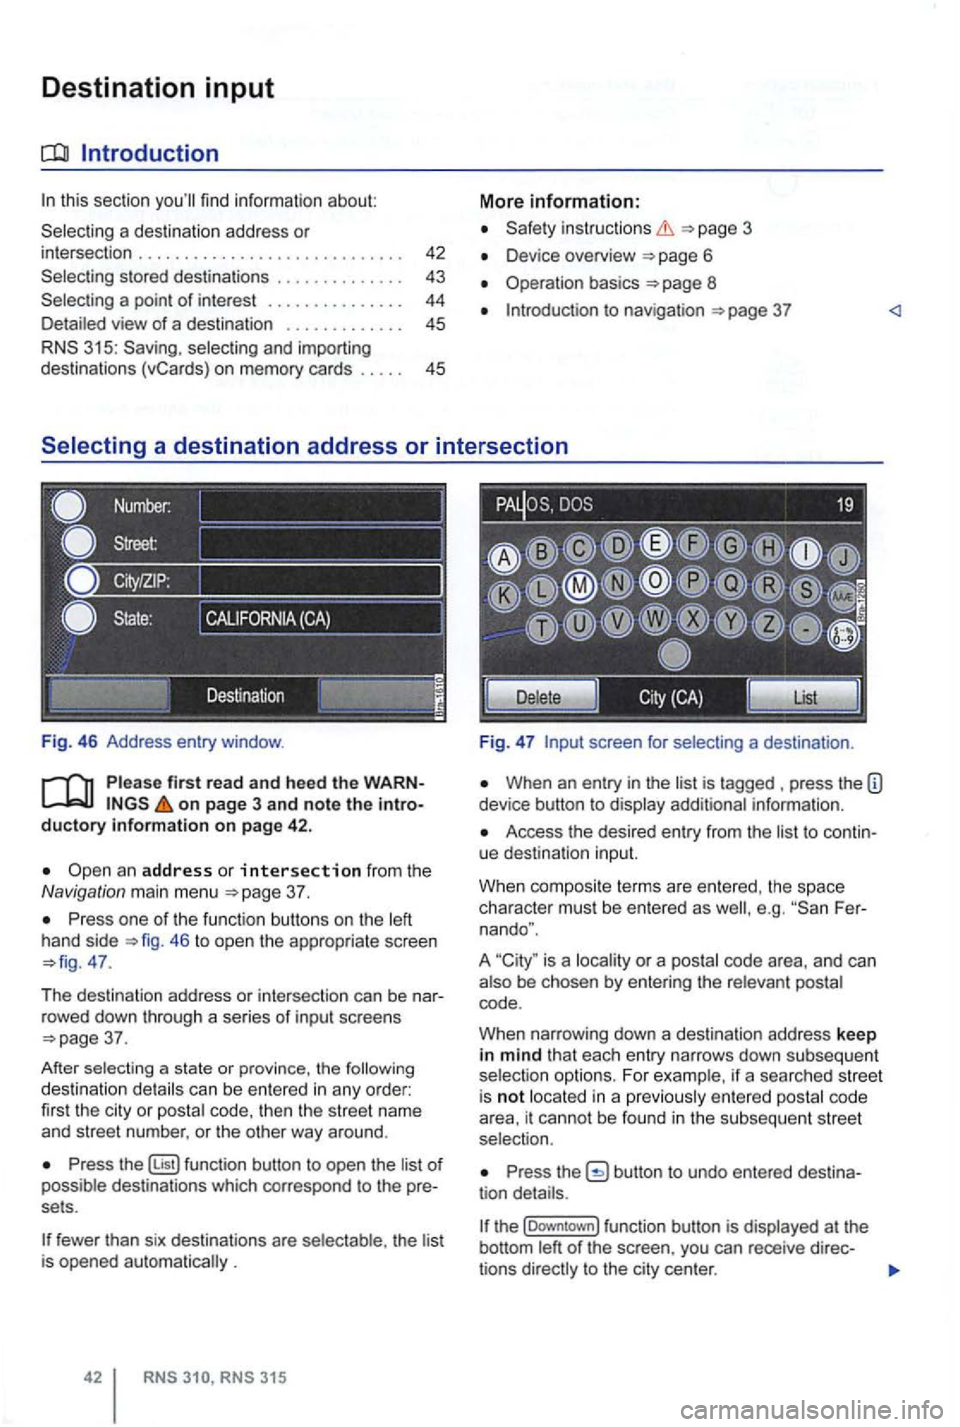
Destination input
this section
a destination address or intersection . . . . . . . . . . . . . . . . . . . . . . . . . . . 43
a point of interest . . . . . . . . . . . . . . . 44 view of a dest ination . . . . . . . . . . . . . 45
315: Saving .
on page 3 an d note t he
37 .
one of the functi on buttons on the 46 to open the appropriate screen 47.
T he destina tion address or intersec tion can be nar
r owed down throug h a se
ries of i nput screens 37.
After sel
ecting a state or province, the can be entered in any order:
fir st the cit y or code, then the str ee t name
and street number. or the oth er way around .
function button to open the of destinations which corres pond to the pre
sets .
fewer than six destinations are th e lis t is opened .
in structio ns
Device overview 6
Operation basics 8
to nav igation
screen for
When an entry in the is tagged press the information .
Access the desired entry from the to continue destinatio n input.
W hen composi te terms are entered . t
he space
character must be ente red as Fer
nando ".
A
is a or a
code .
W hen narrow ing down a
destination address keep in mind that each entry narrows down sub seq uent
ente red cod e
area, it cannot be found in the subsequent stree t
selection.
the
t he (Downtown] function button is
Page 60 of 516
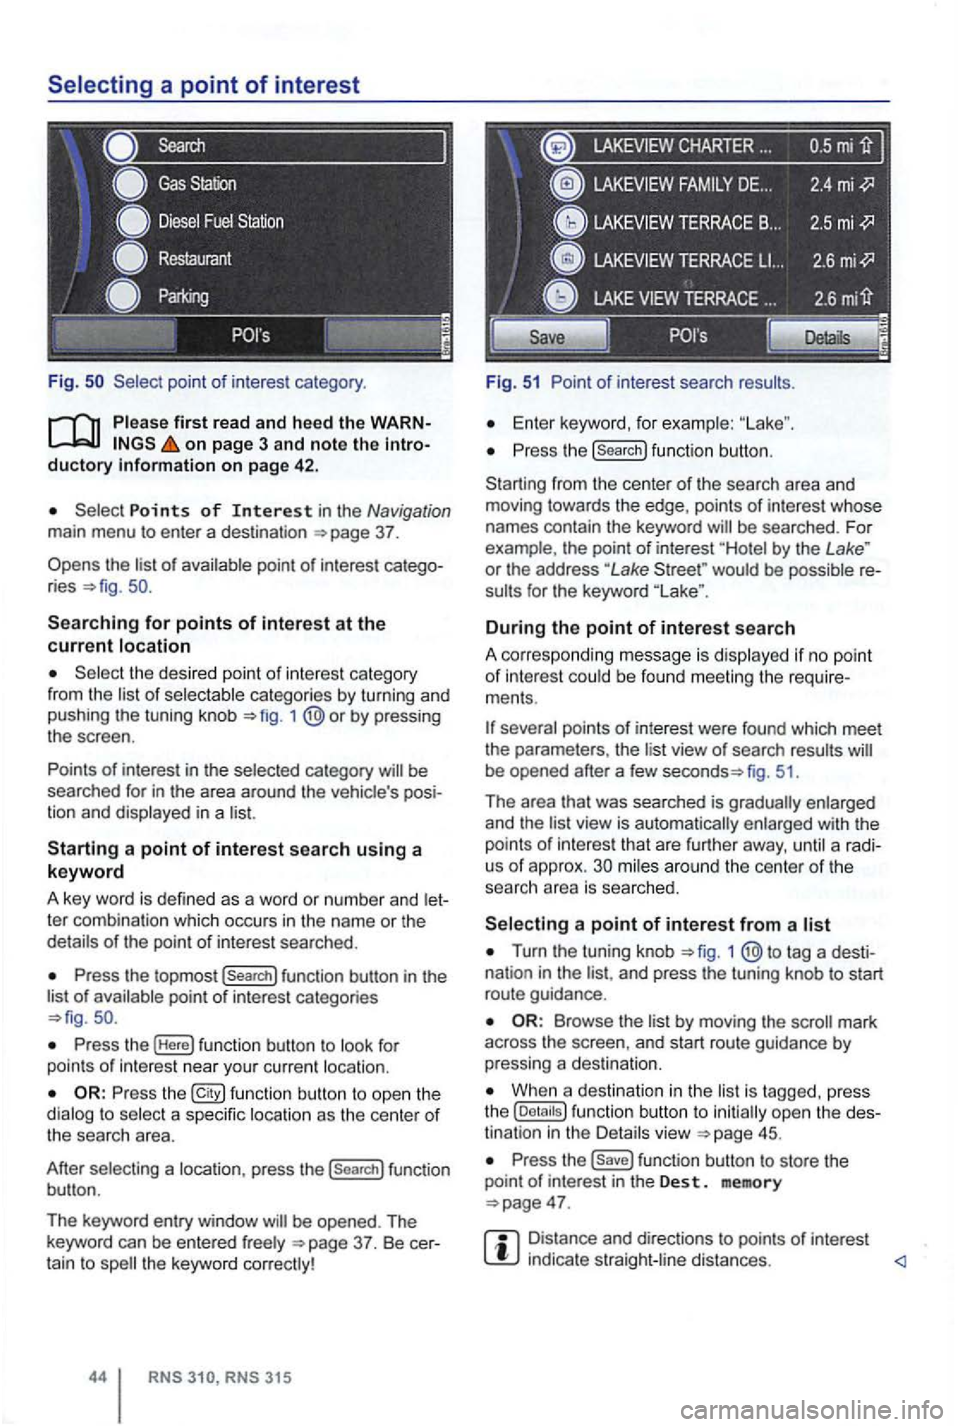
Fig .
on page 3 and note the introductory on pag e 42 .
Points of Interest in the Navigation main menu to enter a destination
Searching for points of interest at the current location
the desired point of interest category
from the list of selectable categories by turning and
pushing the tuning knob 1
Press the topmost (Search] function button in the
list of availab le point of interest categories
Press the (Here] function button to look for
points of int erest near your current location.
Press the function button to ope n the
dialog to select a specific location as the center of the searc h area.
After selecting a location, press the
(search] function
button .
The keyword entry window
CHARTER ...
Fig. 51 Point of interest search results.
Enter keyword, for examp le:
Press the (search] function button.
Starting from the center
of the search area and
moving towards the edge , points of interest whose
names contain the keyword
by the Lake " or the address "Lake would be possible re
sults for the keyword
During the point of interest search
A correspo nding message is disp layed if no point of interest could be found meeting the require
ments .
fig. 51.
Th e area that was searched is gradually enlarged
and the
view is automatically enlarged with the
points of int erest that are further away, until a radi
us of approx. mi les around the center of the
searc h area is searched.
Turn the tuning knob 1 tag a desti
nation in the and press the tuning knob to start
route guidance .
by moving the mark
across the screen , and start route guidance by pressing a destina tion.
When a destination in the is tagg ed , press
the
Press the function button to store the
point of in terest in the Des t. memory
Distance and directions to points of interest indica te straight -line distances.
Page 102 of 516
4
. . . . . . 6
- Front view . . . . . . . . . . . . . . . . . . . .
- Center console overview . . . . . . . . . . . . . . 12
- Fron t pa sse nger side overvi ew . . . . . . . .
14
- Symbo ls o n the roo f console . . . . . . . . . . 14
Instrument cluster and instrument panel
- Warning and indica tor
lights . . . . . . . . . . 15
-cluster . . . . . . . . . . . . . . . . . . . 18
-Volk swage n Information System . . .
basics
- Driv ing check lists and warnings .
....... 31
- Techn ical data . . . . . . . . . . . . . . . . . . . . . . . 34
and closing
- Vehic le key set . . . . . . . . . . . . . . . . . . . . . . . 36
-locking and closing system . . . . . 4 1
- Doo rs . . . . . . . . . . . . . . . . . . . . . . . . . . . . . . . 47
- Rear hatch . . . . . . . . . . . . . . . . . . . . . . . . . 49
-. . . 53
-s lidin g and sunroof . . . . . . . 56
properly and safely
- Adjusting the sea ting position . . . . . . .
. . 58
-functions . . . . . . . . . . . . . . . . . . . . . . 67
- Safety . . . . . . . . . . . . . . . . . . . . . . . . . . 69
- Airbag system . . . . . . . . . . . . . . . . . . . . . . . 82
-Child sa fety and child restraints ........ 1
Lights and vision
- Lights ............................... 122
-protectio n ....................... 128
-Windshield wipers and washer ......... 129
-Mir ro rs .............................. 134
Transporting
- Driving tips
.......................... 137
-Luggage compa rtment ................ 141
of contents
- Roof rack . . . . . . . . . . . . . . . . . . . . . . . . . 146
- Trailer towing ...... ............•. .... 149
1 5 7
- Cup holders
......................... 161
- 12
sockets . . . . . . . . . . . . . . . . . . . . . 163
shifting, park ing
- Sta rting and stoppin g
the engin e ....... 165
- Shifting ................... .......... 171
- Brak ing , stop ping , and park ing
......... 179
- Sav ing
fuel a nd helping the environm ent 189
-Steering ............................. 192
Driver assistance systems
- Starting assistance systems
........... 195
-Cruise Control System ......... 19 7
-
nre Mo nitori ng System .............................
control
- Healing and air cond itioning
At the gas station
- Refueling
........................ .... 214
-Fuel ...........................•.... 2 19
Care , maintenance .... 222
fo r work ing in the engin e
compartment
................... ..... 222
- Engine oil ........................... 227
- Engine coolant ....................... 233
-Vehicle battery ....................... 238
Vehicle care and maintenance
- Exteri or
care and cleaning ............ 243
-care and cleaning ............. 251
-
accesso ries, repa irs and
modi fications ........................ 283
- Consumer information ................ 291
- Declaration
of Complia nce,
T elecomm unicat ions and Electro nic
Systems
............................ 293
- Report ing Safe ty Defects ............. 294
- Engin e con trol and emission control
system .............................. 295
Page 103 of 516
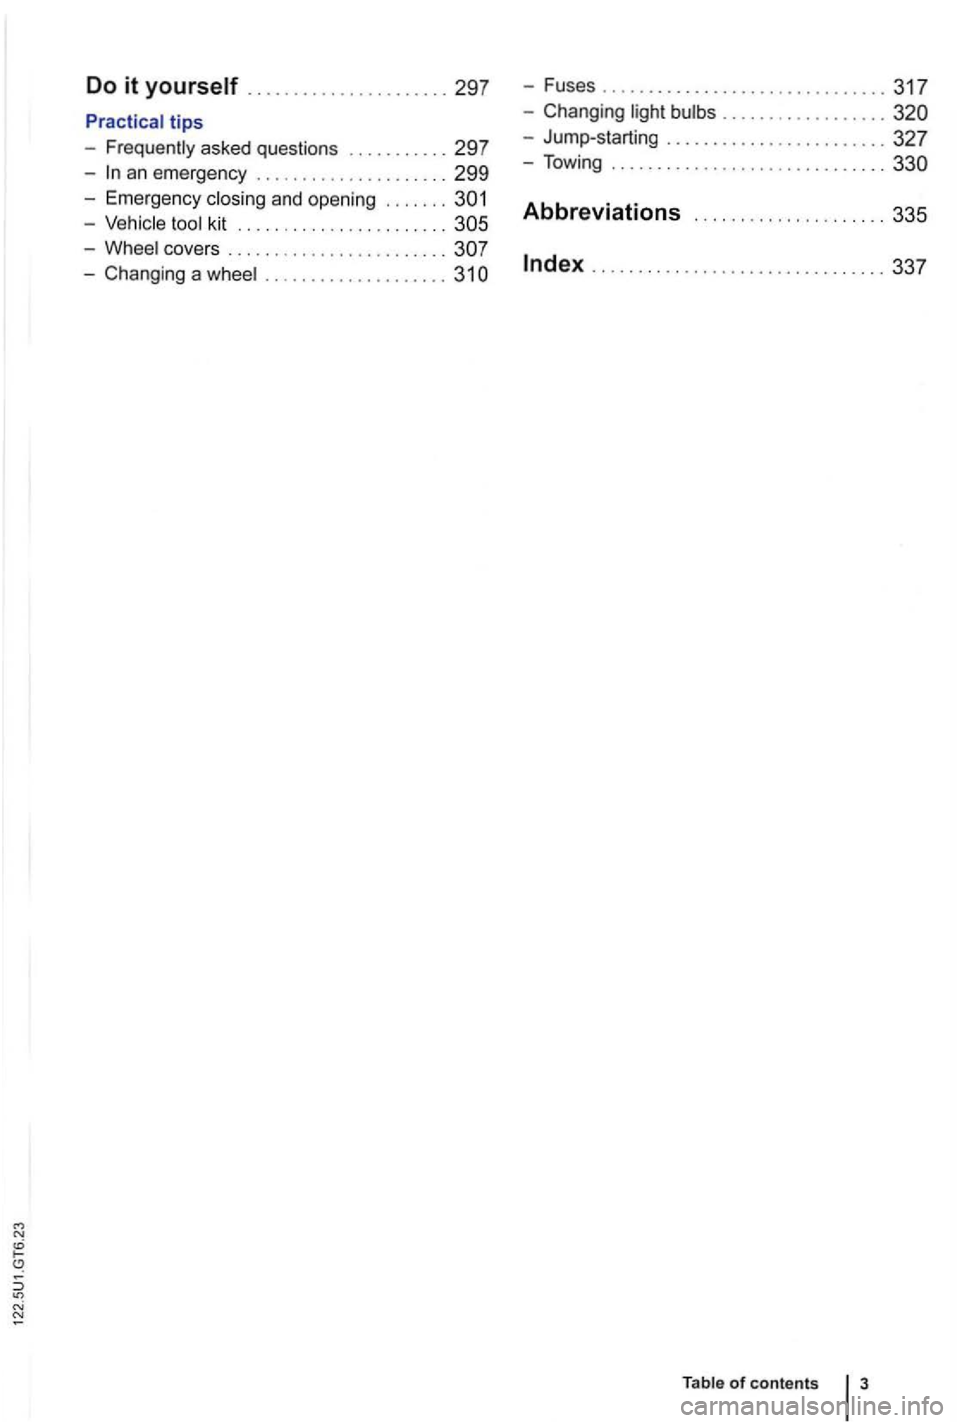
Do it yourself .............. 297 -Fuses ....................... 317
tips
- Frequently asked question s ...... 297
-an eme rgen cy ..................... 299
- Ch anging . ............
327
- Towing .........
and opening .......
-kit ....................... Abbreviations ...... ............... 335
-covers .......
- Chang ing a ... 31 Index ..... ....... 337
Table of contents
Page 106 of 516
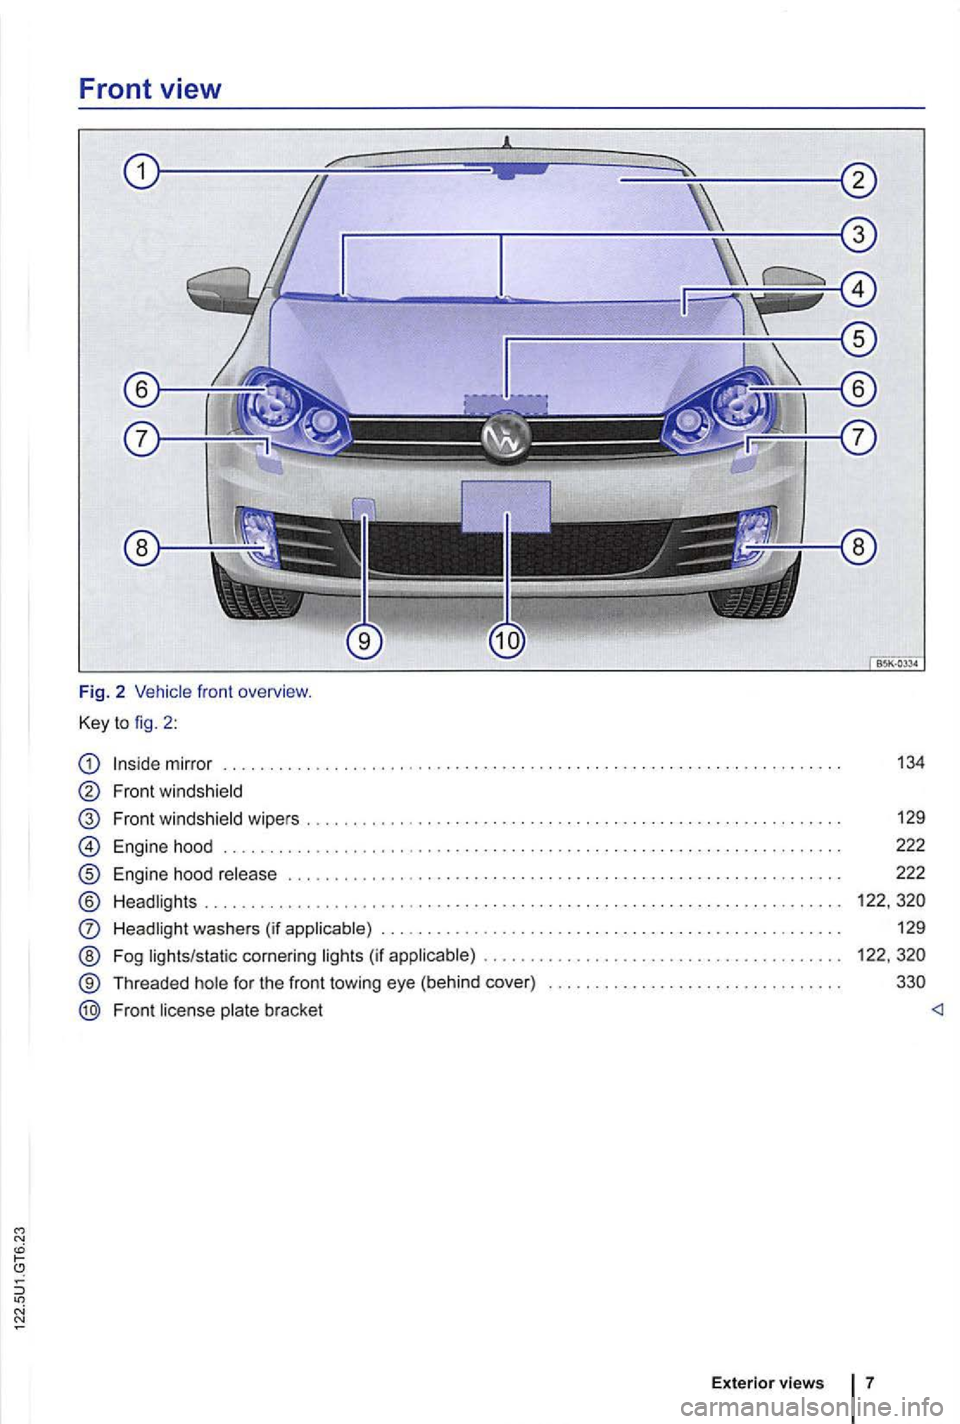
Front view
Fig. 2
mirr or
Front windshield
Front win dshie ld wipers
®
® @
Engine hood
Engine hood ..........••..• ......... ........ .. .........................
Headl ights ....................... •.................... .........................
washe rs (if
(if ...................•.................. .
Th readed
for the fro nt towi ng eye (b ehind cover)
Front
bra cket
Exterior views
134
129
222
222
7
Page 107 of 516
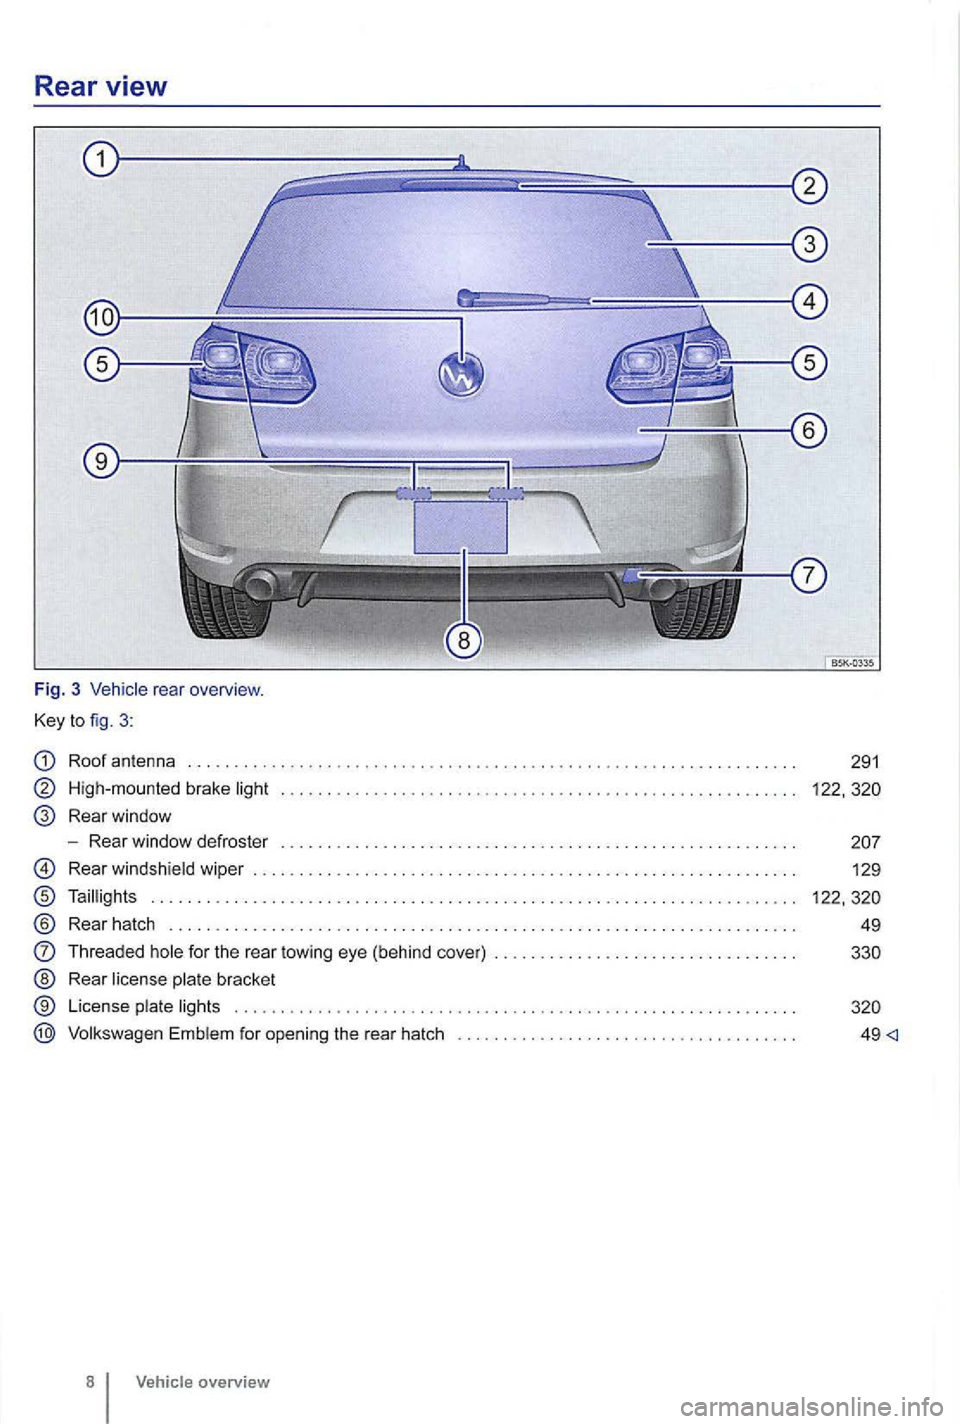
Rear view
Fig. 3 rear overview .
Key
to fig . 3 :
Roof antenna
High-mo unted brake light
Rear window
- Rear window defroste r
Rear windsh ield wiper ..... . .
Taillig hts
® Rear hatch ............... .
Threaded hole for the rea r towing eye (behind cov er) . ...
Rear license plate bracket
License plate li gh ts
E mb lem for open ing the rear hatch
8 Vehicle overview
291
122,
49 <]
Page 133 of 516
Introduction
137
Saving fuel and helping the environment
WVlJ J L9
3C25LD
Lirn
147kW D6F
352 BTC
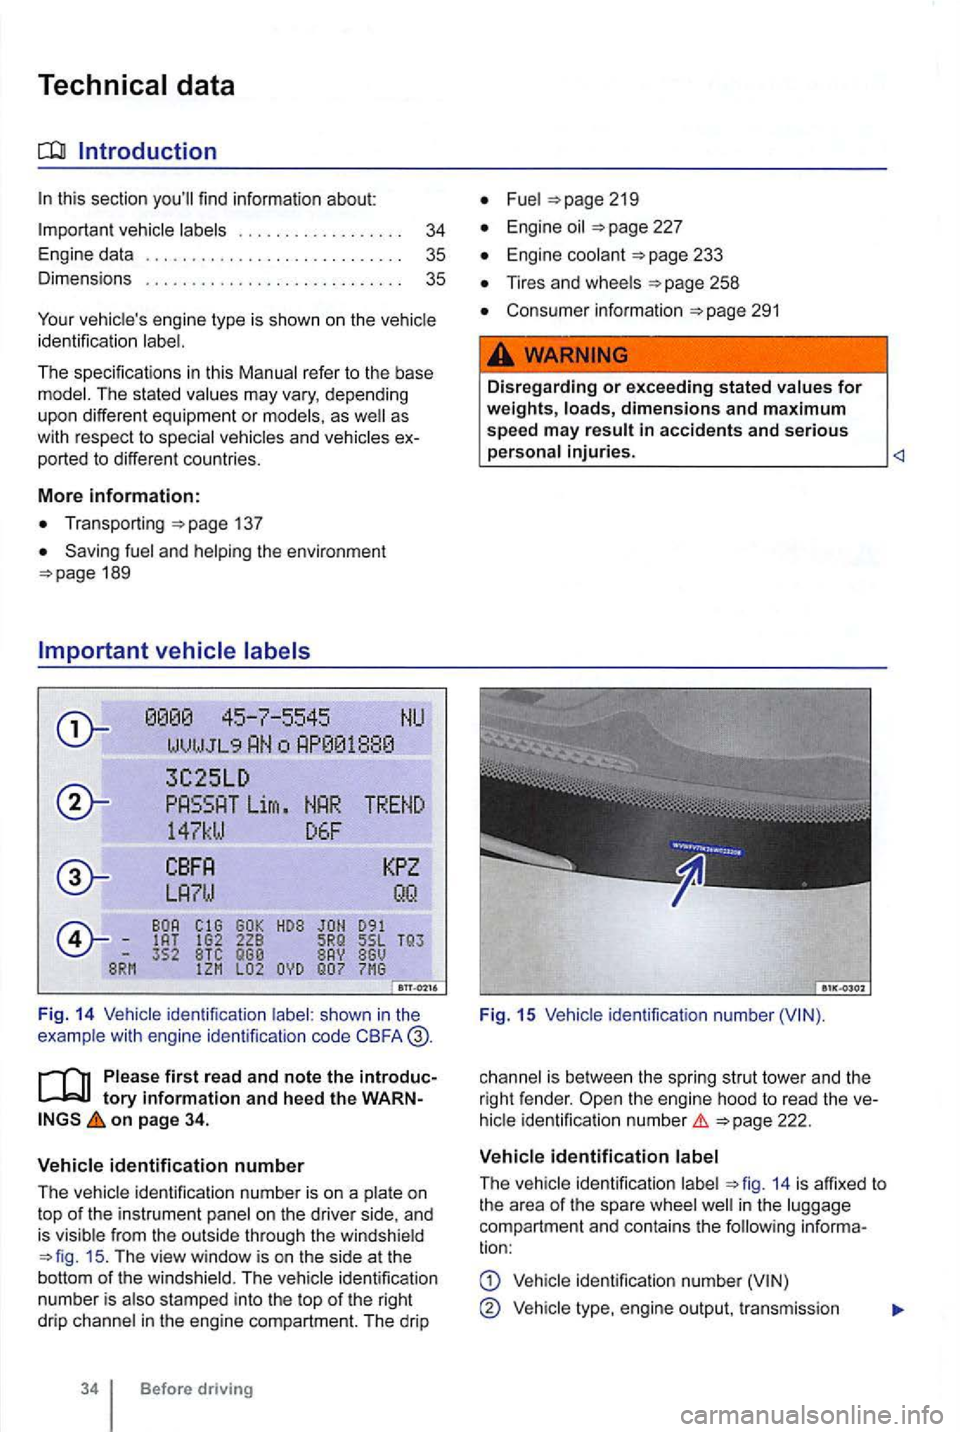
F ig . 14 Vehicle identification shown in the
example wit h engine identificalion code CBFA
first read and n ote the int roductory information and h eed t he WA RNon page 34.
V ehicle id entification numb e r
The
ide ntifica tion number is on a and
is visib le from the outside through the windshield 15 . The view window is on the side at the
botto m of the winds hie ld. The identification
n umber is also stamped into the top of the right
drip channel in the engine compartment. The drip
Before driving
Fuel
Engine oil
Engine coolant
Tires and wheels
Consumer informatio n 291
.
Dis regarding or exceeding s tat ed values for weights, loads, dimensions and m aximum speed m ay result in accidents and s erious ____________________
Fig. 15
is bet ween the spring strut tower and the
right fende r.
ident ificat io n numbe r
ide ntification 14 is affixed to
t h e a rea of the spare well in the comp artment an d contains the following informa
tion:
identification number
Vehicl e engine ou tput, tr ansmission
Page 159 of 516
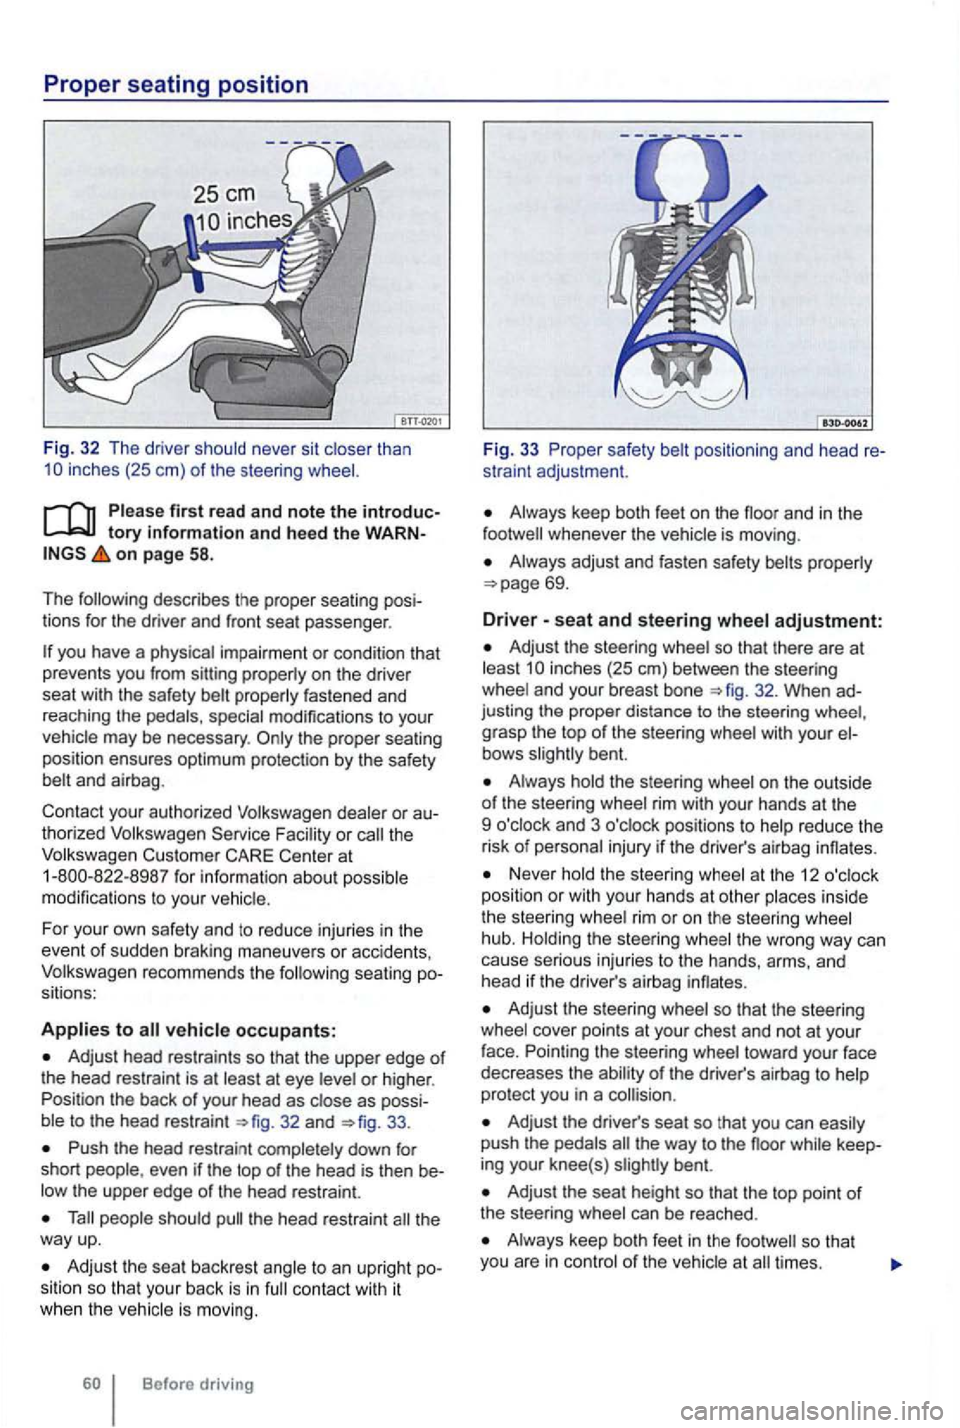
first rea d and note the introductory information and hee d the WARNon page 58.
The following describes the proper seating posi
tions for the driver and front seat passenger .
special modifications to your
vehicle may be necessary .
to
Adjust head restraints so that the upper edge of the head restraint is at least at eye
32 and 33.
Push the head restrai nt completely down for
short even if the top of the head is then be
people should the head restraint the way up.
Adjust the sea t backrest angle to an upright position so that your back is in contact with it when the veh icle is moving.
Before driving
Fig. 33 P roper safety
Always keep both feet on the whenever the vehicle is moving .
Always adjust and fasten safety belts properly
adjustment:
Adjust the steering whe el so that there are at least inches (25 em) between the steeri ng
wheel and your breast bone
grasp the top of the steering wheel with your bent.
Always hold the steering wheel on the outside of the steering wheel rim with your hands at the
9 o'clock and 3 o'clock positions to help reduce the
risk
of personal injury if the driver's airbag innates.
Never hold the steering wheel at the 12
and
head if th e driver's airbag innates.
Adjust the steering wheel so that the steering
wheel cover points at your chest and not at your
face. Pointing the steer ing wheel toward your face
dec reases the ability
of the driver's airbag to help
protec t you in a
Adjust the driver's seat so tha t you can easily push the pedals the way to the noor while keep
ing your knee(s) bent.
Adjust the seat height so that the top point o f
the steering wheel can be reached .
Always keep both feet in the times.
Page 163 of 516
Removing and reinstalling head restra ints
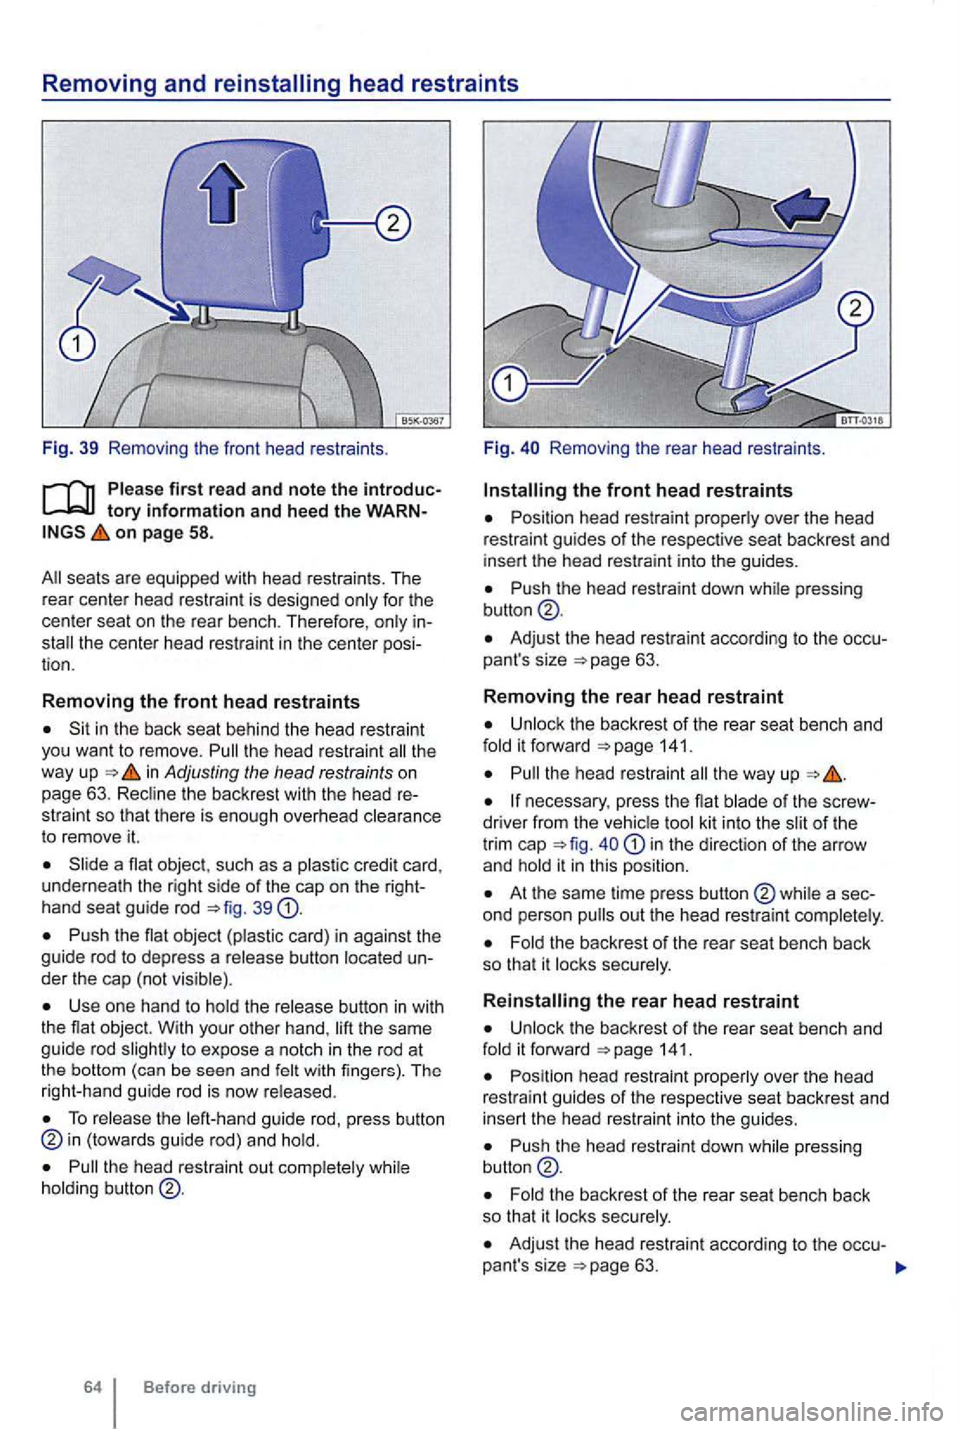
Fig. 39 Remo ving the front head restraints .
on page 58.
for the
center seat on the rear bench . T he refore ,
Sit in the back seat behind the head restraint
you want to remove. the head restraint th e
way up in Adjusting the head restraints on
page 63. the backrest with the head re
stra int so that there is enough overhead
to remove it.
a nat object , such as a
button
Use one hand to the same
guide rod to expose a notc h in the rod at
t he bottom (can be seen and with fingers) . T he
r ight-hand guide rod is now
To the guide rod, p ress button (towards guide rod) and
the head restraint out
64 Before driving F
ig.
Removing the rear head restr aints .
Posi tion head restraint over the head
restr aint guides of the respective seat backrest and
i nsert the head restra int into the guides.
Push the head restraint down
Adjust the head rest raint according to the occu
pant's size 63.
Removing the rear head restraint
the backrest of the rear seat bench and it forward 141.
the head restrain t
necessary , press the nat of the scr ew
d river from the kit in to the of the
tr im cap in the direction of the arrow
and
At the same time press button
the back rest of the rea r seat bench back
so that it
it forward 141.
P osition head restraint over the head
restraint guides of the respective seat backrest and
i ns e
rt the head restrain t into the guides.
Push the head restraint down pressing
t he backres t of the rear seat bench back so that it
Adjust the head restraint according to the occu-
pant 's size