battery VOLKSWAGEN GOLF 2012 Owners Manual
[x] Cancel search | Manufacturer: VOLKSWAGEN, Model Year: 2012, Model line: GOLF, Model: VOLKSWAGEN GOLF 2012Pages: 516, PDF Size: 105.12 MB
Page 7 of 516
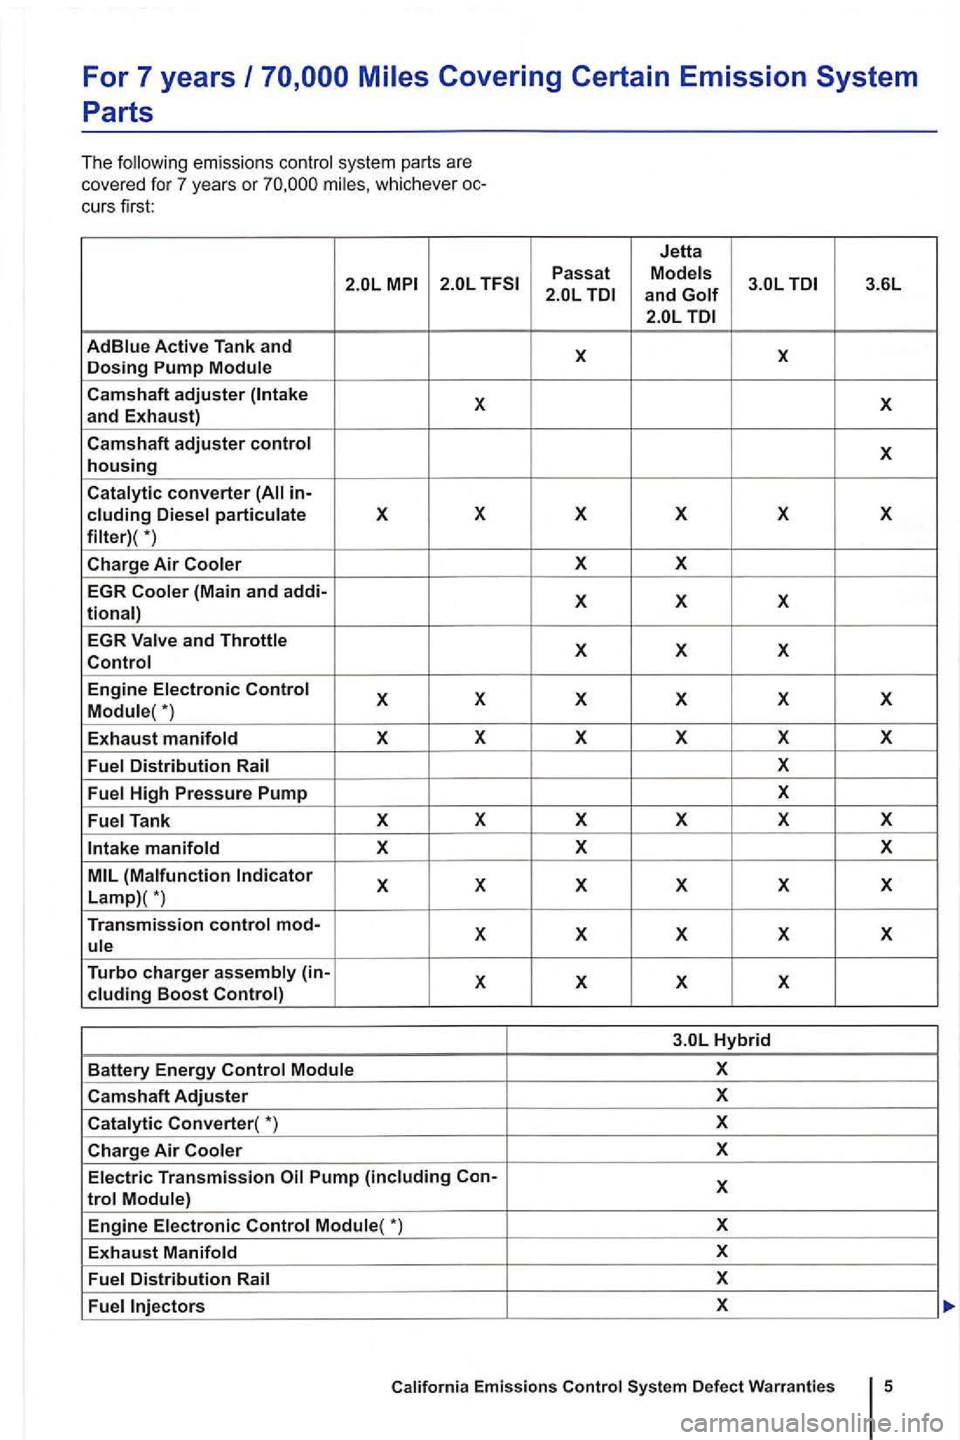
For 7 years
em issio n s co ntrol syste m part s a re
cover ed fo r 7 ye ars or
cu rs fir st:
X and Exhaust)
Camshaft adjuster control housing
converter in-eluding
(Main and addi-
tional)
EGR
and Throttle
manifold X
X X Lamp)(*)
Tran s
mission control mod-X
Battery Energy
Adjuster
*)
Air
Module{ *)
Exhaust Manifold
3.6L and
X X
X
X
X X
X X
X
X
X X X
X
X X
X
X X X
X X
X X
X
X
X X
X X
X
X
X X X X
X X X X
X
X X
Hybrid
X
X
X
X
X
X
X
X
X
Emis sions
Page 8 of 516
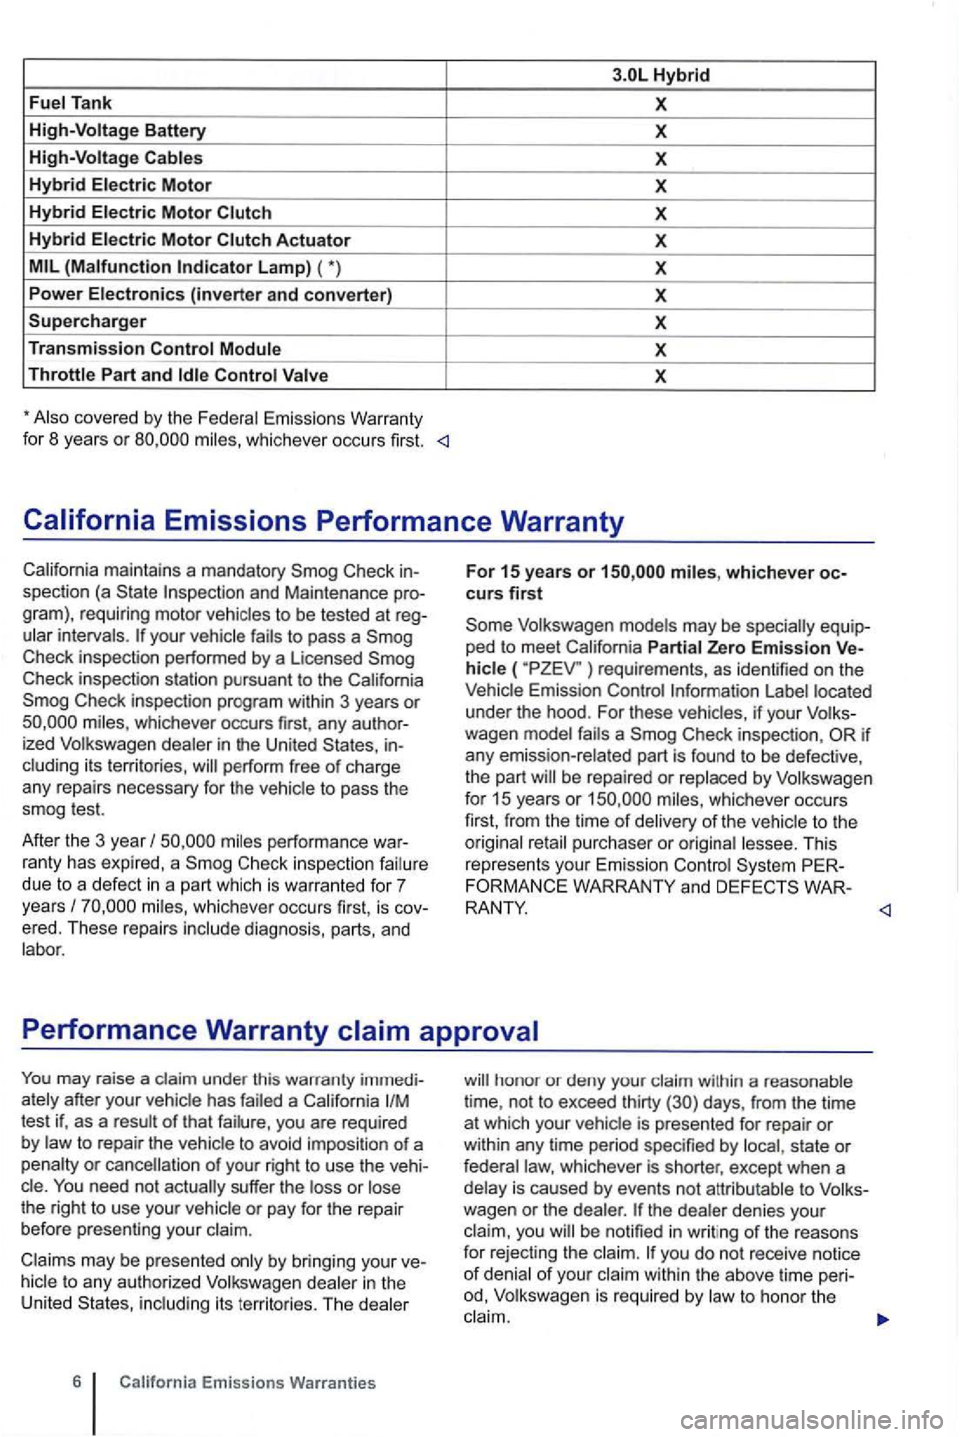
Tank X
High-Voltage Battery X
High-Voltage
(Malfunction X
Power Electronics (inverter and converter) X
Supercharger X
Transmission
X
covered by the Emissions Warranty
fo r 8 yea rs or
intervals .
in the United States , inits ter rit ories , perfor m free of ch arge
any repai rs necessary for the vehicle to pass the
s mo g test.
Afte r the 3 year
I
due to a defect in a part which is warranted fo r 7
years I diagnosis, parts, and
For 15 years or whichever occurs first
Some Volkswagen models may be Parti al Zero Emission Ve) requi reme nts , as identified on the Emi ssion Contro l located
under the hood . For these
be repaired or by Volkswagen
for 15 years or whicheve r occu rs
first , from the time of purchaser or origi nal Th is
represents you r Emission System PER
FORMANCE
you are requi red
by to repa ir the to avoid imposition of a
the right to use your
may be presented to any auth orized Volkswagen
Emissions Warra nti es
w ithin a reasonable
t ime , not to exceed thirty (30) days , fr om th e time
at
which y our is presen ted for repair or within any time period specified by state or whiche ver is shorter , e xcep t when a
you be notified in writ ing of the reasons
for reject ing the
Page 24 of 516
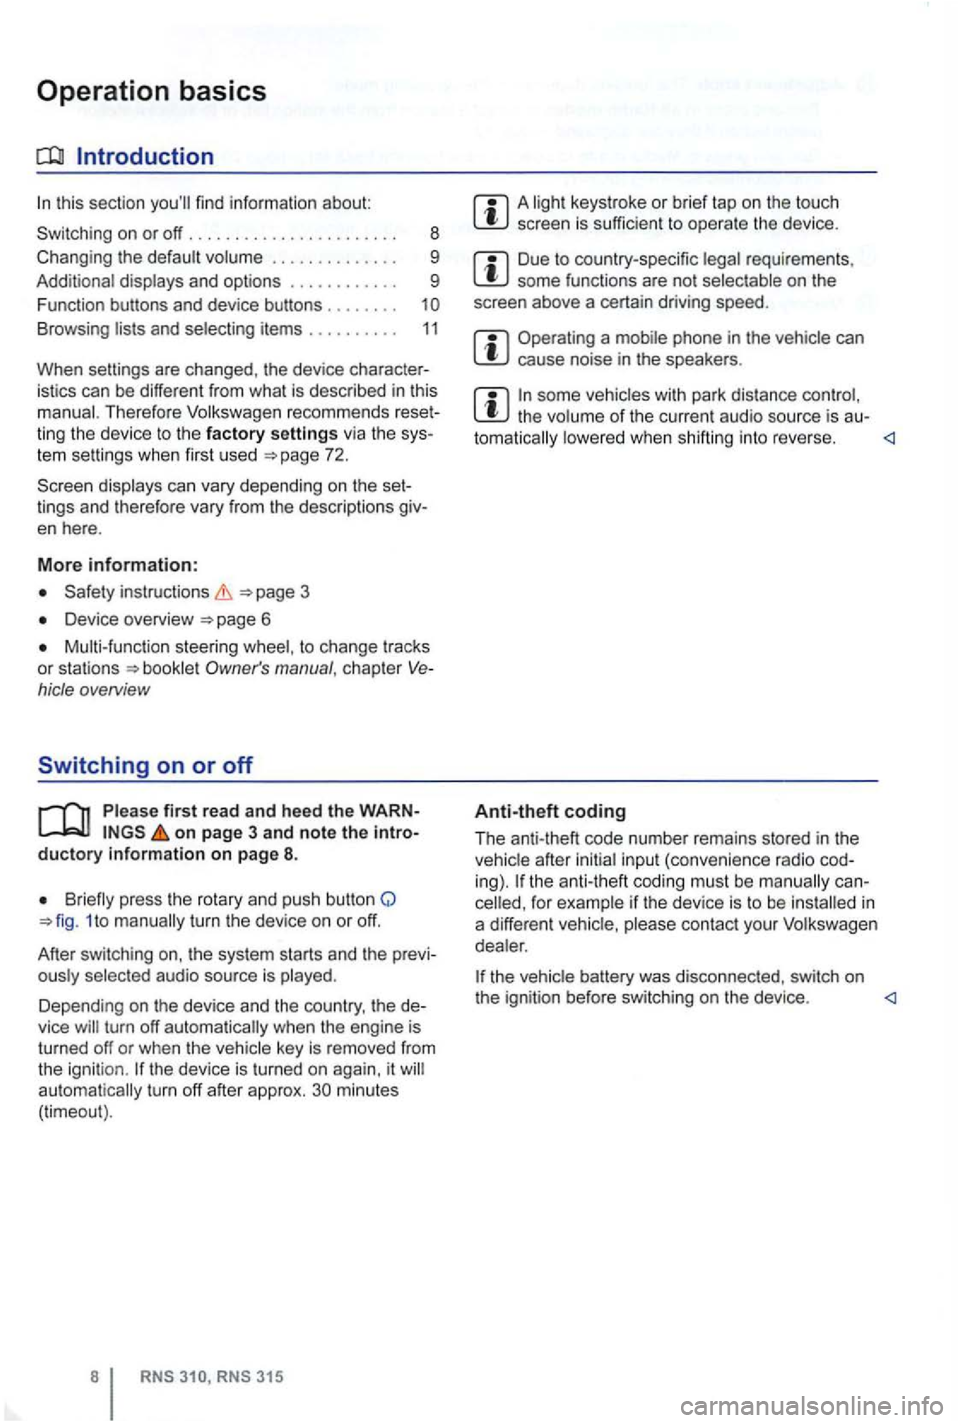
Operation basics
Introduction
. . . . . . . . . . . . 9
Additional displays and options . . . . . . . . . . . . 9
Funct ion buttons and device buttons
........
Therefore Volkswagen recommends reset
ting the device to the factory settings via the sys
tem settings when first used
Device overview
Multi-function steering to change tracks
or stations manual , chapt er Vehicle overvi ew
Switching on or off
page 3 and note the introductory information on page 8.
1 to
minutes (timeout).
3 15
A screen is sufficien t to operate the device .
Due to coun try-sp ecific requirements , some functions are not
Operating a cause noise in the speakers .
some vehicles with park distance control, the lowered when shifting into reverse.
Anti-theft coding
The anti-theft code number remains stored in the
in
a differen t vehicle,
battery was disconnected , switch on
the ignition before switching on the device .
Page 102 of 516
4
. . . . . . 6
- Front view . . . . . . . . . . . . . . . . . . . .
- Center console overview . . . . . . . . . . . . . . 12
- Fron t pa sse nger side overvi ew . . . . . . . .
14
- Symbo ls o n the roo f console . . . . . . . . . . 14
Instrument cluster and instrument panel
- Warning and indica tor
lights . . . . . . . . . . 15
-cluster . . . . . . . . . . . . . . . . . . . 18
-Volk swage n Information System . . .
basics
- Driv ing check lists and warnings .
....... 31
- Techn ical data . . . . . . . . . . . . . . . . . . . . . . . 34
and closing
- Vehic le key set . . . . . . . . . . . . . . . . . . . . . . . 36
-locking and closing system . . . . . 4 1
- Doo rs . . . . . . . . . . . . . . . . . . . . . . . . . . . . . . . 47
- Rear hatch . . . . . . . . . . . . . . . . . . . . . . . . . 49
-. . . 53
-s lidin g and sunroof . . . . . . . 56
properly and safely
- Adjusting the sea ting position . . . . . . .
. . 58
-functions . . . . . . . . . . . . . . . . . . . . . . 67
- Safety . . . . . . . . . . . . . . . . . . . . . . . . . . 69
- Airbag system . . . . . . . . . . . . . . . . . . . . . . . 82
-Child sa fety and child restraints ........ 1
Lights and vision
- Lights ............................... 122
-protectio n ....................... 128
-Windshield wipers and washer ......... 129
-Mir ro rs .............................. 134
Transporting
- Driving tips
.......................... 137
-Luggage compa rtment ................ 141
of contents
- Roof rack . . . . . . . . . . . . . . . . . . . . . . . . . 146
- Trailer towing ...... ............•. .... 149
1 5 7
- Cup holders
......................... 161
- 12
sockets . . . . . . . . . . . . . . . . . . . . . 163
shifting, park ing
- Sta rting and stoppin g
the engin e ....... 165
- Shifting ................... .......... 171
- Brak ing , stop ping , and park ing
......... 179
- Sav ing
fuel a nd helping the environm ent 189
-Steering ............................. 192
Driver assistance systems
- Starting assistance systems
........... 195
-Cruise Control System ......... 19 7
-
nre Mo nitori ng System .............................
control
- Healing and air cond itioning
At the gas station
- Refueling
........................ .... 214
-Fuel ...........................•.... 2 19
Care , maintenance .... 222
fo r work ing in the engin e
compartment
................... ..... 222
- Engine oil ........................... 227
- Engine coolant ....................... 233
-Vehicle battery ....................... 238
Vehicle care and maintenance
- Exteri or
care and cleaning ............ 243
-care and cleaning ............. 251
-
accesso ries, repa irs and
modi fications ........................ 283
- Consumer information ................ 291
- Declaration
of Complia nce,
T elecomm unicat ions and Electro nic
Systems
............................ 293
- Report ing Safe ty Defects ............. 294
- Engin e con trol and emission control
system .............................. 295
Page 123 of 516
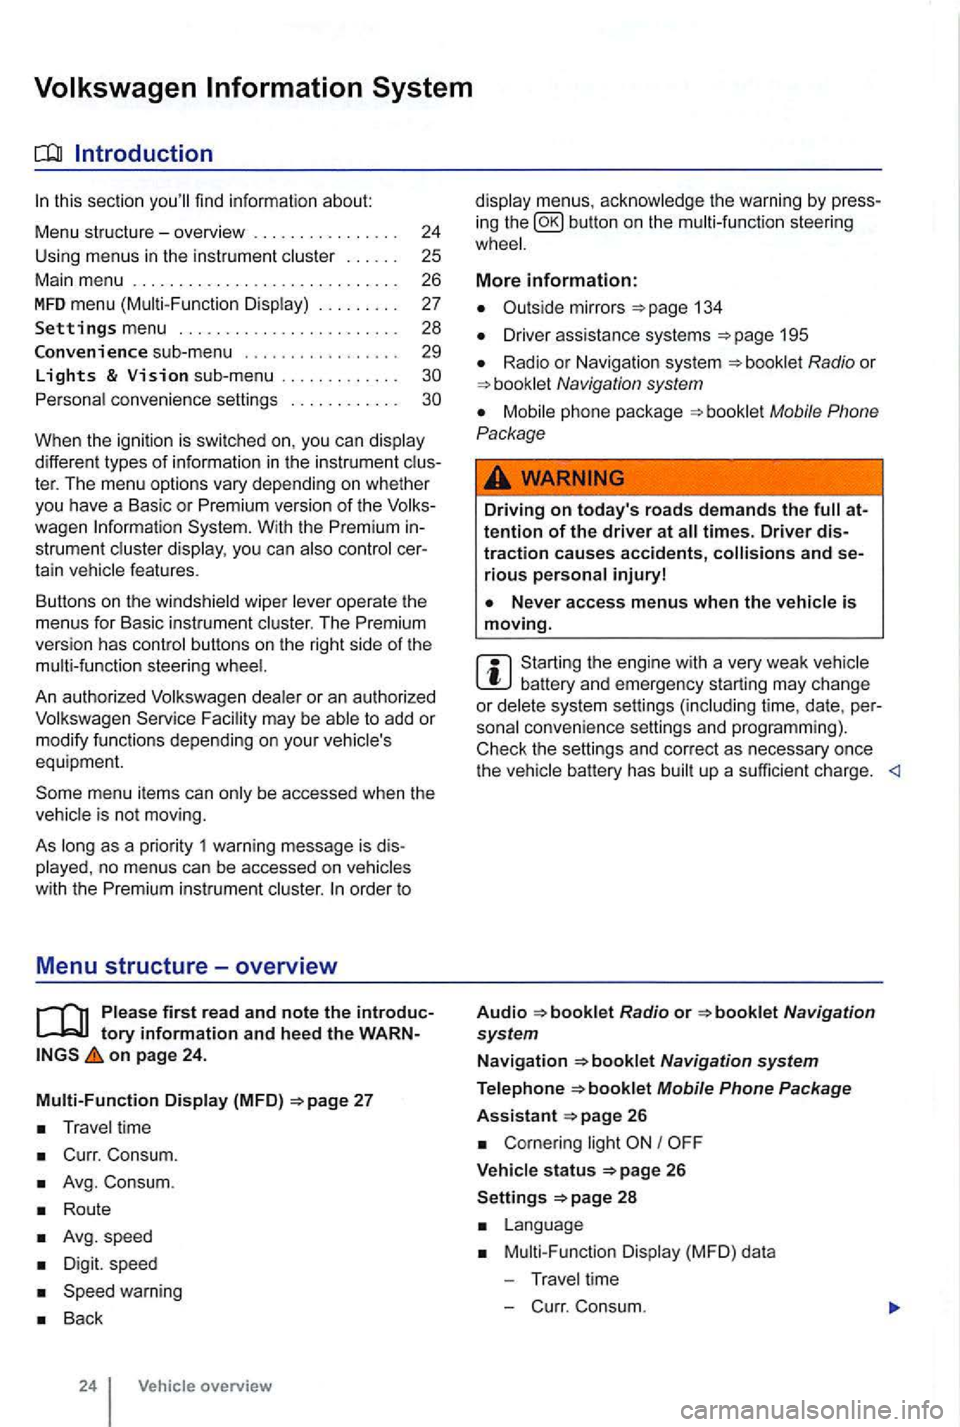
sectio n find informat ion about:
Menu structure-overv iew .......... .
U sing
menus in the instrument
..
Settings menu ................ .
Convenience sub-menu
Lights & Vision sub-menu ............ . convenience settings .. .
24
25 26
27
28
29
different types of information in the instrument ter. The menu options vary depending on whether you h ave a Basic or Premium version of th e
you can
operate the menus for Basic instrument The Premium version has con tro l buttons on the right side of the
An authorized to add or modify functio ns depending on you r vehicle's
equ ipment.
on page 24.
Multi-Function Display (MFD)
Travel time
Curr. Consum.
Avg. Consum.
Route
Avg.speed
Digit. speed
Back
24 Vehicle overview
menus, the warning by press
in g the button on the steeri ng
134
D river assistance systems 195
Radio or Navigation system
Mobile Phone
Package
Driving on today's roads demands the attention of the driver at times. Driver distraction causes accidents, and serious persona l injuryl
is moving.
Start ing the engine with a very weak battery and emergency starting may change or delete system settings (including time, date , per
sonal convenience settings and programming) .
Check the settings and correct as necessary once the
Radio or
26
Corn ering light I
V ehicle s tatus 26
Settings 2 8
Mult i-Functi on Displa y (MFD) da ta
T ravel time
- C urr. Consum.
Page 135 of 516
Opening and closing
this section find info rmation about:
R em o
te control vehicle keys . . . . . . . . . . . . . . 37
Mec hanical key . . . . . . . . . . . . . . . . . . . . . . . . . 38
Volkswagen
Power locking and clos ing system 41
Starti ng and stopping the engine
Cons ume r inf ormat ion
Eme rgen cy closin g and opening
Always keep remote control vehicle key fobs with batteries, spare batterie s, as as
dead button mm batteries out of the reach of children.
Get medical attention immediately if you suspect that a battery has been swallowed .
use of vehicle key s can result in se-rious personal injury.
36 Before driving
Always take the key with you when you leave the vehicle . can be used to start the
engine and operate vehicle systems s uch as
the powe r windows, leading to se rious personal injury.
the vehicle is moving or to a stop. The steering wheel lock and you
Page 136 of 516
Remote control vehicle keys
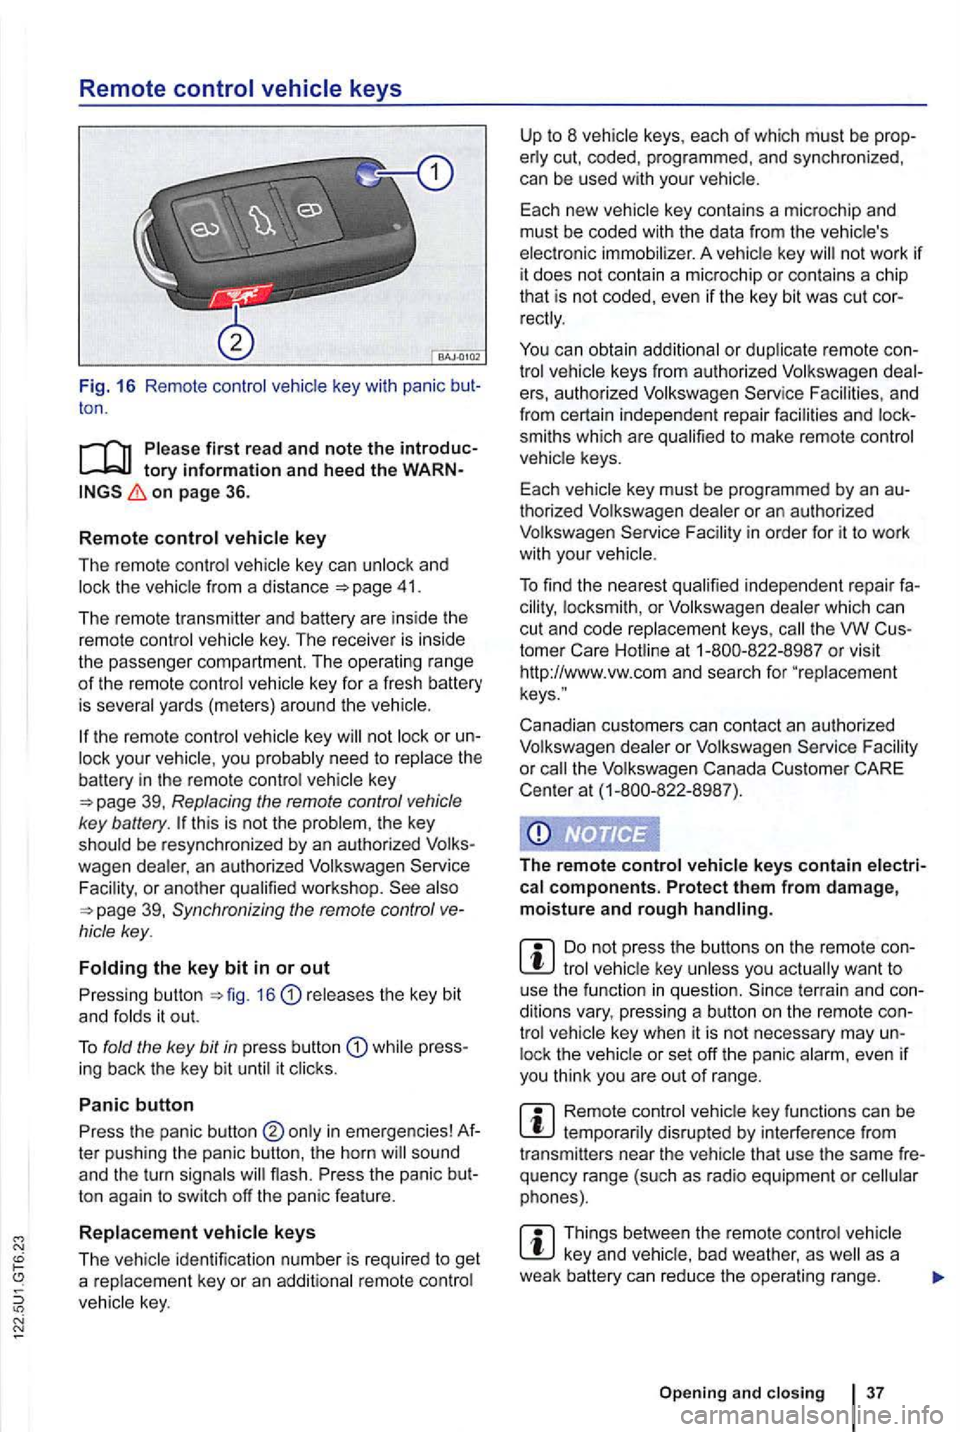
Fig. 16 Remote contro l key with panic ton .
on page 36.
R
emot e control key
The remote control vehicle key can unlock and 41.
The remote transmitter and battery are ins ide the
remot e control vehicle key . The receiver is inside
the passenger compartment. The operating ra
nge of th e remote control key for a fresh battery
is severa l yards (meter s) around the
key or your vehic le , you probably need to rep lace the battery in the remote control key
this is not the problem , the key
should be resynchronized by an authorized
39, Synchronizing the remote control
releases the key bit
and fo lds it out.
T o fold the key
bit in press butt on while press
ing back the key bit until it clicks .
Panic button
Press the panic button ter pushing the panic button , the horn
ton again to switch off the panic feature .
R
eplacement vehicle keys
The
not work if it does not contain a microchip or contai ns a chip
th at is not coded, even if the key bit was cut
keys from authorized Volkswagen e rs, au thorized Volkswagen Service and
from certain independent repair facilities and
smiths which are qualified to make remote control
vehicle keys.
Each vehicle key must be programmed by an
thorized Volkswagen dealer or an au thorized
Volkswagen Service
th e VW
Canadian customers can contact an authorized
Volkswagen dealer or Volkswagen Service
the Volkswagen Canada Customer CARE
Center at (1-800-822 -8987).
The r
emote control vehicle keys contain electrical components. Protect them from damage, moisture and rough handling.
tro l lock the
Remote control disrupted by interferenc e from
transmitters near the vehicle that use the same
Things between the remo te control vehicle as a
weak battery can re duce the opera ting range.
Open ing and clo sin g 3 7
Page 137 of 516
21 or the power locking buttons 22 are pushed repeatedly in quick succes
sion , the power locking system is switched off for a
br i
ef period to help keep it from being overloaded.
Mechanical key
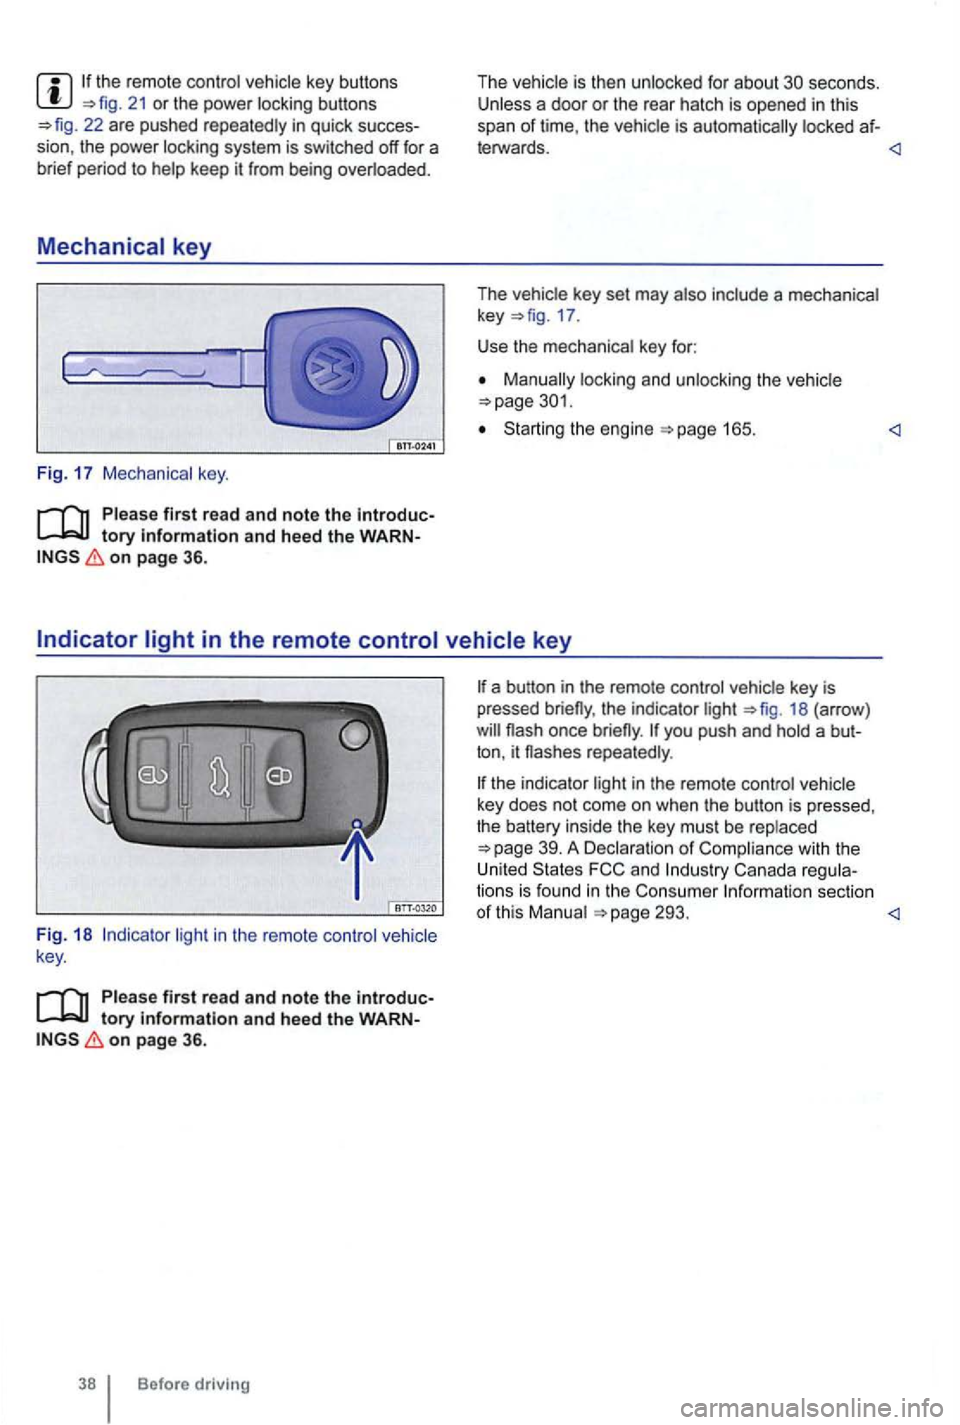
Fig. 17 Mechanical key.
tory information and heed the WARNon page 36.
The vehicle is then unlocked for about secon ds. Unless a door or the rear hatch is opened in this
span of lime , th e vehicle is automatically locked af-
leiWards.
key 17 .
Use the mechanical key for:
locking and unlocking the vehicle
Starting the engine
light in the remote control vehicle
key .
Please first read and note the introductory information and heed the WARNon page 36.
Before driving
the indicator light 18 (arrow )
repeatedly .
the indicator light in the remote control vehicle
key does not come on whe n the button is pressed,
t he battery inside
the key mus t be rep laced
293.
Page 138 of 516
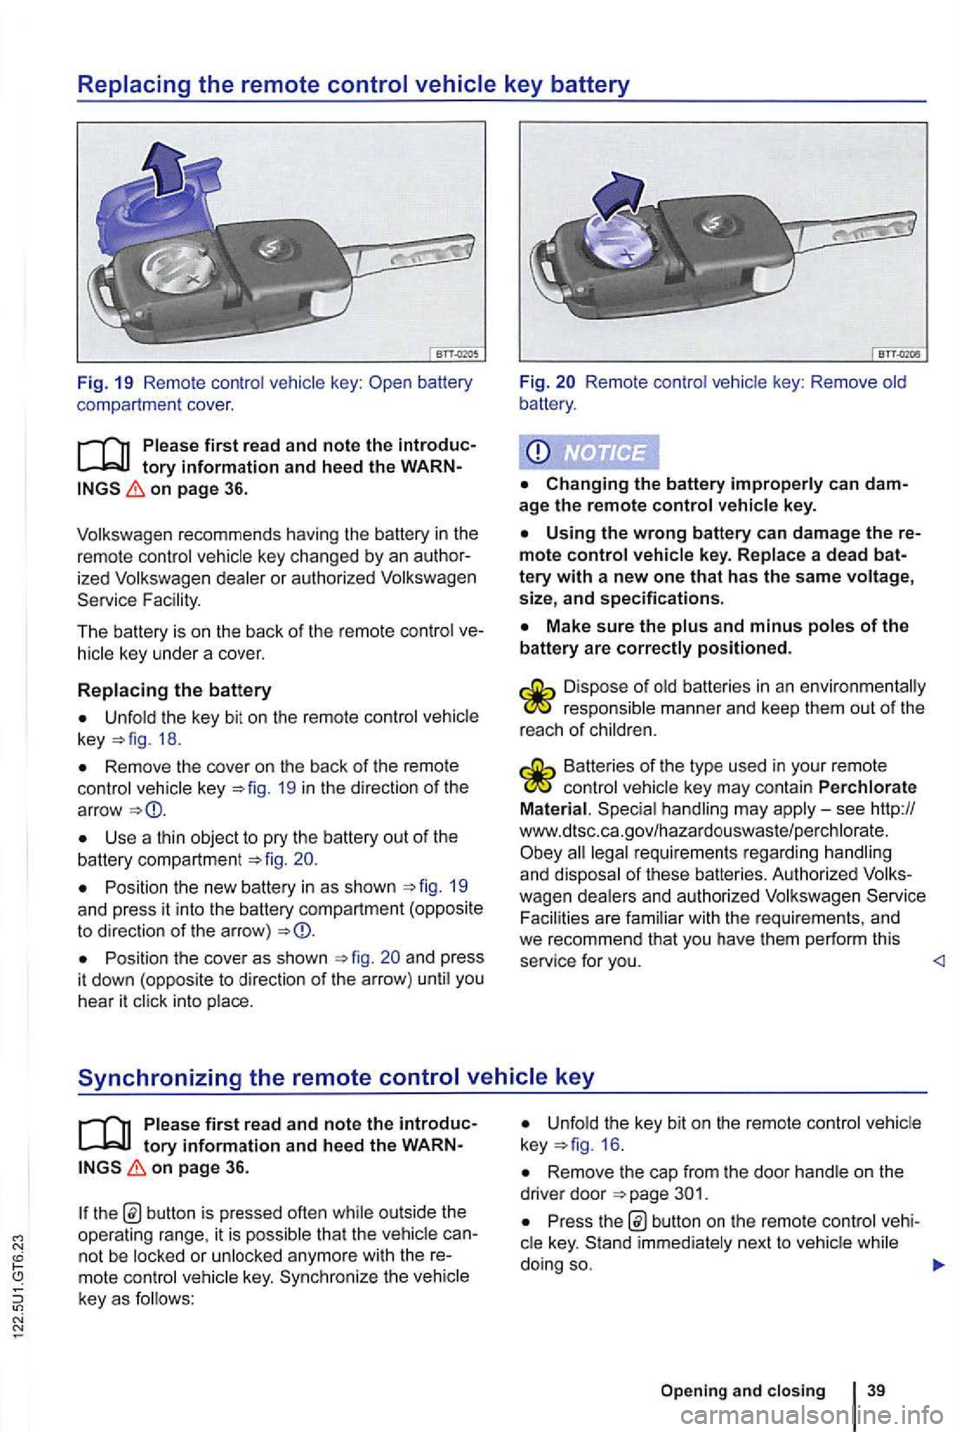
Replacing the remote control vehicle key battery
Fig. 19 Remo te contr ol key :
on page 36.
ized dealer or authori zed Service Fac ility.
The battery is on the back of the remo te control
Unfold the key bit on th e re mote control key 18.
Remove the cover on th e back of the remote control vehicle key 19 in th e d irection of th e
ar row
Use a thin object to pry the battery out of the battery compartment 20.
Position the new battery in as shown 19 and press it into the battery compartm ent (opposite to direction of the arro w)
Position the cove r as shown and press
i t dow n (oppos ite to direction of the arrow ) unti l you
hear it click into place.
Fig. Remote control vehic le key : Remove old
battery .
age the remote control vehicle key.
Using the wrong battery can damage the mote control vehicle key. Replace a dead
Make sure the plus and minus poles of the battery are correctly positioned .
responsible manner and keep them out of the
r eac h of ch ild ren.
Batteries of the type used in your re mote control veh icle key may contain Perchlorate
Material . Special handling may apply-see http://
www.dtsc .c a.go v/hazar douswaste/pe rchlo rate. all legal requirement s regardin g han dling and dispo sal of these batteries. Authorized Serv ice
Facili ties are fami lia r with the re quirements , and we recommend that you have them perform this
service for you.
tory information and hee d the on page 36.
th e b utton is pressed often while out side the
operating range, it is p ossib le tha t the vehicl e
key. Sy nchr oniz e the veh icle
key as f o llows:
Unfold the key bit on the remote control 16 .
Remove the cap from the door hand le on the
drive r door
Pr ess button on the remote cont rol
Opening and closing 39
Page 141 of 516
Automatic locking (Auto Lock)
The vehicle locks au tomatically when it reaches a
speed of about 10 mph (15 km/h) . When the vehi
cle is locked , the indicator light comes on in the
power lock ing button
a door once.
-
a door once.
- Lock the vehicle with the remote control vehicle key.
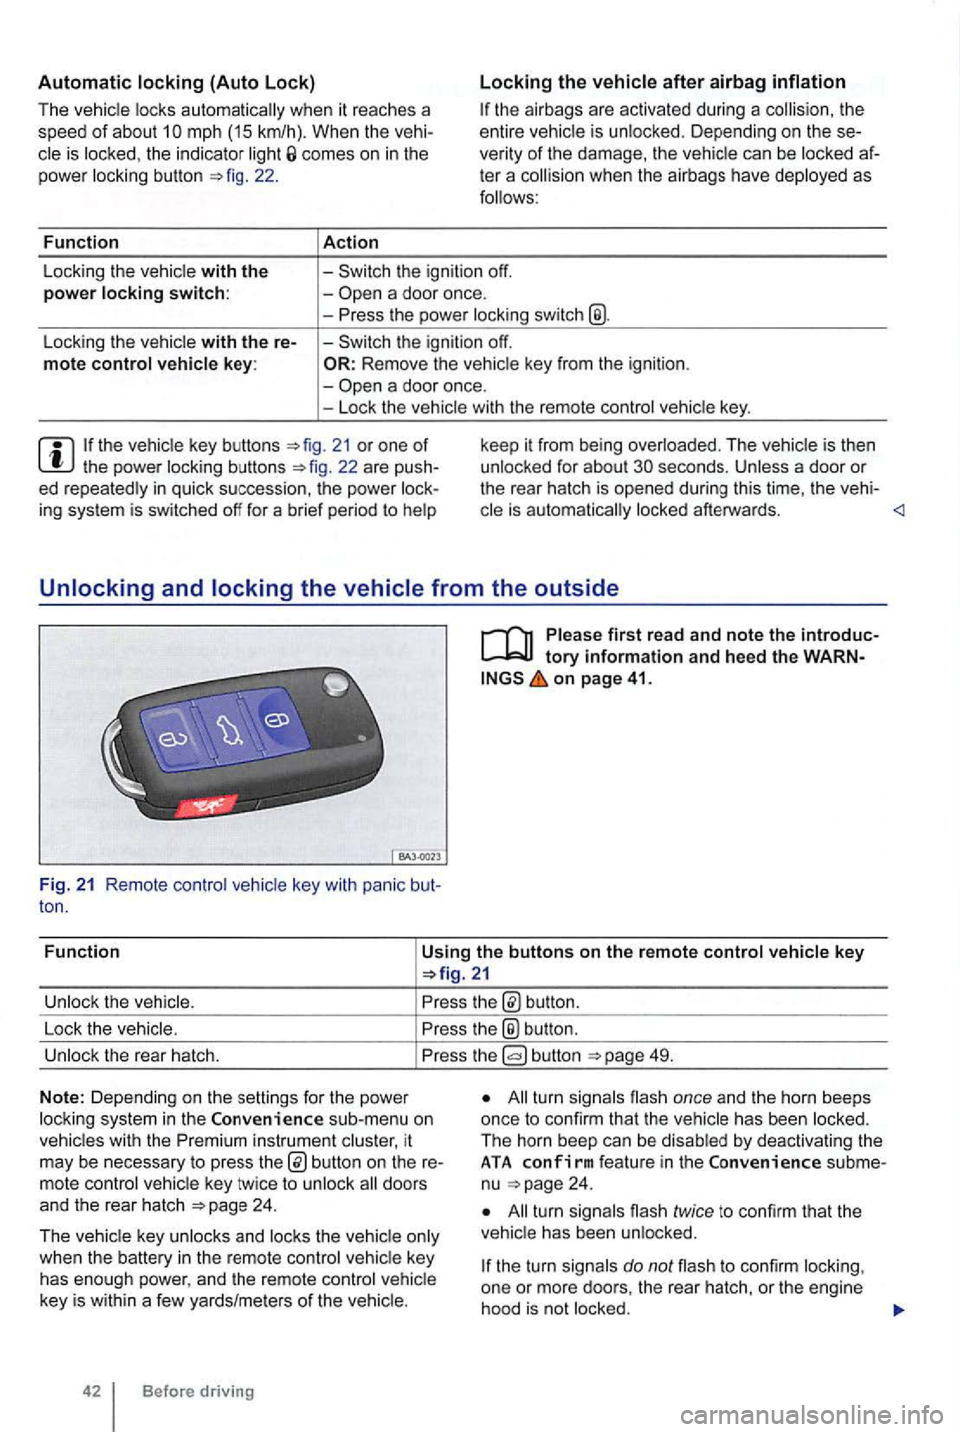
21 or one of th e power locking buttons
on page 41.
Fun c
tion
Using the buttons on the remote control vehicle key
button.
Lock the vehic le.
the® button .
Unlock the rear hatch. button 49.
N o
te: Depending on the settin gs for the power
l ock ing system in the sub-menu on
vehicles with the instrument cluster, it
may be necessary to press
24 .
T he vehicle key unlocks and locks the vehicle only
when the battery
in the remote control vehicle key
has enough power, and the remote control vehicle
key is wi
thin a few yards/me ters of the vehicle.
42 Before driving
All turn signals flash once and the horn beeps
once to confirm that the vehic le has been locked.
The horn beep can be disabled
by deactivating the ATA co nfirm feat ure in the subme
nu 24 .
All turn signals flash twice to confirm that the
vehicle has been unlocked.
the turn signals do not flash to confirm lock ing,
one or mor e doors , the rear hatch, or the engine
hood is not
locked.