VOLKSWAGEN GOLF MK6 2012 Owners Manual
Manufacturer: VOLKSWAGEN, Model Year: 2012, Model line: GOLF MK6, Model: VOLKSWAGEN GOLF MK6 2012Pages: 516, PDF Size: 105.12 MB
Page 241 of 516
vided.
The ventilation slo ts between the rear dow and the luggage compartme nt cover
must not be blocked so that stale air can escape
from the veh ic le .
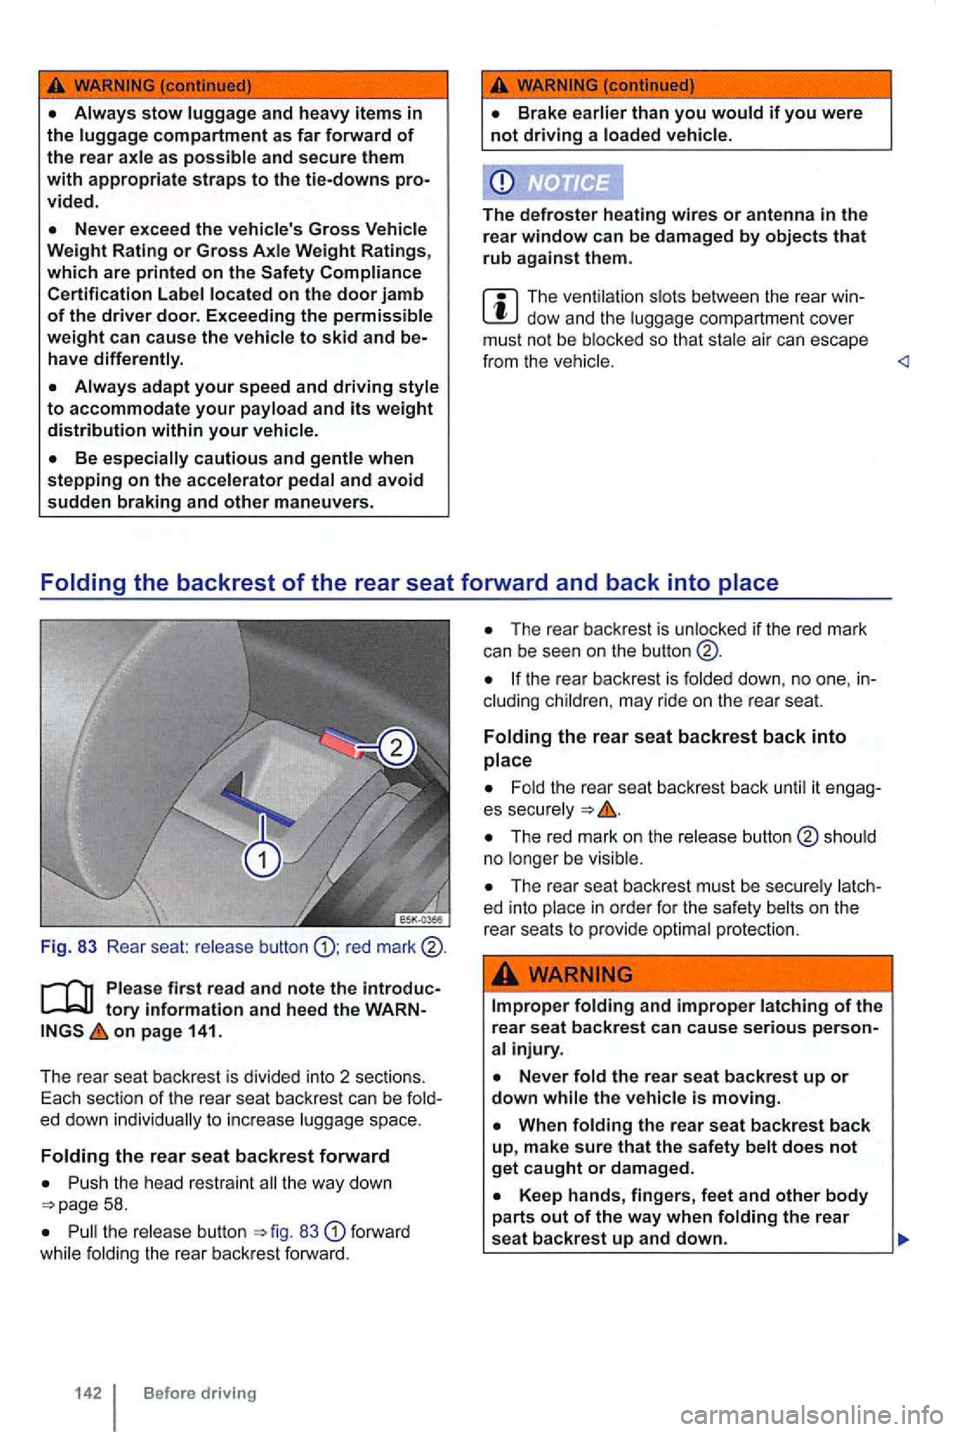
F ig . 83 Rear seat: release button red
Please first read and note the tory information and heed the on page 141.
The rea r seat backrest is di vide d into 2 sectio ns.
E ach sectio n of
the rear seat backrest can be to increase luggage space.
Folding the rear seat backrest forward
58.
the release button 83 forward
w hile folding the rear backrest forward.
142 Before driving
the rear seat backrest back until it es secu re ly
ed into place in order for the safety belts on the
rear seats to provide optimal protection.
Improper folding and improper latching of the rear seat backrest can cause serious
Page 242 of 516
Each backrest must be the upright position so that the safety
a seat is used with an unsecured backrest, the passenger
A red mark on the button indicates that the backres t is not check to make sure that the red marking
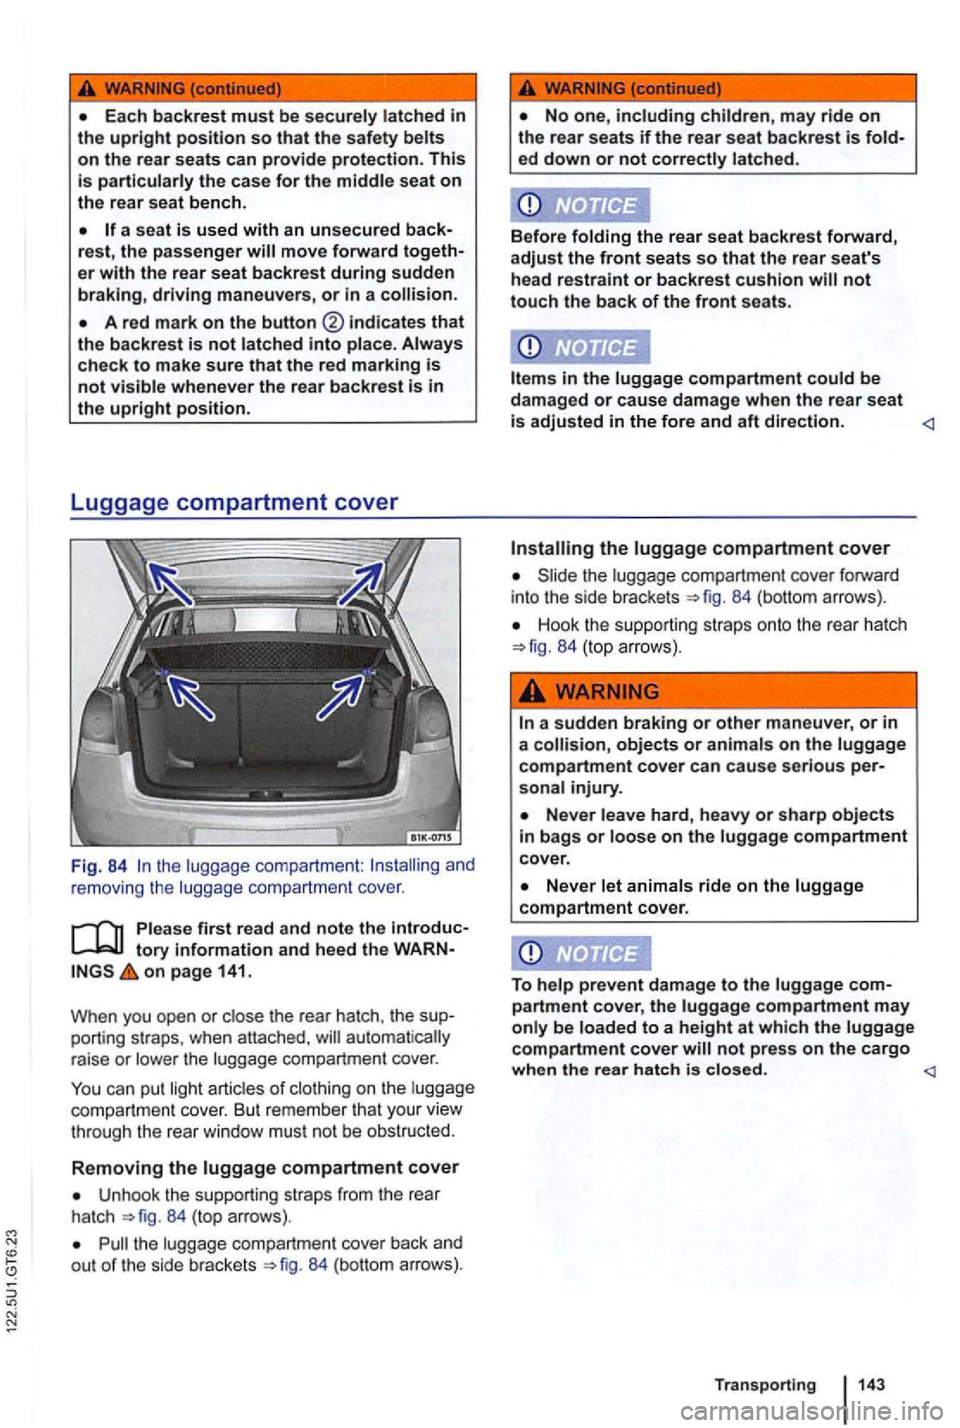
compartment : compartment cove r.
first read and note the introductory on page 141.
When you open
or the rear hatch . the sup
porting str aps , when attached .
can put of
compartment cover
Unhook the supporting str aps from the rear
ha tch 84 (top arrows) .
84 (bottom arrows).
No one, may ride on the rea r seats if the rear seat backrest is ed down or not
Before the rear seat backrest forward, adjust the front seats so that the rear seat's head restraint or backrest cushion not touch the back of the front seats.
compartment
adjuste d in the fore and aft d irection.
84 (bo ttom arrows).
Hook the supporting straps onto the rear hatch 84 (top arrows).
objects or animals on the compartment cover can cause seriou s injury.
Never hard, heavy or s harp objects
ride on the luggage compartment cover.
To prevent damage to the
to a height at which the
Transporting
Page 243 of 516
Luggage compartment pass-through
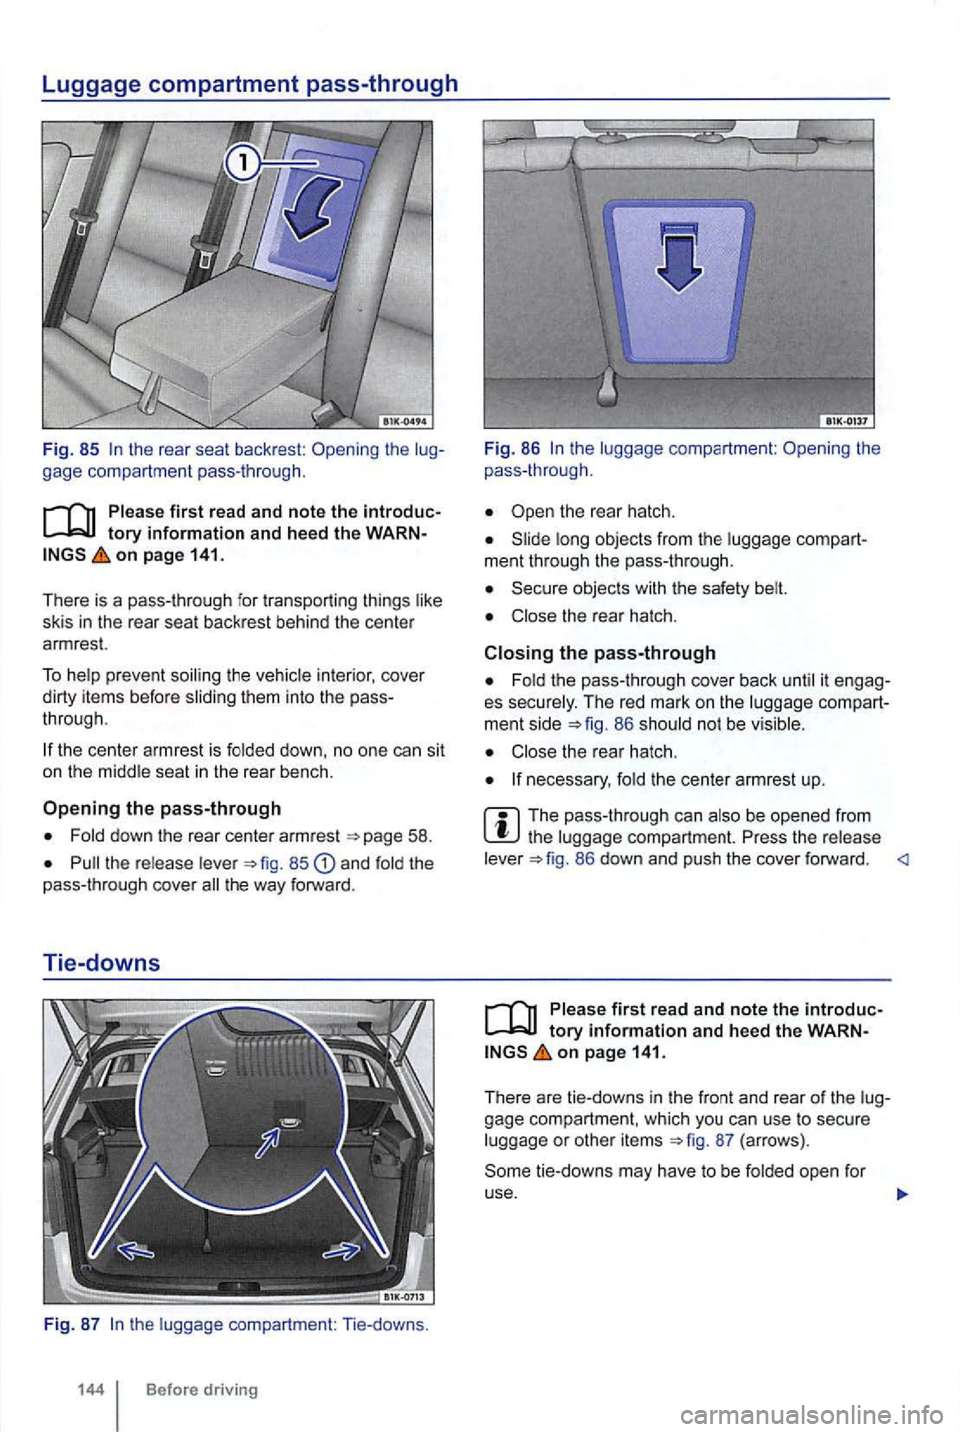
Fig. 85 gage compartmen t pass -th roug h.
first r ead and note the introduc
o n p age 141.
There is a pass-through for transporting things
skis in the rear seat backrest behind the center
armrest.
To them into the through.
seat in th e rear bench.
58.
85 and the
pass -through cover the way forward .
Tie-downs
Fig. 87 the luggage compartment: Tie-downs.
Before driving
Fig. 86 the
pass- through .
the rear hatch .
objects from the lu ggage ment through the pass-through .
Secure objects with the safety
es secure ly. The red mark on the 86
the center arm rest up.
be opened from the luggage compartment. Press the release 86 down and push the cover forward .
on page 14 1.
T here are tie-downs in the front and rear
of the gage compartm ent , which you can use to secur e or other items 87 (arrows) .
open for
use .
Page 244 of 516
Unsuitable, worn, or damaged tie-down
straps
secured with these straps can then come and
and
faste n the tie-down straps to the tie-downs.
Loose or compartment can and change the
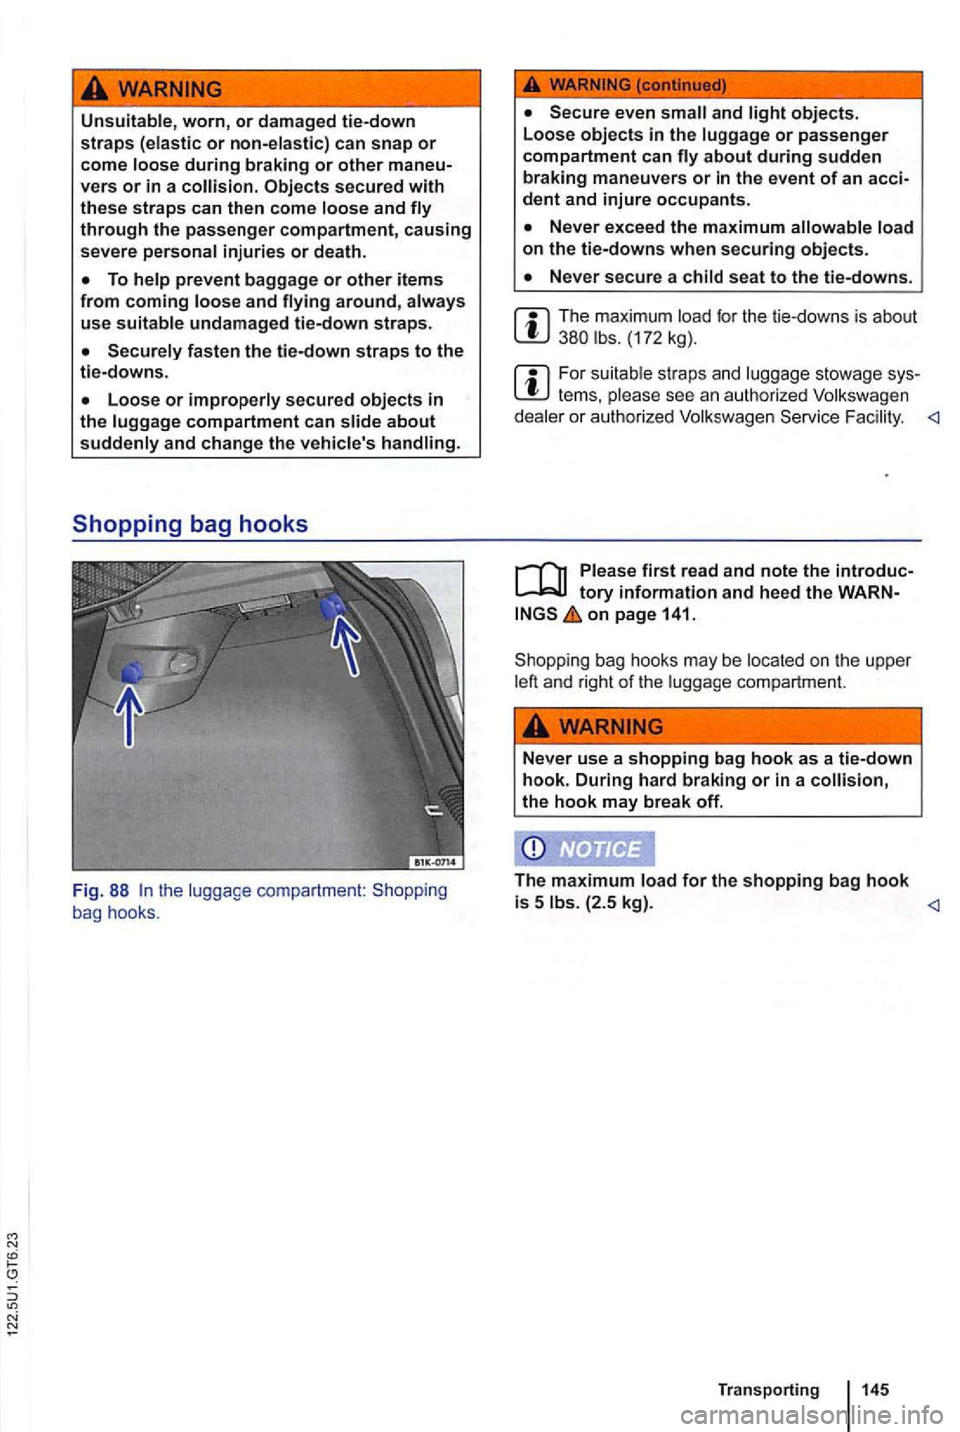
Fig . 88 the co mpartment: Shopping
bag hook s.
Secure even and light objects.
Loose objects in the or passenger compartment can
Never exceed the maximum
Never secure a seat to the tie-downs .
lor the tie-downs is abo ut
see an authorized or aut hor ized Fac ility.
Sh opping bag hooks may be
on the upp er and rig h t of the com partment.
Never use a shopping bag hook as a tie-down hook. During hard braking or in a
(2.5 kg).
Page 245 of 516
Roof rack
Introduction
this sectio n find informa tion about:
Mo unt in g the roof rack base carrier and roof
rack
................................... 147
Securing a load on the roof rack . . . . . . . . . . . 148
The ro of o f your vehicle has been designed to
approv ed base carrie r mounts and roof racks can
be used .
When should the roof rack be removed?
When it is no longer needed .
Before driving through an automatic car was h.
When the vehic le wou ld otherwise be too high
t o ach ieve min imum clearanc e to enter, for
ple, a garage .
More information:
Lights
Transporting 137
Saving fuel and helping the envi ronment
Tires and wheels 258
283
Transporting heavy or bulky loads on the roof rack will change the way the vehicle handles by shifting the vehicle's center of gravity and
increasing the wind drag area.
146 Before driving
able and undam ag ed straps so that the load
have a negative effect on the vehicle's
aerodynamics , center of gravity and ove rall
Your vehicle is higher when the roof rack is installed , especially when it is loaded. Compare
the vehicl e he ight with existing clear ance
heights , such as underpasses and garage doors.
creases due to increased air resis ta nce.
Page 246 of 516
Mounting the roof rack base carrier an d roof rack
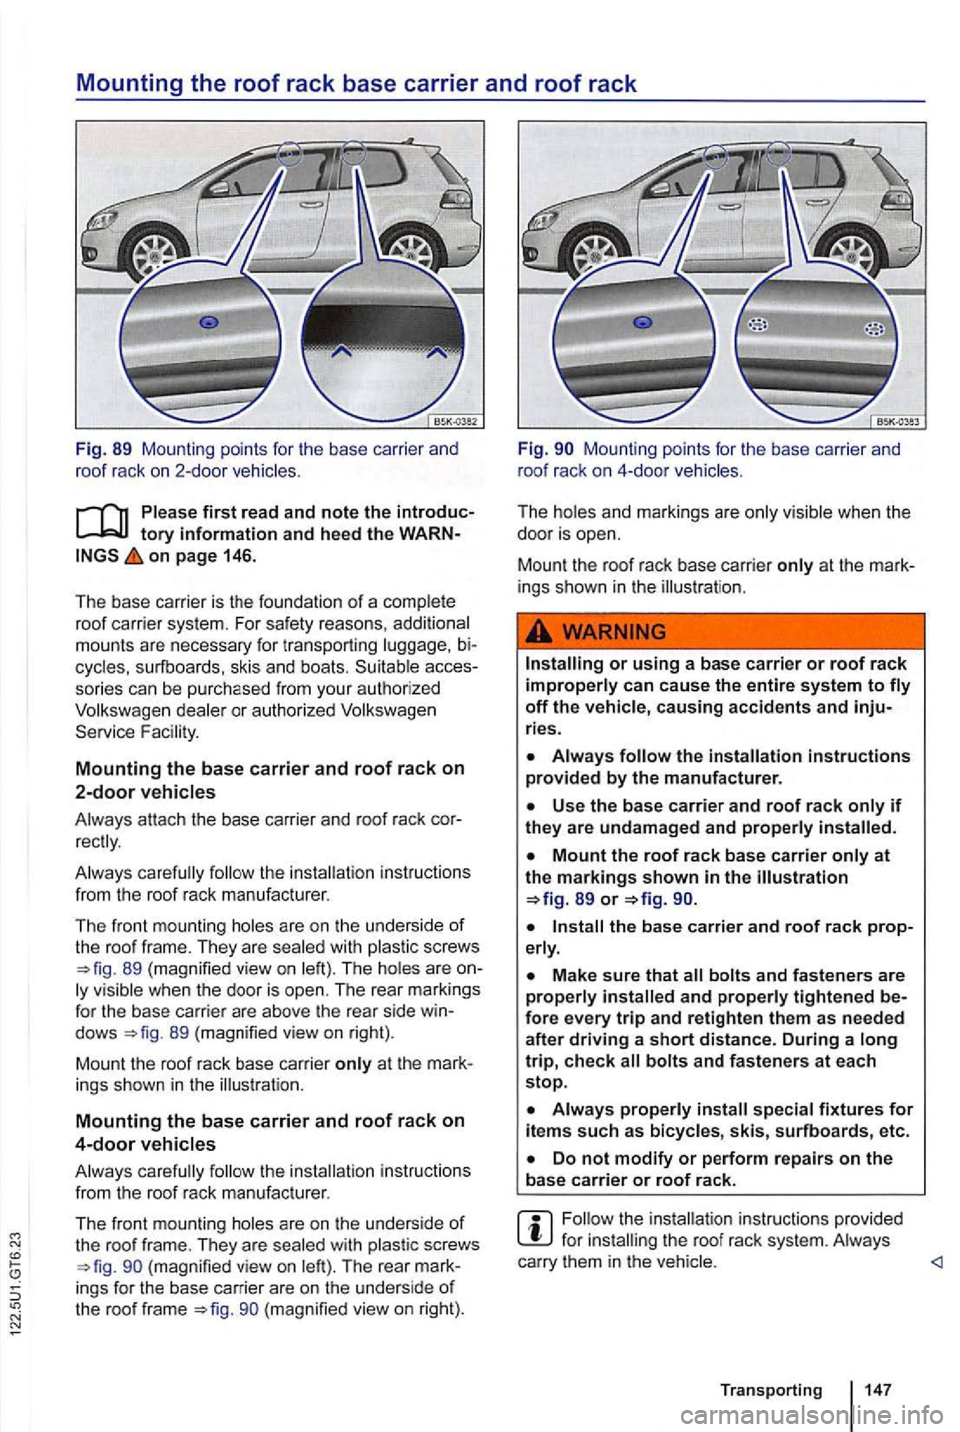
Fig . 89 Mounting points for the base carrier and
r oof rack on 2-door vehicles .
on page 146.
Th e base carrier is th e foundation
of a complet e
roof carrier sys te m . For safety reasons , additi onal
mount s are necessary for tran spor ting luggage,
cycles , s urfb oards, skis and boats . sories can be purchased from your auth orized Volk swage n dea ler or autho rized Volkswagen
Mounting the base carrier and roof rack on
2-door vehicles
Always attach th e base carrier and roof rack
A lways the instruct ions
f r om the roof r ack manuf acture r.
T he fr o nt mount ing holes are on
the unders ide of
t he roo f frame . Th ey are sealed with plastic screws 89 (magnified view on left). The ho les are
do ws 89 (magn ified view on right).
Mou nt the roof ra ck base carrier only a t the ings sh ow n in the
Mounting the base carrier and roof rack on 4-door vehicles
Always instructions
from the roof r ack manufacturer.
The fr ont mounting holes are on the underside
of the roof frame . They are sealed with plastic screws (magnified view on left) . Th e rear ings for the base carrier are on the unders ide of the roof frame (magnified view on right). Fig
.
ings sh own in the
the instructions provided by the manufacturer.
fig.
fore every trip and retighten them as needed
after driving a short distance. During a long trip, check bolts and fasteners at each stop.
for the roof rack system . A lways
carry them in the veh icle.
Page 247 of 516
Securing a load on the roof rack
first read and note the introduc
on page 146.
to sec ure a the roof rack sys tem has been
Maximum
The maximum roof is 165 (75 kg). T he roof
Be sure you know the weight of the roof rack and the items you want to transp ort on the roof. Weigh
them if n ecessary . N ever carry a roof
When using a roof rack with a do
not
this case , you may the
r oof rack to the weight
Distribut e the
Checking the mountings
After the base carrier and rook rack have been incheck and fasteners after driv in g a
short time and at
Before driving
damag e may occur.
the
maximum gross weight rating .
Do not exceed the roof
make sure that are
use u ndam aged tie-down ropes and ratche t straps .
the
Page 248 of 516
Introduction
this section
..
L oading the trailer
.............. ........ .
Driving with a trailer ..... . .. .. ........... .
mount .... . .
Retrofitting a trai l
er hitch ................ .
Max imum permissible trailer weight ... . 150
151
151
152
154
155
156
for
more concentratio n from the
dr iver . Always the ope rat ing and driving in
stru ctions given , and use common sense.
Un der winter conditions ,
win ter tires on the
vehicle and the trailer.
Tongue weight
The m aximum permissible tow bar tongue weight
exerted on the mount should not exceed kg).
More information:
Anti-theft a larm system
Lights page 122
Startin g assistance systems 195
Tires and wheels page 258
Parts, accessories, repairs and modifications
Riding in a trailer is dangerous and may be il
incorrect, or damaged trailer hitch can
cause the trailer to separate from the towing vehicle and cause serious personal injuries.
use an undamaged, properly mount
ed trail er hitch.
mount when you are not towing a trailer.
properly with suitable and undamaged straps so that the not shift.
and under unfavorable weather, or wind conditions.
careful when passing other vehicles.
Transporting 149
Page 249 of 516
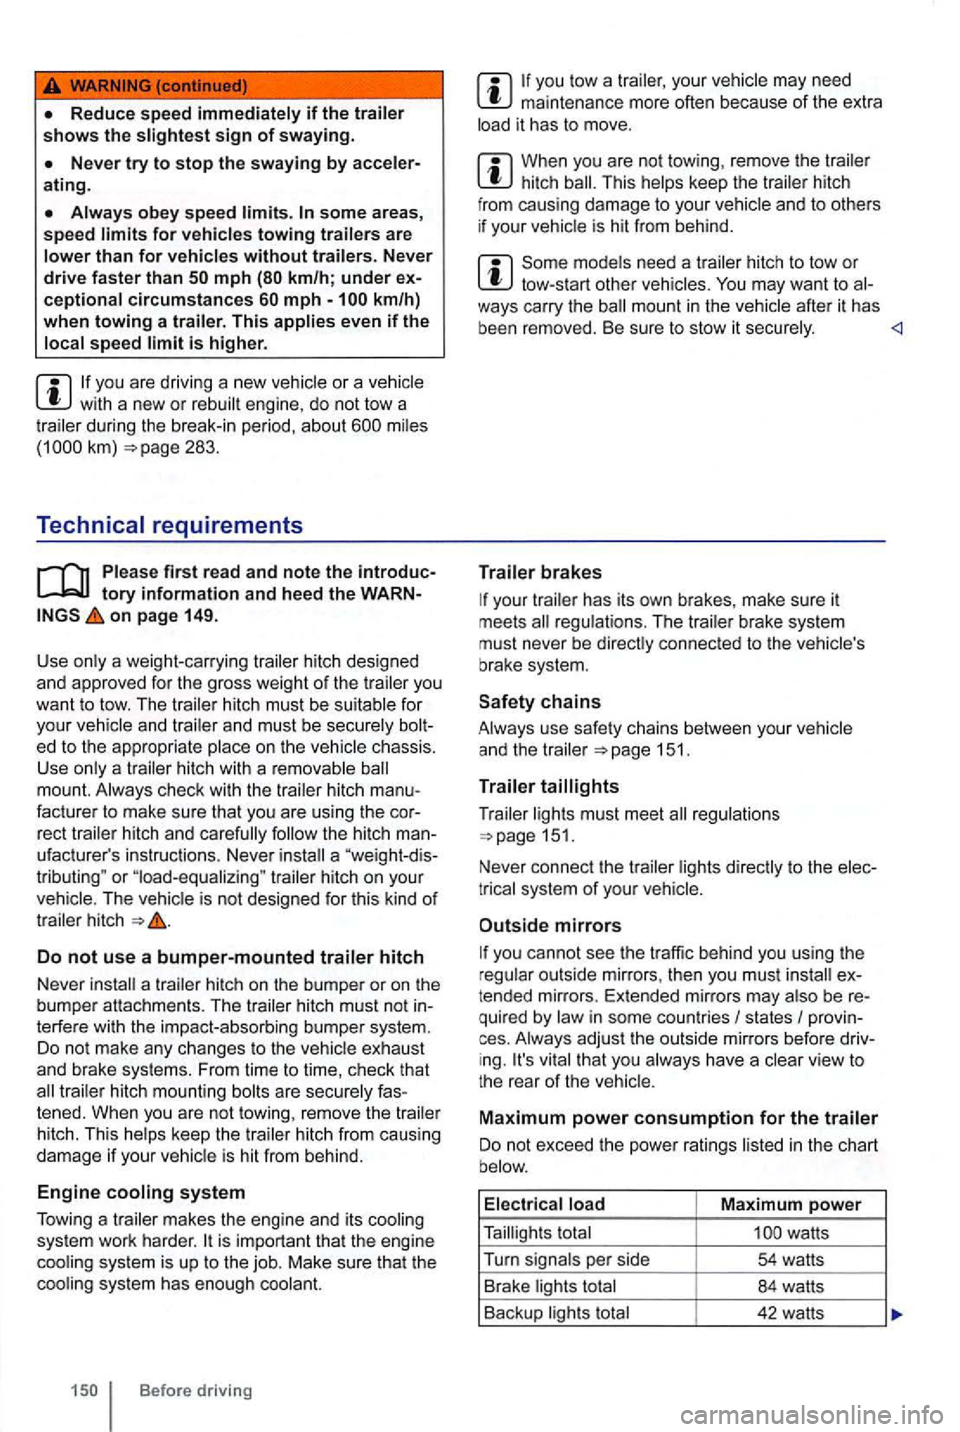
some area s, speed
is higher.
you are driv ing a new vehicle or a ve hicle with a new or rebui lt engine, do not tow a during the break-in period, about 283.
Technical requirements
tory informatio n an d heed the WARNon page 149.
Use only a weight-car rying
hitch must be suitable for
you r
a "weight -dis
tributing " or "load-equalizing " trailer hitch on your The vehicle is not designed for this kind of trailer hitch
Do not use a bumper-mounted traile r hitch
Never
a trailer hitch on the bumper or on the
bumper attachments. The trailer hitch must not in
terfe re with the impact-absorbing bumper system.
Do not make any changes to the vehicle exhaust
and brake systems. From time to time, check that trailer hitch mounting bolts are secure ly fas
tened. When you are not towing, remove the trailer
hitch. This
helps keep the trailer hitch from causing damage if your vehicle is hit from behind.
Engine cooling syste m
Tow i
ng a trailer makes the engine and its cooling
system work harder.
Before driving
maintenance more often because of the extra
load it has to move.
When you are not towing , remove the trailer hitch
Some models need a trailer hitch to tow or tow-start other vehicles. after it has
been removed. Be sure to stow it securely.
your trailer has its own brakes , make sure it
meets
151 .
T ra
iler
Trailer lights must meet regulations 151.
Never connect the trailer lights directly to the elec
t rical system
of your
Outside mirrors
you cannot see the traffic behind you using the
r egular outside mirrors, then you must ex
t ended mirrors. Extended mirrors may also be re
quired by law in some countries
I states I provin
ces . Always adjust the outside mirrors befo re dr iving. It's vital that you always have a clear view to
the rear of the veh icle .
Maximum po w er con sumption fo r the trailer
Do not exceed the power ratings listed in the chart
b elow.
E l
ectr ica l load Maximum power
Taillights total
Page 250 of 516
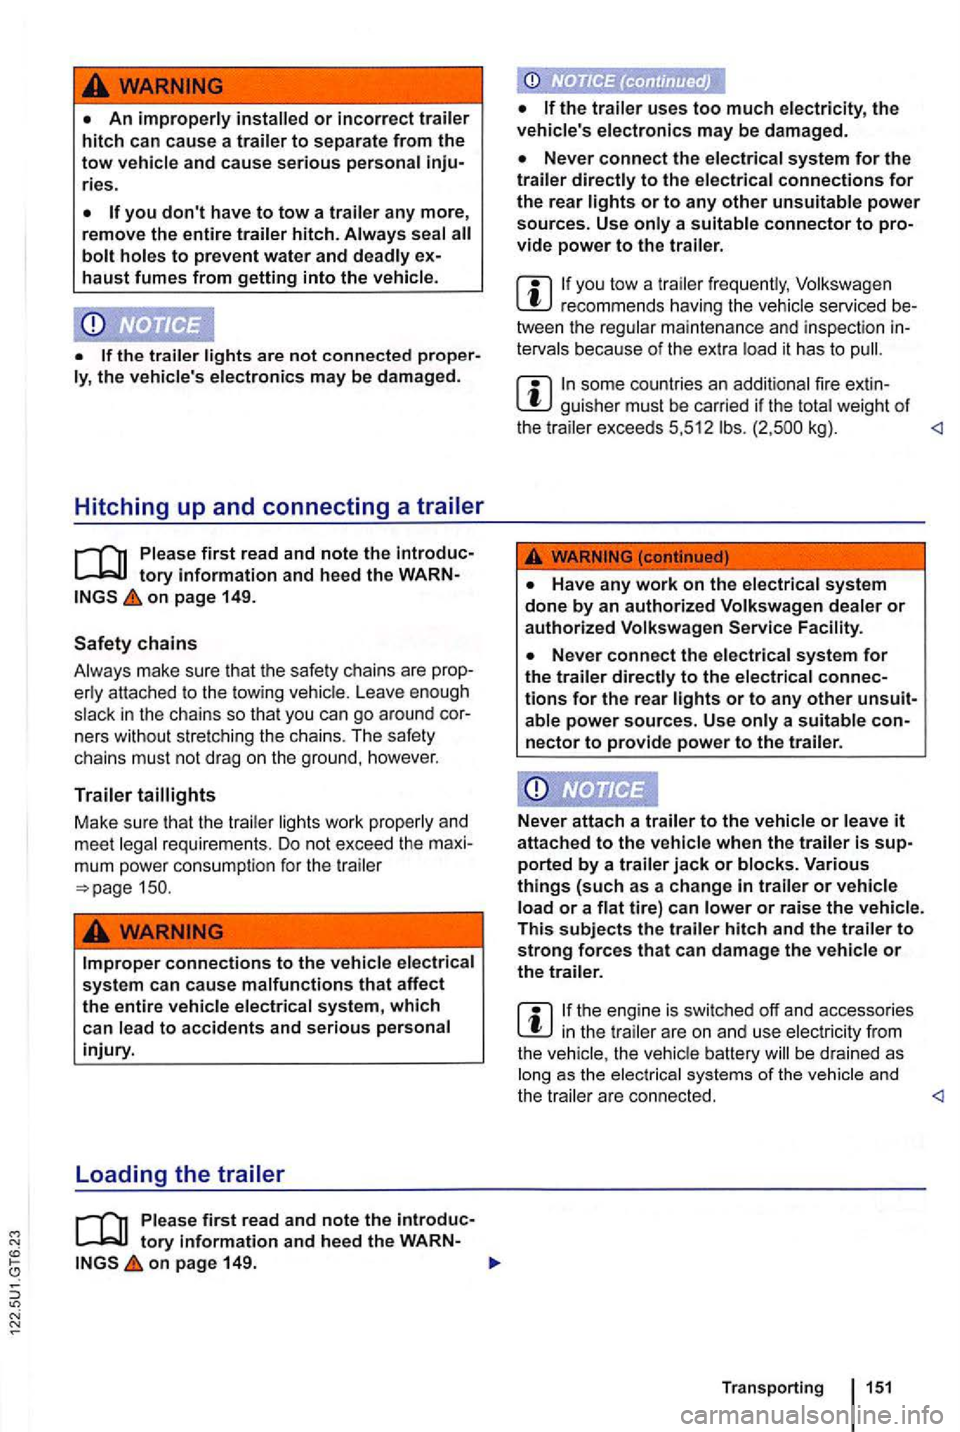
An improperly or incorrect trailer hitch can cause a trailer to separate from the tow vehicle and cause serious personal ries.
you don't have to tow a trailer any more, remove the entire trailer hitch. Always seal bolt holes to prevent water and deadly haust fum es from getting into the vehicle .
the trailer lights are not connected ly, the ve hicle 's ele ctronics may be damaged .
Hitching up and connecting a trailer
on page 149.
Safety chains
Always make sure t hat the safe ty c hai ns a re er ly attac hed to the tow ing ve hic le. Leave enough
s lack in the chain s so th a t yo u ca n go aroun d ners witho ut stre tc hin g the c hai ns. Th e safe ty
c h ai ns must not drag on the groun d, h owever .
Trailer
mum power consumptio n for th e traile r
connections to the vehicle electrical system can cause malfunctions that affect the entire vehicle electrical system, which can lead to accide nts and se rious personal injury.
Loading the trailer
tory information and heed the WARN -on page 149.
the trail er uses too much electricity, the vehicle's electronics may be damaged.
Never connect the electrical system for the trailer directly to the electrical connections for the rear lights or to any other unsuitable power sources. Us e only a suitable connector to vide power to the trailer.
if you tow a trailer freq uently, recom mends havi ng t he vehicle serviced
tervals because of the extr a load it has to pu ll.
some countries an addit ional fire guisher must be carried if the tota l weig ht of
the traile r excee ds 5 ,5 12 lbs. kg ).
Never attach a
trailer to the vehicle or leave it attached to the vehicle when the trailer is
things (such as a change in trailer or vehicle
load or a fla t tire ) can lower or raise the vehicle. This subjects the trailer hitch and the trailer to strong forces that can damage the ve h icle or the trailer.
the engin e is swi tc h ed off and accessories in the tr ailer are o n and use elec tricity from
the vehicl e, th e ve hicl e battery be drained as
l o ng as t he e lec trical sys te m s o f th e an d
the t railer are c onn ecte d .