rear lid VOLKSWAGEN GOLF PLUS 2006 Owners Manual
[x] Cancel search | Manufacturer: VOLKSWAGEN, Model Year: 2006, Model line: GOLF PLUS, Model: VOLKSWAGEN GOLF PLUS 2006Pages: 541, PDF Size: 98.86 MB
Page 42 of 541
Unlocking and locking vehicles with
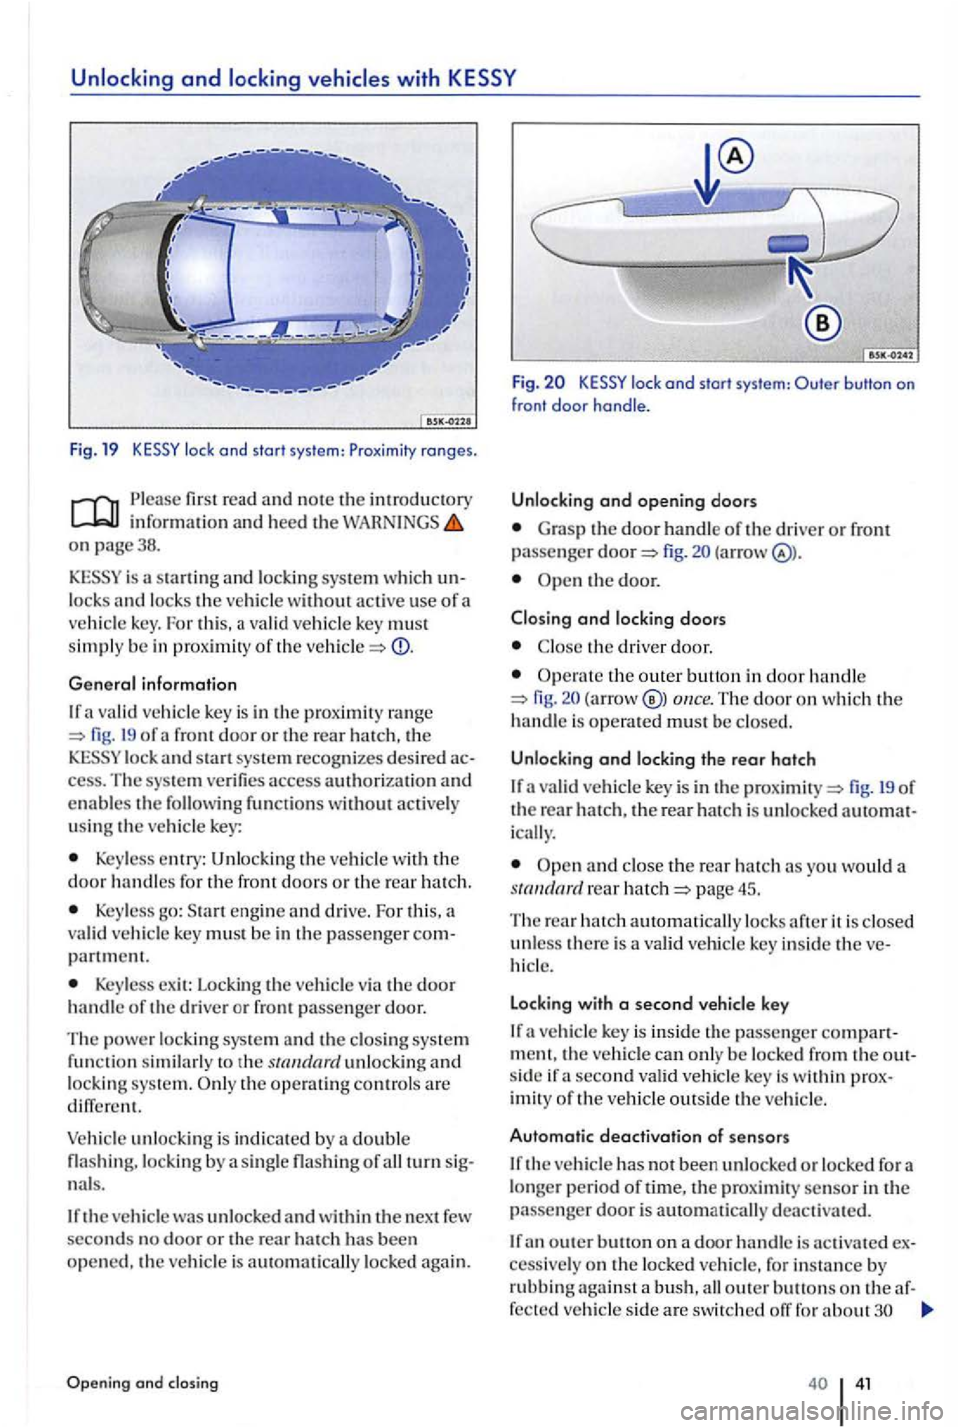
Fig. 19
on page38.
sta rting and system which unlocks and lock s the vehicle without active use of a vehicle key. For this, a valid ve hicle key must simply be in proximity of the
General information
If a va lid vehicl e key is in the proximity range fig . 19 of lock and start system recognizes desired access. T he system verifie s access authorization and enables the followin g functions without actively using the vehicle key:
Keyless entry: Unlocking the vehicle with the door handles fo r the front doors o r the rear hatch.
Keyless go: Start engine and drive. For this. a
valid vehicle key mus t be in the passenger com
partment.
Keyless exi t: Locking the vehicle via the door handle of the driver or fro nt passenger door.
T he power locking system an d the closing system fu nction similarly to th e unlockin g and locking system. the operating con trols are
Veh icle unlocking is indicated by double fla shing. locking by a single fla shing of all turn signals.
the vehicle was unlocked and within the next few seconds n o door o r the rear ha tch has been opened. the vehicle is automatically locked again.
and closing
Fig. lock and start system :
Grasp the door handle of the driver or front passenger fig . (arrow
the driver door.
the outer button in door h andle fig. (arrow The door on whic h the
h andle is operated mus t be closed.
Unlocking and locking the rear hatch
If a va lid vehicle key is in the fig. 19 of the rear hatch, th e rear hatch is unlocked automat
i c ally.
and close the rear hatch as you would a page 45.
The rear hatch automatically locks afte r it is closed unless there is a vali d ve hicl e ke y inside the ve
hicle.
Locking with a second vehicle key
I f a vehicle key is ins ide th e passenger compartment. the vehicl e can only be locked from the outside if a second vali d vehicle key is within proximity of the vehicle outside th e vehicle.
Automatic deactivation of sensors
If the vehicle has not been unlocked or locked fora longer period of time, tJ1e proximity sensor in the passenger door is automatically deactivated.
If an o uter button on a door handle is activated excessively o n the locked vehicle, for instance by rubbing against a bush, all outer buttons on the af-
fected ve hicle side are switched for about
Page 43 of 541
minutes. onl y the outer button on the driver door is affected, o nl y thi s button is deactivat ed.
The sensors become active again if one of the following events occurs:
minutes have pass ed.
OR:The vehicle is unlocked usin g button in the vehicle key.
order to uti lize convenience closing of all power window s and the power sunroof. press the outer button on the door handle for at least
the outer button in ord e r to stop the process.lfthe outer button on th e door handle is acti va te d a gain immedia te ly aft er it relea sed,
all windows are ope n ed (safe ty fun cti on) page 48.
Anti-theft system
lir st read and note the introduc tory information and heed the on page38.
The anti-theft alarm sys te m makes it more difficult
for someon e to break into or ste al the vehicl e.
The anti-theft alarm system is automati cally acti vated when th e ve hicle is locke d b y pressing the lock button on th e vehicle key (remote control
k ey).
When is the alarm trigg ered?
The anti-theft a larm system sounds fo r ab out seconds and fla shes the turn signals fo r up to minutes if the f ollowing a c ti ons are performed on the locke d vehicl e:
Opening been mechanic ally unlo cke d and not swit ching on the ig n ition w ithin about
Forcibl y opening a door.
Forcibl y opening the engin e hood.
Forcibl y opening the rear h atc h .
on the ig nit io n an invalid or unprogrammed key.
Before driving
Door opening is performed ac cording to the settings ac tivate d in the corresponding m enu Settings -Convenience a door handle is being
page
at least o ne power window is open and the sensor i s continuously activated, the convenience clos ing starts .
page
the ele c troni c ste e rin g column lock will not lo ck and the ve hi cle
hide ke y is discharged or it might not be possibl e to unlock and lo ck the vehicle using
D isconnecting the vehicle battery.
Deactivating the alarm
Unlock the ve hicl e with the unlock button on the vehicl e key or swit ch on the ignition with v alid vehicle key.
aft er the alarm h as stoppe d, the v ehi cle is opened aga in in the same or a differ ent area pro tecte d b y the alarm, the alarm sound again if the rear h a tc h is o pen ed after one of the doors has been o pe ned.
T he anti-theft alarm sys te m i s not activa te d w hen th e vehicle is locke d with the lock swit ch
th e driv er door is unloc ke d u sing the ve
the ve hicle battery is disc harge d or weak, not w ork properly.
Page 63 of 541
Removing and head restraints
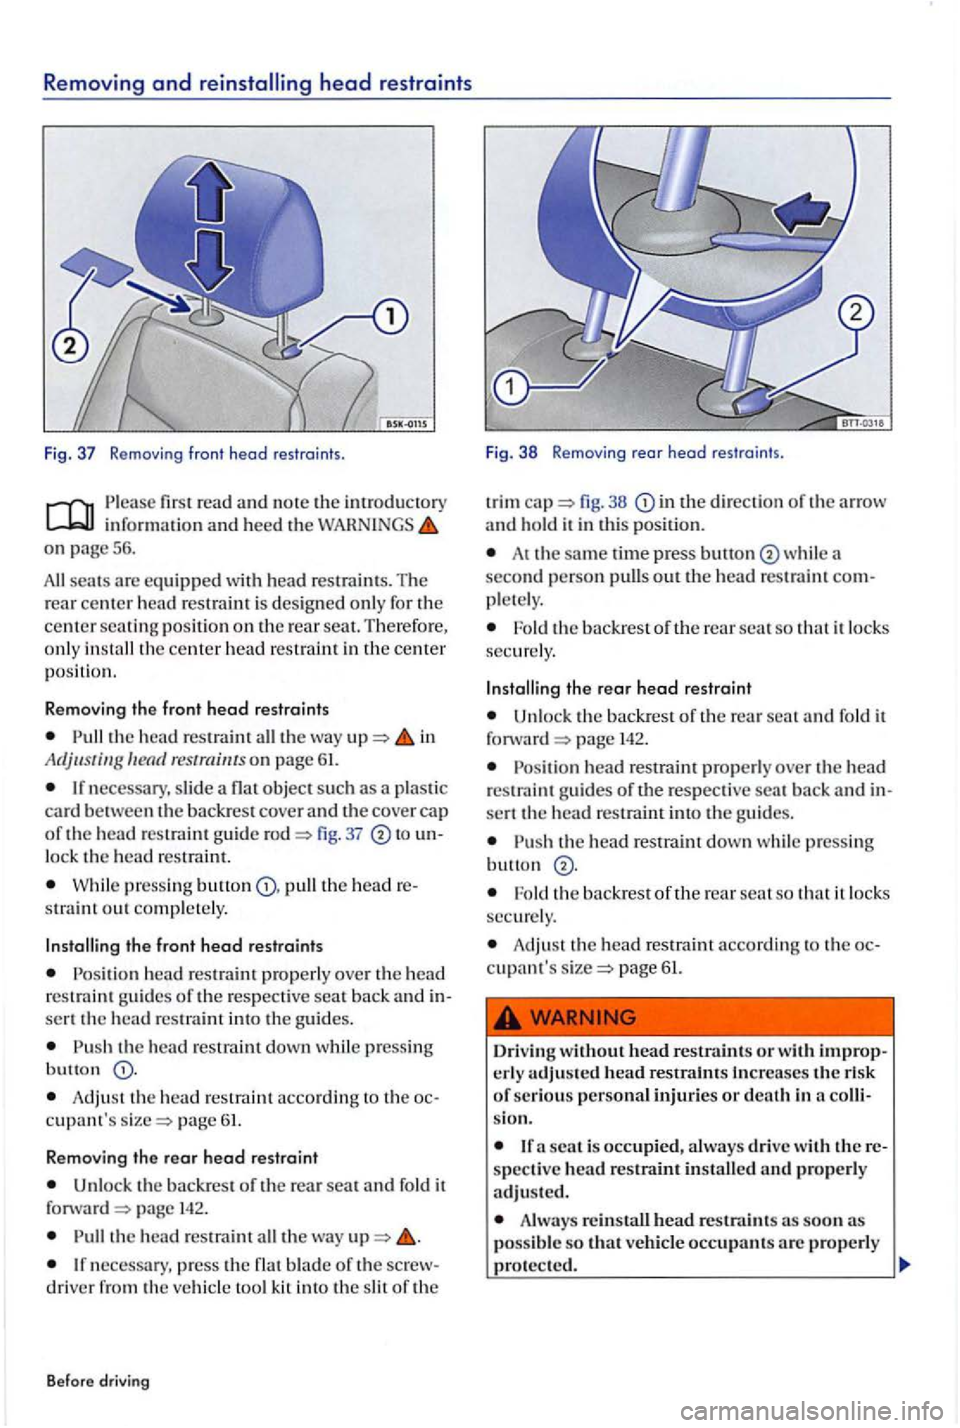
Fig. 37 Removi ng fro nt head restr aints.
read and note the introduc tory informat ion and heed the on page 56 .
scats arc equipped with head restrain ts . The rear c e nt er h ead restrai nt is des igned onl y fo r the ce nter seat ing positi on on th e rear sea t. Th erefo re ,
o nl y
the head re straint the wa y in Adjustin g res traints on page 61.
necessary , slide object su ch a s a pla sti c
ca rd be tween the backre st cover and the co ver cap
of the head restraint g uid e 37
W hil e pres sing pull the head straint out compl ete ly .
the front head restraints
P o sition head restrain t prop erly ove r th e head
r e s tr ain t gu ides of th e respective seat back and sert the head rc s trai m into th e g uid es.
the hea d restraim down whil e pressin g
but to n
Adjust the h ead re strai nt acco rding to the c upant's page 61.
Removing the rear head restraint
Unlock the backrest o f th e re a r seat and fold it
f orward p age
th e head re straint th e wa y
necess ary, pre s s th e flat blade of th e drive r from th e ve hicle too l kit into the s lit of th e
B efore driving Fig
. 38 Remov ing r
ear hea d restra in ts .
trim in the direction o f th e arrow and hold it in thi s posit ion.
At th e same time press bullon second person pull s out th e head restraint
th e backrest of th e rear scat so that it lock s
secure ly.
the rear head restraint
Un lock the backrest of the re a r scat fo ld it
f o rward page 14 2.
h ead restraint prop erly ove r th e head restra int guides of th e re spective sca t back and sert the head restraint into the g uide s.
the head res traint down whil e p ressin g
Fold the backres t of the rear seat so that it lo cks secure ly.
Adju st th e head re straint a ccord in g to the page 61.
Driving without head restraints or wit.h crly adjusted head restra .lnts Increases the ri sk of seriou s personal injuries or death in co
scat is occupied, always drive with
Always reinstall head r estraints as soon possib le so that veh icle occupan ts properl y
Page 65 of 541
Please fir st read and note the in tro ductory
on page 56.
Front center armrest
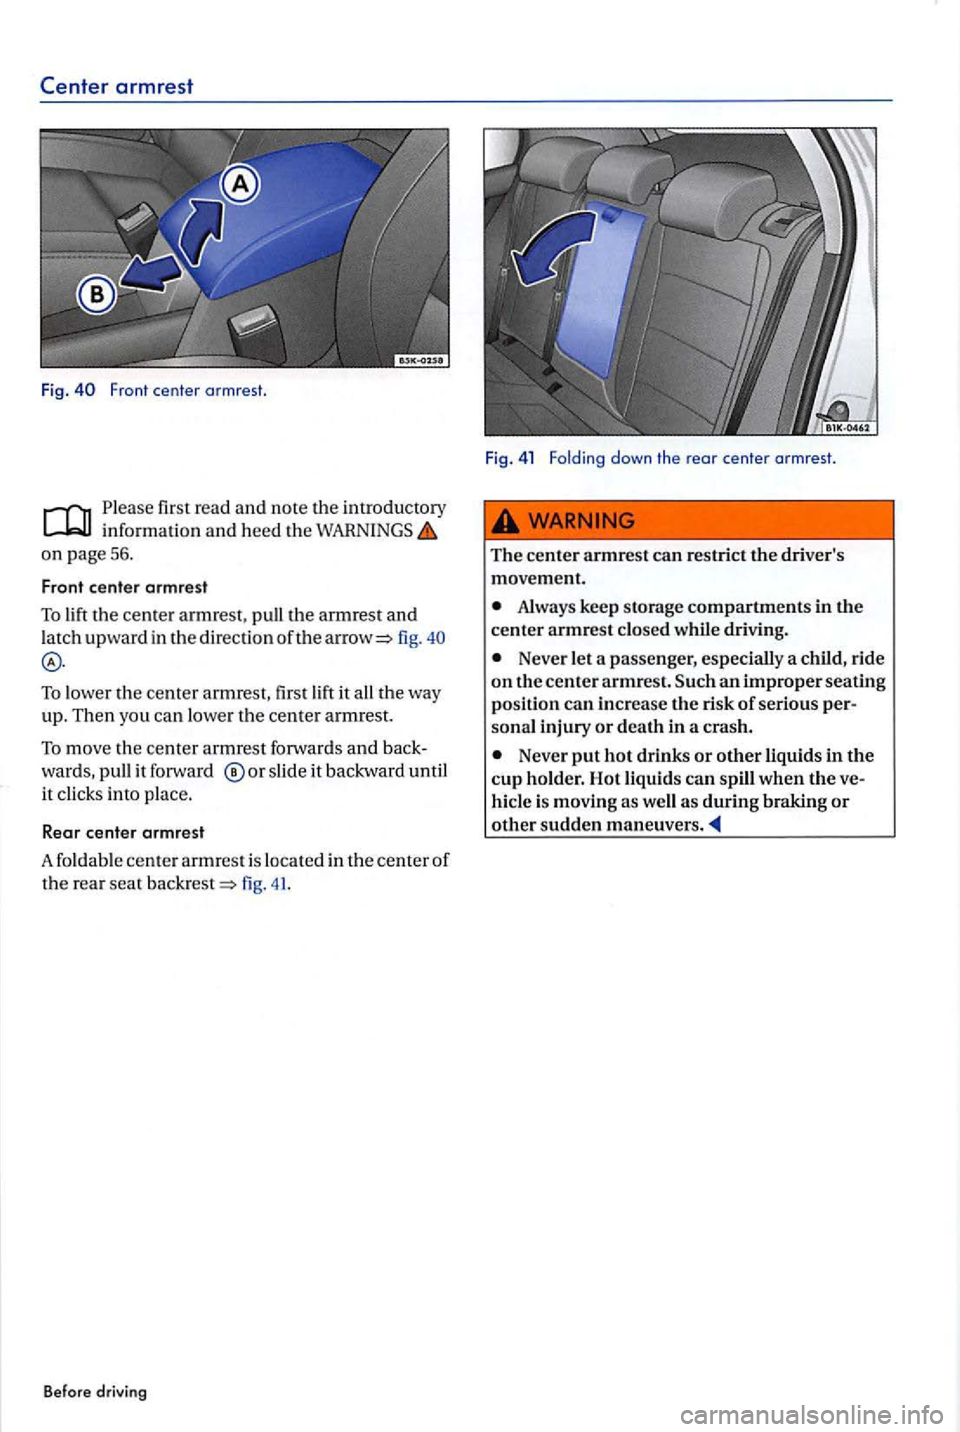
To lift the cente r a rm rest, pull the armrest and
l atc h upward in th e direction of the fig.
To lowe r th e center armre st, first lift it all the way up. Then you ca n lowe r the center armre st.
To move the center armrest forwards and back
wa rds, pull it forwa rd slid e it backward until
it click s into place.
Rear center armrest
A foldabl e ce nter armrest i s loca te d in the center of the rear sea t fig. 41.
Before drivi ng Fig
.
41 Folding d own th e rear center armrest.
The center armrest can restrict the driver 's
movement.
Always keep storage compartments in the center armrest closed whil e driving .
Never let a pas se nger, esp ecially a child , ride on thecenterarmrest. an improper seating position can increas e the risk of se rious personal injury or death in a cras h.
Never put hot drinks or other liquids in the cup h old er. Hot liquid s can spill wh en the ve
hicl e is moving as well as during braking or other sudden maneuvers.
Page 147 of 541
Ski and snowboard sack
Please first rea d and no te the introdu ctory informatio n and heed th e on pag e 142.
Long objects ca n b e tran sported with
out s oiling
t h e vehicl e int erior u sin g th e ski sno wboard
sack.
Loading and sec uring the ski and snowboord sock
the rea r hatch.
the pass -thro ugh
Unfold the ski and snowboard sack.
Put lo ng item s in from th e lugg age ment.
snowboard
s ack into th e center safety belt buck le.
Tighten th e s trap on its loose
Tie-down hooks
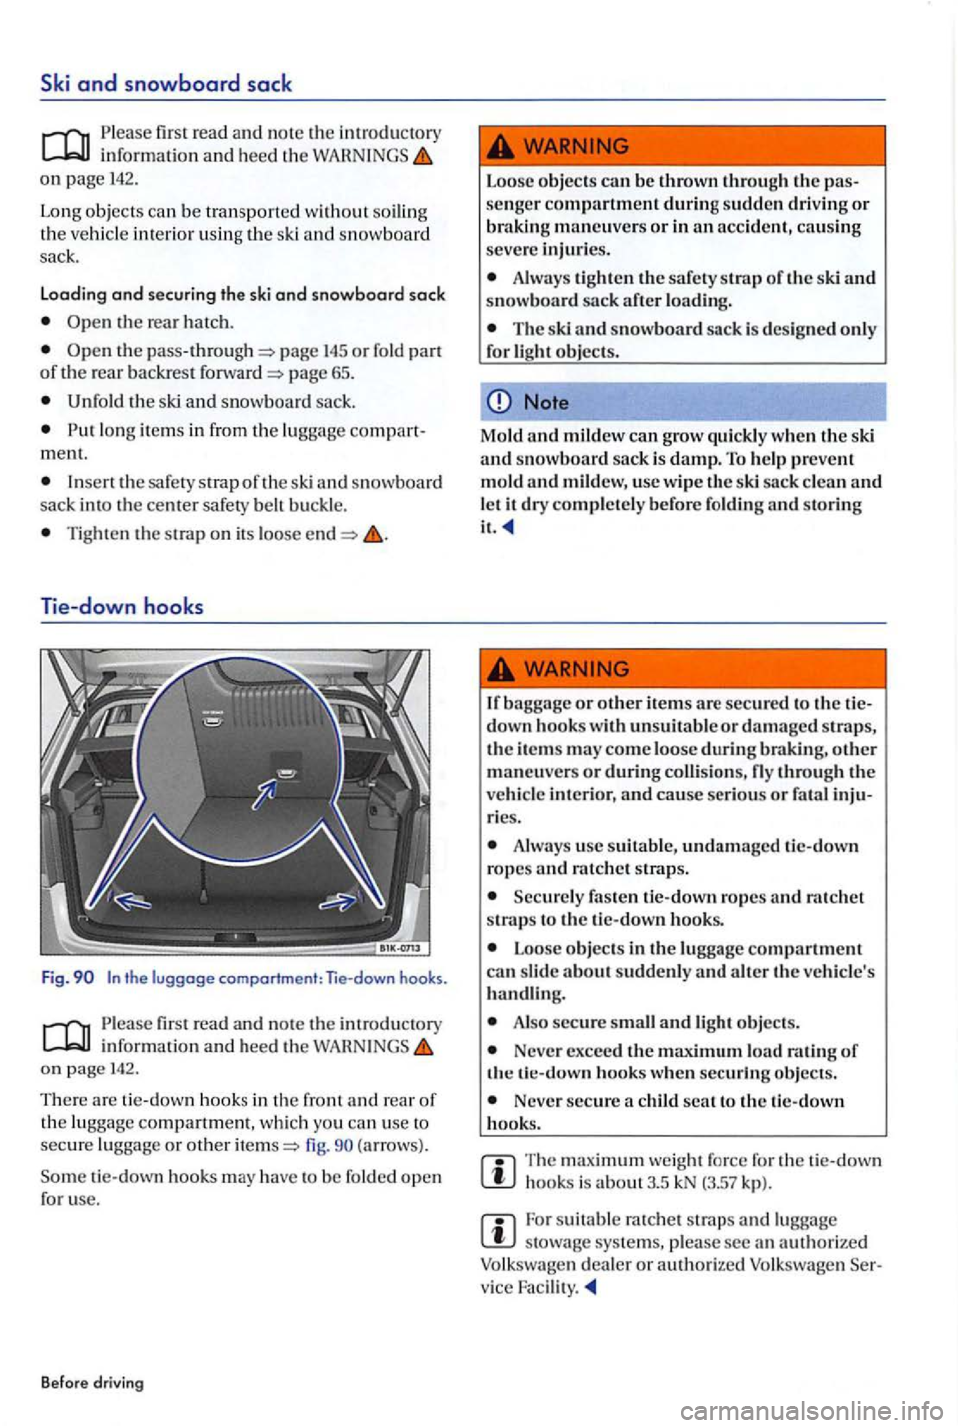
Fig. the luggage comportment: Tie-down hooks.
Please first rea d and note th e in trodu ctory informat io n and heed the on pag e 142.
There are tie-d o w n h ook s in the front and rear o f
the l u ggage compartm ent , wh ic h you can use to se cure lu gga ge or other fig. (arrows).
S
ome tie-d own hook s m ay have to b e fold ed open
f o r u se.
Befo re driving
Loose objects be thrown through the
Always tighten the safety of th e ski and snowboard sack after loading.
The ski snowboard sack is de signed only
fori
Note
Mo ld mildew can grow quickly wh en th e ski and snowboard sack is damp. T o he lp prevent mold and mildew, use wipe th e ski sack clean and let it dry completely before fo lding and storing
it.
baggage or oth er item s arc secured to th e down hooks with unsuitabl e or damaged
ries.
Always usc s uit able , undamaged tic-dow n ropes and
Securely fas ten tic-down ropes and ratch e t
stmps to th e tic -dow n hooks.
Loo se o bjec ts in th e lug gage compartm ent
ca n slide about suddenly a nd alter the ve hicl e's
handling.
A ls o secure and lig ht obj ec ts .
Never exceed the maximum load ra tin g o f
th e
Never secure a c hild seat to th e tic-down
h ooks.
The maximum weig ht fo rce for th e tie-down hook s is about3.5 k N (3.57 kp) .
sui table rat ch e t stmp s and luggage stowage syste m s, please sec a n authorized d ealer or authori zed Volksw agen
Page 165 of 541
Storage compartment in the rear center
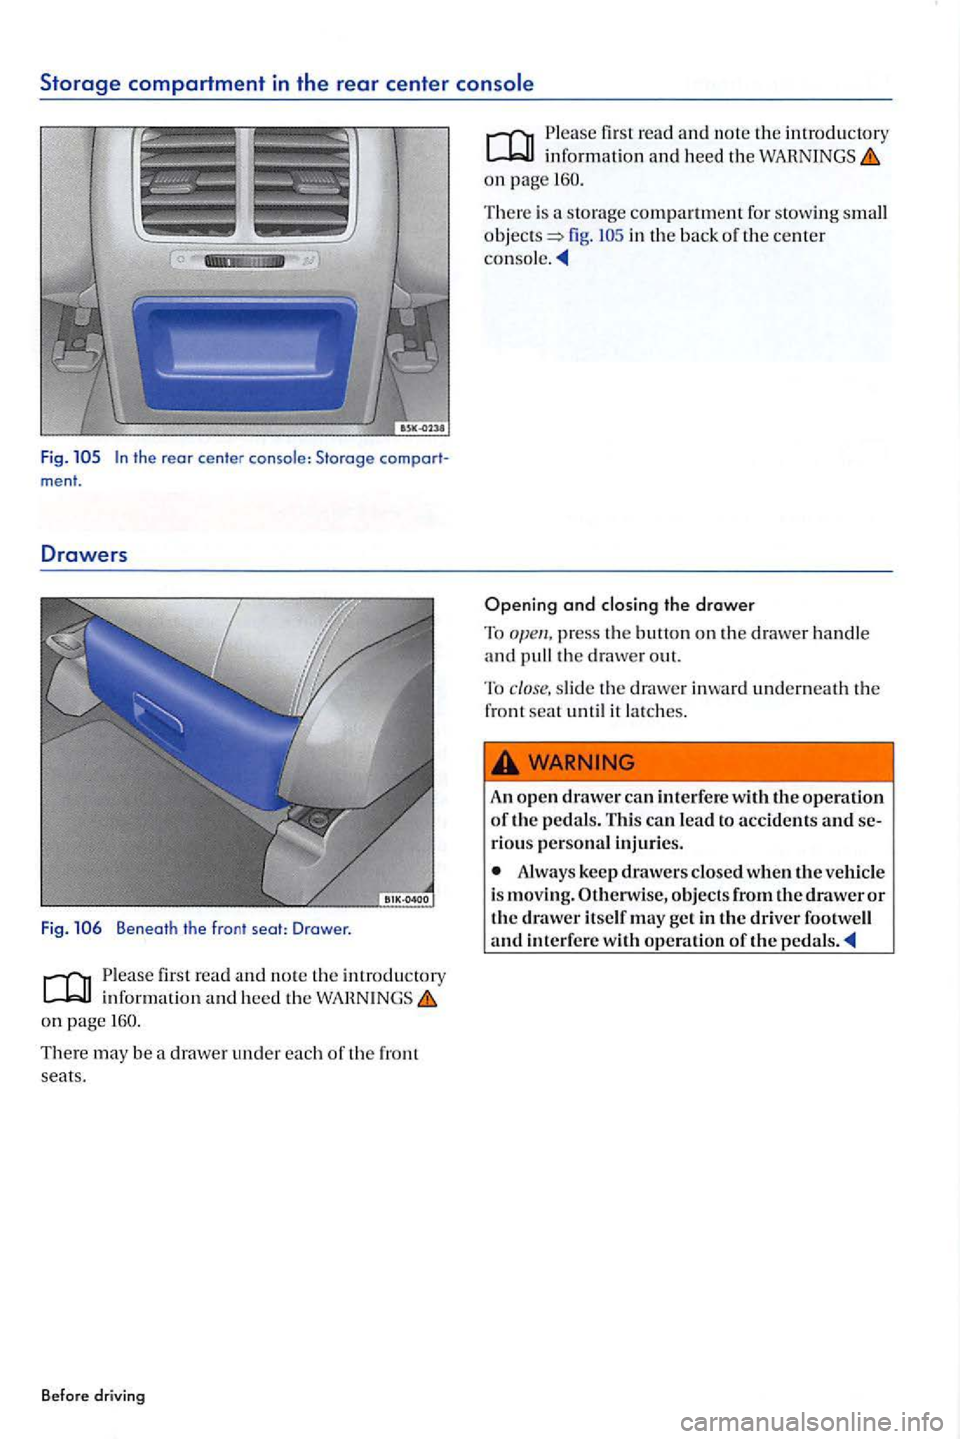
Fig. ment.
Drawers
Fig. Benea th the fron t seat: Drawer.
Please read and not e th e introductory
on pag e
There may be drawer under each of the front seats .
Before driving
Plea se firs t read and no te the introdu ctory information and h eed the o n page
fig. in the back of the center console.
Opening and closing the drawer
T o press th e button on th e drawer handle and pull the drawer out.
To close, slid e the drawe r inward underneath th e front seat until it latches.
An open drawer can interfere with the operation of the pedals. This can lead to accidents and
Always keep drawers closed when the ve hicle
is moving. Otherwise, objects from the drawer or the
Page 167 of 541
In thi s sect io n yo u'll find inform ation on the lowing:
Cup holde r in the front center console ......... .
Cup holder in the rear center .. .... ... . .
Cup holder in the rear center armres t
Bottle holders
There are bottle holders in the open ments in th e dri ver and passe nger doors.
More information:
p age 270
166
167
167
Improper use of cup holders can cause injuries.
Never put hot drin ks in the cup holders. During normal or sudden maneuve rs, sudden braking or in a hot liquid can be and cause burns !
Make certain that bottles or other items
cannot fall into the d.river's footweU while the ve hicl e is moving and interf e re with the ment of the p edals.
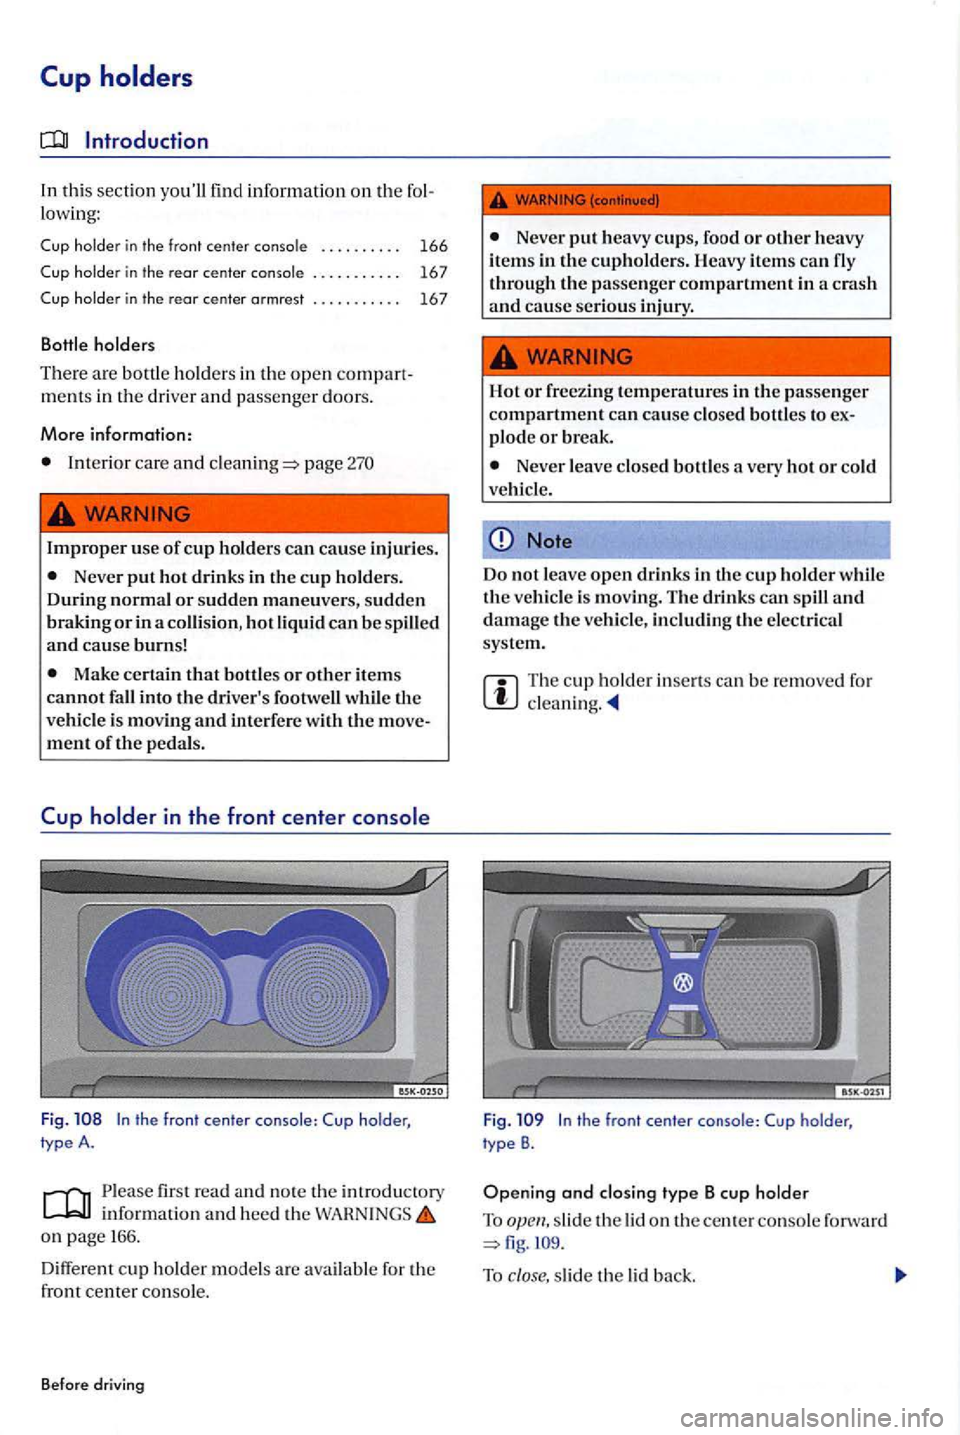
Fig. the fron t cen ter console: Cup holder, type A.
fir st read and no te th e introductory inform ation and heed the o n pag e
Different cup ho ld e r models are available for the
from cen ter co n so le.
B efo re driving
Never put heavy cups, food or oth er h ea vy
it em s in the cu ph olders. H eavy items can fly through the passenger compa.rtment in a crash and cause serious injury .
Hot
or freezing temperatures in the passenger compartment can cause closed bottles to plode or break.
Never leave closed bottles a very hot or co ld
ve hicl e.
Note
Do not leave open drinks in the cu p holder the vehicle is moving. The drinks can and damage the ve hicl e, including the e lectrical system.
The cup ho ld er in se rts ca n be re m ove d for cleaning.
Fig.
slid e th e lid on th e center co nsole fo rwa rd
To close, slide th e lid back.
Page 168 of 541
Securing drink in type B cup holder
page 166. fig. and s lide the bottle o pener forwa rd or
Cup
fir st read and note the introductory informati on and heed the WAHNlNGS on p age 166.
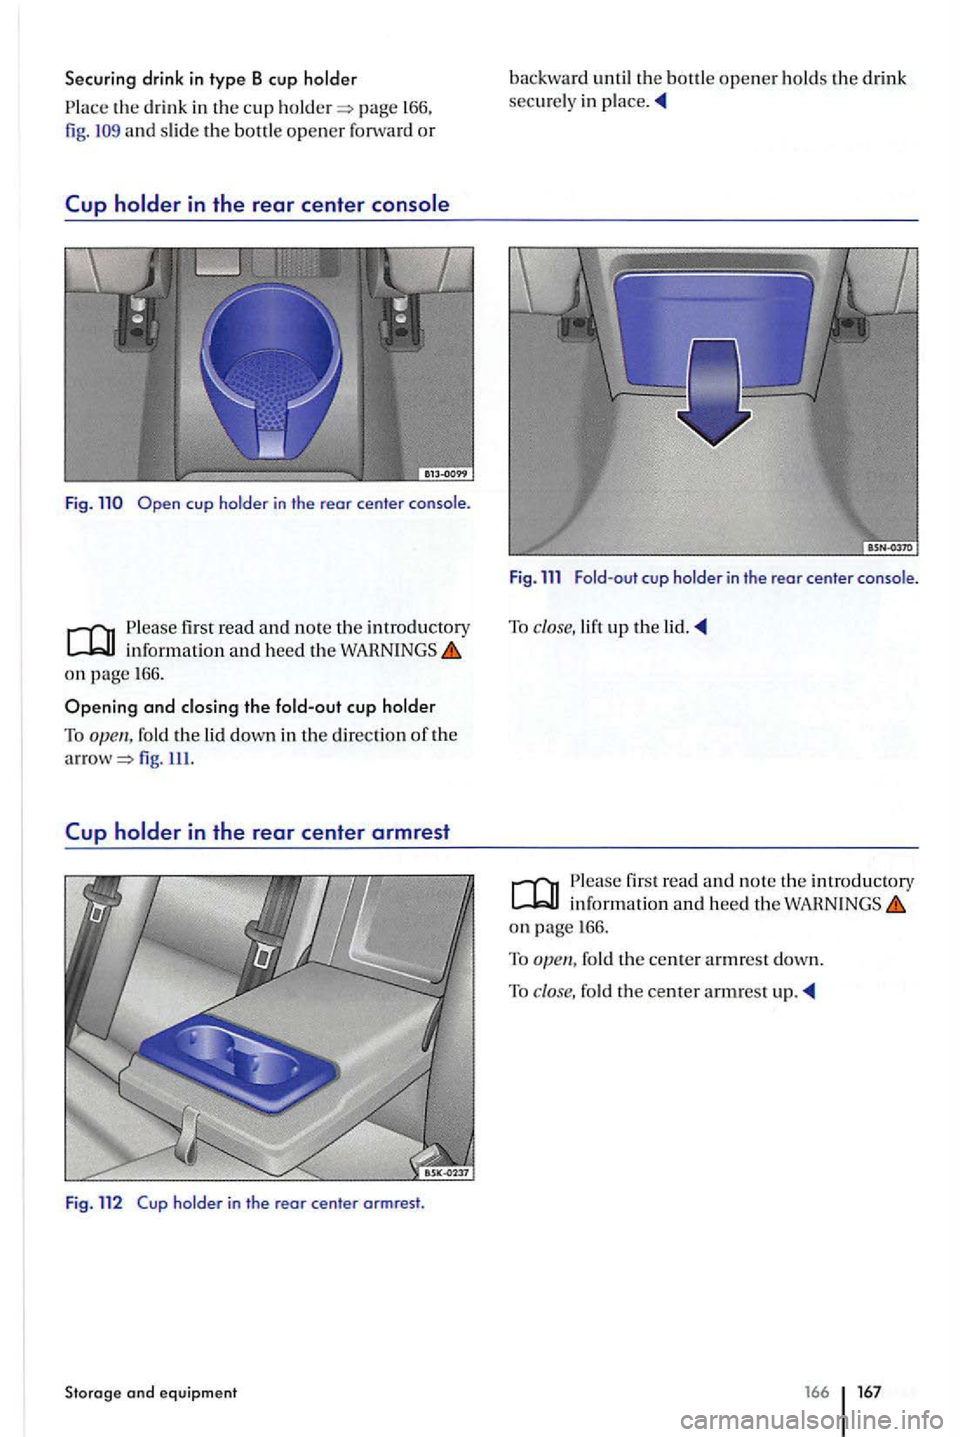
fold the lid down in the direc tio n of the fig . Ill.
Cup in the rear center armrest
Fig . 112
Fig. 111 Fo ld -out cu p h older i n the rear cente r c onso le .
To close, lift up the
first read and note th e introductory information and heed th e on page l66 .
To
f o ld the center armrest down.
T o
fold the armrest up.
166 167
Page 263 of 541
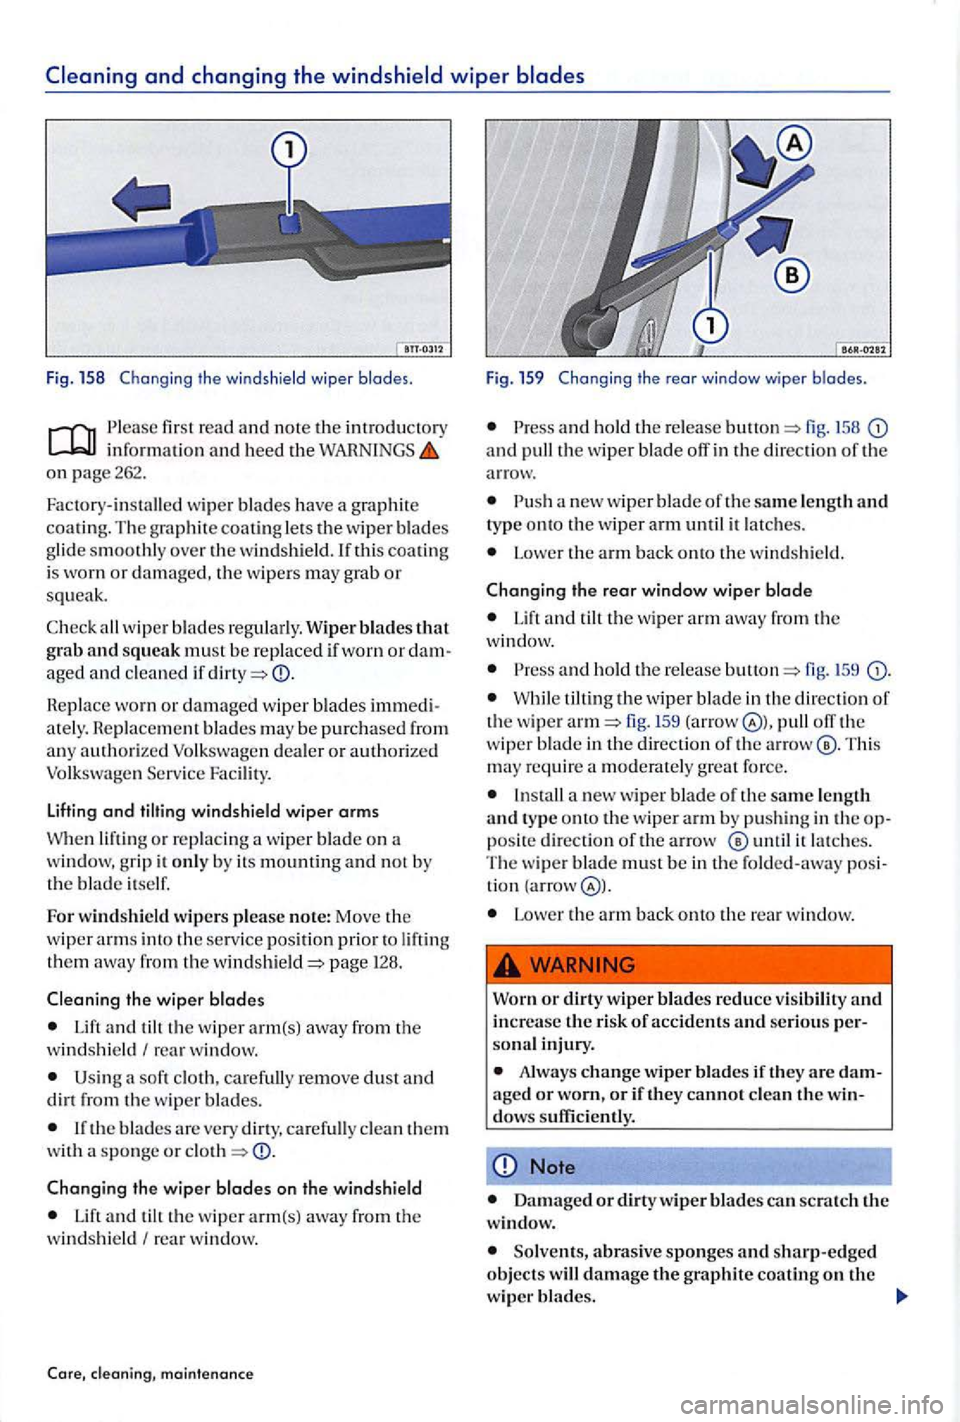
first r ead and not e th e introdu cto ry in fo rmati on and heed th e on page 262.
wip er b lades have a g raphit e
coating. Th e gra phit e coating le ts th e w ip er b la d es
g lid e smoothl y over the w ind shi eld.lfthis coating
i s worn or d am age d, the w ipers m ay grab or squ eak.
wip er bla d es regularly. Wiper blades that grab and squeak m ust b e re placed if worn or
Replace wo m or damaged wip er b lades ate ly. R ep lac em ent may be purch ased fro m
a ny authorize d Se rv ic e Faci lity
Lifting and windshield wiper arms
W he n lift in g o r re plac ing a w iper b la d e o n grip it onl y b y its m ounting and not by
th e blad e itself.
For windshi eld wipe rs p lease note: M ove the
w ip er a rm s in to th e serv ice pos ition prior to lifting
th em awa y fro m the page 128.
Cleaning th e wiper blades
Lift and the wip er arm(s) awa y from the
w ind shi eld I rea r w indow.
Usin g a soft cloth, care full y re m ove dust a nd dirt fro m th e wiper bla d es.
clean th em
w ith a sp onge or
Changing the w ip er blades on th e windshi eld
Lift and th e wipe r arm(s ) awa y from th e
w in dsh ie ld I re a r w ind ow .
maintenanc e
Fig. 159 Changing the rear windo w wip e r b lades.
and h o ld th e re le a se 15 8 and th e w iper blade off in the direc tio n of th e
a rro w.
a
Lo we r th e arm b ack onto the w in d shield .
Changing the rear window w iper
Lift and tilt th e w iper a rm aw ay fro m the
w ind ow.
and ho ld t he re lease 1 5 9
W hile th e w iper b lade in the direc tio n of th e w ip e r !59 (arro w off th e
wip er blade in the dir ection of th e This
m ay require moderat ely
a new wiper bl ade o f th e same length and type onto th e w ip er a rm b y pu shin g in the pos ite dir ectio n of th e arrow ® until it l atc h es.
Th e w ip e r b lade must b e in the fo ld ed -aw ay
Low er th e arm bac k onto the rea r w indow.
Worn
or d ir ty wiper blades reduce visibilit y and increase the ri sk of accidents and se riou s so n al in jury.
Always change wip er blades if th ey are or if they cannot clea n the
Note
Damag ed or dirty w ip er blades can sc ra tch the window.
graphit e coating on th e
wiper blades.
Page 320 of 541
informatio n and heed the WAH N INGS o n page322.
W h
en lock ing the vehicl e all doo rs are
l ocke d. When th e vehicle is unlocke d o n ly th e drive r door is unlo cke d. Note the tions for the anti-th eft ala rm page 38.
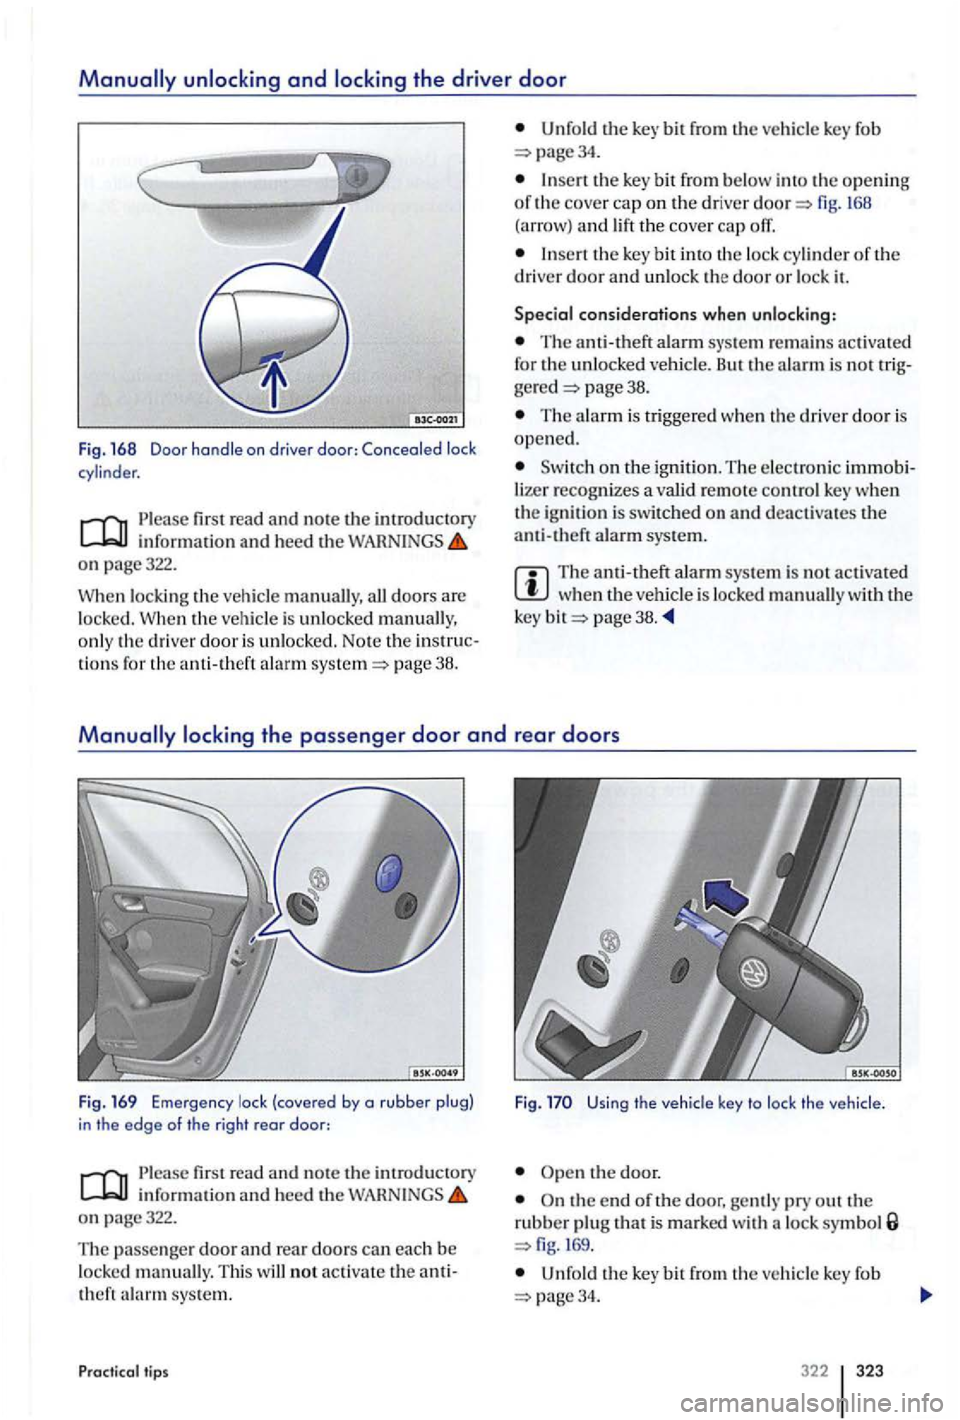
Unfo ld the bit from ve hicle key fob page34.
th e key bit from be low into the o pening of the cove r cap on the driver and lift th e cover cap
the ke y bit int o th e lock cy linder of the
driver door and unl ock the door o r lock it.
Special considerations when unlocking:
The anti-theft alarm sys te m activated for the unlo cke d ve hicle. But the alarm is no t page 38.
The alarm is tri gge re d when the drive r door is open e d.
o n the ignition. The e lectron ic lize r recognizes a valid re mot e contro l key w hen
th e ig nit ion is switc hed on and deactivates the anti -theft alarm sys tem.
The anti-theft alarm sys te m is no t activa ted when veh icl e is loc ked manuall y w ith the
k ey page 3 8.
read and note the int roductory information and heed th e WAR N INGS on page322.
T he passe nge r d o
or and rear doors can eac h be loc ked manually. Thi s will not ac tiv ate theft sys te m .
Practic al tip s F
ig. the
vehicle key to lock the vehicle .
Ope n the door.
O n the end of the door, gently pry out th e rubber plug that is m arked with lock symbol 169.
the key bit from the ve hicle key fob 34.
322 323