key VOLKSWAGEN JETTA 2008 Owners Manual
[x] Cancel search | Manufacturer: VOLKSWAGEN, Model Year: 2008, Model line: JETTA, Model: VOLKSWAGEN JETTA 2008Pages: 477, PDF Size: 77.6 MB
Page 4 of 477
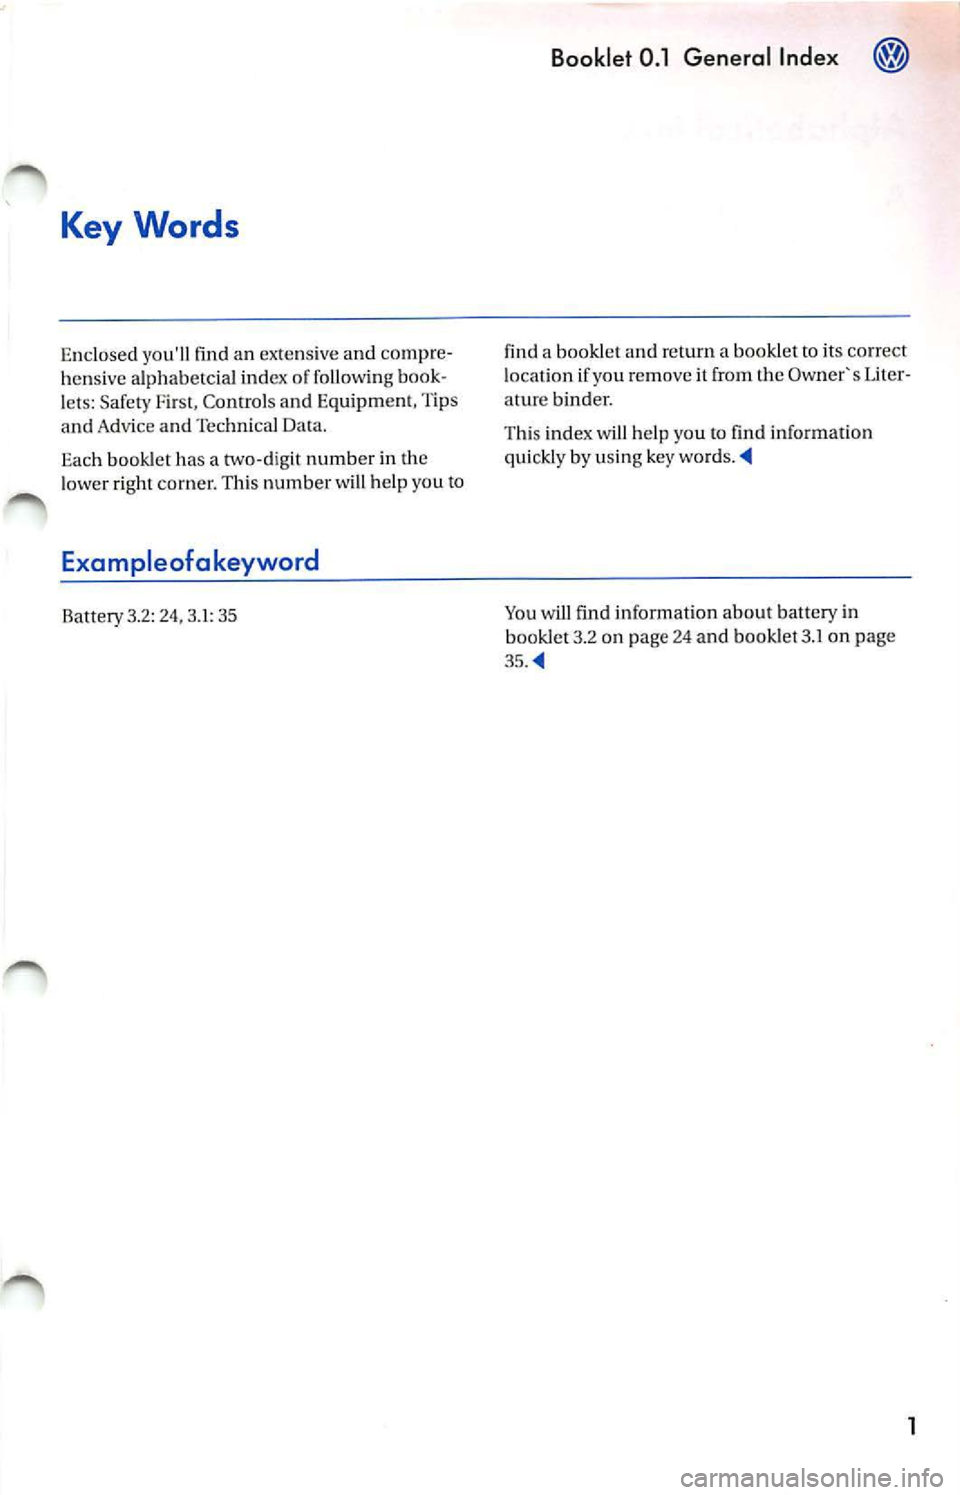
Key Words
Enclosed you'll find an extensive and compre
hensi ve alphabetcia l index of following book
l ets : Safety First, Conrrol s and Equipment, Tips
and Advice and Technical Data.
Eac h book let has a two-digit number in th e
l ower right co rner. This number will help you to
Exampleofakeyword
Battery 3.2: 24, 3.1: 35
Booklet 0.1 G eneral Ind ex
find a booklet and return a boo klet to its correct
l oca tion if you remove it from the Owner's Liter
ature binder.
Th is ind ex w ill help you
to find information
quickl y by using key
You will find informat ion about battery in
booklet 3.2 on page 24 and book let 3 .1 on pa ge
Page 6 of 477
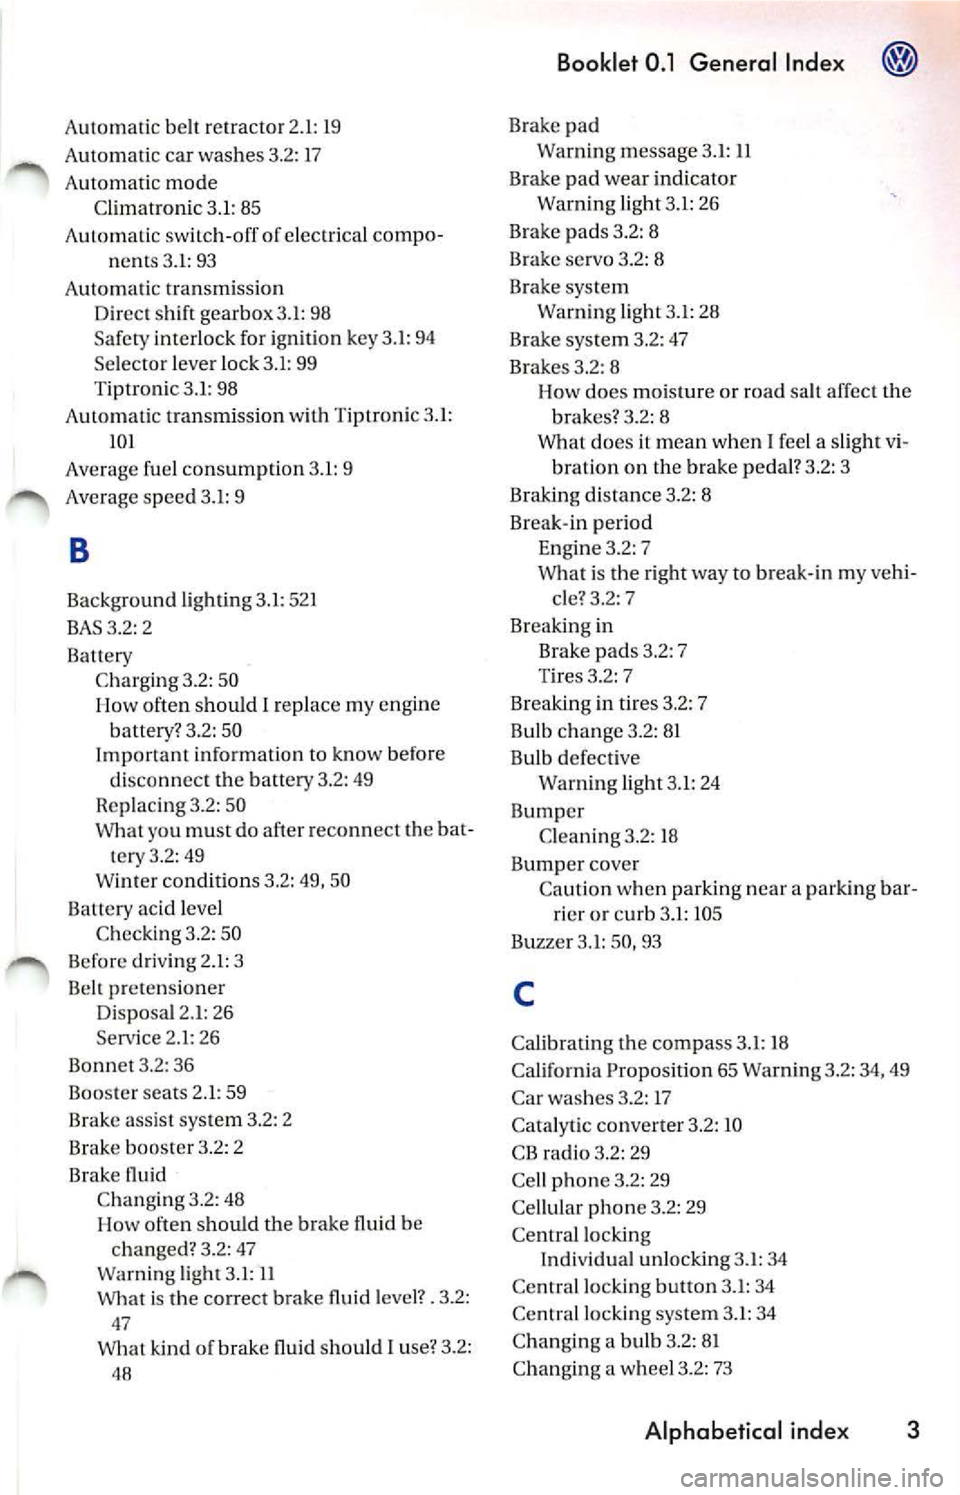
Automatic belt retractor 2.1: 19
Automatic car washes 3.2: 17
Automatic mode Climatronic 3 .1: 85
A utomatic switch-off of electrica l compo
nents 3.1: 93
A utoma tic transm iss ion
D irec t shif t gearbox 3.1: 98
Safety interlock for ignition key 3.1 : 94
Se lector lever lock 3.1: 99
Tiptro nic 3.1: 98
Automatic transmission with Tiptronic 3.1:
IOI
Average fuel consum ption 3.1: 9
Average speed 3.1: 9
B
Background lighting 3.1: 521
BAS3.2: 2
Batt ery
Charging 3.2: 50
How often should
I replace my engine
battery? 3.2: 50
I m portant information to kn ow before
disconnect the batt ery 3.2: 49
Repla cin g 3.2: 50
What you must do afte r r eco nnect the bat
tery 3.2: 49
Winter condi tions 3.2: 49, 50
Battery acid level
C hec kin g 3.2: 50
Before d riv in g 2.1: 3
Belt pretensioner
Disposa l 2. 1: 26
Serv ice 2.1: 26
Bonnet 3.2: 36
Booster seats 2.1 : 59
Brake assis t sys tem 3.2: 2
Brake booster 3.2: 2
Brak e flu id
C hangin g 3.2: 48
How of ten s hould the brak e fluid be
changed? 3.2: 47
Warning light 3.1: 11
What is the correc t brake fluid level?. 3.2:
47
What kind of brake fluid should
I u se? 3 .2:
48
Booklet 0.1 General Index ®
Brake pad
Warning message 3.1 :
ll
Brak e pad wear indicator
Warn ing light 3.1: 26
Brak e pads 3.2: 8
Brak e servo 3.2: 8
Brak e system
Warn ing light 3.1: 28
Brake system 3.2: 47
Brakes 3.2: 8
H ow does moisture or road salt aff ec t the
brakes? 3.2: 8
What does it mea n when I fee l a s ligh t vi
bration o n the brake peda l? 3.2: 3
Braking distance 3.2: 8
Br eak-in peri od
Engine 3.2: 7
W hat is the rig h t way to break- in my vehi
cle? 3.2:
7
Breaking in
Brake pads 3.2: 7
Tire s 3.2: 7
Breaking in tires 3.2: 7
Bulb c hange 3.2: 8 1
Bulb defective Warning light 3.1: 24
Bumper Clean ing 3.2: 18
Bumper cover Caut ion w hen parking n ear a parking bar
rier or curb 3.1: 105
B uzzer 3.1: 50, 93
C
Ca libratin g the co mpa ss 3.1 : 18
California Propos ition 65 Wa rning 3.2 : 34 , 49
Car washes 3.2: 17
Cata ly tic converter 3.2:
10
CB radio 3 .2: 29
Ce ll phone 3.2 : 29
Cellu lar phone 3.2: 29
Ce ntral lo cking
I ndiv idua l un locking 3.1 : 34
Ce ntral locking button 3.1: 34
Ce ntral locking syste m 3.1: 34
C han gi ng a bu lb 3.2: 8 1
C hanging a wheel 3.2: 73
Alphabetical inde x 3
Page 10 of 477
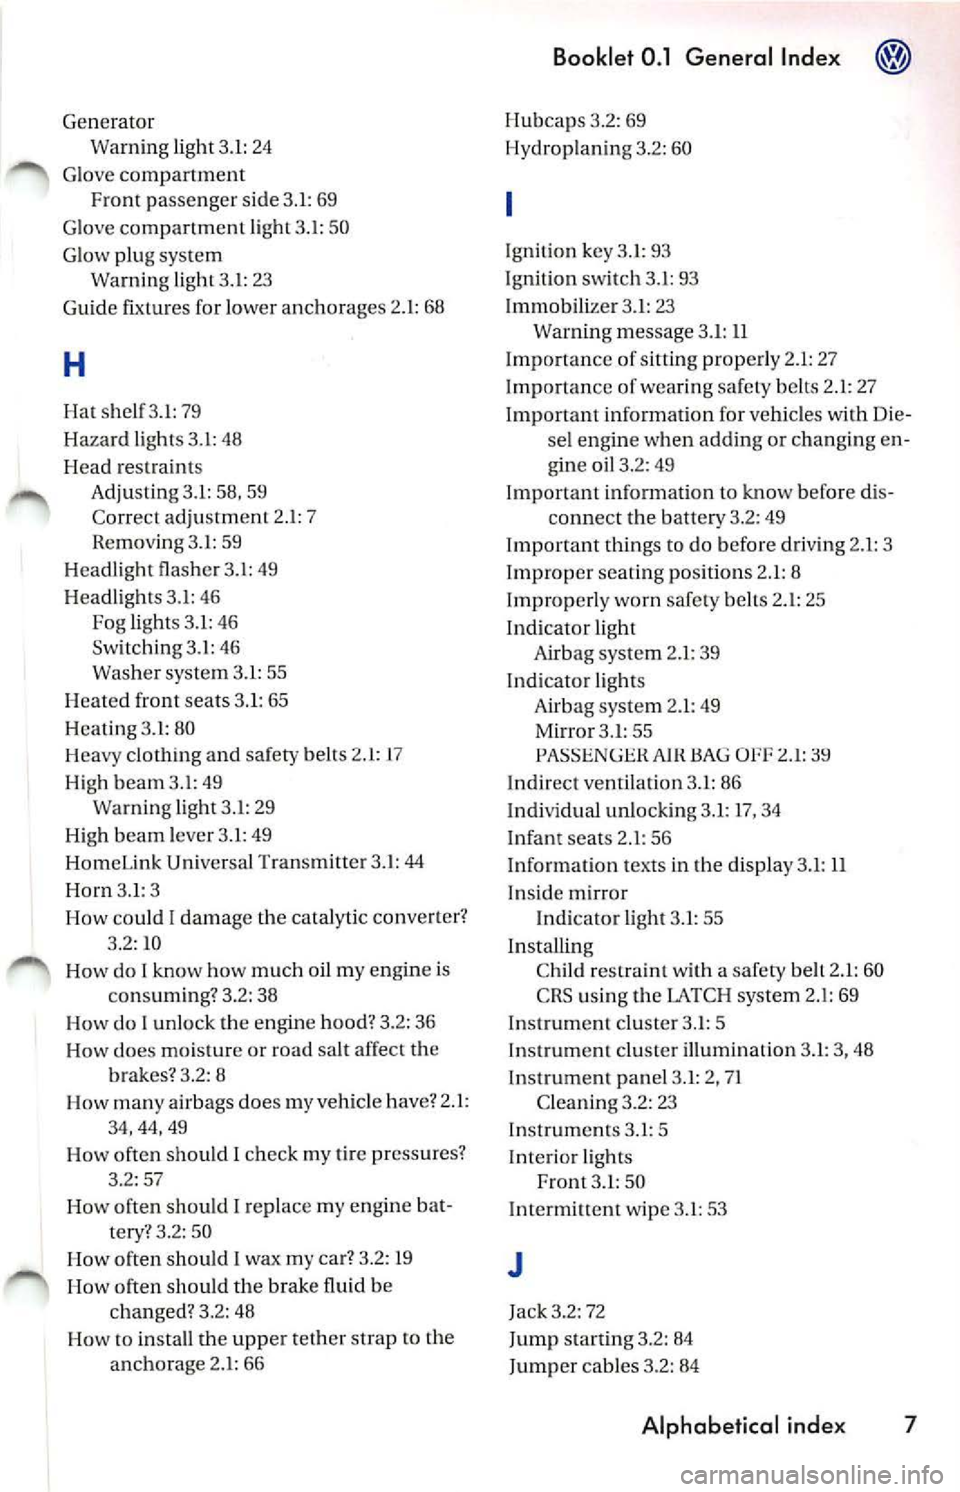
Generator
Warn ing light 3.1: 24
G love compartm ent
Front pa ssenger s ide 3.1: 69
G love compartment light 3.1: 50
G low plug system
W arning light 3. l: 23
Gu ide fi xture s for lower anchorages 2.1: 68
H
H at sh el f3 .l : 79
H aza rd ligh ts 3.1: 48
H ea d re straint s
Adj ust ing 3.1: 58, 59
Correc t ad justm ent 2.1: 7
R emo ving 3.1: 59
H ea dligh t fla sh er 3. 1: 4 9
H ea dligh ts 3.1: 46
Fog light s 3.1: 46
Switching 3.1: 46
Wa sh er syste m 3.1: 55
H eat ed front seats 3. 1: 65
H ea ting 3.I: 80
H eavy clothi ng and safety belt s 2.1:
17
High b eam 3.l: 49
Warning light 3.1 : 29
High b eam leve r 3. 1: 49
Hom eLink Univer sal Tran smitter 3.1: 44
Horn 3.1 : 3
How could I dama ge the catal ytic conve rter?
3 .2:
10
Ho w do I know how much oil my engin e is
co nsumin g? 3.2: 38
How do I unlo ck th e engine hood? 3.2: 36
I-lo w does moisture or road salt affect th e
brak es'? 3.2: 8
Ho w man y airbags does my veh icl e h ave? 2.1:
34 ,44,4 9
H ow often shou ld
I c h eck my tire pr essures ?
3.2: 57
How often should I r epl ace my eng ine bat
ter y? 3. 2: 50
How often should I wax my ca r? 3.2: 19
I-l ow often sho uld the brake fluid b e
c han ged? 3. 2: 48
How to in stall the upper t eth er strap
to th e
anchorage 2.l: 66
Booklet 0.1 General Inde x
Hubcaps 3.2: 69
H ydrop laning 3.2: 60
Ignition key 3.1: 93
I gnit ion switch 3.1: 93
I mmobili zer 3.1 : 23
Warning message 3.1:
11
Imp ortance of sitting prop erl y 2.1 : 27
Imp ortance of wearing safe ty bel ts 2.1: 27
Important information for vehicles with Die-
se l e ngine when adding or changing en
gine oil 3.2: 49
Import ant information
kn ow befo re di s-
co nn ect the b att ery 3.2: 49
I mport ant thing s to do b efore dri ving 2.1: 3
Improper seating po sitions 2.1: 8
Improp erl y worn safety belt s 2.1: 25
Indicator light
A ir bag syste m 2.1: 39
Indicator light s
Airbag syste m 2.1: 49
Mi rror 3.1: 55
OFF 2.1:
Indi re ct ventilat ion 3.1: 86
Indi vidual unlockin g 3.1: 17 , 34
I nfant seats 2 .1: 56
Information t exts in the display 3.1:
11
Insid e m irr or
Indicator light 3.1: 55
In stallin g
C hi ld re straint with a safety belt 2.1: 60
CRS using th e LATCH system 2.1: 69
In strum ent clu ster 3.1 : 5
In strum ent cluster illumination 3.1 : 3 , 48
Instrument panel 3.1: 2, 71
Cleaning 3.2: 23
In strum ent s 3.
I: 5
Interior lights
Fro nt 3.1: 50
Int ermittent w ipe 3.1: 53
J
Ja ck 3.2: 72
Jump s ta rtin g 3.2: 84
J ump er cables 3.2: 84
Alphabetical index 7
Page 11 of 477
® Booklet 0.1 General Inde x
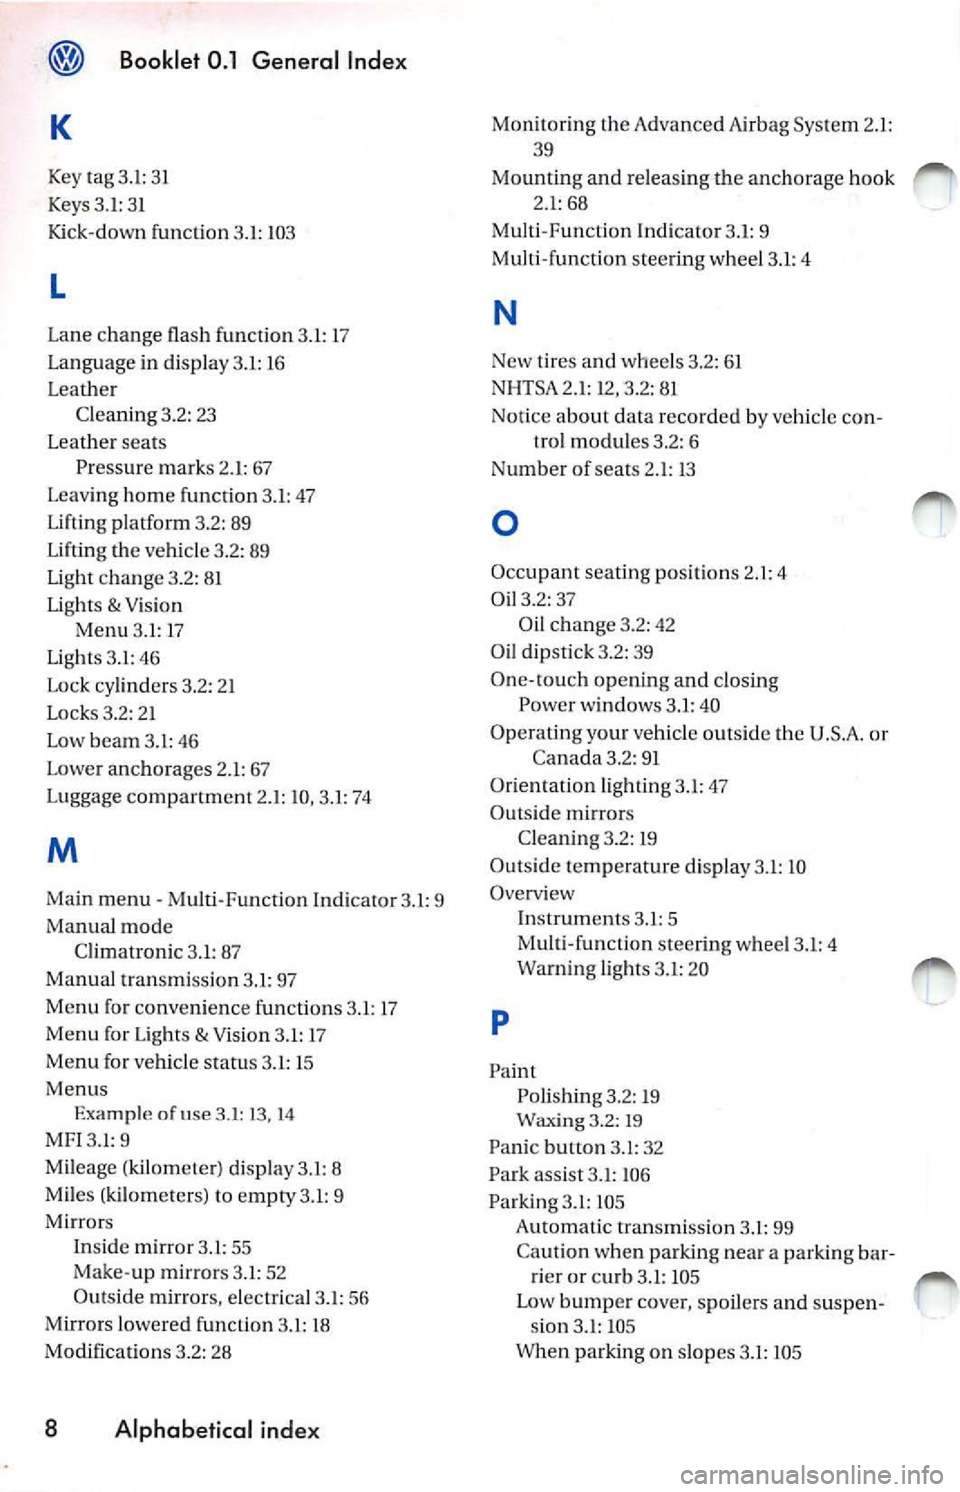
Mon itoring th e Advanc ed Air bag Sys te m 2.1 :
Key tag 3 .l: 3 1
K eys 3. 1: 3 1
Kick-d own funcli on 3.1: 10 3
L
Lan e change fla sh function 3.1: 17
L a n gu age in displa y 3.1: 16
L ea ther
C lean ing3.2: 23
L ea ther seats
Pr essure mark s 2. 1: 67
Leavi ng hom e function 3.1: 47
Li fti ng platform 3.2: 89
Lifting the ve hicle 3.2: 89
Light chang e 3.2: 81
Li ght s
& Vi sio n
Menu 3.J : 17
Ligh ts 3.1: 46
Lo ck cy linders 3.2 : 2 1
Locks 3.2: 2 1
Low beam 3.l: 46
Lowe r anchorage s 2.1: 6 7
Luggage compartment 2.1: 10, 3.1: 74
M
Main menu Multi -Functi on Indic ator 3. l: 9
Manual mode
C lim atron ic 3. 1: 87
M anu al tran smi ssio n 3.1: 97
M enu for convenien ce functions 3.1: 17
Menu for Light s
& Vision 3.1: 17
Menu for vehicl e stat us 3. 1: 15
Me nus
Exa mple
of u se 3.1: 13 , 14
MF! 3.1: 9
M ileage (kilom eler) disp lay 3. l: 8
Mile s (ki lom eters) to
3.1: 9
Mirror s
In sid e mir ror 3.1: 55
M ake -u p m irrors 3.1: 52
Out side mirror s, elec trical 3.1: 56
Mirror s low ered fun ction 3.1: 18
Modification s 3.2: 28
8 Alphabetical index
39
Mo untin g and re le asing the anchorage hook
2. 1: 68
Multi -Fun cti on Ind icator 3.1 : 9
Multi -function steering w heel 3. 1: 4
N
New t ires and whee ls 3.2 : 61
N HTSA 2.1: 12, 3.2: 81
No tice about dat a recorded b y veh icle con
tro l modu les3 .2: 6
N umb er of seats 2 .1: 13
0
Occ upant seating position s 2. 1: 4
O il 3.2: 37
Oil chan ge 3.2 : 42
O il dip stick 3.2: 39
O ne-to uch op en in g a nd closi ng
P owe r w ind ows 3.1: 40
Operating you r vehicl e outsid e th e U .S.A. or
C anada 3.2: 91
Orientation lightin g3.l: 47
Outs ide mi rror s
C lea nin g 3.2: 19
Out sid e te mp erat ure di splay 3.1: 10
Overview
p
In strum ent s 3 .1: 5
M ulti-fun ction stee ring whee l 3. 1: 4
Wa rnin g light s 3. 1: 2 0
Paint Poli shin g 3.2: 19
Wax ing 3.2:
19
Pani c but ton 3.1 : 32
Park assist 3.1: 106
P arki ng 3.1 :
Aut oma tic tran smi ssio n 3.l: 99
Ca ution when parking near a parking b ar
ri er or c urb 3.1: 10 5
Low bump er cove r, spoil ers and su sp en
s io n 3.1 : 10 5
W hen parkin g on slop es 3.1 : 10 5
Page 12 of 477
Parking 3.1: 10 8
Drive r 2.1: 4
Front pa ssenge r 2.1: 5
Occ upant s 2. 1: 4
R ear passe nge rs 2.1 : 6
Park ing aid 3.1: 106
Parki ng Ass is tance
C lea ning senso rs 3 .2: 18
Parking brake 3. 1: 10 4
Warn ing light 3 .1: 28, 104 l
Parki ng di sta nce warnin g sys te m 3.1: 106
Parts 3.2: 27
P ASS EN GER AIR BAG OFF light 2.l: 39
Pe dal s 2.l: 9
Phys ica l p rinci ple s o f a fr ontal colli sion 2.l:
1 5
P in ch prot ection
Power roof 3.l: 43
Window s 3.l: 4 1
Plastic parts 3.2: 1 9
C le aning 3.2: 23
Po lle n filter 3.1: 88
Pollution filter 3.1: 88
Powe r
Roo f3.l:4 2
Power outlet 3.l: 73
Pow er roof 3.1 : 42
Po we r ste ering
Wa rnin g light 3.1 : 29
Power steering 3.2: 6
Pow er was her 3.2: 18
Power windows 3.l : 39
Pr egna nt women
Spec ia l co nsideration s when wea ring a
safety belt 2. 1: 2 1
Premium Gasoline 3.2: 32
Pre ssure mark s 2.l: 67
Prop er adju stm ent of head rest raint s 2.l : 7
Proper occupa nt sea ting pos itions 2.1: 4
Proper safety belt p os iti on 2.l : 2 0
R
Rain sensor 3.l : 54
Raising the vehicl e with th e ja ck 3.2: 72
R eading light s
Fro nt 3.1: 51
Rear armr est 3. 1: 70
Booklet 0 .1 General Index
Rear interior light 3.1: 52
R ea r lid 3.l: 37
Clo sing 3.l: 38
Esc ape handl e 3.2: 76
W arnin g light 3.l : 26
R ea r sea t b ackres t
Fo lding forward 3.1: 66
Rai sing in to place 3.l: 67
R ea r seat ben ch 3.1 : 66
R ea r v entilation 3.l: 86
R ear view mirro r 3. 1: 55
R ea r wi ndo w 3.1: 3 7
Re ar window heat ing
H ea ting ele m en t w ires 3 .2: 2 0
R ea r window heat ing 3.1: 80, 81
R ea r wi per 3.l: 53
R ef uelin g 3.2 : 30
R eg ular Gasoline 3.2: 32
R emote control
Ve hicl e3.1:32
R em ote contro l key
Button s 3. 1: 32
Repl acing th e b attery 3 .l: 32
S yn chroni zin g 3.1 : 33
R emo vin g t he ignition key 3.l : 94
R epa irs
sy stem 2.1: 42
Repair s 3.2: 28
R eplac em ent keys 3.1: 31
R eplacing th e batt ery
Remote co ntrol key 3.1: 32
Re porti ng safety defects 2.1: 12
C an ada 3.2: 90
Uni ted Sta tes 3 .2: 90
Re tracto r 2.1: 19
R eve rse
A utoma tic tran sm iss ion 3.1: 102
Roof carrier mounts 3.1: 7 6
Roof load 3.l: 77
Roo f rack 3.1 : 76, 77
Rubber gaskets 3. 2: 20
s
Sa fe drivin g 2.1: 2
Sa fety belt exte nder 2. 1: 22
Sa fety belt h eight adjustm ent 2.1: 24
Alphabetical index 9
Page 141 of 477
Booklet 2.1 Safety first
WARN ING (continued)
• Neve r strap m ore than one perso n, in
cluding small ch ildr en, into belt.
• Neve r p lace a safety belt over a child sitting
o n your lap.
• Always keep fee t in the foot we ll in front of
th e scat w hile th e ve hicl e is being driven.
• Neve r let a n y perso n r ide with feet on the
instrument panel or sticking out th e window
or on th e sca t.
• Never remove a safety be lt whil e th e ve
hicle i s mo ving. Do ing so w ill increase yo ur
ri sk of being injur ed or kill ed.
• Neve r wear be lts twi sted.
• Never wear bel ts over rigid o r breakable
ob jects in or on your clothing, su ch as eye
glasses, pen s, keys, etc., as these may cause in
jur y.
• Neve r allo w sa fet y belts to become dam
aged by being caugh t in door or sea t hardware.
• Neve r wear t he s hou lder part of the be lt
und er you r ar m or otherwi se ou t of posi tion.
• Severa l layers of heavy clothing may inter
fere w ith correc t position ing of belt s and re
duce the overa ll eff ect ive ness of t he sys tem.
18 Safety belt s
WARNING (continued)
• Alwa ys keep b elt buckles free of a nyt hing
that may prevent th e buckl e from latc hing se
cure ly.
• Never use comfor t clips or dev ices that
crea te slac k in the sh ould er bel t. Howeve r,
s pecial clips may be required for the correc t
u se of some child restraint systems.
• Torn o r frayed safety belt s can tear a nd
damag ed belt hardw are can break in a colli
s ion. In spect belts reg ularl y. lf webb ing, bind
in gs, buckl es, or retractors are damaged, h ave
b elt s rep laced by an authorized Volkswage n
dealer or qualifi ed worksho p.
• Safety be lts that have been worn and
l oaded in an accident must b e re pl ace d w ith
the correct re placement safety belt by a n au
t h orized Volkswage n dea le r. Replacement
may be necessary even if damage canno t be
clea rly see n. Anchorages t hat were loaded
mu st a lso be inspecte d.
• Neve r remove, modify, disassembl e, or try
t o repa ir th e safe ty belts yourse lf.
• Always keep the belts clean. Dirty belts
m ay not work co rrectl y and can impair the
fun ction o f th e in erti a ree l
3.4 "Ti ps
an d Adv ice", c hap te r "C lea nin g and
Pro tect ion."
Page 143 of 477
@) Booklet 2.1 Safety first
Safety belt position
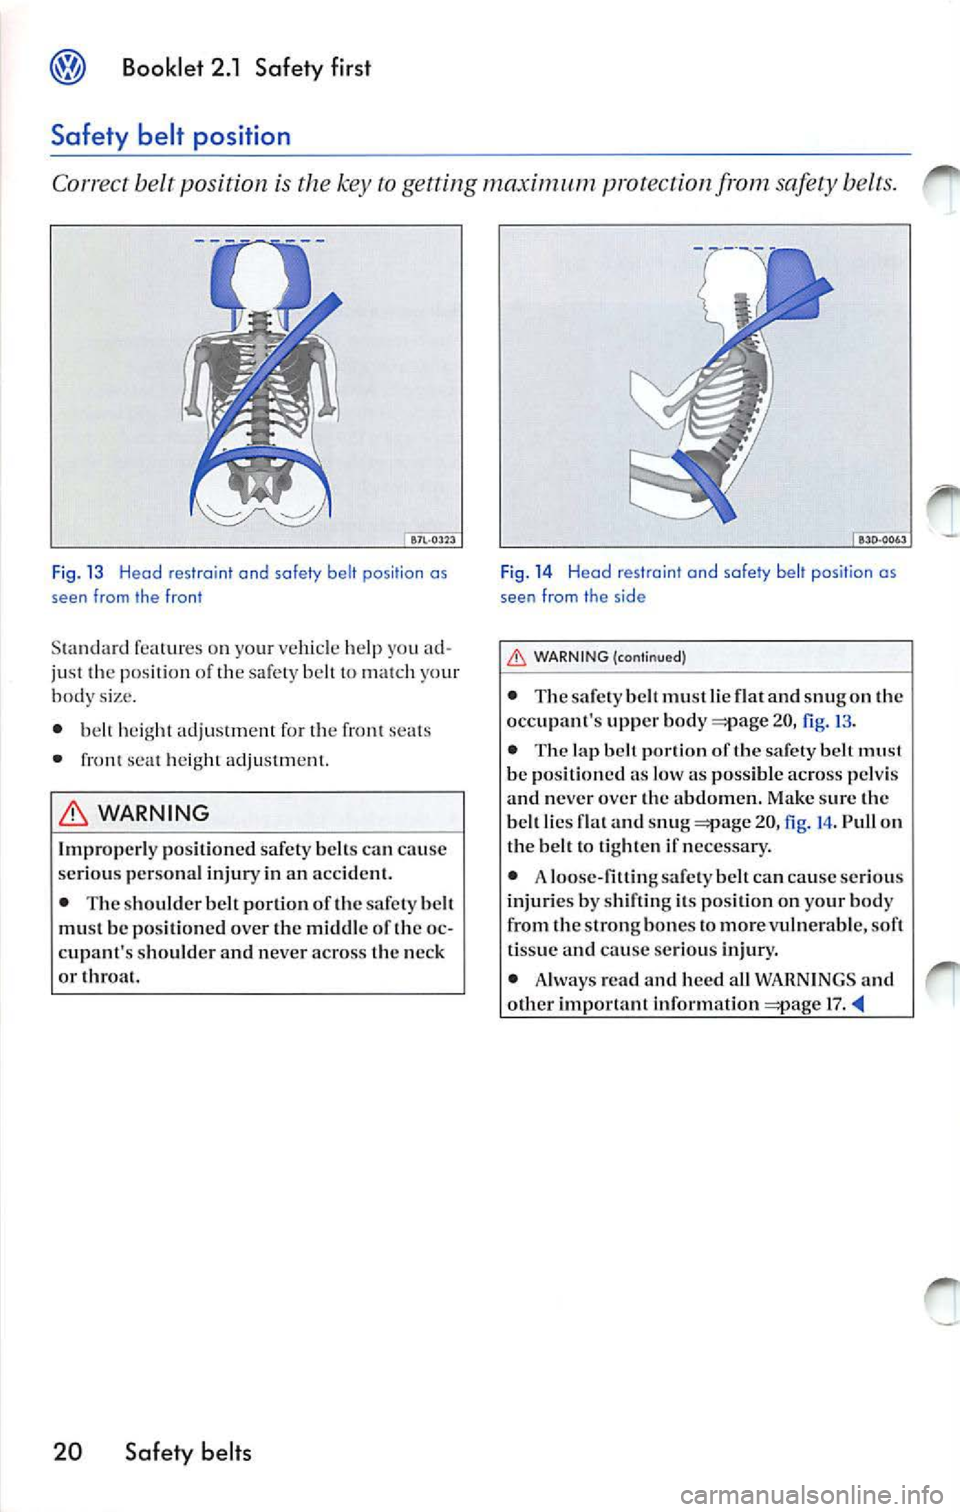
Correct belt position is the key maximum protection bel ts.
Fi g. 13 Head restra int and safety belt position as
seen from the front
S1a nd ard feal ures o n yo ur vehicl e help you ad
ju sl o f safel y lo yo ur
body size .
•
h eigh! adjuslmelll for lh e fron l se als
•
s ea l heig h!
WARNING
Improperly posilioned safety belts ca n cause
ser ious person al injury in an
• The sh ou lder belt porlion of lhe safety mu st be po sitioned over the middle of the oc
cupant' s shoulder and never across the neck
or lhr oal.
20 Safety belts
Fig . 14 Head restraint and safety belt position as
see n from the side
Lf::. WARNING (continued)
• The safet y must lie flat and snug on the
occupant 's upper body 20, fig.
• The lap porlion lhe safely belt must
be position ed as low as possible across pelvis
and never over the abdomen. Make sur e th e
lies and snug 20, fig. 14 . Pull on
the belt to tighten
can cause seriou s
injuri es by shiftin g its position on your bod y
from the strong bone s to more vulnerable, soft
ti ss ue and cause se ri ous injury.
• Alway s read and heed all WARNIN GS and
othe r importa nt inform ation
17 .
Page 204 of 477
Booklet 3.1 Controls and Equipm ent ®
Table of contents
Instrument panel ........... .. .. ... .
Overview .............................. .
Overview of the contro l butto ns on the
mu lti- function steering w heel ..... .... . . .
Instrument cluster ...... ............. ... . .
Display in the in strument cluster ......... .
Menus in the instrument cluster ..... •.. ..
Warning lights .... ....... ........ ..... . .
2
2
4
5
7
12
20
Op ening and closing Keys . . . . . . . .
31
K ey Set . . . . . . . . . . . . . . . . . . . . . . . . . . . . . . . . . . 31
Remo te cont rol key . . . . . . . . . . . . • . . . . . . • . . 32 C ent ral locking system . . . . . . . . . . . . . . . . . . . 34
Anti-the ft o lorm system . . . . . . . . . . . . . . . • . . 36
Rear lid . . . . . . . . . . . . . . . . . . • . . . . . . . . . . . . . . 37
Windows .... .. . . .. .... ... . .... . .. .. .. . .
39 Po wer roof . . . . . . . . . . . . . . . . . . . . . . . . . . . • . . 42
H ome link® Universal Transm itter . . . . . . . . 44
Lights and a clear view . . . . . . . . . . . 46
Lights . . . . . . . . . . . . . . . . . . . . . . . . . . . . . . . . . . . 46
Interior lights . . . . . . . . . . . . . . . . . . . . . . . . . . . . 50
Clear vision . . . . . . . . . . . . . . . . . . . . . . . . . . . . . 52
Windshie ld wi pers . . . . . • . . . . . . . . . . . . . . . . 53
Mirrors . . . . . . . . . . . . . . . . • . . . . . . . . . . . . . . . . 55
Seat s and storag e . . . . . . . . . . . . . . . . . . 57
Why is seat adjust ment so im portant ? . . . . 57
H ead restraints . . . . . . . . . . . . . . . . . . . . . . . . . . 58 Front seats .
..... .... ... •..... .• .... .....
Rear seat bench . ... ...... ....... •.. .... .
Sto rage ......... ................... .... .
Additiona l storage comportmen t ond
elec trica l sockets .... ... .... .... ... ...... .
Luggage comportment ........... ....... .
R oo f rock . .......... ......•.... .. •.......
Air conditioning system ...... ... .. . 60
66
69
73
74
76
80
Heal
ing . . . . . . . . . . . . . . . . . . . . . . . . . . .. . . . . . 80
Cl imatic . . . . . . . . . . . . . . . . . . . . . . . . . . . • . . . . . 8 1 Climotronic . . . . . . . . . . . . . . . . . . . . . . . . . . . . . . 84
Im portan t no tes . . . . . . . . . . . . . . . . . . . . . . . . . 88
Driving ................... ............. 90
Steering . . . . . . . . . . . . . . . . . . . . . . . . . . . . . . . . . 90
Safety . . . . . . . . . . . . . . . . . . . . . . . . . . . . . . . . . . . 91
Igniti on lock . . . . . . . . . . . . . . . . . . . . . . . . . . . . . 93
Starting ond stopping the engine . . . . . . . . . 95
Monuol transmission . . . . . . . . . . . . . . . . . . . . . 97
Automatic transmissio n
I Direct sh ift
gea rbox . . . . . . . . . . . . . . . . . . . . . . . . . . . . . . . . . 98
P arking brok e . ...... .... .... .. .. .. . .. ...
104 Electronic Parking Assistance . ........ •.. . 10 6
Crui se co ntrol ......... ........ .... ...... 107
Alphabetical inde x .... ...... .... ... 10 9
T ab le of contents
Page 216 of 477
Booklet 3.1 Controls and Equipment
Applies to vehicles: H ighline instrumen t cluster and multi-function steering wheel
Example of using the menus with the mult i- function steering wheel
All menus in the i nstrwnen t cluster can be used following the steps described here.
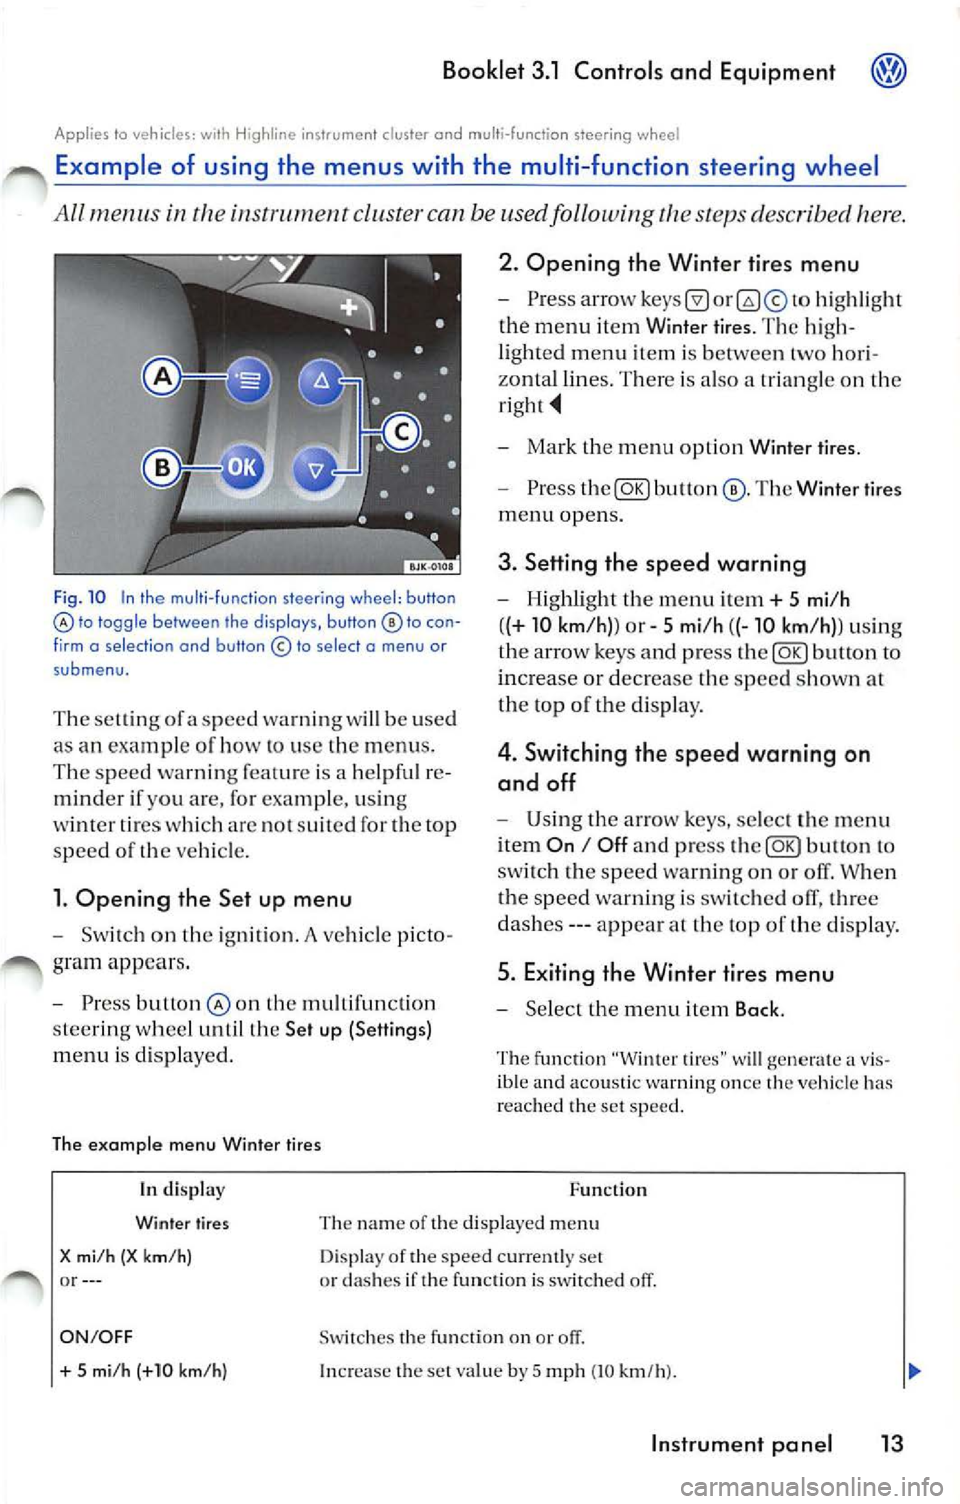
Fig . 10 In the multi -fu nction steering wh eel: button lo toggle between the disp lays, button to con
f irm o se lect ion and button © to select o menu or
submenu.
T he se lling of a speed warning w ill be used
as an exam pie of how lo use the menus .
The speed warn ing feat ure is a helpfu l re
minder if you are, for example, usi ng
wi nter ti res whi ch arc no t suit ed for th e top
s p ee d of
ve hicle.
l. Opening the Set up menu
Switch on the ignition. A ve hicle p icto
gram appea rs .
Press butlon the mult ifunct io n
s tee rin g whee l until the Set up (Settings)
menu is disp layed.
The example menu Winter tires 2. Opening the Winter
tires menu
hig hli ght
the menu item Winier tires. The hig h
li ghted menu item is between two hori
zonta l lines. Th ere is also a trian gle on the
Mark the m enu opt ion Wint er tire s.
Press The Winter tires
menu opens.
3. Setting th e speed warning
Highlight th e menu it em+ 5 mi/h
( (+
10 km /h )) or 5 mi /h ((-10 km /h)) usi ng
th e ar row keys and p ress
butto n to
increa se or decrease the speed s how n at
th e top of t he di sp lay.
4 . Switching the speed warning on
and off
U sing th e arrow keys , select th e menu
i tem
On I Off a nd press to
sw itch the sp ee d wa rnin g on o r off. When
t h e s peed warnin g is swi tched olT, three
da she s --- appea r at the top of the disp lay .
5. Exiting the Winter tires menu
Se lect the m enu item Back .
The fu nction "Winter tires" w ill generate a v is
ible and acoustic warn ing once the ve hicl e has
r eac hed th e set speed .
In di splay
Winter tires
X mi /h (X km/ h) or--- Function
Th e na m e of the displaye d m enu
D isp lay of the speed cur ren tly set
or dashes if the function is switched off.
ON/OFF Swi tc h es the fu nction on or
+ 5 mi /h (+10 km/h ) In crease the set va lue by 5 mp h (10 km/h ).
Instrument pan el 13
Page 221 of 477
Booklet 3.1 Controls and Equipment
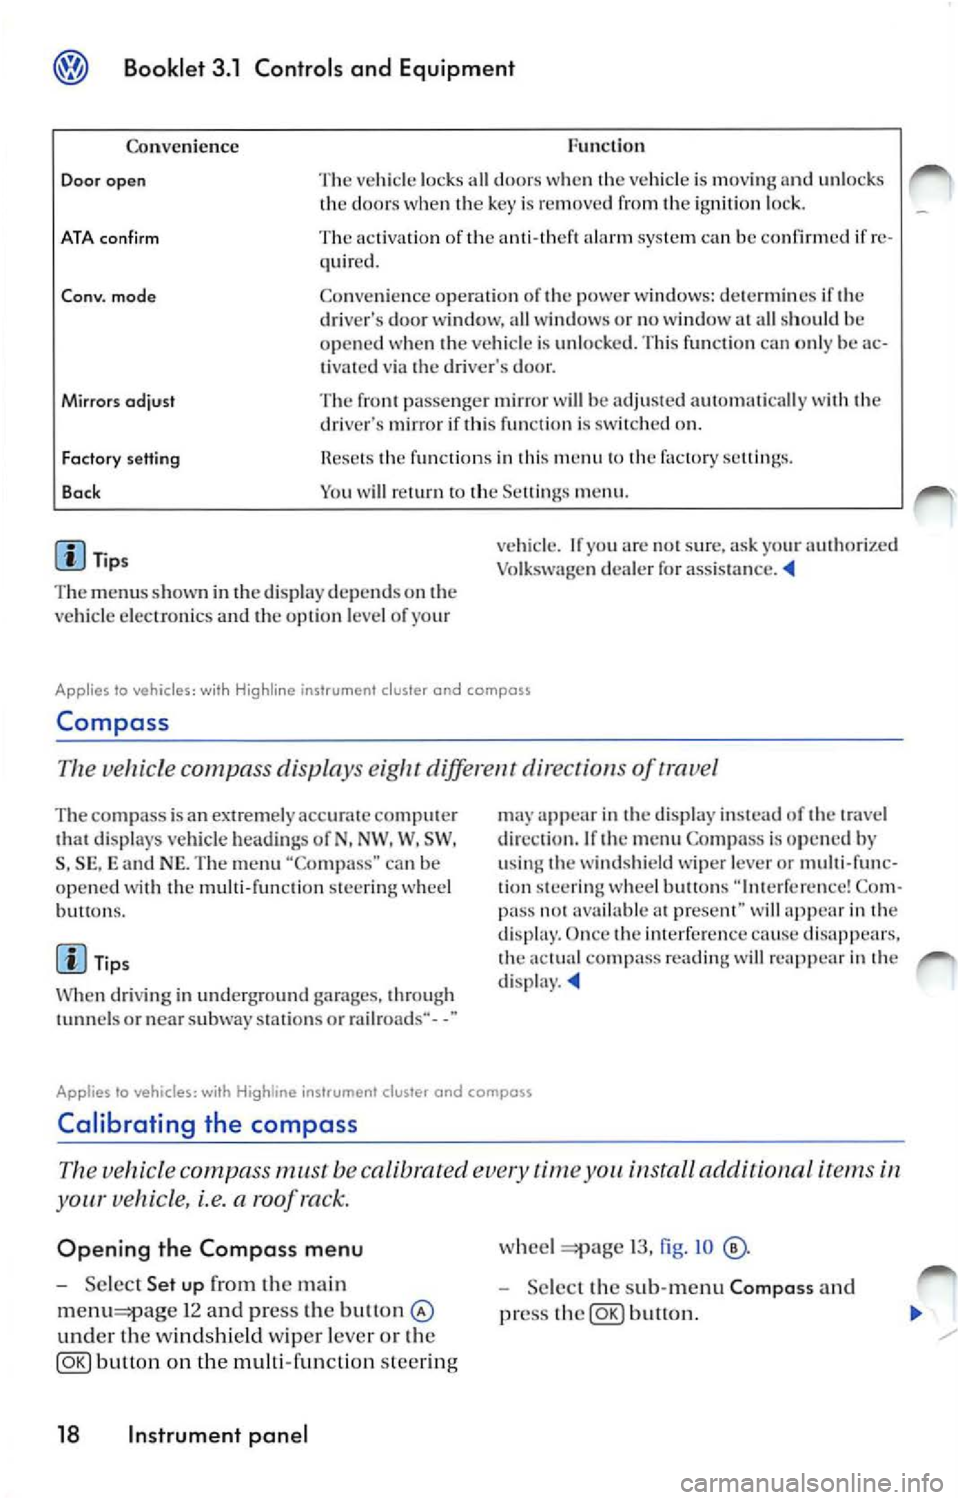
Func tion
Co nven ience
Door open The vehicl e lock s all door s w he n th e vehicle is mov ing and unl ocks
th e door s w hen key is re mo ved fr om ignition loc k.
ATA con firm The activati on of ala rm sys te m ca n be confirmed if re
quir ed .
Co nv. mode Co nve nien ce opera tio n of powe r w ind ows: dete rm in es if dri ver's door wi ndow, all w indows o r no window all sh ould h e
o p en ed when ve hicle is unlo cked. Thi s fun ctio n ca n o nly be ac
t ivated via dr iver's door.
Mirrors odjust The pa sse nger mir ror will be adju ste d au to mati cally wit h dri ve r's mirror if thi s fun cti o n is on.
Factory setting
Bo ck fun ctio n s in thi s m en u factory sellin gs.
Y o u w ill
m enu .
Tip s
T he m enu s show n in
displ ay depends on ve hicl e elec troni cs and o pti on l eve l of yo ur v
ehicl e. If
arc s ur e, ask yo ur authori zed
Vo lk sw age n dealer for assis ta nce .
Applies lo vehicles: wi th Hig hline ins trument cluster and compass
Compa ss
Th e ve hicle c ompa ss displa ys diff ere nt dir ect of trave l
The com pass is a n extremely ac curat e comput er di spl ays veh icle hea di ng s of N, NW . W, SW ,
S , SE , and NE. Th e m enu "Co mpa ss" can b e
op en ed wit h th e mu lti-fun cti on stee ring w hee l
bu H ons.
Ti ps
W hen dri vi ng in und erg round garages, throug h
or nea r subwa y stat ions o r rail roads·· - -"
app ear in displa y in stead of tr ave l
di rec tio n. If
m enu Compa ss is op en ed by
u sing w ind shi eld wipe r lever or multi-func
tion stee rin g w hee l butto ns Co m
pa ss avai lable prese nt" wi ll in dis p lay. Once imerfer cn ce cause dis appears. co mp ass rea ding will re app ear in d isp lay.
Applies to vehicles: with instrument cluster and compass
Calibrating the compass
vehicle compass must be calibrated time install aclditionnl i te m s
your vehicle, i.e. a roof ra ck.
Opening the Compass menu
Se lec t Set up the ma in
1 2 and press the bu11on
und er th e windsh ie ld wiper leve r o r th e
button on the multi-func tion steer ing
18 Instrument panel
wheel 13, fig . IO
Selec t th e sub-m enu Composs and
pr ess
button.