start button VOLKSWAGEN T-ROC 2019 Owner's Guide
[x] Cancel search | Manufacturer: VOLKSWAGEN, Model Year: 2019, Model line: T-ROC, Model: VOLKSWAGEN T-ROC 2019Pages: 502, PDF Size: 8.58 MB
Page 198 of 502

Reverse gear
Reverse gear is selected. May be selected only when the vehicle is stationary.
Neutral
The gearbox is in the neutral position. No force is transmitted to the wheels and the braking effect of
the engine is not available.
Standard forward driving position
Position : Normal programme.
All forward gears are shifted up and down automatically. The timing of the gear shift is determined
by the engine load, your individual driving style and the speed of the vehicle.
Position : Sport programme.
The forward gears are automatically changed up later and down earlier than in selector lever
by the engine load, your individual driving style and the speed of the vehicle.
To change between positions D and S, move the selector lever to the rear Fig. 105
The selector lever will always return to selector lever position D/S. That also works in the Tiptronic
gate Changing gear using Tiptronic
Selector lever lock
P
N
To release the selector lever lock, switch on the ignition and depress the brake pedal. Then press the
lock button in the selector lever handle in the direction of the arrow Fig. 105
The selector lever lock is not engaged if the selector lever is moved quickly through position N, e.g.
when shifting from reverse to D/S. This makes it possible, for instance, to rock the vehicle backwards
and forwards if it is stuck in snow or mud. The selector lever lock engages automatically if the lever is
in position N for more than approximately one second without the brake being pressed and when
the vehicle is travelling no faster than approximately 5 km/h (3 mph).
WARNING
Selecting the wrong position can cause you to lose control of the vehicle, which can lead to accidents
and serious injuries.
Never depress the accelerator when selecting a position.
When the engine is running and a position is engaged, the vehicle will start moving as soon as the
brake pedal is released.
Never shift to reverse or selector lever position P while the vehicle is moving.
Page 203 of 502
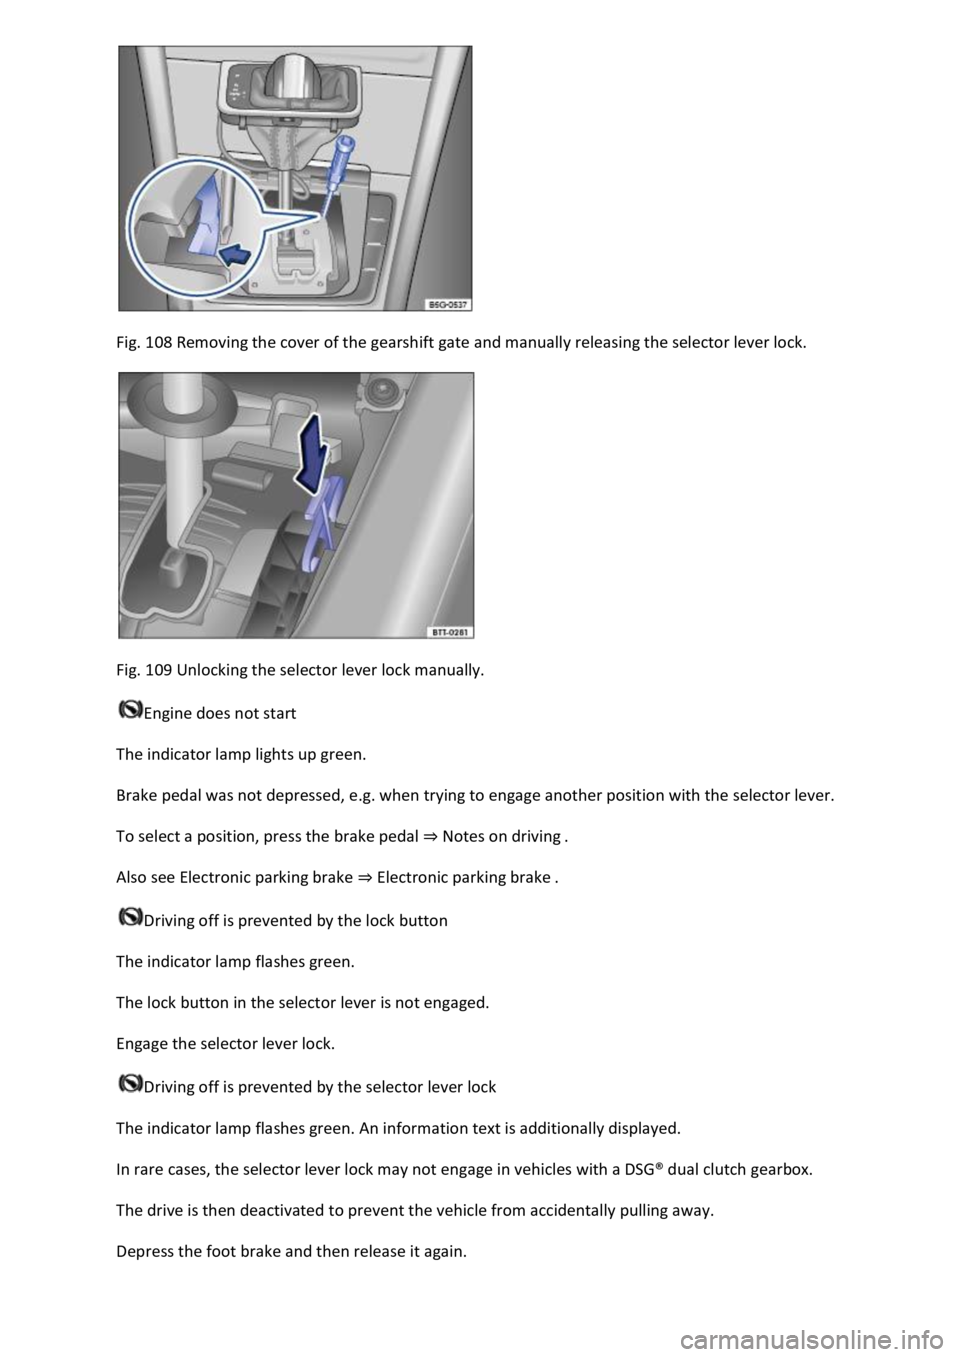
Fig. 108 Removing the cover of the gearshift gate and manually releasing the selector lever lock.
Fig. 109 Unlocking the selector lever lock manually.
Engine does not start
The indicator lamp lights up green.
Brake pedal was not depressed, e.g. when trying to engage another position with the selector lever.
To select a position, press the brake pedal Notes on driving
Also see Electronic parking brake Electronic parking brake
Driving off is prevented by the lock button
The indicator lamp flashes green.
The lock button in the selector lever is not engaged.
Engage the selector lever lock.
Driving off is prevented by the selector lever lock
The indicator lamp flashes green. An information text is additionally displayed.
In rare cases, the selector lever lock may not engage in vehicles with a DSG
Page 207 of 502

old the vehicle on the gradient in all situations or brake it
sufficiently on all slopes going downhill (e.g. if the ground is slippery or icy).
WARNING
Always be prepared to brake the vehicle. Accidents and injuries could occur if you are not prepared
to brake.
The downhill speed control is only a support function and may not be able to brake the vehicle
sufficiently in all situations when driving downhill.
The vehicle may become faster despite the downhill speed control being in operation.
Steering
Information on steering
The steering should be locked every time you leave the vehicle to make it more difficult for the
vehicle to be stolen.
The steering
The power steering is not hydraulic, but is an electromechanical system. The advantage of this
steering system is that no hydraulic hoses, hydraulic oil, pumps, filter or other parts are required.
The electromechanical system reduces fuel consumption. A hydraulic system requires constant oil
pressure in the system, whereas an electromechanical steering system only needs an energy supply
while steering.
In vehicles with driving profile selection, the selected driving profile can affect the behaviour of the
power steering Driving profile selection and 4MOTION Active Control
Electronic steering column lock in vehicles with a starter button
The steering column will be locked if the driver door is opened when the ignition is switched off. For
this, the vehicle should be stationary and, if necessary, the gear selector lever should be in position
P.
If the ignition is not switched off until after the driver door is opened, the electronic steering column
will only be locked when the vehicle is locked using the sensor in the door handle or the vehicle key.
Mechanical steering column lock (steering lock) in vehicles with an ignition lock
The steering column is locked if the vehicle key is removed from the ignition lock when the vehicle is
stationary. Turn the steering wheel slightly until the steering lock audibly engages.
Insert the vehicle key into the ignition lock to unlock the steering lock. Turn the steering wheel
slightly to relieve the load on the steering lock mechanism. Hold the steering wheel in this position
and turn the ignition on.
Electromechanical steering
Page 212 of 502

ill remain
selected.
Vehicles with all-wheel drive: if the Snow, Offroad or Offroad Individual driving profile was
selected last, the onroad driving profile that was last active will be activated after the ignition has
been switched off for a long period.
Vehicles without starter button: as soon as the vehicle key is removed from the ignition lock.
Vehicles with starter button: as soon as the driver door is opened when the ignition is switched
off.
Sport functions: select Sport driving profile again.
OR: tap the selector lever of the DSG
Page 214 of 502
Go to a qualified workshop and have the system checked.
Fault in Hill Start Assist
Go to a qualified workshop and have the system checked.
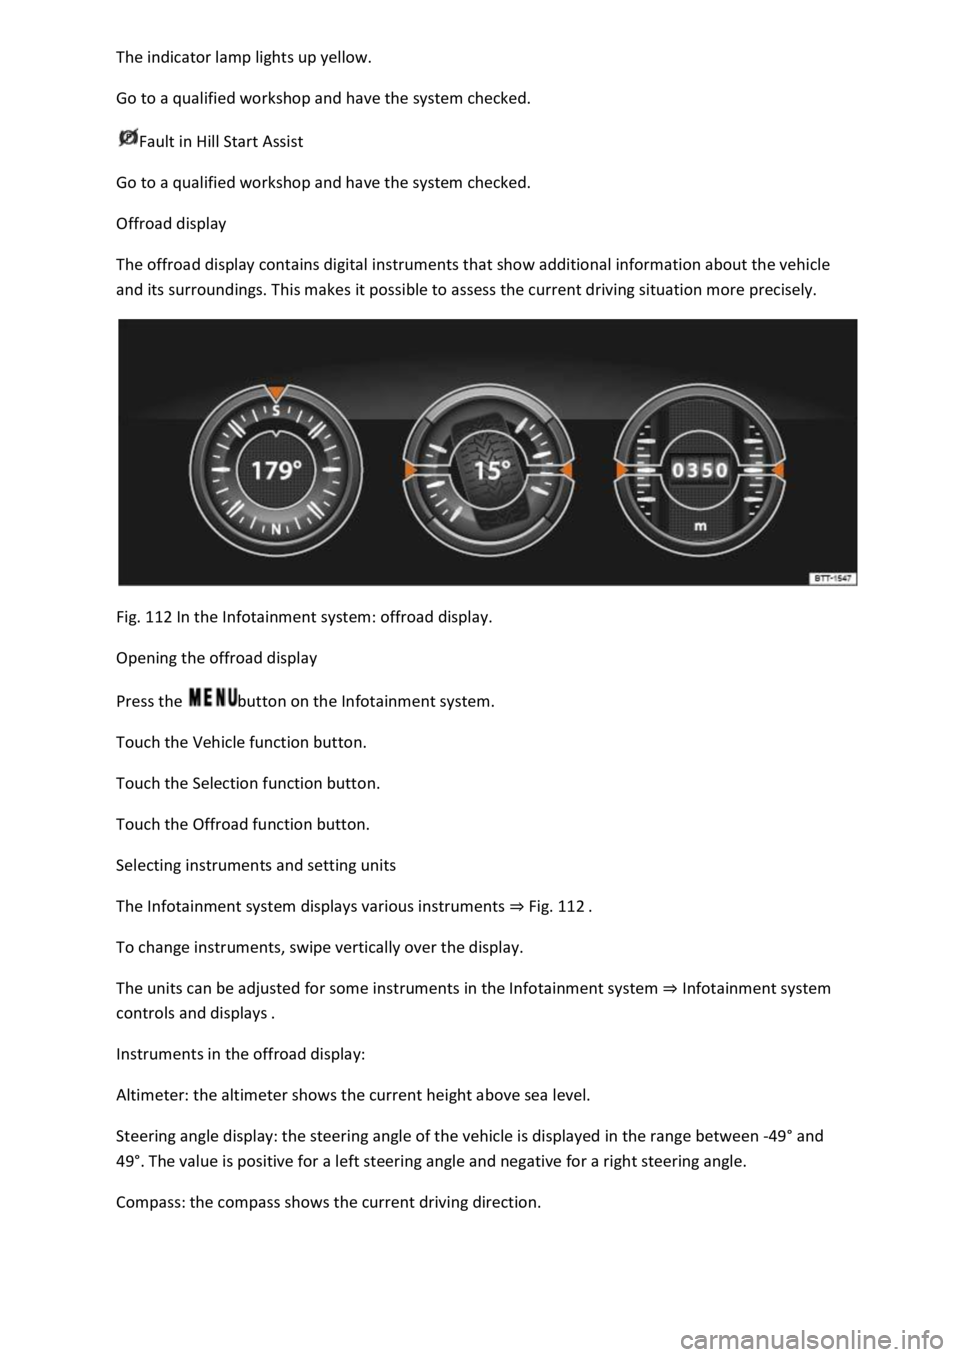
Offroad display
The offroad display contains digital instruments that show additional information about the vehicle
and its surroundings. This makes it possible to assess the current driving situation more precisely.
Fig. 112 In the Infotainment system: offroad display.
Opening the offroad display
Press the button on the Infotainment system.
Touch the Vehicle function button.
Touch the Selection function button.
Touch the Offroad function button.
Selecting instruments and setting units
The Infotainment system displays various instruments Fig. 112
To change instruments, swipe vertically over the display.
The units can be adjusted for some instruments in the Infotainment system Infotainment system
controls and displays
Instruments in the offroad display:
Altimeter: the altimeter shows the current height above sea level.
Steering angle display: the steering angle of the vehicle is displayed in the range between -49
Page 233 of 502
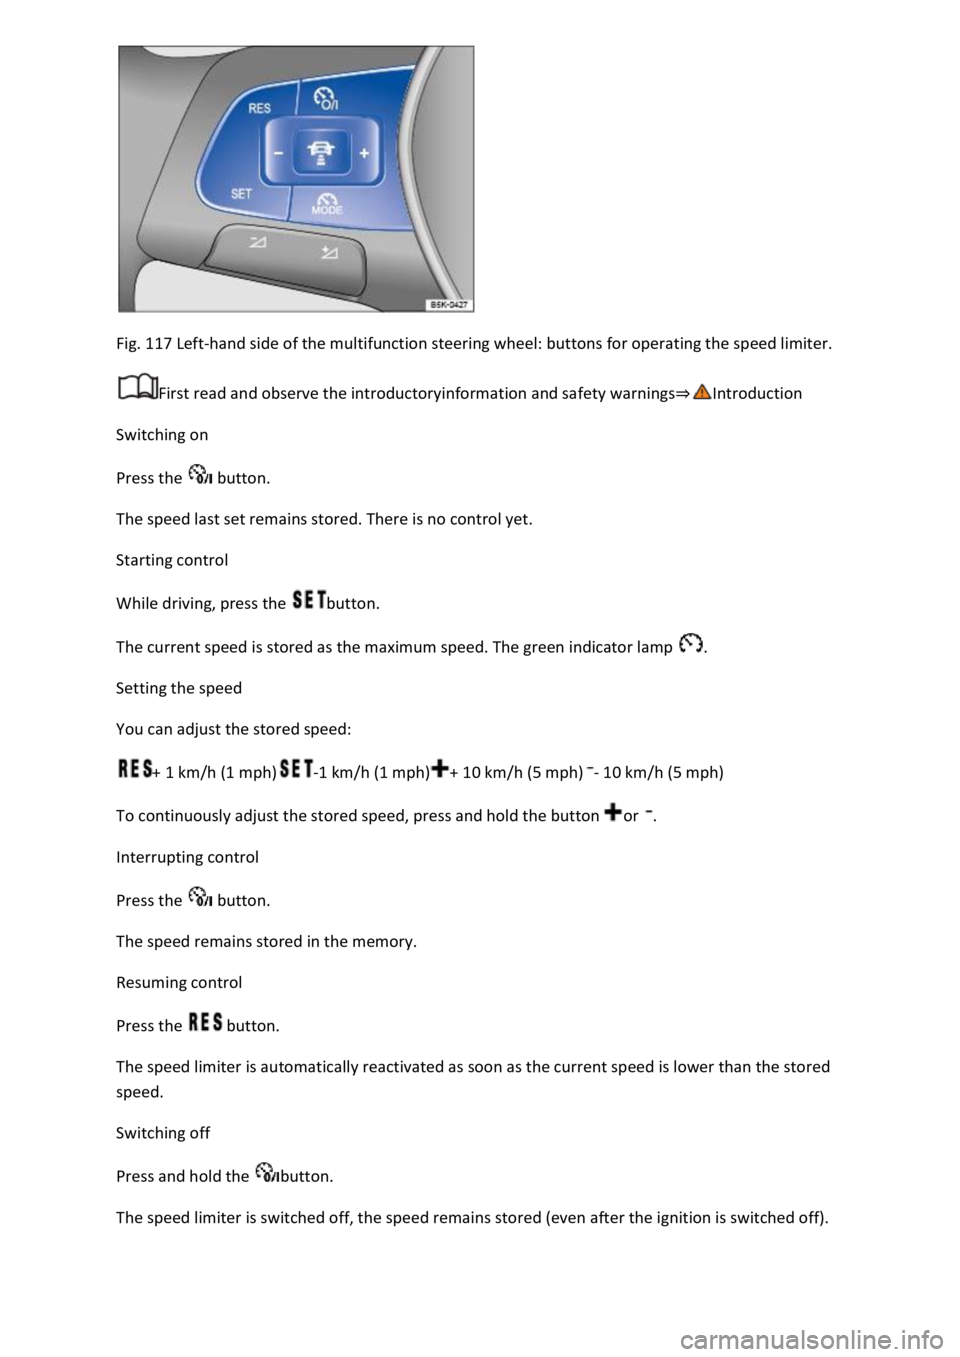
Fig. 117 Left-hand side of the multifunction steering wheel: buttons for operating the speed limiter.
First read and observe the introductoryinformation and safety warnings
Switching on
Press the button.
The speed last set remains stored. There is no control yet.
Starting control
While driving, press the button.
The current speed is stored as the maximum speed. The green indicator lamp .
Setting the speed
You can adjust the stored speed:
+ 1 km/h (1 mph)-1 km/h (1 mph)+ 10 km/h (5 mph)- 10 km/h (5 mph)
To continuously adjust the stored speed, press and hold the button or .
Interrupting control
Press the button.
The speed remains stored in the memory.
Resuming control
Press the button.
The speed limiter is automatically reactivated as soon as the current speed is lower than the stored
speed.
Switching off
Press and hold the button.
The speed limiter is switched off, the speed remains stored (even after the ignition is switched off).
Page 239 of 502

121 Left-hand side of the multifunction steering wheel: buttons for operating ACC.
First read and observe the introductoryinformation and safety warnings
Switching on ACC
Press the button.
The indicator lamp lights up grey, ACC does not regulate.
Starting control
Press the button while driving forwards.
ACC stores the current speed and maintains the set distance. If the current speed is outside the
defined speed range, ACC will set the minimum speed (when driving more slowly than the limit) or
maximum speed (when driving faster than the limit).
The following indicator lamps light up, depending on the driving situation:
ACC regulating.No vehicle has been detected ahead.Vehicle detected ahead (white).
Interrupting control
Briefly press the button or press the brake pedal.
The indicator lights up grey, the speed and distance remain stored.
Control is automatically interrupted if the traction control system (TCS) is deactivated.
Resuming control
Press the button.
ACC adopts the last set speed and last set distance. The instrument cluster display shows the set
speed and the indicator lamp lights up green.
Switching off ACC
Press and hold the button.
The set speed is deleted.
Changing to the speed limiter
Press the button.
ACC is switched off.
Setting ACC
Page 240 of 502
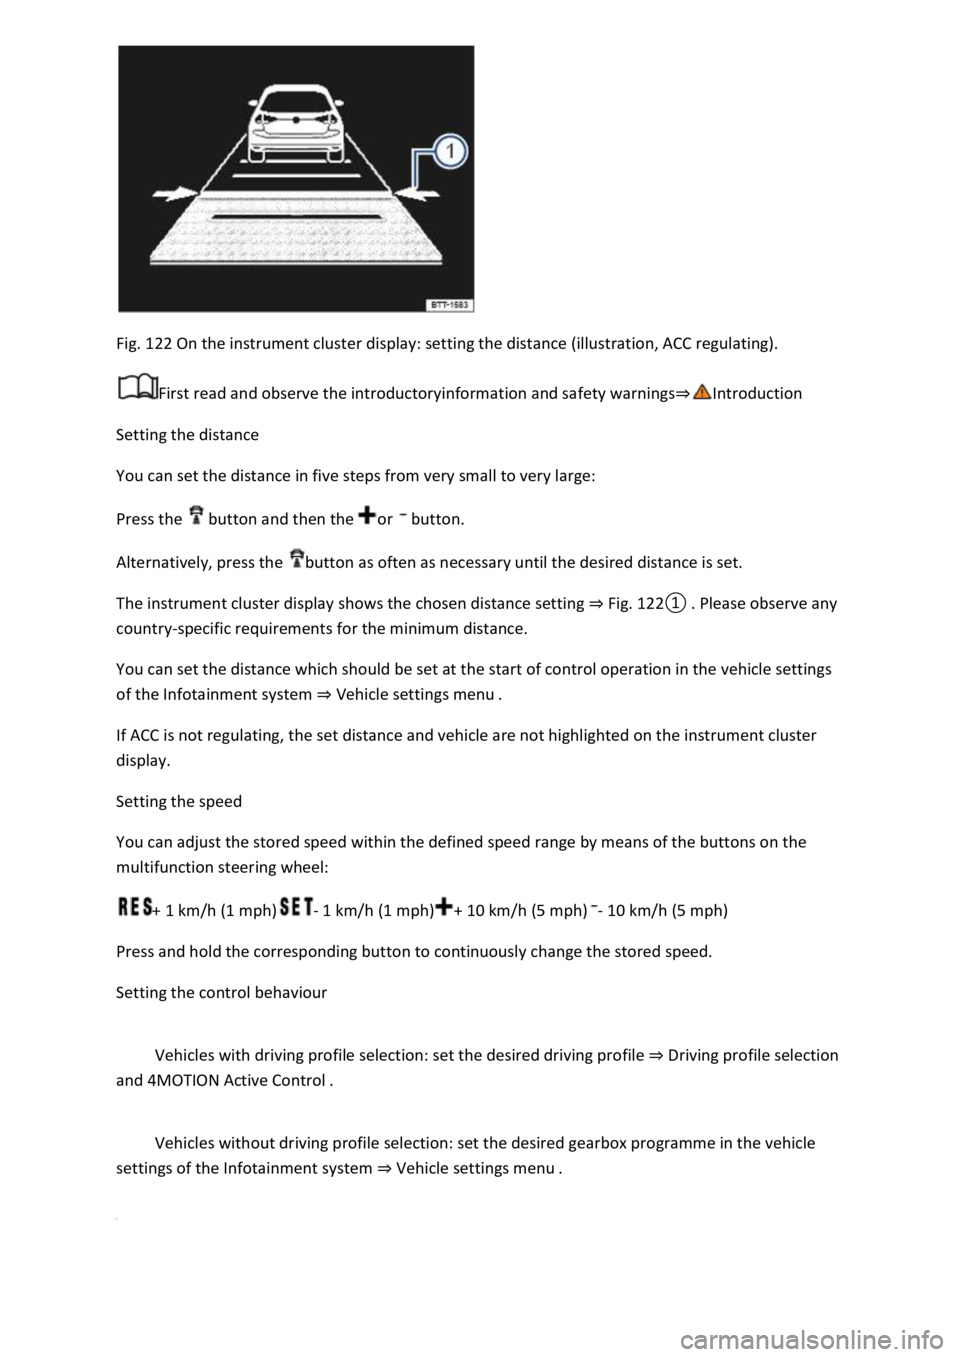
Fig. 122 On the instrument cluster display: setting the distance (illustration, ACC regulating).
First read and observe the introductoryinformation and safety warnings
Setting the distance
You can set the distance in five steps from very small to very large:
Press the button and then the or button.
Alternatively, press the button as often as necessary until the desired distance is set.
The instrument cluster display shows the chosen distance setting Fig.
0lease observe any
country-specific requirements for the minimum distance.
You can set the distance which should be set at the start of control operation in the vehicle settings
of the Infotainment system Vehicle settings menu
If ACC is not regulating, the set distance and vehicle are not highlighted on the instrument cluster
display.
Setting the speed
You can adjust the stored speed within the defined speed range by means of the buttons on the
multifunction steering wheel:
+ 1 km/h (1 mph)- 1 km/h (1 mph)+ 10 km/h (5 mph)- 10 km/h (5 mph)
Press and hold the corresponding button to continuously change the stored speed.
Setting the control behaviour
Vehicles with driving profile selection: set the desired driving profile Driving profile selection
and 4MOTION Active Control
Vehicles without driving profile selection: set the desired gearbox programme in the vehicle
settings of the Infotainment system Vehicle settings menu
Page 260 of 502

stopped using the foot brake
Pull the button. The vehicle brakes hard. A signal tone can be heard at the same time.
WARNING
Incorrect use of the electronic parking brake can cause accidents and serious injuries.
Never use the electronic parking brake to brake the vehicle, except in emergencies. The braking
distance is considerably longer as only the rear wheels are braked. Always use the foot brake.
WARNING
Failing to park the vehicle properly before leaving it may result in the vehicle rolling away. This can
cause accidents, serious injuries and damage to property.
Always park the vehicle in the specified order Parking
Ensure that the electronic parking brake is switched on before you leave the vehicle and the
indicator lamp in the instrument cluster lights up red after you switch off the ignition.
Troubleshooting
Fault in electronic parking brake
The indicator lamp lights up yellow. Go to a qualified workshop or a Volkswagen dealership.
Electronic parking brake does not switch off
The prerequisites for switch off are not met.
OR: the 12-volt vehicle battery is discharged.
Check whether all requirements for switching off the electronic parking brake are met Switching
off
Use jump leads Jump starting the vehicle
Noises from the electronic parking brake
You may hear noises when the electronic parking brake is switched on and off.
If the electronic parking brake has not been used for a long period, the system will carry out
occasional automatic and audible checks when the vehicle is parked.
Auto Hold function
Page 261 of 502
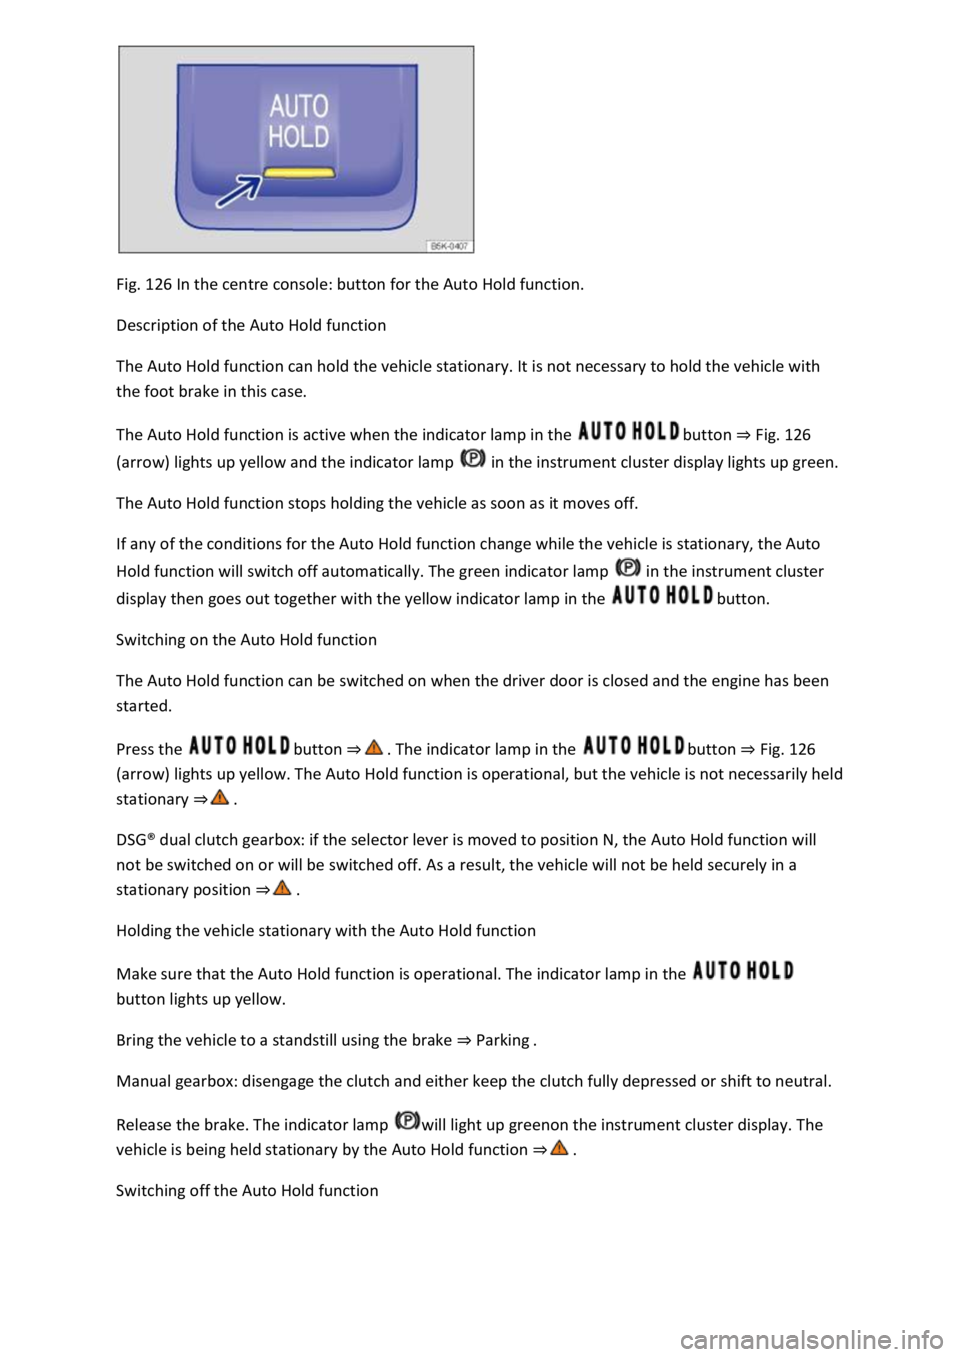
Fig. 126 In the centre console: button for the Auto Hold function.
Description of the Auto Hold function
The Auto Hold function can hold the vehicle stationary. It is not necessary to hold the vehicle with
the foot brake in this case.
The Auto Hold function is active when the indicator lamp in the button Fig. 126
(arrow) lights up yellow and the indicator lamp in the instrument cluster display lights up green.
The Auto Hold function stops holding the vehicle as soon as it moves off.
If any of the conditions for the Auto Hold function change while the vehicle is stationary, the Auto
Hold function will switch off automatically. The green indicator lamp in the instrument cluster
display then goes out together with the yellow indicator lamp in the button.
Switching on the Auto Hold function
The Auto Hold function can be switched on when the driver door is closed and the engine has been
started.
Press the button button Fig. 126
(arrow) lights up yellow. The Auto Hold function is operational, but the vehicle is not necessarily held
stationary
DSG