display VOLKSWAGEN T-ROC 2019 Workshop Manual
[x] Cancel search | Manufacturer: VOLKSWAGEN, Model Year: 2019, Model line: T-ROC, Model: VOLKSWAGEN T-ROC 2019Pages: 502, PDF Size: 8.58 MB
Page 134 of 502

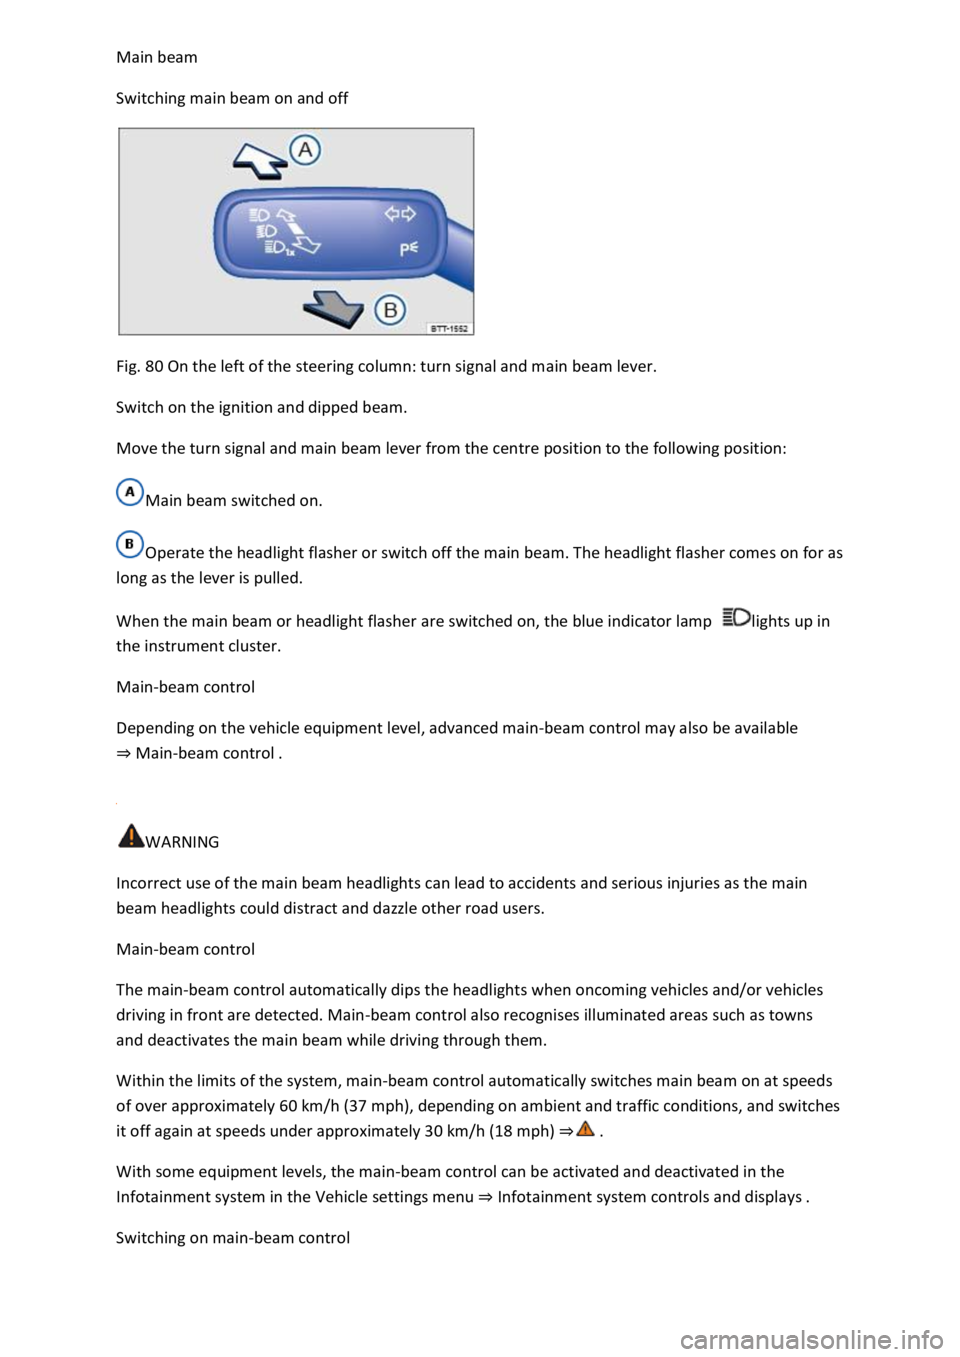
Switching main beam on and off
Fig. 80 On the left of the steering column: turn signal and main beam lever.
Switch on the ignition and dipped beam.
Move the turn signal and main beam lever from the centre position to the following position:
Main beam switched on.
Operate the headlight flasher or switch off the main beam. The headlight flasher comes on for as
long as the lever is pulled.
When the main beam or headlight flasher are switched on, the blue indicator lamp lights up in
the instrument cluster.
Main-beam control
Depending on the vehicle equipment level, advanced main-beam control may also be available
Main-beam control
WARNING
Incorrect use of the main beam headlights can lead to accidents and serious injuries as the main
beam headlights could distract and dazzle other road users.
Main-beam control
The main-beam control automatically dips the headlights when oncoming vehicles and/or vehicles
driving in front are detected. Main-beam control also recognises illuminated areas such as towns
and deactivates the main beam while driving through them.
Within the limits of the system, main-beam control automatically switches main beam on at speeds
of over approximately 60 km/h (37 mph), depending on ambient and traffic conditions, and switches
it off again at speeds under approximately 30 km/h (18 mph)
With some equipment levels, the main-beam control can be activated and deactivated in the
Infotainment system in the Vehicle settings menu Infotainment system controls and displays
Switching on main-beam control
Page 135 of 502

matic headlights .
Tap the turn signal and main beam lever forwards from the basic position.
When main-beam control is switched on, the indicator lamp lights up in the instrument cluster
display.
Switching off main-beam control
Pull back the turn signal and main beam lever.
OR: switch off the automatic headlights .
OR: switch off the ignition.
OR: push the turn signal and main beam lever forwards to switch on the manual main beam.
System limits
The main beam must be manually switched off under the following conditions, as it is not switched
off by the main-beam control in time or at all:
In poorly lit streets where there are highly-reflective signs.
Other road users with insufficient lighting facilities, such as pedestrians, cyclists.
In tight bends, with half-hidden oncoming traffic, on steep crests or in dips.
With oncoming traffic on roads with a central barrier where the driver can see clearly over the
central barrier e.g. truck drivers.
In fog, snow or heavy rain.
In conditions with swirled-up dust and sand.
If the windscreen is damaged in the camera's field of vision.
If the camera's field of vision is covered by condensation, dirt, a sticker, or by snow or ice.
If the camera is faulty or the power supply is interrupted.
WARNING
Do not let the extra convenience afforded by main-beam control tempt you into taking any risks
when driving. The system is not a substitute for the full concentration of the driver.
Always check the vehicle lights yourself and adapt them to the prevailing conditions for light,
visibility and road traffic.
The main-beam control may not be able to recognise all driving situations correctly and may not
work properly in certain situations.
If the camera's field of view is dirty, covered or damaged, the function of the main-beam control
may be impaired. This also applies if changes are made to the vehicle's lighting system, for example
if additional headlights are fitted.
Page 137 of 502

Lock the vehicle from the outside.
Automatic switch-off of side lights and parking lights
If the battery capacity is not sufficient for the side lights or parking light to remain switched on for
two hours, the 12-volt vehicle battery can be discharged to such an extent that it is no longer
possible to start the engine
In the case of standing times of more than two hours, the vehicle will detect a weak 12-volt vehicle
battery and switch off the side lights or parking light so that the engine can still be started.
WARNING
Accidents and serious injuries can occur if the vehicle is parked without sufficient illumination, as
other road users might have difficulty seeing the vehicle, or may not see it at all.
Always park the vehicle safely and with sufficient lighting. Observe any applicable local regulations.
If the vehicle lighting is required for several hours, switch on the right or left parking light if possible.
The illumination time of the parking light on one side is generally twice as long as for continuous
parking light on both sides of the vehicle.
Coming Home and Leaving Home function (orientation lighting)
The Coming Home and Leaving Home function lights up the area immediately surrounding the
vehicle when you get in or out of the vehicle in darkness.
Not in China: the Coming Home function is switched on manually. In contrast, the Leaving
Home function is controlled automatically by a rain/light sensor.
Only in China: the Coming Home and Leaving Home function is controlled automatically by a
rain/light sensor.
The switch-off delay can be adjusted and the function activated or deactivated in the Vehicle
settings menu in the Infotainment system Infotainment system controls and displays
Activating the Coming Home function
Not in China
Switch off the ignition.
Operate the headlight flasher for approximately one second.
The Coming Home lighting is switched on when the driver door is opened. The switch-off delay starts
when the last vehicle door or the boot lid has been closed.
Activating the Coming Home function
Page 140 of 502

If you have to drive a right-hand drive vehicle in a left-hand drive country, or vice versa, the
asymmetric dipped beam headlights may dazzle oncoming traffic. The headlights must therefore be
switched over when you travel to these countries.
With some equipment levels, the headlight alignment can be adjusted in the Infotainment system in
the Vehicle settings menu Infotainment system controls and displays
In vehicles in which the headlights cannot be switched over in the menu, masking stickers should be
applied to certain parts of the headlight lenses, or the headlights should be adjusted by a qualified
workshop. A qualified workshop can provide you with further information. Volkswagen recommends
using a Volkswagen dealership for this purpose.
Travel mode may be used only for a short period. Please contact a qualified workshop for a
permanent conversion. Volkswagen recommends using a Volkswagen dealership for this purpose.
Interior lighting
Instrument and switch lighting
The brightness of the instrument and switch lighting can be adjusted in the Infotainment system in
the Vehicle settings menu Infotainment system controls and displays
The brightness setting is automatically adjusted to the changing light conditions in the vehicle.
When the light switch is in position , a sensor will switch the dipped beam and the lighting in
the instruments and switches on and off automatically depending on the ambient brightness level.
When the light is switched off and the ignition switched on, the instrument and switch lighting
(needles and scales) is switched on. As the ambient light becomes lower, the illumination of the
scales is automatically reduced and may be switched off entirely. This function is intended to remind
the driver to switch on the dipped beam in good time, i.e. when driving through tunnels.
Interior and reading lights
Press the appropriate button or move the switch to the appropriate position:
Switch off the interior light.Switch on the interior lights.The interior lights are switched on
automatically when the vehicle is unlocked, a door is opened or the vehicle key is removed from the
ignition.Switch the reading light on or off.
Stowage compartment and luggage compartment lights
A light will be switched on and off when the stowage compartment on the front passenger side or
the boot lid is opened or closed.
Background lighting
Page 141 of 502

pending on the equipment level, the background lighting provides indirect light in various areas of
the vehicle interior.
The front footwell may also be illuminated.
The brightness of the background lighting can be adjusted in the Infotainment system in the Vehicle
settings menu Infotainment system controls and displays
The lights go out when the vehicle is locked or after a delay of a few minutes when the vehicle key is
removed from the ignition lock. This prevents the 12-volt vehicle battery from discharging.
Some settings can be stored in the user accounts of the personalisation function and therefore
change automatically when the user account changes Personalisation
Visibility
Wipers
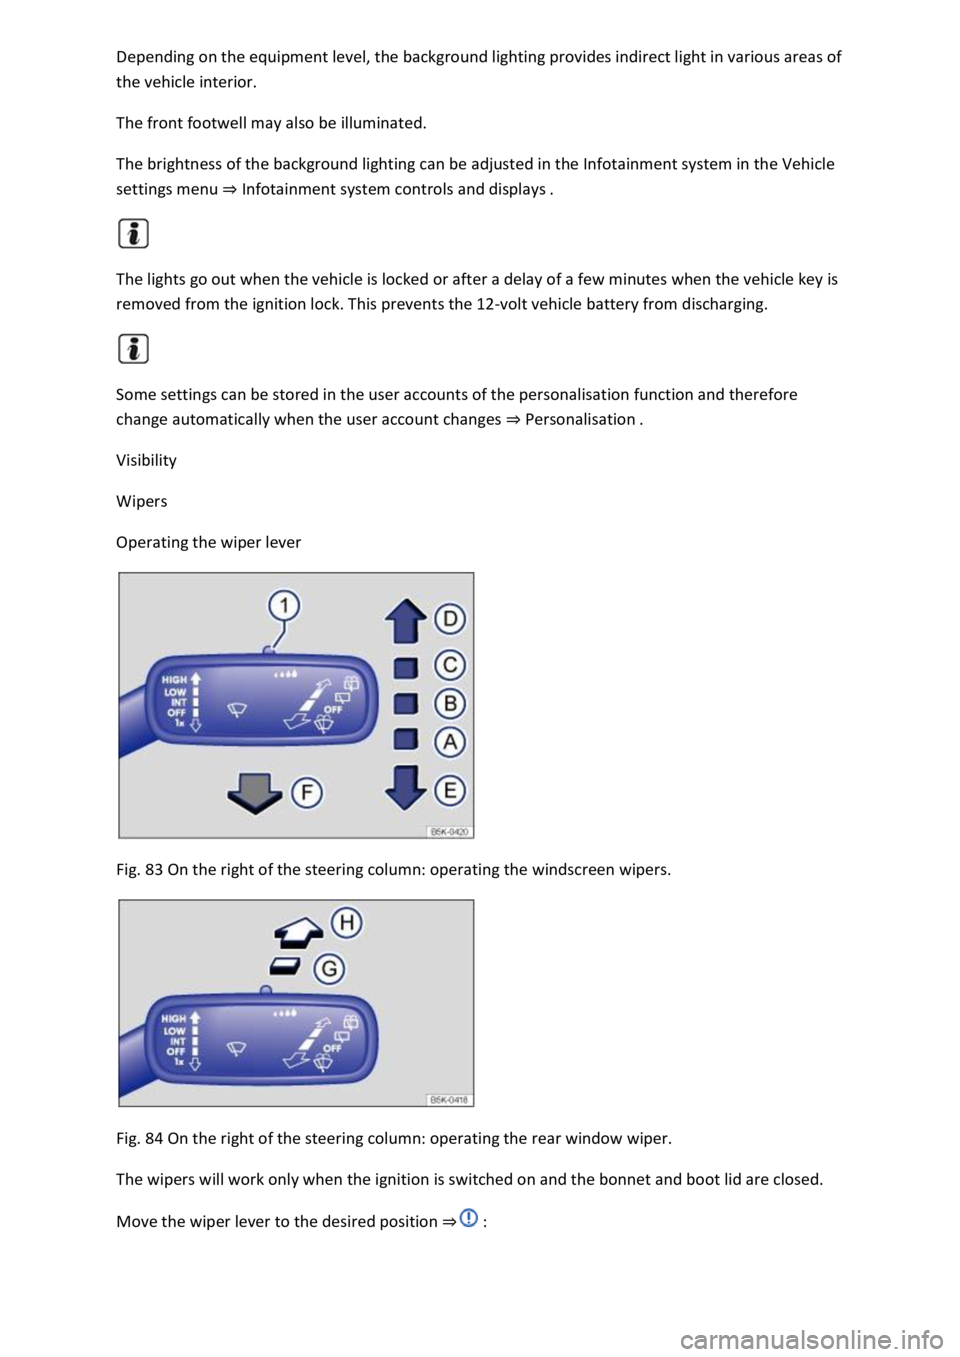
Operating the wiper lever
Fig. 83 On the right of the steering column: operating the windscreen wipers.
Fig. 84 On the right of the steering column: operating the rear window wiper.
The wipers will work only when the ignition is switched on and the bonnet and boot lid are closed.
Move the wiper lever to the desired position
Page 143 of 502

to the windscreen, the wiper blades and the wiper motor:
The wiper lever is located in the basic position.
Snow and ice have been removed from the wiper blades and door windows.
Wiper blades that have become frozen onto the glass have been carefully loosened. Volkswagen
recommends using a de-icer spray for this.
NOTICE
Do not switch on the wipers when the window is dry. Using the wipers when the window is dry can
damage the glass.
When switched on, the wipers will temporarily be switched to the next setting down when the
vehicle is stationary.
When parking the vehicle in cold weather, it may be helpful to leave the front windscreen wipers in
the service position to make it easier to loosen the wiper blades Wiper blades
Wiper function
Automatic activation of the rear window wiper
The rear window wiper is switched on automatically if the windscreen wipers are switched on and
reverse gear is engaged. Automatic switch-on when reverse gear is selected can be activated and
deactivated in the Infotainment system in the Vehicle settings menu Infotainment system controls
and displays
Heated washer jets
The heating defrosts frozen washer jets. The heating output is automatically regulated depending on
the ambient temperature when the ignition is switched on. Only the jets are heated, not the hoses
that the washer fluid flows through.
Rain/light sensor
Fig. 85 On the right of the steering column: wiper lever.
Page 144 of 502

depending on the intensity of the rain.
Activating and deactivating the rain/light sensor
Position - the rain/light sensor is deactivated.
Position - the rain/light sensor is activated, automatic wipe when necessary.
The automatic wipe function can be activated and deactivated in the Infotainment system in
the Vehicle settings menu Infotainment system controls and displays
If the automatic wipe function is deactivated in the Infotainment system, the intervals are set at
fixed levels.
Adjusting the sensitivity of the rain/light sensor
The sensitivity of the rain/light sensor can be adjusted manually using the switch in the wiper lever
Fig.
Switch to the right high sensitivity.
Switch to the left low sensitivity.
WARNING
The rain/light sensor cannot always adequately detect all precipitation and activate the wipers
correspondingly.
If necessary, switch on the wipers manually in good time if the water on the windscreen restricts the
field of vision.
Some settings can be stored in the user accounts of the personalisation function and therefore
change automatically when the user account changes
Troubleshooting
Washer fluid level too low
The indicator lamp lights up yellow.
Fill up the washer fluid reservoir at the next opportunity Washer fluid
Fault in rain/light sensor
The wipers are not switched on automatically if it rains during rain/light sensor operation.
The indicator lamp lights up yellow.
Switch the ignition off and on.
If the problem persists, go to a qualified workshop.
Page 153 of 502

-back
function is not active.
The roll-back function does not prevent fingers or other body parts from being pressed against the
roof frame and being injured.
When the glass roof is open, the electric sun blind can be closed only up to the front edge of the
glass roof.
Heating and air conditioning system
Heating, ventilating, cooling
Introduction
This chapter contains information on the followingsubjects:
Front controls
Air recirculation mode
Seat heating
Steering wheel heating
Troubleshooting
The following systems may be installed in the vehicle
Both the manual air conditioning system and Climatronic heat, cool and dehumidify the air. It works
most effectively when the windows and the glass roof are closed. If heat has built up in the vehicle
interior, ventilating the vehicle can speed up the cooling process.
Display of activated functions
Lit up LEDs on rotary knobs and buttons indicate that the function is switched on.
WARNING
Poor visibility through the windows increases the risk of collisions and accidents, which can cause
serious injuries.
Keep all windows free from ice, snow and condensation to maintain good visibility.
Adjust the heating, air conditioning system and rear window heating so that condensation does not
form on the windows.
Only set off once all windows are clear.
Use air recirculation mode for a short period only. If the cooling system is switched off, condensation
can form on the windows very quickly in air recirculation mode and reduce visibility considerably.
Page 156 of 502

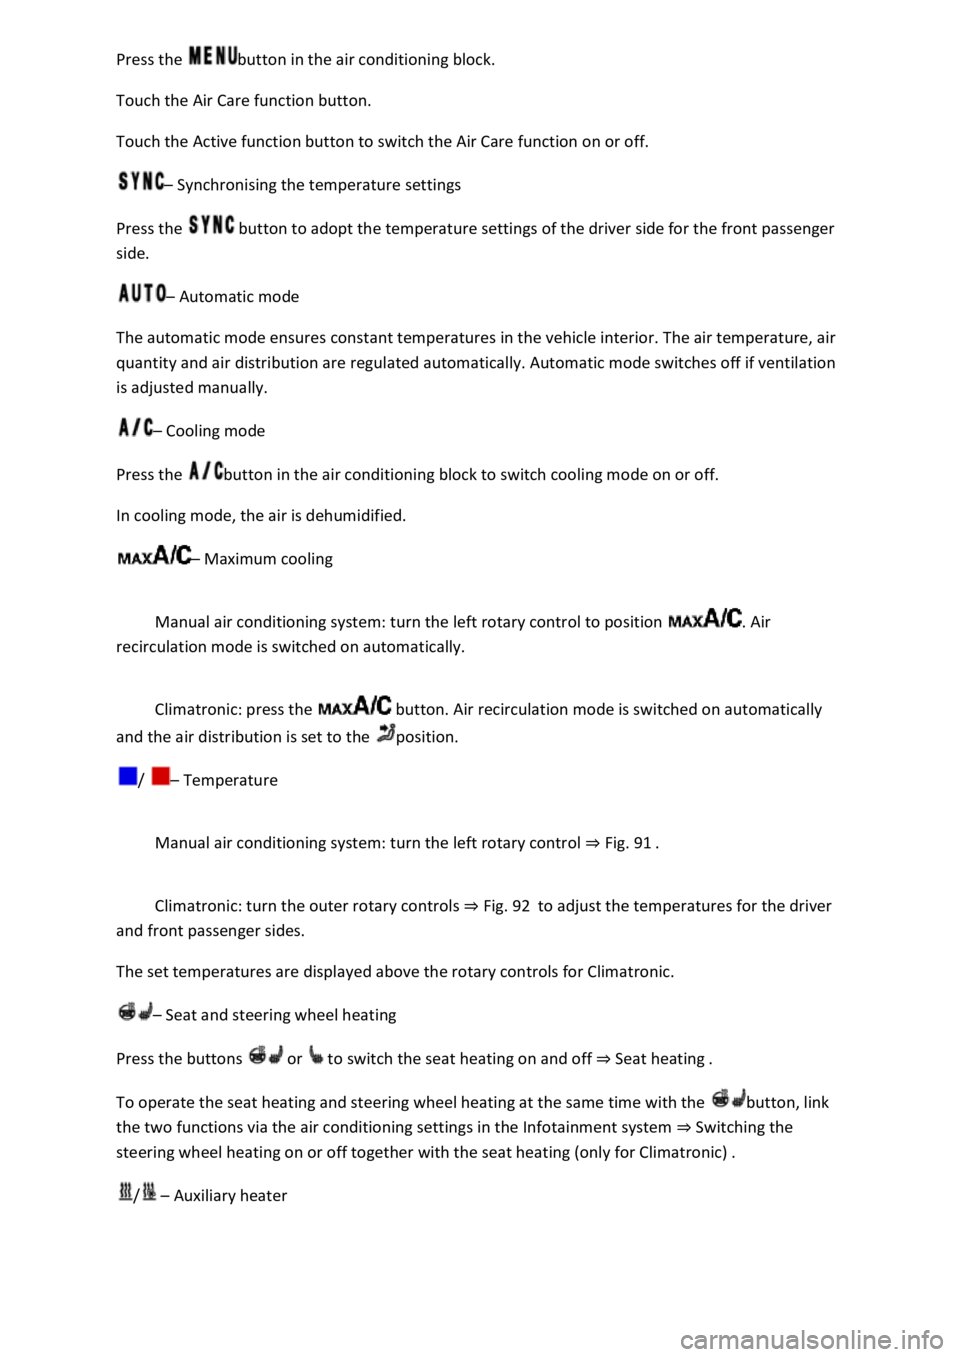
button in the air conditioning block.
Touch the Air Care function button.
Touch the Active function button to switch the Air Care function on or off.
Synchronising the temperature settings
Press the button to adopt the temperature settings of the driver side for the front passenger
side.
Automatic mode
The automatic mode ensures constant temperatures in the vehicle interior. The air temperature, air
quantity and air distribution are regulated automatically. Automatic mode switches off if ventilation
is adjusted manually.
Cooling mode
Press the button in the air conditioning block to switch cooling mode on or off.
In cooling mode, the air is dehumidified.
Maximum cooling
Manual air conditioning system: turn the left rotary control to position . Air
recirculation mode is switched on automatically.
Climatronic: press the button. Air recirculation mode is switched on automatically
and the air distribution is set to the position.
/ Temperature
Manual air conditioning system: turn the left rotary control Fig. 91
Climatronic: turn the outer rotary controls Fig. 92to adjust the temperatures for the driver
and front passenger sides.
The set temperatures are displayed above the rotary controls for Climatronic.
Seat and steering wheel heating
Press the buttons or to switch the seat heating on and off Seat heating
To operate the seat heating and steering wheel heating at the same time with the button, link
the two functions via the air conditioning settings in the Infotainment system Switching the
steering wheel heating on or off together with the seat heating (only for Climatronic)
/ Auxiliary heater
Page 157 of 502

button in the air conditioning block to switch the auxiliary heater on and off when the
ignition is switched off
Touch the function button in the Infotainment system air conditioning settings to access the
Auxiliary heater menu Auxiliary heater and ventilation
The auxiliary heater provides additional heating when the ignition is switched on.
Blower
Turn the middle rotary control.
When Climatronic is in automatic mode, no blower speed is displayed in the rotary control.
Air recirculation mode
Press the button.
Air distribution
air distribution to the upper body via the vents in the dash panel.
air distribution to footwell.
air distribution to the upper body and the footwell.
air distribution to the windscreen and the footwell.
air distribution to the windscreen.
| Defrost function
Manual air conditioning system: turn the right rotary knob to position Fig. 91
Climatronic: press the button Fig. 92
Manual air conditioning system: in the defrost function, the air recirculation mode switches off
and the air conditioning compressor for the cooling system switches on in order to dehumidify the
air. When the defrost function is switched on, it is not possible to switch the air recirculation mode
on or the air conditioning compressor off1).
Rear window heating
Press to switch the rear window heating on or off while the engine is running.
The rear window heating will switch off after 10 minutes at the latest.
Recommended settings for manual air conditioning system
Switch off air recirculation mode.
Set blower to setting or .