heating VOLKSWAGEN TRANSPORTER 2019 Owners Manual
[x] Cancel search | Manufacturer: VOLKSWAGEN, Model Year: 2019, Model line: TRANSPORTER, Model: VOLKSWAGEN TRANSPORTER 2019Pages: 486, PDF Size: 69.28 MB
Page 3 of 486
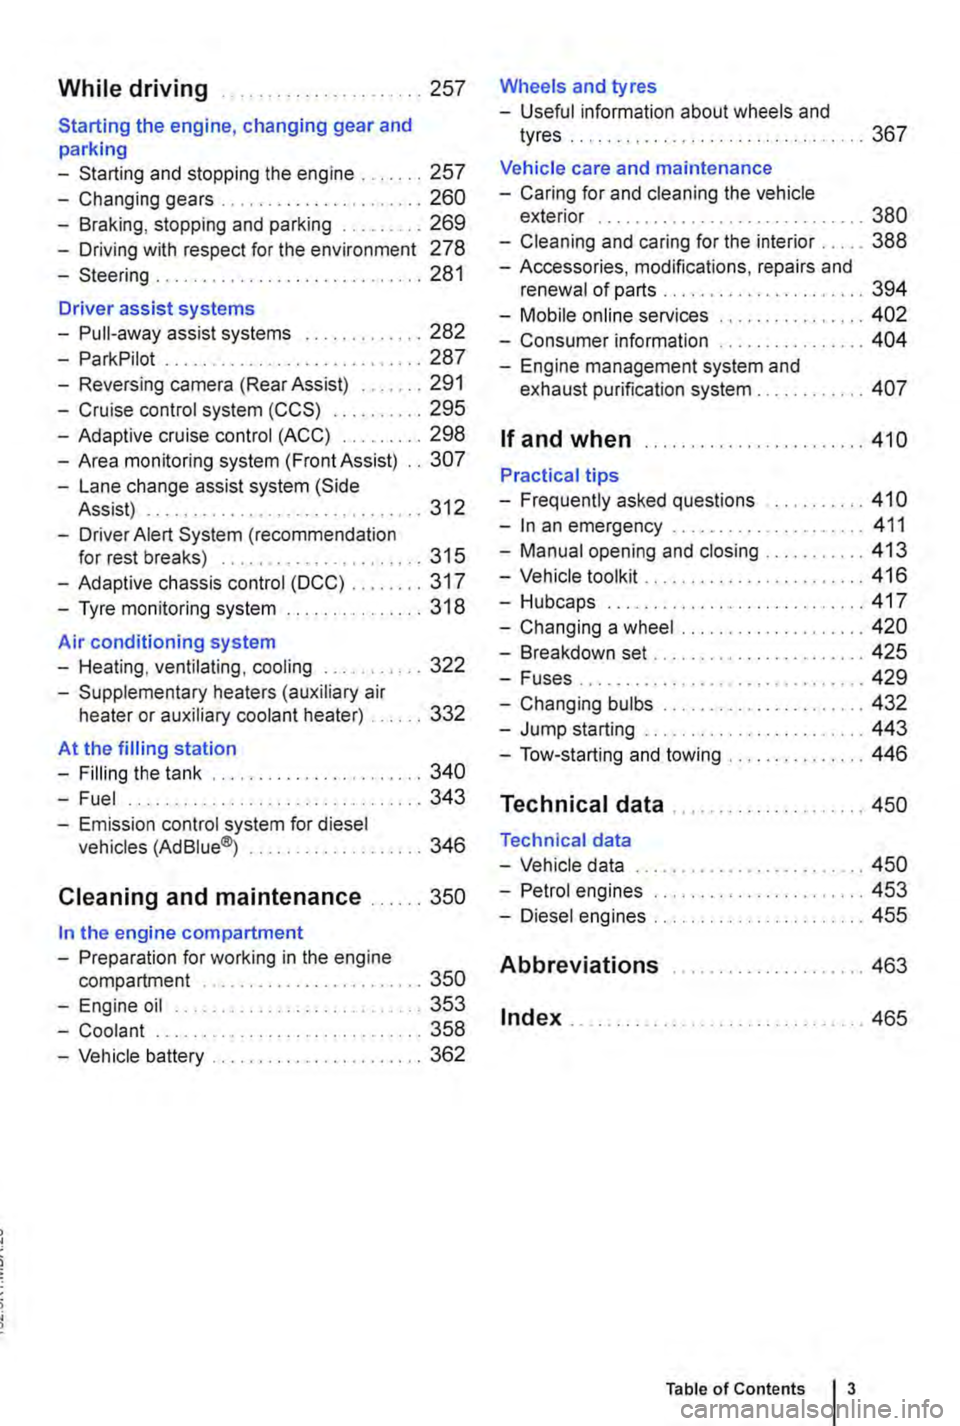
While driving .. ...... 257
Starting the engine, changing gear and parking
-Starting and stopping the engine .. 257
-Changing gears . . . . . . . . . .......... 260
-Braking, stopping and parking ......... 269
-Driving with respect for the environment 278
-Steering ........... 281
Driver assist systems
-Pull-away assist systems .... 282
-ParkPilot ............................ 287
-Reversing camera (Rear Assist) ....... 291
-Cruise control system (CCS) . . . . . ... 295
-Adaptive cruise control (ACC) ......... 298
-Area monitoring system (Front Assist) .. 307
-Lane change assist system (Side Assist) . .. . . .. .. . . . . . . . . .......... 312
-Driver Alert System (recommendation for rest breaks) . . . . . . . . . . ......... 315
-Adaptive chassis control (DCC) ........ 317
-Tyre monitoring system . . . . . . . ....... 318
Air conditioning system
-Heating, ventilating, cooling ........... 322
-Supplementary heaters (auxiliary air heater or auxiliary coolant heater) .... 332
At the filling station
-Filling the tank ....................... 340
-Fuel . . . . . . . . . . . . . . . . ........ 343
-Emission control system for diesel vehicles (AdBiue®j ................... 346
Cleaning and maintenance ...... 350
In the engine compartment
-Preparation for working in the engine compartment . . . . . . . . . . . . . . . . 350
-Engine oil ........................... 353
-Coolant ..................... 358
-Vehicle battery ....................... 362
Wheels and tyres
-Useful information about wheels and
tyres . . . . . . . . . . . . . . ..... 367
Vehicle care and maintenance
-Caring for and cleaning the vehicle exterior . . . . . . . . . . . . . . . . . . . ... 380
-Cleaning and caring for the interior ..... 388
-Accessories, modifications, repairs and renewal of parts . . . . . . . .... 394
-Mobile online services .. 402
-Consumer information 404
-Engine management system and exhaust purification system . . . .. 407
If and when ........................ 410
Practical tips
-Frequently asked questions ........... 410
-In an emergency ..................... 411
-Manual opening and closing . . . . . . . . . 413
-Vehicle toolkit . . ............... 416
-Hubcaps.. . .................... 417
-Changing a wheel .................... 420
-Breakdown set ....................... 425
-Fuses................ . . 429
-Changing bulbs . . . . . . . . .....•.... 432
-Jump starting . . . . . . .......... 443
-Tow-starting and towing . . . 446
Technical data ...
Technical data
-Vehicle data
-Petrol engines
-Diesel engines ..
Abbreviations
Index .......... .
... 450
... 450
......... 453
455
..... " ... 463
.. 465
Table of Contents 3
Page 6 of 486
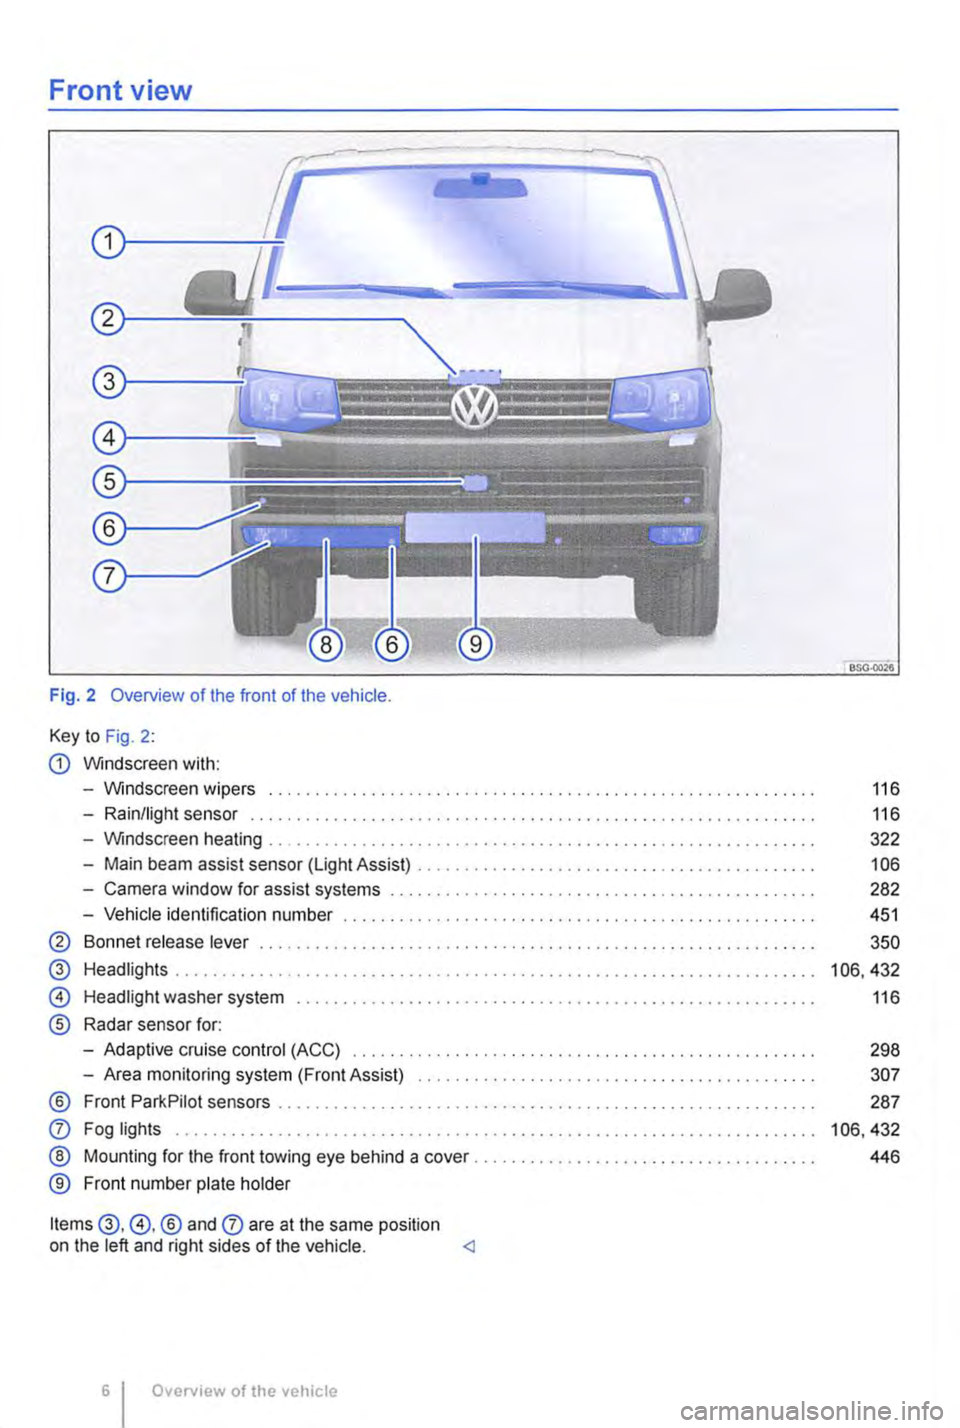
Front view
Fig. 2 Overview of the front of the vehicle.
Key to Fig. 2:
G) Windscreen with:
-Windscreen wipers .............. .
-Rain/light sensor .............. .
-Windscreen heating
-Main beam assist sensor (light Assist) ...
-Camera window for assist systems
-Vehicle identification number
® Bonnet release lever
@ Headlights ...... .
@
®
Headlight washer system
Radar sensor for:
-Adaptive cruise control (ACC) ............................................. .
-Area monitoring system (Front Assist)
® Front ParkPilot sensors . . . . . . . . ........... .
0 Fog lights ................ .
® Mounting for the front towing eye behind a cover .
® Front number plate holder
Items @, @, ® and 0 are at the same position on the left and right sides of the vehicle.
850.0026
116
116
322
106
282
451
350
106,432
116
298
307
287
106,432
446
Page 7 of 486
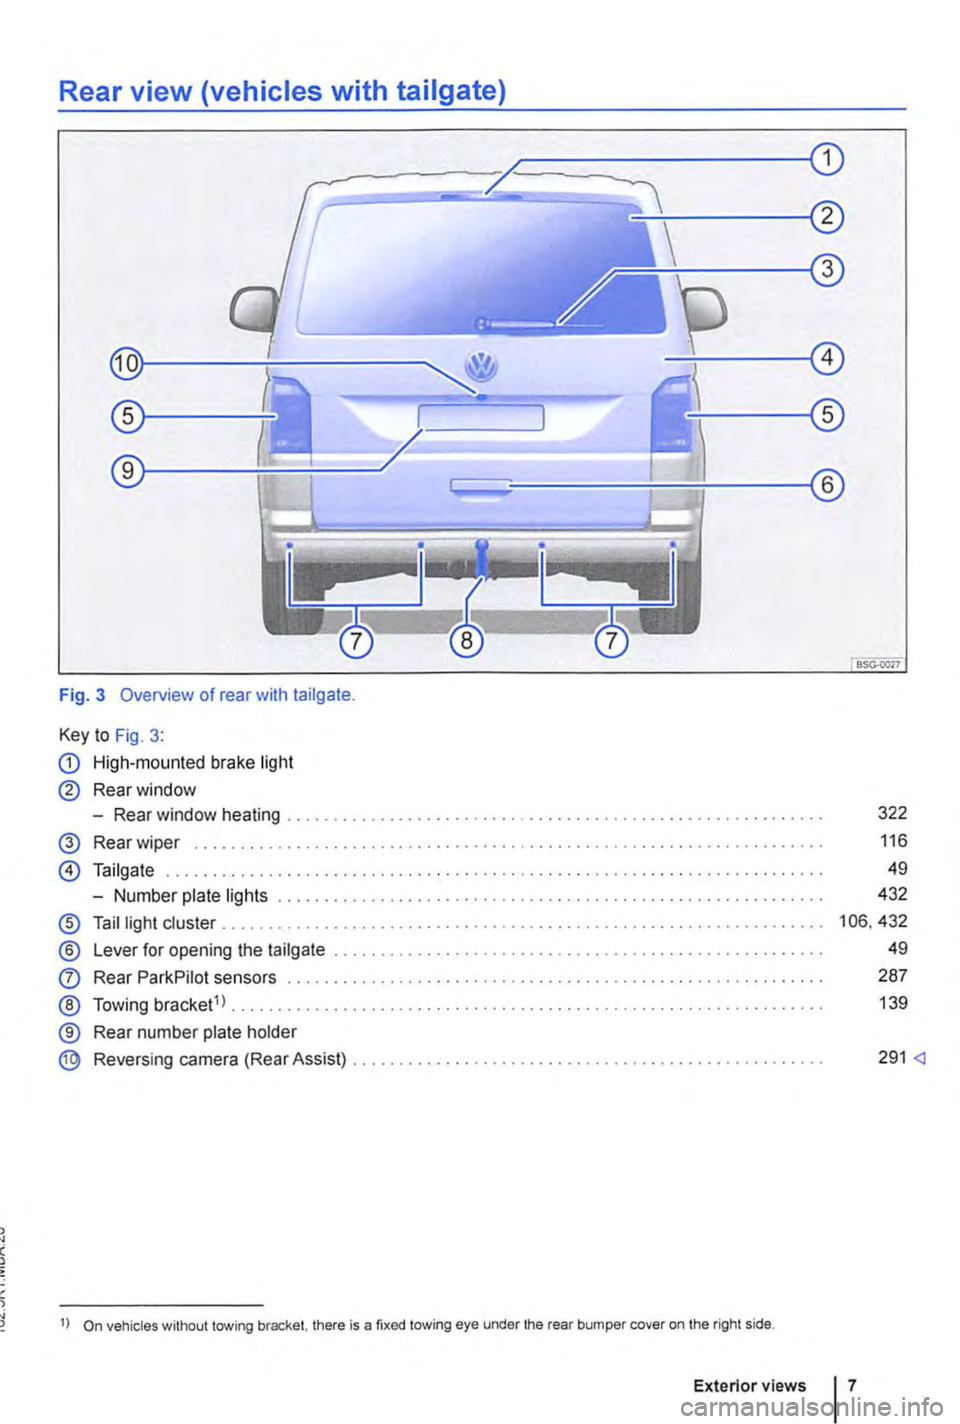
Rear view (vehicles with tailgate)
Fig. 3 Overview of rear with tailgate.
Key to Fig. 3:
CD High-mounted brake light
@ Rear window
-Rear window heating ........................ .
@ Rear wiper .................................. .
@ Tailgate . . . . ............... .
-Number plate lights ......................... .
® Tail light cluster ............................................ .
®
0
®
®
®
Lever for opening the tailgate .................................................... .
Rear ParkPilot sensors ............. .
Towing bracket1> ........................•................•••.••••.•............•
Rear number plate holder
Reversing camera (Rear Assist) ................................•..................
I) On vehicles without towing bracket, there is a fixed towing eye under the rear bumper cover on the right side.
322
116
49
432
106,432
49
287
139
291
Page 8 of 486
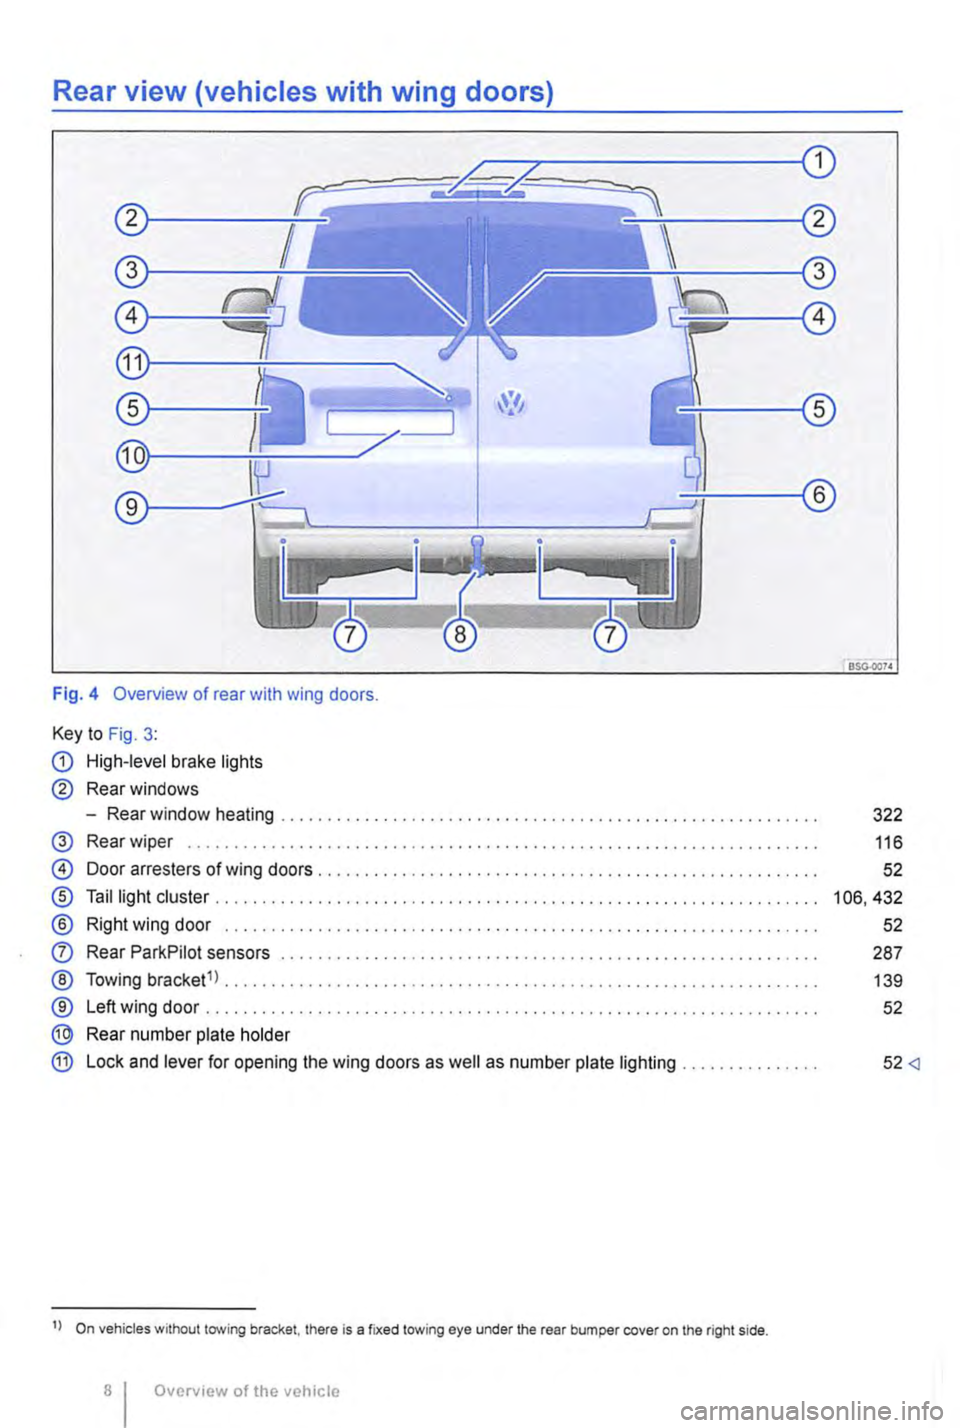
Rear view (vehicles with wing doors)
Fig. 4 Overview of rear with wing doors.
Key to Fig. 3:
G) High-level brake lights
® Rear windows
-Rear window heating ......................................................... .
@ Rear wiper ............................•.......................................
@
®
® Q)
®
®
®
®
Door arresters of wing doors .................... .
Tail light cluster ..................... .
Right wing door .....
Rear ParkPilot sensors
Towing bracket1> ..... .
Left wing door ................................ .
Rear number plate holder
Lock and lever for opening the wing doors as well as number plate lighting
11 On vehicles without towing bracket. there is a fixed towing eye under the rear bumper cover on the right side.
Overview of the vehicle
BSG.0074
322
116
52
106,432
52
287
139
52
52
Page 9 of 486
Vehicle interior
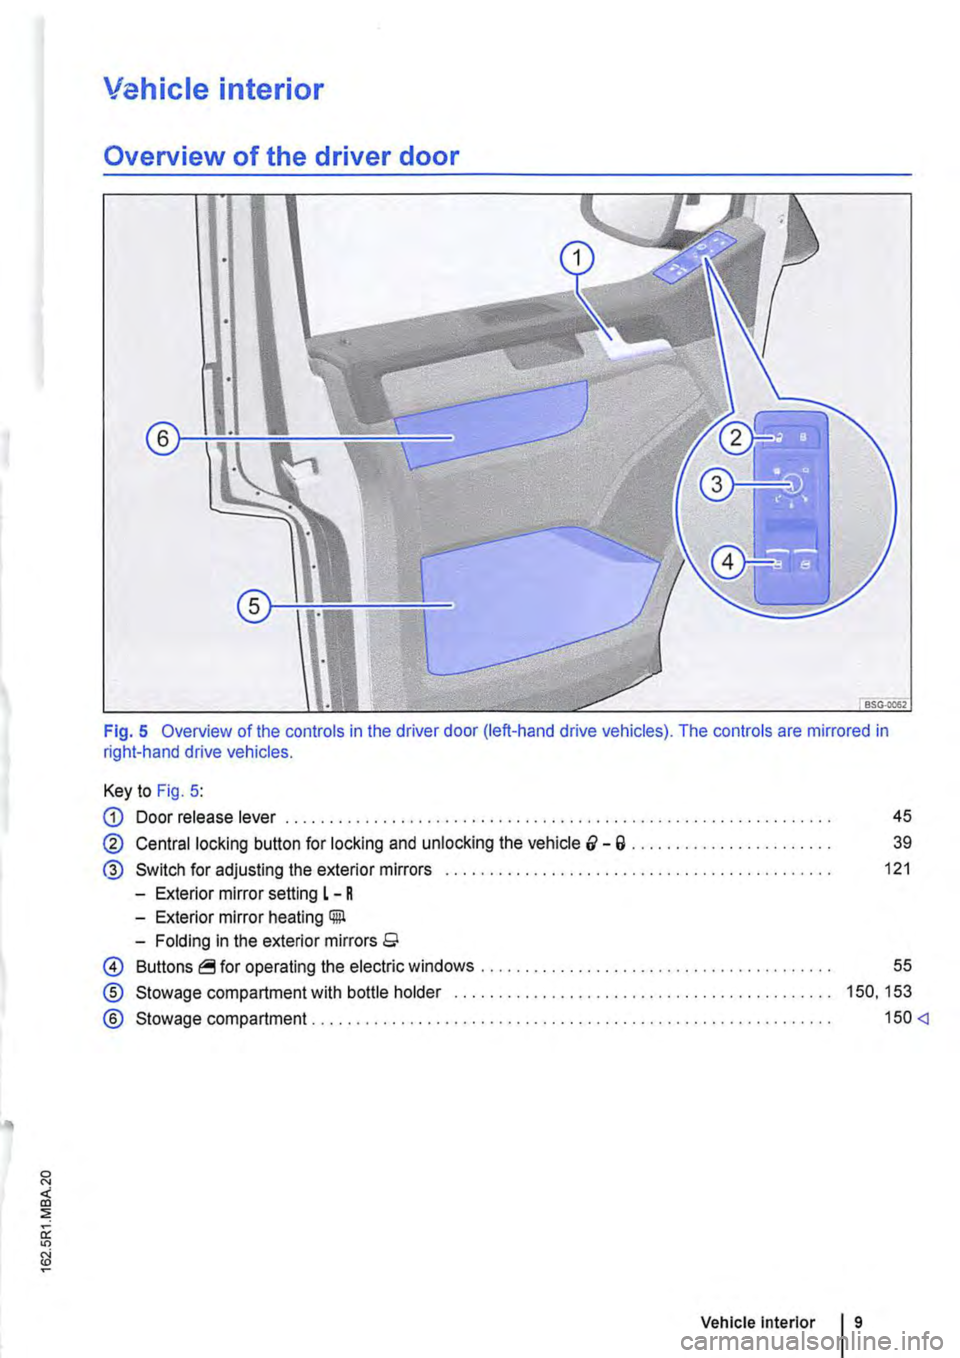
Overview of the driver door
Fig. 5 Overview of the controls in the driver door (left-hand drive vehicles). The controls are mirrored in right-hand drive vehicles.
Key to Fig. 5:
G) Door release lever . . . . . . . . . . . . . . . . . . . . . . . . . . . . . . . . . . . . . . . . . . . . . . . . . 45
@ Central locking button for locking and unlocking the vehicle &-a . . . . . . . . . . . . . . . . . . . . . 39
® Switch for adjusting the exterior mirrors . . . . . . . . . . . . . . . . . . . . . . . . . . . . . . . . . . . . . 121
-Exterior mirror setting L - R
-Exterior mirror heating Gill
-Folding in the exterior mirrors 9
0 Buttons operating the electric windows ..
® Stowage compartment with bottle holder
® Stowage compartment ..................... .
55
150, 153
150
Page 12 of 486
Overview of the centre console
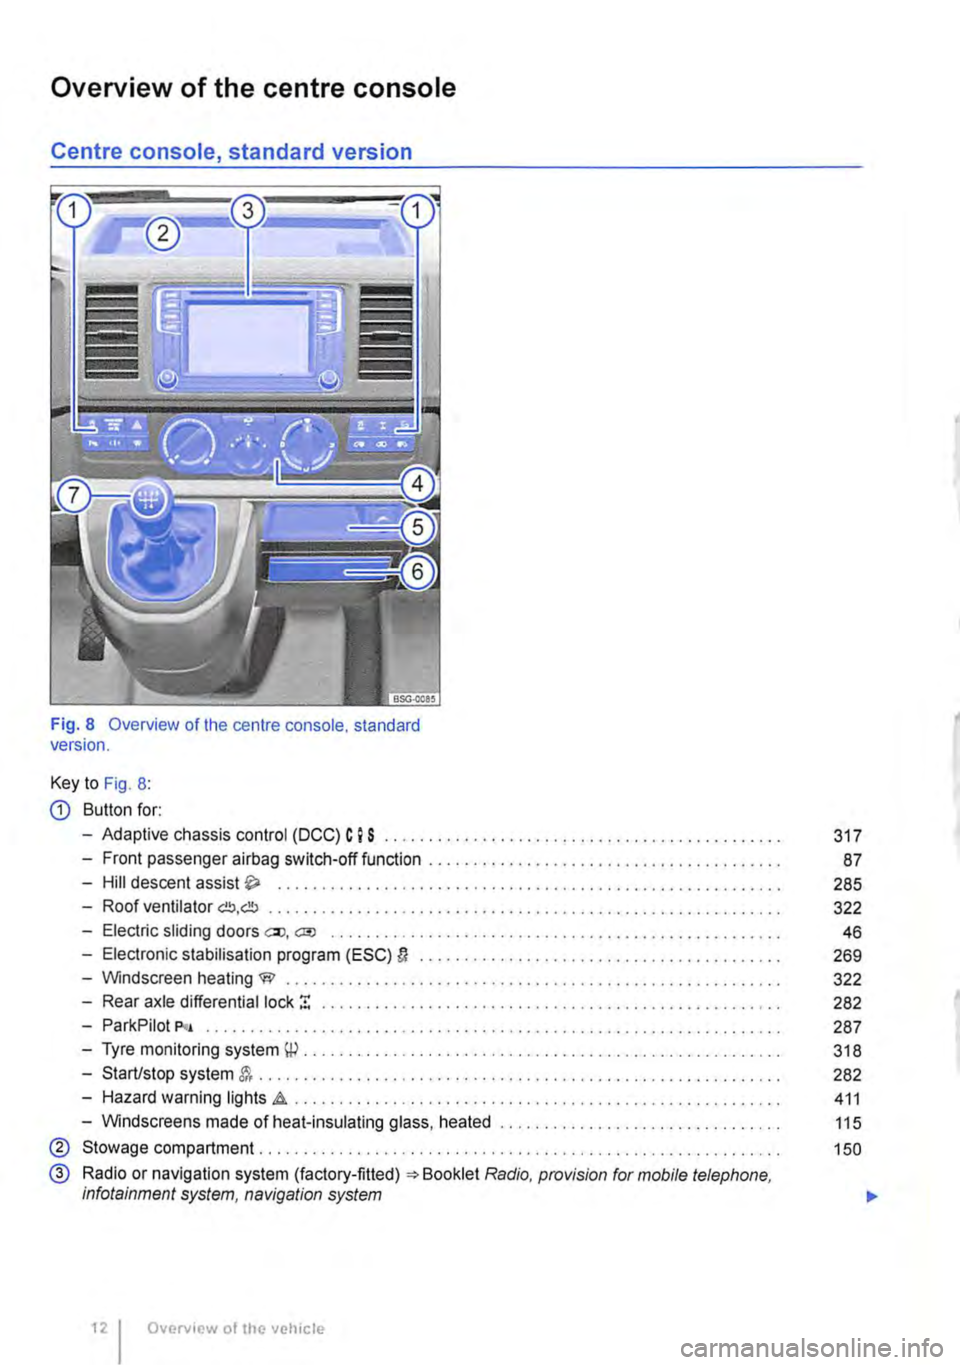
Centre console, standard version
Fig. 8 Overview of the centre console. standard version.
Key to Fig. 8:
CD Button for:
-Adaptive chassis control (DCC) C I S .......................................... .
-Front passenger airbag switch-off function ................•.......................
-Hill descent assist .................................•.......................
-Roof ventilator G!!J,db ......................................................... .
-Electric sliding doors ell, a;o ............................................••....•
-Electronic stabilisation program (ESC) D ........................................ .
-Windscreen heating W ..................•...................................
-Rear axle differential lock ! ................................................. .
-ParkPilot P<• .....................•..••••.............••..............•••••.
-Tyre monitoring system \P . . . . . . . . . . . . . . . . . . . . . . . . ........................ .
-Start/stop system . . . . . . . . . . . . . . . . . . . . . . . . ............................... .
-Hazard warning lights .a . . . . . . . . . . . . . . . . . . . ............................ .
-Windscreens made of heat-insulating glass, heated ............................... .
® Stowage compartment. . . . . . . . . . . . . . . . ............... .
@ Radio or navigation system (factory-fitted) =:-Booklet Radio, provision for mobile telephone, infotainment system, navigation system
Overview of the vehicle
317
87
285
322
46
269
322
282
287
318
282
411
115
150
...
Page 14 of 486
-Start/stop system &. ........................ . 282
-Hazard warning lights d1.. . . . . . . . . . . . . . . . . . . . . • • . . . . . . . . . . . 411
-Windscreens made of heat-insulating glass, heated . . . . . . . . . . . . . . . . . . . . . . . . . . . . . . . . 115
@ Stowage compartment........... . . . . . . . . . . . . . . . . . . . . . . . . . . . . 150
@ Radio or navigation system (factory-fitted) Radio, provision for mobile telephone, infotainment system, navigation system
@) Controls for:
-Heating and fresh air system
-Climatic ............ .
-Climatronic . . . . . . . . . . . . . ....•............
® Stowage compartment . . . . ........................ .
-Mobile telephone interface "comfort version" Radio, provision for mobile tele-phone, infotainment system, navigation system
® Stowage compartment with
-12-volt socket
-Ashtray with cigarette lighter
-Drink holder ................................................. .
Q) Cooled bottle holder .....
® Gear lever for:
-Manual gearbox ...... .
-DSG® dual clutch gearbox .................................................... .
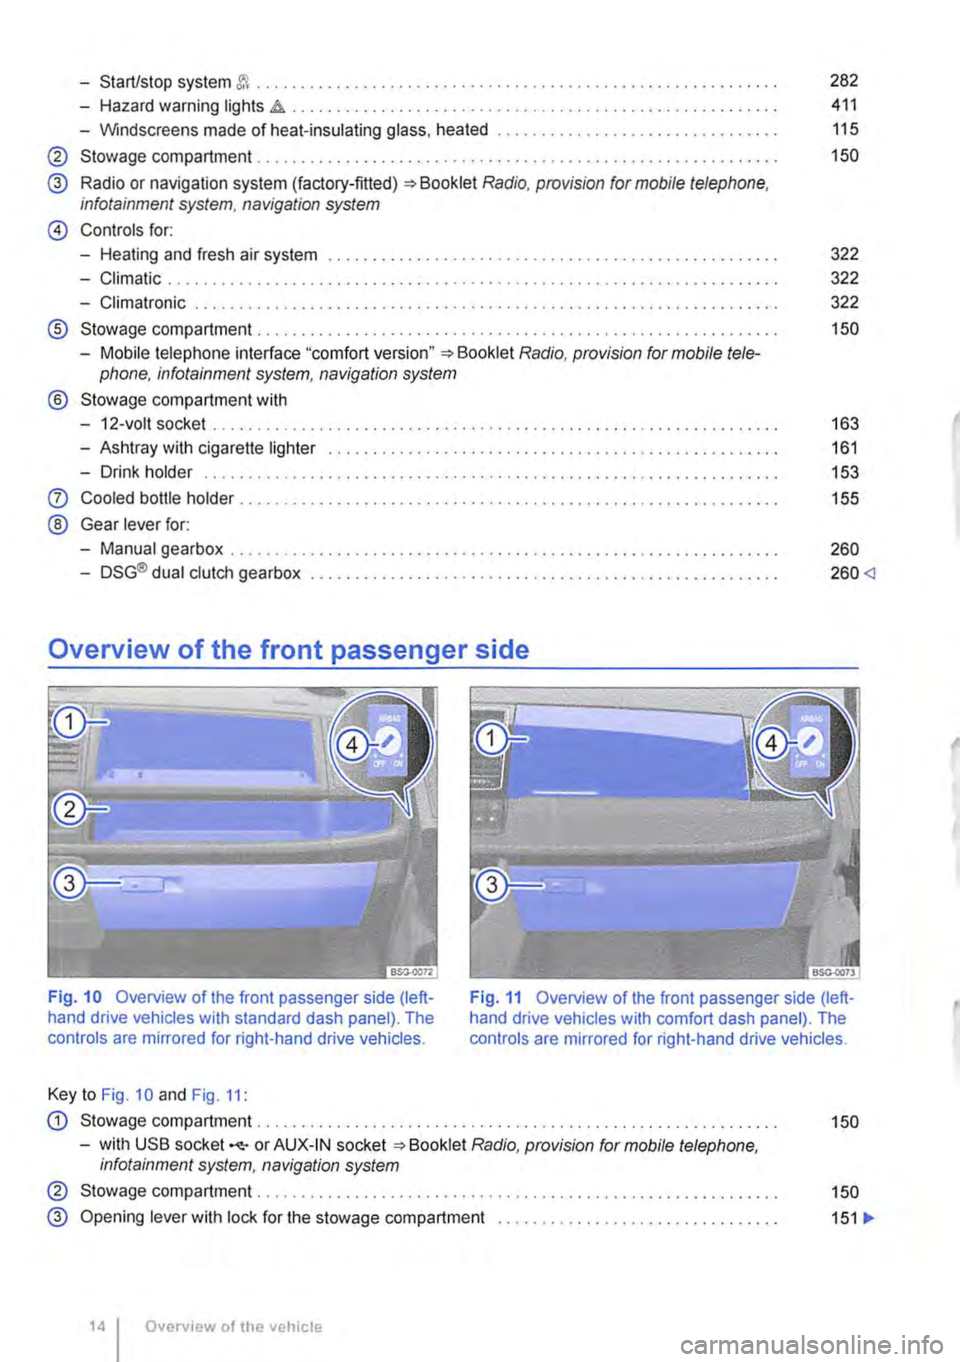
Overview of the front passenger side
322
322
322
150
163
161
153
155
260
260
Fig. 11 Overview of the front passenger side (left-hand drive vehicles with comfort dash panel). The controls are mirrored for right-hand drive vehicles.
Key to Fig. 10 and Fig. 11:
CD Stowage compartment. . . . . . . . . . . . . . . . . . . . . . . . . . 150
-with USB socket -<1:-or AUX-IN socket Radio, provision for mobile telephone. infotainment system, navigation system
@ Stowage compartment . . . . . . . . . . . . . . . . . . . . . . . . . . . . . . . . . . . . . . . . . . . 150
@ Opening lever with lock for the stowage compartment . . . . . . . . . . . . . . . . . . . . . . . . . . . . . . . . 151 .,.
Overv1ew of the vehicle
Page 69 of 486
A WARNING (Continued)
• The steering wheel must always point to-wards the chest and not towards the face. This ensures that the driver front airbag pro-vides maximum protection in the event of an accident.
• While driving, always keep both hands on the outside of the steering wheel (at the 9 o'clock and 3 o'clock positions =>Fig. 47). This reduces the risk of injury if the driver front alrbag Is triggered.
Seat functions, front
a:n Introduction
This chapter contains information on the following subjects:
Seat heating . . . . . . . . . . . . . . . . . . . • • • . . . . . . 69
Memory seats . . . . . . . . . . . . . . . . . . . 70
Rotating front seats . . . . . . . . . . . . . . . . . . . . . . 71
Additional information and warnings:
• Adjusting the seat position =>page 61
• Seat bells =>page 79
• Airbag system =>page 87
• Child seats (accessories) 96
• Heating, ventilating, cooling 322
Seat heating
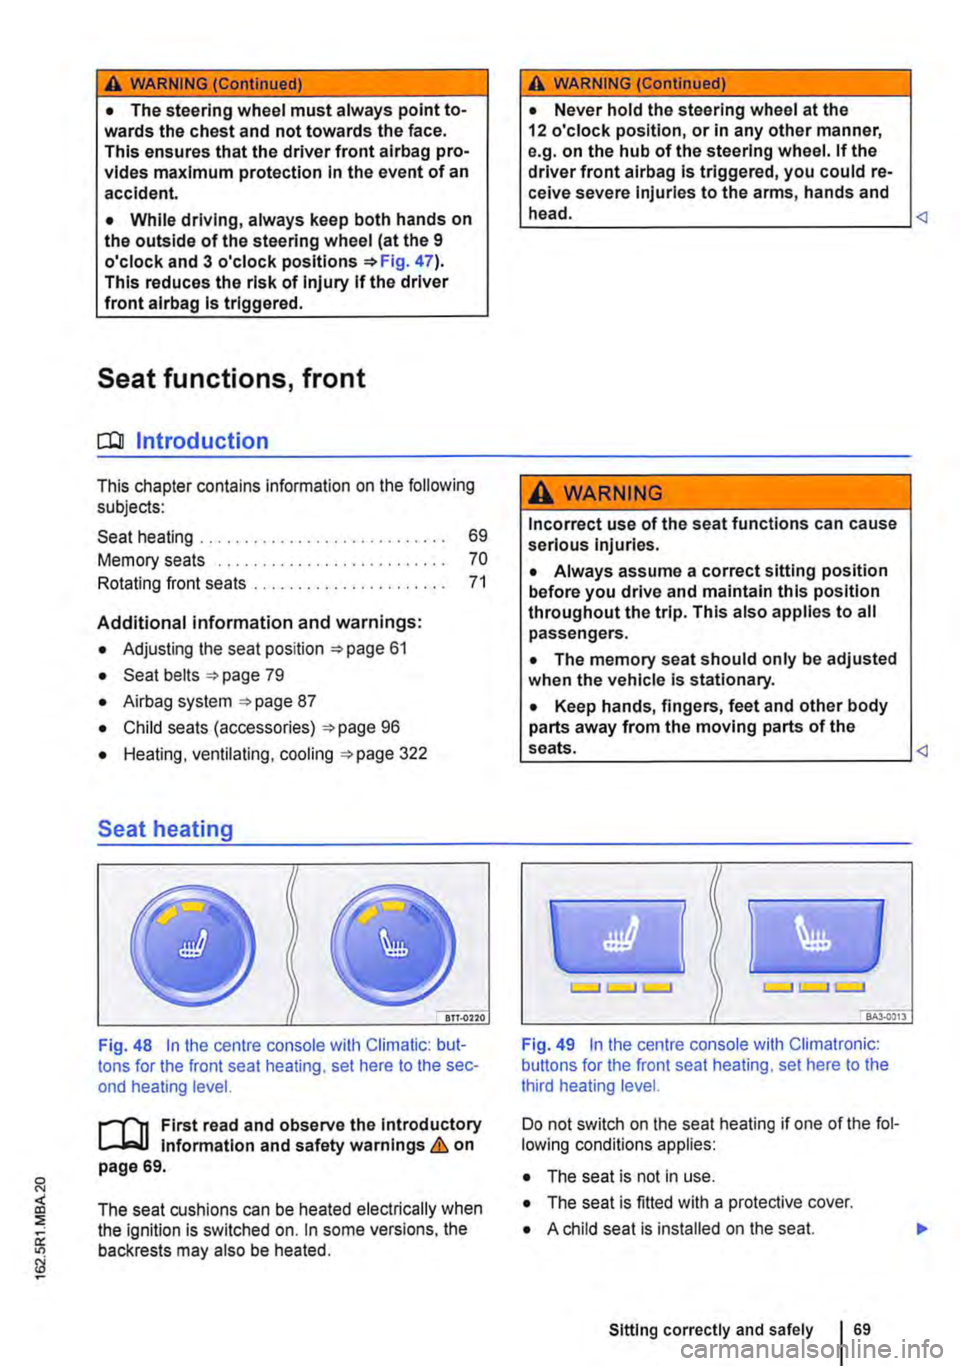
Fig. 48 In the centre console with Climatic: but-tons for the front seat heating, set here to the sec-ond heating level.
First read and observe the Introductory l-J,:.,U Information and safety warnings & on page 69.
The seat cushions can be heated electrically when the ignition is switched on. In some versions, the backrests may also be heated.
A WARNING (Continued)
• Never hold the steering wheel at the 12 o'clock position, or in any other manner, e.g. on the hub of the steering wheel. If the driver front airbag is triggered, you could re-ceive severe Injuries to the arms, hands and head.
A WARNING
Incorrect use of the seat functions can cause serious injuries.
• Always assume a correct sitting position before you drive and maintain this position throughout the trip. This also applies to all passengers.
• The memory seat should only be adjusted when the vehicle Is stationary.
• Keep hands, fingers, feet and other body parts away from the moving parts of the seats.
Fig. 49 In the centre console with Climatronic: buttons for the front seat heating, set here to the third heating level.
Do not switch on the seat heating if one of the fol-lowing conditions applies:
• The seat is not in use.
• The seat is fitted with a protective cover.
• A child seat is installed on the seat.
Sitting correctly and safely 69
Page 70 of 486
• The seat cushion is damp or wet.
• The interior or exterior temperature is above 2s•c (7rF).
Function
Switching on
Adjusting the heating output
Switching off
Action 49
Press the 0 or (9 button. The seat heating is switched on at the highest setting. All indicator lamps light up.
Press the 0 or (9 button repeat-edly until the required heat level is set.
Press the button 0 or (9 until the indicator lamps in the button go out 49.
A WARNING
Anyone experiencing reduced sensitivity to pain or temperature due to medication, para-lysis or chronic illness (e.g. diabetes) could sustain burns on the back, buttocks and legs when using the seat heating. These burns may take a long time to heal or may never heal fully. Please consult a doctor to deter-mine your own level of health.
Memory seats
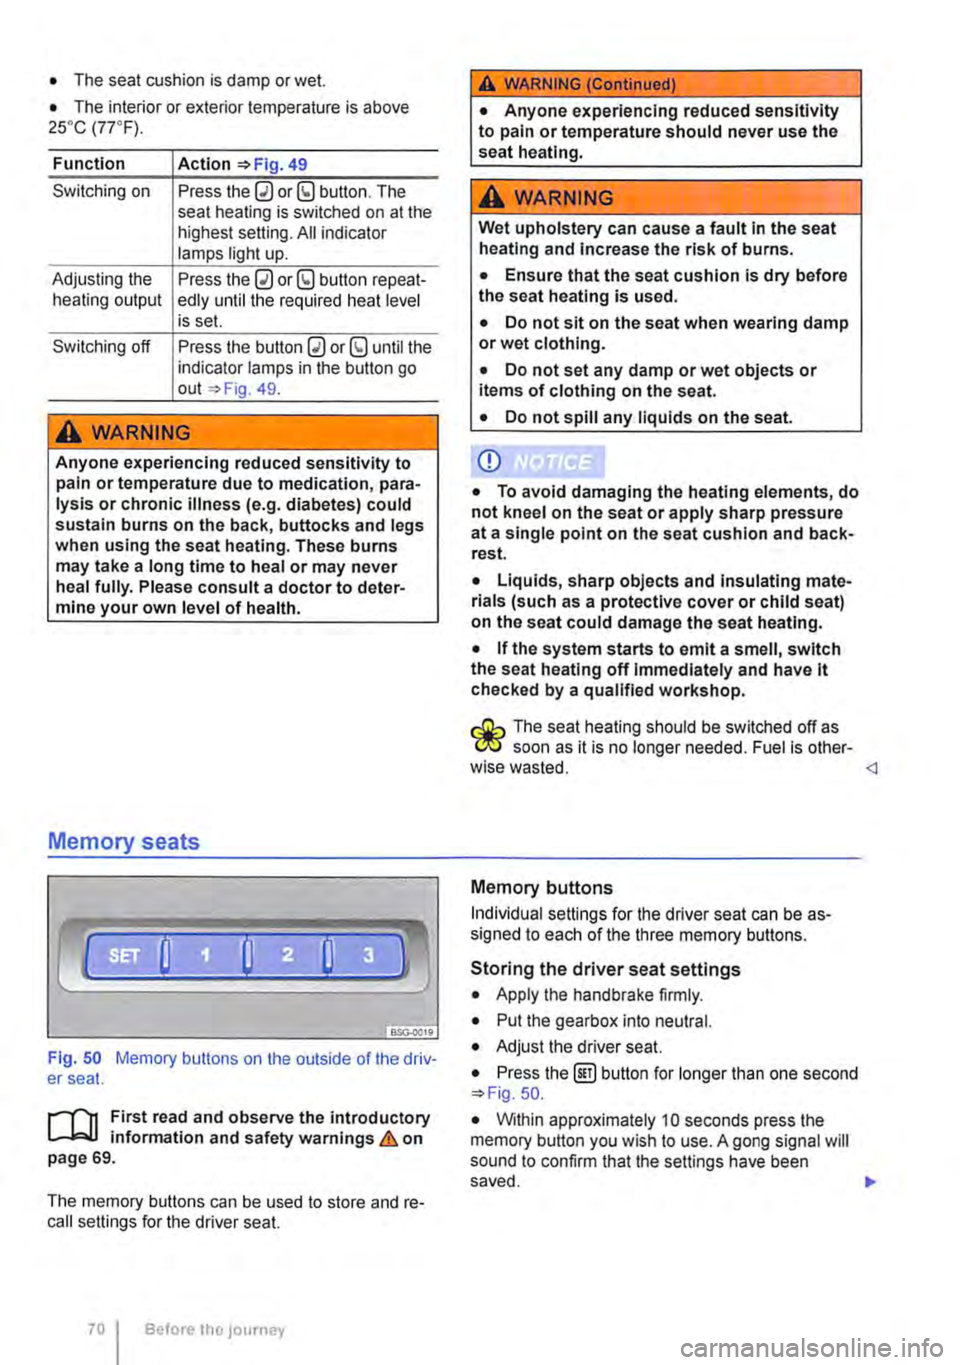
Fig. 50 Memory buttons on the outside of the driv-er seat.
r"''l1 First read and observe the introductory L-JcJ.I information and safety warnings & on page 69.
The memory buttons can be used to store and re-call settings for the driver seat.
Before the JOurney
A WARNING (Continued)
• Anyone experiencing reduced sensitivity to pain or temperature should never use the seat heating.
A wARNING
Wet upholstery can cause a fault In the seat heating and Increase the risk of burns.
• Ensure that the seat cushion is dry before the seat heating is used.
• Do not sit on the seat when wearing damp or wet clothing.
• Do not set any damp or wet objects or items of clothing on the seat.
• Do not spill any liquids on the seat.
Q)
• To avoid damaging the heating elements, do not kneel on the seat or apply sharp pressure at a single point on the seat cushion and back-rest.
• Liquids, sharp objects and Insulating mate-rials (such as a protective cover or child seat) on the seat could damage the seat heating.
• If the system starts to emit a smell, switch the seat heating off Immediately and have lt checked by a qualified workshop.
r:O:-, The seat heating should be switched off as C!JtJ soon as it is no longer needed. Fuel is other-wise wasted.
Individual settings for the driver seat can be as-signed to each of the three memory buttons.
Storing the driver seat settings
• Apply the handbrake firmly.
• Put the gearbox into neutral.
• Adjust the driver seat.
• Press the @] button for longer than one second 50.
• Within approximately 10 seconds press the memory button you wish to use. A gong signal will sound to confirm that the settings have been saved. .,..
Page 123 of 486
Do not attach external navigation devices to the windscreen or near interior automatic anti-dazzle
Manual anti-dazzle interior mirror
• Basic position: the lever on the lower part of the mirror is pointing towards the windscreen.
• Pull the lever to the back to select the anti-daz-zle function 99.
Exterior mirrors
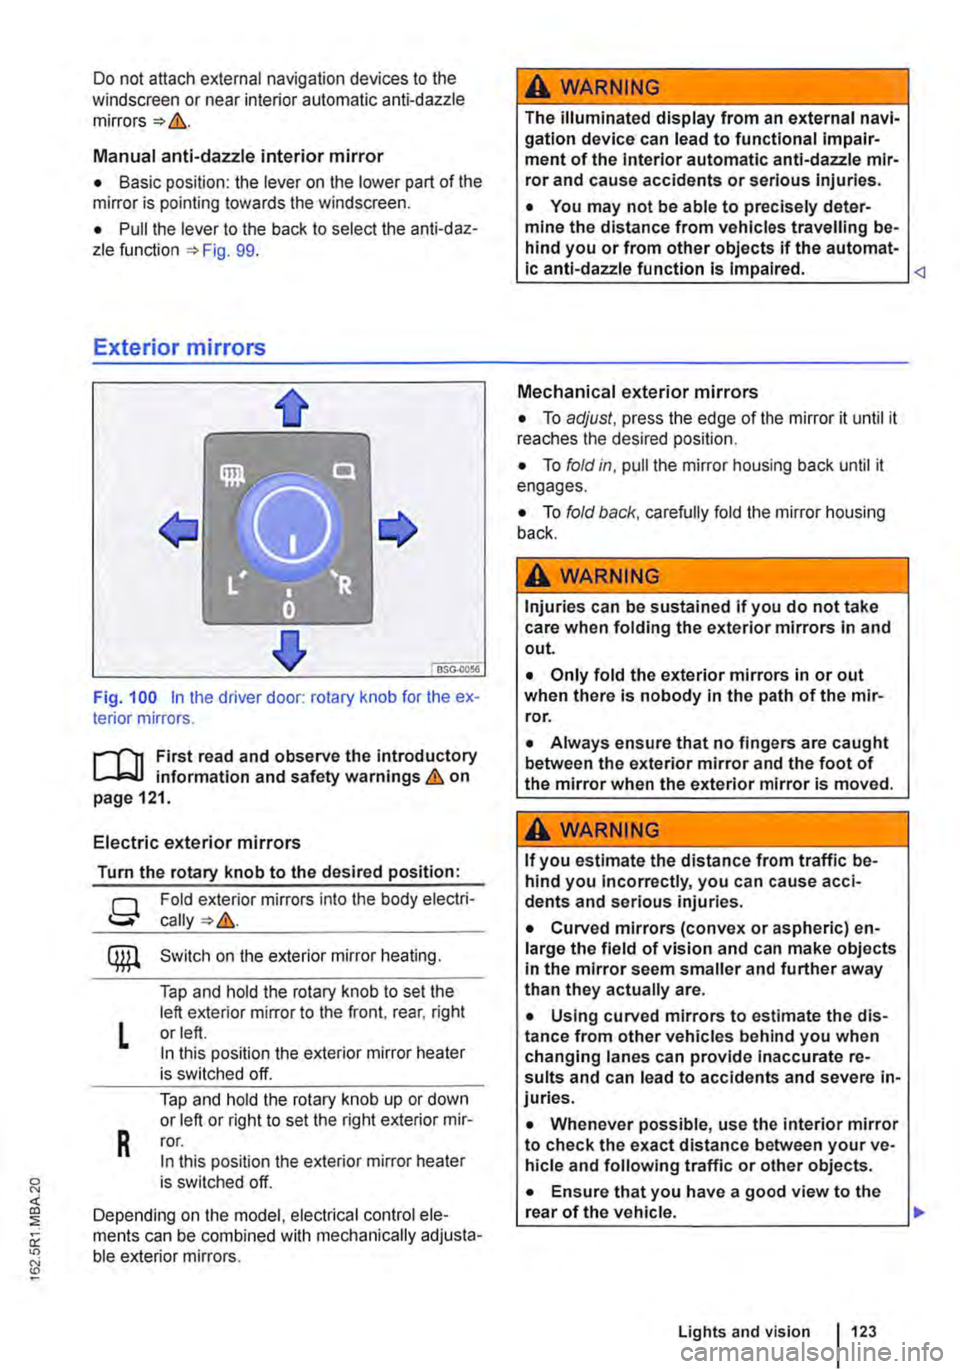
Fig. 100 in the driver door: rotary knob for the ex-terior mirrors.
First read and observe the introductory L..-Jr:.U information and safety warnings & on page 121.
Electric exterior mirrors
Turn the rotary knob to the desired position:
g
L
R
Fold exterior mirrors into the body electri-
Switch on the exterior mirror heating.
Tap and hold the rotary knob to set the left exterior mirror to the front, rear, right or left. In this position the exterior mirror heater is switched off.
Tap and hold the rotary knob up or down or left or right to set the right exterior mir-ror. In this position the exterior mirror heater is switched off.
Depending on the model, electrical control ele-ments can be combined with mechanically adjusta-ble exterior mirrors.
A WARNING
The illuminated display from an external navi-gation device can lead to functional impair-ment of the Interior automatic anti-dazzle mir-ror and cause accidents or serious injuries.
• You may not be able to precisely deter-mine the distance from vehicles travelling be-hind you or from other objects if the automat-ic anti-dazzle function is Impaired.
• To adjust, press the edge of the mirror it until it reaches the desired position.
• To fold in, pull the mirror housing back until it engages.
• To fold back, carefully fold the mirror housing back.
A WARNING
Injuries can be sustained if you do not take care when folding the exterior mirrors in and out.
• Only fold the exterior mirrors in or out when there is nobody in the path of the mir-ror.
• Always ensure that no fingers are caught between the exterior mirror and the foot of the mirror when the exterior mirror is moved.
A WARNING
If you estimate the distance from traffic be-hind you Incorrectly, you can cause acci-dents and serious injuries.
• Curved mirrors (convex or aspheric) en-large the field of vision and can make objects in the mirror seem smaller and further away than they actually are.
• Using curved mirrors to estimate the dis-tance from other vehicles behind you when changing lanes can provide inaccurate re-sults and can lead to accidents and severe in-juries.
• Whenever possible, use the interior mirror to check the exact distance between your ve-hicle and following traffic or other objects.
• Ensure that you have a good view to the rear of the vehicle. .,..
Lights and vision 123