radio VOLVO C30 2008 Owners Manual
[x] Cancel search | Manufacturer: VOLVO, Model Year: 2008, Model line: C30, Model: VOLVO C30 2008Pages: 234, PDF Size: 4.8 MB
Page 4 of 234
09 Maintenance and servicing
Volvo maintenance198
Maintaining your car199
Hood201
Engine compartment202
Engine oil203
Fluids205
Wiper blades207
Battery208
Bulbs210
Replacing bulbs211
Fuses219
10 Audio
Audio functions 228
Radio functions233
Sirius satellite radio(option)235
CD player/CD changer (option)239
Audio menu243
11 Specifications
Label information246
Dimensions and weights248
Fluid capacities250
Engine oil251
Engine specifications253
Electrical system255
Three-way catalytic converter257
Volvo programs258
5 -
cont. Contents
12 Index
Index 260
6 Introduction
General information
Shiftlock (automatic transmission)
When your vehicle is parked, the gear selector is locked in the ( P)ark position. To release the selector from this
position, turn the ignition key to position II (or start the engine), depress the brake pedal, press the button on the front
side of the gear selector and move the selector from ( P)ark.
Keylock (automatic transmission)
When the ignition is switched off, the gear selector must be in the ( P)ark position before the key can be removed from
the ignition switch.
Anti-lock Brake System (ABS)
The ABS system in your vehicle performs a self -diagnostic test when the vehicle first reaches the speed of
approximately 12 mph (20 km/h). The brake pedal will pulsate several times and a sound may be audible from the
ABS control module. This is normal.
Fuel filler door
Press the button on the light switch panel when the vehicle is at a standstill to open the fuel filler door.
Fuel filler cap
After refueling, close the fuel filler cap by turning it clockwise until it clicks into place. If this cap is not closed tightly
or if the engine is running when the vehicle is refueled, the Malfunction Indicator Lamp ("Check Engine" light) may
indicate a fault.
Points to keep in mind
Page 7 of 234
driving experience. Improperly used, any of these could cause a distraction.
For all of these systems, we want to provide the following warning that reflects the strong Volvo concern for your
safety:
Never use these devices or any feature of your vehicle in a way that distracts you from the task of driving safely.
Distraction can lead to a serious accident.In addition to this general warning, we offer the following guidance
regarding specific newer features that may be found in your vehicle:
Never use a hand -held cellular telephone while driving. Some jurisdictions prohibit cellular telephone use by a
driver while the vehicle is moving.
If your vehicle is equipped with a navigation system, set and make changes to your travel itinerary only with the
vehicle parked.
Never program your audio system while the vehicle is moving. Program radio presets with the vehicle parked, and
use your programmed presets to make radio use quicker and simpler.
Never use portable computers or personal digital assistants while the vehicle is moving.
A driver has a responsibility to do everything possible to ensure his or her own safety and the safety of passengers in
the vehicle and others sharing the roadway. Avoiding distractions is part of that responsibility.
Contents | Top of Page
Page 124 of 234
After refueling, close the fuel filler cap by turning it clockwise until it clicks into place.
Avoid overfilling the fuel tank. Do not press the handle on the filler nozzle more than one extra time. Too much
fuel in the tank in hot weather conditions can cause the fuel to overflow. Overfilling could also cause damage to the
emission control systems.
Avoid spilling gasoline during refueling. In addition to causing damage to the environment, gasolines containing
alcohol can cause damage to painted surfaces, which may not be covered under the New Vehicle Limited Warranty.
Do not use gasolines containing methanol (methyl alcohol, wood alcohol). This practice can result in vehicle
performance deterioration and can damage critical parts in the fuel system. Such damage may not be covered under
the New Vehicle Limited Warranty.
1If the fuel filler cap is not closed tightly or if the engine is running when the vehicle is refueled, the Check Engine Light (malfunction indicator
lamp) may indicate a fault. However, your vehicle's performance will not be affected. Use only Volvo original or approved fuel filler caps.
139 06 Starting and driving
Ignition switch/Steering wheel lock
Ignition switch and steering wheel lock
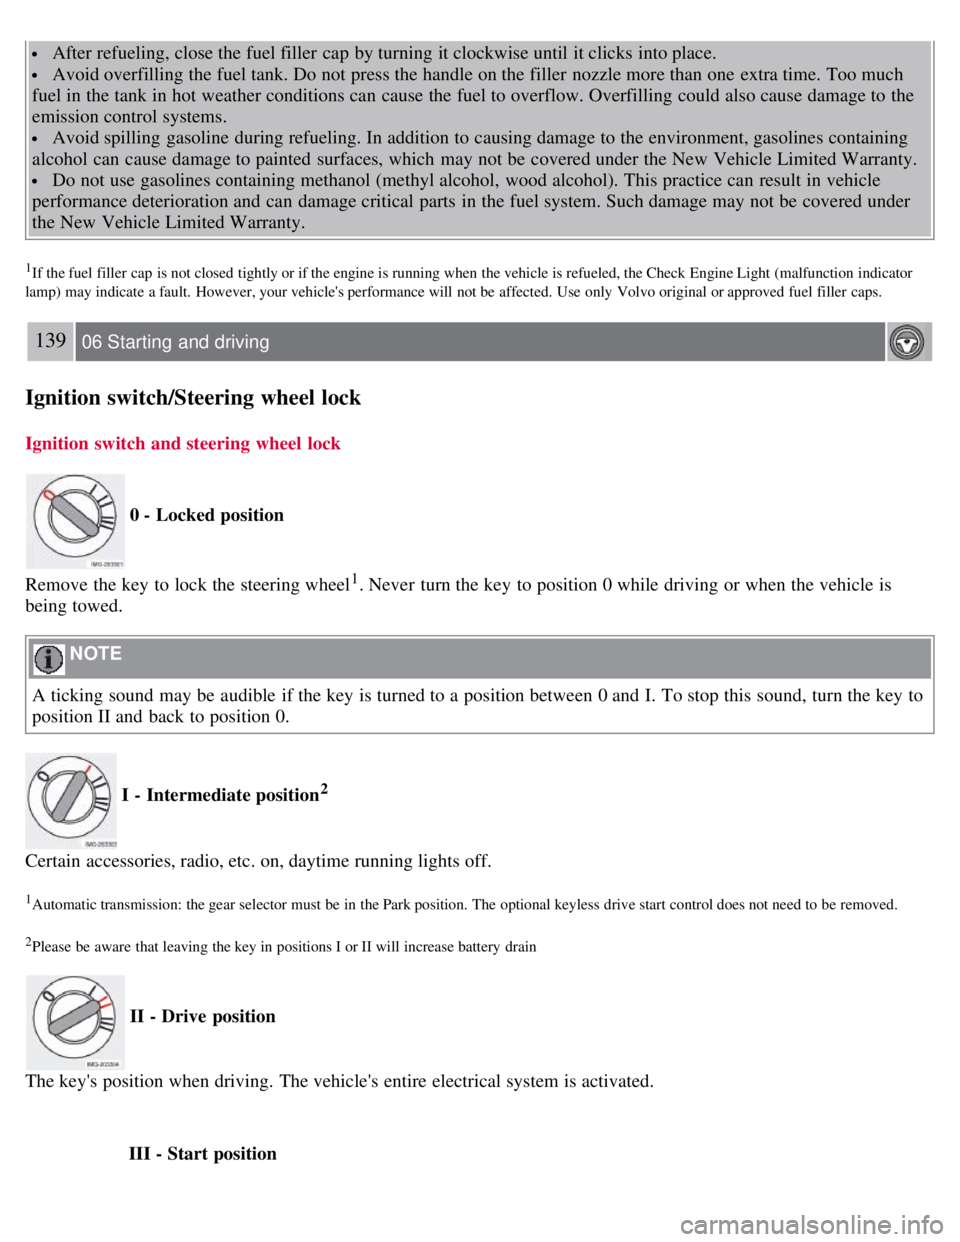
0 - Locked position
Remove the key to lock the steering wheel
1. Never turn the key to position 0 while driving or when the vehicle is
being towed.
NOTE
A ticking sound may be audible if the key is turned to a position between 0 and I. To stop this sound, turn the key to
position II and back to position 0.
I - Intermediate position2
Certain accessories, radio, etc. on, daytime running lights off.
1Automatic transmission: the gear selector must be in the Park position. The optional keyless drive start control does not need to be removed.
2Please be aware that leaving the key in positions I or II will increase battery drain
II - Drive position
The key's position when driving. The vehicle's entire electrical system is activated.
III - Start position
Page 200 of 234
2 0 0 8
VOLVO C30
226 10 Audio
Audio functions 228
Radio functions233
Sirius satellite radio(option)235
CD player/CD changer (option)239
Audio menu243
227 10 Audio
228 10 Audio
Audio functions
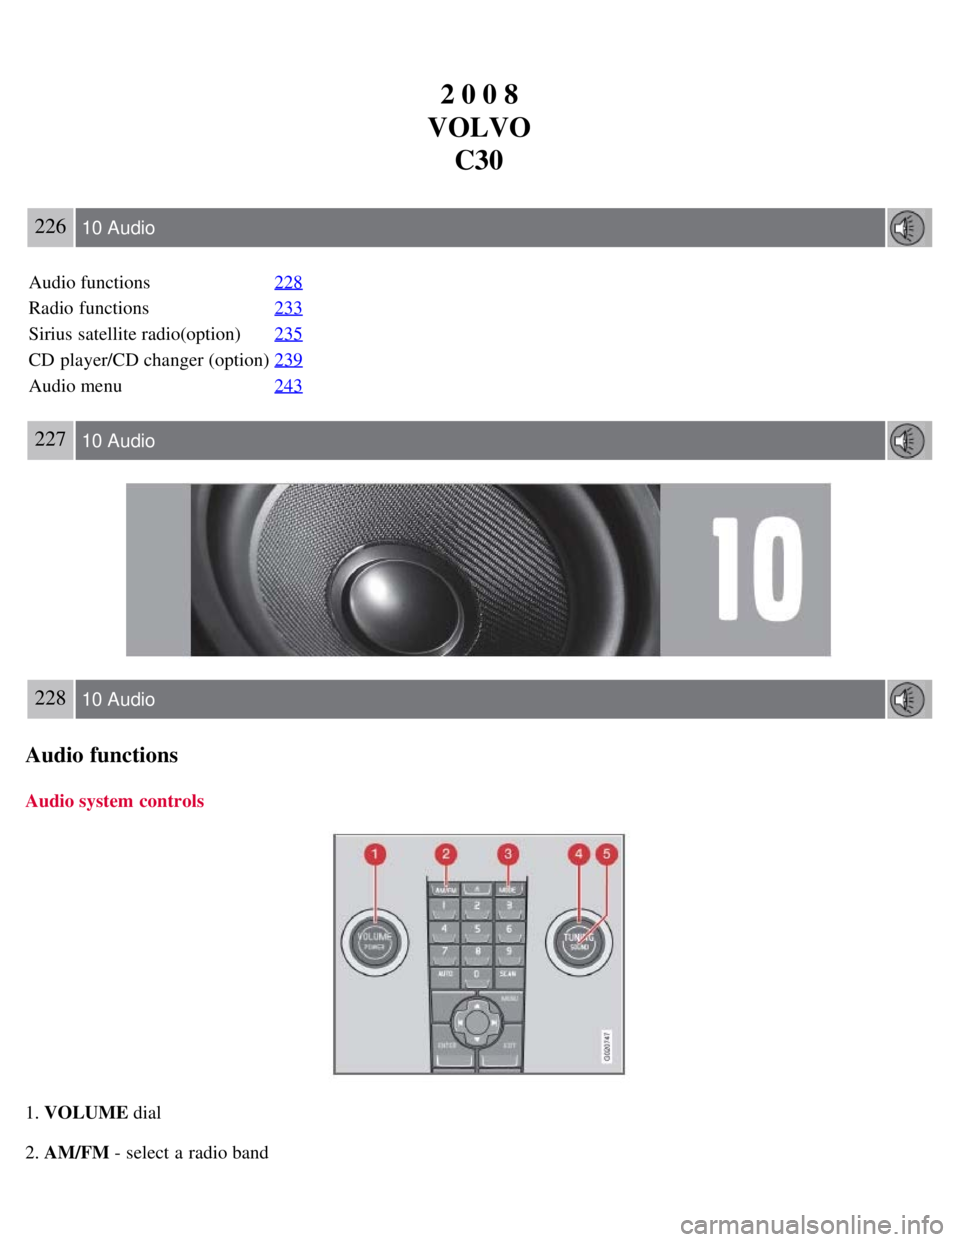
Audio system controls
1. VOLUME dial
2. AM/FM - select a radio band
Page 201 of 234
3. MODE - select a sound source
4. TUNING dial
5. SOUND button
Selecting a sound source
Press AM/FM (2) repeatedly to toggle between FM1, FM2, and AM.
Press MODE (3) repeatedly to toggle between the CD player and the optional external sound source AUX or the
optional Sirius satellite radio.
The currently selected sound source will be shown in the display.
AUX
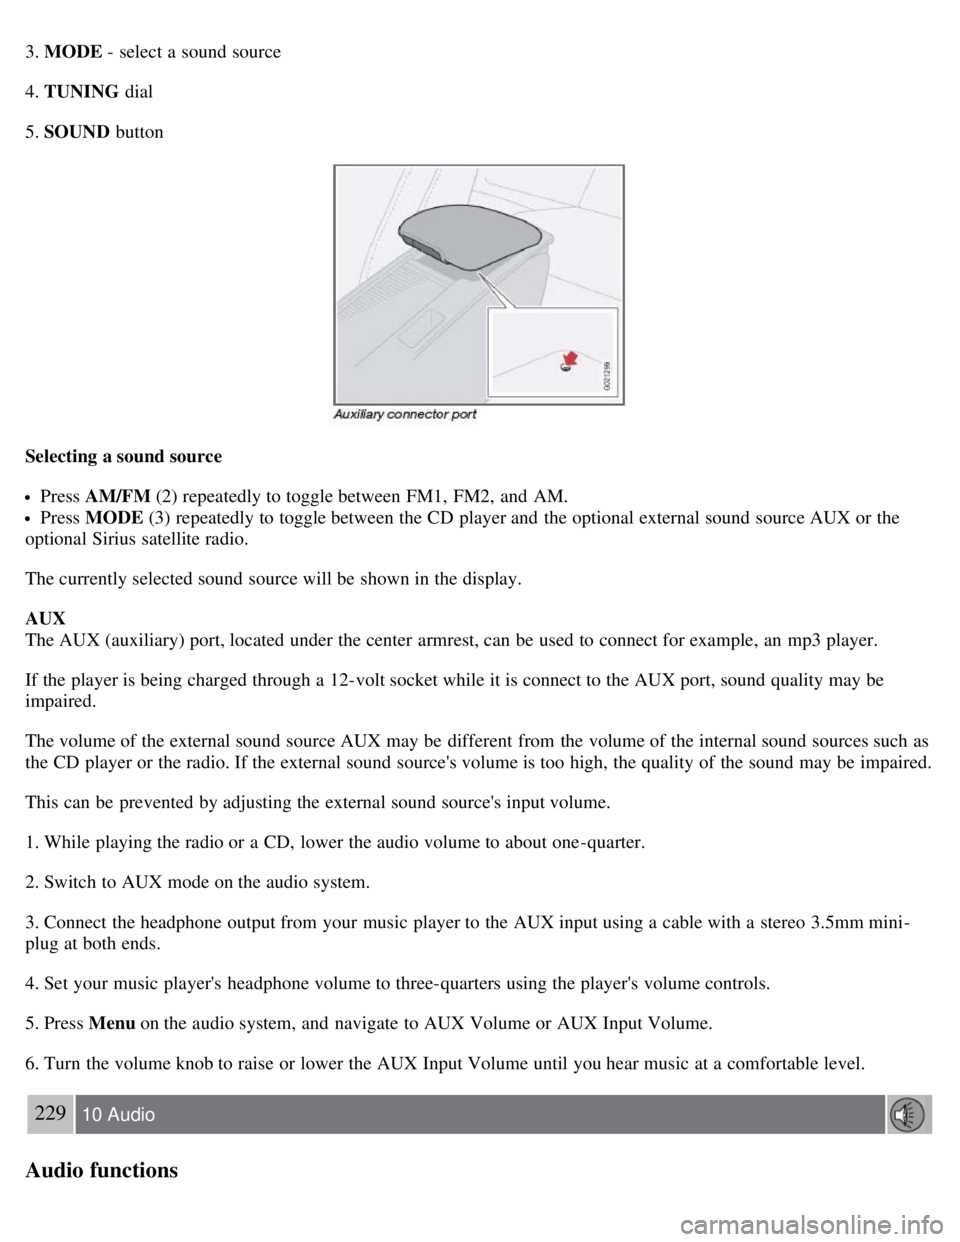
The AUX (auxiliary) port, located under the center armrest, can be used to connect for example, an mp3 player.
If the player is being charged through a 12-volt socket while it is connect to the AUX port, sound quality may be
impaired.
The volume of the external sound source AUX may be different from the volume of the internal sound sources such as
the CD player or the radio. If the external sound source's volume is too high, the quality of the sound may be impaired.
This can be prevented by adjusting the external sound source's input volume.
1. While playing the radio or a CD, lower the audio volume to about one -quarter.
2. Switch to AUX mode on the audio system.
3. Connect the headphone output from your music player to the AUX input using a cable with a stereo 3.5mm mini-
plug at both ends.
4. Set your music player's headphone volume to three-quarters using the player's volume controls.
5. Press Menu on the audio system, and navigate to AUX Volume or AUX Input Volume.
6. Turn the volume knob to raise or lower the AUX Input Volume until you hear music at a comfortable level.
229 10 Audio
Audio functions
Page 202 of 234
7. If there is distortion, lower your music player's headphone volume until the distortion goes away.
8. Finally, exit the menu and adjust the audio volume to a comfortable level.
Volume
Use the volume dial (1) or the buttons in the optional steering wheel keypad to adjust the volume level. The volume
level is also adjusted automatically according to the vehicleÕs speed, see page 232
for more information on this
function.
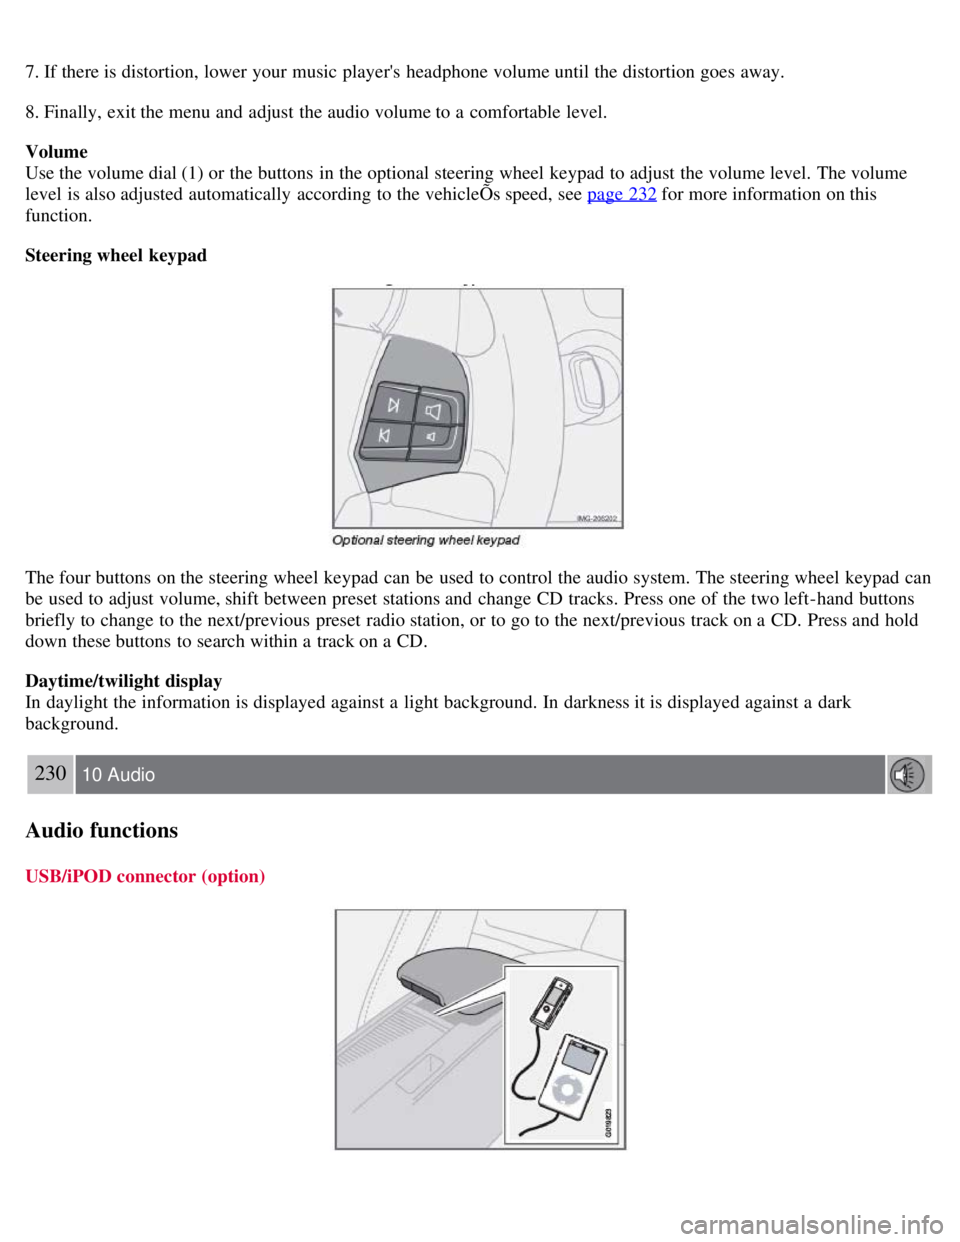
Steering wheel keypad
The four buttons on the steering wheel keypad can be used to control the audio system. The steering wheel keypad can
be used to adjust volume, shift between preset stations and change CD tracks. Press one of the two left-hand buttons
briefly to change to the next/previous preset radio station, or to go to the next/previous track on a CD. Press and hold
down these buttons to search within a track on a CD.
Daytime/twilight display
In daylight the information is displayed against a light background. In darkness it is displayed against a dark
background.
230 10 Audio
Audio functions
USB/iPOD connector (option)
Page 204 of 234
acoustics, the seating position of the listener, etc., for each combination of vehicle and audio system. There is also
dynamic calibration that takes into account the setting of the volume control, radio reception, and the vehicle's speed.
The sound settings described in this manual, such as BASS, TREBLE, and EQUALIZER are only intended to enable
the user to adapt sound reproduction to his/her personal preferences.
1. Press SOUND (5). Press this button repeatedly until you come to the setting that you wish to change.
2. Turn the TUNING dial (4) to make the desired setting.
The following settings can be made:
BASS -set the bass level
TREBLE -set the treble level
BALANCE -set the left/right sound balance
FADER -set the front/rear sound balance
CENTER
1-make settings for the center speaker
SURROUND
1-make settings for surround sound
1Dynaudio Sound System only
Surround sound
Surround sound settings are used to balance sound levels throughout the vehicle. Surround settings for the various
sound sources are made separately.
NOTE
Dolby Surround Pro Logic II is only available on the Dynaudio Sound system.
When listening to FM radio stations, Dolby Surround Pro Logic II functions best in areas with strong reception. If
reception is weak, selecting 2 or 3-channel stereo may provide better sound quality.
The Dolby symbol will be appear in the display when Dolby Pro Logic II is activated.
There are three alternative settings:
Pro Logic II
3-channel
Off (normal 2-channel stereo)
Activating/deactivating Surround sound
1. Press MENU followed by ENTER .
2. Select AUDIO SETTINGS in the menu and press ENTER .
3. Select Surround FM/AM/CD/AUX and press ENTER.
4. Select PRO LOGIC II , 3-channel stereo or OFF and press ENTER .
Equalizer Front/Rear
Page 205 of 234
This function is used to fine-tune the sound level for different frequencies separately.
NOTE
This function is only available on certain sound systems.
To adjust the equalizer settings:
1. Press MENU followed by ENTER .
2. Select AUDIO SETTINGS in the menu and press ENTER .
3. Select EQUALIZER FRONT/REAR and press ENTER.
The column in the display indicates the sound level for the current frequency.
Adjust the level with the TUNING dial (4), or use the Up/Down arrows. Additional frequencies can be selected
with the Right/Left arrows.
232 10 Audio
Audio functions
Save the settings by pressing ENTER or exit without saving by pressing EXIT .
Automatic sound control
The audio system's volume is adjusted automatically according to the speed of the vehicle. There are three settings
available, which determine the level of volume compensation:
LOW
MEDIUM*
HIGH
* Default setting.
To set the automatic sound level:
1. Press MENU followed by ENTER .
2. Select AUDIO SETTINGS in the menu and press ENTER .
3. Select AUTO. VOLUME CONTROL in the menu and press ENTER.
4. Select LOW , MEDIUM, or HIGH and press ENTER .
233 10 Audio
Radio functions
Radio function controls
Page 206 of 234
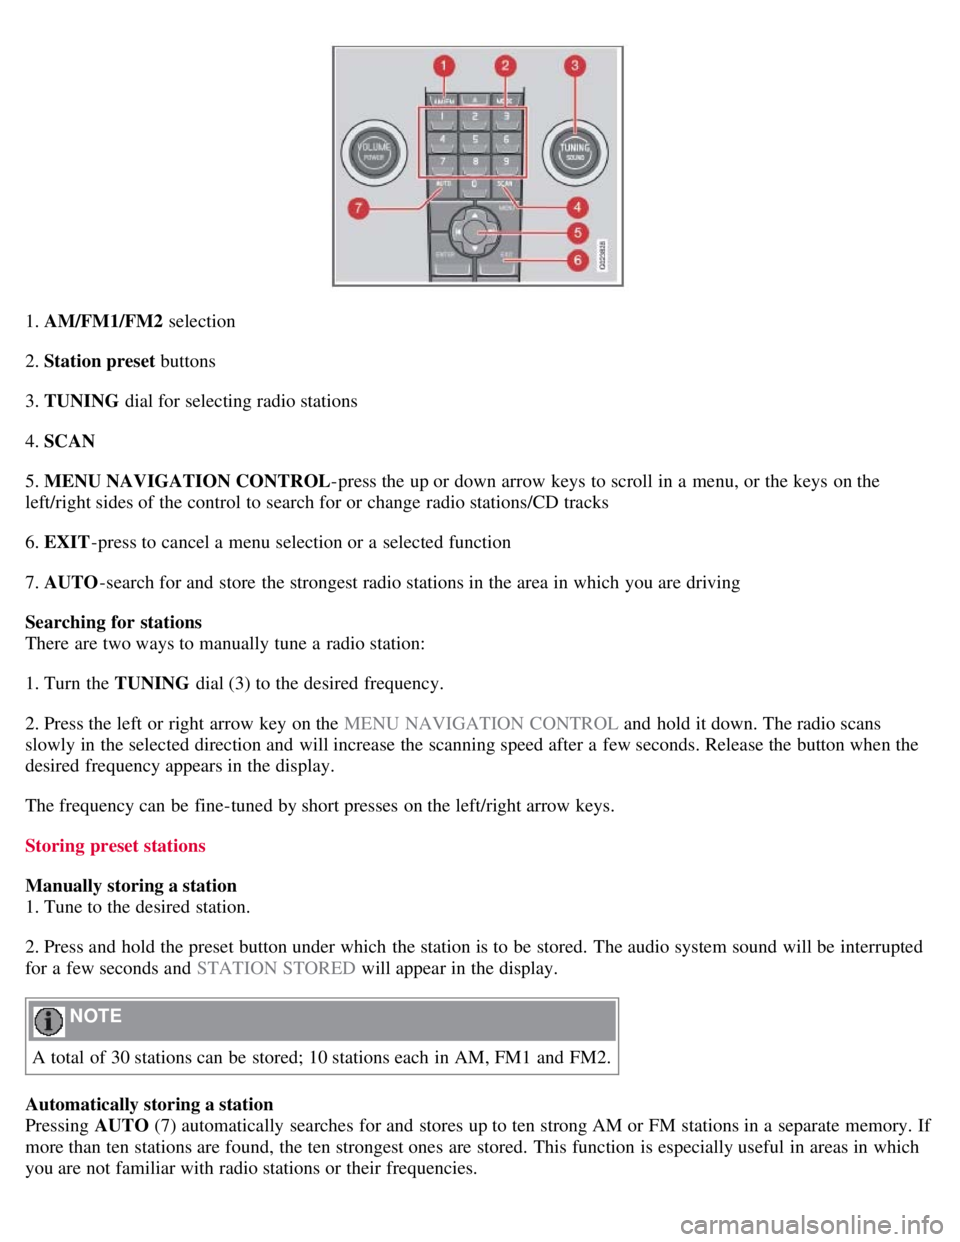
1. AM/FM1/FM2 selection
2. Station preset buttons
3. TUNING dial for selecting radio stations
4. SCAN
5. MENU NAVIGATION CONTROL -press the up or down arrow keys to scroll in a menu, or the keys on the
left/right sides of the control to search for or change radio stations/CD tracks
6. EXIT -press to cancel a menu selection or a selected function
7. AUTO -search for and store the strongest radio stations in the area in which you are driving
Searching for stations
There are two ways to manually tune a radio station:
1. Turn the TUNING dial (3) to the desired frequency.
2. Press the left or right arrow key on the MENU NAVIGATION CONTROL and hold it down. The radio scans
slowly in the selected direction and will increase the scanning speed after a few seconds. Release the button when the
desired frequency appears in the display.
The frequency can be fine-tuned by short presses on the left/right arrow keys.
Storing preset stations
Manually storing a station
1. Tune to the desired station.
2. Press and hold the preset button under which the station is to be stored. The audio system sound will be interrupted
for a few seconds and STATION STORED will appear in the display.
NOTE
A total of 30 stations can be stored; 10 stations each in AM, FM1 and FM2.
Automatically storing a station
Pressing AUTO (7) automatically searches for and stores up to ten strong AM or FM stations in a separate memory. If
more than ten stations are found, the ten strongest ones are stored. This function is especially useful in areas in which
you are not familiar with radio stations or their frequencies.
Page 207 of 234
To use the AUTO function:
1. Select a waveband using the AM/FM button (1).
2. Start the search by pressing AUTO until AUTO STORING appears in the display.
When the search is completed, AUTO STORING will no longer be displayed If there are no stations with sufficient
signal strength, NO AST FOUND is displayed.
The auto-stored stations can be selected using the preset buttons (2).
Press EXIT (6) to terminate the automatic storing function.
When the radio is in auto-store mode, AUTO is shown in the display. AUTO disappears when you return to normal
radio mode, which can be done by briefly pressing AM/FM (1), EXIT (6), or AUTO (7).
234 10 Audio
Radio functions
To return to the Auto-store mode, press the AUTO button briefly and select a stored station by pressing one of the
preset buttons (2).
Saving auto-stored stations in the preset memory
An auto-stored station can be saved in the memory for manually preset stations.
1. Press AUTO (7) briefly.
2. Auto is displayed.
3. Press one of the preset buttons (2) under which the station is to be stored. Hold down the button until STATION
STORED is displayed.
The radio will then exit auto-store mode and the stored station can be selected by pressing the preset button.
Scanning
SCAN (4) automatically searches through the selected waveband for strong AM or FM stations. When the radio finds a
station, that station will be played for approximately 8 seconds, after which scanning resumes.
Activating/deactivating SCAN
1. Select radio mode using the AM/FM button (2).
2. Press SCAN to activate the function. SCAN is shown in the display.
3. Press the SCAN or EXIT button to deactivate the scan function and listen to the selected station.
Storing a station found with SCAN
A station can be stored as a preset while the SCAN function is activated.
Press one of the preset buttons (2) under which the station is to be stored. Hold down the button until STATION
STORED is displayed.