steering wheel VOLVO C30 2009 Quick Guide
[x] Cancel search | Manufacturer: VOLVO, Model Year: 2009, Model line: C30, Model: VOLVO C30 2009Pages: 8, PDF Size: 2.27 MB
Page 2 of 8

AUTOSTART
Depress the clutch and/or brake pedal. Turn
the key/keyless drive start control to position III
and release it. The engine will start automati-
cally.
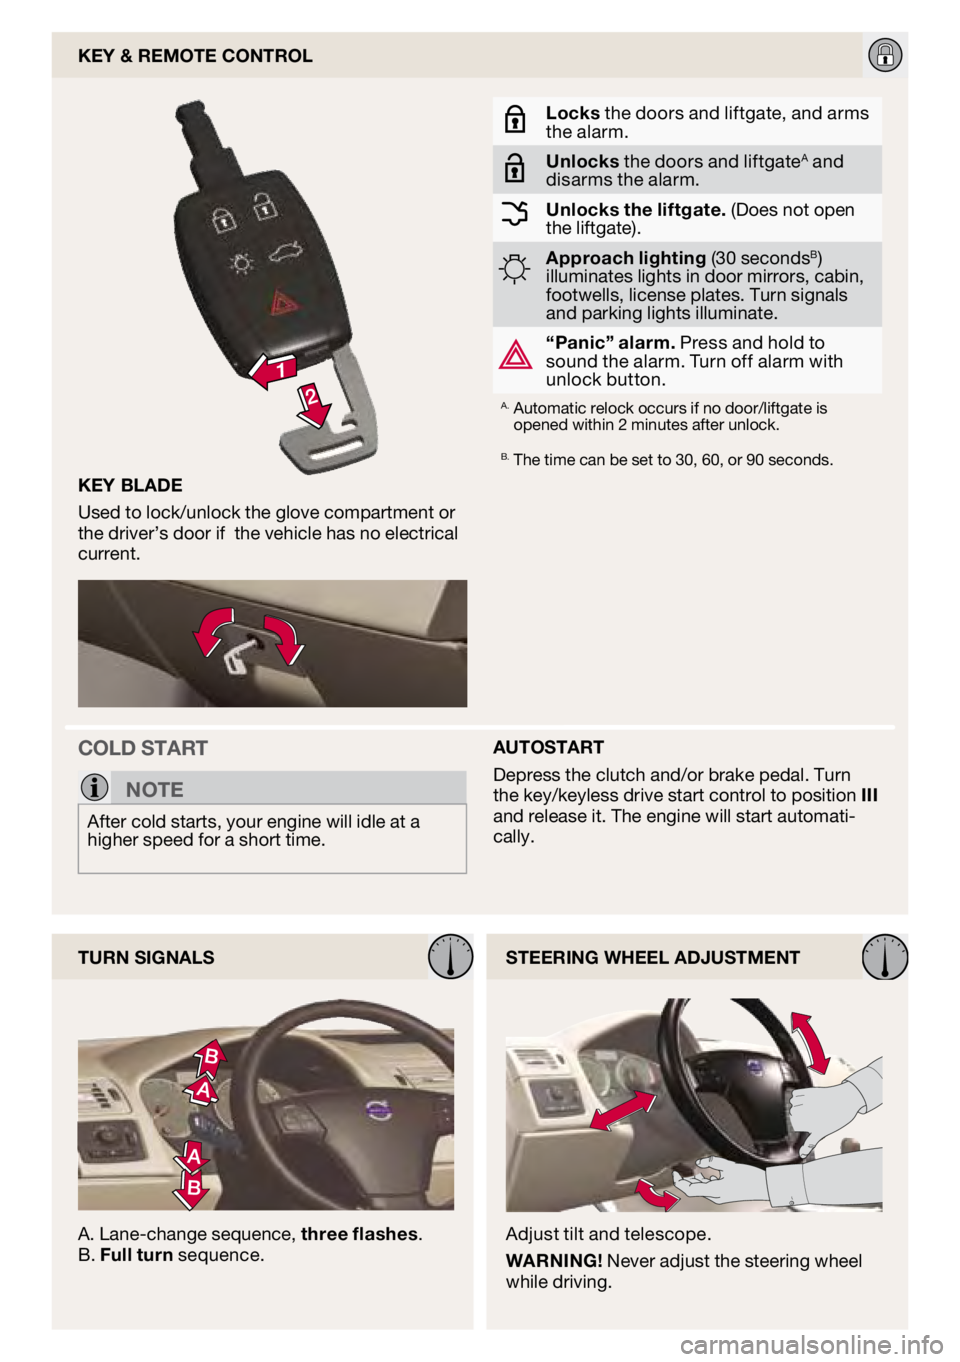
key
blAde
Used to lock/unlock the glove compartment or
the driver’s door if the vehicle has no electrical
current.
c O ld START
n
OT e
After cold starts, your engine will idle at a
higher speed for a short time.
key &
RemOTe cOnTROl
l
ocks the doors and liftgate, and arms
the alarm.
Unlocks the doors and liftgateA and
disarms the alarm.
Unlocks the liftgate. (Does not open
the liftgate).
Approach lighting (30 secondsB)
illuminates lights in door mirrors, cabin,
footwells, license plates. Turn signals
and parking lights illuminate.
“Panic” alarm. Press and hold to
sound the alarm. Turn off alarm with
unlock button.
A. Automatic relock occurs if no door/liftgate is opened within 2 minutes after unlock.
B. The time can be set to 30, 60, or 90 seconds.
TURn SIgnAlS
A. Lane-change sequence, three flashes.
B. Full turn sequence. Adjust tilt and telescope.
W
AR nIng ! Never adjust the steering wheel
while driving. S
TeeRIng Wheel AdjUSTmenT
Page 3 of 8

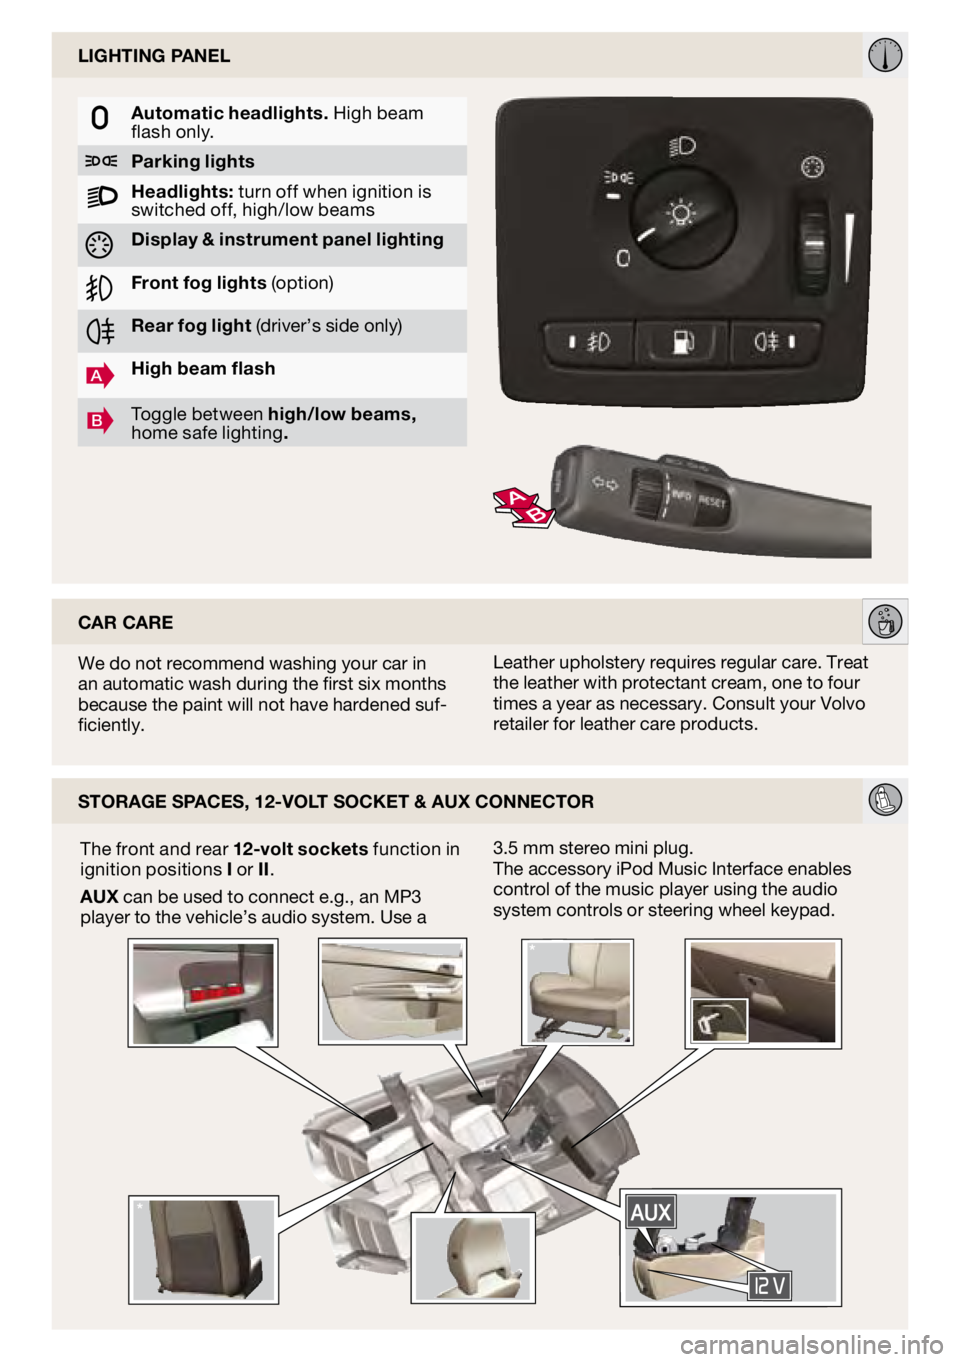
lIghTIng PAnel
Automatic headlights. High beam
flash only.
Parking lights
h eadlights: turn off when ignition is
switched off, high/low beams
display & instrument panel lighting
Front fog lights (option)
Rear fog light (driver’s side only)
Ahigh beam flash
BToggle between high/low beams,
home safe lighting .
S
TORAge SPAceS, 12-vOl T SOckeT & AUX cOnnecTOR
3.5 mm stereo mini plug.
The accessory iPod Music Interface enables
control of the music player using the audio
system controls or steering wheel keypad.
The front and rear
12-volt sockets function in
ignition positions I or II.
AUX can be used to connect e.g., an MP3
player to the vehicle’s audio system. Use a
We do not recommend washing your car in
an automatic wash during the first six months
because the paint will not have hardened suf-
ficiently.
cAR
cARe
Leather upholstery requires regular care. Treat
the leather with protectant cream, one to four
times a year as necessary. Consult your Volvo
retailer for leather care products.
Page 4 of 8

AUdIO SySTemTIRe PReSSURe mOnITORIng
S
ySTem (TPmS)
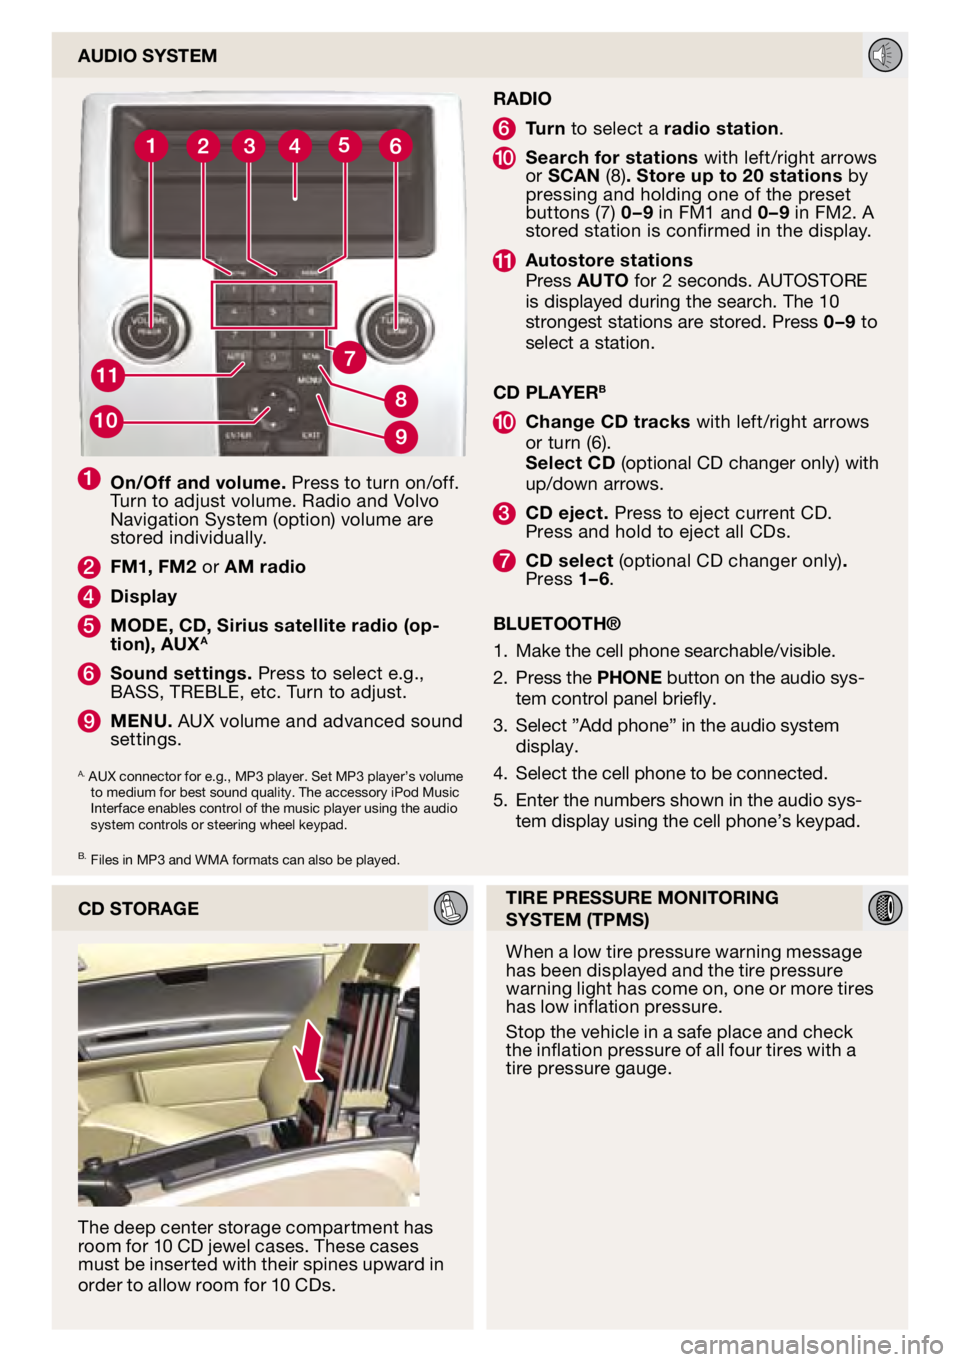
1 On/Off and volume. Press to turn on/off.
Turn to adjust volume. Radio and Volvo
Navigation System (option) volume are
stored individually.
2 F m 1, F m2 or A m radio
4 d isplay
5 m Ode , cd , Sirius satellite radio (op-
tion), AUXA
6 Sound settings. Press to select e.g.,
BASS, TREBLE, etc. Turn to adjust.
9 men U. AUX volume and advanced sound
settings.
A. AUX connector for e.g., MP3 player. Set MP3 player’s volume
to medium for best sound quality. The accessory iPod Music
Interface enables control of the music player using the audio
system controls or steering wheel keypad.
B. Files in MP3 and WMA formats can also be played.
RAdIO
6 Turn to select a radio station.
10 Search for stations with left/right arrows
or Sc An (8) . Store up to 20 stations by
pressing and holding one of the preset
buttons (7) 0 – 9 in FM1 and 0 – 9 in FM2. A
stored station is confirmed in the display.
Autostore stations
Press AUTO for 2 seconds. AUTOSTORE
is displayed during the search. The 10
strongest stations are stored. Press 0 – 9 to
select a station.
cd
PlAyeR
b
10 c hange cd tracks with left/right arrows
or turn (6).
S
elect cd (optional CD changer only) with
up/down arrows.
3 cd eject. Press to eject current CD.
Press and hold to eject all CDs.
7 cd select (optional CD changer only) .
Press 1– 6.
bl
UeTOOTh®
Make the cell phone searchable/visible.
Press the P
hOne button on the audio sys-
tem control panel briefly.
Select ”Add phone” in the audio system
display.
Select the cell phone to be connected.
Enter the numbers shown in the audio sys-
tem display using the cell phone’s keypad.
1.
2.
3.
4.
5.
cd
STORAge
The deep center storage compartment has
room for 10 CD jewel cases. These cases
must be inserted with their spines upward in
order to allow room for 10 CDs. When a low tire pressure warning message
has been displayed and the tire pressure
warning light has come on, one or more tires
has low inflation pressure.
Stop the vehicle in a safe place and check
the inflation pressure of all four tires with a
tire pressure gauge.