set clock VOLVO C70 2001 Owners Manual
[x] Cancel search | Manufacturer: VOLVO, Model Year: 2001, Model line: C70, Model: VOLVO C70 2001Pages: 88, PDF Size: 2.07 MB
Page 16 of 88

Some of the items above are available on certain models only.
pg. 16 Instruments
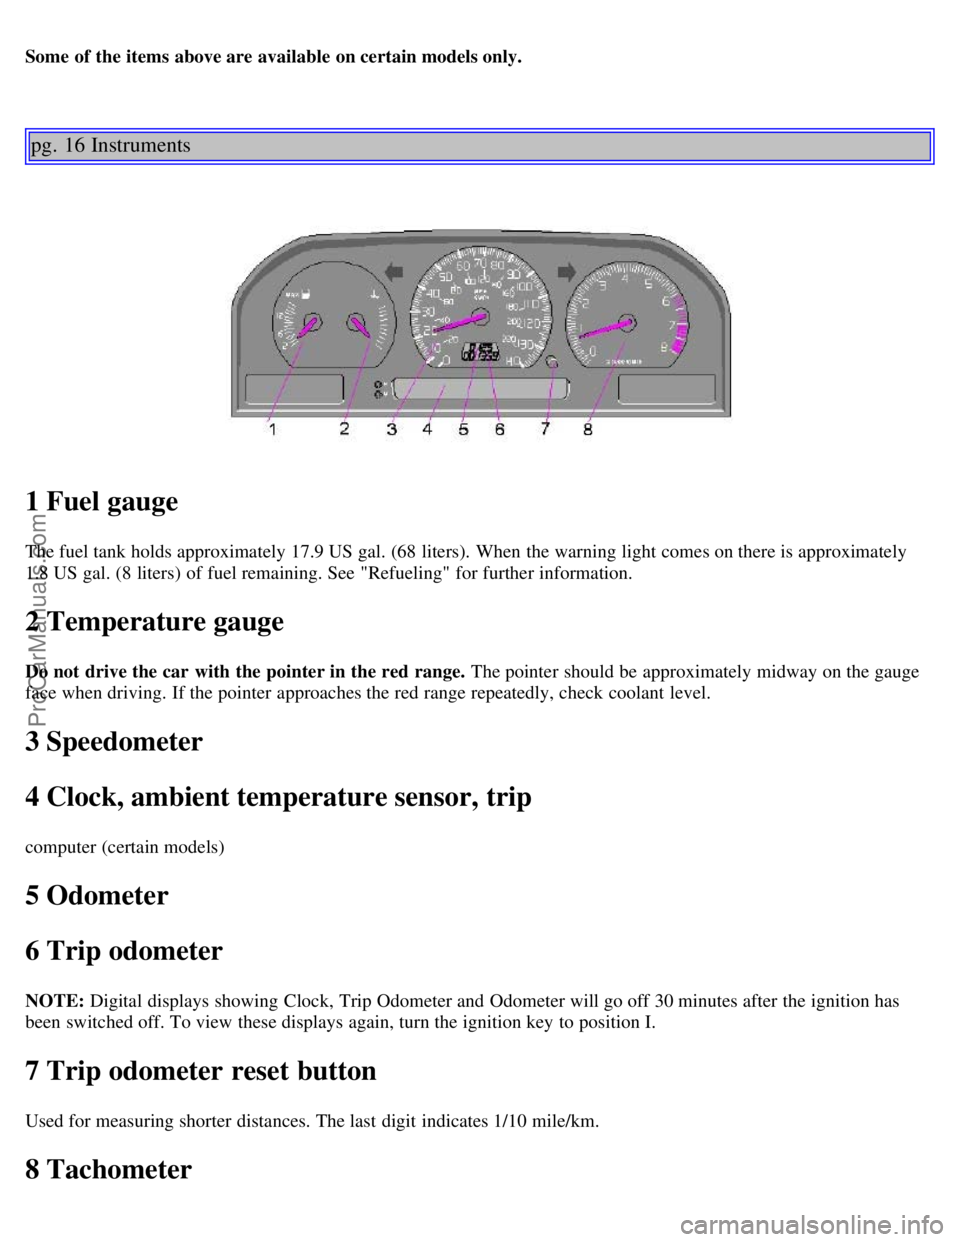
1 Fuel gauge
The fuel tank holds approximately 17.9 US gal. (68 liters). When the warning light comes on there is approximately
1.8 US gal. (8 liters) of fuel remaining. See "Refueling" for further information.
2 Temperature gauge
Do not drive the car with the pointer in the red range. The pointer should be approximately midway on the gauge
face when driving. If the pointer approaches the red range repeatedly, check coolant level.
3 Speedometer
4 Clock, ambient temperature sensor, trip
computer (certain models)
5 Odometer
6 Trip odometer
NOTE: Digital displays showing Clock, Trip Odometer and Odometer will go off 30 minutes after the ignition has
been switched off. To view these displays again, turn the ignition key to position I.
7 Trip odometer reset button
Used for measuring shorter distances. The last digit indicates 1/10 mile/km.
8 Tachometer
ProCarManuals.com
Page 44 of 88

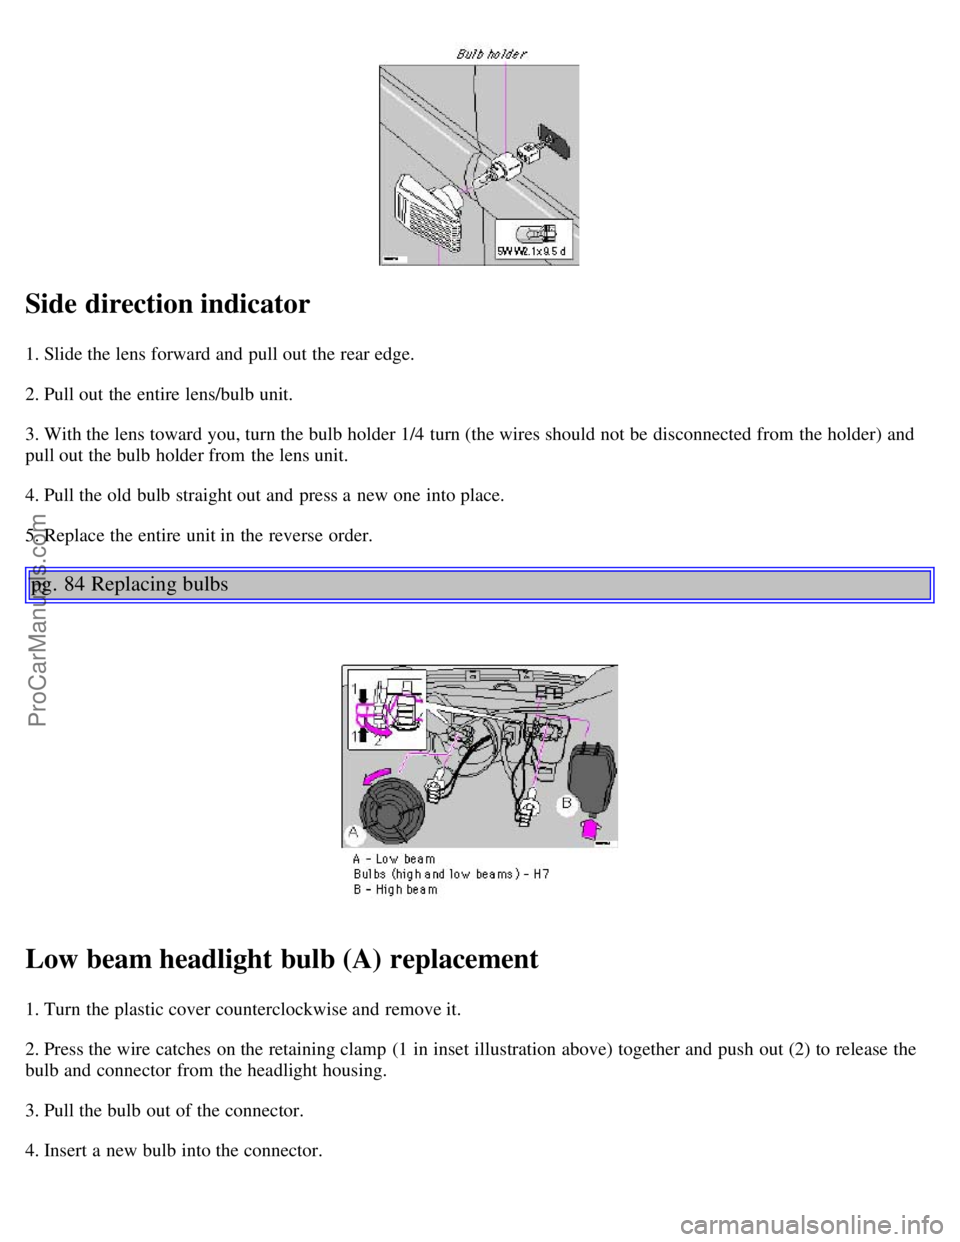
Side direction indicator
1. Slide the lens forward and pull out the rear edge.
2. Pull out the entire lens/bulb unit.
3. With the lens toward you, turn the bulb holder 1/4 turn (the wires should not be disconnected from the holder) and
pull out the bulb holder from the lens unit.
4. Pull the old bulb straight out and press a new one into place.
5. Replace the entire unit in the reverse order.
pg. 84 Replacing bulbs
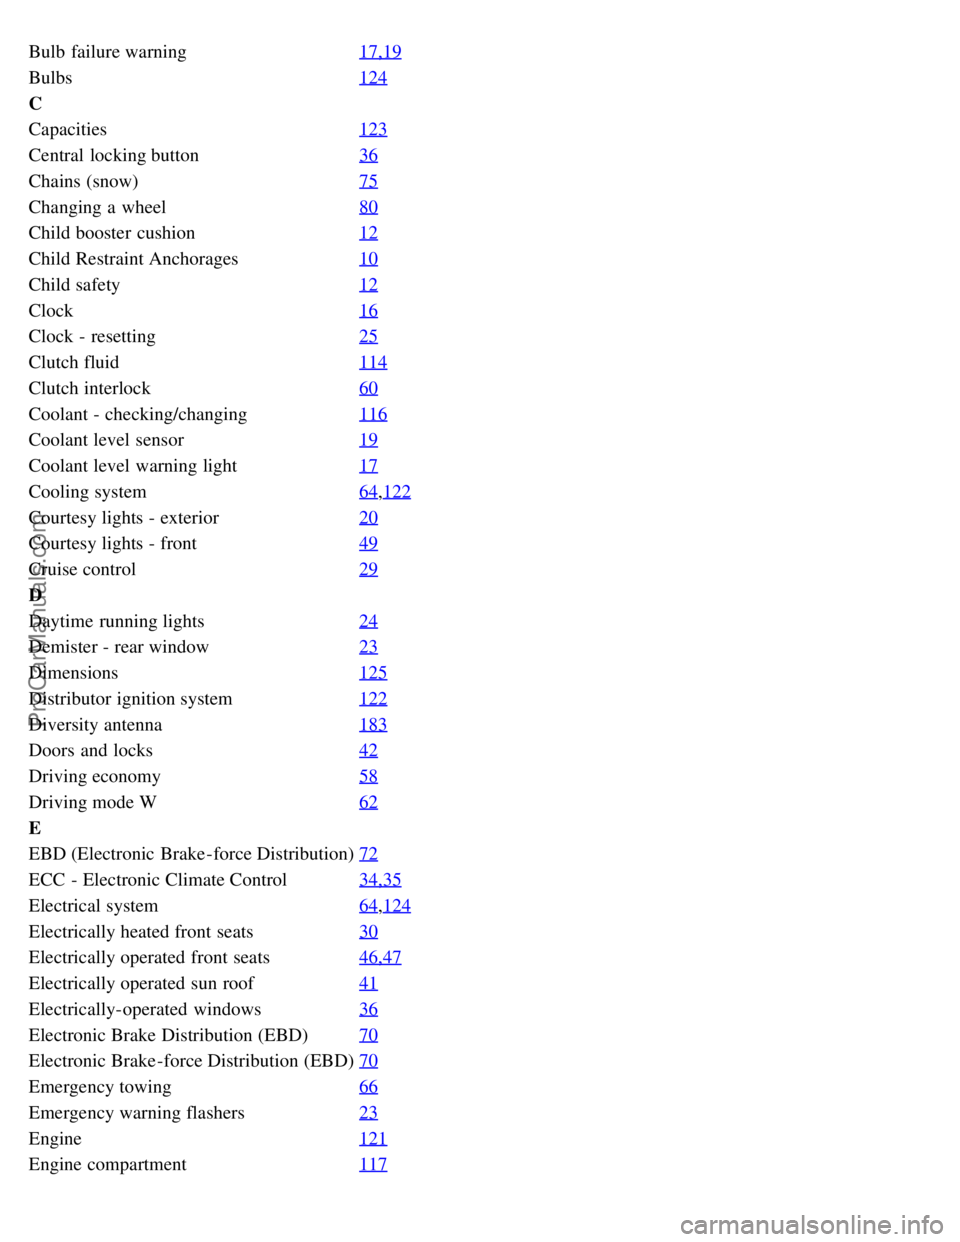
Low beam headlight bulb (A) replacement
1. Turn the plastic cover counterclockwise and remove it.
2. Press the wire catches on the retaining clamp (1 in inset illustration above) together and push out (2) to release the
bulb and connector from the headlight housing.
3. Pull the bulb out of the connector.
4. Insert a new bulb into the connector.
ProCarManuals.com
Page 71 of 88

Incorrect code
If an incorrect code has been entered "rPt" is displayed. Enter the correct code.
After three unsuccessful coding attempts the set will lock and remain locked for two hours. "OFF" is displayed.
During this waiting period:
· the battery must be connected
· the ignition key must be turned to position I
· the unit must be turned on
Make sure the headlights are turned off to help prevent battery drain (please refer to page 24 for information on turning
the headlights off).
Enter the code again once this time has elapsed.
pg. 130 Radio SC -813
A - On/off switch
Push the button to switch on the radio. Press the button slightly longer to turn the radio off.
B - Volume control
Turn the button clockwise to increase the volume. The volume control is electronic and has no end stop.
C - Waveband selector
The desired waveband is set by pressing one of the waveband selector buttons. The frequency and waveband is shown
on the display.
NOTE: There are two FM wavebands and one AM waveband. This makes it possible to store 2 x 6 FM stations and 6
AM stations in memory.
ProCarManuals.com
Page 80 of 88

Bulb failure warning17,19
Bulbs124
C
Capacities123
Central locking button36
Chains (snow)75
Changing a wheel80
Child booster cushion12
Child Restraint Anchorages10
Child safety12
Clock16
Clock - resetting25
Clutch fluid114
Clutch interlock60
Coolant - checking/changing116
Coolant level sensor19
Coolant level warning light17
Cooling system64,122
Courtesy lights - exterior20
Courtesy lights - front49
Cruise control29
D
Daytime running lights24
Demister - rear window23
Dimensions125
Distributor ignition system122
Diversity antenna183
Doors and locks42
Driving economy58
Driving mode W62
E
EBD (Electronic Brake-force Distribution)72
ECC - Electronic Climate Control34,35
Electrical system64,124
Electrically heated front seats30
Electrically operated front seats46,47
Electrically operated sun roof41
Electrically-operated windows36
Electronic Brake Distribution (EBD)70
Electronic Brake-force Distribution (EBD)70
Emergency towing66
Emergency warning flashers23
Engine121
Engine compartment117
ProCarManuals.com