bulb VOLVO C70 2002 Owners Manual
[x] Cancel search | Manufacturer: VOLVO, Model Year: 2002, Model line: C70, Model: VOLVO C70 2002Pages: 99, PDF Size: 2.56 MB
Page 16 of 99
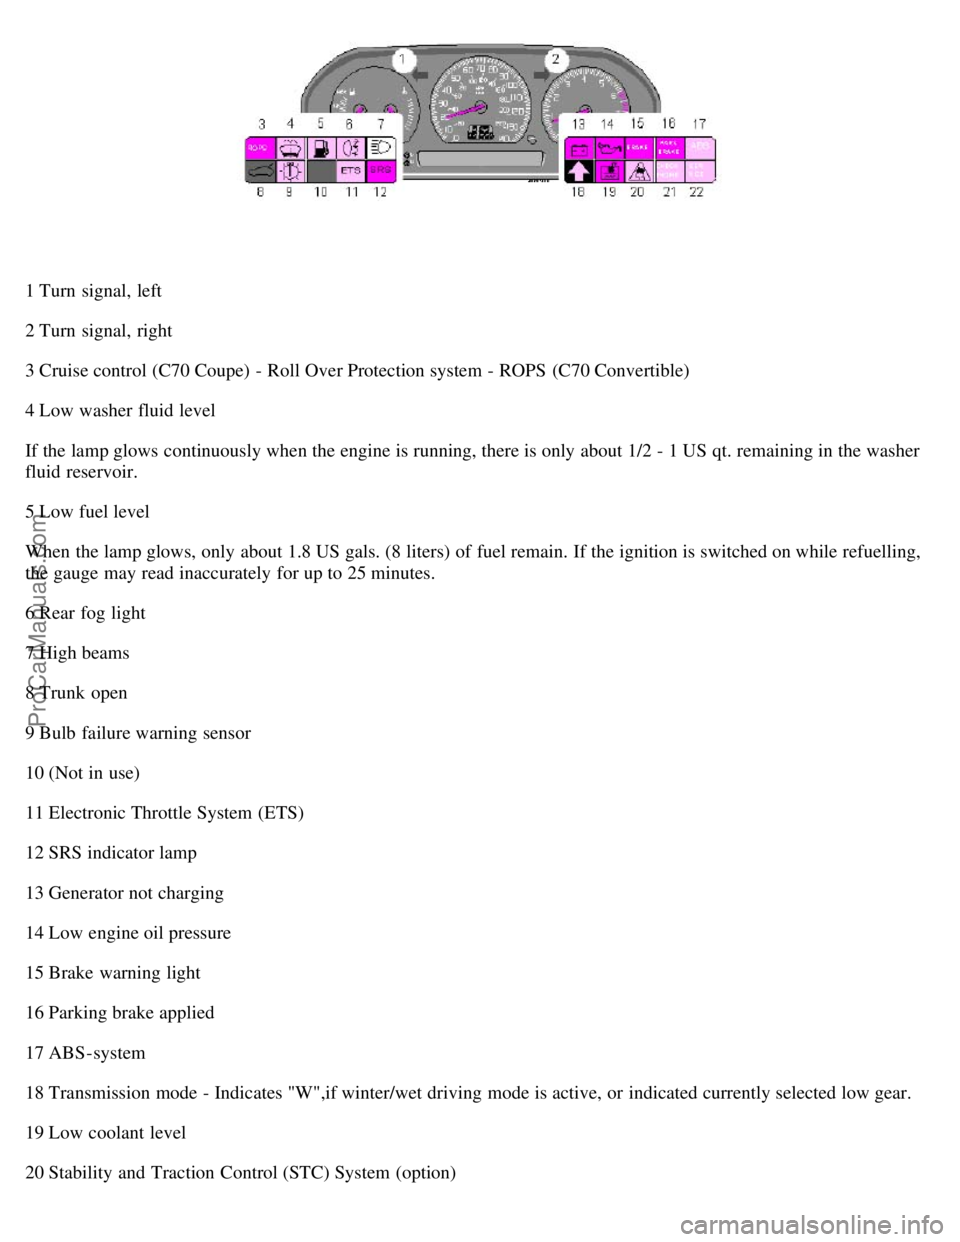
1 Turn signal, left
2 Turn signal, right
3 Cruise control (C70 Coupe) - Roll Over Protection system - ROPS (C70 Convertible)
4 Low washer fluid level
If the lamp glows continuously when the engine is running, there is only about 1/2 - 1 US qt. remaining in the washer
fluid reservoir.
5 Low fuel level
When the lamp glows, only about 1.8 US gals. (8 liters) of fuel remain. If the ignition is switched on while refuelling,
the gauge may read inaccurately for up to 25 minutes.
6 Rear fog light
7 High beams
8 Trunk open
9 Bulb failure warning sensor
10 (Not in use)
11 Electronic Throttle System (ETS)
12 SRS indicator lamp
13 Generator not charging
14 Low engine oil pressure
15 Brake warning light
16 Parking brake applied
17 ABS -system
18 Transmission mode - Indicates "W",if winter/wet driving mode is active, or indicated currently selected low gear.
19 Low coolant level
20 Stability and Traction Control (STC) System (option)
ProCarManuals.com
Page 17 of 99
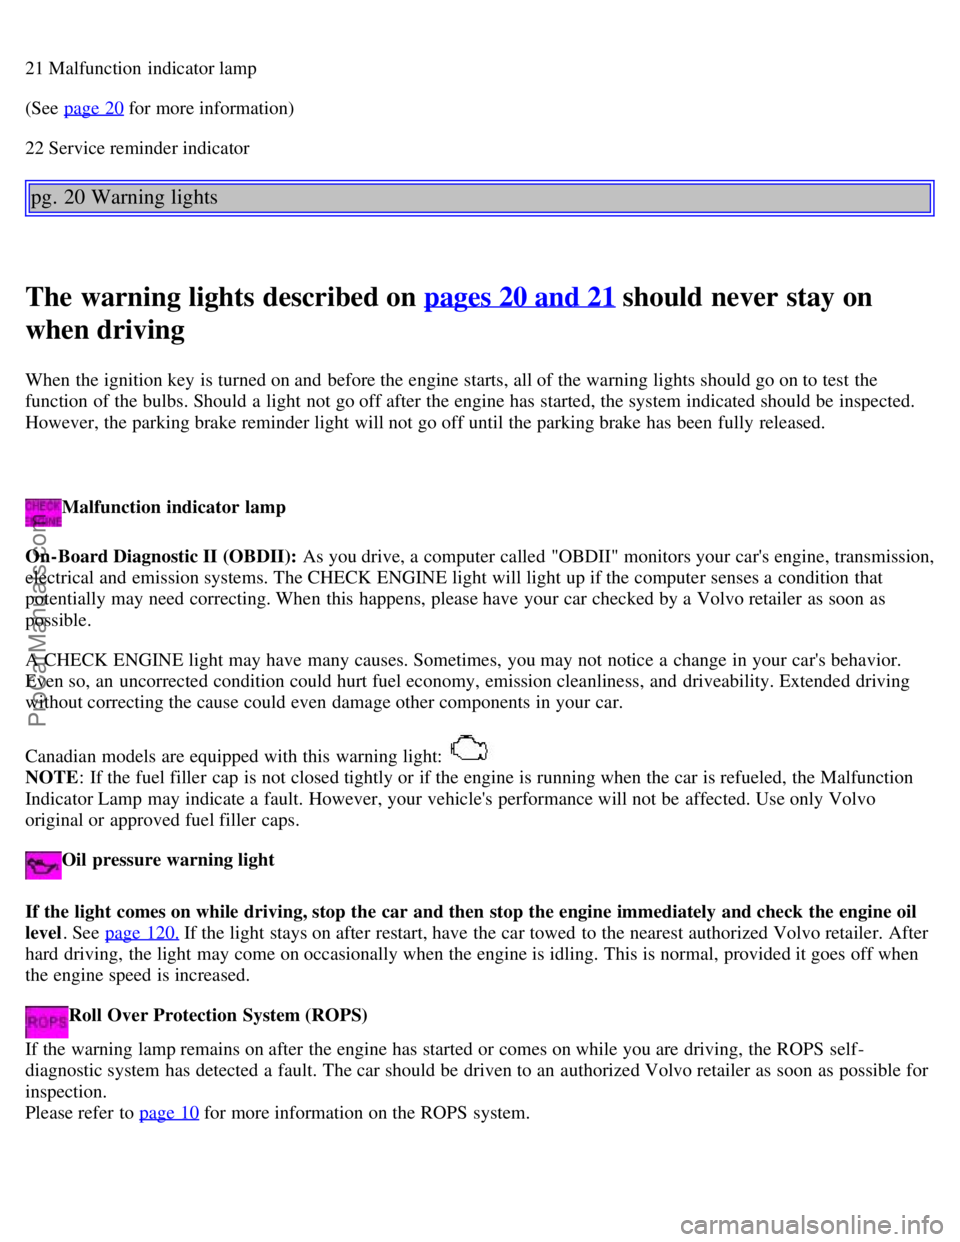
21 Malfunction indicator lamp
(See page 20
for more information)
22 Service reminder indicator
pg. 20 Warning lights
The warning lights described on pages 20 and 21 should never stay on
when driving
When the ignition key is turned on and before the engine starts, all of the warning lights should go on to test the
function of the bulbs. Should a light not go off after the engine has started, the system indicated should be inspected.
However, the parking brake reminder light will not go off until the parking brake has been fully released.
Malfunction indicator lamp
On-Board Diagnostic II (OBDII): As you drive, a computer called "OBDII" monitors your car's engine, transmission,
electrical and emission systems. The CHECK ENGINE light will light up if the computer senses a condition that
potentially may need correcting. When this happens, please have your car checked by a Volvo retailer as soon as
possible.
A CHECK ENGINE light may have many causes. Sometimes, you may not notice a change in your car's behavior.
Even so, an uncorrected condition could hurt fuel economy, emission cleanliness, and driveability. Extended driving
without correcting the cause could even damage other components in your car.
Canadian models are equipped with this warning light:
NOTE : If the fuel filler cap is not closed tightly or if the engine is running when the car is refueled, the Malfunction
Indicator Lamp may indicate a fault. However, your vehicle's performance will not be affected. Use only Volvo
original or approved fuel filler caps.
Oil pressure warning light
If the light comes on while driving, stop the car and then stop the engine immediately and check the engine oil
level . See page 120.
If the light stays on after restart, have the car towed to the nearest authorized Volvo retailer. After
hard driving, the light may come on occasionally when the engine is idling. This is normal, provided it goes off when
the engine speed is increased.
Roll Over Protection System (ROPS)
If the warning lamp remains on after the engine has started or comes on while you are driving, the ROPS self -
diagnostic system has detected a fault. The car should be driven to an authorized Volvo retailer as soon as possible for
inspection.
Please refer to page 10
for more information on the ROPS system.
ProCarManuals.com
Page 19 of 99
Supplemental Restraint System (SRS)
If the light comes on (or stays on after the vehicle has started), the SRS diagnostic system has detected a fault. Drive to
an authorized Volvo retailer for an inspection of the system. See the SRS section for more information.
Generator warning light
If the light comes on while the engine is running, have the charging system checked.
Service reminder indicator
This light will come on at 7,500 mile (12,000 km) intervals, after 750 hours of driving or after 12 months, whichever
occurs first. It is a reminder to the driver that the service interval has been exceeded. The light will stay on for 2
minutes after start until reset by the servicing retailer.
Bulb failure warning light
The light will come on if any of the following bulbs are defective:
one of the low beam headlights
one of the tail lights
one of the brake lights when the brake pedal is depressed.
Check the fuse and bulb. See sections "Replacing bulbs" and "fuses.
Should the warning light come on after a defective outside bulb has been replaced, the corresponding bulb on the other
side of the car should also be replaced.
Fault in ETC (Electronic Throttle Control system)
If this lamp comes on, there is a fault in the engine control system and driveability will be affected. Switch the ignition
off and then on again. If the light remains on, the system should be inspected by an authorized Volvo retailer.
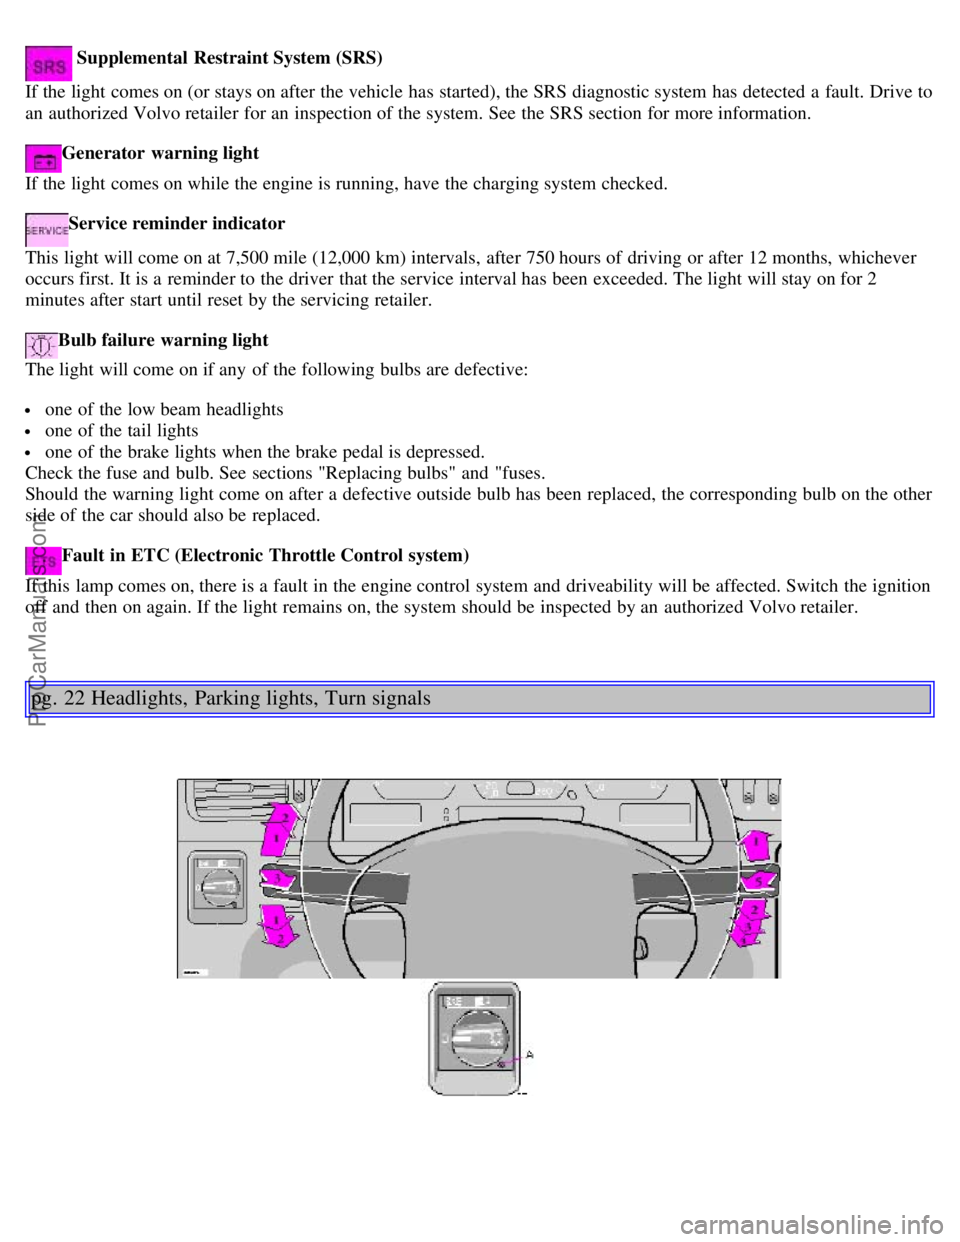
pg. 22 Headlights, Parking lights, Turn signals
ProCarManuals.com
Page 20 of 99

Headlights and parking lights
All lights off *
Parking lights on *
Headlights and parking lights are on if starting (ignition ) switch is in positions I or II.
If the headlight switch is in the position
all lights will go out when the starting switch is switched off.
With the headlight switch in position
the parking lights will stay on (headlights off) with the daytime running light
screw (A) in position
.
The high beams can only be switched on if the headlight switch is in position
.
Switch from high to low beams and vice versa by moving the turn signal switch lever on the left side of steering
column towards the steering wheel.
* See page 26
for information on Daytime running lights.
Exterior courtesy lights
When you leave your car at night, you can make use of the exterior courtesy lighting function:
· Remove the key from the ignition switch.
· Pull the direction indicator lever towards the steering wheel (as when using the headlight flasher function).
The low beam headlights will now remain on for 30 seconds to light your way.
Turn signals
1 Lane change position. In maneuvers such as lane changing, the driver can flash the turn signals by moving the turn
signal lever to the first stop and holding it there. The lever will return to the neutral position when released.
2 Signal lever engaged for normal turns.
3 High beam/low beam switch (headlights on).
Move the lever towards the steering wheel and release it.
Headlight flasher (headlights off).
Move the lever towards the steering wheel. The headlight high beam will be on until the lever is released.
NOTE: A defective turn signal bulb will cause the turn signal indicator and remaining signal lights to flash more
rapidly than normal.
pg. 23 Windshield wipers/washers, Ignition switch
ProCarManuals.com
Page 50 of 99

2 0 0 2
VOLVO
C70 Coupe & Convertible
Chapter 6 - In case of an emergency
pg. 89 In case of an emergency
Page
Wheel changing 90
Spare tire92
Replacing bulbs93
Replacing fuses99
Installation of accessories102
Replacing wiper blades103
In case of emergency105
pg. 90 Wheel changing
Loosen wheel bolts
Changing a wheel
The spare wheel is located under the carpet on the trunk floor. The jack and crank are secured in the wheel recess.
Engage the parking brake.
Put the gear selector in (P)ark (automatic) or in Reverse (manual).
With the car still on the ground, use the lug wrench to loosen the wheel bolts 1/2 1 turn. Turn the bolts
counterclockwise to loosen.
Fold out the crank handle on the jack by pressing the knob on the handle downward. To attach the jack, refer to the
ProCarManuals.com
Page 52 of 99
CAUTION: Correct tightening torque on wheel bolts must be observed. The wheel bolts should never be greased or
lubricated. The extended, chromed wheel bolts must not be used with steel rims, as they make it impossible to fit the
hub caps.
Correct tightening order for wheel bolts
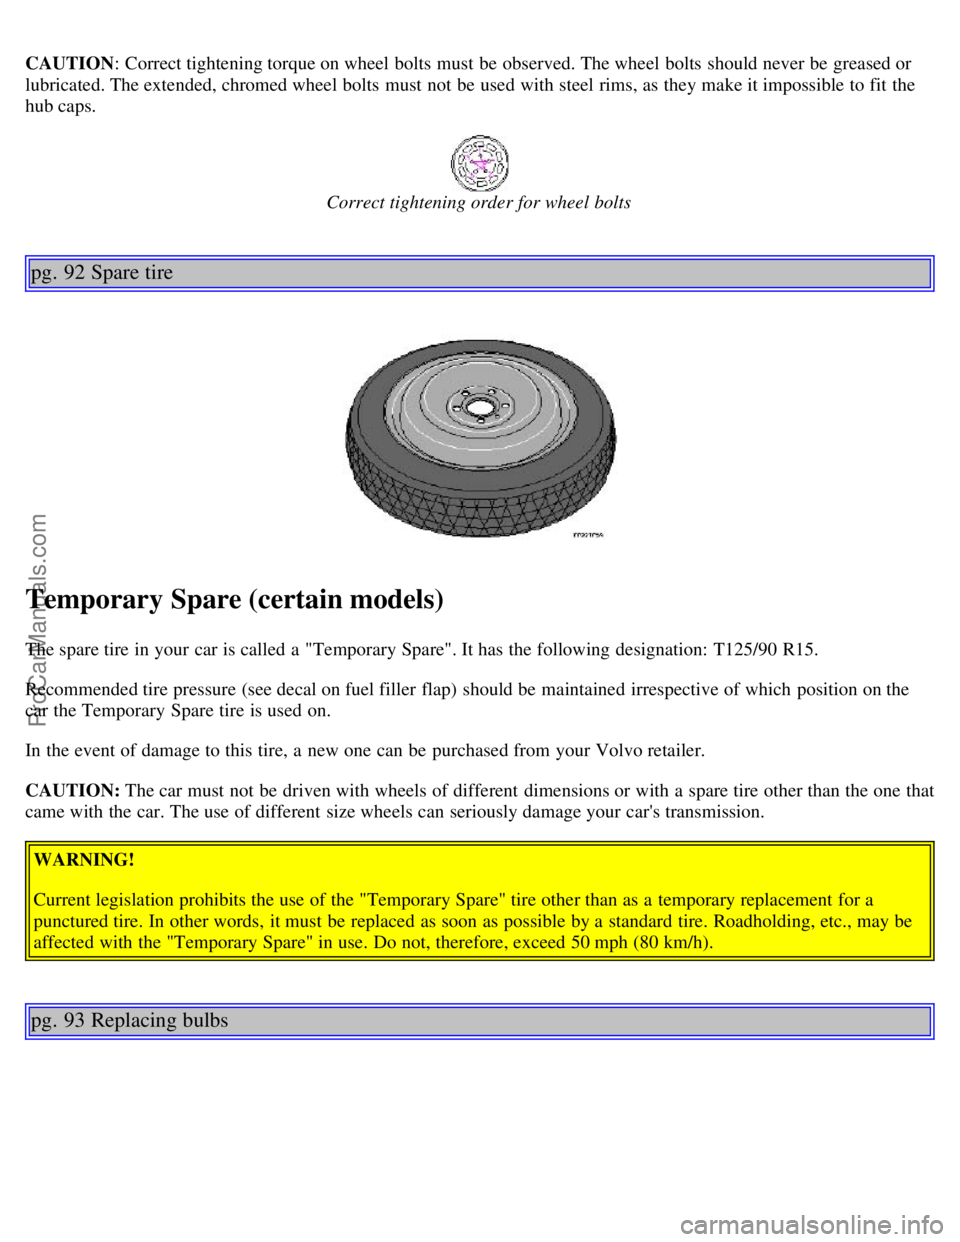
pg. 92 Spare tire
Temporary Spare (certain models)
The spare tire in your car is called a "Temporary Spare". It has the following designation: T125/90 R15.
Recommended tire pressure (see decal on fuel filler flap) should be maintained irrespective of which position on the
car the Temporary Spare tire is used on.
In the event of damage to this tire, a new one can be purchased from your Volvo retailer.
CAUTION: The car must not be driven with wheels of different dimensions or with a spare tire other than the one that
came with the car. The use of different size wheels can seriously damage your car's transmission.
WARNING!
Current legislation prohibits the use of the "Temporary Spare" tire other than as a temporary replacement for a
punctured tire. In other words, it must be replaced as soon as possible by a standard tire. Roadholding, etc., may be
affected with the "Temporary Spare" in use. Do not, therefore, exceed 50 mph (80 km/h).
pg. 93 Replacing bulbs
ProCarManuals.com
Page 53 of 99

Parking light/direction indicator
1. From the front of the car, use a screwdriver to press down on the silver catch (located in the space between the
inside of the fender and the headlight unit) to release the lamp housing from the front fender.
2. Turn the bulb holder 1/4 turn clockwise (viewed from the front) and withdraw it from the from the lamp housing.
Leave the connector with its wires in the bulb holder.
4. Remove the bulb from the holder by pulling it straight out.
5. Press a new bulb into the holder and reinstall the unit in the reverse order.
Side direction indicator
1. Slide the lens forward and pull out the rear edge.
2. Pull out the entire lens/bulb unit.
3. With the lens toward you, turn the bulb holder 1/4 turn (the wires should not be disconnected from the holder) and
pull out the bulb holder from the lens unit.
4. Pull the old bulb straight out and press a new one into place.
5. Replace the entire unit in the reverse order.
pg. 94 Replacing bulbs
ProCarManuals.com
Page 54 of 99

A - Low beam Bulbs (high and low beams) - H7 B - High beam
Low beam headlight bulb (A) replacement
1. Turn the plastic cover counterclockwise and remove it.
2. Press the wire catches on the retaining clamp (1 in inset illustration above) together and push out (2) to release the
bulb and connector from the headlight housing.
3. Pull the bulb out of the connector.
4. Insert a new bulb into the connector.
5. Reinsert the bulb and connector into the headlight housing. The guide lug must be up to ensure proper positioning.
6. Press the retaining clamp back into position.
7. Reinstall the plastic cover. The marking "Top" on the cover should be up when the cover is reinstalled.
High beam headlight bulb (B) replacement
1. Pull the catch on the lower edge of the cover upward and remove the plastic cover.
2. Press the wire catches on the retaining clamp (1 in inset illustration above) together and push out (2) to release the
bulb and connector from the headlight housing.
3. Pull the bulb out of the connector.
4. Insert a new bulb into the connector.
5. Reinsert the bulb and connector into the headlight housing. The guide lug must be up to ensure proper positioning.
6. Press the retaining clamp back into position.
7. Reinstall the plastic cover. Catch B should snap into position.
Caution! Do not touch the glass on halogen bulbs with your fingers. Grease, oil or any other impurities can be
carbonized onto the bulb and cause damage to the reflector.
Be sure to use bulbs of the correct type and voltage
pg.95 Replacing bulbs
ProCarManuals.com
Page 55 of 99
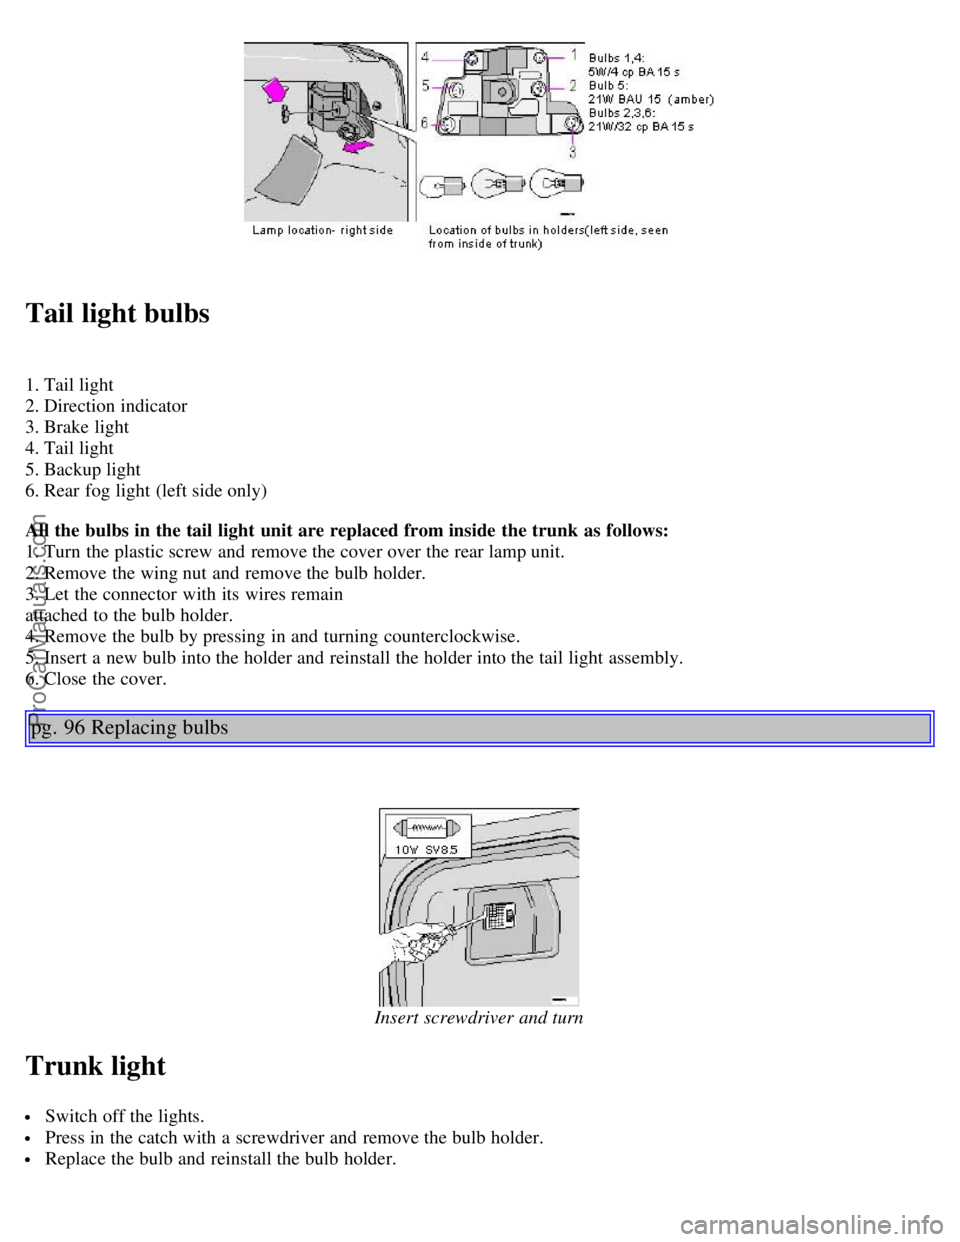
Tail light bulbs
1. Tail light
2. Direction indicator
3. Brake light
4. Tail light
5. Backup light
6. Rear fog light (left side only)
All the bulbs in the tail light unit are replaced from inside the trunk as follows:
1. Turn the plastic screw and remove the cover over the rear lamp unit.
2. Remove the wing nut and remove the bulb holder.
3. Let the connector with its wires remain
attached to the bulb holder.
4. Remove the bulb by pressing in and turning counterclockwise.
5. Insert a new bulb into the holder and reinstall the holder into the tail light assembly.
6. Close the cover.
pg. 96 Replacing bulbs
Insert screwdriver and turn
Trunk light
Switch off the lights.
Press in the catch with a screwdriver and remove the bulb holder.
Replace the bulb and reinstall the bulb holder.
ProCarManuals.com
Page 56 of 99

License plate lights
Switch off the lights.
Unscrew the screw.
Insert the screwdriver and turn gently to loosen the glass lens.
Replace the bulb and reinstall the glass lens.
Front courtesy lights - C70 Coupe
Switch off the ignition.
Insert a screwdriver and turn carefully to loosen the glass lens.
Replace the bulb and press the glass lens back into place.
pg. 97 Replacing bulbs
Insert screwdriver and turn
Front courtesy lights - C70 Convertible
ProCarManuals.com