height VOLVO C70 2011 Quick Guide
[x] Cancel search | Manufacturer: VOLVO, Model Year: 2011, Model line: C70, Model: VOLVO C70 2011Pages: 8, PDF Size: 2.42 MB
Page 7 of 8

operatIng the power retract-able hard top
PreParatIoN
there should be no objects on the parcel
shelf, roof, or trunk lid.
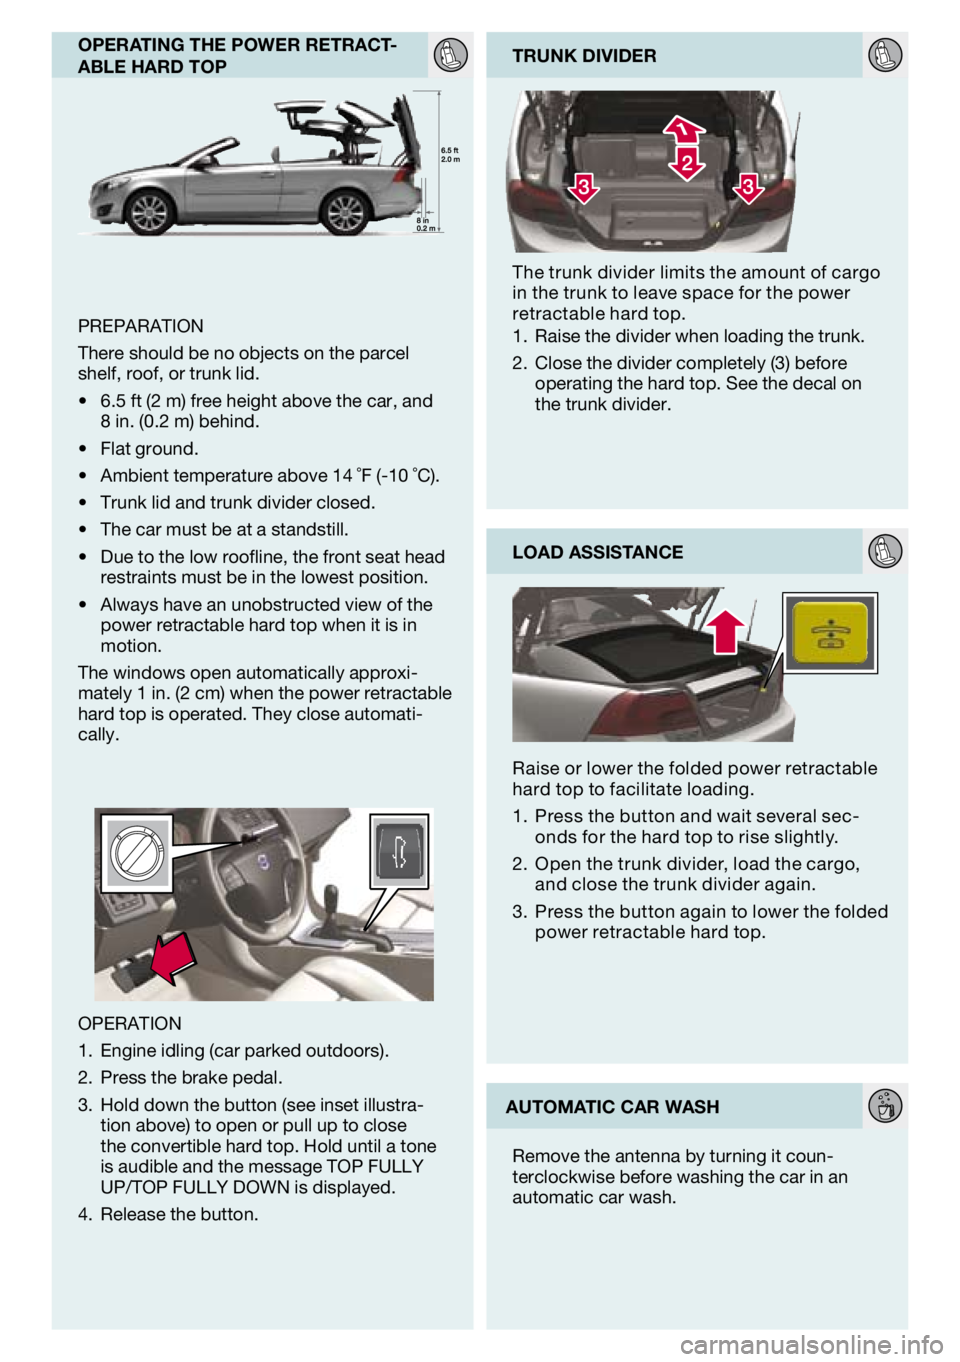
6.5 ft (2 m) free height above the car, and 8 in. (0.2 m) behind.
Flat ground.
ambient temperature above 14 ˚F (-10 ˚C).
trunk lid and trunk divider closed.
the car must be at a standstill.
due to the low roofline, the front seat head
restraints must be in the lowest position.
always have an unobstructed view of the
power retractable hard top when it is in motion.
the windows open automatically approxi
-mately 1 in. (2 cm) when the power retractable
hard top is operated. they close automati-cally.
•
•
•
•
•
•
• trunk dIvIder
t he trunk divider limits the amount of cargo
in the trunk to leave space for the power retractable hard top.
raise the divider when loading the trunk.
Close the divider completely (3) before
operating the hard top. see the decal on
the trunk divider.
1.
2.
raise or lower the folded power retractable
hard top to facilitate loading.
Press the button and wait several sec-onds for the hard top to rise slightly.
o pen the trunk divider, load the cargo,
and close the trunk divider again.
Press the button again to lower the folded power retractable hard top.
1.
2.
3. load assIstance
oPeratIoN engine idling (car parked outdoors).
Press the brake pedal.
Hold down the button (see inset illustra-tion above) to open or pull up to close the convertible hard top. Hold until a tone
is audible and the message toP FUlly
UP/toP FUlly doWN is displayed.
release the button.
1.
2.
3.
4. automatIc car wash
remove the antenna by turning it coun
-terclockwise before washing the car in an automatic car wash.
Page 8 of 8

tP 11905 (U sa & Canada) at 1020. Printed in sweden, Göteborg 2010, Copyright © 2000 -2010 Volvo Car Corporation
enterIng the rear seat
MaNUal seat
m oving the seat forward
remove the seat belt from the guide (a).
Pull up the handle (b) and fold the backrest
forward until it locks in position.
Move the seat forward (C).
m oving the seat rearward
Move the seat rearward until it reaches the
desired position (d).
Pull up the handle (e) and return the back
-rest to the upright position.
Put the seat belt back into the guide (F).
PoWer seat*
m oving the seat forward
remove the seat belt from the guide (a).
Pull up the handle (b) and fold the backrest
forward until it locks in position.
Press and hold in the front section of the button (G).
m oving the seat rearward
Press and hold in the rear section of the button (G).
Pull up the handle (e) and return the back
-rest to the upright position.
Put the seat belt back into the guide (F).
note
When putting on the seat belt, it is easiest to reach for the lower section of the belt, near the guide, instead of reaching over your shoulder.
1.
2.
3.
1.
2.
3.
1.
2.
3.
1.
2.
3.
adjustIng the Front seat
tIre pressure monItorIng
system (tpms)
When a low tire pressure warning message (low
tIre press. check tIres or very
low tIre pressure) has been displayed and the tire pressure warning light () has illuminated, one or more tires has low inflation pressure.
Check the inflation pressure of all four tires with a tire pressure gauge as soon as possible and pump the tire(s) with low pressure to the recommended inflation pressure.
refer to the inflation pressure tables in the
chapter “Wheels and tires” in the owner’s
Manual.
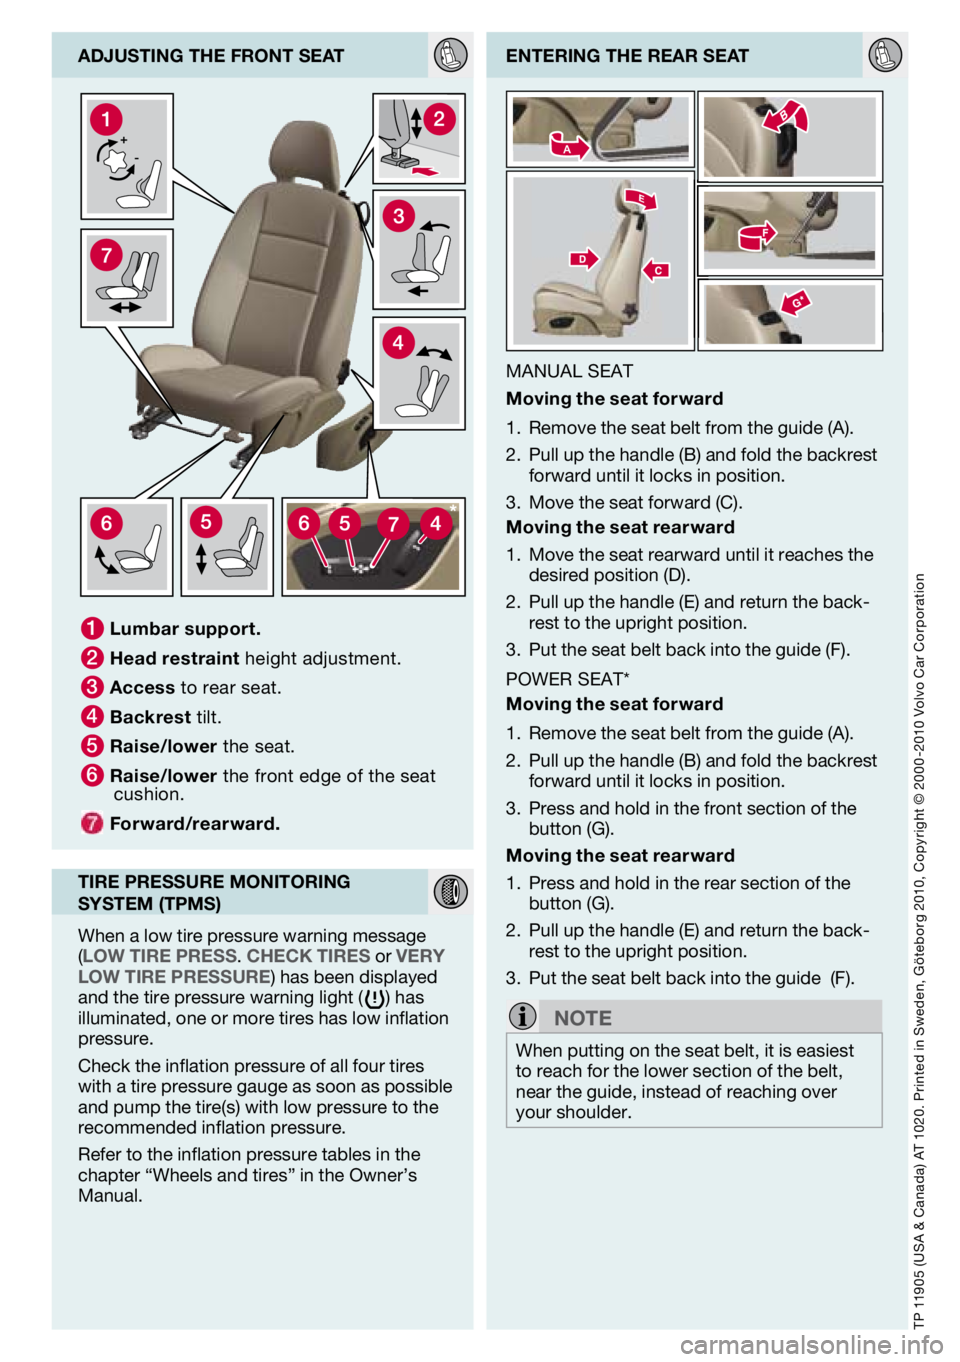
1 l umbar support.
2 h ead restraint height adjustment.
3 a ccess to rear seat.
4 b ackrest tilt.
5 r aise/lower the seat.
6 r aise/lower the front edge of the seat cushion.
Forward/rearward.