check engine VOLVO S60 2001 User Guide
[x] Cancel search | Manufacturer: VOLVO, Model Year: 2001, Model line: S60, Model: VOLVO S60 2001Pages: 128, PDF Size: 2.52 MB
Page 58 of 128

You can disconnect the automatic function by pressing the courtesy light button for more than 3 seconds. Briefly
pressing the courtesy light button again automatically reconnects the function.
The courtesy light timer periods can be changed. Contact your Volvo retailer.
Reading lights - front/ rear
The reading lights can be switched on or off by pressing the respective buttons. These lights switch off automatically
after 10 minutes if the engine is not running. If the engine is running, the lights stay on indefinitely. The lights can be
switched off at any time by pressing the button.
pg. 105 Floor mats (option)
Vanity mirror
The light comes on when you open the cover.
Floor mats (option)
Volvo offers floor mats specially manufactured for your car. They must be properly placed and secured in the mat
clips.
WARNING!
An extra mat on the driver's floor can cause the accelerator pedal to catch. Check that the movement of the
accelerator pedal is not impeded. No more than one protective floor covering may be used at one time.
ProCarManuals.com
Page 65 of 128

up when the ignition key is turned to positions I, II or III and should go out after 7 seconds or when the engine is
started. Check that this light is functioning properly every time the car is started.
The following items are monitored by the self - diagnostic system:
Sensor unit
Cable harness
Gas generator
WARNING!
If the SRS warning light stays on after the engine has started or if it comes on while you are driving, drive the car to
the nearest authorized Volvo retailer for inspection as soon as possible.
pg. 15 Airbags (Supplemental Restraint System)
NOTE: The information on this page does not pertain to the Side Impact Protection System airbags.
When are the airbags deployed?
The SRS system is designed to deploy during certain frontal or front -angular collisions, impacts, or decelerations,
depending on the crash severity, angle, speed and object impacted. The SRS sensor is designed to react to both the
impact of the collision and the inertial forces generated by it and to determine if the intensity of the collision is
sufficient for the seat belt tensioners or airbags to be deployed. If the airbags have been deployed, we recommend the
following:
Have the car towed to an authorized Volvo retailer. Never drive with the airbags deployed.
Have an authorized Volvo retailer replace the SRS system components.
Use only new, Genuine Volvo Parts when replacing SRS components (airbags, seat belts, tensioners, etc.).
When are the airbags NOT deployed?
Not all frontal collisions activate the SRS system. If the collision involves a nonrigid object (e. g., a snow drift or
bush), or a rigid, fixed object at a low speed, the SRS system will not necessarily deploy. Front airbags do not
normally deploy in a side impact collision, in a collision from the rear or in a rollover situation. The amount of
damage to the bodywork does not reliably indicate if the airbags should have deployed or not.
Seat belts - the heart of the Volvo safety system
The heart of the Volvo safety system is the three-point seat belt (a Volvo invention)! In order for the SRS system to
provide the protection intended, seat belts must be worn at all times by everyone in the car. The SRS system is a
supplement to the seat belts.
WARNING!
Never drive with the airbags deployed. The fact that they hang out can impair the steering of your car. Other safety
systems can also be damaged. The smoke and dust formed when the airbags are deployed can cause skin and eye
irritation in the event of prolonged exposure.
pg. 16 Airbags (Supplemental Restraint System)
WARNING!
ProCarManuals.com
Page 77 of 128

2 0 0 1
VOLVO S60
Starting and driving
pg. 125 Starting and driving
Refueling 126
Starting the car128
General information130
Manual transmission132
Automatic transmission (option)133
Geartronic (option )135
Brake system137
Stability system139
Towing141
Jump starting143
Towing a trailer144
Detachable trailer hitch - installing146
Detachable trailer hitch - removing147
Attaching load carriers148
Cold weather precautions149
Before a long distance trip150
pg. 126 Refueling
ENGINE OIL
Although some oil consumption occurs during normal engine operation, more oil is consumed when the engine is new
as the internal parts generate higher friction while wearing- in to each other. From the time the engine is new until the
first service is performed, the oil consumption could be higher than normal. For this reason, it is especially important
to check the oil every time you refuel your car during this period. See page 172
.
Fuel requirements
Octane rating
Volvo engines are designed for optimum performance on unleaded premium gasoline with an AKI octane rating of 91
or above. AKI (ANTI KNOCK INDEX) is an average of the Research Octane Number, RON, and the Motor Octane
Number, MON. (RON + MON/ 2). The minimum octane requirement is AKI 87 (RON 91).
Deposit control gasoline (detergent additives)
Volvo recommends the use of gasoline containing deposit control additives. These additives have shown to be
effective in keeping injectors and intake valves clean. Consistent use of deposit control gasolines will help ensure
good driveability and fuel economy. If you are not sure whether the gasoline contains deposit control additives, check
with the service station operator.
NOTE: Volvo does not recommend the use of external fuel injector cleaning systems. Unleaded fuel Each Volvo has
a three-way catalytic converter and must use only unleaded gasoline. U. S. and Canadian regulations require that
ProCarManuals.com
Page 78 of 128

pumps deliv- ering unleaded gasoline be labelled "UNLEADED". Only these pumps have nozzles which fit your car's
filler inlet. It is unlawful to dispense leaded fuel into a vehicle labelled "unleaded gasoline only". Leaded gasoline
damages the three- way catalytic converter and the heated oxygen sensor system. Repeated use of leaded gasoline will
lessen the effectiveness of the emission control system and could result in loss of emission warranty coverage. State
and local vehicle inspection programs will make detection of misfueling easier, possibly resulting in emission test
failure for misfueled vehicles.
NOTE: Some U. S. and Canadian gasolines contain an octane enhancing additive called methyl- cyclopentadienyl
manganese tricar- bonyl (MMT). If such fuels are used, your Emission Control System performance may be affected,
and the Check Engine Light (malfunction indicator lamp) located on your instrument panel may light. If this occurs,
please return your vehicle to an authorized Volvo retailer for service.
Gasoline containing alcohol and ethers
"Oxygenated fuels"
Some fuel suppliers sell gasoline containing "oxygenates" which are usually alcohols or ethers. In some areas, state or
local laws require that the service pump be marked indicating use of alcohols or ethers. However, there are areas in
which the pumps are unmarked. If you are not sure whether there is alcohol or ethers in the gasoline you buy, check
with the service station operator. To meet seasonal air quality standards, some areas require the use of "oxygenated"
fuel.
Volvo allows the use of the following "oxygenated" fuels; however, the octane ratings listed on this page must still be
met.
Alcohol - Ethanol: Fuels containing up to 10% ethanol by volume may be used. Ethanol may also be referred to as
Ethyl alcohol, or "Gasohol".
Ethers - MTBE: Fuels containing up to 15% MTBE may be used.
pg. 127 Refueling
Fuel filler door
The fuel filler door, located on the right rear fender, is connected to your car's central locking system. The driver's
door must be unlocked before the fuel filler door can be opened.
Be sure the fuel filler door is not obstructed and is completely closed after refueling. Open the fuel filler cap slowly
during hot weather.
NOTE: During a transitional period, a small number of service stations may still have fuel nozzles that are not
compatible with the fuel filler neck on cars equipped with the evaporative control system.
Refueling
The fuel tank is designed to hold approximately 18.5 US gals (70 liters) or 21.1 US gals (80 liters) on turbo models,
ProCarManuals.com
Page 79 of 128
with sufficient volume left over to accommodate possible expansion of the fuel in hot weather. Be aware that the
"usable" tank capacity will be somewhat less than the specified maximum. When the fuel level is low, such factors as
ambient temper- ature, the fuel's "Reid vapor pressure" charac- teristics, and terrain can affect the fuel pump's ability
to supply the engine with an adequate supply of fuel. Therefore, it is advisable to refuel as soon as possible when the
needle nears the red zone, or when the fuel warning light comes on.
CAUTION:
Do not refuel with the engine running *. Turn the ignition off or to position I. If the ignition is on, an incorrect
reading could occur in the fuel gauge After refueling, close the fuel filler cap by turning it clockwise until it clicks
into place*.
Allow for fuel expansion by not overfilling the tank. Overfilling could also cause damage to the emission control
systems. Avoid spilling gasoline during refueling. In addition to causing damage to the environment, gasolines
containing alcohol can cause damage to painted surfaces, which may not be covered under the New Vehicle Limited
Warranty.
Do not use gasolines containing methanol (methyl alcohol, wood alcohol). This practice can result in vehicle
performance deterioration and can damage critical parts in the fuel system. Such damage may not be covered under
the New Vehicle Limited Warranty.
* If the fuel filler cap is not closed tightly or if the engine is running when the car is refueled, the Check Engine Light
(malfunction indicator lamp) may indicate a fault. However, your vehicle's performance will not be affected. Use only
Volvo original or approved fuel filler caps.
pg. 128 Starting the car
Starting the engine
1. Fasten the seat belt.
WARNING!
Before starting, check that the seat, steering wheel and mirrors are adjusted properly. Make sure the brake pedal can
be depressed completely. Adjust the seat if necessary. See pages 100, 102.
2. Apply the parking brake (hand brake) if not already set. The gear selector (automatic transmission) is locked in the
(P) ark position (SHIFTLOCK). Manual transmission: the clutch must be fully depressed.
3. Without touching the accelerator pedal, turn the ignition key* to the starting position. Allow the starter to operate
for up to 10 seconds. Release the key as soon as the engine starts. If the engine fails to start, repeat this step.
For cold starts at altitudes above 6000 ft (1800 meters), depress the accelerator pedal halfway and turn the key to the
starting position. Release the pedal slowly when the engine starts.
4. To release the gear selector from the (P) ark position, the engine must be running (or theignition key must be in
position II) and the brake pedal must be depressed.
5. Select the desired gear. The gear engages after a very slight delay which is especially noticeable when selecting R.
NOTE: Your car is equipped with a KEYLOCK system (automatic transmission). When the engine is switched off,
the gear selector must be in the (P) ark position before the key can be removed from the ignition switch.
When starting in cold weather, the transmission may shift up at slightly higher engine speeds than normal until the
automatic transmission fluid reaches normal operating temperature.
CAUTION:
ProCarManuals.com
Page 81 of 128
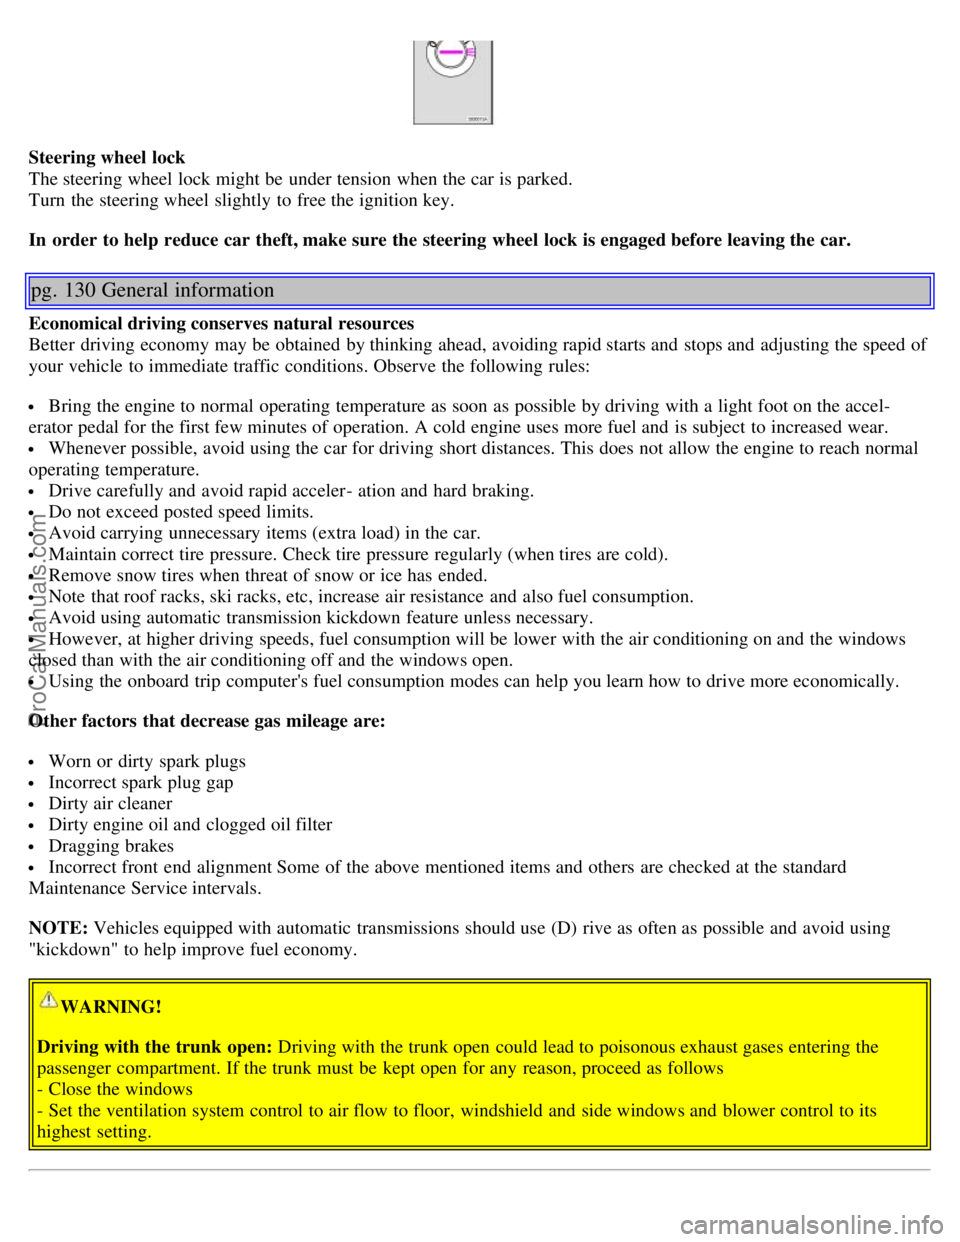
Steering wheel lock
The steering wheel lock might be under tension when the car is parked.
Turn the steering wheel slightly to free the ignition key.
In order to help reduce car theft, make sure the steering wheel lock is engaged before leaving the car.
pg. 130 General information
Economical driving conserves natural resources
Better driving economy may be obtained by thinking ahead, avoiding rapid starts and stops and adjusting the speed of
your vehicle to immediate traffic conditions. Observe the following rules:
Bring the engine to normal operating temperature as soon as possible by driving with a light foot on the accel-
erator pedal for the first few minutes of operation. A cold engine uses more fuel and is subject to increased wear.
Whenever possible, avoid using the car for driving short distances. This does not allow the engine to reach normal
operating temperature.
Drive carefully and avoid rapid acceler- ation and hard braking.
Do not exceed posted speed limits.
Avoid carrying unnecessary items (extra load) in the car.
Maintain correct tire pressure. Check tire pressure regularly (when tires are cold).
Remove snow tires when threat of snow or ice has ended.
Note that roof racks, ski racks, etc, increase air resistance and also fuel consumption.
Avoid using automatic transmission kickdown feature unless necessary.
However, at higher driving speeds, fuel consumption will be lower with the air conditioning on and the windows
closed than with the air conditioning off and the windows open.
Using the onboard trip computer's fuel consumption modes can help you learn how to drive more economically.
Other factors that decrease gas mileage are:
Worn or dirty spark plugs
Incorrect spark plug gap
Dirty air cleaner
Dirty engine oil and clogged oil filter
Dragging brakes
Incorrect front end alignment Some of the above mentioned items and others are checked at the standard
Maintenance Service intervals.
NOTE: Vehicles equipped with automatic transmissions should use (D) rive as often as possible and avoid using
"kickdown" to help improve fuel economy.
WARNING!
Driving with the trunk open: Driving with the trunk open could lead to poisonous exhaust gases entering the
passenger compartment. If the trunk must be kept open for any reason, proceed as follows
- Close the windows
- Set the ventilation system control to air flow to floor, windshield and side windows and blower control to its
highest setting.
ProCarManuals.com
Page 82 of 128
CAUTION: Drive slowly and carefully if going through standing water (i. e. flooded roadways, etc.). Damage to the
engine could result if excess water is drawn in through the air intake system. Never drive the vehicle in water deeper
than 1 foot (300 mm). See the flood warning on page 16.
Weight distribution affects handling
At the specified curb weight your car has a tendency to understeer, which means that the steering wheel has to be
turned more than might seem appropriate for the curvature of a bend. This ensures good stability and reduces the risk
of rear wheel skid. Remember that these properties can alter with the vehicle load.
pg. 131 General information
The heavier the load in the trunk (max. 220 lbs, 100 kg), the less the tendency to understeer.
Handling, roadholding
Vehicle load, tire design and inflation pressure all affect vehicle handling. Therefore, check that the tires are inflated
to the recommended pressure according to the vehicle load. See "Tire pressure" section.
Loads should be distributed so that capacity weight or maximum permissible axle loads are not exceeded.
pg. 132 Manual transmission
Shift positions
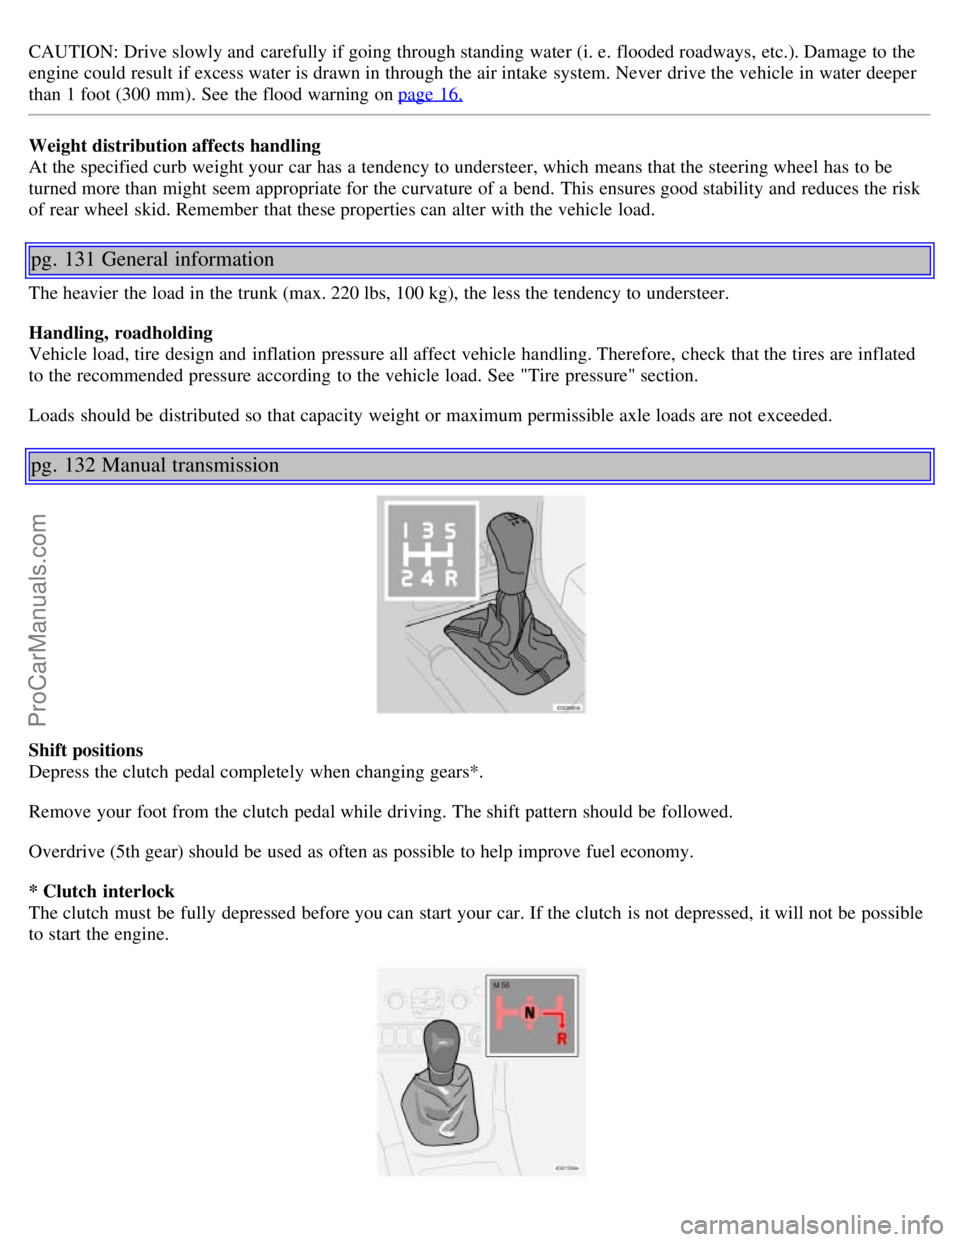
Depress the clutch pedal completely when changing gears*.
Remove your foot from the clutch pedal while driving. The shift pattern should be followed.
Overdrive (5th gear) should be used as often as possible to help improve fuel economy.
* Clutch interlock
The clutch must be fully depressed before you can start your car. If the clutch is not depressed, it will not be possible
to start the engine.
ProCarManuals.com
Page 87 of 128
If you slow down to a very low speed, the transmission will automatically shift down.
When starting in the (MAN) ual position, 3rd gear is the highest gear that may be selected.
NOTE: Kickdown does not function when the transmission is in the manual shift (Geartronic) mode.
Kickdown
Automatic shift to a lower gear (kickdown) is achieved by depressing the accelerator pedal fully and briskly. An
upshift will occur when approaching the top speed for a particular gear or by releasing the accelerator pedal slightly.
Kickdown can be used for maximum acceleration or when passing at highway speeds.
Kickdown does not function when the transmission is in the manual shift (Geartronic) mode.
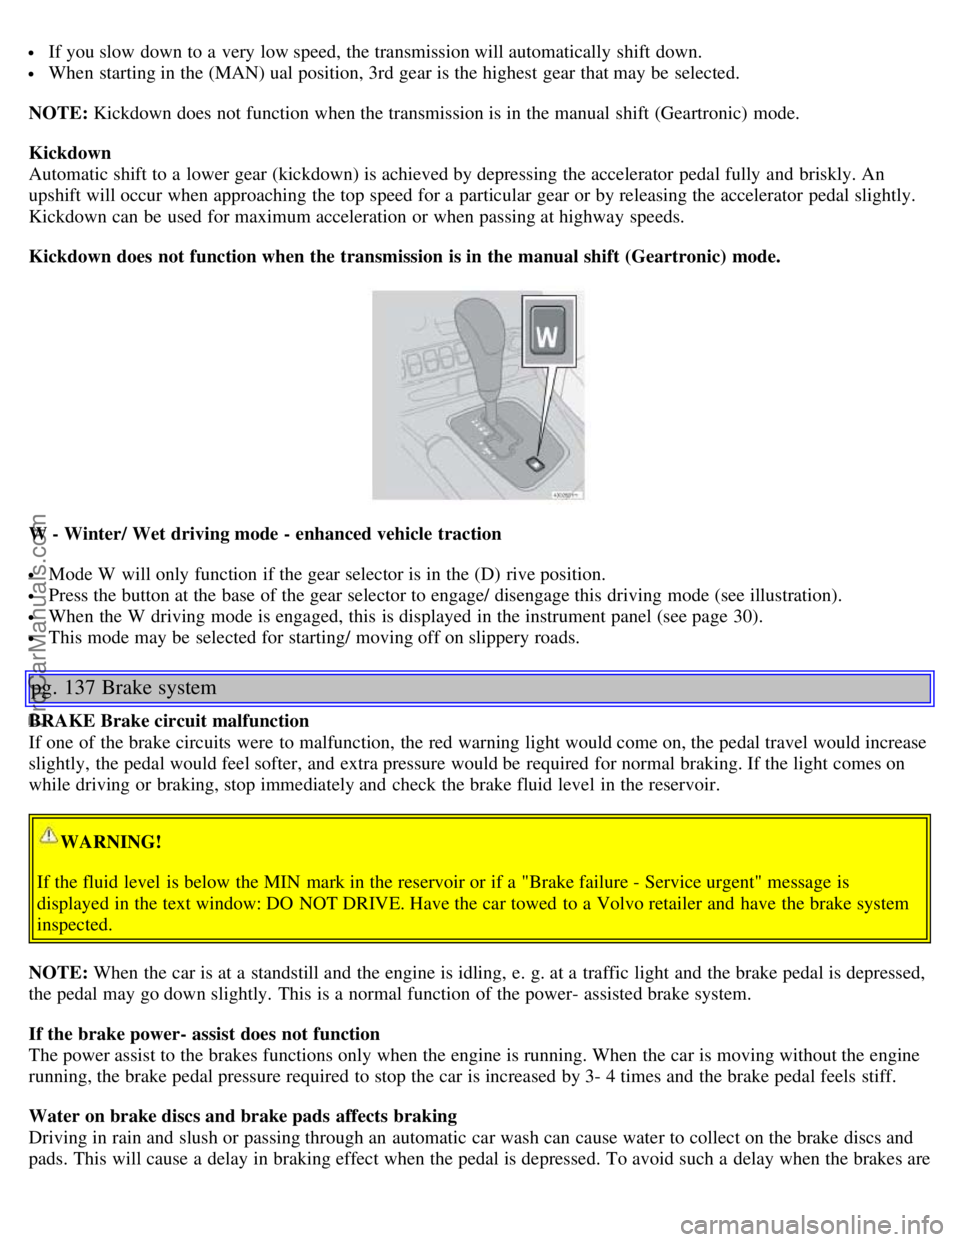
W - Winter/ Wet driving mode - enhanced vehicle traction
Mode W will only function if the gear selector is in the (D) rive position.
Press the button at the base of the gear selector to engage/ disengage this driving mode (see illustration).
When the W driving mode is engaged, this is displayed in the instrument panel (see page 30).
This mode may be selected for starting/ moving off on slippery roads.
pg. 137 Brake system
BRAKE Brake circuit malfunction
If one of the brake circuits were to malfunction, the red warning light would come on, the pedal travel would increase
slightly, the pedal would feel softer, and extra pressure would be required for normal braking. If the light comes on
while driving or braking, stop immediately and check the brake fluid level in the reservoir.
WARNING!
If the fluid level is below the MIN mark in the reservoir or if a "Brake failure - Service urgent" message is
displayed in the text window: DO NOT DRIVE. Have the car towed to a Volvo retailer and have the brake system
inspected.
NOTE: When the car is at a standstill and the engine is idling, e. g. at a traffic light and the brake pedal is depressed,
the pedal may go down slightly. This is a normal function of the power- assisted brake system.
If the brake power- assist does not function
The power assist to the brakes functions only when the engine is running. When the car is moving without the engine
running, the brake pedal pressure required to stop the car is increased by 3- 4 times and the brake pedal feels stiff.
Water on brake discs and brake pads affects braking
Driving in rain and slush or passing through an automatic car wash can cause water to collect on the brake discs and
pads. This will cause a delay in braking effect when the pedal is depressed. To avoid such a delay when the brakes are
ProCarManuals.com
Page 88 of 128
needed, depress the pedal occasionally when driving through rain, slush etc. This will remove the water from the
brakes. Check that brake application feels normal. This should also be done after washing or starting in very damp or
cold weather.
Severe strain on the brake system
The brakes will be subject to severe strain when driving in mountains or hilly areas or towing. Vehicle speed is
usually slower, which means that the cooling of the brakes is less efficient than when driving on level roads. To
reduce the strain on the brakes, it is advisable not to use the brakes excessively. Instead, shift into a lower gear and let
the engine help with the braking. Do not forget that, if you are towing a trailer, the brakes will be subjected to a
greater than normal load.
pg. 138 Brake system
Anti-lock brakes (ABS)
If the warning lamp lights up there is a malfunction of the ABS system (the standard braking system will however
function) and the vehicle should be driven cautiously to a Volvo retailer for inspection. The Anti-lock Braking
System (ABS) helps to improve vehicle control (stopping and steering) during severe braking conditions by limiting
brake lockup. When the system "senses" impending lockup, braking pressure is automatically modulated in order to
help prevent lockup, which could lead to a skid.
The system performs a self - diagnostic test when the engine is started and when the vehicle first reaches a
speed of approximately 12 mph (20 km/ h). The brake pedal will pulsate several times and a sound may be audible
from the ABS control module. This is normal.
To obtain optimal effect from the ABS system, constant pressure should be kept on the brake pedal, keep constant
pressure on the brake pedal. Do not pump the brake pedal.
The switching of the ABS modulator will be audible and the brake pedal will pulsate during braking. Please be aware
that ABS does not increase the absolute braking potential of the vehicle. While control will be enhanced, ABS will
not shorten stopping distances on slippery surfaces.
ABS with EBD (Electronic Brake Force Distribution)
EBD is an integrated part of the ABS system. EBD regulates the hydraulic pressure to the rear brakes to help provide
optimal braking capacity.
If the BRAKE and ABS warning lights come on at the same time, this could indicate a fault in the brake system.
Stop the car in a suitable place and switch off the engine.
Restart the engine.
If both warning lights go off, no further action is required.
If both lights are still on after the engine has been restarted, switch off the engine again and check the brake fluid
level (see page 170 for the location of the brake fluid reservoir).
If the brake fluid level is above the MIN mark, drive carefully to an authorized Volvo retailer and have the brake
system inspected.
WARNING!
If the fluid level is below the MIN mark in the reservoir or if a "Brake failure - Service urgent" message is
displayed in the text window: DO NOT DRIVE. Have the car towed to a Volvo retailer and have the brake system
inspected.
ProCarManuals.com
Page 99 of 128

Bear in mind
Take extra care when removing stains such as ink or lipstick since the coloring can spread.
Use solvents sparingly. Too much solvent can damage the seat padding.
Start from the outside of the stain and work toward the center.
pg. 162 Paint touch up
Paint touch up
Paint damage requires immediate attention to avoid rusting. Make it a habit to check the finish regularly - when
washing the car for instance. Touch- up if necessary.
Paint repairs require special equipment and skill. Contact your Volvo retailer for any extensive damage.
Minor scratches can be repaired by using Volvo touch- up paint.
NOTE: When ordering touch- up paint from your Volvo retailer, use the paint code indicated on the model plate. The
plate is located in the engine compartment.
Color code
Make sure you have the right color. The color code number is on the data plate in the engine compartment.
Minor stone chips and scratches
Material:
Primer - can
Paint - touch- up pen
Brush
Masking tape
If the stone chip has not gone down to the bare metal and an undamaged color coat remains, you can add paint
immediately after removing dirt.
NOTE: When touching up the car, it should be clean and dry. The surface temperature should be above 60° F (15°
C).
Minor scratches on the surface
If the stone chip has not penetrated down to the metal and an undamaged layer of paint remains, the touch- up paint
can be applied as soon as the spot has been cleaned.
Deep scratches
1. Place a strip of masking tape over the damaged surface. Pull the tape off so that any loose flakes of paint adhere to
it.
2. Thoroughly mix the primer and apply it with a small brush.
When the primer surface is dry, the paint can be applied using a brush. Mix the paint thoroughly; apply several thin
paint coats and let dry after each application.
3. If there is a longer scratch, you may want to protect surrounding paint by masking it off.
ProCarManuals.com