warning light VOLVO S60 2001 User Guide
[x] Cancel search | Manufacturer: VOLVO, Model Year: 2001, Model line: S60, Model: VOLVO S60 2001Pages: 128, PDF Size: 2.52 MB
Page 19 of 128
Ashtrays
Volvo cars in North America do not have an ashtray in the front seat as standard equipment. If you want to have an
ashtray in the front seat, please contact your Volvo retailer.
pg. 46 Electrically operated windows
Electrically operated windows
The electrically operated windows are controlled by buttons in the arm rests. The ignition switch must be ON *
(ignition key in position I, II or the engine running) for the electrically operated windows to function.
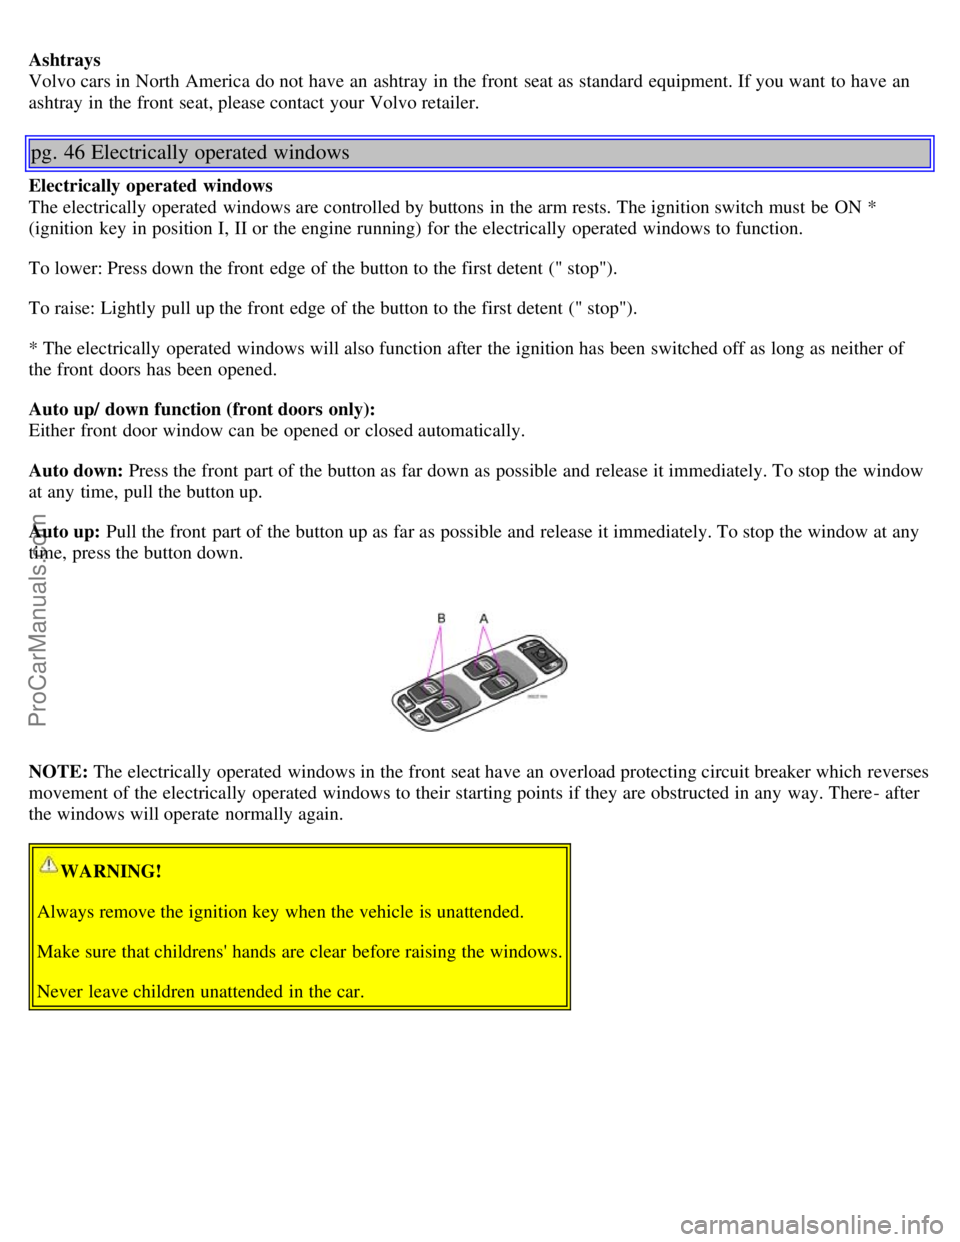
To lower: Press down the front edge of the button to the first detent (" stop").
To raise: Lightly pull up the front edge of the button to the first detent (" stop").
* The electrically operated windows will also function after the ignition has been switched off as long as neither of
the front doors has been opened.
Auto up/ down function (front doors only):
Either front door window can be opened or closed automatically.
Auto down: Press the front part of the button as far down as possible and release it immediately. To stop the window
at any time, pull the button up.
Auto up: Pull the front part of the button up as far as possible and release it immediately. To stop the window at any
time, press the button down.
NOTE: The electrically operated windows in the front seat have an overload protecting circuit breaker which reverses
movement of the electrically operated windows to their starting points if they are obstructed in any way. There- after
the windows will operate normally again.
WARNING!
Always remove the ignition key when the vehicle is unattended.
Make sure that childrens' hands are clear before raising the windows.
Never leave children unattended in the car.
ProCarManuals.com
Page 21 of 128

Rearview mirror
A Normal position
B Night position, reduces glare from following headlights
Autodim function (option)
The autodim function reacts to headlights from following traffic and automatically reduces glare.
NOTE: This function is automatically switched off when the gear selector is placed in the Reverse position.
Electrically operated sideview mirrors
The mirror control switches are located on the driver's door armrest.
Driver's side: Press the L switch (an LED in the switch will light up) to activate the adjustment control and then use
this control to adjust the driver's door mirror.
Passenger's door: Press the R switch (an LED in the switch will light up) and then use the adjustment control to
adjust the passenger's door mirror.
After you have adjusted the mirror( s), press the L or R switch again (the LED will go out) to deactivate the
adjustment control.
WARNING!
The mirrors should always be adjusted prior to driving. Objects seen in the passenger's side wide - angle sideview
mirror are closer than they appear to be.
Remote control (central locking system) - option
If you lock the car and later unlock it with the same remote control and open the driver's door, the sideview mirrors
(and the driver's seat) will automatically move to the position they were in when you left the car.
pg. 49 Electrically operated sun roof
ProCarManuals.com
Page 27 of 128

6. Horn4
7. Instrument panel30
8. Audio controls67
9. Windshield wipers41
10. Parking brake (hand brake)45
11. Center console switches37, 38
12. Climate control51
13. Audio system61
14. 12 V socket45
15. Hazard warning flashers42
16. Glove compartment108
17. Panel vents53
18. Text window30
19. Temperature gauge30
20. Odometer/ Trip odometer/Cruise control indicator30/ 44
21. Speedometer30
22. Turn signal indicators30
23. Tachometer30
24. Ambient temperature/ Clock/Selected gear indicator30
25. Fuel gauge30
26. Indicator and warning symbols31
27. Cup holder (option)108
28. Panel vents53
29. Instrument lighting39
30. Lighting panel39
31. Reading lights104
32. Interior lighting104
33. Sun roof control49
34. Seat belt reminder4, 10
35. Rearview mirror48
36. Lock button, for all doors119
37. Blocking rear seat power windows46
38. Controls, power windows46
39. Controls, sideview mirrors48
ProCarManuals.com
Page 52 of 128
Center head restraints
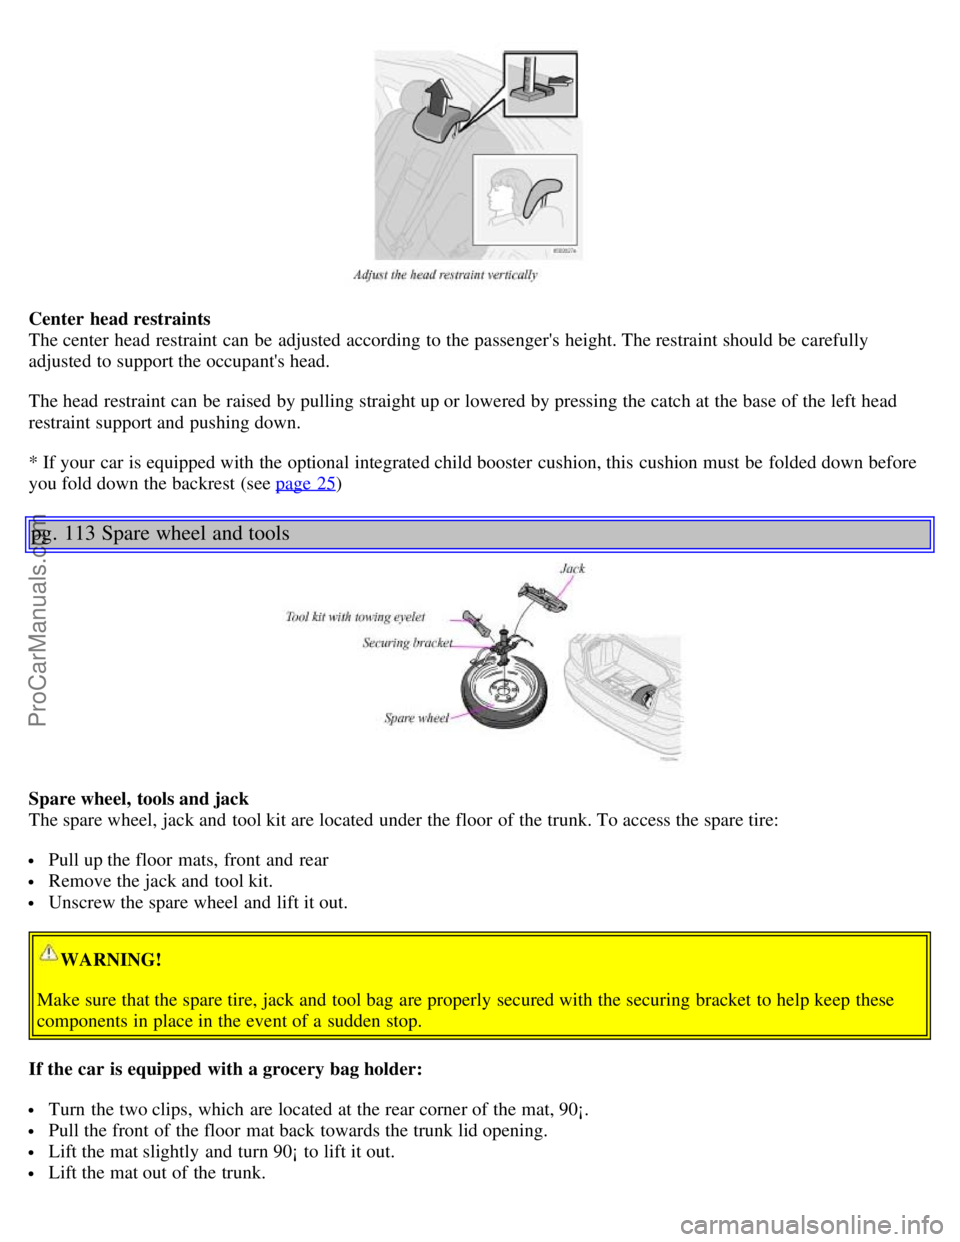
The center head restraint can be adjusted according to the passenger's height. The restraint should be carefully
adjusted to support the occupant's head.
The head restraint can be raised by pulling straight up or lowered by pressing the catch at the base of the left head
restraint support and pushing down.
* If your car is equipped with the optional integrated child booster cushion, this cushion must be folded down before
you fold down the backrest (see page 25
)
pg. 113 Spare wheel and tools
Spare wheel, tools and jack
The spare wheel, jack and tool kit are located under the floor of the trunk. To access the spare tire:
Pull up the floor mats, front and rear
Remove the jack and tool kit.
Unscrew the spare wheel and lift it out.
WARNING!
Make sure that the spare tire, jack and tool bag are properly secured with the securing bracket to help keep these
components in place in the event of a sudden stop.
If the car is equipped with a grocery bag holder:
Turn the two clips, which are located at the rear corner of the mat, 90¡.
Pull the front of the floor mat back towards the trunk lid opening.
Lift the mat slightly and turn 90¡ to lift it out.
Lift the mat out of the trunk.
ProCarManuals.com
Page 54 of 128
2 0 0 1
VOLVO S60
Interior
pg. 99 Interior
Front seats 100
Interior lighting104
Floor mats (option)105
Storage compartments106
Rear seat and trunk111
Spare wheel and tools113
pg. 100 Front seats
Manual height adjustment - front seat
The front edges of the driver and passenger seat cushions can be adjusted to seven different settings and the rear
edges to nine different settings.
Lever (A) - adjusting the front edge of the seat.
Lever (B) - adjusting the rear edge of the seat.
Manual front-rear adjustment
The seat can be moved forward or rearward by pulling up on the front -rear adjustment bar.
Check that the seat is securely locked into position after adjusting.
WARNING!
Do not adjust the seat while driving. The seat should be adjusted so that the brake pedal can be depressed fully. In
addition, position the seat as far rearward as comfort and control allow.
ProCarManuals.com
Page 58 of 128

You can disconnect the automatic function by pressing the courtesy light button for more than 3 seconds. Briefly
pressing the courtesy light button again automatically reconnects the function.
The courtesy light timer periods can be changed. Contact your Volvo retailer.
Reading lights - front/ rear
The reading lights can be switched on or off by pressing the respective buttons. These lights switch off automatically
after 10 minutes if the engine is not running. If the engine is running, the lights stay on indefinitely. The lights can be
switched off at any time by pressing the button.
pg. 105 Floor mats (option)
Vanity mirror
The light comes on when you open the cover.
Floor mats (option)
Volvo offers floor mats specially manufactured for your car. They must be properly placed and secured in the mat
clips.
WARNING!
An extra mat on the driver's floor can cause the accelerator pedal to catch. Check that the movement of the
accelerator pedal is not impeded. No more than one protective floor covering may be used at one time.
ProCarManuals.com
Page 64 of 128

release of the powder may appear as smoke- like matter. This is a normal characteristic and does not indicate fire.
NOTE: Volvo's dual- threshold, dual- stage airbags use special sensors that are integrated with the front seat buckles.
The point at which the airbag deploys is determined by whether or not the seat belt is being used, as well as the
severity of the collision. Collisions can occur where only one of the airbags deploys.
If the impact is less severe, but severe enough to present a clear injury risk, the dual- stage airbags are triggered at
just 70% of their total capacity. If the impact is more severe, the dual- stage airbags are triggered at full capacity.
WARNING!
Do not use child safety seats or child booster cushions/ backrests in the front passenger's seat. We also recommend
that occupants under 4 feet 7 inches (140 cm) in height who have outgrown these devices sit in the rear seat with the
seat belt fastened. Never drive with the airbags deployed. The fact that they hang out can impair the steering of your
car. Other safety systems can also be damaged. The smoke and dust formed when the airbags are deployed can
cause skin and eye irritation in the event of prolonged exposure.
pg. 14 Airbags (Supplemental Restraint System)
WARNING!
Children must never be allowed in the front passenger's seat. Volvo recommends that ALL occupants (adults and
children) shorter than 4 feet 7 inches (140 cm) be seated in the back seat of any vehicle with a front passenger -side
airbag. See page 28
for guidelines.
Occupants in the front passenger's seat must never sit on the edge of the seat, sit leaning toward the instrument
panel or otherwise sit out of position. The occupant's back must be as upright as comfort allows and be against the
seat back with the seat belt properly fastened.
Feet must be on the floor, e. g. not on the dash, seat or out of the window. No objects or accessory equipment, e. g.
dash covers, may be placed on, attached to, or installed near the SRS hatch (the area above the glove compartment)
or the area affected by airbag deployment (see illustration on page 12
).
There should be no loose articles, e. g. coffee cups, on the floor, seat or dash area. Never try to open the SRS cover
on the steering wheel or the passenger side dash. This should only be done by an authorized Volvo service
technician.
Failure to follow these instructions can result in injury to the vehicle occupants
Warning light in the instrument panel
A self - diagnostic system incorporated in the sensor monitors the SRS. This system does not, however, monitor the
Side Impact Protection System (SIPS) airbags. If a fault is detected, the warning light will illuminate. The light is
included in the warning/ indicator light cluster in the instrument panel. Normally, the SRS warning lamp should light
ProCarManuals.com
Page 65 of 128

up when the ignition key is turned to positions I, II or III and should go out after 7 seconds or when the engine is
started. Check that this light is functioning properly every time the car is started.
The following items are monitored by the self - diagnostic system:
Sensor unit
Cable harness
Gas generator
WARNING!
If the SRS warning light stays on after the engine has started or if it comes on while you are driving, drive the car to
the nearest authorized Volvo retailer for inspection as soon as possible.
pg. 15 Airbags (Supplemental Restraint System)
NOTE: The information on this page does not pertain to the Side Impact Protection System airbags.
When are the airbags deployed?
The SRS system is designed to deploy during certain frontal or front -angular collisions, impacts, or decelerations,
depending on the crash severity, angle, speed and object impacted. The SRS sensor is designed to react to both the
impact of the collision and the inertial forces generated by it and to determine if the intensity of the collision is
sufficient for the seat belt tensioners or airbags to be deployed. If the airbags have been deployed, we recommend the
following:
Have the car towed to an authorized Volvo retailer. Never drive with the airbags deployed.
Have an authorized Volvo retailer replace the SRS system components.
Use only new, Genuine Volvo Parts when replacing SRS components (airbags, seat belts, tensioners, etc.).
When are the airbags NOT deployed?
Not all frontal collisions activate the SRS system. If the collision involves a nonrigid object (e. g., a snow drift or
bush), or a rigid, fixed object at a low speed, the SRS system will not necessarily deploy. Front airbags do not
normally deploy in a side impact collision, in a collision from the rear or in a rollover situation. The amount of
damage to the bodywork does not reliably indicate if the airbags should have deployed or not.
Seat belts - the heart of the Volvo safety system
The heart of the Volvo safety system is the three-point seat belt (a Volvo invention)! In order for the SRS system to
provide the protection intended, seat belts must be worn at all times by everyone in the car. The SRS system is a
supplement to the seat belts.
WARNING!
Never drive with the airbags deployed. The fact that they hang out can impair the steering of your car. Other safety
systems can also be damaged. The smoke and dust formed when the airbags are deployed can cause skin and eye
irritation in the event of prolonged exposure.
pg. 16 Airbags (Supplemental Restraint System)
WARNING!
ProCarManuals.com
Page 79 of 128
with sufficient volume left over to accommodate possible expansion of the fuel in hot weather. Be aware that the
"usable" tank capacity will be somewhat less than the specified maximum. When the fuel level is low, such factors as
ambient temper- ature, the fuel's "Reid vapor pressure" charac- teristics, and terrain can affect the fuel pump's ability
to supply the engine with an adequate supply of fuel. Therefore, it is advisable to refuel as soon as possible when the
needle nears the red zone, or when the fuel warning light comes on.
CAUTION:
Do not refuel with the engine running *. Turn the ignition off or to position I. If the ignition is on, an incorrect
reading could occur in the fuel gauge After refueling, close the fuel filler cap by turning it clockwise until it clicks
into place*.
Allow for fuel expansion by not overfilling the tank. Overfilling could also cause damage to the emission control
systems. Avoid spilling gasoline during refueling. In addition to causing damage to the environment, gasolines
containing alcohol can cause damage to painted surfaces, which may not be covered under the New Vehicle Limited
Warranty.
Do not use gasolines containing methanol (methyl alcohol, wood alcohol). This practice can result in vehicle
performance deterioration and can damage critical parts in the fuel system. Such damage may not be covered under
the New Vehicle Limited Warranty.
* If the fuel filler cap is not closed tightly or if the engine is running when the car is refueled, the Check Engine Light
(malfunction indicator lamp) may indicate a fault. However, your vehicle's performance will not be affected. Use only
Volvo original or approved fuel filler caps.
pg. 128 Starting the car
Starting the engine
1. Fasten the seat belt.
WARNING!
Before starting, check that the seat, steering wheel and mirrors are adjusted properly. Make sure the brake pedal can
be depressed completely. Adjust the seat if necessary. See pages 100, 102.
2. Apply the parking brake (hand brake) if not already set. The gear selector (automatic transmission) is locked in the
(P) ark position (SHIFTLOCK). Manual transmission: the clutch must be fully depressed.
3. Without touching the accelerator pedal, turn the ignition key* to the starting position. Allow the starter to operate
for up to 10 seconds. Release the key as soon as the engine starts. If the engine fails to start, repeat this step.
For cold starts at altitudes above 6000 ft (1800 meters), depress the accelerator pedal halfway and turn the key to the
starting position. Release the pedal slowly when the engine starts.
4. To release the gear selector from the (P) ark position, the engine must be running (or theignition key must be in
position II) and the brake pedal must be depressed.
5. Select the desired gear. The gear engages after a very slight delay which is especially noticeable when selecting R.
NOTE: Your car is equipped with a KEYLOCK system (automatic transmission). When the engine is switched off,
the gear selector must be in the (P) ark position before the key can be removed from the ignition switch.
When starting in cold weather, the transmission may shift up at slightly higher engine speeds than normal until the
automatic transmission fluid reaches normal operating temperature.
CAUTION:
ProCarManuals.com
Page 80 of 128
Automatic transmission
The engine should be idling when you move the gear selector. Never accelerate until after you feel the transmission
engage! Acceler- ating immediately after selecting a gear will cause harsh engagement and premature transmission
wear.
Selecting P or N when idling at a standstill for prolonged periods of time will help prevent overheating of the
automatic trans - mission fluid.
WARNING!
Always place the gear selector in Park and apply the parking brake before leaving the vehicle. Never leave the car
unattended with the engine running.
Always open garage doors fully before starting the engine inside a garage to ensure adequate ventilation. The
exhaust gases contain carbon monoxide, which is invisible and odorless but very poisonous
Do not race a cold engine immediately after starting. Oil flow may not reach some lubrication points fast enough to
prevent engine damage.
* If two of the keys to your car are close together, e. g., on the same key ring, when you try to start the car, this could
cause interference in the immobilizer system and result in the car not starting. If this should occur, remove one of the
keys from the key ring before trying to start the car again.
pg. 129 Starting the car
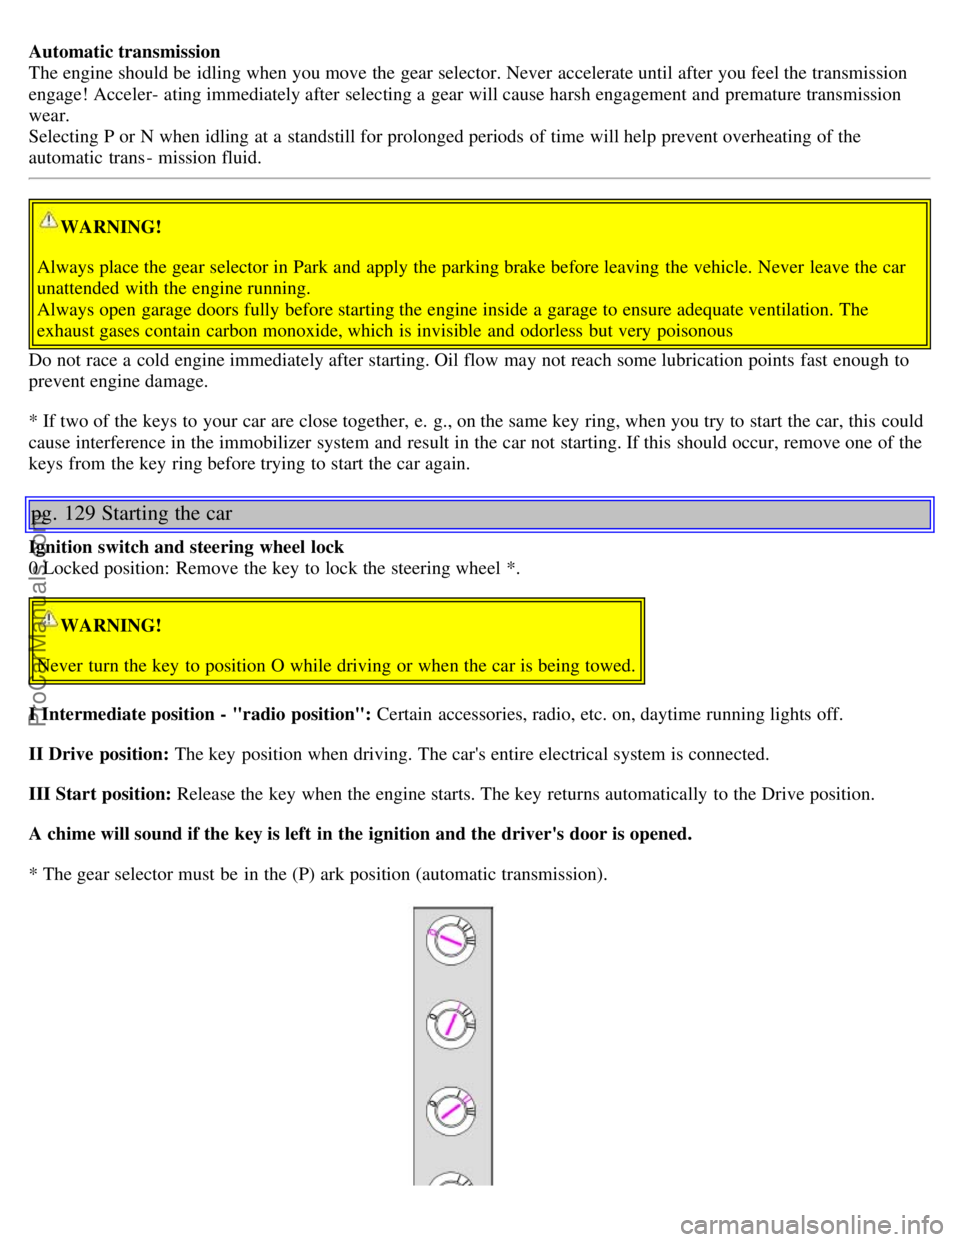
Ignition switch and steering wheel lock
0 Locked position: Remove the key to lock the steering wheel *.
WARNING!
Never turn the key to position O while driving or when the car is being towed.
I Intermediate position - "radio position": Certain accessories, radio, etc. on, daytime running lights off.
II Drive position: The key position when driving. The car's entire electrical system is connected.
III Start position: Release the key when the engine starts. The key returns automatically to the Drive position.
A chime will sound if the key is left in the ignition and the driver's door is opened.
* The gear selector must be in the (P) ark position (automatic transmission).
ProCarManuals.com