buttons VOLVO S60 2003 Owners Manual
[x] Cancel search | Manufacturer: VOLVO, Model Year: 2003, Model line: S60, Model: VOLVO S60 2003Pages: 120, PDF Size: 2.43 MB
Page 21 of 120
Messages in the text window
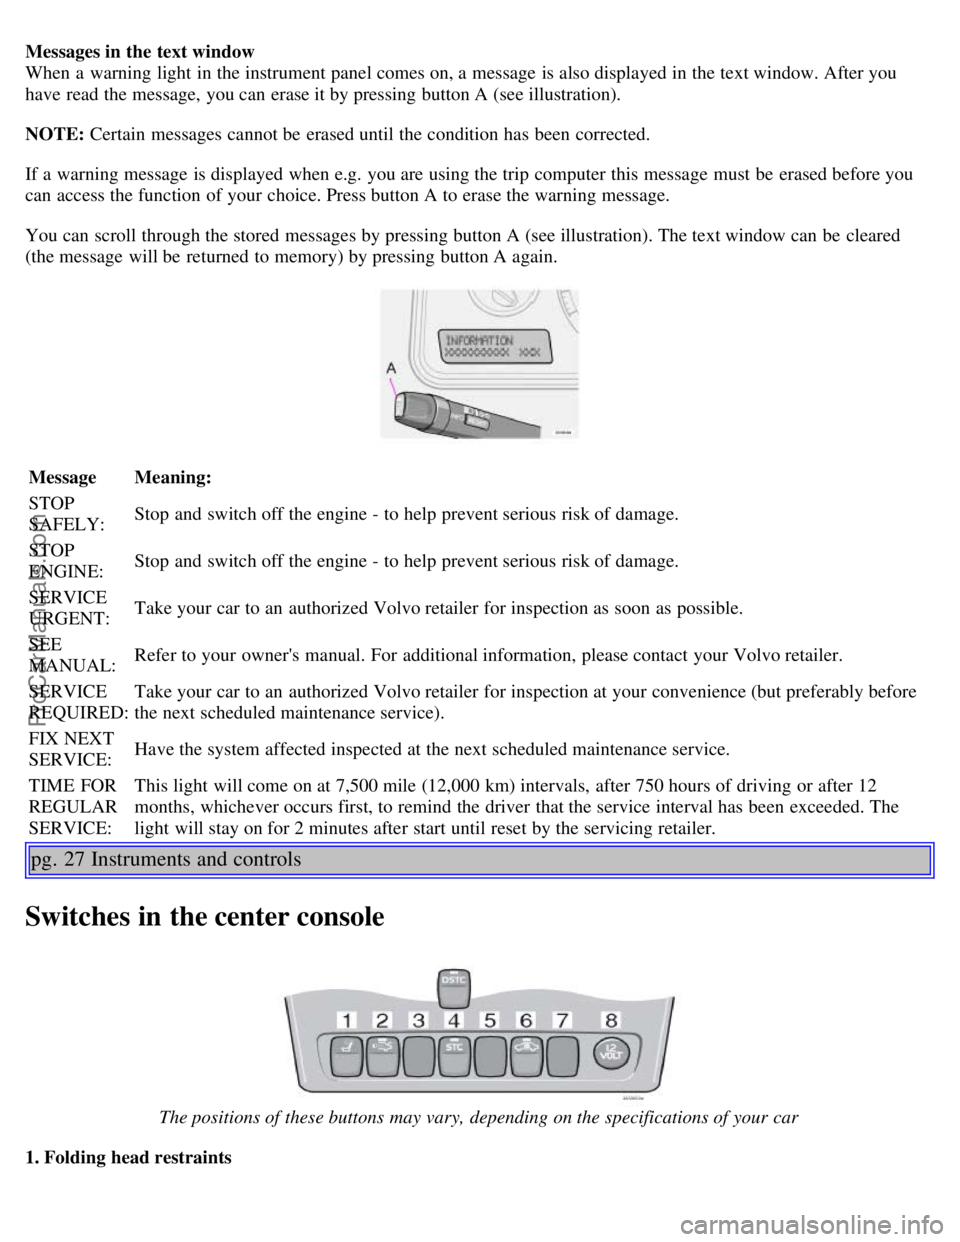
When a warning light in the instrument panel comes on, a message is also displayed in the text window. After you
have read the message, you can erase it by pressing button A (see illustration).
NOTE: Certain messages cannot be erased until the condition has been corrected.
If a warning message is displayed when e.g. you are using the trip computer this message must be erased before you
can access the function of your choice. Press button A to erase the warning message.
You can scroll through the stored messages by pressing button A (see illustration). The text window can be cleared
(the message will be returned to memory) by pressing button A again.
MessageMeaning:
STOP
SAFELY: Stop and switch off the engine - to help prevent serious risk of damage.
STOP
ENGINE: Stop and switch off the engine - to help prevent serious risk of damage.
SERVICE
URGENT: Take your car to an authorized Volvo retailer for inspection as soon as possible.
SEE
MANUAL: Refer to your owner's manual. For additional information, please contact your Volvo retailer.
SERVICE
REQUIRED: Take your car to an authorized Volvo retailer for inspection at your convenience (but preferably before
the next scheduled maintenance service).
FIX NEXT
SERVICE: Have the system affected inspected at the next scheduled maintenance service.
TIME FOR
REGULAR
SERVICE: This light will come on at 7,500 mile (12,000 km) intervals, after 750 hours of driving or after 12
months, whichever occurs first, to remind the driver that the service interval has been exceeded. The
light will stay on for 2 minutes after start until reset by the servicing retailer.
pg. 27 Instruments and controls
Switches in the center console
The positions of these buttons may vary, depending on the specifications of your car
1. Folding head restraints
ProCarManuals.com
Page 31 of 120
Auxiliary sockets
These 12 volt sockets can be used to plug in certain accessories such as cellular telephones, etc. The key must be in
position I (or higher) for the auxiliary socket to function.
The auxiliary sockets can also be used for cigarette lighters, which are available at your Volvo retailer.
NOTE: The cover should be kept on when the auxiliary socket is not in use.
Ashtrays
Volvo cars in North America do not have an ashtray in the front seat as standard equipment. If you want to have an
ashtray in the front seat, please contact your Volvo retailer.
pg. 38 Instruments and controls
Electrically operated windows
Electrically operated windows
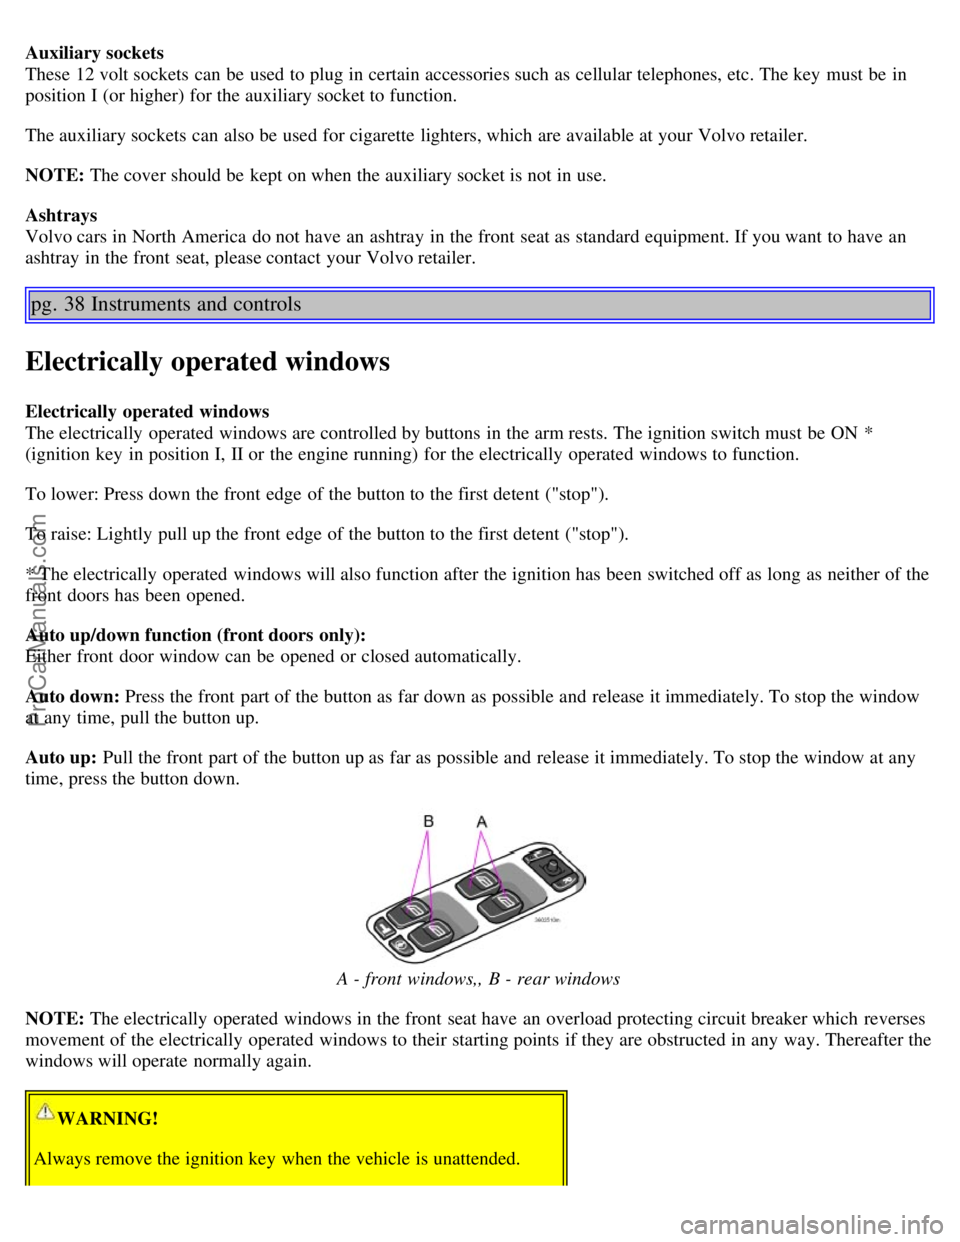
The electrically operated windows are controlled by buttons in the arm rests. The ignition switch must be ON *
(ignition key in position I, II or the engine running) for the electrically operated windows to function.
To lower: Press down the front edge of the button to the first detent ("stop").
To raise: Lightly pull up the front edge of the button to the first detent ("stop").
* The electrically operated windows will also function after the ignition has been switched off as long as neither of the
front doors has been opened.
Auto up/down function (front doors only):
Either front door window can be opened or closed automatically.
Auto down: Press the front part of the button as far down as possible and release it immediately. To stop the window
at any time, pull the button up.
Auto up: Pull the front part of the button up as far as possible and release it immediately. To stop the window at any
time, press the button down.
A - front windows,, B - rear windows
NOTE: The electrically operated windows in the front seat have an overload protecting circuit breaker which reverses
movement of the electrically operated windows to their starting points if they are obstructed in any way. Thereafter the
windows will operate normally again.
WARNING!
Always remove the ignition key when the vehicle is unattended.
ProCarManuals.com
Page 32 of 120
Make sure that childrens' hands are clear before raising the windows.
Never leave children unattended in the car.
Cutout switch for rear windows
Cutout switch for rear windows
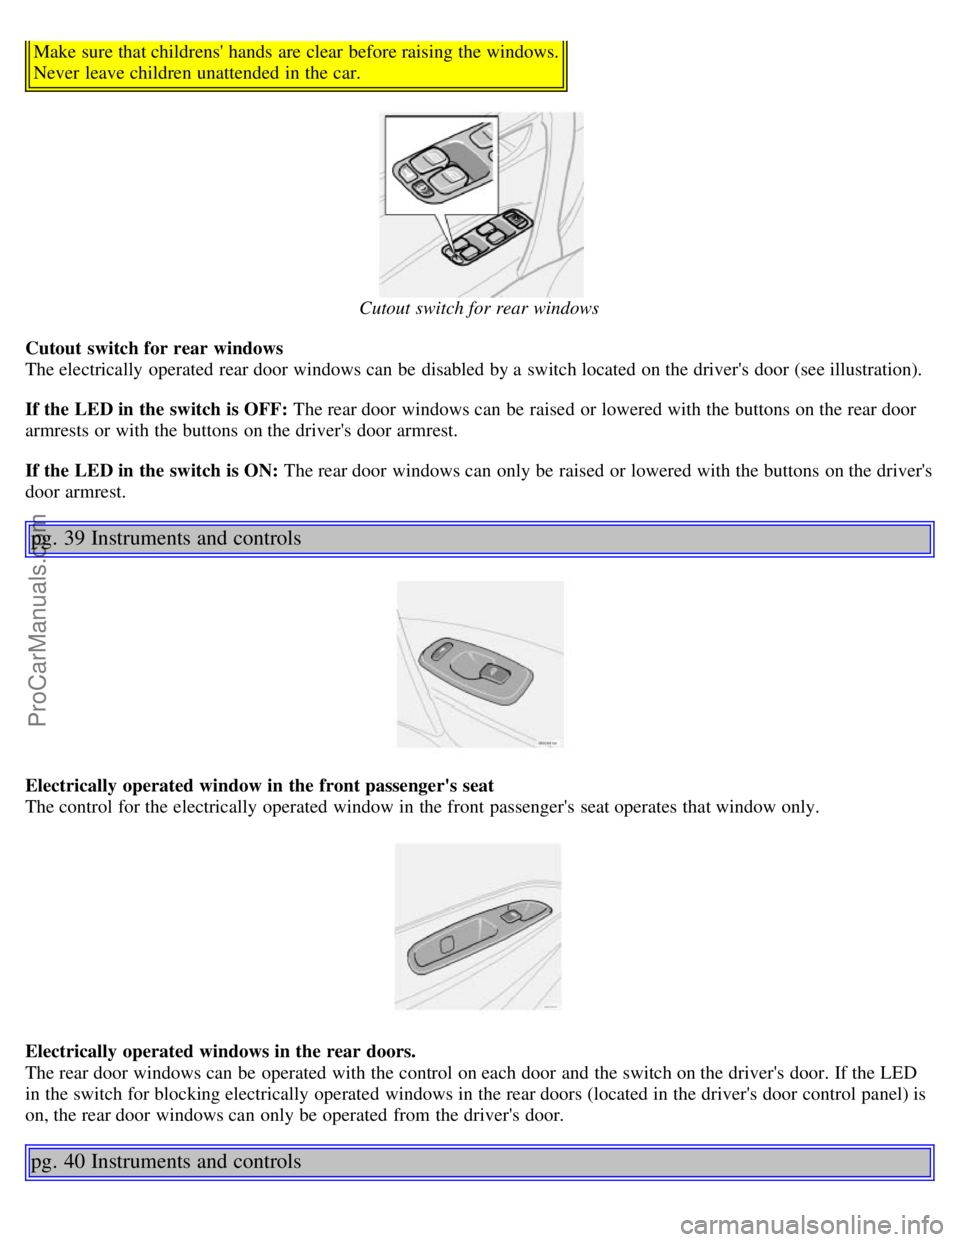
The electrically operated rear door windows can be disabled by a switch located on the driver's door (see illustration).
If the LED in the switch is OFF: The rear door windows can be raised or lowered with the buttons on the rear door
armrests or with the buttons on the driver's door armrest.
If the LED in the switch is ON: The rear door windows can only be raised or lowered with the buttons on the driver's
door armrest.
pg. 39 Instruments and controls
Electrically operated window in the front passenger's seat
The control for the electrically operated window in the front passenger's seat operates that window only.
Electrically operated windows in the rear doors.
The rear door windows can be operated with the control on each door and the switch on the driver's door. If the LED
in the switch for blocking electrically operated windows in the rear doors (located in the driver's door control panel) is
on, the rear door windows can only be operated from the driver's door.
pg. 40 Instruments and controls
ProCarManuals.com
Page 46 of 120
1. Within 40 seconds of the ignition key being turned to position 0 or removed from the ignition switch.
2. After you have unlocked the driver's door with the key or remote control, the driver's seat can be adjusted during a
10 minute period if the door remains open. If the door is closed, the seat can be adjusted for 40 seconds. The ignition
key can be in position 0 or not yet inserted in the ignition switch.
Remote keyless entry system and driver's seat
The remote control transmitter also controls the electrically operated driver's seat in the following way:
Adjust the seat to your preferences.
When you leave your car, lock it using the remote control.
The next time you unlock the driver's door with the same remote control (the one you used to lock the doors with) and
open the driver's door, the driver's seat will automatically move to the position in which you left it.
The seat will move to this position even if someone else has adjusted it since you last unlocked the car with the same
remote control.
NOTE! This feature will work in the same way with all of the remote control transmitters (up to 3) that you use with
your car.
This feature will not function if you lock your car with the key. This feature will not function if you lock you car with
the key.
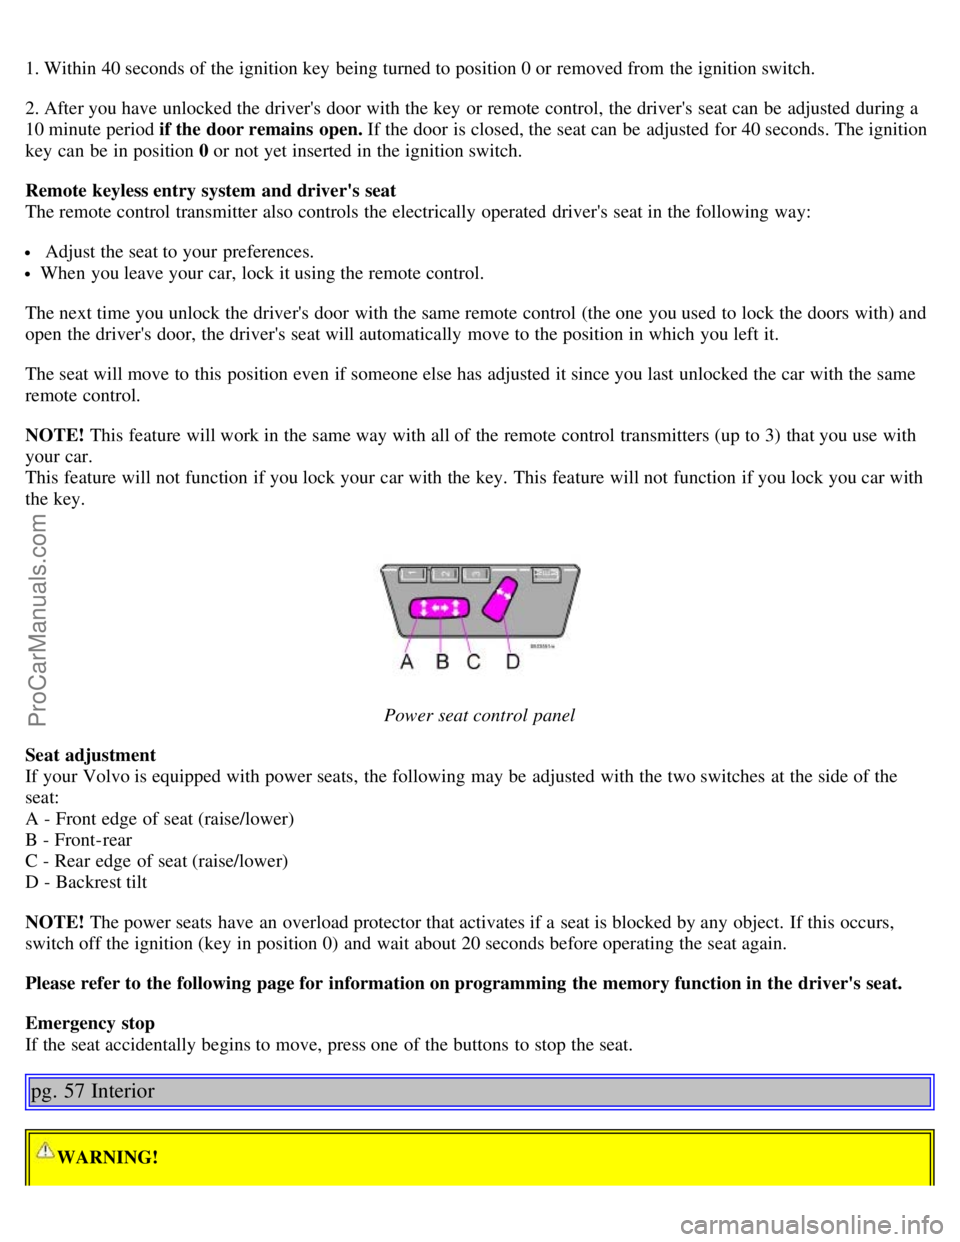
Power seat control panel
Seat adjustment
If your Volvo is equipped with power seats, the following may be adjusted with the two switches at the side of the
seat:
A - Front edge of seat (raise/lower)
B - Front-rear
C - Rear edge of seat (raise/lower)
D - Backrest tilt
NOTE! The power seats have an overload protector that activates if a seat is blocked by any object. If this occurs,
switch off the ignition (key in position 0) and wait about 20 seconds before operating the seat again.
Please refer to the following page for information on programming the memory function in the driver's seat.
Emergency stop
If the seat accidentally begins to move, press one of the buttons to stop the seat.
pg. 57 Interior
WARNING!
ProCarManuals.com
Page 47 of 120
Because the driver's seat can be adjusted with the ignition off, children should never be left unattended in the car.
Movement of the seat can be STOPPED at any time by pressing any button on the power seat control panel.
Do not adjust the seat while driving. The seat should be adjusted so that the brake pedal can be depressed fully. In
addition, position the seat as far rearward as comfort and control allow.
The seat rails on the floor must not be obstructed in any way when the seat is in motion.
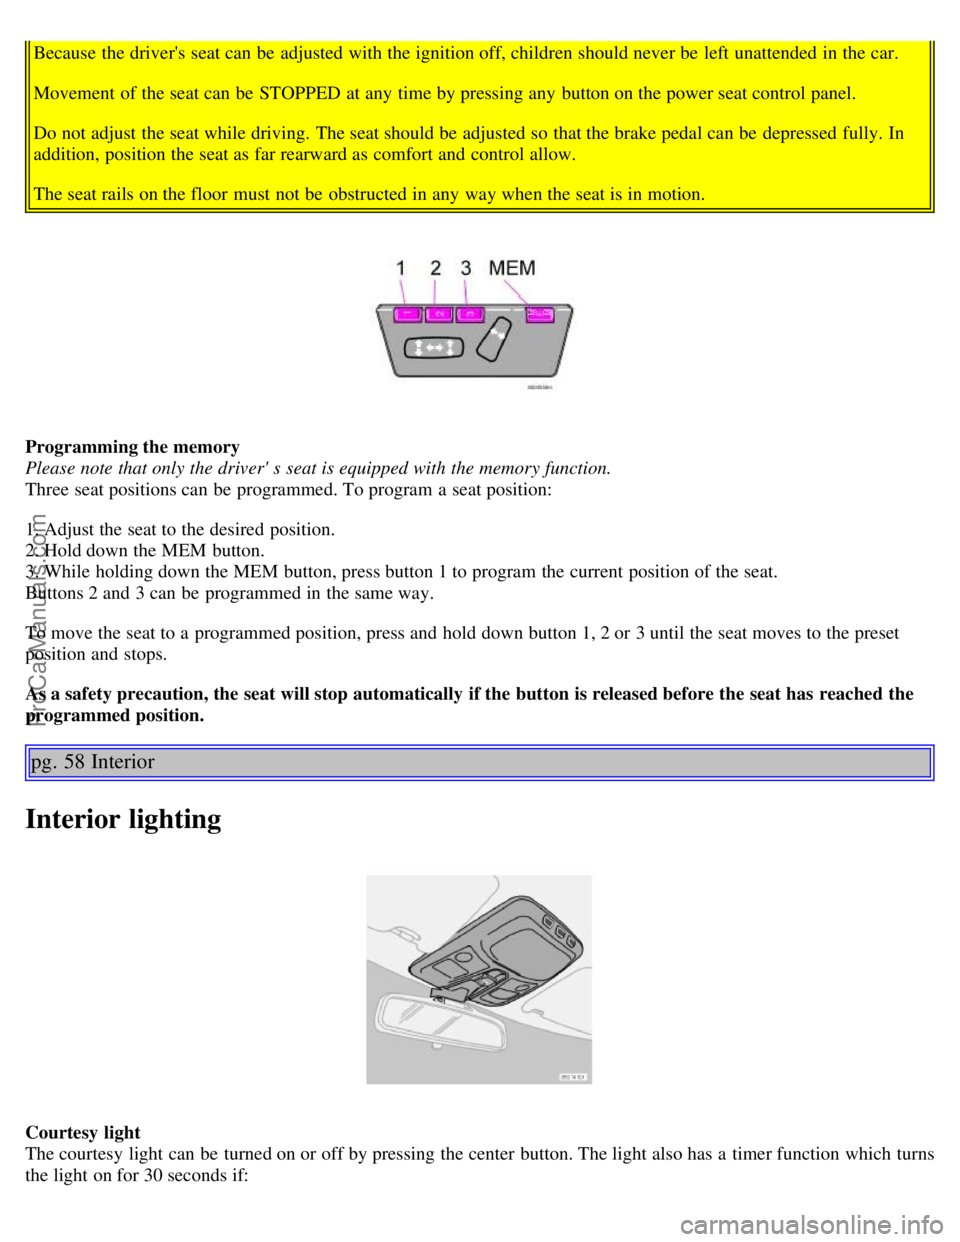
Programming the memory
Please note that only the driver' s seat is equipped with the memory function.
Three seat positions can be programmed. To program a seat position:
1. Adjust the seat to the desired position.
2. Hold down the MEM button.
3. While holding down the MEM button, press button 1 to program the current position of the seat.
Buttons 2 and 3 can be programmed in the same way.
To move the seat to a programmed position, press and hold down button 1, 2 or 3 until the seat moves to the preset
position and stops.
As a safety precaution, the seat will stop automatically if the button is released before the seat has reached the
programmed position.
pg. 58 Interior
Interior lighting
Courtesy light
The courtesy light can be turned on or off by pressing the center button. The light also has a timer function which turns
the light on for 30 seconds if:
ProCarManuals.com
Page 48 of 120

You unlock the car from the outside with the key or remote control.
You switch off the ignition (turn the key to position 0).
The courtesy light stays on for 10 minutes if one of the doors is left open after the car is unlocked.
The courtesy light switches off if:
The engine is started.
The car is locked from the outside with the key or remote control.
The courtesy light can be switched off or on in all situations by briefly pressing the button.
When you switch the light on, it remains lit for 10 minutes.
You can disconnect the automatic function by pressing the courtesy light button for more than 3 seconds. Briefly
pressing the courtesy light button again automatically reconnects the function.
The courtesy light timer periods can be changed. Contact your Volvo retailer.
Rear reading lights
Reading lights - front/rear
The reading lights can be switched on or off by pressing the respective buttons. These lights switch off automatically
after 10 minutes if the engine is not running. If the engine is running, the lights stay on indefinitely. The lights can be
switched off at any time by pressing the button.
pg. 59 Interior
Vanity mirror
ProCarManuals.com
Page 53 of 120
Doing so would ACTIVATE:
the break-in alarm, which would sound if one of the doors were opened
the optional interior motion and inclination alarm sensors.
Doing so would DEACTIVATE:
the sunroof and interior courtesy light controls.
the central locking buttons on the front door armrests, although the interior door handles would still function to
allow occupants to leave the car.
Disabled features would remain disabled until the remote were used again to unlock the car.
In addition, locking an occupied vehicle would hinder rapid access to the occupants in an accident or emergency.
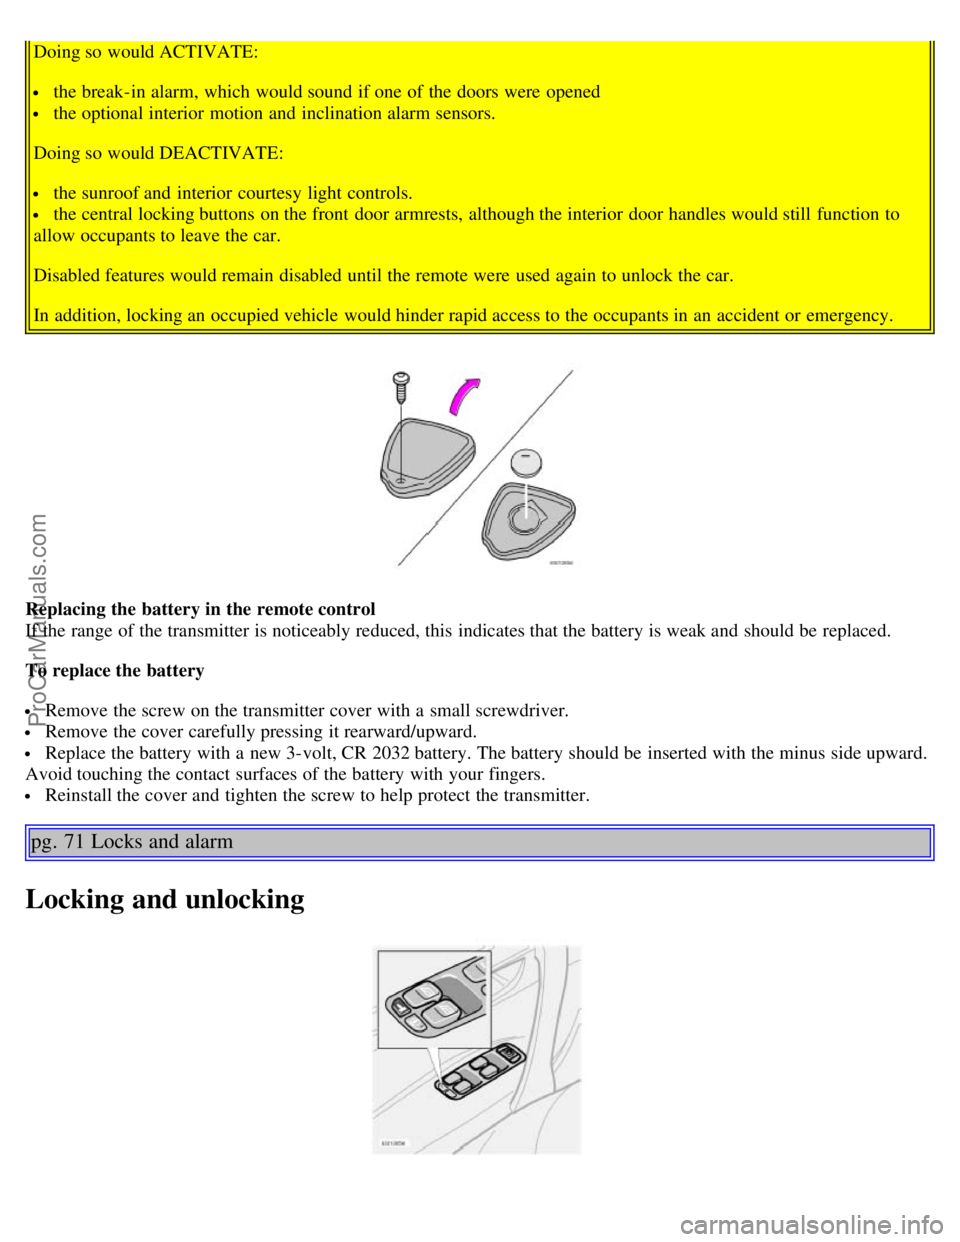
Replacing the battery in the remote control
If the range of the transmitter is noticeably reduced, this indicates that the battery is weak and should be replaced.
To replace the battery
Remove the screw on the transmitter cover with a small screwdriver.
Remove the cover carefully pressing it rearward/upward.
Replace the battery with a new 3-volt, CR 2032 battery. The battery should be inserted with the minus side upward.
Avoid touching the contact surfaces of the battery with your fingers.
Reinstall the cover and tighten the screw to help protect the transmitter.
pg. 71 Locks and alarm
Locking and unlocking
ProCarManuals.com
Page 56 of 120
buttons in position A
pg. 75 Locks and alarm
Alarm
Alarm
The alarm is automatically armed whenever you lock your car.
When armed, the alarm continuously monitors a number of points on the car. The following conditions will set off the
alarm:
The hood is forced open.
The trunk is forced open.
A door is forced open.
The ignition switch is tampered with.
If there is movement in the passenger compartment (if the car is equipped with the optional movement sensor).
The car is lifted or towed (if the car is equipped with the optional inclination sensor).
The battery is disconnected (while the alarm is armed).
The siren is disconnected when the alarm is disarmed.
Arming the alarm
Press the LOCK button on the remote control, lock the car using the key in the driver's door or press the central lock
button on one of the front doors with the door open. One long flash of the turn signals will confirm that the alarm is
armed.
Disarming the alarm
Press the UNLOCK button on the remote control or unlock the doors with the key.
Turning off (stopping) the alarm
If the alarm is sounding, it can be stopped by pressing the UNLOCK button on the remote control or by unlocking the
driver's door with the key.
Visual alarm signal
The visual alarm signal is given by flashing all turn signals and turning on the interior lighting for approximately 5
minutes.
Audible alarm signal
An audible alarm signal is given by a battery powered siren. One alarm cycle lasts for 25 seconds.
"Panic" button
In an emergency situation, this feature can be used to attract attention.
Activate the "panic" button by pressing the red button on the remote control (see illustration on page 69
) for at least 3
seconds or by pressing this button twice within 3 seconds. The turn signals will flash, the interior lights will go on and
the car's horn will sound.
The function can be turned off by pressing any of the buttons on the remote control or will stop automatically after 25
seconds. When a button is pressed, there is a 5 second delay before the panic alarm is deactivated.
NOTE: This button will NOT unlock the car.
pg. 76 Locks and alarm
ProCarManuals.com
Page 103 of 120
Station scan - press
External CD changer (option)
7. Radio - Station seek up/down
CD - Selecting next/previous track
8. Radio - Manual station selection
CD - Fast forward/backward
9. CD eject
10. Dolby Pro Logic - switching on
11. 2 channel stereo
12. 3 channel stereo
13. CD slot
14. CD random play
15. Program type
16. News
17. Traffic information
18. Automatic presetting of radio stations
19. Display
pg. 160 Audio
Audio systems HU-613/HU-803
Switch on/off
Press the knob to switch on or turn off the radio.
Volume control
Turn the knob clockwise to increase volume. Volume control is electronic and does not have an end stop. If you have
a key pad in the steering wheel, increase or decrease the volume with the + or - buttons.
Band selector
Turn "SOURCE" knob to select FM or AM. The station and band are displayed. You can also select cassette deck,
CD, or the optional CD changer if connected, with this knob.
Active sound control (ASC)
The ASC (Active Sound Control) automatically adapts volume to vehicle speed.
Press the ASC button (HU-613) for several seconds to switch this function ON or OFF. This function is included in
ProCarManuals.com