display VOLVO S60 2007 User Guide
[x] Cancel search | Manufacturer: VOLVO, Model Year: 2007, Model line: S60, Model: VOLVO S60 2007Pages: 200, PDF Size: 4.03 MB
Page 52 of 200

Increasing or decreasing speed
Use + or - in the following ways to increase or decrease the vehicle's speed
Press and hold down + or - until the vehicle reaches the desired speed.
Press + or - for approximately a half second and release the button to increase or decrease vehicle speed by
approximately 1 mph (1.6 km/h).
NOTE: Cruise control will not function at speeds below approximately 20 mph (30 km/h).
Braking
Cruise control is automatically disengaged when the brake pedal is depressed. The currently set speed is stored in
memory.
Pressing resume will return the vehicle to the previously set speed.
Acceleration
Momentary acceleration, such as when passing another vehicle, does not affect cruise control operation. The vehicle
will automatically return to the previously set speed when you release the accelerator pedal.
Disengaging cruise control
To disengage cruise control, press the CRUISE button. CRUISE or CRUISE-ON will no longer be displayed in the
information window in the instrument panel.
NOTE: Cruise control is automatically disengaged if:
the engine is switched off
the gear selector is placed in (N)eutral
the wheels start to spin or lock
if an increase in speed is maintained for more than one minute
if the vehicle's speed falls below approximately 20 mph (30 km/h).
pg. 61 Instruments and controls
Cruise control
Temporarily disengaging cruise control
Press 0 to temporarily disengage cruise control. CRUISE will be displayed in the information window in the
instrument panel.
Press the brake pedal. Press "resume" to return to the previously set speed.
ProCarManuals.com
Page 57 of 200
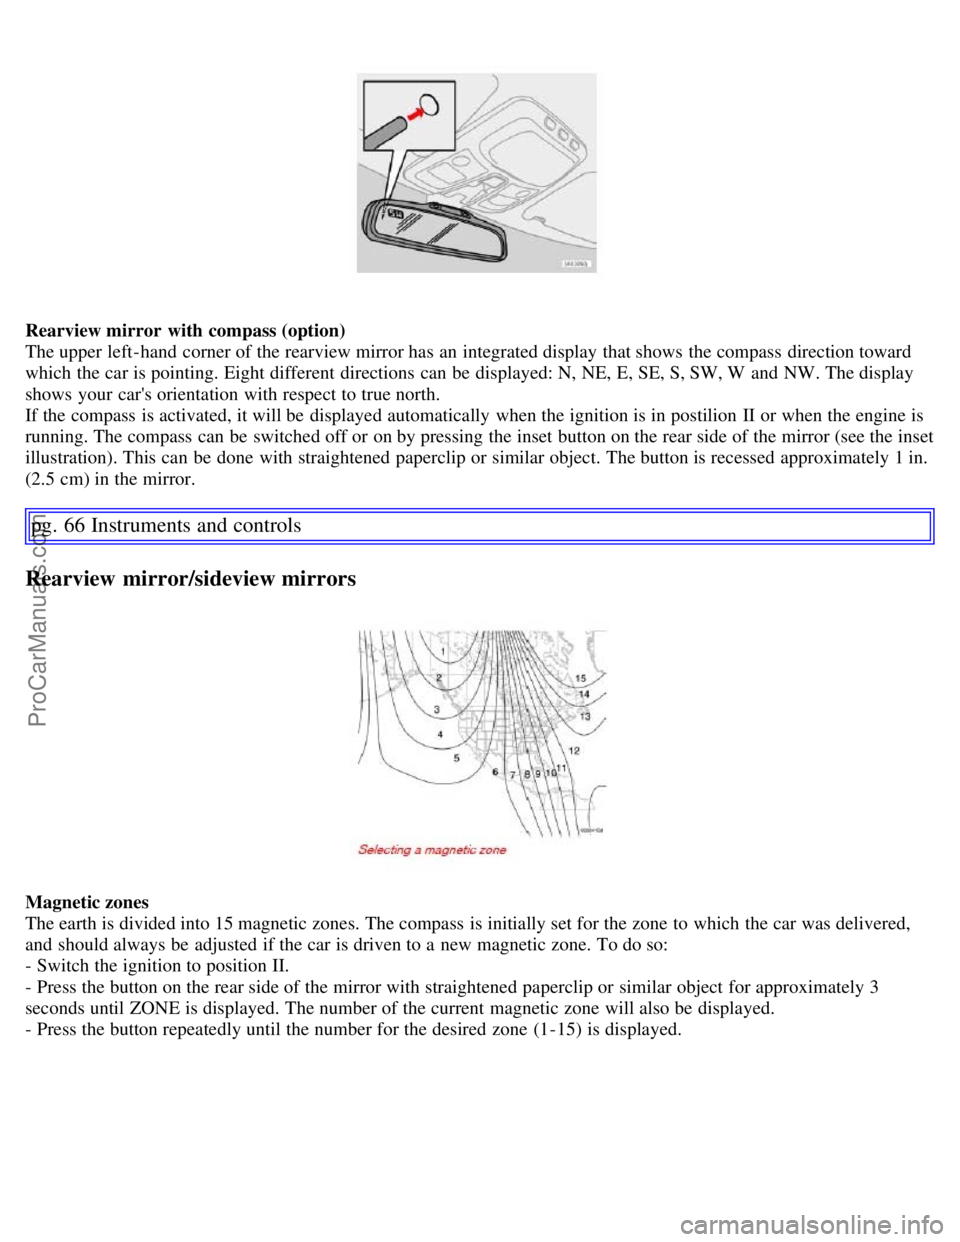
Rearview mirror with compass (option)
The upper left-hand corner of the rearview mirror has an integrated display that shows the compass direction toward
which the car is pointing. Eight different directions can be displayed: N, NE, E, SE, S, SW, W and NW. The display
shows your car's orientation with respect to true north.
If the compass is activated, it will be displayed automatically when the ignition is in postilion II or when the engine is
running. The compass can be switched off or on by pressing the inset button on the rear side of the mirror (see the inset
illustration). This can be done with straightened paperclip or similar object. The button is recessed approximately 1 in.
(2.5 cm) in the mirror.
pg. 66 Instruments and controls
Rearview mirror/sideview mirrors
Magnetic zones
The earth is divided into 15 magnetic zones. The compass is initially set for the zone to which the car was delivered,
and should always be adjusted if the car is driven to a new magnetic zone. To do so:
- Switch the ignition to position II.
- Press the button on the rear side of the mirror with straightened paperclip or similar object for approximately 3
seconds until ZONE is displayed. The number of the current magnetic zone will also be displayed.
- Press the button repeatedly until the number for the desired zone (1-15) is displayed.
ProCarManuals.com
Page 58 of 200
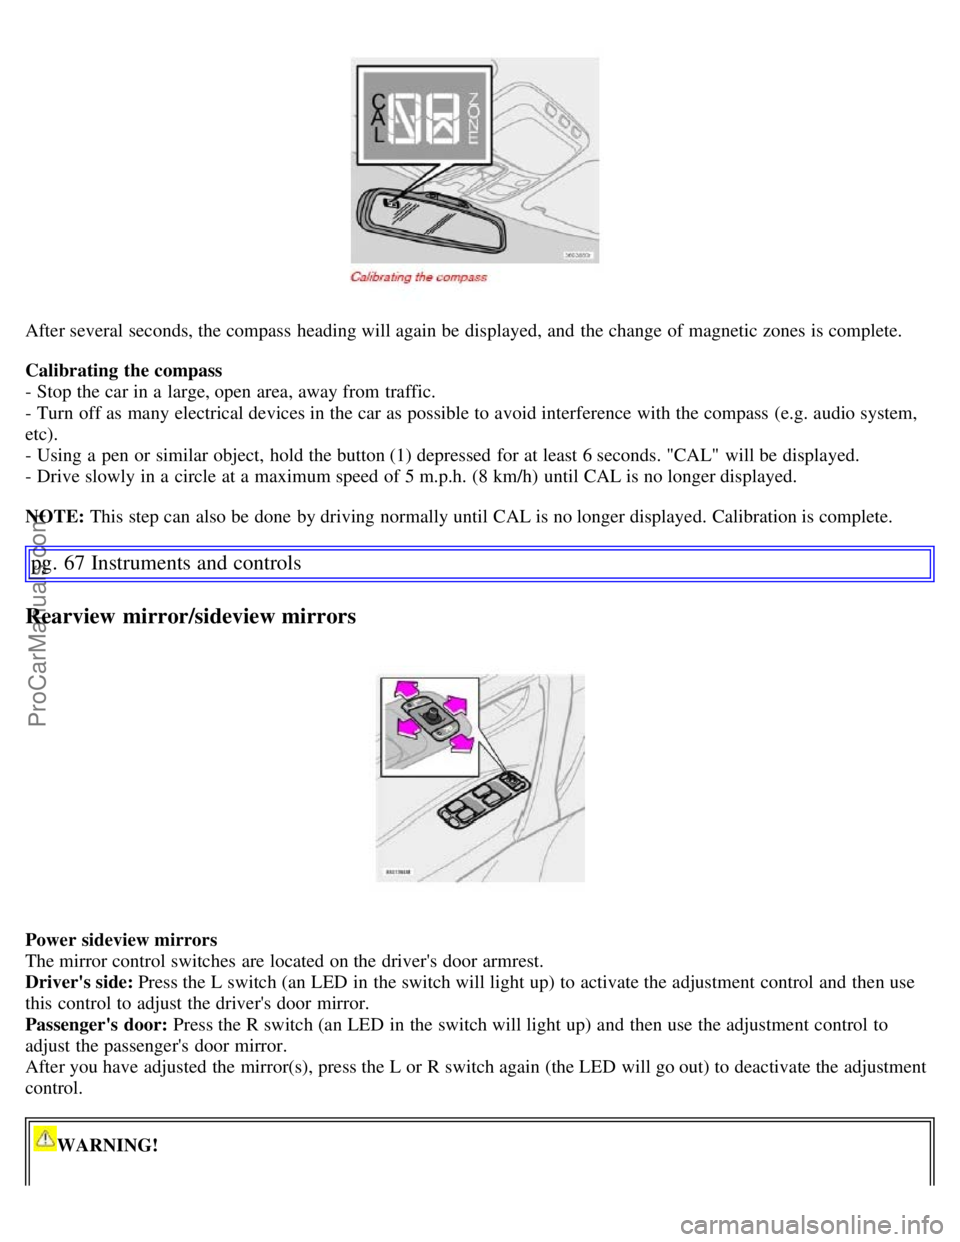
After several seconds, the compass heading will again be displayed, and the change of magnetic zones is complete.
Calibrating the compass
- Stop the car in a large, open area, away from traffic.
- Turn off as many electrical devices in the car as possible to avoid interference with the compass (e.g. audio system,
etc).
- Using a pen or similar object, hold the button (1) depressed for at least 6 seconds. "CAL" will be displayed.
- Drive slowly in a circle at a maximum speed of 5 m.p.h. (8 km/h) until CAL is no longer displayed.
NOTE: This step can also be done by driving normally until CAL is no longer displayed. Calibration is complete.
pg. 67 Instruments and controls
Rearview mirror/sideview mirrors
Power sideview mirrors
The mirror control switches are located on the driver's door armrest.
Driver's side: Press the L switch (an LED in the switch will light up) to activate the adjustment control and then use
this control to adjust the driver's door mirror.
Passenger's door: Press the R switch (an LED in the switch will light up) and then use the adjustment control to
adjust the passenger's door mirror.
After you have adjusted the mirror(s), press the L or R switch again (the LED will go out) to deactivate the adjustment
control.
WARNING!
ProCarManuals.com
Page 85 of 200
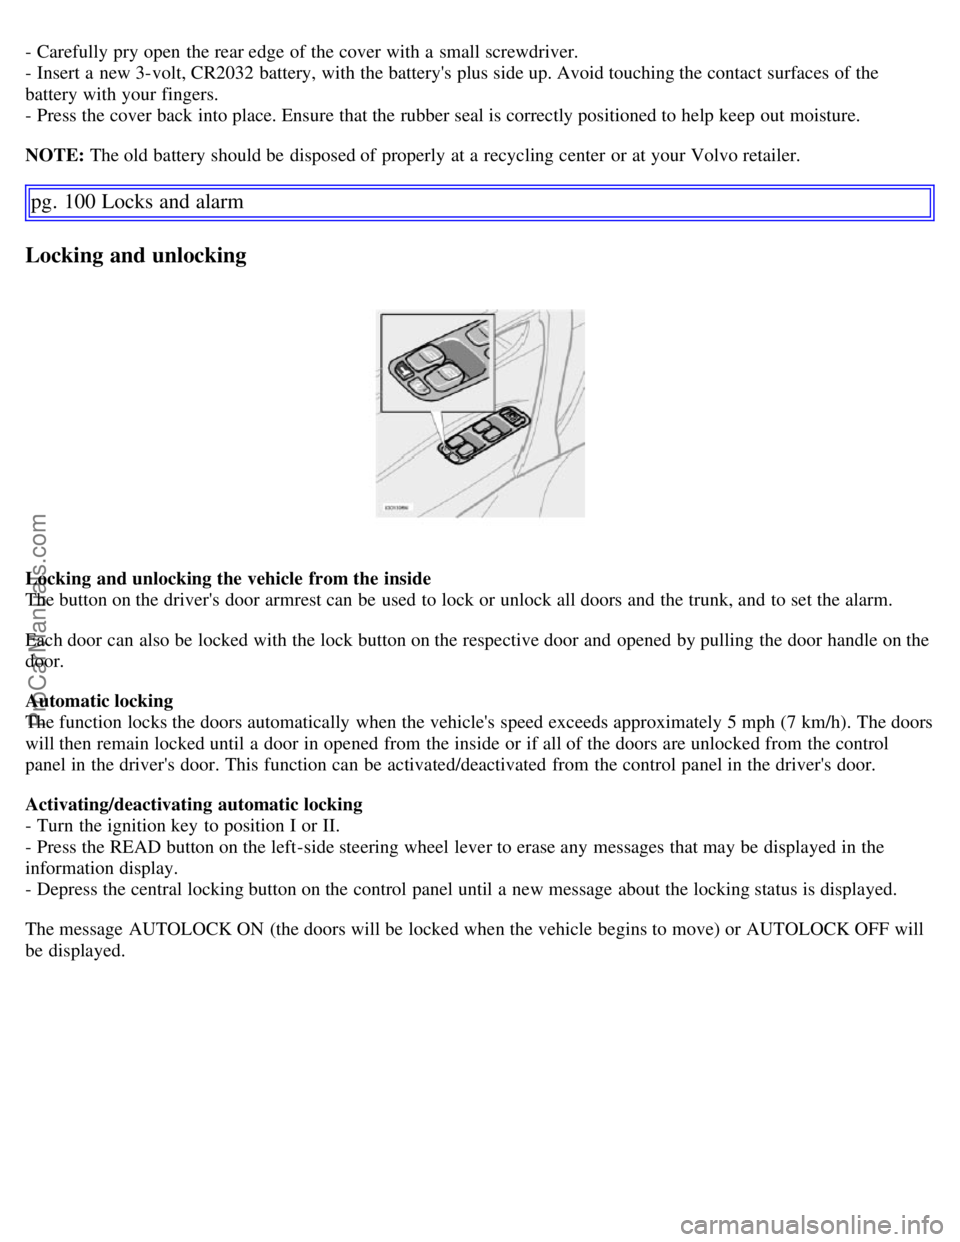
- Carefully pry open the rear edge of the cover with a small screwdriver.
- Insert a new 3-volt, CR2032 battery, with the battery's plus side up. Avoid touching the contact surfaces of the
battery with your fingers.
- Press the cover back into place. Ensure that the rubber seal is correctly positioned to help keep out moisture.
NOTE: The old battery should be disposed of properly at a recycling center or at your Volvo retailer.
pg. 100 Locks and alarm
Locking and unlocking
Locking and unlocking the vehicle from the inside
The button on the driver's door armrest can be used to lock or unlock all doors and the trunk, and to set the alarm.
Each door can also be locked with the lock button on the respective door and opened by pulling the door handle on the
door.
Automatic locking
The function locks the doors automatically when the vehicle's speed exceeds approximately 5 mph (7 km/h). The doors
will then remain locked until a door in opened from the inside or if all of the doors are unlocked from the control
panel in the driver's door. This function can be activated/deactivated from the control panel in the driver's door.
Activating/deactivating automatic locking
- Turn the ignition key to position I or II.
- Press the READ button on the left-side steering wheel lever to erase any messages that may be displayed in the
information display.
- Depress the central locking button on the control panel until a new message about the locking status is displayed.
The message AUTOLOCK ON (the doors will be locked when the vehicle begins to move) or AUTOLOCK OFF will
be displayed.
ProCarManuals.com
Page 89 of 200
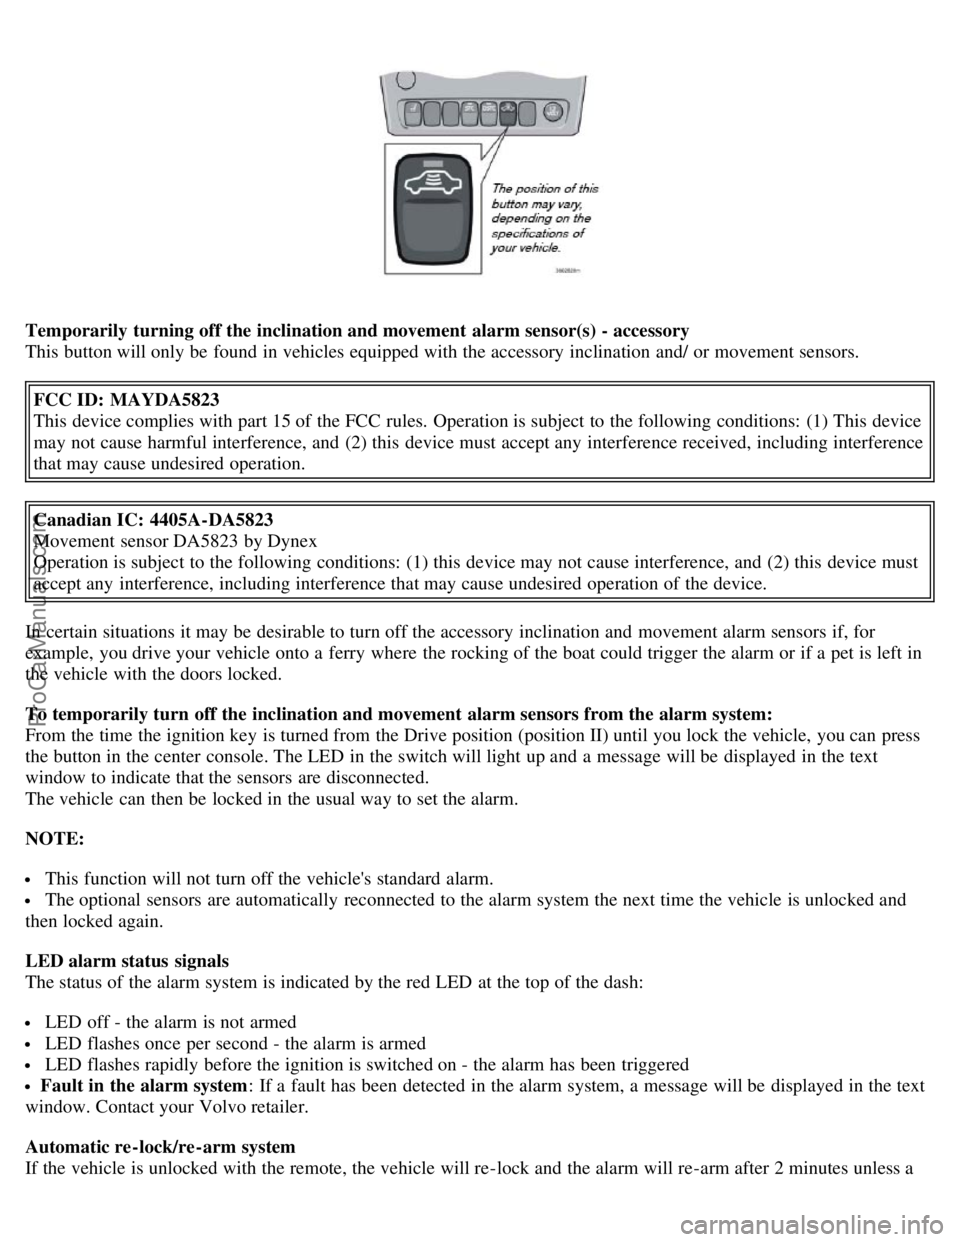
Temporarily turning off the inclination and movement alarm sensor(s) - accessory
This button will only be found in vehicles equipped with the accessory inclination and/ or movement sensors.FCC ID: MAYDA5823
This device complies with part 15 of the FCC rules. Operation is subject to the following conditions: (1) This device
may not cause harmful interference, and (2) this device must accept any interference received, including interference
that may cause undesired operation.
Canadian IC: 4405A-DA5823
Movement sensor DA5823 by Dynex
Operation is subject to the following conditions: (1) this device may not cause interference, and (2) this device must
accept any interference, including interference that may cause undesired operation of the device.
In certain situations it may be desirable to turn off the accessory inclination and movement alarm sensors if, for
example, you drive your vehicle onto a ferry where the rocking of the boat could trigger the alarm or if a pet is left in
the vehicle with the doors locked.
To temporarily turn off the inclination and movement alarm sensors from the alarm system:
From the time the ignition key is turned from the Drive position (position II) until you lock the vehicle, you can press
the button in the center console. The LED in the switch will light up and a message will be displayed in the text
window to indicate that the sensors are disconnected.
The vehicle can then be locked in the usual way to set the alarm.
NOTE:
This function will not turn off the vehicle's standard alarm.
The optional sensors are automatically reconnected to the alarm system the next time the vehicle is unlocked and
then locked again.
LED alarm status signals
The status of the alarm system is indicated by the red LED at the top of the dash:
LED off - the alarm is not armed
LED flashes once per second - the alarm is armed
LED flashes rapidly before the ignition is switched on - the alarm has been triggered
Fault in the alarm system : If a fault has been detected in the alarm system, a message will be displayed in the text
window. Contact your Volvo retailer.
Automatic re-lock/re -arm system
If the vehicle is unlocked with the remote, the vehicle will re-lock and the alarm will re-arm after 2 minutes unless a
ProCarManuals.com
Page 101 of 200
L are selected.
pg. 117 Starting and driving
Automatic transmission (option)
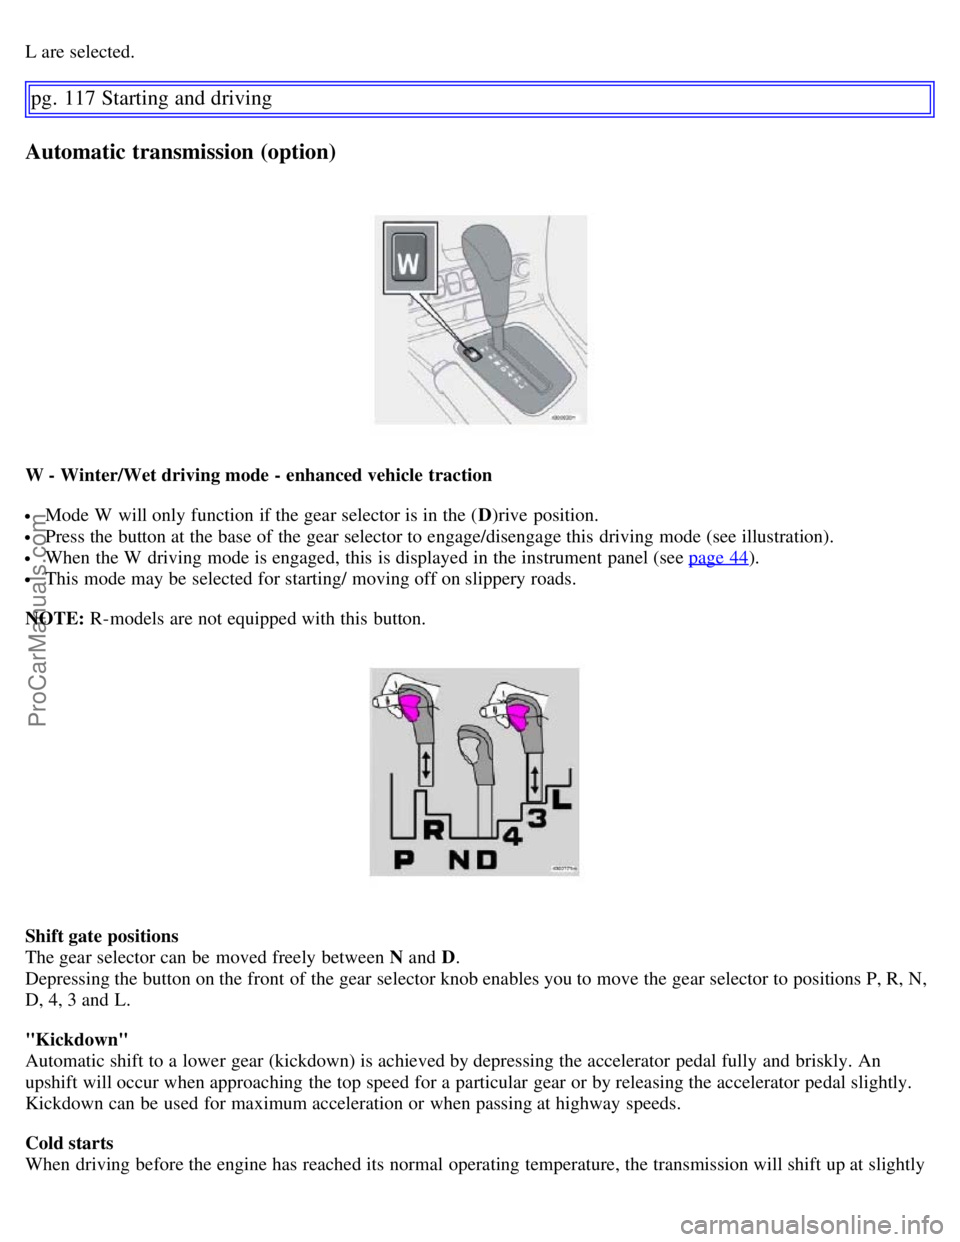
W - Winter/Wet driving mode - enhanced vehicle traction
Mode W will only function if the gear selector is in the (D)rive position.
Press the button at the base of the gear selector to engage/disengage this driving mode (see illustration).
When the W driving mode is engaged, this is displayed in the instrument panel (see page 44).
This mode may be selected for starting/ moving off on slippery roads.
NOTE: R-models are not equipped with this button.
Shift gate positions
The gear selector can be moved freely between N and D.
Depressing the button on the front of the gear selector knob enables you to move the gear selector to positions P, R, N,
D, 4, 3 and L.
"Kickdown"
Automatic shift to a lower gear (kickdown) is achieved by depressing the accelerator pedal fully and briskly. An
upshift will occur when approaching the top speed for a particular gear or by releasing the accelerator pedal slightly.
Kickdown can be used for maximum acceleration or when passing at highway speeds.
Cold starts
When driving before the engine has reached its normal operating temperature, the transmission will shift up at slightly
ProCarManuals.com
Page 103 of 200
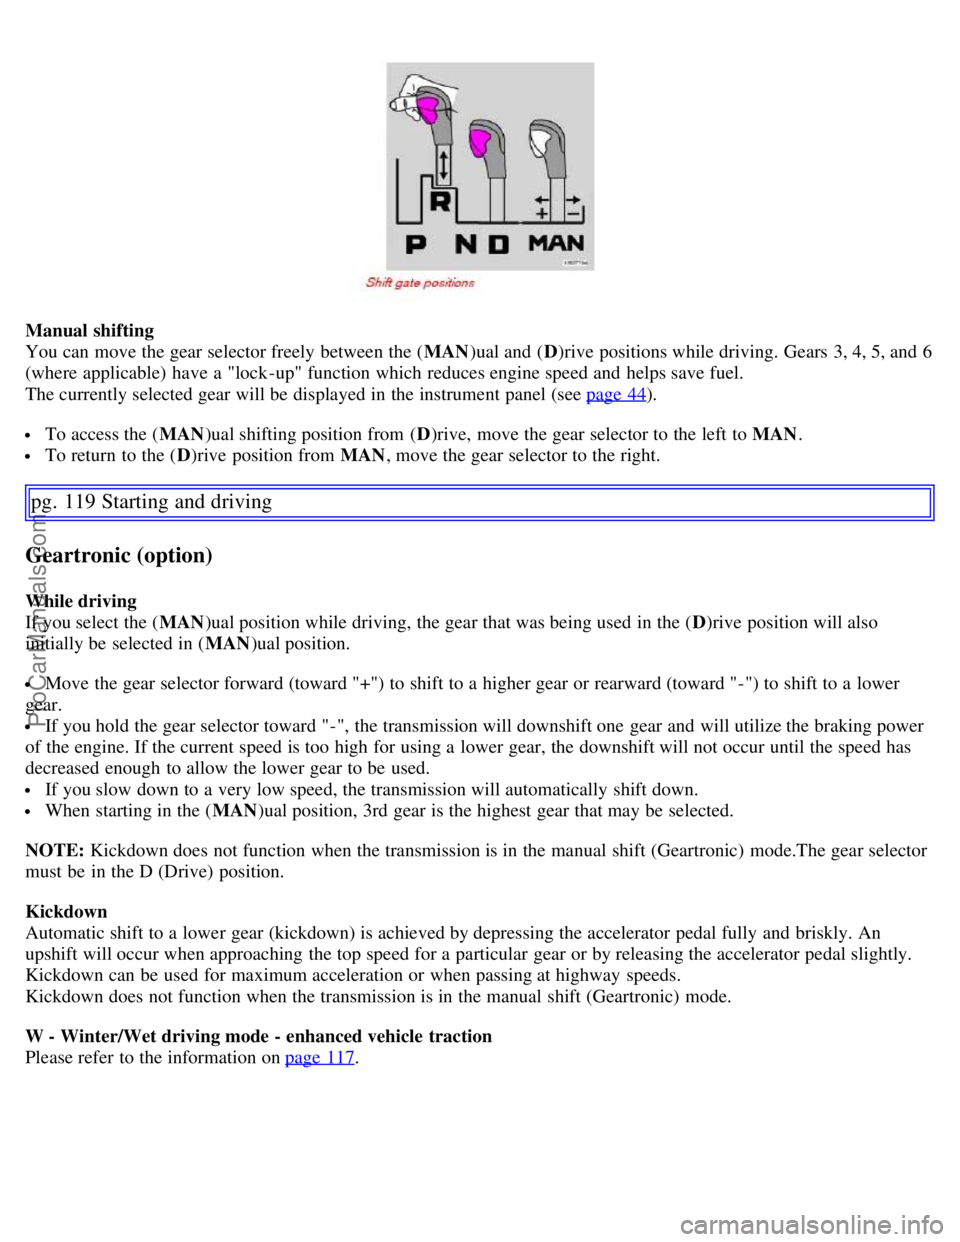
Manual shifting
You can move the gear selector freely between the (MAN)ual and ( D)rive positions while driving. Gears 3, 4, 5, and 6
(where applicable) have a "lock -up" function which reduces engine speed and helps save fuel.
The currently selected gear will be displayed in the instrument panel (see page 44
).
To access the ( MAN)ual shifting position from ( D)rive, move the gear selector to the left to MAN .
To return to the (D)rive position from MAN , move the gear selector to the right.
pg. 119 Starting and driving
Geartronic (option)
While driving
If you select the (MAN)ual position while driving, the gear that was being used in the ( D)rive position will also
initially be selected in ( MAN)ual position.
Move the gear selector forward (toward "+") to shift to a higher gear or rearward (toward "-") to shift to a lower
gear.
If you hold the gear selector toward "-", the transmission will downshift one gear and will utilize the braking power
of the engine. If the current speed is too high for using a lower gear, the downshift will not occur until the speed has
decreased enough to allow the lower gear to be used.
If you slow down to a very low speed, the transmission will automatically shift down.
When starting in the ( MAN)ual position, 3rd gear is the highest gear that may be selected.
NOTE: Kickdown does not function when the transmission is in the manual shift (Geartronic) mode.The gear selector
must be in the D (Drive) position.
Kickdown
Automatic shift to a lower gear (kickdown) is achieved by depressing the accelerator pedal fully and briskly. An
upshift will occur when approaching the top speed for a particular gear or by releasing the accelerator pedal slightly.
Kickdown can be used for maximum acceleration or when passing at highway speeds.
Kickdown does not function when the transmission is in the manual shift (Geartronic) mode.
W - Winter/Wet driving mode - enhanced vehicle traction
Please refer to the information on page 117
.
ProCarManuals.com
Page 106 of 200
problem should occur in one of these circuits, it is still possible to stop the vehicle with the other brake circuit.
If the brake pedal must be depressed farther than normal and requires greater foot pressure, the stopping distance will
be longer.
A warning light in the instrument panel will light up to warn the driver that a fault has occurred.
If this light comes on while driving or braking, stop immediately and check the brake fluid level in the reservoir.
NOTE: Press the brake pedal hard and maintain pressure on the pedal - do not pump the brakes.
WARNING!
If the fluid level is below the MIN mark in the reservoir or if a "Brake failure - Service urgent" message is displayed
in the text window: DO NOT DRIVE. Have the vehicle towed to a Volvo retailer and have the brake system
inspected.
NOTE: When the vehicle is at a standstill and the engine is idling, e.g. at a traffic light and the brake pedal is
depressed, the pedal may go down slightly. This is a normal function of the power-assisted brake system.
Power brakes function only when the engine is running
The power brakes utilize vacuum pressure which is only created when the engine is running. Never let the vehicle roll
to a stop with the engine switched off.
If the power brakes are not working, the brake pedal must be pressed approximately four times harder than usual to
make up for the lack of power assistance. This can happen for example when towing your vehicle or if the engine is
switched off when the vehicle is rolling. The brake pedal feels harder than usual.
Water on brake discs and brake pads affects braking
Driving in rain and slush or passing through an automatic car wash can cause water to collect on the brake discs and
pads. This will cause a delay in braking effect when the pedal is depressed. To avoid such a delay when the brakes are
needed, depress the pedal occasionally when driving through rain, slush etc. This will remove the water from the
brakes. Check that brake application feels normal. This should also be done after washing or starting in very damp or
cold weather.
Severe strain on the brake system
The brakes will be subject to severe strain when driving in mountains or hilly areas or towing. Vehicle speed is usually
slower, which means that the cooling of the brakes is less efficient than when driving on level roads. To reduce the
strain on the brakes, shift into a lower gear and let the engine help with the braking. Do not forget that, if you are
towing a trailer, the brakes will be subjected to a greater than normal load.
pg. 123 Starting and driving
Brake system
Anti-lock brakes (ABS)
If the warning lamp lights up there is a malfunction of the ABS system (the standard braking system will however
function) and the vehicle should be driven cautiously to a Volvo retailer for inspection. The Anti-lock Braking System
(ABS) helps to improve vehicle control (stopping and steering) during severe braking conditions by limiting brake
lockup. When the system "senses" impending lockup, braking pressure is automatically modulated in order to help
prevent lockup, which could lead to a skid.
The system performs a self -diagnostic test when the engine is started and when the vehicle first reaches a speed
of approximately 12 mph (20 km/h). The brake pedal will pulsate several times and a sound may be audible from the
ABS control module. This is normal.
To obtain optimal effect from the ABS system, constant pressure should be kept on the brake pedal. Do not pump the
ProCarManuals.com
Page 107 of 200
brake pedal.
The switching of the ABS modulator will be audible and the brake pedal will pulsate during braking. Please be aware
that ABS does not increase the absolute braking potential of the vehicle. While control will be enhanced, ABS will not
shorten stopping distances on slippery surfaces.
ABS with EBD (Electronic Brake Force Distribution)
EBD is an integrated part of the ABS system. EBD regulates the hydraulic pressure to the rear brakes to help provide
optimal braking capacity. The brake pedal will pulsate during braking, which is normal.
If the BRAKE and ABS warning lights come on at the same time, this could indicate a fault in the brake system.
- Stop the vehicle in a suitable place and switch off the engine.
- Restart the engine.
- If both warning lights go off, no further action is required.
- If both lights are still on after the engine has been restarted, switch off the engine again and check the brake fluid
level (see page 173
for the location of the brake fluid reservoir).
WARNING!
If the fluid level is below the MIN mark in the reservoir or if a "Brake failure - Service urgent" message is displayed
in the text window: DO NOT DRIVE. Have the vehicle towed to a Volvo retailer and have the brake system
inspected.
- If the brake fluid level is above the MIN mark, drive carefully to an authorized Volvo retailer and have the brake
system inspected.
Emergency Brake Assistance (EBA)
The EBA function is designed to provide full brake effect immediately in the event of sudden, hard braking. The
system is activated by the speed with which you depress the brake pedal.
NOTE:
When the EBA system is activated, the brake pedal will go down and pressure in the brake system immediately
increases to the maximum level. You must maintain full pressure on the brake pedal in order to utilize the system
completely. There will be no braking effect if the pedal is
pg. 124 Starting and driving
Brake system
released. EBA is automatically deactivated when the brake pedal is released.
When the vehicle has been parked for some time, the brake pedal may sink more than usual when the engine is
started. This is normal and the pedal will return to its usual position when it is released.
pg. 125 Starting and driving
Stability system
Stability Traction Control (STC)/ Dynamic Stability Traction Control (DSTC)
The stability system consists of a number of functions designed help reduce wheel spin, counteract skidding, and to
generally help improve directional stability.
NOTE: A pulsating sound will be audible when the system is actively operating and is normal.
ProCarManuals.com
Page 108 of 200
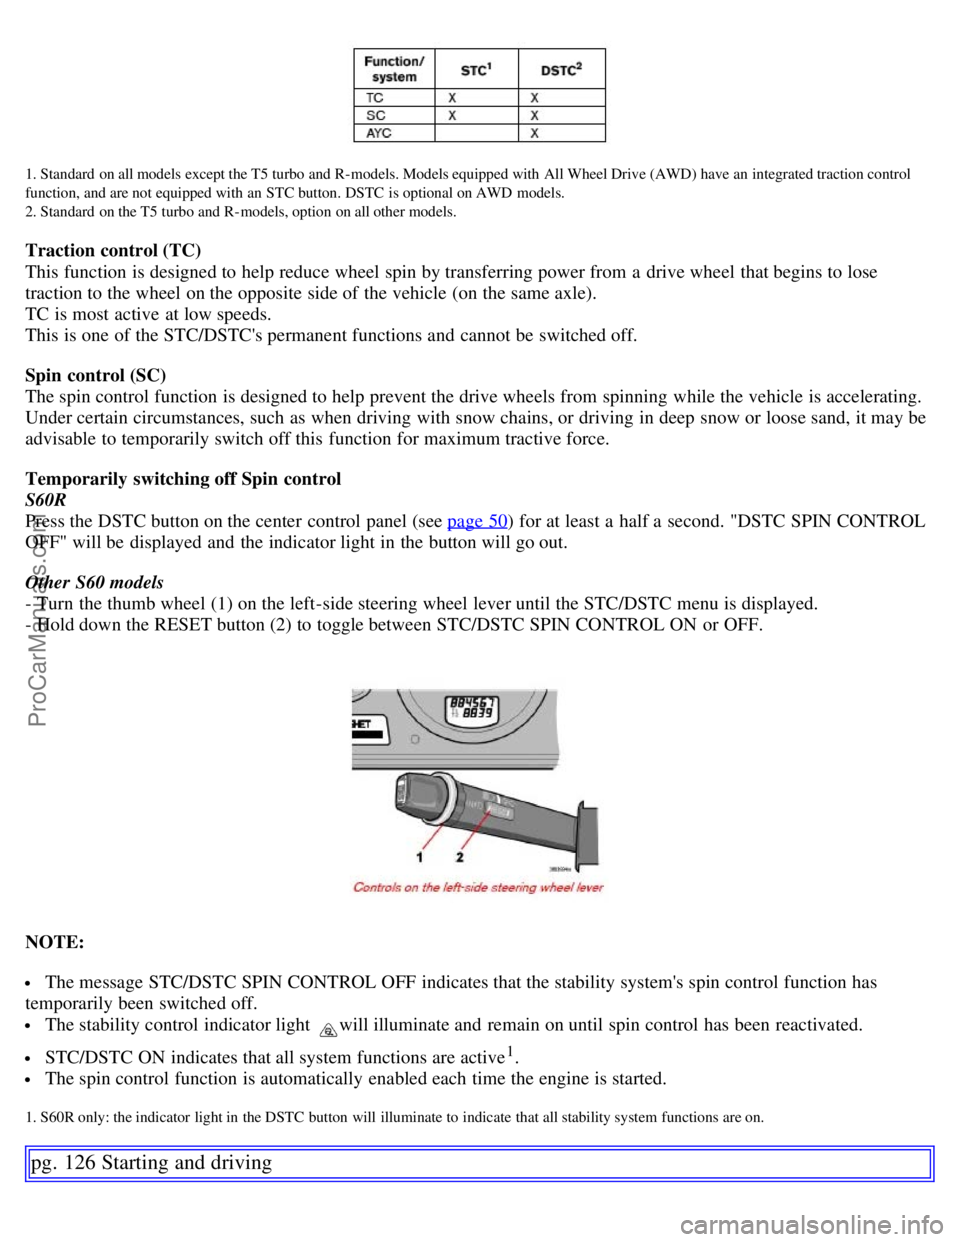
1. Standard on all models except the T5 turbo and R- models. Models equipped with All Wheel Drive (AWD) have an integrated traction control
function, and are not equipped with an STC button. DSTC is optional on AWD models.
2. Standard on the T5 turbo and R- models, option on all other models.
Traction control (TC)
This function is designed to help reduce wheel spin by transferring power from a drive wheel that begins to lose
traction to the wheel on the opposite side of the vehicle (on the same axle).
TC is most active at low speeds.
This is one of the STC/DSTC's permanent functions and cannot be switched off.
Spin control (SC)
The spin control function is designed to help prevent the drive wheels from spinning while the vehicle is accelerating.
Under certain circumstances, such as when driving with snow chains, or driving in deep snow or loose sand, it may be
advisable to temporarily switch off this function for maximum tractive force.
Temporarily switching off Spin control
S60R
Press the DSTC button on the center control panel (see page 50
) for at least a half a second. "DSTC SPIN CONTROL
OFF" will be displayed and the indicator light in the button will go out.
Other S60 models
- Turn the thumb wheel (1) on the left-side steering wheel lever until the STC/DSTC menu is displayed.
- Hold down the RESET button (2) to toggle between STC/DSTC SPIN CONTROL ON or OFF.
NOTE:
The message STC/DSTC SPIN CONTROL OFF indicates that the stability system's spin control function has
temporarily been switched off.
The stability control indicator light will illuminate and remain on until spin control has been reactivated.
STC/DSTC ON indicates that all system functions are active1.
The spin control function is automatically enabled each time the engine is started.
1. S60R only: the indicator light in the DSTC button will illuminate to indicate that all stability system functions are on.
pg. 126 Starting and driving
ProCarManuals.com